Forte's

Visit our community sponsor

Thanks Thanks:  1
Likes Likes:  8
Page 2 of 2 FirstFirst 12
Results 41 to 78 of 78

Thread: Ehansen007/33 Machine Build page

  1. #41
    Senior Member ehansen007's Avatar
    Join Date
    Mar 2011
    Location
    Aliso Viejo, CA
    Posts
    1,625
    Post Thanks / Like
    I put on my new mirrors I got in the mail and then went straight to the tail and headlights. I haven't installed the trunk insides or the waterfall or the hood. Do you think that will be a problem with the CHP?


  2. #42
    Senior Member ehansen007's Avatar
    Join Date
    Mar 2011
    Location
    Aliso Viejo, CA
    Posts
    1,625
    Post Thanks / Like
    And they work too!


  3. #43
    Senior Member ehansen007's Avatar
    Join Date
    Mar 2011
    Location
    Aliso Viejo, CA
    Posts
    1,625
    Post Thanks / Like
    Wow, I guess it's been a while since my last update. I've been working on the the overall ride and mostly getting the car registered. On Tuesday I offcially turned in all my paperwork to the DMV. Like a dummy I forgot to make copies of everything but as long as I get what I need back along with the registration I'll be happy! Overall the process wasn't too bad. You just have to make your appointments. I didn't need all the receipts all the time. Usually I just told them, "I was told I didn't need it" whenever I was missing something. Sometimes it worked other times it didn't. BOTTOM LINE: Take your all your receipts with you all the time. Here's a breakdown of the experience:

    1. DMV- One of two trips. I had all the paperwork and was then shocked when she asked I had the car for VIN verification. But I said, "I thought the CHP does that?" She agreed and kept processing. Then I wrote a check for $1996 and I got my TOP paper with an "8" on it *(which means good through August), put it in the window and was good to go. BTW, I drove the car everywhere and was never stopped. I also put a copy of my TOP on my license plate as to avoid questions from the police.

    2. Brake and Lamp inspection- Two/three trips. I wrote up a long story on this one in another post but the long and short of it was I was able to get it passed without having a backup light (which is apparently required in California) by going to a place that didn't care about it. So that worked out. Putting a working backup light on my car was going to be a PIA.

    3. One trip. The CHP was a decent experience. Make an appointment early on as they typically only do it once a week and they get booked up! The only question was where to put the VIN plate. He said it had to be visible and on a non-removeable part of the car. So he stuck it right on my frame rail! Lame!


    4. Smog- Two trips. The only place local to me was a college about 30 miles away where they teach smog to up and coming smog cert pros. This one took me two trips as I forgot the receipt for my engine and I needed to close the crankcase system and add a PCV valve. My car runs pretty good with it so I may just leave it!. Another problem was where to locate it. Same as CHP. They guy puts it on my firewall!. I'm supposed to put some sort of plexiglass over it to protect it I guess. Overall, a very formal process.


    5. DMV- Second of two trips- again, no appointment so I got lunch while I was waiting so it went quick. NOTE: Keep your paperwork stapled together and don't let the other guys take it apart! DMV gathered my stuff and sent it to Sacramento. I got another TOP which has a "9" on it so I should have my stuff by Sept.

    Erik

  4. #44
    Senior Member ehansen007's Avatar
    Join Date
    Mar 2011
    Location
    Aliso Viejo, CA
    Posts
    1,625
    Post Thanks / Like
    I can't believe how much sleep I lost and how much time I put in on this one. I'm a big fan of wheels and what they can or can't do for a car. I fell in love with the original drawing for the Hot Rod Mag car which had these racy looking mesh-type wheels so I was sold. But man it was hard to find anything affordable that looked like that that wasn't forged! Over the past 8 months I vacillated over this decision time and time again looking at offsets, wheel lips, tires, fender clearance, etc like so many of you have. Well, after placing an order for this brand new wheel I saw at SEMA, and waiting for three months, this is what I got.

    XXR 526 Black with chrome lip
    18x9 front +25 offsest 2.5" lip
    18x10.5 rear +20 offset 4.25" lip
    Nitto NT-05
    265/35/18 Front
    295/35/18 Rear

    So far the tires are nice and sticky and I think I have just enough sidewall on the back for a decent ride. I originally had 1.5" spacers in there but took them off. I may still opt for some 7/16" front to help with steering a bit as I do get some rub on full lock. Maybe the back too if they rub.


  5. #45
    Senior Member ehansen007's Avatar
    Join Date
    Mar 2011
    Location
    Aliso Viejo, CA
    Posts
    1,625
    Post Thanks / Like
    Quote Originally Posted by Olli View Post
    How is the windshield without the top frame when driving? Any issues with movement? It really looks a million times better!

    Olli
    It won't move as long as you do this. Totally secure and it's made all the difference in the world. Less turbulence coming off the windshield as well. If you're 6-0" or around there and using the stock seats, that upper frame is right, and I mean RIGHT in your line of sight. So much so, I was getting surprised by red lights from time to time. What's also crazy is the amount of distortion you get at the top of the windshield...everyone and everything looks "Funhouse" tall!

    Last edited by ehansen007; 09-20-2012 at 02:31 PM.

  6. #46
    Senior Member ehansen007's Avatar
    Join Date
    Mar 2011
    Location
    Aliso Viejo, CA
    Posts
    1,625
    Post Thanks / Like
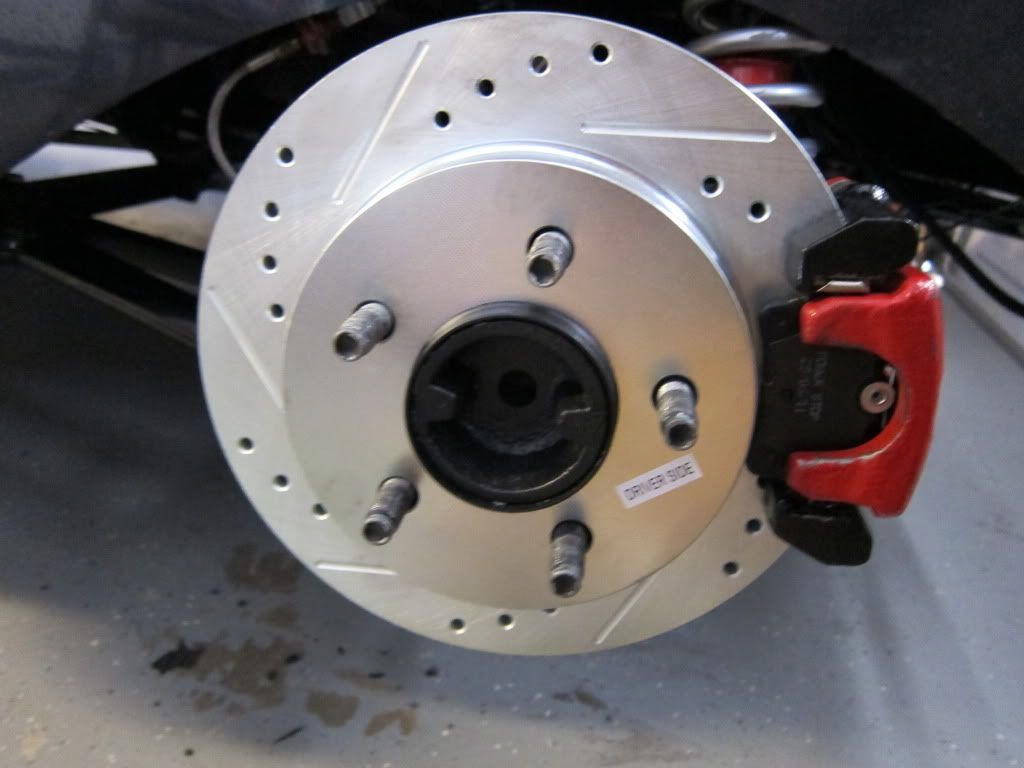
    Just updating my build here. Lately I've been putting on more miles and I'm well over 500 now. No major issues and the body's pretty much just sitting on there. I now plan on taking everything apart and doing the electrical and get started on the body work. I'd like to get both roll bars (hoops and square) fitted and functional before lifting the body off though. That will take a bit of welding. I put on the new brakes from Powerstop and they are one of the best upgrades per dollar that I've done. Here are some pics.


  7. #47
    Senior Member ehansen007's Avatar
    Join Date
    Mar 2011
    Location
    Aliso Viejo, CA
    Posts
    1,625
    Post Thanks / Like
    Couple more pics of the car in the driveway.


  8. #48
    Senior Member ehansen007's Avatar
    Join Date
    Mar 2011
    Location
    Aliso Viejo, CA
    Posts
    1,625
    Post Thanks / Like

    Started on the bodywork by scuffing everything with 80.


    In order to get the holes right for the dual roll bars, I made some plumbs with coat hangers. Worked great. Cutting the holes is a challenge as they are not at all round and require constant adjustment and fitting the the roll bar.

  9. #49
    Senior Member ehansen007's Avatar
    Join Date
    Mar 2011
    Location
    Aliso Viejo, CA
    Posts
    1,625
    Post Thanks / Like

    Here's the entire car scuffed.


    Most of the parting lines from the mold disappeared.

  10. #50
    Senior Member ehansen007's Avatar
    Join Date
    Mar 2011
    Location
    Aliso Viejo, CA
    Posts
    1,625
    Post Thanks / Like

    My buddy Geoff came by and helped me float the door line up to the bulkhead/dash area as they are pretty far from from the factory. I know some guys are pulling the doors apart and refitting but I'm just not at that level yet!


  11. #51
    Senior Member ehansen007's Avatar
    Join Date
    Mar 2011
    Location
    Aliso Viejo, CA
    Posts
    1,625
    Post Thanks / Like

    After reading the horror stories about folks not grinding out the parting lines and filling with Poly or HSRF, I decided to go ahead and do it myself. It wasn't bad except for on the the roof where it was pretty uneven.


  12. #52
    Senior Member ehansen007's Avatar
    Join Date
    Mar 2011
    Location
    Aliso Viejo, CA
    Posts
    1,625
    Post Thanks / Like

    Quite a bit of filler was needed on the bulkhead.


    The top wasn't too bad but I sanded right through the lower back edge like everyone else. I just cut that out the thin area and filled the crap out of it.


    A lot of people complain about the valley in the hood that takes about a half a gallon of filler. Problem solved!


    Just cut it out in favor of a hood scoop!

  13. #53
    Senior Member ehansen007's Avatar
    Join Date
    Mar 2011
    Location
    Aliso Viejo, CA
    Posts
    1,625
    Post Thanks / Like
    Now that the body's been blocked (not completely though) it's time to take it off and take her to the body shop!


    With the body off, it's time to tackle that nasty wiring.


    Although Russ Francis does a nice job of making it plug and play, it sure is a lot of extra wire


    I'm going to make a label list for all wires to put above the wiring blocks.

  14. #54
    Senior Member ehansen007's Avatar
    Join Date
    Mar 2011
    Location
    Aliso Viejo, CA
    Posts
    1,625
    Post Thanks / Like
    At the body shop


    Having a nice table for a buck sure helps.


    We blocked out everything as much as we could with Gel coat and rarely got down to fiberglass. All in all I used about 3/4 gallon G2 featherfill on the entire car.


    We used the PCL Hi build Poly primer and it worked pretty well.


    crappy iphone photo but this is the car being blocked after guide coat. Something I found out, if you want to avoid clogging, do yourself a big favor and use the 3M dry guide coat instead of the standard cheap spray can method. It lets you sand immediately and doesn't clog.

  15. #55
    Senior Member ehansen007's Avatar
    Join Date
    Mar 2011
    Location
    Aliso Viejo, CA
    Posts
    1,625
    Post Thanks / Like

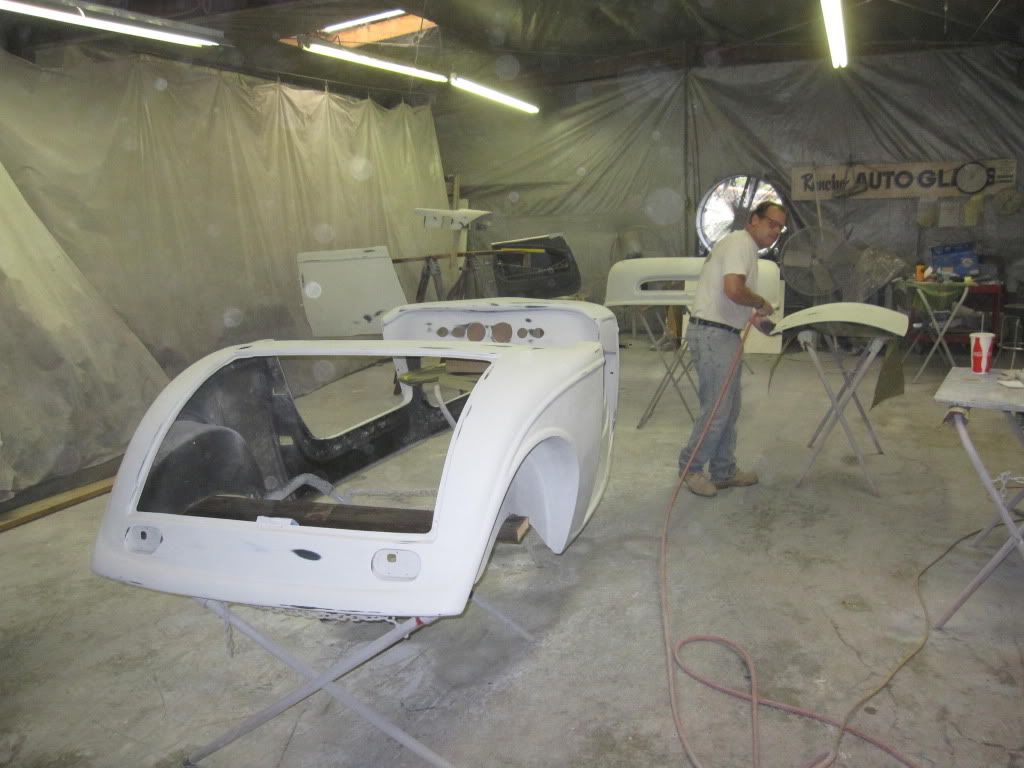
    Spraying the polyprimer. I got to do some of it but felt it was best left to the experts.


    Like I said, we used very little filler on the side doors trunk or hood. it was mostly in the body.


    Click to see video
    My buddy like to use a pencil or a sharp tip to fill pin holes with polyprimer, not body filler. it's much easier to sand and keeps you from creating more pinholes when sanding filler on top of primer.

  16. #56
    Senior Member ehansen007's Avatar
    Join Date
    Mar 2011
    Location
    Aliso Viejo, CA
    Posts
    1,625
    Post Thanks / Like
    Onto the Bat Cave!


    here we are getting ready to shoot the sealer.


    Sealer is making it look good.


  17. #57
    Senior Member ehansen007's Avatar
    Join Date
    Mar 2011
    Location
    Aliso Viejo, CA
    Posts
    1,625
    Post Thanks / Like


    Jeff layin' down the paint. Click to see video. I still can't believe he doesn't use a respirator but it sure does explain a lot of those posts he puts up!


    Click to see video

  18. #58
    Senior Member ehansen007's Avatar
    Join Date
    Mar 2011
    Location
    Aliso Viejo, CA
    Posts
    1,625
    Post Thanks / Like
    Let the final assembly begin!


    Body back on. I noticed with the carpet over the sills that it sets the body up about 1/8". Just enough to start throwing things off. Too late now though. Recommendation: just get some door sill covers and cut the carpet to the edge of the body.


    Trunk metal in. Not so bad.


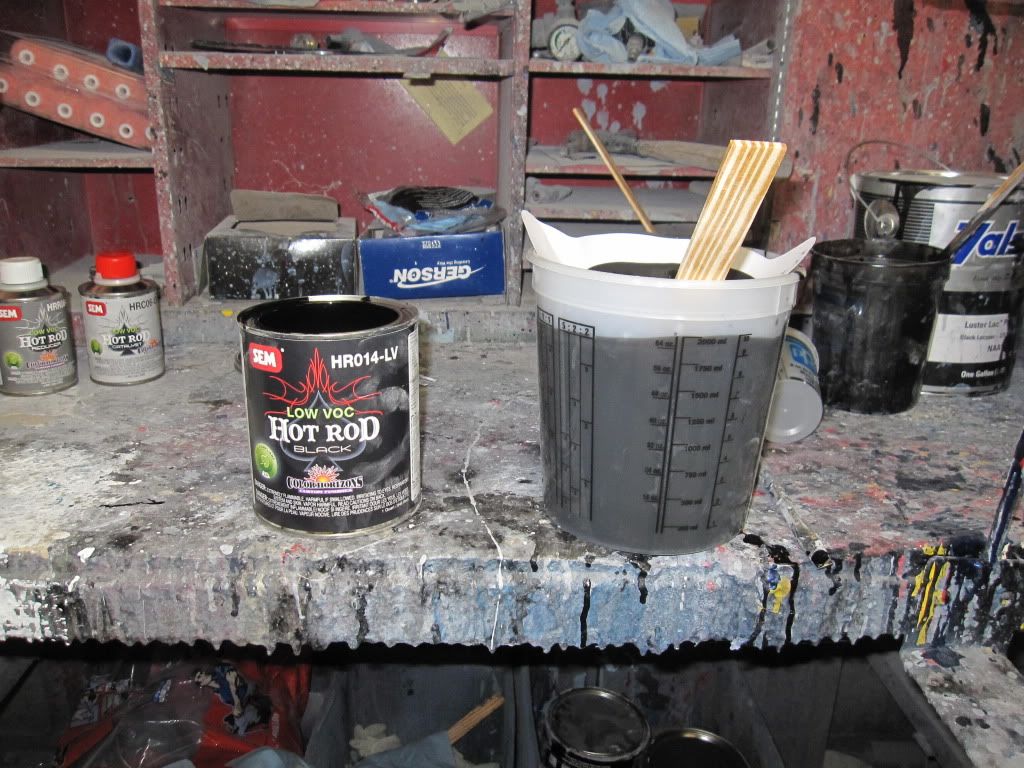
    I decided to do the trunk and hood underneath with the SEM undercoat. Man, that stuff just flies out of the can at first but they tell you for a smoother coat to stay close. Lesson learned. Feather that stuff in from like 2 feet away!

  19. #59
    Senior Member ehansen007's Avatar
    Join Date
    Mar 2011
    Location
    Aliso Viejo, CA
    Posts
    1,625
    Post Thanks / Like
    I wasn't liking the center piece I had made for the dash so I made the decision to design a new console and try my hand at Engine Turning (Thanks to John Cameron for showing me how on Car Warriors)


    First, get your sheetmetal all clean and mark your piece to be cut but don't cut it! Cut edges will ruin what ever your turning with. Leave the overlap for now so you're on flat metal all the time.


    Mark your grid for proper spacing and overlap. I decided to use a drill press with some Red scuff pad wrapped around a bolt with a zip tie. I thought I'd just test it and liked it so I kept going. But Craytex is much better. I checked my pattern on some scrap and adjusted the spacing accordingly. Mine is not even close to being perfect but it also looks hand done as well! Now get ready to be pretty bored and in the same position for the next few hours!


    Using some clamps and a ruler I created a gate so my lines were perfect each time. Man I have some ugly hands, no wonder I never got those call backs for those Palmolive commercials....


    Turning Turning Turning. For about 4 hours! Kept having to change the scuff pad out since I started with a used one.

  20. #60
    Senior Member ehansen007's Avatar
    Join Date
    Mar 2011
    Location
    Aliso Viejo, CA
    Posts
    1,625
    Post Thanks / Like
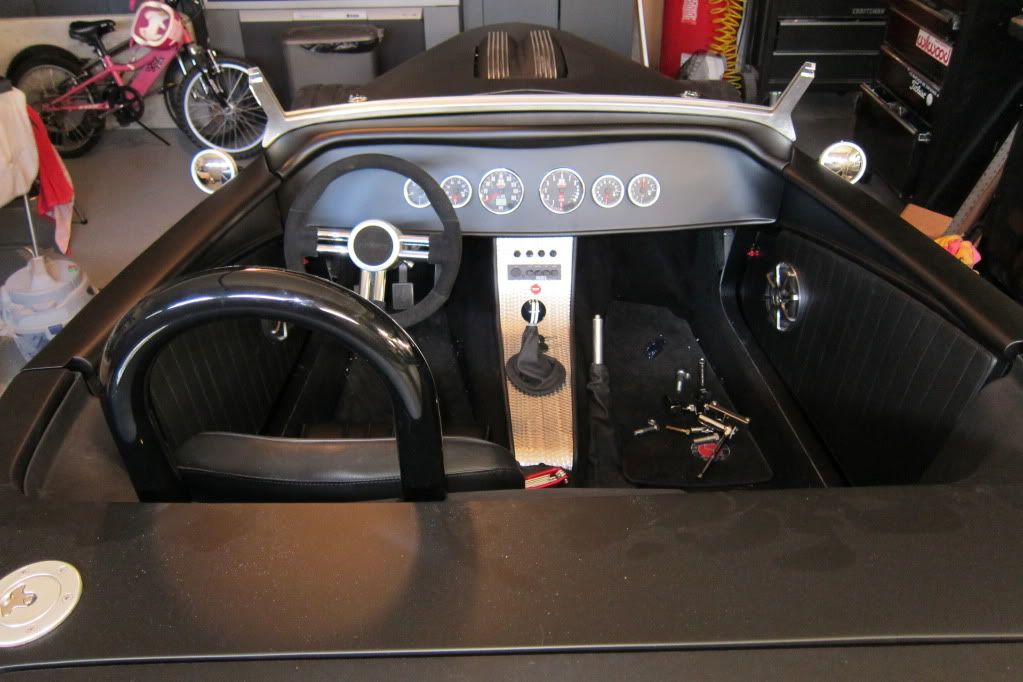
    Here's the console in place. I used 1/8" MDF so it's light and easy.


    Test fit.


    Finished product covered in black vinyl. Man I need to stop using my iphone to take pics. It's just so damn convenient.


    Getting close!

  21. #61
    Senior Member ehansen007's Avatar
    Join Date
    Mar 2011
    Location
    Aliso Viejo, CA
    Posts
    1,625
    Post Thanks / Like
    Getting down the wire now. Like I was saying, I've been busting *** this holiday season so I could get a fresh start to the year but it's dragging out!


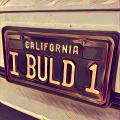
    I just got my "Novelty" license plate in so I'm not broadcasting in blue and white! So much better.


    I like big butts and I cannot lie.....


    I'm picking up some plexiglass so I can run the windshield this low. I call it the chopper version.


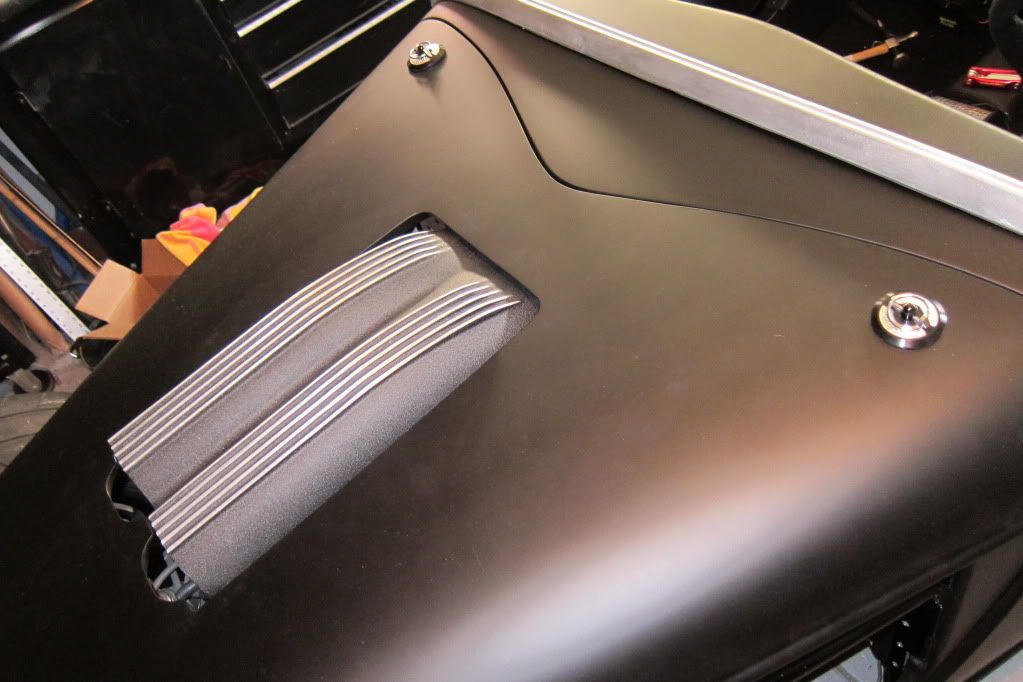
    My hamster shooter poking out. I didn't want the hood hinges in there so I made my own front hood catch that holds under the grill and ordered some billet hood pins to hold down the back. Originally I ordered all black from EMS but they were out of stock and offered these "Highlight Series" which were $40 more at no extra cost.

    I won't be running the hood all the time so I wanted to find a way to keep the the grill area clean along with the firewall and access panels, so this was it. A fully removable hood. More pics to come.

    WHEW! That was a buttload of posts. Hope you guys enjoy em'!

    e!

  22. #62
    Senior Member ehansen007's Avatar
    Join Date
    Mar 2011
    Location
    Aliso Viejo, CA
    Posts
    1,625
    Post Thanks / Like
    And now, for my moment of zen.....

    http://www.youtube.com/embed/IoDX0mH65WQ
    Last edited by ehansen007; 03-26-2012 at 12:47 PM.

  23. #63
    Senior Member ehansen007's Avatar
    Join Date
    Mar 2011
    Location
    Aliso Viejo, CA
    Posts
    1,625
    Post Thanks / Like
    Thanks Brett!

    Yes, I've got a tranny leak. Of course I learned that it has to come out the top if you want to leave the motor in. I learned this right AFTER I carpeted the interior! I tried to start pulling up the carpet but it just destroyed it, so I patched it back up and decided I'll fix the tranny leak when I pull the engine next. THERE IS NO way to get it out the bottom without pulling the motor (Unless you want to cut the frame of course) which blows.

    As for the hood. Here are some pics of how I did it.


    I used some aluminum and formed a spring loaded system that will flex just enough to slide it in place.


    As you can see, I also use the factory D Gasket as well as some of the rubber grommets to maintain the hood height.


    Then I used the hood pins from EMS to mount the rear.

  24. #64
    Senior Member ehansen007's Avatar
    Join Date
    Mar 2011
    Location
    Aliso Viejo, CA
    Posts
    1,625
    Post Thanks / Like
    Windsheild cut down.


    As you can see I'm running it pretty low. I bought some 3/8" plexiglass and had the top line polished. Then I cut the frame and rounded the edges down. It took a lot of effort to get it in down there and Ive put some good miles on it so far and it hasn't moved but I'm still going to use some 3M windshield glue to keep it in there. So far it works better than I thought. The wind just hits the top of my head and I thought it would be much worse and hit me in the eyes but nope.


  25. #65
    Senior Member ehansen007's Avatar
    Join Date
    Mar 2011
    Location
    Aliso Viejo, CA
    Posts
    1,625
    Post Thanks / Like
    If you remember, I had cut the top windshield frame and left the top caps on to secure the windshield. This time I cut the entire male end off the frame and just rounded the edges. Much lower.


    As for the tranny it's leaking from the front so it's probably the main seal. There is no way to get that thing out the bottom without moving the engine. For you builders out there make sure you make the tunnel removable!!!!!!!!!!! that is, if you're going to put in a tranny that leaks. :001_tongue:

  26. #66
    Senior Member ehansen007's Avatar
    Join Date
    Mar 2011
    Location
    Aliso Viejo, CA
    Posts
    1,625
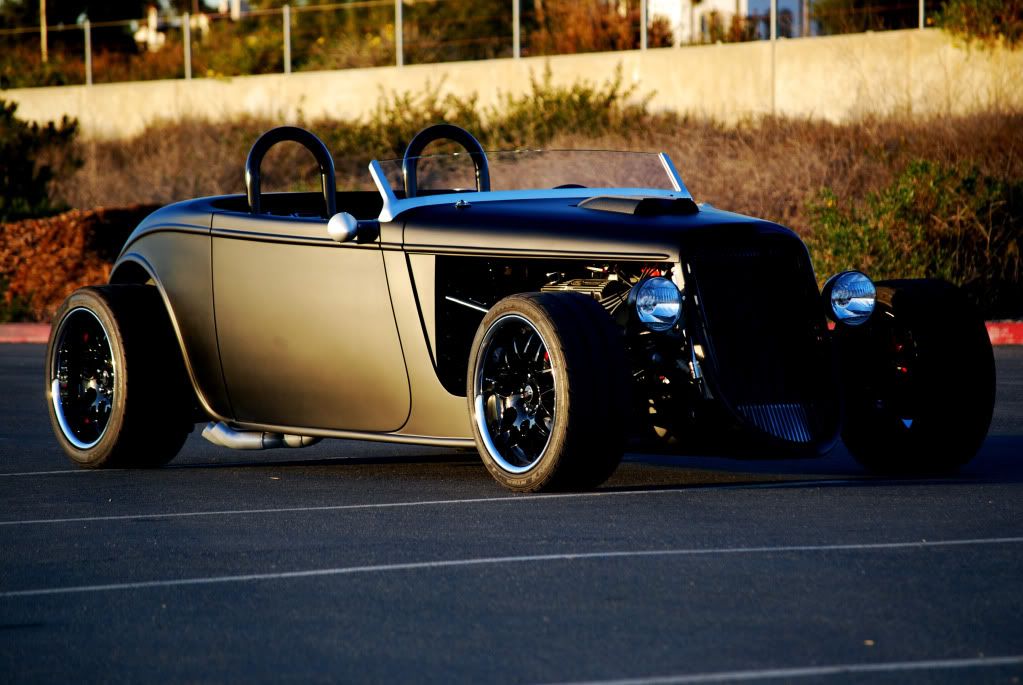
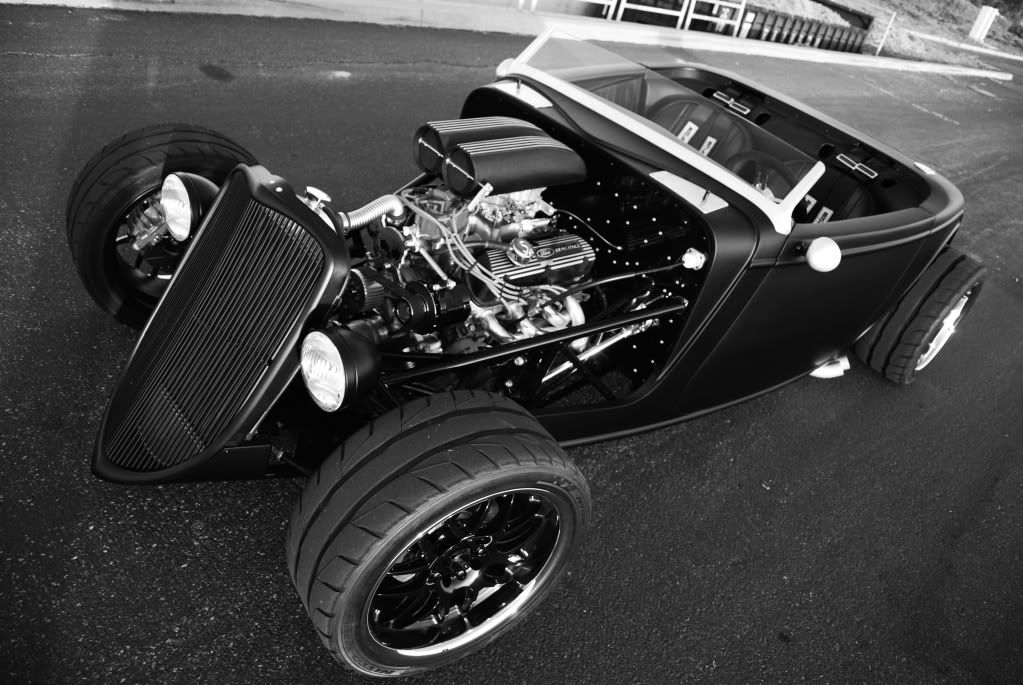
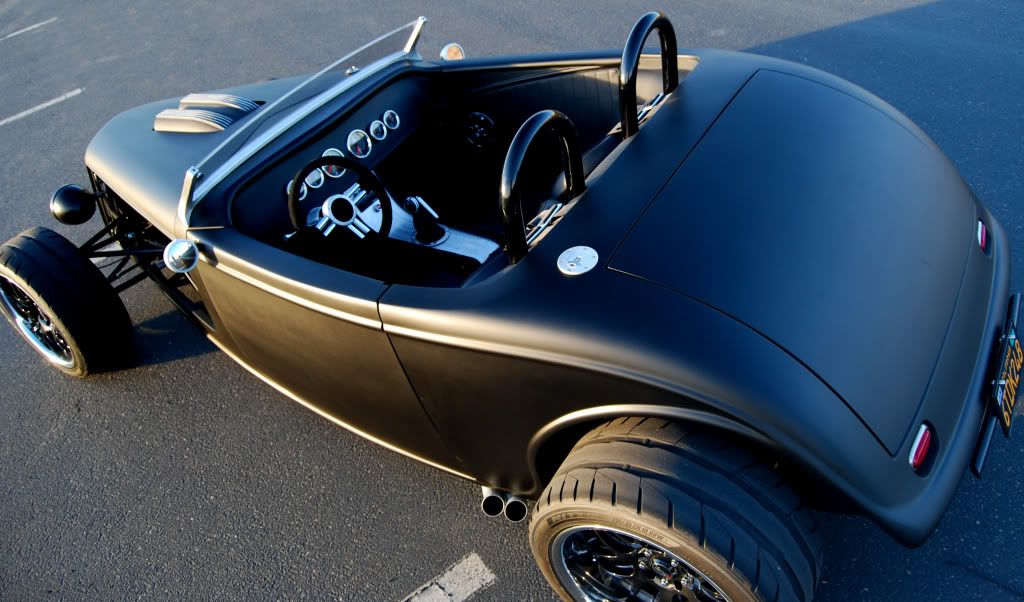
    Post Thanks / Like
    I'm posting these up in a few different areas but really wanted them here to finish off my build thread. At least until I get my top on that is....:001_tongue:


  27. #67
    Senior Member ehansen007's Avatar
    Join Date
    Mar 2011
    Location
    Aliso Viejo, CA
    Posts
    1,625
    Post Thanks / Like
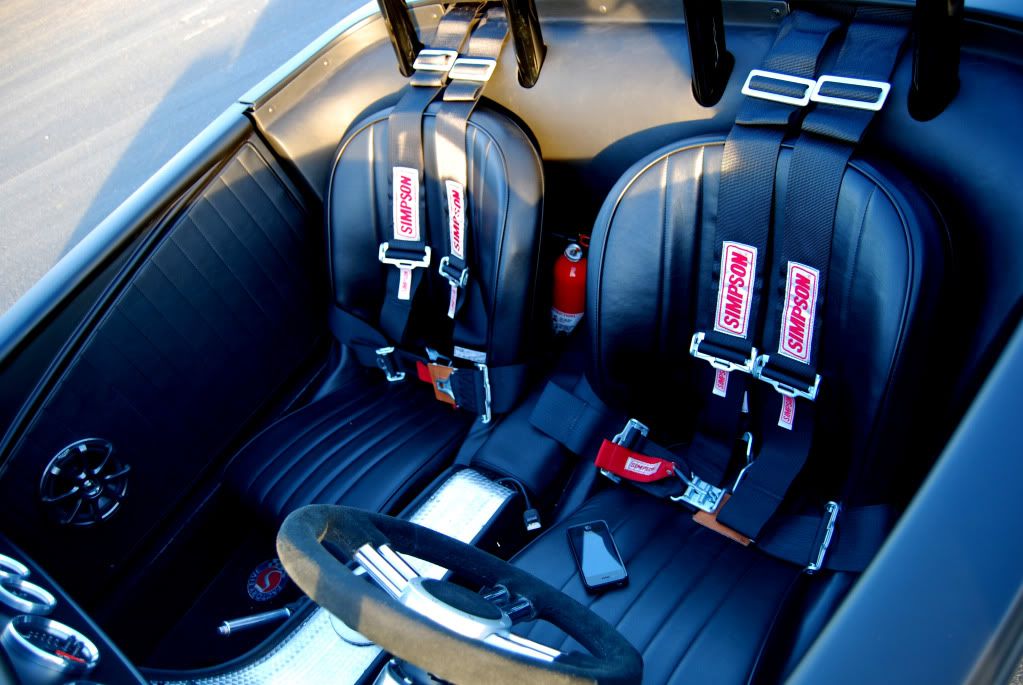
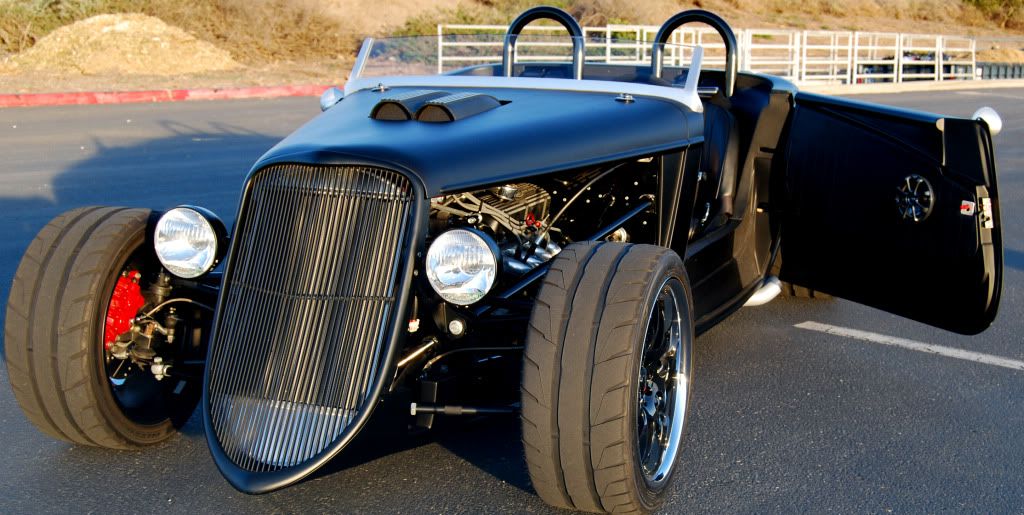
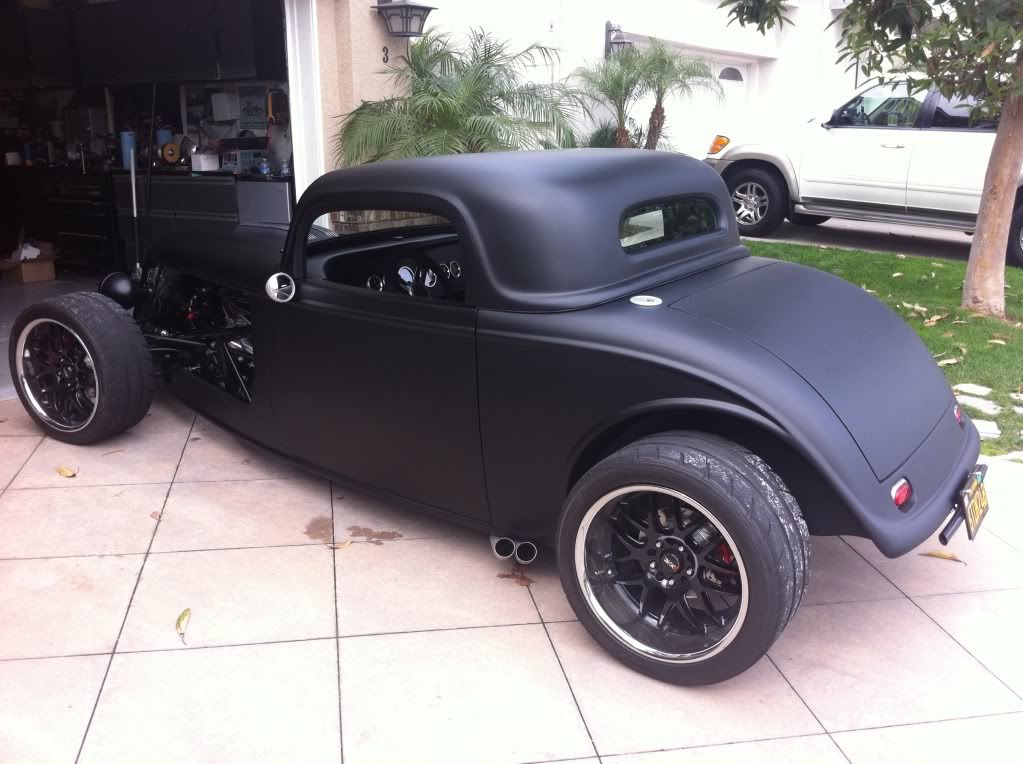
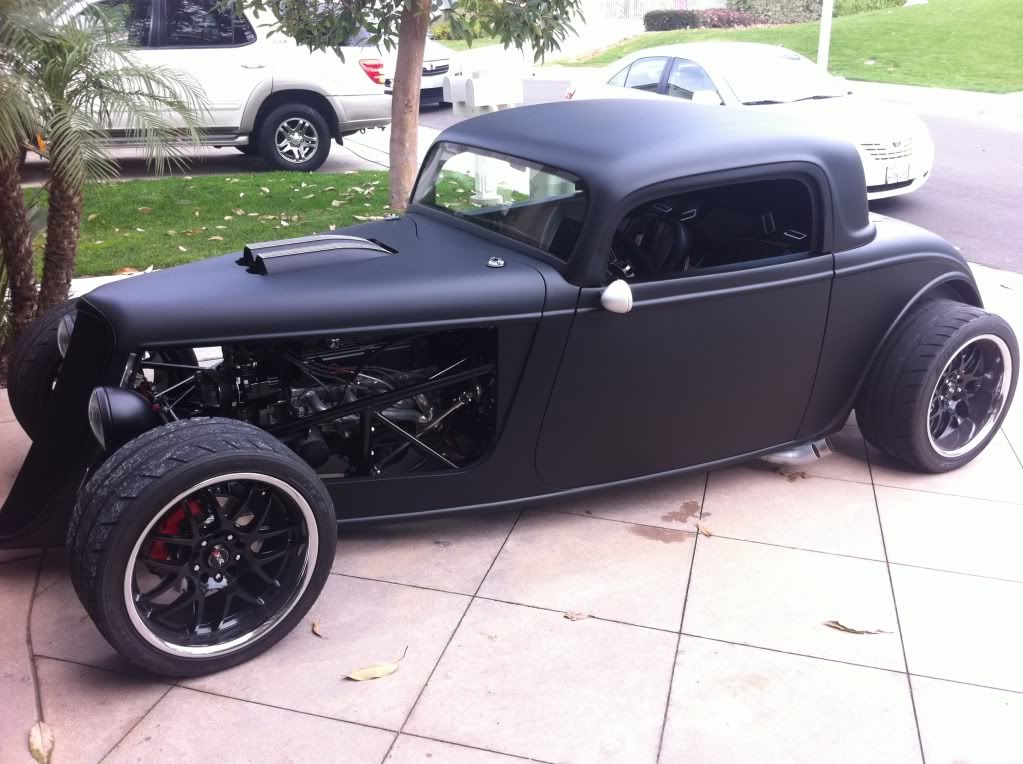
    I recently put the top on and drove it around a bit. Then the temp went to 80 and it was beautiful so it came right back off. While it was on I noticed it's pretty noisy in there even with the hushmat on the inside headliner area. But I also have m exhaust out the side so that can't help. To mount it, I simplified the latch system by using the standard three bolts (planning on a quick release there too) in the front but only use two catch style latches in the back. They simply catch the body right inside my seatbelt holes so I haven't even put a single locator pin or hole in the deck area...totally clean..which is what I wanted because I don't want to run the upholstered collar they giv e you. As far as the secure-ness of it, i can't move it side or front to back. The front pretty much anchors it and the latches just hold the back down. And it takes about 15 minutes to switch between the windshield and hard top now.

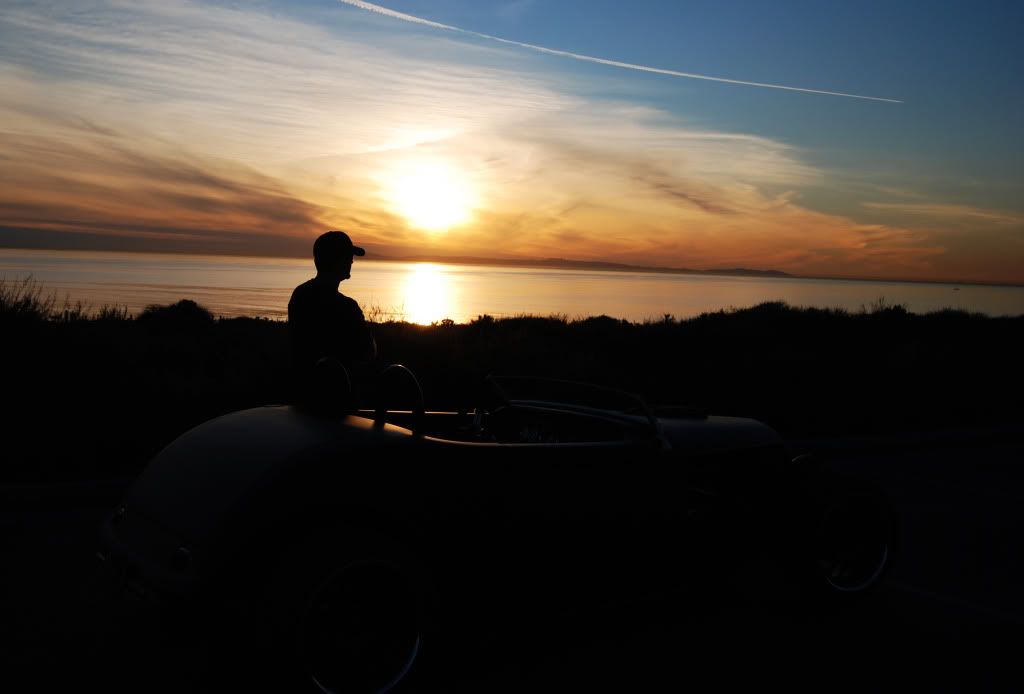
    Been enjoying it so much driving it up and down PCH here in Orange County it's just fantastic. I took my 7 year old daughter on Sunday and she thought it was the best. My biggest recommendation to those building out there: in roadster mode, consider chopping that windshield down a bit and/or getting the edge out of your site line; having a clear line of vision and the wind in your hair is heaven. :eclipsee_steering:


  28. #68
    Senior Member riptide motorsport's Avatar
    Join Date
    Feb 2011
    Location
    Fort Lauderdale Fl.
    Posts
    3,296
    Post Thanks / Like
    great post......and great work!!!
    FFR Daytona Type 65 Coupe
    67 427 Cobra
    57' Belair
    72 Pinto Wagon ,306" 1/4 miler
    34 5 window coupe Ford
    2003 Mustang GT
    99' ZX9
    85 Goldwing

    All toys still in the Scuderia!


    Every Saint has a past..................every sinner a future

    Don't take yourself so seriously........no one else does.

    You never see a motorcycle parked outside a Psychiatrists office.

  29. #69
    Junior Member
    Join Date
    Mar 2012
    Location
    From Neguac NB Live in Kingston ON CANADA
    Posts
    4
    Post Thanks / Like
    Good job looks nice

  30. #70
    Junior Member
    Join Date
    Apr 2012
    Location
    St. Petersburg FL
    Posts
    7
    Post Thanks / Like
    WOW, I really hope when I get mine it turns out this good! I have a few years of waiting, but still can't wait!

  31. #71
    Senior Member ehansen007's Avatar
    Join Date
    Mar 2011
    Location
    Aliso Viejo, CA
    Posts
    1,625
    Post Thanks / Like

    Hydraulic Trunk setup

    I searched around and didn't see that anyone had setup the hydraulic struts for the trunk so here's my take. While the prop rod looks period, I felt that train had already sailed on my more modern interpretation anyway so why not give it a shot. Plus I had so much stuff in my trunk for the shows the prop rod was just a pain and I had the lid land on my head more than once.

    I used the gas struts from the hood and then I made some standoff brackets out of some urethane I had lying around and man that stuff is dense! Worked great! I mounted to the inside sheet metal of the trunk which is a bit flexy since you don't attach that to anything and plan on reinforcing it with a bracket. But it works great without it and the trunk stays open by itself. It may not look the coolest but I really need function over form here.

    I also made a little spring trunk popper thanks to some of the others here on the forum and their great pics. Now I can release the trunk with the cabin latch and then open it up and it stays up!


  32. #72
    Senior Member Motor_Freak's Avatar
    Join Date
    Feb 2014
    Location
    Los Angeles, CA
    Posts
    116
    Post Thanks / Like
    Thank you Erik for great build, inspires me more and more!

  33. #73
    Senior Member ehansen007's Avatar
    Join Date
    Mar 2011
    Location
    Aliso Viejo, CA
    Posts
    1,625
    Post Thanks / Like
    Thanks my friend! Glad to hear it's still giving some inspiration.

  34. #74
    Senior Member
    Join Date
    Nov 2015
    Location
    Elverta, CA
    Posts
    401
    Post Thanks / Like
    Quote Originally Posted by ehansen007 View Post
    Been a while since I posted up some progress. Lately, I've been working on building my exhaust tips, a trailer hitch with a bumper, and acquiring all my stereo gear. I also got my new custom gauges from Speedhut.

    Now I just need to get some wiring done and get her started! Getting close!


    Eric, are u still selling the hitches? I would prefer to build my own but don't wanna pirate you're design. Are you willing to sell me the drawings and cut list for a reasonable fee? I really like your concept with the rear bumper for daily driving and the option of pulling a small trailer for my wife's purse! I can be reached at 916 812-5441 in Sacramento area.. thanks, tom

  35. #75
    Senior Member ehansen007's Avatar
    Join Date
    Mar 2011
    Location
    Aliso Viejo, CA
    Posts
    1,625
    Post Thanks / Like
    There is nothing better than going back and looking at all this years after the build and they are long gone. Looking at my own comments makes me laugh but this sure was fun. I don't own an FFR right now but looking at these sure makes me think of buying back in. Now if my daughter would only NOT be going to a 4 year school I could!

  36. Likes wrp, FF33rod, HVACMAN liked this post
  37. #76
    Senior Member
    Join Date
    Aug 2015
    Posts
    1,217
    Post Thanks / Like
    I always admired your work

  38. Thanks ehansen007 thanked for this post
    Likes ehansen007 liked this post
  39. #77

    Join Date
    May 2014
    Location
    Simi Valley, CA
    Posts
    566
    Post Thanks / Like
    Quote Originally Posted by wrp View Post
    I always admired your work
    Ditto! You were one of the builders who inspired my plunge into the pool.
    Keith HR #894

  40. Likes wrp liked this post
  41. #78
    Senior Member ehansen007's Avatar
    Join Date
    Mar 2011
    Location
    Aliso Viejo, CA
    Posts
    1,625
    Post Thanks / Like
    I appreciate that fellas. I was just looking at my other builds thinking this would be the one car, if I found it out there in the wild, I would consider buying back. Like an old girlfriend, nothing like your first.

  42. Likes FF33rod, HVACMAN, Oldguy33 liked this post
Page 2 of 2 FirstFirst 12

Posting Permissions

  • You may not post new threads
  • You may not post replies
  • You may not post attachments
  • You may not edit your posts
  •  

FFMetal

Visit our community sponsor