Boig Motorsports

Visit our community sponsor

Thanks Thanks:  1
Likes Likes:  4
Page 3 of 23 FirstFirst 1234513 ... LastLast
Results 81 to 120 of 908

Thread: GTM roll cage modifications and race car build log

  1. #81
    Member kabacj's Avatar
    Join Date
    Mar 2011
    Location
    Long Island
    Posts
    1,103
    Post Thanks / Like
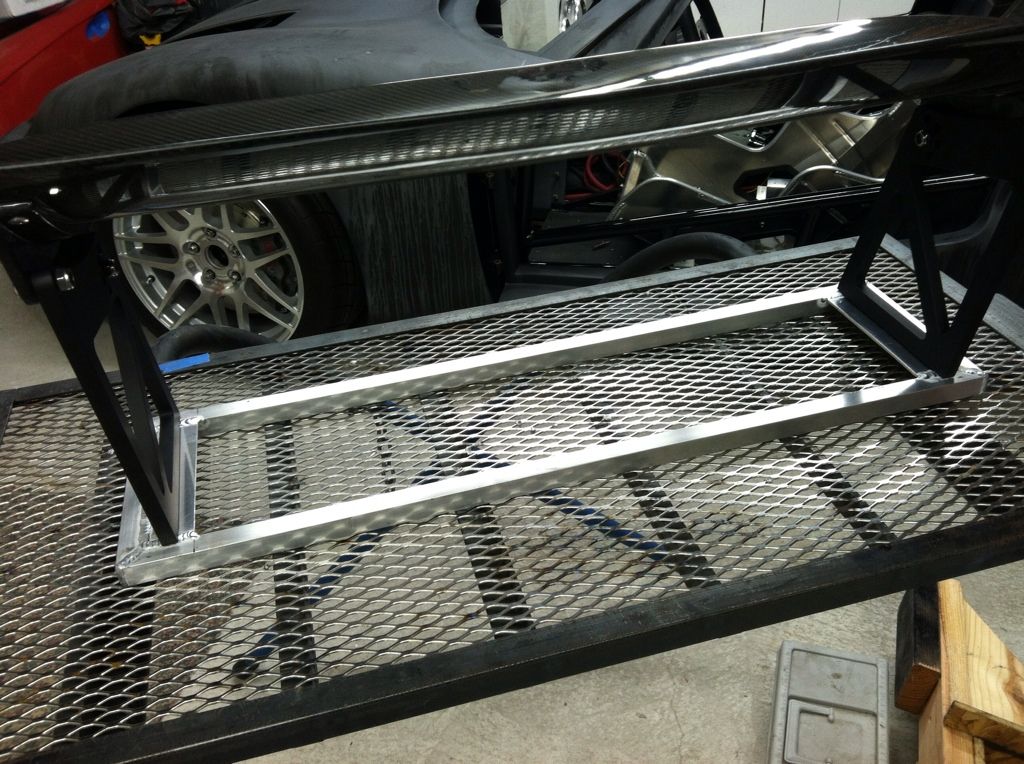
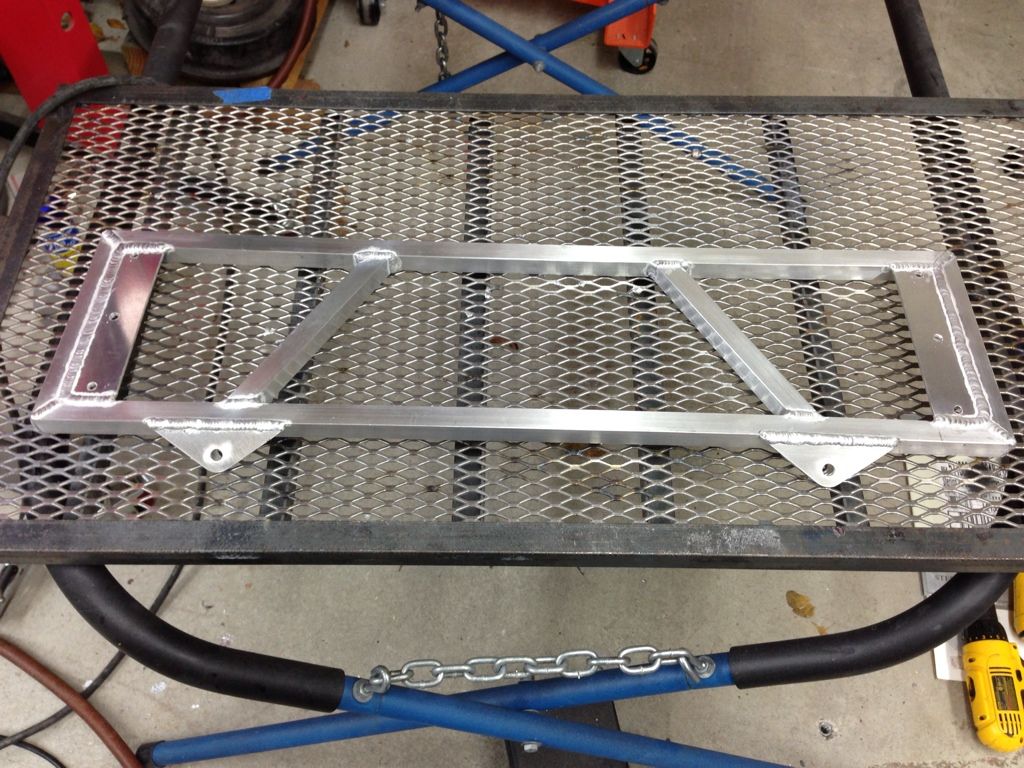
    You can find the mounts here.


    http://www.mcmaster.com/#catalog/118/1381/=j3c9c6

    I got both of these..

    http://www.mcmaster.com/#5823K24

    http://www.mcmaster.com/#93945K37

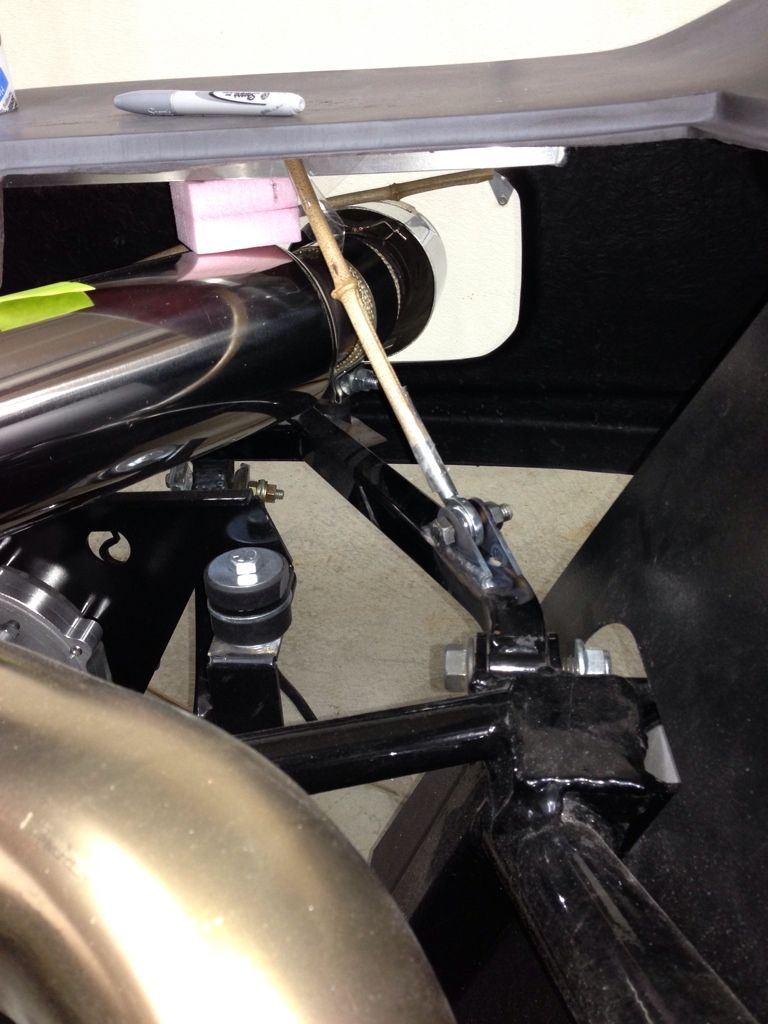
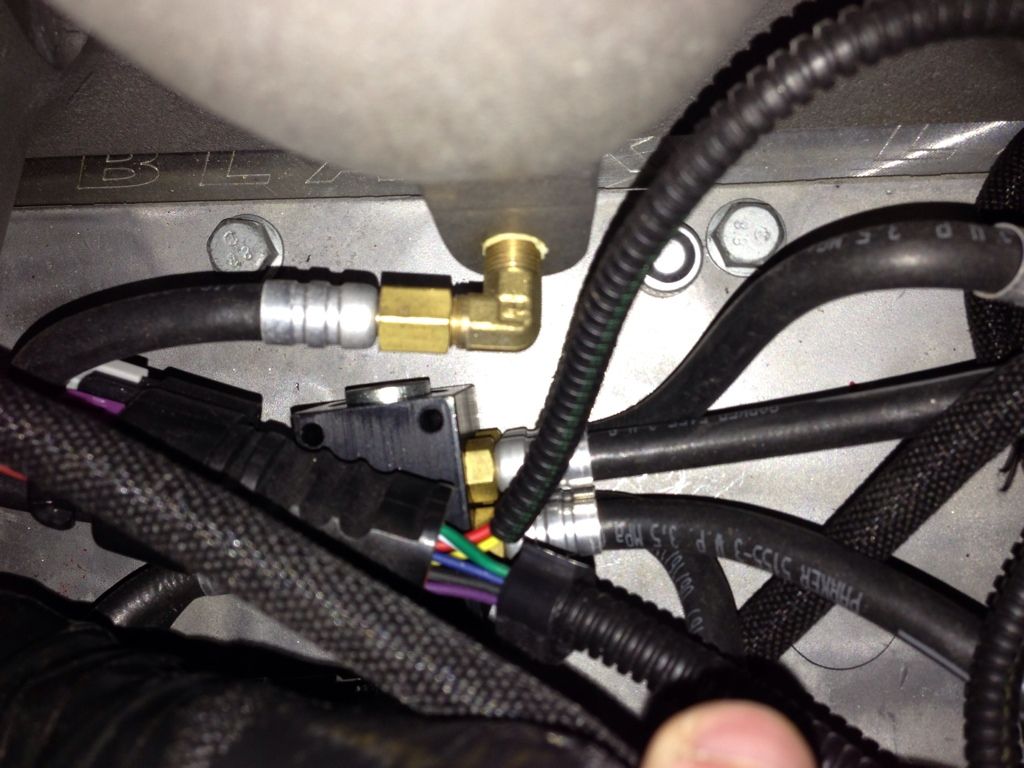
    Turns out I lied I actually used the rubber ones with the stainless stud. They are both the same durometer or hardness so there was no difference there. you really cant tell them apart unless you look at the stainless stud. The neoprene is a little more heat resistant, but I don't think they will be 300 degrees.

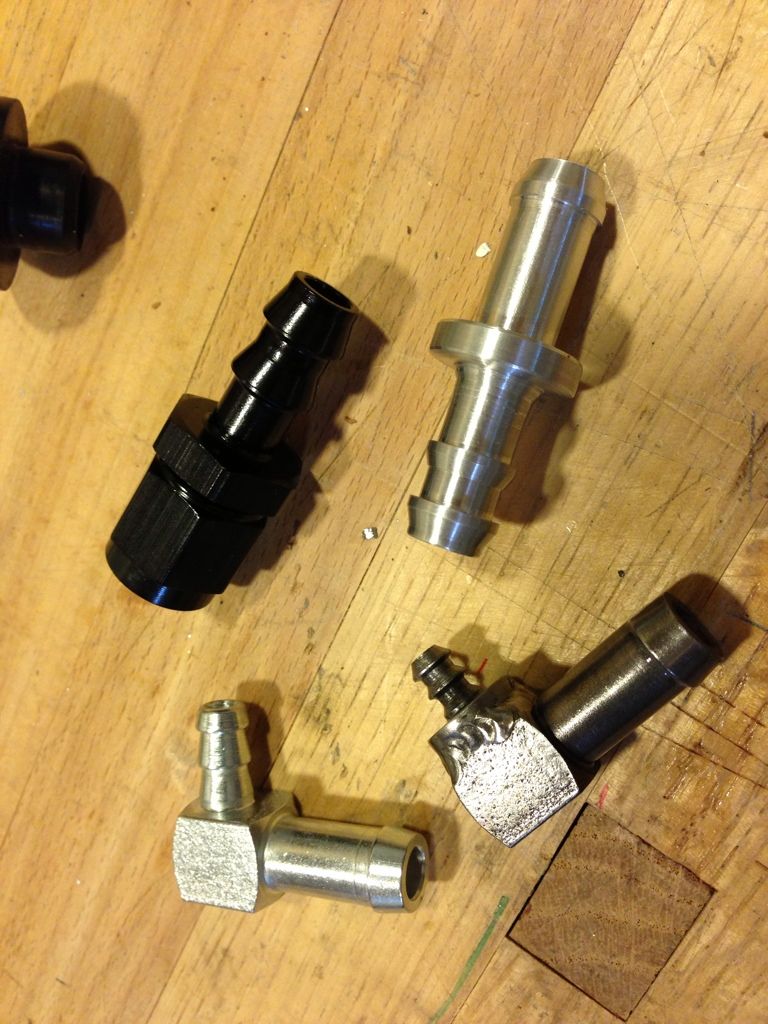
    I love stainless steel so I used those.

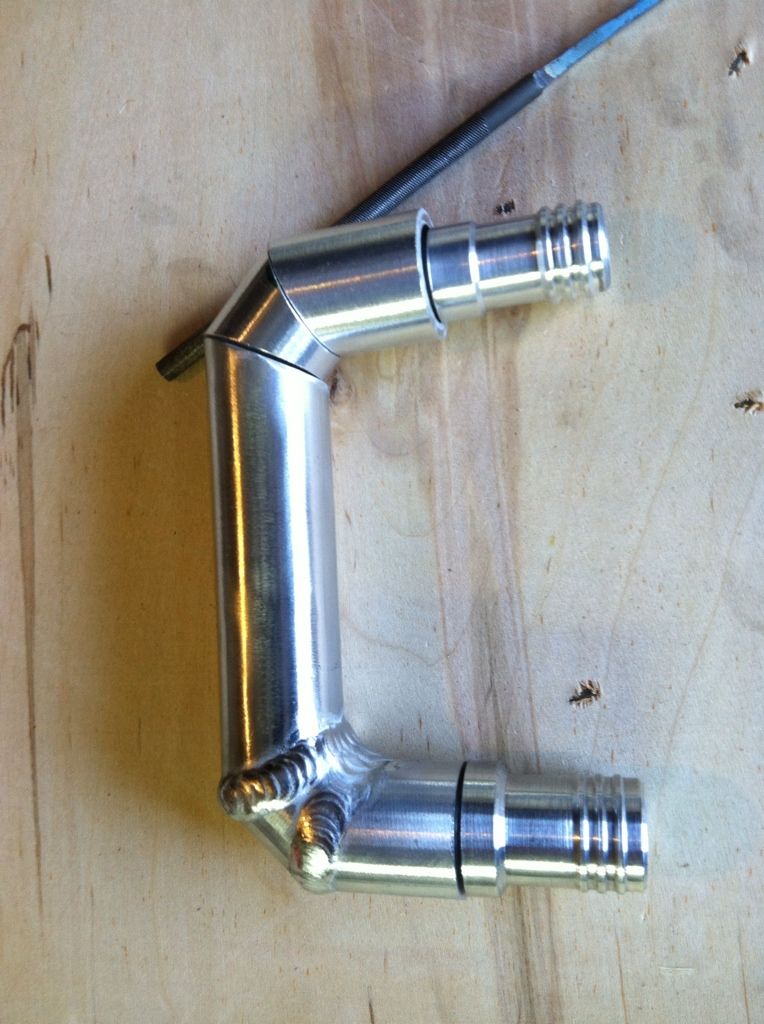
    Jegs has the accuseal clamps.

    John
    XTF #2
    build start date June 19 2023

    GTM # 344
    Build Start December 2010
    First track day April 2013

  2. #82
    Member noother's Avatar
    Join Date
    Jun 2012
    Location
    Oakland, CA
    Posts
    38
    Post Thanks / Like
    Thanks John! I was just getting a McMaster order together, those mounts look quite handy, I'll get some extras.

    I totally get the SS love, it's my favorite alloy.

    Mark

  3. #83
    Member kabacj's Avatar
    Join Date
    Mar 2011
    Location
    Long Island
    Posts
    1,103
    Post Thanks / Like
    Hugo pointed out off line that the both the rubber and neoprene are only rated up to 180 degrees. Somehow I thought they were rated higher. But anyway he has me thinking a better way to do this is to add a strip of heat shielding exhaust wrap between the accuseal clamp and the exhaust tube. This would eliminate the need to trim down the stock 3" clamp and slow the heat transfer between the exhaust pipe and the damper and maybe allow the damper to live next to a very hot exhaust.

    Well ill see how hot it gets and just in case Ill get another set of clamps and some heat shielding wrap. All the other stuff will just transfer over.

    Thanks for the heads up Hugo

    John
    Last edited by kabacj; 08-31-2012 at 08:30 PM.
    XTF #2
    build start date June 19 2023

    GTM # 344
    Build Start December 2010
    First track day April 2013

  4. #84
    Member kabacj's Avatar
    Join Date
    Mar 2011
    Location
    Long Island
    Posts
    1,103
    Post Thanks / Like
    Spent some time mounting the 6 point harness. Boy was that a pain.

    I am using Schroth harnesses. They have a DOT legal harness as well as some nice hans specific designs.

    They also have very good mounting instructions.

    http://www.schrothracing.com/docs/Co...structions.pdf

    They want the shoulder belts to be horizontal or at a decline from the shoulders of no more then 20 degrees. Well thats unfortunate because there is nothing to mount to on the stock or my modified GTM that fits that requirement.

    The solution i came up with was to mount stubs on the cage that but up against the back of the firewall aluminum. I can then mount a harness bar on the cabin side of the firewall.

    This little job took forever.

    First I fish mouthed one end of the stub. Then mitered the side that would touch the firewall. Cut out a disk of steel plate that matched the mitered end. Welded a 7/16 fine thread nut on to the plate.


    Then welded the plate on to the end of the stub. Then mounted the stub on the firewall and welded it to the cage.


    Here is the passenger side done.


    Then I needed to mount tabs on the passenger side of the firewall because there is not room for nutcerts on the lower firewall since my fuel tank is about 1/8 of an inch away from the steel tab.


    John
    XTF #2
    build start date June 19 2023

    GTM # 344
    Build Start December 2010
    First track day April 2013

  5. #85
    Senior Member
    Join Date
    Feb 2011
    Location
    San Diego
    Posts
    1,961
    Post Thanks / Like
    There was someone selling harness bar kits awhile ago. Don't know if he is still doing it or not? Too late for you, but maybe this will save someone else some time.
    www.myraceshop.com

    GTM solution kits
    Corvette and Race parts

  6. #86
    Member kabacj's Avatar
    Join Date
    Mar 2011
    Location
    Long Island
    Posts
    1,103
    Post Thanks / Like
    Quote Originally Posted by crash View Post
    There was someone selling harness bar kits awhile ago. Don't know if he is still doing it or not? Too late for you, but maybe this will save someone else some time.
    That's correct Crash I remember Richard from north race cars was making them a few years ago. http://www.northracecars.com/gtmparts.html

    Even if I were to use Richards bar, I still needed to add the stub mounting points following the directions from Schroth.

    They want the belts to travel over the top of your shoulders and back from a 0 to 20 degree angle.


    Since I have the seat raked back quite a bit to get my helmet down as far as possible, My shoulders are also lower. The harness bar also needs to mount lower down in the car where there is not any support structure in a stock or my modified GTM

    Now I am not an expert on what works and or what is required for the harness installation, I'm just following the directions.

    John
    XTF #2
    build start date June 19 2023

    GTM # 344
    Build Start December 2010
    First track day April 2013

  7. #87
    Member kabacj's Avatar
    Join Date
    Mar 2011
    Location
    Long Island
    Posts
    1,103
    Post Thanks / Like
    The last weekend was a mad dash to get my car finished for my first track day October 6th. I am out of my mind to try to get the car finished that quickly, but I like a challenge. BTW by finished I mean it drives and has a primed body on it.

    This past weekend I painted up the chassis. It was kind of sad to cover up the steel, but it must be done. Its nice to see the frame shiny and black again.


    I welded up the engine compartment braces, made some double shear tabs welded them in and installed the braces.


    Installed my motor with Pfadt motor mounts, hooked up the cooling system, installed the belts, and installed the, fly wheel, clutch and starter.

    Here is an over head shot of the motor with the braces installed. They have right and left hand threaded rod ends so I can twist them up and preload the chassis. I am interested to see if I can notice the stiffness change by removing and adding them back on the track.


    Transaxle goes in tomorrow night and ill start wiring.

    So much to do so little time.

    John
    Last edited by kabacj; 09-19-2012 at 09:55 PM.
    XTF #2
    build start date June 19 2023

    GTM # 344
    Build Start December 2010
    First track day April 2013

  8. #88
    Senior Member Kempo's Avatar
    Join Date
    Feb 2011
    Location
    Cabo Rojo,PR. USA
    Posts
    723
    Post Thanks / Like
    That is one hell of a challenge but with your talent I'm sure you'll make it. Your GTM is coming along very nice and al those mods really make it unique. Keep up the good work buddy.
    GenII GTM #354
    Delivered (02/09/11)

  9. #89

    Join Date
    May 2011
    Location
    Pittsburgh, PA
    Posts
    728
    Post Thanks / Like
    I really like those engine compartment braces. I would have given serious thought to doing that on 2 removable triangulating tubes, rather than using Ballistic Fabrication connectors, as the latter are extremely tight are will probably be difficult to remove and reinstall when the chassis is stressed. Nice work, as always!

  10. #90
    Senior Member The Stig's Avatar
    Join Date
    Feb 2011
    Location
    Charlotte, NC
    Posts
    2,004
    Post Thanks / Like
    Beautiful work John! It looks great.

    Mike
    The Stig

    Some say, that I only know two facts about ducks, (both being wrong); and that if I could be bothered, I could solve the "da Vinci Code" in 47 seconds...
    All I know is that I'm called "The Stig".
    GTM #0081

  11. #91
    Member kabacj's Avatar
    Join Date
    Mar 2011
    Location
    Long Island
    Posts
    1,103
    Post Thanks / Like
    Transaxle went in last night. It was not the smoothest install as it just did not want to slip in. After 20 or 30 min of twisting and wiggling it found its way home. I had to swap the hard line to the passenger side of the car since the mendiola slave unit is on the passenger side.

    I got a stainless braided flex line with a 90 on one end. This allows me to keep the flex line tight to the side if the transaxle, but not so close that the stainless braid will touch anything.


    I pulled some dot3 fluid through the system with a mity vac and called it a night.


    John
    Last edited by kabacj; 09-21-2012 at 05:32 AM.
    XTF #2
    build start date June 19 2023

    GTM # 344
    Build Start December 2010
    First track day April 2013

  12. #92
    Trick Tool Maker, Super Moderator Hankl's Avatar
    Join Date
    Feb 2011
    Location
    Northern CA
    Posts
    671
    Post Thanks / Like
    Blog Entries
    1
    John,

    Great work, you'll need to do a video of the first engine start!!!

    Hank
    “If you didn’t have enough time to do it right the first time. How come you always have time to go back and do it again?” FFR1000186CP

    Understeer is when you hit the wall with the front of the car and oversteer is when you hit the wall with the rear of the car.
    Horsepower is how fast you hit the wall and torque is how far you take the wall with you.

  13. #93
    Member kabacj's Avatar
    Join Date
    Mar 2011
    Location
    Long Island
    Posts
    1,103
    Post Thanks / Like
    Mike, Jacob, Hugo, and Hank thanks for the support.

    Hank I will surely get video of the first start.

    I cant belive its almost ready.

    John
    XTF #2
    build start date June 19 2023

    GTM # 344
    Build Start December 2010
    First track day April 2013

  14. #94
    Member kabacj's Avatar
    Join Date
    Mar 2011
    Location
    Long Island
    Posts
    1,103
    Post Thanks / Like

    First start almost ready to go kart.

    Well after a few 17 hour days I think I might have the car ready for the weekend. My wife says its like watching overhauling. I go down to the garage at 5.30am and return at 11.30pm.


    This is really the first start note the smoke off the headers. I quickly stopped shooting to check that everything was OK. It was fine


    I just need to bleed the rear brakes and install the seats and do an alignment and I'm ready to do a test drive.


    Yesterday I also started the bodywork. The goal is to make the car straight enough to look presentable in flat black epoxy sealer.


    It's going to be close.

    John
    Last edited by kabacj; 02-27-2013 at 10:19 PM.
    XTF #2
    build start date June 19 2023

    GTM # 344
    Build Start December 2010
    First track day April 2013

  15. #95
    Senior Member Kempo's Avatar
    Join Date
    Feb 2011
    Location
    Cabo Rojo,PR. USA
    Posts
    723
    Post Thanks / Like
    Looks great John!!!!! Its impressive how much work you have accomplished in so little time. Looking forward to your track day videos. Just subscribed to your YouTube channel.
    GenII GTM #354
    Delivered (02/09/11)

  16. #96
    Senior Member sk7500's Avatar
    Join Date
    Feb 2011
    Posts
    377
    Post Thanks / Like
    Unbelieveable!!! I can work a whole day and come out the next morning and say, "What did you do all day yesterday"? I know that when a car comes together this quickly it's because of all the time that was spent in preparation. Putting the bolt in for the last time looks easy. Most people don't see the 400 times you put it in and out until it finally fit just right. Your chassis looks awesome. It's almost a shame to cover it with a body. Keep it up. I know you'll make your goal. I'm rowing the same boat. But without deadlines, nothing ever gets done. Right?!

  17. #97
    Member kabacj's Avatar
    Join Date
    Mar 2011
    Location
    Long Island
    Posts
    1,103
    Post Thanks / Like
    Quote Originally Posted by sk7500 View Post
    Unbelieveable!!! I can work a whole day and come out the next morning and say, "What did you do all day yesterday"? I know that when a car comes together this quickly it's because of all the time that was spent in preparation. Putting the bolt in for the last time looks easy. Most people don't see the 400 times you put it in and out until it finally fit just right. Your chassis looks awesome. It's almost a shame to cover it with a body. Keep it up. I know you'll make your goal. I'm rowing the same boat. But without deadlines, nothing ever gets done. Right?!
    Thanks Hugo and Steve. Steve I too have had many many of those "where did the time go?' days where I have nothing meaningful to show for my toils. Like the two weekends I spent re furbishing and grinding all the casting marks off the corvette suspension. I was waiting for parts and wanted to work so that's what I did And yes most of the car was together quite a few times then taken back apart. My biggest problem has been parts that were not in the car at the same time a few leaks and a few crossed wires that lead me down the wrong trouble shooting path. Yep im a deadline guy. Give me a target and too little time and I don't have the option to 'fix' things that are not broken. Time to get back to work.

    John
    XTF #2
    build start date June 19 2023

    GTM # 344
    Build Start December 2010
    First track day April 2013

  18. #98
    Senior Member Kalstar's Avatar
    Join Date
    Feb 2011
    Location
    Cape Cod
    Posts
    1,300
    Post Thanks / Like
    Looks awesome John, like said " what a shame to cover all that beautiful work with a body". YouTube subscribed.

  19. #99
    Master Debator
    Join Date
    Sep 2012
    Location
    Central Ohio
    Posts
    26
    Post Thanks / Like
    Nice work man. I bet that thing is a monster around a track.

    You need to get these plans the Factory Five so they can incorporate them and have say a "race" model that is legal to race with the major sanctioning bodies.

    That way in a few years when I buy mine I wont have to do all this work
    Last edited by joe0121; 10-04-2012 at 09:40 AM.

  20. #100
    Member kabacj's Avatar
    Join Date
    Mar 2011
    Location
    Long Island
    Posts
    1,103
    Post Thanks / Like
    Track day

    Well it was Thursday night around midnight and I had the final list of things to complete.

    I had to re connect all the guages to the Mast Motorsports Ecu which has all the sending units plumbed into the engine control. It's completely stand alone so all I needed to do is make a circuit for the brake lights and I'm done with electrical . Make a bracket for the guages and design and fabricate an intake that would allow for an air filter and the mass air flow sensor.

    After bleading the engine cooling, front and rear brakes, and clutch for the final time,I was in no mood to start those projects at midnight.

    I went to bed with a strong feeling that I was not going finish everything up and road test the car in time to make new jersery motorsports park (4 hours away)by 7am sat.

    I still needed to unload the trailer which is the temporary garage for my next project. Load the trailer with tools,supplies, and the car. Mount all of the tunnel and under car aluminum and finally glue in the windshield.

    Over the past 3 weeks I have been working like a madman putting 35 hours a week into the car. I knew I had my work cut out for me especially getting the Hillborne setup ready for the track.

    To add to the mix I decided not to use the stock seats (already installed) . I took them out and swapped in Kirkey intermediate road race seats.

    I needed to make mounting brackets and weld in tabs for the new seats and weld in tabs for the harnesses that will work for both setups.


    So basically I just added more work making difficult goal even more difficult.

    No time to spare. Friday am I was down in the Garage at 5.00 am. The previous night I was pretty down about my prospects of finishing in time. I felt better with a little rest. Maybe I can make it!

    Four and a half hours later my buddy shows up.


    His car is loaded and his gear packed. We took some time to review the punch list and he asked if I was really going to get all of that done properly and have the car tech inspected by my local race shop by the evening.

    I have never cut corners on the build. I was not going to start now. That also meant the I was not going to make it to the track.

    To add to the mix. Saturday weather was clear . Sunday was calling for a monsoon.

    My buddy said swallow your pride grab your gear and drive my car this weekend. It's nice to have good friends.

    So we had a ton of fun. We drove all the way down to southern Delaware to pickup a cool tilt bed trailer.


    We tested out our video and telemetry capture gear. And met some great people.

    Funny thing about me building this track version of the GTM is that I have only driven 20 laps around a track in a car. Sure I have done thousands on a motorcycle but clearly it's not the same.

    Lucky for me Carl Thomson was assigned my driving instructor. Carl has a long racing history starting before i was born. He currently campaigns a Factory Five Challenge car. Imagine that! I go to a Porsche club event and factory five guys are there.

    I was still working out the bugs of the video capture setup but here is a saturday lap of NJMP thunderbolt.

    By sunday AM i was able to get down to consistently run low 1.45 lap times. I'm happy with those times in a borrowed stock C5.

    Here is a quick video.


    So the deadline has come and gone. I made a pretty good attempt at finishing, but looks like now I can take the time I really wanted to make some more parts for the GTM and make it truly track ready.

    John
    Last edited by kabacj; 02-27-2013 at 10:18 PM.
    XTF #2
    build start date June 19 2023

    GTM # 344
    Build Start December 2010
    First track day April 2013

  21. #101
    Senior Member sk7500's Avatar
    Join Date
    Feb 2011
    Posts
    377
    Post Thanks / Like
    Bummer you missed your goal. I respect your unwillingness to compromise. You made some unbelievable progress and you are much further along than you would have been without the goal. And it proves you are only crazy and not stupid. I think the first time you drive your well prepared GTM on the track you will look back on your wise decision to wait and go out with your "A Game" car. I also think the seat time you spent on the track in a tame car will prove invaluable. The seat time did little to prepare you for the brute force you will experience with your GTM but it can't hurt.
    I can't wait to read your impression of your first track day. I remember my day and it was a true eye opener.

  22. #102
    Member kabacj's Avatar
    Join Date
    Mar 2011
    Location
    Long Island
    Posts
    1,103
    Post Thanks / Like
    Quote Originally Posted by sk7500 View Post
    Bummer you missed your goal. I respect your unwillingness to compromise. You made some unbelievable progress and you are much further along than you would have been without the goal. And it proves you are only crazy and not stupid. I think the first time you drive your well prepared GTM on the track you will look back on your wise decision to wait and go out with your "A Game" car. I also think the seat time you spent on the track in a tame car will prove invaluable. The seat time did little to prepare you for the brute force you will experience with your GTM but it can't hurt.
    I can't wait to read your impression of your first track day. I remember my day and it was a true eye opener.
    Yeah the seat time was very good. But it was a real bummer not to have the GTM. I'll simply take the necessary time to complete the mentioned items as well as add heat shielding, oil and transaxle cooling and do a quality alignment and corner balance.

    I'll put together a photo guide of the seat and harness install so folks can see how well the Kirkey seats fit a six point harness setup in the GTM

    I'll have the car street legal in the two months it takes for New York State to process the paperwork.

    Maybe the dry sump or accusump will go in before the first track day as well. I was pulling 1 G in the corvette with Nitto nt05s. The gtm should hold quite a bit higher g load with dot slicks.

    It probably would have been stupid to rush a car on to the track missing the cooling and oiling mods. I just like to hit the goals I set out

    John
    XTF #2
    build start date June 19 2023

    GTM # 344
    Build Start December 2010
    First track day April 2013

  23. #103
    Senior Member
    Join Date
    Feb 2011
    Location
    Clarksville, MD
    Posts
    232
    Post Thanks / Like
    John,

    While I feel your pain in the missed deadline (i've missed plenty), I applaud you holding to the "do it once, do it right" mentality. As all of us who are building a GTM can attest, the quick and easy way is rarely the right way. If nothing else, my build has taught me as much about patience as my two kids have!

    I've been looking for a tilt-bed trailer as well - where did you get yours?

    -Michael

  24. #104
    Senior Member sk7500's Avatar
    Join Date
    Feb 2011
    Posts
    377
    Post Thanks / Like
    Quote Originally Posted by kabacj View Post
    Yeah the seat time was very good. But it was a real bummer not to have the GTM. I'll simply take the necessary time to complete the mentioned items as well as add heat shielding, oil and transaxle cooling and do a quality alignment and corner balance.

    I'll put together a photo guide of the seat and harness install so folks can see how well the Kirkey seats fit a six point harness setup in the GTM

    I'll have the car street legal in the two months it takes for New York State to process the paperwork.

    Maybe the dry sump or accusump will go in before the first track day as well. I was pulling 1 G in the corvette with Nitto nt05s. The gtm should hold quite a bit higher g load with dot slicks.

    It probably would have been stupid to rush a car on to the track missing the cooling and oiling mods. I just like to hit the goals I set out

    John
    You didn't miss the Goal, you missed the date. The goal remains the same, "the best GTM you can build for both street and track". I have no doubt you'll get there.

  25. #105
    Member kabacj's Avatar
    Join Date
    Mar 2011
    Location
    Long Island
    Posts
    1,103
    Post Thanks / Like
    Quote Originally Posted by RumRunner View Post
    I've been looking for a tilt-bed trailer as well - where did you get yours?
    l
    Michael

    My buddy got his tilt bed from Down to earth trailers who have their factory in Georiga.

    He went with the 20 foot steel deck hydraulic tilt model. The goal was to get his stock corvette on the trailer without any blocks or wood at the transition. He just makes it with stock ride height. He will need a scrap of 2/12 to ease the transition when he lowers his car. The gtm will also need a few blocks of wood to ease the transition.

    The 20 foot model also allows him to put a pit bike, tool box and tire rack on the trailer with plenty of room to balance the tongue weight

    The closest dealer to us in NY was in Laural Delaware, which is on the southern border of the state. Made for a nice road trip.

    Quote Originally Posted by sk7500 View Post
    You didn't miss the Goal, you missed the date.
    That's a better way to think about it Steve. Thanks.

    Quote Originally Posted by joe0121 View Post
    You need to get these plans the Factory Five so they can incorporate them and have say a "race" model that is legal to race with the major sanctioning bodies.
    Joe I'm going to discuss it with Factory Five. I know they have their hands full with the 818 right now. Maybe an idea for the gen 3 GTM.

    John
    Last edited by kabacj; 10-11-2012 at 05:36 AM.
    XTF #2
    build start date June 19 2023

    GTM # 344
    Build Start December 2010
    First track day April 2013

  26. #106
    Member kabacj's Avatar
    Join Date
    Mar 2011
    Location
    Long Island
    Posts
    1,103
    Post Thanks / Like
    There have been a few threads regarding seats in the GTM and although I am happy with the Gen2 seats for street use I needed something stiffer and offering a bit more containment for the track.

    I used two methods for mounting the seats. Both used button head bolts and brackets I made from 2x4x.25 6061 aluminum angle.


    I cut 4 inch sections and drilled them for two mounting holes into the side of the kirkey seats. The button heads go on the inside of the seat and can barely be felt under the Air knit kirkey seat covers. (which I was surprised how nice look and how comfortable they are) two bolts go down through the rear of the seat in the corners attaching the seat to the floor. I think I might mount the back of the seat to the aluminum firewall for added rigidity. I just need to figure out the best method.

    I used the 15 inch wide seat for the drivers side with tons of extra room on either side. I am going to move the steering column slightly more inboard to center it on the new seat position.

    I used the 16 inch wide seat for the passenger still fitting between my door bars and the center tunnel without modification. The tunnel will need to be made a bit more narrow before I fit the stock seats.


    I also welded in plates to mount the harnesses.

    Two plates outboard to mount the anti sub straps and the lap belts.


    I used the stock factory five belt mount for inboard lap belt.


    and installed two mounts for the anti sub straps the top left unpainted mount works better for the racing seat and the lower mount works well with the street seat.


    On the drivers side the only difference was welding in plates slightly farther forward to the x brace. These have welded in nuts to receive grade 8 7/16ths -20 bolts. This method of mounting is more rigid then mounting to the sheet metal floor pan. The sheet metal oil cans a bit when you really pull on the seat. I think a third attachment to the aluminum firewall will stiffen up both the passenger and driver method. Seat mounting is something i think its worth spending a little time to over kill.


    Also in this picture you can see the smaller nuts that I use to mount the stock seat that rides on tracks for easy adjustment.

    John
    Last edited by kabacj; 10-15-2012 at 09:16 PM.
    XTF #2
    build start date June 19 2023

    GTM # 344
    Build Start December 2010
    First track day April 2013

  27. #107
    Member kabacj's Avatar
    Join Date
    Mar 2011
    Location
    Long Island
    Posts
    1,103
    Post Thanks / Like
    This weekends focus was the cooling system. Although the canton tanks work just fine, I wanted to make a custom tank that fits into the nook created by my roll cage additions.


    The Corvette tank is 4.5 quarts with 2 quarts to full cold. I figure with the larger volume of water in the GTM an extra quart of expansion area would not hurt. My tank measures 5.5 quarts.

    I had temporarily mounted the corvette catch tank. Propped up its higher then the heads and works fine. The hose routing is not ideal with the corvette tank. You cant get the tank all the way up to the top of the hatch like you can with a canton setup.

    I mocked up the tank in cardboard. It slots right into the space in the frame but still has enough room for easy removal in the future if necessary.

    Since the hookups hang below the tank I wanted to make them first and add them to the mock up to ensure clearance.

    I turned the two fittings on the lathe then cut some 1 inch pipe I had laying around .


    After some fitting and welding I have the part ready to be drilled for the tube that attaches the tank.


    One of the things I like about this setup is I can route the hoses without any major twists and turns. Both hoses have a straight run from the water pump.

    This is the connection on the Corvette tank.


    John
    Last edited by kabacj; 10-21-2012 at 08:38 PM.
    XTF #2
    build start date June 19 2023

    GTM # 344
    Build Start December 2010
    First track day April 2013

  28. #108
    Member kabacj's Avatar
    Join Date
    Mar 2011
    Location
    Long Island
    Posts
    1,103
    Post Thanks / Like
    Well Hurricane Sandy put the brakes on my GTM build. She even canceled my week long trip to SEMA! The storm itself canceled my flight out on Monday AM. It was a bit windy but I have flown out in worse... On Wed when the storm passed I could not get a flight out because all of the coastal fuel terminals were damaged and without power. The jets did not have enough fuel and airlines were not flying in to NY. Only short haul flights were operating and the airplanes were flying in with enough fuel to fly out... Crazy! Of course we had a gas shortage for cars too, but there was plenty of diesel. It was nice not to deal with 3 hour lines for gas. It reminded me waiting in gas lines in the 70s . I think that scared my for life. I hate waiting.
    I was fortunate to only have minor damage at my house but my family was not as lucky. So the past few weeks have been spent helping them recover. Finally this weekend I was able to put a few hours in on the car.

    I was in the mood to do some welding so I started with the wing support.

    First step was to build a frame to hold the wing.


    I welded in some plate on each side of the frame to accept the through bolts that mount the aluminum wing supports.


    Next I needed to figure out how I was going to support the frame.

    I wanted to use struts and rod ends because that will allow me some adjustment.. and i just like them.

    The next step was to support the frame in such a way that its rigid and able to support a few hundred lbs. I had a few ideas, but I find that mock up always highlights changes that would be better then my original idea.

    I was outside cleaning up the mess from the hurricane and then the nor'easter that dropped 6 inches of very wet snow and did even more damage.... and I had to cut back some of the bamboo. What a great building material that stuff is.

    I used it to mock up my struts. The cool part of using this instead of metal is I can see it flex when it takes a load. Was very helpful to optimize the strut placement.


    The metal struts will be slightly different, however I got some good ideas from using the bamboo.

    After cutting out a few tabs I ran out of time for this weekend. Its nice to be back in the garage.

    John
    XTF #2
    build start date June 19 2023

    GTM # 344
    Build Start December 2010
    First track day April 2013

  29. #109
    Super Moderator vnmsss's Avatar
    Join Date
    Feb 2011
    Location
    California
    Posts
    649
    Post Thanks / Like
    Blog Entries
    13
    Great that you're back at it John!! We really missed you at SEMA, and all of us were thinking about and praying for our friends back East during our time at the show. Glad you're home didn't sustain too much damage, and very sorry to hear about the damage your relatives sutained. While the hurricane is weeks behind us, I know many folks are still suffering, and we continue to pray and send help where we can.

    You made some good progress this weekend, and your story about the bamboo is awesome....I've had the good fortune of talking with some of the greatest racecar designers and engineers over the years, and I think people like Peter Brock and Phil Remmington would appreciate your pragmatic genius. I continue to cheer for you over here, and can't wait to see your creation under speed!

    Karen
    #28 FFR Challenge Series
    #28 FFR Type-65 Coupe
    2011 Western Endurance Racing Championship
    2010 West Coast Champion
    Drive it.....Like you stole it!

  30. #110
    Member kabacj's Avatar
    Join Date
    Mar 2011
    Location
    Long Island
    Posts
    1,103
    Post Thanks / Like
    Hey Karen!

    Great to hear from you. I felt bad I let you guys down and could not make the show. From the pictures it was clear that the Factory Five booth was as crowded as ever. When I spoke to Jason his voice was horse from all the talking. That is a great indication of a successful show!

    I was also very disappointed that I was unable to see your new coupe and all the beautiful factory five cars at the show.

    Thanks for the kind words on the build. Hopefully some of these mods actually work as planned on the track.

    Talk to you soon.

    John
    XTF #2
    build start date June 19 2023

    GTM # 344
    Build Start December 2010
    First track day April 2013

  31. #111
    Member kabacj's Avatar
    Join Date
    Mar 2011
    Location
    Long Island
    Posts
    1,103
    Post Thanks / Like
    In order to support the wing I will make at least 4 struts that support the square frame that acts as the wing mount.

    Each mounting point will have two tabs, That means lots and lots of tabs. I don't have a CNC mill or plasma cutter.... yet so I am relegated to the old school methods my a designer / fabricator friend showed me before everybody had cool software that make CAD drawing easy.

    Step one mock up the tabs in poster board. Once you have a good design re draw the tab on a piece of paper. Make a copy of the drawing. Cut out the tab from the copy and tape it to the first page recopy and you can multiply your tabs pretty quickly.


    I can use autocad, but some times this method is just quicker and easier for simple shapes. I also don't need to leave the garage.

    Next a little spray adhesive on your paper pattern and glue it to the metal sheet stock.

    Next drill then cut out the shapes on the band saw being very careful not to touch the lines of the pattern.

    Finally using a stationary sanding wheel or what ever you have handy creep up on the lines. If you are making many of the same tab, I bolt them together and sand them all at once.

    Sure its lots of work to make tabs this way, however I like the fact that I have complete freedom with the shapes and I can make the same shapes out of aluminum and steel.

    With a few tabs complete, I welded them on and started to measure for the struts.


    Im sure there are better ways to make tabs, but this is one easy method i enjoy.

    John
    Last edited by kabacj; 12-03-2012 at 10:10 PM.
    XTF #2
    build start date June 19 2023

    GTM # 344
    Build Start December 2010
    First track day April 2013

  32. #112
    Member kabacj's Avatar
    Join Date
    Mar 2011
    Location
    Long Island
    Posts
    1,103
    Post Thanks / Like
    Next step on the wing support was mounting the tabs and making the struts. I also added some cross bracing to the frame.


    I made the two front struts out of some tubing with machined ends. The rod ends are left and right hand threaded so I can spin the tube and lengthen or shorten the strut. I turned off the welds because I thought it looked nicer. The ends are a press fit into the tube and I made sure to get good penetration so the joint would remain strong.


    I have started a theme with the strut design. I'll make all the struts for the car using this design.


    Merry Christmas guys

    John
    XTF #2
    build start date June 19 2023

    GTM # 344
    Build Start December 2010
    First track day April 2013

  33. #113
    Junior Member
    Join Date
    Dec 2012
    Posts
    4
    Post Thanks / Like
    Normally X-design are stronger for cage purpose. If you don't have that extra room that the gutted doors would provide, than X-design provide similar protection without being as intrusive. As well as X door are cheaper than others.

  34. #114
    Member kabacj's Avatar
    Join Date
    Mar 2011
    Location
    Long Island
    Posts
    1,103
    Post Thanks / Like
    Quote Originally Posted by frank23 View Post
    Normally X-design are stronger for cage purpose. If you don't have that extra room that the gutted doors would provide, than X-design provide similar protection without being as intrusive. As well as X door are cheaper than others.
    Hi Frank. I agree an x in the door opening would be stronger. That was my origional idea. However I could not make it work without making entry and exit very dificult. Since the GTM is quite low and your knees are almost at the leading edge of the door entry and exit are already tight. I wanted to maintain ease of entry and exit so I went with NASCAR style. Since the frame structure is inboard of the fiberglass shell
    gutting the doors does not buy you room like it does in a production car. Thanks for the input. If someone can make the x style work in a GTM I agree it would be better.

    John
    Last edited by kabacj; 12-26-2012 at 06:51 PM.
    XTF #2
    build start date June 19 2023

    GTM # 344
    Build Start December 2010
    First track day April 2013

  35. #115
    Senior Member
    Join Date
    Feb 2011
    Location
    San Diego
    Posts
    1,961
    Post Thanks / Like
    If you go to half doors and put a shelf in, then not only can you beef up the side protection, but you now are sitting on a shelf when you get out and you aren't looking so silly crawling out of the car.

    Half Door 2012 2.JPG
    www.myraceshop.com

    GTM solution kits
    Corvette and Race parts

  36. #116
    Member kabacj's Avatar
    Join Date
    Mar 2011
    Location
    Long Island
    Posts
    1,103
    Post Thanks / Like
    Quote Originally Posted by crash View Post
    If you go to half doors and put a shelf in, then not only can you beef up the side protection, but you now are sitting on a shelf when you get out and you aren't looking so silly crawling out of the car.
    Ha! No doubt Crash. That is a very cool setup.

    John
    XTF #2
    build start date June 19 2023

    GTM # 344
    Build Start December 2010
    First track day April 2013

  37. #117
    Member kabacj's Avatar
    Join Date
    Mar 2011
    Location
    Long Island
    Posts
    1,103
    Post Thanks / Like
    Although lots of people get the factory five setup with the overflow tank in the front of the car to work without issue, I chose to go with the tank mounted higher than the engine. I think its easier to bleed out the air from the system with this setup.

    The mods I did to the cage in order to hopefully qualify it for SCCA and NASA created a nice little nook that I wanted to install the coolant overflow tank into. The corvette overflow is 2qts to full cold and has a total of 4.5 qts full to the rim. I wanted to have at least this much volume in my overflow tank. This tank is 5 qts.

    I mocked it up in Google Sketchup to get the right volume then cardboard to check the fit. Then aluminum.

    I copied the design of the input tubes from the corvette tank with a larger diameter hose going into a smaller diameter. I figure this design slows down the fluid flow and I am guessing that it allows air to come out of the system. What ever the reason some engineer figured it was a good idea so I kept it.


    There is this little hole in the rear hatch hinge support. so I turned a bit that fits into the hole then drilled and tapped it to accept a bolt.


    Its a crazy tight fit, but it fits....just barely.


    I added a second mounting bolt on the back to lock the tank into position.

    This project took a while, but i think it was worth it.

    John
    XTF #2
    build start date June 19 2023

    GTM # 344
    Build Start December 2010
    First track day April 2013

  38. #118
    Member kabacj's Avatar
    Join Date
    Mar 2011
    Location
    Long Island
    Posts
    1,103
    Post Thanks / Like
    Mast Motorsports suggested that I run a vacuum reservoir with the individual throttle bodies. Of course one throttle body is only generating vacuum at any point in time. To provide a constant vacuum each is plumbed into a manifold.


    I researched all types of tanks. Production car vacuum tanks were expensive and not what I wanted. I was browsing through the Jegs catalog and I found this tank. It seemed like it could work. It was only 14 bucks so I figured i would take a chance. Worst case I would make a tank from aluminum.

    The vacuum manifold has a -6 AN fitting. I purchased fittings and hose and got to plumbing the setup.

    Of course the Jegs canister did not have the size fittings I needed. No problem. Lathe to the rescue.


    the bottle had two fittings top and bottom like the one on the lower left. I needed a fitting for the top that would connect to the push lock hose. So I copied the Black fitting on one side and the lower left fitting on the other. That gave me the aluminum fitting on the top right.

    The bottom fitting needed to connect to a very small vacuum accessory line for my heater bypass valve. I figured that small a barb would be weaker if I made it from aluminum so I opted for stainless steel. That also made it easy to just chop off the barb on the jegs fitting and weld on the new barb. See bottom right in the pic above.

    Here is the new setup


    And the picture installed.


    Neat and tidy install for 14 bucks. I was happy with that.

    John
    Last edited by kabacj; 01-23-2013 at 09:22 PM.
    XTF #2
    build start date June 19 2023

    GTM # 344
    Build Start December 2010
    First track day April 2013

  39. #119
    Senior Member Kempo's Avatar
    Join Date
    Feb 2011
    Location
    Cabo Rojo,PR. USA
    Posts
    723
    Post Thanks / Like
    John,
    I've said it before and I'll say it again. You really are one hell of a craftsman. If it ain't available you just fabricate it. I'm definitely becoming a big fan of your work. Keep the updates coming buddy.
    GenII GTM #354
    Delivered (02/09/11)

  40. #120
    Member
    Join Date
    Jan 2013
    Posts
    30
    Post Thanks / Like
    you might want to make the cross member over the gearbox removable. It makes taking the gearbox and engine a lot easier to remove and replace. If you are really going to put some power to the ground with that, might I suggest checking the vertical loads of the rear toe links for twisting and compression.

Page 3 of 23 FirstFirst 1234513 ... LastLast

Tags for this Thread

Posting Permissions

  • You may not post new threads
  • You may not post replies
  • You may not post attachments
  • You may not edit your posts
  •  

Martin's Dent and Collision Shop

Visit our community sponsor