Midwest Classic Insurance

Visit our community sponsor

Thanks Thanks:  1
Likes Likes:  4
Page 4 of 23 FirstFirst ... 2345614 ... LastLast
Results 121 to 160 of 908

Thread: GTM roll cage modifications and race car build log

  1. #121
    Member kabacj's Avatar
    Join Date
    Mar 2011
    Location
    Long Island
    Posts
    1,103
    Post Thanks / Like
    Quote Originally Posted by GTM RACER View Post
    you might want to make the cross member over the gearbox removable. It makes taking the gearbox and engine a lot easier to remove and replace. If you are really going to put some power to the ground with that, might I suggest checking the vertical loads of the rear toe links for twisting and compression.
    Hi GTM Racer.

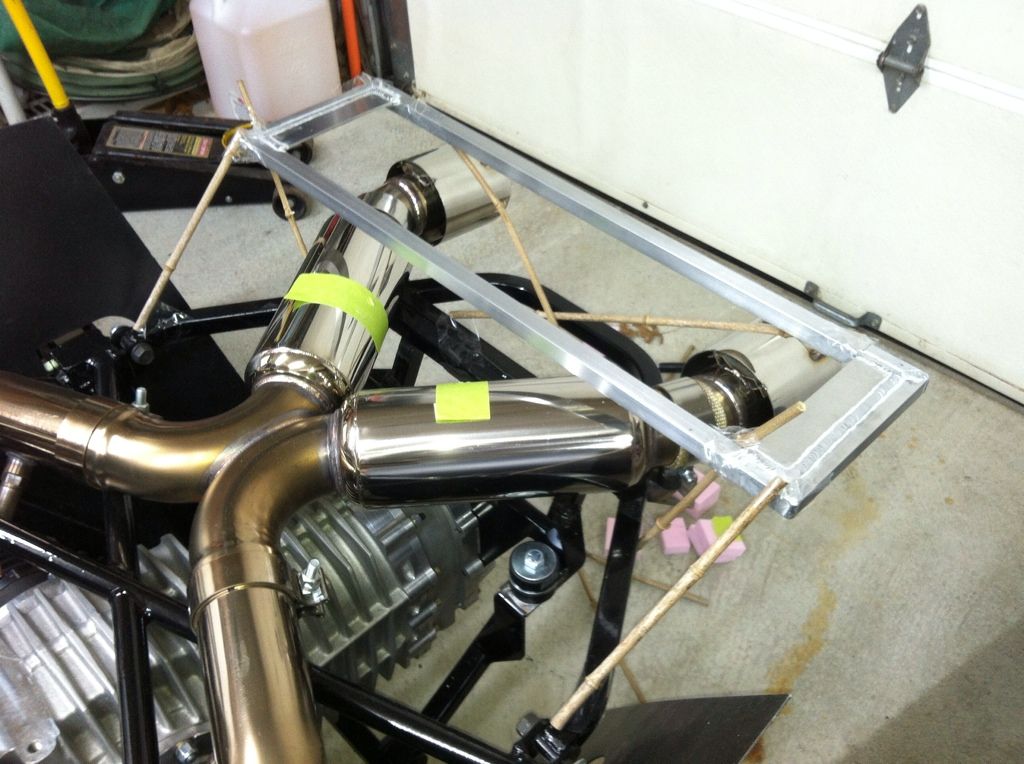
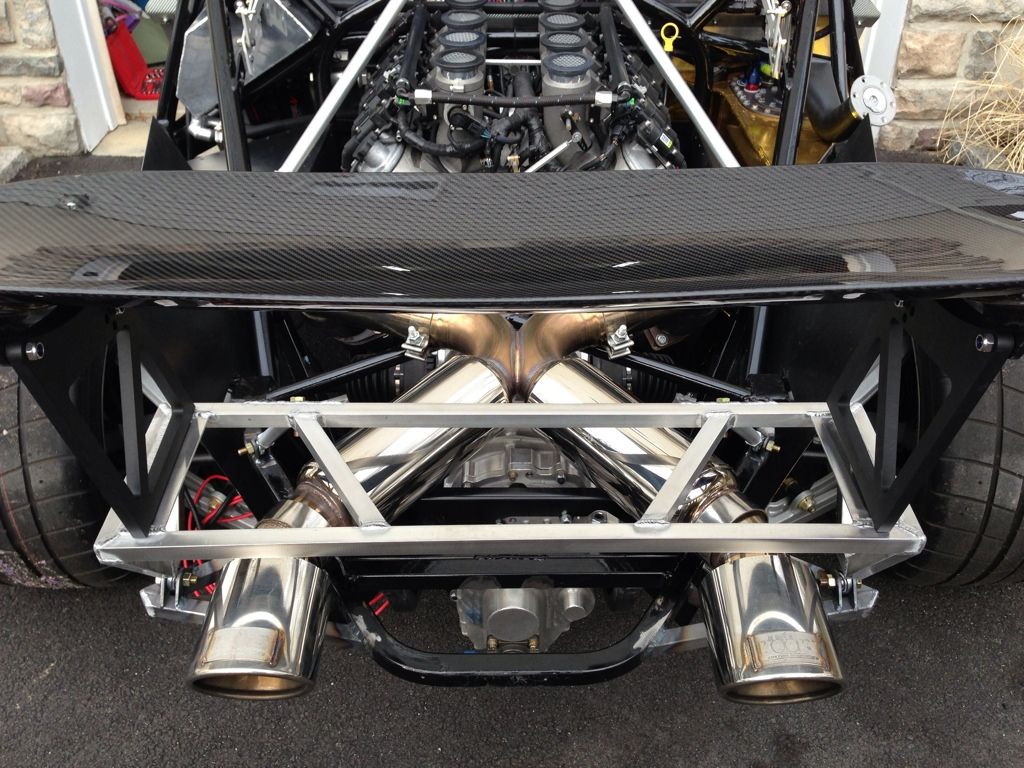
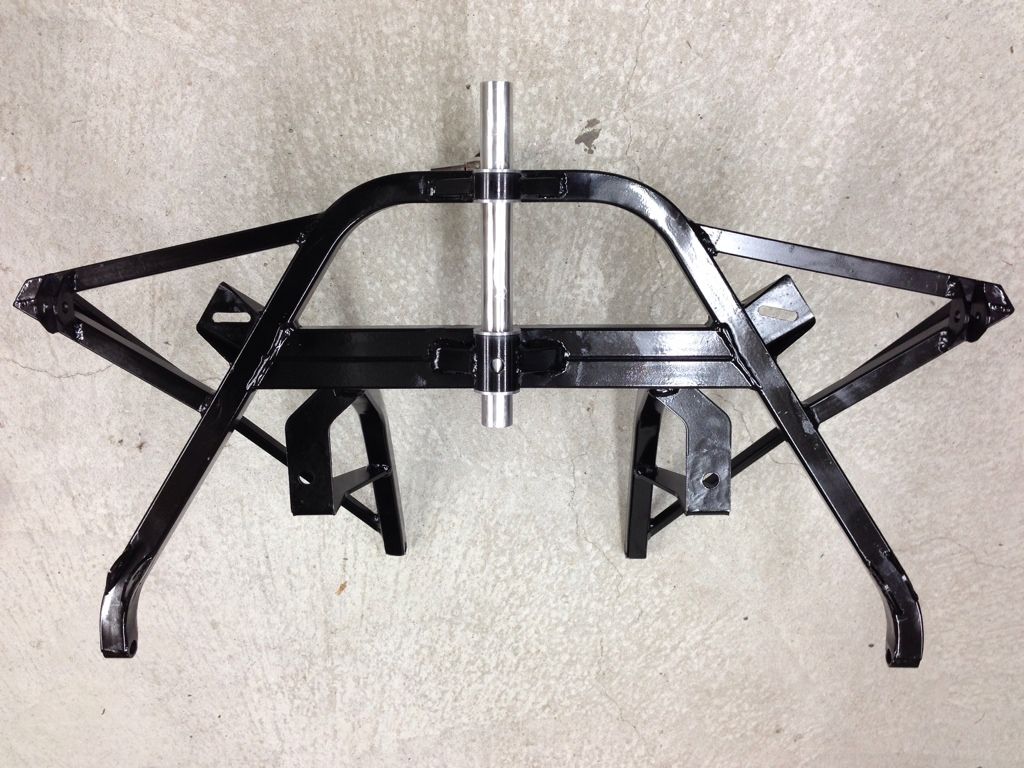
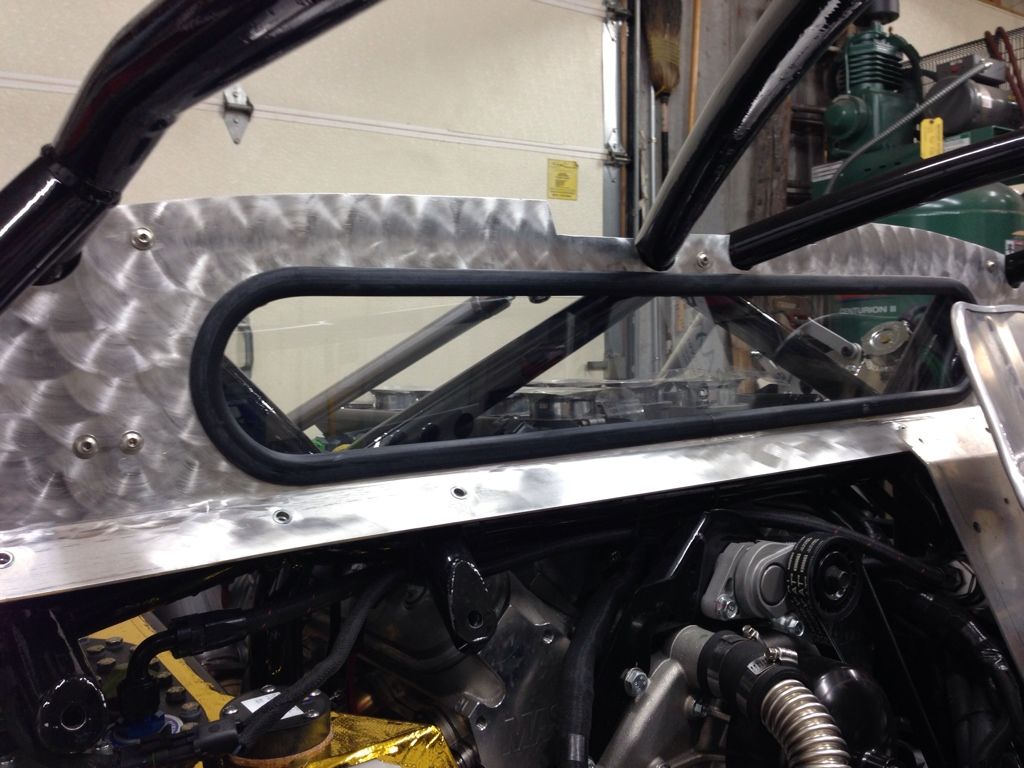
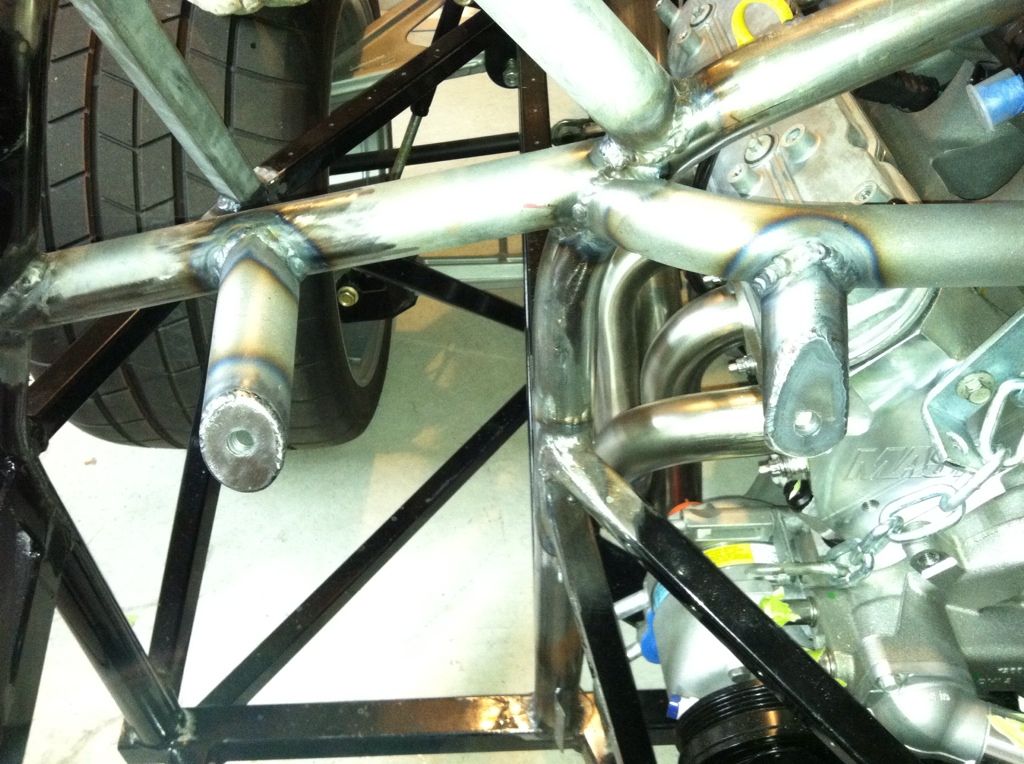
    Regarding the cross brace above the transaxle. With the current setup its necessary to remove the transaxle, clutch, and flywheel before the motor comes out easily. I might be able to squeeze it out with the clutch and flywheel still attached, but that’s more of a two man job. I have more in the way of the front accessories with the roll cage additions.

    The motor has been in and out 5 times or more and I can do it with help from my 8 year old son who guides and watches the front accessories while I work the lift and twist the motor. The transaxle drops out the rear pretty easily I can do that myself with a cradle I made for my floor jack.

    It would be nice to just lift the motor and transaxle out in one piece. I am not at the point where I bring a spare motor and transaxle to the track where a quick motor swap and transaxle swap is a premium. All that said I agree a removable cross brace would be very nice. Its on the list.

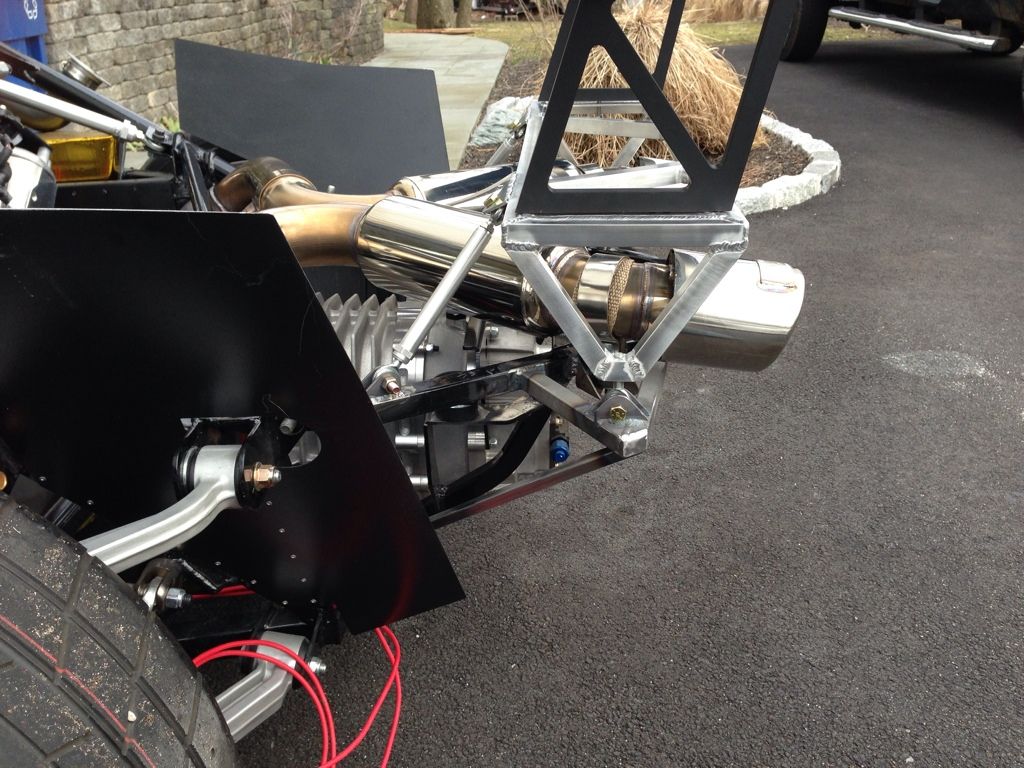
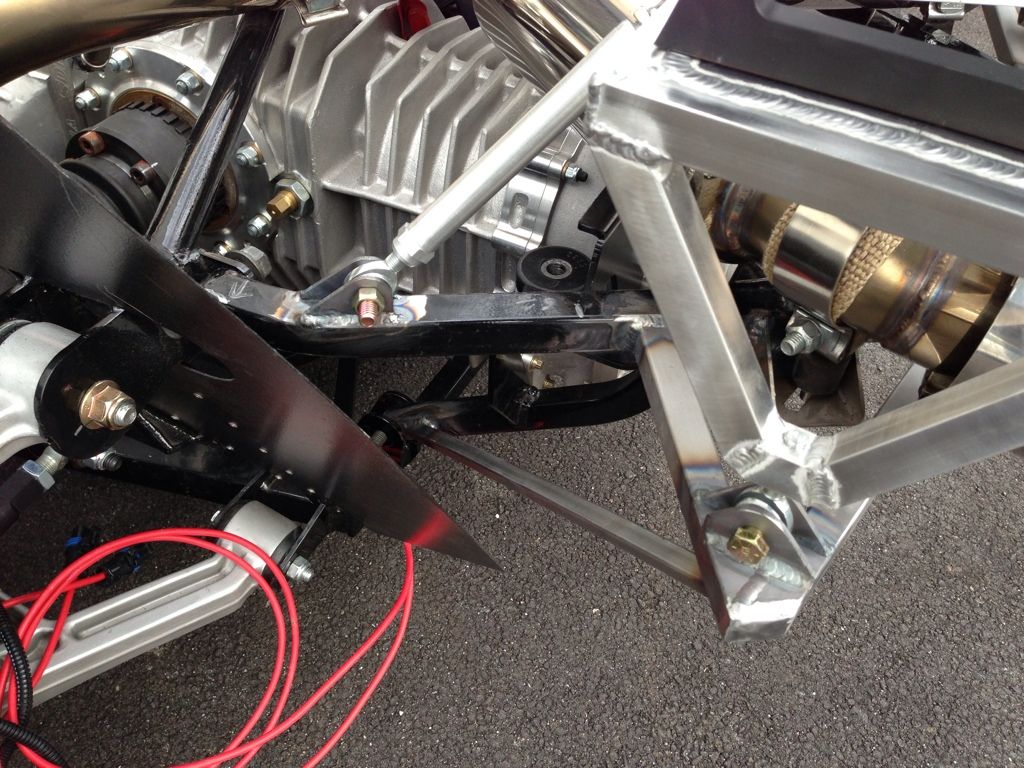
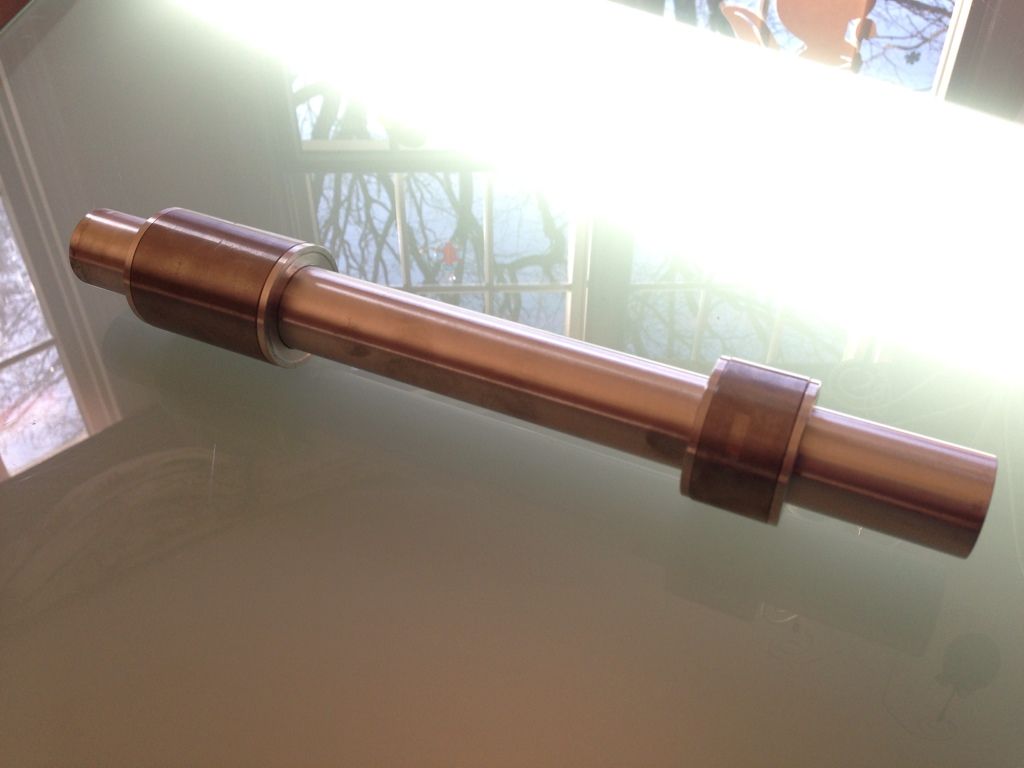
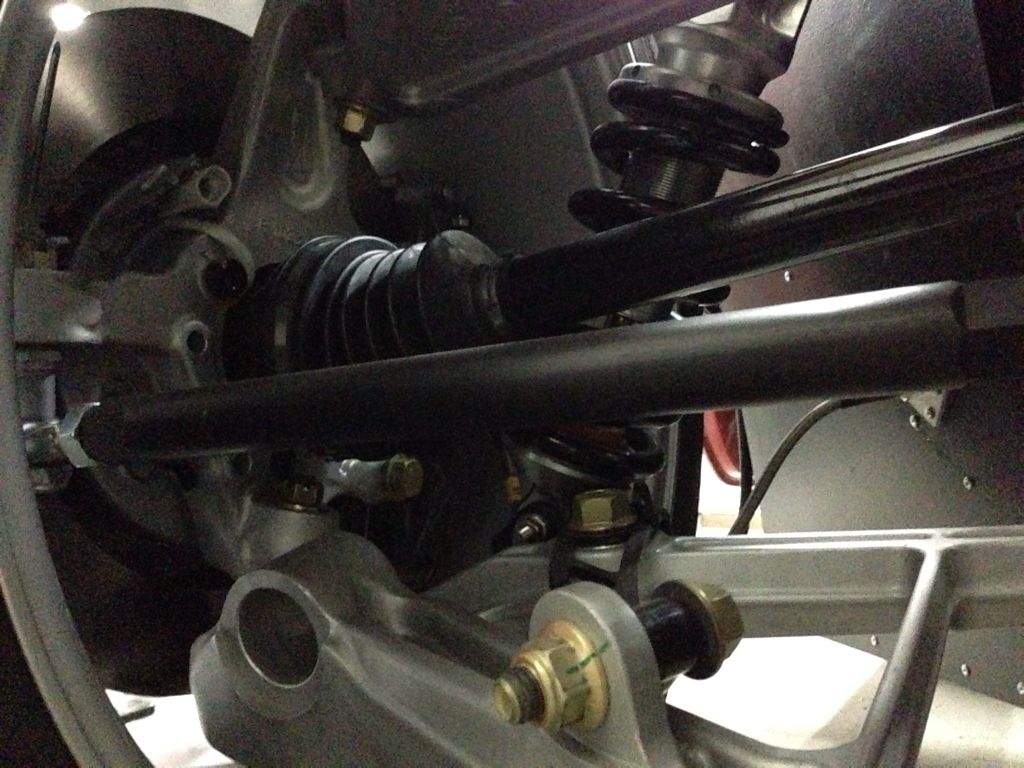
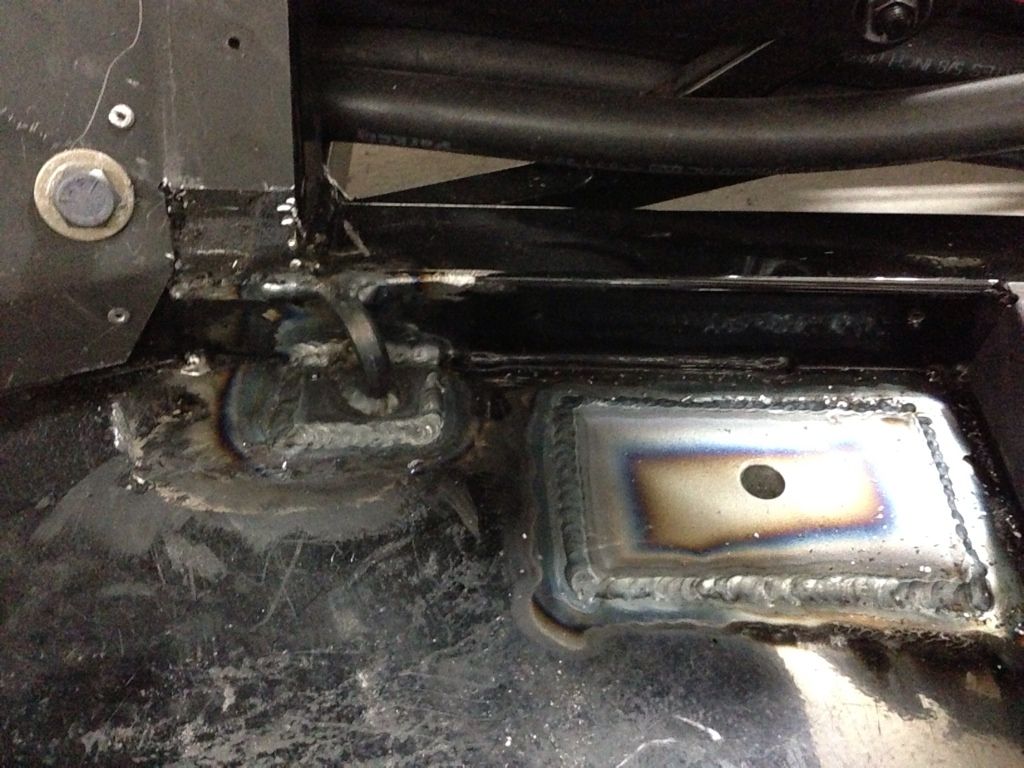
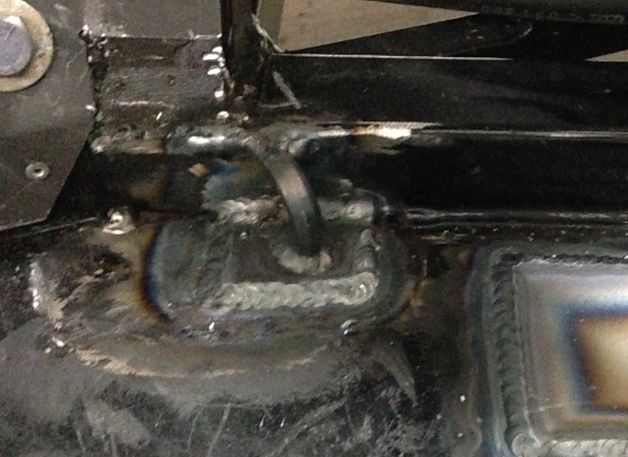
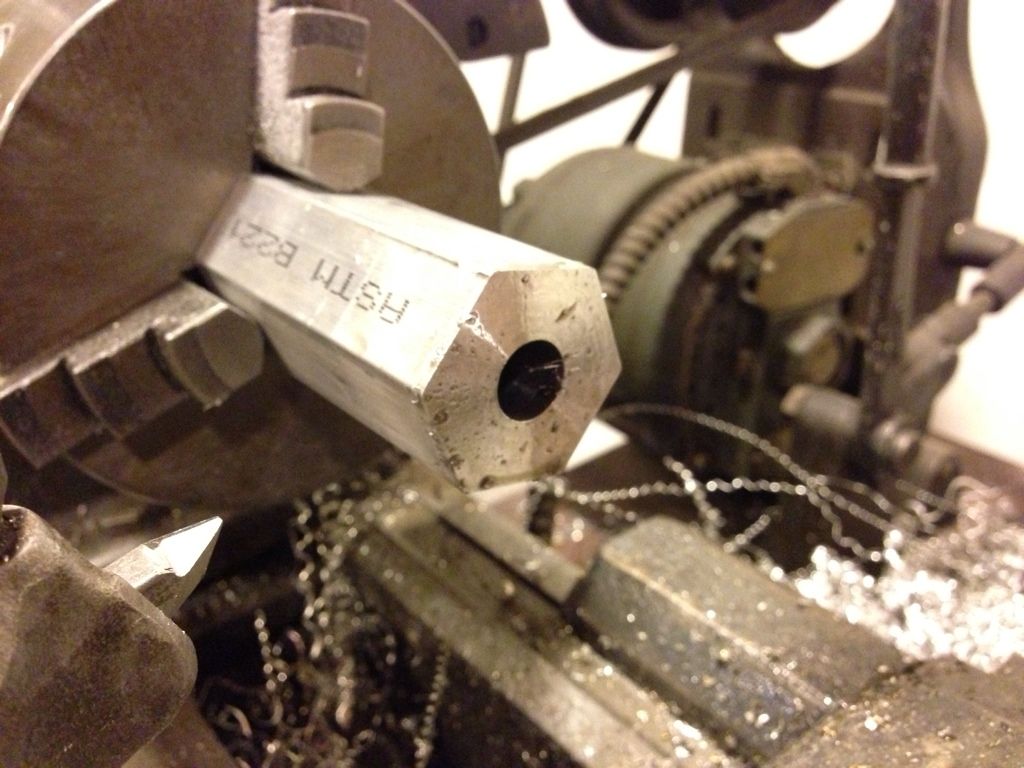
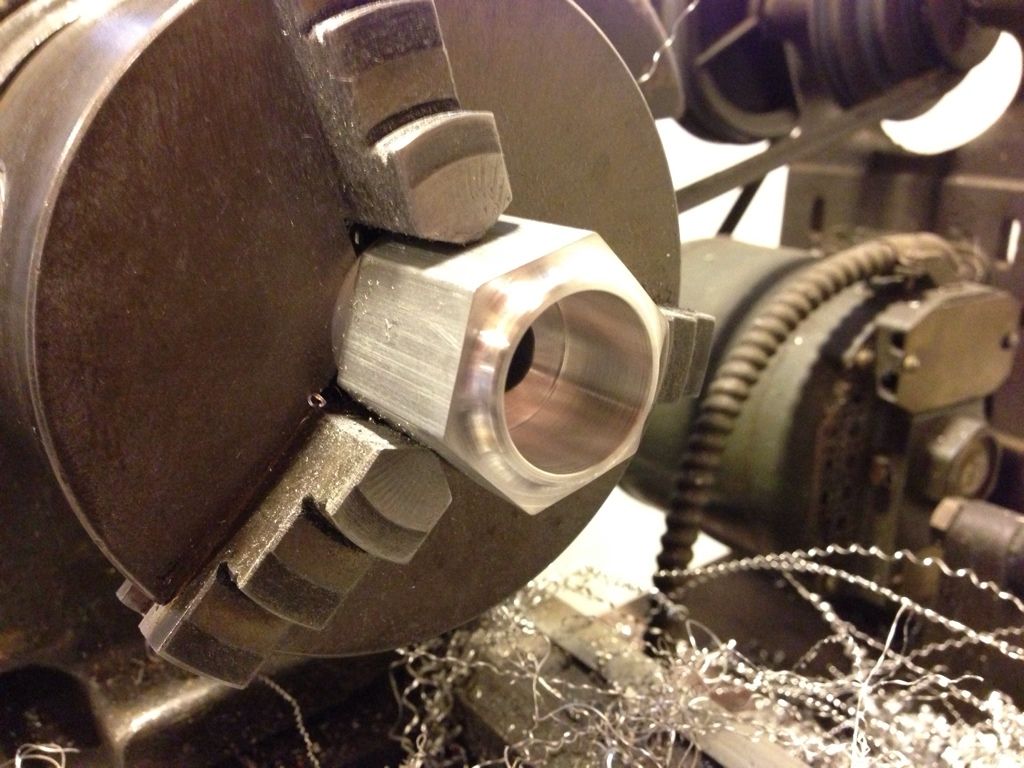
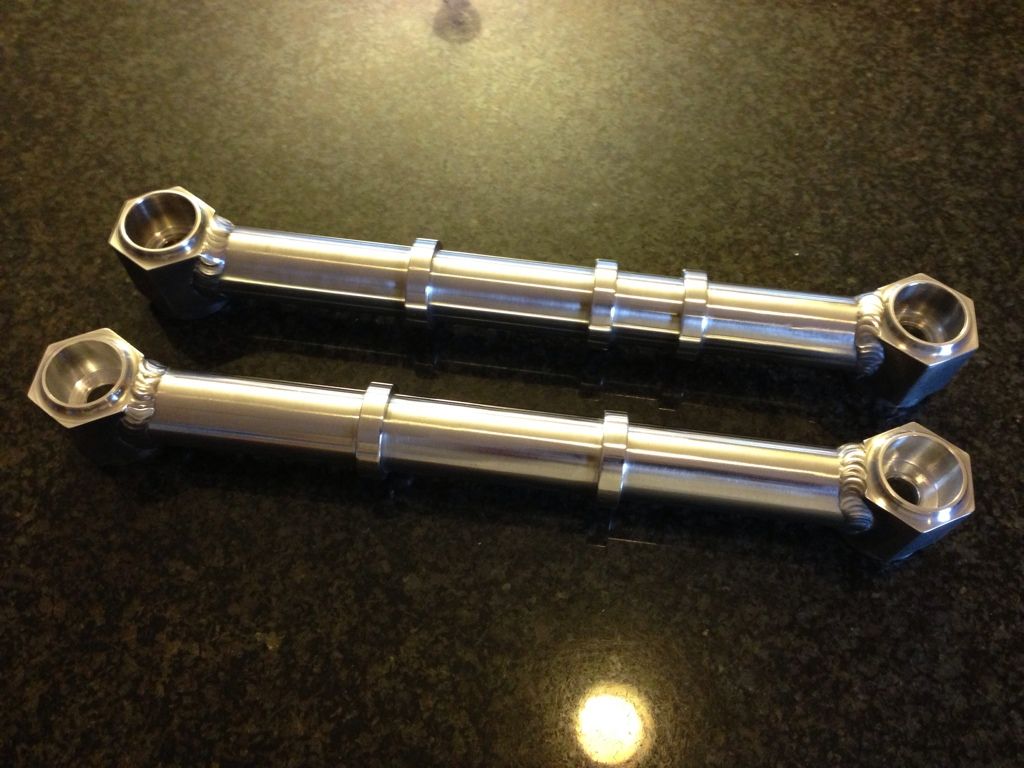
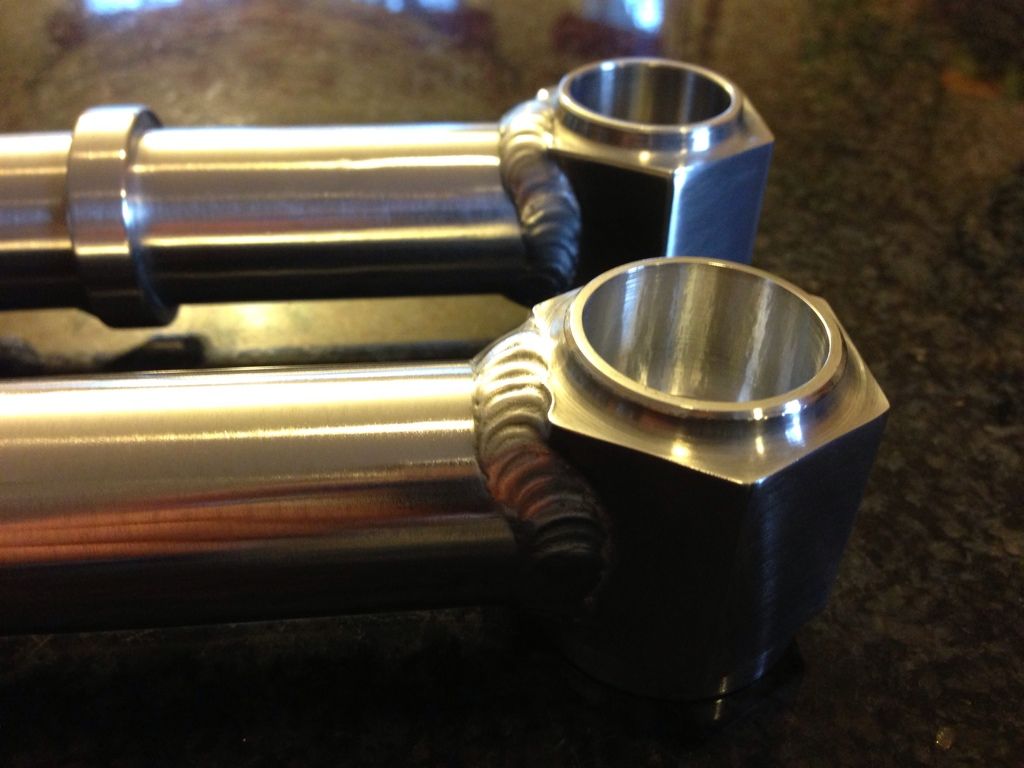
    Regarding stiffening the toe links. The stock corvette pieces are good, but could be better. I replaced with aluminum links and rod ends.

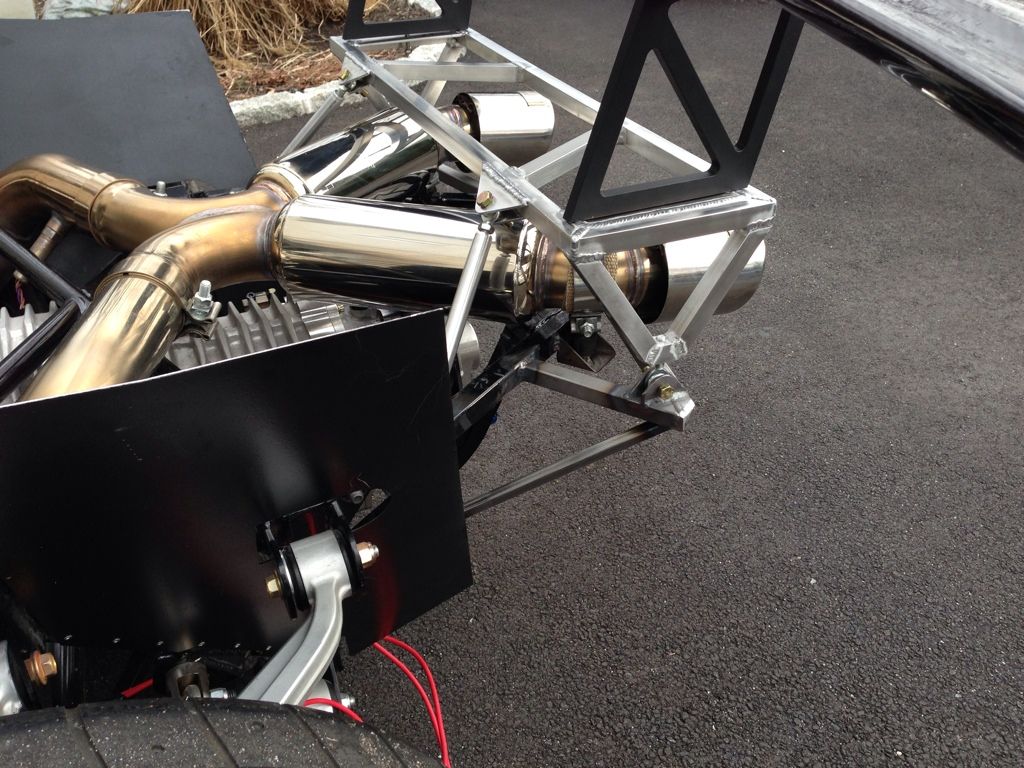
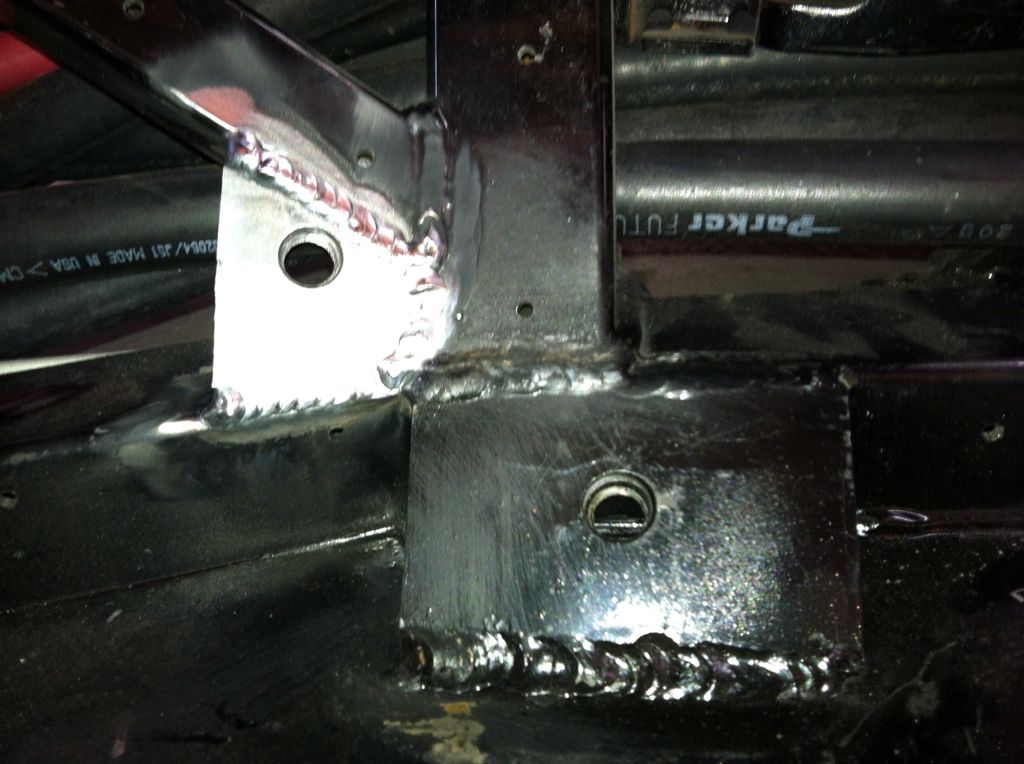
    These are both stiffer and the rod ends will take more of a beating and remain tight. Of course that moves the next weakest link to the frame brackets.

    Boxing in the suspension mounting points is a project for another time as well. I am interested to see how the stock frame reacts. I am attempting to limit the scope of changes I make these days so I can be sure I am ready to start sorting out the car come March 30th.

    Quote Originally Posted by Kempo View Post
    John,
    I've said it before and I'll say it again. You really are one hell of a craftsman. If it ain't available you just fabricate it. I'm definitely becoming a big fan of your work. Keep the updates coming buddy.
    You are too kind Hugo. I'm just having fun over here.

    John
    XTF #2
    build start date June 19 2023

    GTM # 344
    Build Start December 2010
    First track day April 2013

  2. #122
    Member
    Join Date
    Jan 2013
    Posts
    30
    Post Thanks / Like
    I hope you are not going to use those shock mounts that are in the photo! They will not hold up in a high performance or track environment for very long.

  3. #123
    Member
    Join Date
    Jan 2013
    Posts
    30
    Post Thanks / Like
    I hope you are not going to use those shock mounts that are in the photo! They will not hold up in a high performance or track environment for very long. About the cross bar: I presume you haven't tried taking any of these components out with the body permanently mounted.

  4. #124
    Member kabacj's Avatar
    Join Date
    Mar 2011
    Location
    Long Island
    Posts
    1,103
    Post Thanks / Like
    Quote Originally Posted by GTM RACER View Post
    I hope you are not going to use those shock mounts that are in the photo! They will not hold up in a high performance or track environment for very long. About the cross bar: I presume you haven't tried taking any of these components out with the body permanently mounted.
    Hi GTM Racer,

    I do plan to use the re designed factory five shock mounts. The first design was a bit weak and Factory Five sent out a replacements to all owners free of charge. The new design might not be up to the task for a 25 hour, but i think they will be fine for a while. Ill keep an eye on them. I appreciate the concern. I have not heard of any failures of the new design, have you?

    The motor comes out with the body on as well. Even without a cross brace removed, its necessary to move the motor back to get the water pump and accessories out from under the rear hoop. That is not possible with the trans axle attached and the rear transaxle mount still on the car. With the hatch off the engine bay is the same size with the body on or off.

    If I was going with the quick change drive line I would do what Richard and team have done making the rear clip on the body removable. Then it might be possible to get the whole drive line out in one piece.

    I would love to see any pictures you have of a working quick change drive line setup.

    Thanks for the comments.

    John
    XTF #2
    build start date June 19 2023

    GTM # 344
    Build Start December 2010
    First track day April 2013

  5. #125
    Member
    Join Date
    Jan 2013
    Posts
    30
    Post Thanks / Like
    Just reading post 114. NASA and SCCA doesn't allow cross bracing in the doors anymore. They spec out two door bars but not in a cross unless you add a bar or box plate at the intersection to eliminate the impact-knee action or hinging as if it is still one bar. It is the same configuration that the world challenge Ferraris use and is quite clean. I went back and looked at the door bars in my car and they are even with the factory cage, however, I have gutted doors and it looks like you would gain almost three inches from frame to outside the bar. With a removable steering wheel, it looks like you would have some pretty good ingress and egress. Adding the door bars to meet any sanctioned body is a challenge with the GTM. I don't see it any different than any other small import road racer.

    John,
    It is undeniable that your work and craftsmanship is second to none on this forum. It is a pleasure to see your hard work come together!

  6. #126
    Member
    Join Date
    Jan 2012
    Location
    Wales, Ma
    Posts
    56
    Post Thanks / Like
    Quote Originally Posted by GTM RACER View Post
    John,
    It is undeniable that your work and craftsmanship is second to none on this forum. It is a pleasure to see your hard work come together!
    I have to second this statement. I read most of the posts in this GTM world but I look forward to updates to this thread above all others.
    Scott

  7. #127
    Mad Scientist mendo's Avatar
    Join Date
    Sep 2011
    Location
    Meadow Vista, CA
    Posts
    72
    Post Thanks / Like
    Quote Originally Posted by kabacj View Post
    Hi GTM Racer,

    The new design might not be up to the task for a 25 hour, but i think they will be fine for a while. Ill keep an eye on them. I appreciate the concern. I have not heard of any failures of the new design, have you?

    John
    Richard and his boys broke the new repaired design. I heard a rumor that there may be some of his race proven mounts that can be had.
    GTM #253 In Process

  8. #128
    Member
    Join Date
    Jan 2013
    Posts
    30
    Post Thanks / Like
    They broke a prototype design before the fix was sent to the public by FF. the "fix" was direct to them at the race and made on the spot. (the result of that is shown in the infamous picture of the sparks flying out the rear of the car) That is the fix failing.(prototype one, not the one sent). I believe ther is not anyone actually tracking the "fix" on a regular basis, but I do know those that do track regularly use the shock mount provided by Ted.

  9. #129
    Mad Scientist mendo's Avatar
    Join Date
    Sep 2011
    Location
    Meadow Vista, CA
    Posts
    72
    Post Thanks / Like
    Quote Originally Posted by GTM RACER View Post
    They broke a prototype design before the fix was sent to the public by FF. the "fix" was direct to them at the race and made on the spot. (the result of that is shown in the infamous picture of the sparks flying out the rear of the car) That is the fix failing.(prototype one, not the one sent). I believe ther is not anyone actually tracking the "fix" on a regular basis, but I do know those that do track regularly use the shock mount provided by Ted.
    makes sense! Ted's piece is nice. I will be running the fix on my street only car until I get extra money to upgrade.
    GTM #253 In Process

  10. #130
    Member kabacj's Avatar
    Join Date
    Mar 2011
    Location
    Long Island
    Posts
    1,103
    Post Thanks / Like
    Quote Originally Posted by GTM RACER View Post
    They broke a prototype design before the fix was sent to the public by FF. the "fix" was direct to them at the race and made on the spot. (the result of that is shown in the infamous picture of the sparks flying out the rear of the car) That is the fix failing.(prototype one, not the one sent). I believe ther is not anyone actually tracking the "fix" on a regular basis, but I do know those that do track regularly use the shock mount provided by Ted.
    Good information GTM racer. Do you know if the prototype part and new production part were the same? Any pictures of the failed part? Does the PDG GTM run the same part Ted sells? No doubt Ted has a wealth of first hand racing experience. Ted also makes some very high quality parts for sale. Ted has helped me with a few aspects of my car and I value his opinion. I would just like to hear more first hand account regarding what failed during the 25 and why.

    The 25 hour finds the weak link in every system. Things that never fail under normal racing use fail under the stress of the 25 hour. That's what makes it such a cool event.

    When I am ready to address the lower shock mount I think I am going to machine and weld something up. Both Ted and factory five need to make parts that work, are cost effective, and easy to install.

    I only need to make parts that work. The time and effort required to make and install the part are a bonus.

    Good discussion. Thanks for the input.

    John
    XTF #2
    build start date June 19 2023

    GTM # 344
    Build Start December 2010
    First track day April 2013

  11. #131
    LS MAN's Avatar
    Join Date
    Feb 2011
    Location
    Stockton, CA
    Posts
    111
    Post Thanks / Like
    Hey Guys, the PDG GTM has been using our rear mounts for 4 or 5 years, with no problems so far.
    http://quickracingproducts.com/html/chassis.html

    Thanks,

  12. #132
    Member kabacj's Avatar
    Join Date
    Mar 2011
    Location
    Long Island
    Posts
    1,103
    Post Thanks / Like
    Quote Originally Posted by LS MAN View Post
    Hey Guys, the PDG GTM has been using our rear mounts for 4 or 5 years, with no problems so far.
    http://quickracingproducts.com/html/chassis.html

    Thanks,
    Well Ted that is a record to be proud of. Nice job on the design.

    John
    XTF #2
    build start date June 19 2023

    GTM # 344
    Build Start December 2010
    First track day April 2013

  13. #133
    Member kabacj's Avatar
    Join Date
    Mar 2011
    Location
    Long Island
    Posts
    1,103
    Post Thanks / Like
    Yesterday was snow blowing and shoveling all day long to remove the 20 inches of snow. Even my truck without a plow got into the act.


    Today it was time to get some work done on the GTM. A few months ago I had installed a piece of lexan just to close up the window. But the fact that the window opening was not perfectly oval bothered me.

    So out came the bulkhead. I pulled out the lexan and started reshaping the opening. A while back, I had attached a strip of aluminum to the stock opening in order to fit the roof bars.


    So I needed to weld up a patch in each corner before I moved the semi circle that makes each end of the window about a half inch downward.


    Next was trim a half inch off the bottom half of the window. I welded up all of the holes I will not use and installed the window.


    So with that sorted I decided I needed a activated carbon canister to prevent the vent on the gas tank from releasing fumes.

    I machined up some parts and used a length of tubing I had left over from making my cooling system pipes. A little welding and i had this. I glued some open cell foam to the bottom of the canister to prevent any of the carbon bits from falling into the tank.


    I was able to use the hole in the rear hatch mount to attach the canister. A small length of Tygon fuel resistant tubing forms a flexible joint between the canister and the tank.


    I purchased some crankcase vent filters and one to the hole in the top of the canister and here it is.


    John
    XTF #2
    build start date June 19 2023

    GTM # 344
    Build Start December 2010
    First track day April 2013

  14. #134
    Senior Member
    Join Date
    Feb 2011
    Location
    Clarksville, MD
    Posts
    232
    Post Thanks / Like
    John,

    What you accomplish in a few hours would take me days. Hats off to you, sir! And it looks really good.

    -Michael

  15. #135
    Member kabacj's Avatar
    Join Date
    Mar 2011
    Location
    Long Island
    Posts
    1,103
    Post Thanks / Like
    Thanks Michael. Don't let the magic of the Internet fool you. This took around 8 hours. I have a system to keep the family happy. 3 hours from 6am till 9. Then five hours between 9 and 6.

    It also helps when I keep redoing the same thing. The second and third time are much faster.

    John
    XTF #2
    build start date June 19 2023

    GTM # 344
    Build Start December 2010
    First track day April 2013

  16. #136
    Member JCHRacer's Avatar
    Join Date
    Feb 2011
    Posts
    54
    Post Thanks / Like
    Hey John,

    How is your progress getting sanctioning approval for the cage? Any updates?
    Ciao,

    Joel

    Working ever so slowly on GTM #269, Twin Turbo SBC, Ricardo, Kit arrived April 5, 2009

    http://photobucket.com/JCHRacer_GTM_Build

  17. #137
    Member kabacj's Avatar
    Join Date
    Mar 2011
    Location
    Long Island
    Posts
    1,103
    Post Thanks / Like
    Quote Originally Posted by JCHRacer View Post
    Hey John,

    How is your progress getting sanctioning approval for the cage? Any updates?
    Hi Joel,

    The local scrutineers have signed off that the cage "looks good to them". They actually said its over kill. I was happy to hear that. Sadly these guys don't have the authority to approve a non standard cage. Their job is to enforce the rule book. The next step is to lobby the NASA national Safety board regarding the structure. Of course they want an engineering opinion on the strength of the GTM setup compared to the standard setup they show in their rule book. I am not an engineer. In the end I need to show them some proof that this cage design is at least as strong as their approved design which allows them to continue to have insurance. It always boils down to that these days.... oh well.

    The current NASA rules have exceptions for other rear engine production cars, however none allow the setup we have in the GTM.

    Regarding SCCA they have a spring tech event locally here ill bring GTM and see what feedback I get. SCCA also have a auto cross event April 7th. I will bring the GTM to the autocross so I can get some slow speed setup info.

    Since I need to sort out the car for at least a few weekends I hope to try to lobby folks/ make connections at those events and go from there.

    Unfortunately the first NASA event, March 30t at Lime Rock Park in CT, has a noise restriction of 88db. Clearly none of our cars are that quiet. I still have plenty of loose ends to tie up before then so building an 88db exhaust and re tuning the motor are out of scope. The next event is April 19th. I will attend that one and sort out the car and see how close I am to race ready condition.

    BTW love your car. It sounds awesome! The finish is in sight!

    John
    Last edited by kabacj; 02-27-2013 at 10:33 PM.
    XTF #2
    build start date June 19 2023

    GTM # 344
    Build Start December 2010
    First track day April 2013

  18. #138
    Member
    Join Date
    Jan 2013
    Posts
    30
    Post Thanks / Like
    John,
    Mike has a muffler set up that is quiet enough for Lime Rock. Get a hold of him. I went through an unorthodoxies cage design that would withstand 150 mph = rollovers and NASA wanted numbers. I provided numbers from a structural program and still. because it did not look similar to the three designs, they declined the effort. You are right it is all about insurance and who would pay out in a court case. I was told that the wagon wheel approach has a very good chance of approval on its own merit! Sometimes too many bars are not a good thing. A race friend of mine had a Toyota that had a very strong cage...hit the wall and the impact went right to the seat and broke his back. The car was too rigid. Great work, by the way!

  19. #139
    Member kabacj's Avatar
    Join Date
    Mar 2011
    Location
    Long Island
    Posts
    1,103
    Post Thanks / Like

    First Drive!

    This weekend I finally had some reasonably nice weather, and no little projects getting in the way of a drive, so I decided it was time to take the car for its first drive around the block.


    I was just taking it easy and figured I would just get on it a little to see how it accelerated. Holy cow!! Barely any throttle and I broke the rear tires loose. It did not do anything evil. Just stepped out a little. HA that was fun! I know they are stone cold, but still. Sheesh what was I thinking to get a 630 hp motor. Oh well with warmer weather and a bit of setup I'm sure it will be just fine. Man this is going to be fun to drive on the track.


    Quote Originally Posted by GTM RACER View Post
    John,
    Mike has a muffler set up that is quiet enough for Lime Rock.
    Thanks GTM Racer.
    Last edited by kabacj; 03-03-2013 at 10:24 PM.
    XTF #2
    build start date June 19 2023

    GTM # 344
    Build Start December 2010
    First track day April 2013

  20. #140
    Senior Member
    Join Date
    Feb 2011
    Location
    Clarksville, MD
    Posts
    232
    Post Thanks / Like
    John,

    Looks good, sounds great. The first drive around the neighborhood is a big milestone - for you and your neighbors - Congrats!

    -Michael


    GTM # 327: In prime, wet-sanding time.

  21. #141
    Senior Member Kalstar's Avatar
    Join Date
    Feb 2011
    Location
    Cape Cod
    Posts
    1,300
    Post Thanks / Like
    Quote Originally Posted by kabacj View Post
    This weekend I finally had some reasonably nice weather, and no little projects getting in the way of a drive, so I decided it was time to take the car for its first drive around the block.


    I was just taking it easy and figured I would just get on it a little to see how it accelerated. Holy cow!! Barely any throttle and I broke the rear tires loose. It did not do anything evil. Just stepped out a little. HA that was fun! I know they are stone cold, but still. Sheesh what was I thinking to get a 630 hp motor. Oh well with warmer weather and a bit of setup I'm sure it will be just fine. Man this is going to be fun to drive on the track.


    Thanks GTM Racer.
    Go Daddy, go Daddy, go Daddy. Very cool, congrats on a couple of fronts.

  22. #142
    Banned
    Join Date
    Aug 2011
    Posts
    669
    Post Thanks / Like
    looks good man! i'm digging the details of your build. good to see you're at the go-kart stage. keep it up!

  23. #143
    Senior Member Presto51's Avatar
    Join Date
    Feb 2011
    Location
    Catonsville, Maryland
    Posts
    578
    Post Thanks / Like
    Very Nice John, very nice

    Thanks for sharing

    Ron
    "May you be in heaven a full half hour before the Devil knows you're dead"

  24. #144
    Member JCHRacer's Avatar
    Join Date
    Feb 2011
    Posts
    54
    Post Thanks / Like
    Quote Originally Posted by kabacj View Post
    Hi Joel,

    The local scrutineers have signed off that the cage "looks good to them". They actually said its over kill. I was happy to hear that. Sadly these guys don't have the authority to approve a non standard cage. Their job is to enforce the rule book. The next step is to lobby the NASA national Safety board regarding the structure. Of course they want an engineering opinion on the strength of the GTM setup compared to the standard setup they show in their rule book. I am not an engineer. In the end I need to show them some proof that this cage design is at least as strong as their approved design which allows them to continue to have insurance. It always boils down to that these days.... oh well.

    The current NASA rules have exceptions for other rear engine production cars, however none allow the setup we have in the GTM.

    Regarding SCCA they have a spring tech event locally here ill bring GTM and see what feedback I get. SCCA also have a auto cross event April 7th. I will bring the GTM to the autocross so I can get some slow speed setup info.

    Since I need to sort out the car for at least a few weekends I hope to try to lobby folks/ make connections at those events and go from there.

    Unfortunately the first NASA event, March 30t at Lime Rock Park in CT, has a noise restriction of 88db. Clearly none of our cars are that quiet. I still have plenty of loose ends to tie up before then so building an 88db exhaust and re tuning the motor are out of scope. The next event is April 19th. I will attend that one and sort out the car and see how close I am to race ready condition.

    BTW love your car. It sounds awesome! The finish is in sight!

    John
    Congrats on getting it running John. Looks Awesome.

    As far as the sanctioning bodies go, you have had the same experience that many people have had when you just can't make it the rule book. While I have performed a structural analysis and determined that my cage (and yours) is as good or better than a cage built to the rule book under most loading conditions, I can’t guarantee that it is superior under every possible circumstance. Plus you have the liability thing....I feel safe in the cage I built but I'm not going to take the responsibility and the liability of certifying the design for someone else's use. Blame the lawyers and insurance companies.

    Let us know if you make any progress with the scrutineers.
    Ciao,

    Joel

    Working ever so slowly on GTM #269, Twin Turbo SBC, Ricardo, Kit arrived April 5, 2009

    http://photobucket.com/JCHRacer_GTM_Build

  25. #145
    Member kabacj's Avatar
    Join Date
    Mar 2011
    Location
    Long Island
    Posts
    1,103
    Post Thanks / Like
    Quote Originally Posted by JCHRacer View Post
    While I have performed a structural analysis and determined that my cage (and yours) is as good or better than a cage built to the rule book under most loading conditions
    Joel your cage design is awesome. I think it both looks nice and of course unlike me you can actually test what design is best. Thanks so much for sharing the design. I will get the cage approved. I totally understand the lawyer / insurance thing. Its a sad state that we all must fear for our lively hoods at the hands of ... well don't get me started. Ill find a way to get it approved and hopefully give back a little.

    Quote Originally Posted by Presto51 View Post
    Very Nice John, very nice Ron
    Hey Ron Thanks!

    Quote Originally Posted by carbon fiber View Post
    looks good man! i'm digging the details of your build. good to see you're at the go-kart stage. keep it up!
    Thanks CF! Hopefully ill have some cool CF details to add to my car pretty soon...

    Quote Originally Posted by Kalstar View Post
    Go Daddy, go Daddy, go Daddy. Very cool, congrats on a couple of fronts.
    HA, HA. Thanks Jim. I owe the ITB idea to you. Yeah I am a pretty lucky guy that the family are always cheering me on.

    Quote Originally Posted by RumRunner View Post
    John,

    Looks good, sounds great. The first drive around the neighborhood is a big milestone - for you and your neighbors - Congrats!

    .
    Thanks Michael

    The video does not do the sound justice. I am really pleased with the package. It definitely is more work to package the ITB setup, however it just sounds special. And nobody called the cops! That was nice.


    John
    XTF #2
    build start date June 19 2023

    GTM # 344
    Build Start December 2010
    First track day April 2013

  26. #146
    Member kabacj's Avatar
    Join Date
    Mar 2011
    Location
    Long Island
    Posts
    1,103
    Post Thanks / Like
    I'm back in thrash mode again. I am pushing to get the car into an auto cross the weekend of April 6th. Then out for the NASA weekend at NJ Motorsports Park on April 20. I figure autocross will be a good slow speed shakedown prior to going out on the track.

    This weekend I wrapped mounting the ISIS cells. I have three modules mounted up front.

    The master cell, one power cell, and an in motion motor controller.

    I like the Isis because its easy to troubleshoot . It's light weight compared to the painless setup and I can add all of the little details and features of a new car into my GTM. Lots of gizmo factor with this setup.

    I hate looking at wires so I wanted to hide as much of the Isis setup as possible while still keeping it accessible for easy maintenance and keeping the wire lengths as short as possible.

    Not too many choices regarding where to install it.

    I installed the power cell and the in motion motor controller on the passenger side. Also installed here are the high amp fuse block for power distribution and low voltage Isis power shutdown solenoid.

    the view from the top


    the view from the passenger foot well


    On the driver side I installed the master cell. I tipped it so its easier to see when sticking my head under the dash for programming and diagnostics.

    the view from over head


    the view from the foot well.


    I end up with two stand alone computers.

    The Engine Control unit which powers/ controls fans, fuel pump, gauges, AC clutch. The Isis controls everything else with power. The only think I lack with the ecu for track duty is brake lights.

    I did not expect the ECU to control so much but Mast Motorsports design the system to drop into anything from a muscle car to a race car. The ecu will also control turbos, NOS, Methanol injection it even will adjust/ calibrate the speedhut gauges. For now ill get the headlights and brake lights working using the ISIS...

    John
    Last edited by kabacj; 03-12-2013 at 08:42 PM.
    XTF #2
    build start date June 19 2023

    GTM # 344
    Build Start December 2010
    First track day April 2013

  27. #147
    Member kabacj's Avatar
    Join Date
    Mar 2011
    Location
    Long Island
    Posts
    1,103
    Post Thanks / Like
    This weekends focus was the seat and harness setup for the passenger and driver. First thing was strengthening the passenger floor so I could bolt the seat to the pan without the bolts pulling through.


    While I was at it I removed the lower right belt mounting plate to relocate the belt attachment point lower to the floor. The anti sub straps were rubbing against the seat bottom and it was hard to pull them tight.


    I hate cutting things back out. This little guy was welded in there good.


    I made a few rings to use instead of the eye hook that came with the belts.


    A little cutting and I had a low profile belt mounting point.


    XTF #2
    build start date June 19 2023

    GTM # 344
    Build Start December 2010
    First track day April 2013

  28. #148
    Member kabacj's Avatar
    Join Date
    Mar 2011
    Location
    Long Island
    Posts
    1,103
    Post Thanks / Like
    Next was the fun and time consuming part. I needed harness bars to attach the belts to the mounting points I welded to the cage.


    I got some hex bar stock and bored out a hole. I cut it in half.


    Then I hollowed it out.


    Then I welded them up. The lower bar Fits the stock seats on both sides. I moved the kirkey road race seat two inches inboard so I also needed to move the belt locating rings inboard in order to keep the belts centered relative to the holes in the seat.


    When I have more time i will make a third bar that matches the bottom one. This way I will have a matching setup for the street and the harness bar setup for the road race seat.

    It took me a whole day to make the first bar. The second only took a few hours. I ran out of time before I could mount everything and take a few pictures.

    The only thing I need to work out is how to brace the back of the seat against the firewall. Its a well made seat, but mounting the back to the firewall will stiffen it up. Anybody have ideas on an approved method of bracing?

    Thanks
    John
    XTF #2
    build start date June 19 2023

    GTM # 344
    Build Start December 2010
    First track day April 2013

  29. #149
    Mad Scientist mendo's Avatar
    Join Date
    Sep 2011
    Location
    Meadow Vista, CA
    Posts
    72
    Post Thanks / Like
    How about attaching it to the Harness Bar? seems logical to me!
    GTM #253 In Process

  30. #150
    Senior Member
    Join Date
    Apr 2011
    Posts
    641
    Post Thanks / Like
    Good show man, looks good.

  31. #151
    LCD Gauges's Avatar
    Join Date
    Apr 2011
    Location
    Toronto, Ontario
    Posts
    1,545
    Post Thanks / Like
    Blog Entries
    3
    Damn, look at that roll cage addition, and the link bars! If there's a top five GTM builder's list, you are definitely on it. I need to keep an eye on this thread for floor re-inforcement ideas. My plan is to weld a plate to the underside of the floor pan to keep the seat clearance higher, but that might be difficult for welding a decent bead. I'm also ready for the seat belt install, and I see that you've modified the anchor points. Are you using theC5 belts, or something else?
    Custom LCD Gauges , Data Loggers, Control Touch Screens
    www.LCDdash.com \\ 647-522-9953 \\ Voice & Text
    Proud new owner of GTM Gen 1., #105 - 08/27/11
    LQ9 Powered, G96.00 6 speed transaxle

  32. #152
    Member kabacj's Avatar
    Join Date
    Mar 2011
    Location
    Long Island
    Posts
    1,103
    Post Thanks / Like
    Quote Originally Posted by 00SS_M6LS1 View Post
    My plan is to weld a plate to the underside of the floor pan to keep the seat clearance higher, but that might be difficult for welding a decent bead. I'm also ready for the seat belt install, and I see that you've modified the anchor points. Are you using theC5 belts, or something else?
    Hi Tino. You could definitely weld a plate under the floor pan, but its much harder to weld over your head, and you only lose an 1/8 of an inch with the plate on the inside. I am using a six point system from Schroth Racing.


    Yes I did need to add mounting points for the harness. It took a little trial and error to get all the mounting points in good locations where all the adjustments worked as designed. With the seat only a half inch off the floor pan the anti submarine belts were more difficult to install. Normal cars have he seat at least a few inches higher off the pan and as a result have easier belt routing options. Also note that the top mounts on my setup wrap around the harness bar I made. I did not use clips on the top, but I could have. I thought the bars looked nicer.


    Quote Originally Posted by fastthings View Post
    Good show man, looks good.
    Thanks Gene. BTW no doubt the individual carbs on your sons car are more work, but you don't see them every day. I personally like that. And they look and sound so cool.

    Quote Originally Posted by mendo View Post
    How about attaching it to the Harness Bar? seems logical to me!
    Hey Mendo, some racing organizations require additional bracing to mount the upper part of the seat to the cage. or body structure of the car.

    Something like this.


    I don't like the idea of a pole pointed at my spine, and every forum has some horror story of a guy who was injured because his seat failed for some reason. I figure there might be a solution out there that we could borrow or modify to fit the GTM.

    Maybe I will just brace the seat along the lines of many of the full containment seats out there and not add any additional mount. It does need something. I'm unsure what the right thing to do is so was looking to see if anybody has seen or experienced a solution that works.


    John
    XTF #2
    build start date June 19 2023

    GTM # 344
    Build Start December 2010
    First track day April 2013

  33. #153
    Super Moderator vnmsss's Avatar
    Join Date
    Feb 2011
    Location
    California
    Posts
    649
    Post Thanks / Like
    Blog Entries
    13
    Wow, John! You've been a busy, busy man! Thanks for posting all the pics...I truly appreciate how much work (design/engineering/fabrication/installation) you've devoted to making your GTM an amazing race machine! Big kudos, my friend....Very nice work!

    Karen
    #28 FFR Challenge Series
    #28 FFR Type-65 Coupe
    2011 Western Endurance Racing Championship
    2010 West Coast Champion
    Drive it.....Like you stole it!

  34. #154
    Member JCHRacer's Avatar
    Join Date
    Feb 2011
    Posts
    54
    Post Thanks / Like
    Quote Originally Posted by kabacj View Post
    Hey Mendo, some racing organizations require additional bracing to mount the upper part of the seat to the cage. or body structure of the car.

    Something like this.


    I don't like the idea of a pole pointed at my spine, and every forum has some horror story of a guy who was injured because his seat failed for some reason. I figure there might be a solution out there that we could borrow or modify to fit the GTM.

    Maybe I will just brace the seat along the lines of many of the full containment seats out there and not add any additional mount. It does need something. I'm unsure what the right thing to do is so was looking to see if anybody has seen or experienced a solution that works.


    John
    I was planning on filling the space between the back of the seat and the firewall with expanding foam like this stuff:

    https://www.pegasusautoracing.com/pr...asp?RecID=1038

    Should spread the load, it's light weight and will be WAY safer than the spine pole.
    Ciao,

    Joel

    Working ever so slowly on GTM #269, Twin Turbo SBC, Ricardo, Kit arrived April 5, 2009

    http://photobucket.com/JCHRacer_GTM_Build

  35. #155
    Senior Member
    Join Date
    Feb 2011
    Location
    Houston TX
    Posts
    374
    Post Thanks / Like
    You could use something like this?
    Not sure if it abides by the rule book.

    http://www.jegs.com/i/JEGS+Performan...70291/10002/-1
    Cheers,
    Dave

    GTM # 294 Build Start Date 10/12/2009,
    2000 C5 Donor, LS-1 Twin Turbo, AC/Heat, G50-20.02 6 speed, Brandwood Cable shifter
    Build site. http://s679.photobucket.com/albums/vv153/dfraser/

  36. #156
    Member kabacj's Avatar
    Join Date
    Mar 2011
    Location
    Long Island
    Posts
    1,103
    Post Thanks / Like
    Quote Originally Posted by vnmsss View Post
    Wow, John! You've been a busy, busy man! Thanks for posting all the pics...I truly appreciate how much work (design/engineering/fabrication/installation) you've devoted to making your GTM an amazing race machine! Big kudos, my friend....Very nice work!

    Karen
    Thanks so much Karen. After 2 years I am really excited to get the GTM out on the track. Hopefully I'll be half as successful as you were with your coupe.


    Quote Originally Posted by JCHRacer View Post
    I was planning on filling the space between the back of the seat and the firewall with expanding foam like this stuff:

    https://www.pegasusautoracing.com/pr...asp?RecID=1038

    Should spread the load, it's light weight and will be WAY safer than the spine pole.
    Great idea Joel. I like the fact that it spreads the load and is a great way to absorb energy in the event of an impact.

    Quote Originally Posted by Fraser D View Post
    You could use something like this?
    Not sure if it abides by the rule book.

    http://www.jegs.com/i/JEGS+Performan...70291/10002/-1
    Thanks Dave.

    I had not seen this mount. Of course I could never buy something I can make. . This is a great design to copy elements from. Thanks for posting.

    I was also thinking of welding some C channel to my seat like they did on this seat.


    I figure I can mount a bracket like the one Dave posted but only need to worry about stabilizing the seat laterally. Preventing the top of the seat from twisting sideways in a side impact. Then using Joel's idea I can prevent the seat from folding in a rear impact. Then with some C channel I can stiffen up the shoulder and hip bolsters to prevent them from flexing and folding with a side impact.

    Before I started all this I researched the companies that make custom full containment seats. They are both expensive and difficult to get fitted without bringing the whole car to their shop.

    As we have discussed there is little room to fit a guy taller then me two inches under the stock cage height with a helmet on.

    My ability to mount and tilt the seat at the ideal position was key.

    Thanks for the suggestions guys.

    Ill post what I come up with.

    John.
    Last edited by kabacj; 03-20-2013 at 05:36 AM.
    XTF #2
    build start date June 19 2023

    GTM # 344
    Build Start December 2010
    First track day April 2013

  37. #157
    Senior Member
    Join Date
    Feb 2011
    Location
    San Diego
    Posts
    1,961
    Post Thanks / Like
    FYI on the foams. I have looked at many of those and they usually have a pretty low temperature threshold and will burn easily. I believe one of the foams I was looking at that had OK properties was "tiger foam" but it was awhile ago. As I say, just an FYI to make sure you aren't putting something flammable right next to the driver.
    www.myraceshop.com

    GTM solution kits
    Corvette and Race parts

  38. #158
    Member kabacj's Avatar
    Join Date
    Mar 2011
    Location
    Long Island
    Posts
    1,103
    Post Thanks / Like
    This weekend while I was standing staring at the car a design idea came to me. I knew how I would mount the rear wing. I wanted it to be adjustable and I was going to do that using links and rod ends, but I could see that I would need to make seven or eight links to keep everything locked in place. I did not like that idea.


    When something is right I look at it and say that obviously the way you solve that problem. (course it was not obvious to me at the start of the project)

    I wanted the solution to be light and adjustable.

    This is what I came up with.


    The wing support transfers the down force into extensions I added to the rear frame.


    The load is also transferred to the lower mounting points with some half inch square tube.


    a top view


    I am really happy with how strong this setup is. It does not flex at all even when I throw my weight on it and yank.

    I just need to fabricate and add a receiver type setup so I can add a rear tow hook or a drag chute depending on the situation. the connector will be hidden with the license plate in place. After that a little paint and on to suspension setup.

    John
    Last edited by kabacj; 03-24-2013 at 08:22 PM.
    XTF #2
    build start date June 19 2023

    GTM # 344
    Build Start December 2010
    First track day April 2013

  39. #159
    Senior Member sk7500's Avatar
    Join Date
    Feb 2011
    Posts
    377
    Post Thanks / Like
    More chassis artwork! Love it!

  40. #160
    Member kabacj's Avatar
    Join Date
    Mar 2011
    Location
    Long Island
    Posts
    1,103
    Post Thanks / Like
    Quote Originally Posted by sk7500 View Post
    More chassis artwork! Love it!
    Thanks Steve.

    This weekend I built my receiver setup. With this setup I can attach a tow hook or a drag chute. I started with a very simple idea of using some of the spare 1.5 inch DOM tubing from the roll cage and turning down bar or tube to fit inside.

    Well I did not have any 1.5 inch aluminum laying around but I did have some one inch.

    Of course I needed to use what I had. That meant I needed to make some bushings to fit inside the 1.5 inch roll cage tubing.


    I made the bushings out of 6061 aluminum. Each bushing is a press fit into the steel tubing. Then I spent too much time fitting the 1 inch tube inside the bushings. I got the fit so precise the when I took the aluminum tube off the lathe it was warm from the friction of polishing. It would not fit into the bushings. When the pipe cooled it would slide into the bushings perfectly.


    Of course this was totally impractical. I knew it, but I was having fun.


    I used the aluminum tube as a jig to keep everything aligned as I welded. I welded the bushings on to the transmission carrier . In spite if my best efforts trying to balance the heat and warping as I welded. The weld cooling slightly warped the alignment and tightened everything up.

    I pressed the bushings out opened them up two thousandths and they are good to go.

    There are definitely easier ways to do this. The time invested will pay off when I can swap a tow hook for a drag parachute with one bolt.


    John
    XTF #2
    build start date June 19 2023

    GTM # 344
    Build Start December 2010
    First track day April 2013

Page 4 of 23 FirstFirst ... 2345614 ... LastLast

Tags for this Thread

Posting Permissions

  • You may not post new threads
  • You may not post replies
  • You may not post attachments
  • You may not edit your posts
  •  

Martin's Dent and Collision Shop

Visit our community sponsor