BluePrint Engines

Visit our community sponsor

Thanks Thanks:  0
Likes Likes:  0
Results 1 to 5 of 5

Thread: Install of dash - Mark IV (photo's needed)

  1. #1
    Senior Member Slider's Avatar
    Join Date
    Aug 2011
    Location
    Fargo, ND
    Posts
    388
    Post Thanks / Like

    Install of dash - Mark IV (photo's needed)

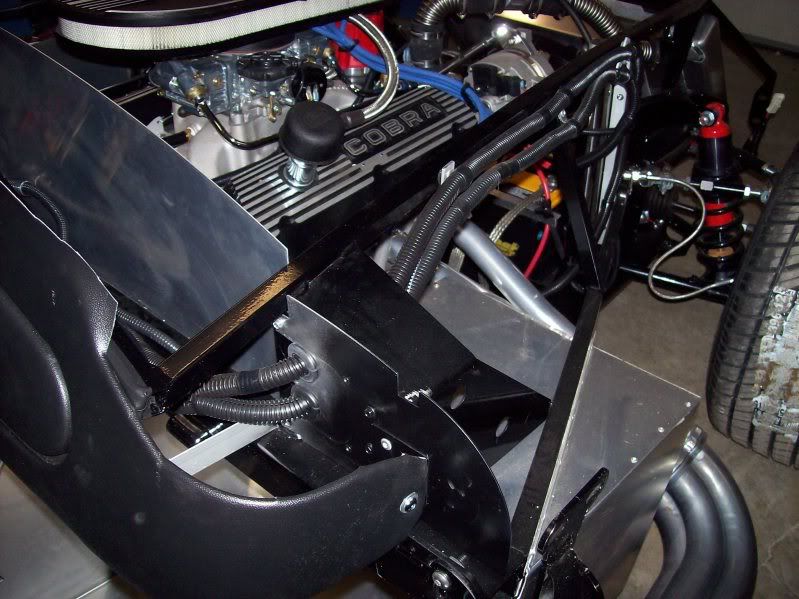
    Hi all, The build is going really well and expect to have the Coyote and TKO arrive next week. Getting close to making noise. However, one very simple question that I'm having trouble finding an answer to.

    1. Where do I bend the dash and attach the ends to the frame? The FF manual doesn't seem to have good pictures so I'm hoping someone can post a few pics along with maybe some measurements on where the dash should bend and where it attaches to. (I have a Mark IV Roadster)

    Thanks
    Last edited by Slider; 07-27-2012 at 09:12 AM. Reason: typo

  2. #2
    Senior Member LuckyWinner's Avatar
    Join Date
    Feb 2011
    Location
    Fort Huachuca, Sierra Vista, AZ
    Posts
    779
    Post Thanks / Like
    I also would like to know the answer to that.
    Owner MK4 7642RD, 393 stroker, Gordon Levy Super Alloy T5, HDX Clutch, Moser 3.31 3-link with disc brakes, 17" Bullit wheels, NT05's, Seat heaters donated by WarmSeats.com, door panels donated by Herbs Door panels.

  3. #3

    Join Date
    Feb 2011
    Location
    Norton, MA USA earth
    Posts
    3,340
    Post Thanks / Like
    Heres what I do. start the bend right after the end of the curved dash support. I never attach the dash at the ends to the frame. I just tuck the ends in behind where the hinges mount. You may need to trim the length a little so check the fit before covering the dash. Once you have the dash in place it becomes pretty clear cut where you need to bend it and where it will tuck behind the hinges.
    Mike

  4. #4
    Not a waxer Jeff Kleiner's Avatar
    Join Date
    Feb 2011
    Location
    Bloomington, Indiana
    Posts
    8,067
    Post Thanks / Like
    Like Mike I bend just off of the hoop. He and I differ after that though; FFR does intend for the dash to tuck behind the hinges but I don't care for that and use some simple brackets to secure it to the firewall extension (the driver's side does not have an extension from FFR but I made one similar to the passenger side shown and attached it the same way). Although this photo isn't focused on it you can see how it was done:


    If it ever needs to be removed the chrome buttonhead bolts with nuts on the backside are accessable from below.

    Cheers,
    Jeff

  5. #5
    Senior Member
    Join Date
    Feb 2011
    Location
    Bourne-Cape Cod, MA
    Posts
    813
    Post Thanks / Like
    I do as Jeff Does. Simple , but effective.
    FFinisher/AKA RE63

Tags for this Thread

Posting Permissions

  • You may not post new threads
  • You may not post replies
  • You may not post attachments
  • You may not edit your posts
  •  

FFMetal

Visit our community sponsor