Boig Motorsports

Visit our community sponsor

Thanks Thanks:  0
Likes Likes:  0
Page 4 of 4 FirstFirst ... 234
Results 121 to 134 of 134

Thread: Chris' Bodywork Thread - Mk3.1

  1. #121
    Out Drivin' Gumball's Avatar
    Join Date
    Feb 2011
    Location
    Blackberry Township, IL
    Posts
    2,653
    Post Thanks / Like
    It's been a long time coming - almost a year has passed since I started my "DIY" bodywork project. With no further delay, then, here it is the morning after paint was applied - it hasn't been sanded or buffed yet... I can't wait for that and to get it in the sun.

    Color is '65 - '66 Ford Ivy Green. The color coat is PPG Envirobase - water-based paint. The 2K sealer under the paint is black, lending a bit of a dark hue to the color.

    No stripes, satin black ceramic sidepipes, chrome rollhoop, bumpers with hoops front and rear, black interior (leather covered Kirkey lowbacks).


    A shot of the rolled cowl in front of the driver showing the fake rivets:


    The passenger door showing the fake rivets along the upper edge and the support tubes for the side curtain ferrules:


    Gess trunk lid - made by Karl Gess a few years ago before the Mk 4 came out:

    Later,
    Chris

    "There are no more monsters to fear, and so, we have to build our own."
    Mk3.1 #7074

  2. #122
    Junior Member
    Join Date
    Sep 2013
    Location
    Louisiana
    Posts
    9
    Post Thanks / Like
    Man that is SWEET!!!!!!

  3. #123
    Out Drivin' Gumball's Avatar
    Join Date
    Feb 2011
    Location
    Blackberry Township, IL
    Posts
    2,653
    Post Thanks / Like
    For those who don't want to sort through four pages of my ramblings, here is a summary (in no particular order) of the body mods on my Mk3.1 - three things that I dropped from the original plan are the Mk4 trunk lid, shaving the front turn signal perches, and adding holes and grommets in the lower rear pan for a bungee like that used on the original race cars to hold the trunk closed.

    • Rivet-on hood scoop using button-head screws
    • Modified scoop by removing Ύ” pie-shaped slice from both sides to get the top curve to follow the lines of the hood when viewed from the side
    • Rivets ringing the leading edge of the hood – actually very small button-head screws
    • Hood opening under scoop modified to fit turkey pan – front 8” of hole covered
    • Original style hood hinges (Breeze)
    • Hidden trunk hinges (Breeze)
    • Original style trunk lid support rod (**********)
    • Trunk lid, modified without Mk1-3 peak (Gess Bros. lid by Karl Gess)
    • Reshaped tail lamp pads to fit rectangular Lucas L542 lamps
    • Soft top, side curtain (FFR old-style with three-pin mounting), and tonneau cover fixings – ‘Lift-the-dot” posts and door/body ferrules
    • Rolled cowl front and rear with exposed rivet heads
    • Rolled door tops with exposed rivets and support tubes for soft top / side curtain ferrules - foam filled doors (be careful not to overfill and cause distortion!)
    • Rolled wheel well lips
    • Hidden body mounts on sides
    • Side louver openings – interior lips removed and body edge rounded to mimic original aluminum body at this location
    • Side louvers painted body color (**********)
    • Defrost vent covers painted body color
    • Aluminum cover in trunk lid painted body color
    • Original-style grab handle on passenger side cowl
    • Smoothed and painted inside of body – mimics mill finish of aluminum panels (Eastwood Aluma-blast paint)
    • Revised front body mounts at the air intake holes using button-head screws to mimic original rivets
    • All edges smoothed and radiused
    • Front cowl outer ends made thicker to match thickness of doors
    • Door to cowl fit (front & rear) modified for smooth transition
    • Hidden “Z” bracket mounting studs at top of trunk area to attach body to upper trunk crossmember
    Later,
    Chris

    "There are no more monsters to fear, and so, we have to build our own."
    Mk3.1 #7074

  4. #124
    Not a waxer Jeff Kleiner's Avatar
    Join Date
    Feb 2011
    Location
    Bloomington, Indiana
    Posts
    8,067
    Post Thanks / Like
    Looks great Chris!

    A couple of questions; why the water based base coat and what clear went on top?

    Can't wait to see it all assembled!

    Jeff

  5. #125
    Senior Member MPTech's Avatar
    Join Date
    Feb 2011
    Location
    St. Louis, MO
    Posts
    1,182
    Post Thanks / Like
    Blog Entries
    8
    That paint looks terrific! Still looks wet!

    Did you modify the front bumper holes with grommets? Cant' remember the mk3.1 setup.
    F5R #7446: MK4, 302, T5 midshift, 3.55 Posi IRS, 17" Halibrands
    Delivered 4/4/11, First start 9/29/12, Licensed 4/24/13, off to PAINT 2/15/14!! Wahoo!

  6. #126
    Out Drivin' Gumball's Avatar
    Join Date
    Feb 2011
    Location
    Blackberry Township, IL
    Posts
    2,653
    Post Thanks / Like
    Jeff - my friend who did the paint uses PPG products and gave me the choice between solvent and water based color. He said the water based version is a bit more vibrant and is easier to color match down the road. The clear is the standard type two-part solvent based stuff that PPG uses in their Envirobase line.

    Mark - Yes - I did reshape the front bumper mount holes to accommodate ********** grommets.
    Later,
    Chris

    "There are no more monsters to fear, and so, we have to build our own."
    Mk3.1 #7074

  7. #127
    Out Drivin' Gumball's Avatar
    Join Date
    Feb 2011
    Location
    Blackberry Township, IL
    Posts
    2,653
    Post Thanks / Like
    I dropped by the shop again today to see how the cut and buff is going - what looks like lines in the paint is the reflection of the ceiling:


    Later,
    Chris

    "There are no more monsters to fear, and so, we have to build our own."
    Mk3.1 #7074

  8. #128
    Senior Member chopthebass's Avatar
    Join Date
    Oct 2013
    Location
    Calgary, Canada
    Posts
    941
    Post Thanks / Like
    What a fantastic paint job!!

  9. #129
    Out Drivin' Gumball's Avatar
    Join Date
    Feb 2011
    Location
    Blackberry Township, IL
    Posts
    2,653
    Post Thanks / Like
    Yeah - not bad for a couple of first timers. Before this, I'd never done any bodywork and the shop, KB Customs in Sugar Grove, IL had never painted a FFR. Neither of us can take full credit, though, since it was the forums that really made this possible by offering tips and support.

    Thanks to all of you for sharing your ideas, comments, and experience so that we all can build better cars!
    Later,
    Chris

    "There are no more monsters to fear, and so, we have to build our own."
    Mk3.1 #7074

  10. #130
    Out Drivin' Gumball's Avatar
    Join Date
    Feb 2011
    Location
    Blackberry Township, IL
    Posts
    2,653
    Post Thanks / Like
    Big day today - the body came home! This was the first time I saw it in the sunlight and I'm more than a little happy. More pics to come, but here's a teaser as we were getting ready to load it on the trailer for the mile-long trip to the hangar.

    Later,
    Chris

    "There are no more monsters to fear, and so, we have to build our own."
    Mk3.1 #7074

  11. #131
    cobra Handler skullandbones's Avatar
    Join Date
    Jul 2011
    Location
    Superstition Mtn foothills 5 miles west of Gold Canyon AZ
    Posts
    2,686
    Post Thanks / Like
    Blog Entries
    19
    Hi Chris,

    You actually got your hands dirty on this one. So you should be able to give us a breakdown on the steps the guys did for the cut and buffing process. What grade papers, polishing pads, polish, etc..... was used? I'm thinking they didn't have to do a whole lot since it turned out so well but the details would probably be good for us other DIYers. Help us out and me in particular!!!

    Now I'm not going to be satisfied without a reflection like that! That's a hard act to follow. Between you and Gene with the black GTM, it's really setting the bar high. His reflects a lot like yours.

    Thanks,

    WEK.
    Last edited by skullandbones; 04-20-2014 at 12:10 PM. Reason: added comment
    FFR MkIII 302 (ATK), EFI 75mm TB with custom box plenum chamber, 24# injectors, 4 tube BBK ceramic, cold air sys, alum flywheel, crane roller rockers, T5, Wilwood pedals, custom five link with Watt's link, 4 rotors, coil overs, power steering with Heidt valve, alum FFR rad, driver's crash bar mod, mini dead pedal mod, quick release steering wheel hub #6046

  12. #132
    Out Drivin' Gumball's Avatar
    Join Date
    Feb 2011
    Location
    Blackberry Township, IL
    Posts
    2,653
    Post Thanks / Like
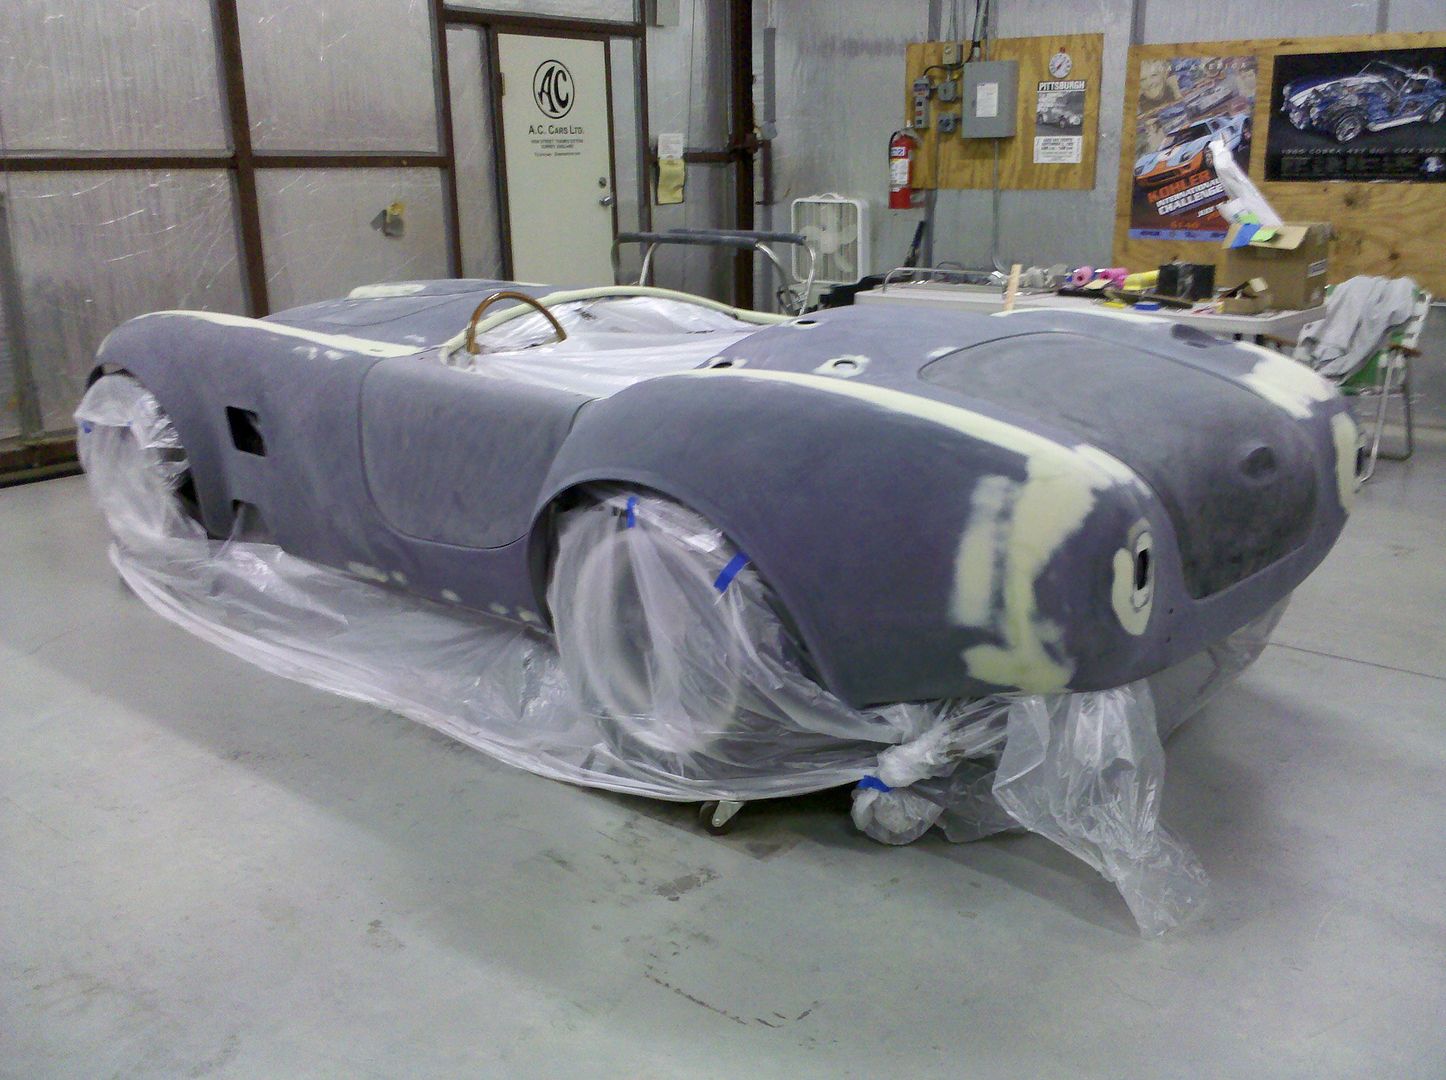
    Just having fun with some "before-and-after" shots comparing how it looked when I called my bodywork done and after paint. The paint really looks different from the sunny side to the shade. It also really turns to black as it goes around the curves - I really recommend a dark seal coat if you're looking to get a cool effect on a darker color metallic paint.

    I can't wait to see it at that golden-time of sunrise or sunset... but I'll hold off on that until it's finished!


    And I just really like this shot:

    Later,
    Chris

    "There are no more monsters to fear, and so, we have to build our own."
    Mk3.1 #7074

  13. #133
    Senior Member 6t8dart's Avatar
    Join Date
    Apr 2015
    Location
    Irving, TX
    Posts
    545
    Post Thanks / Like
    Thanks for sharing, this is valuable info for first timers.

  14. #134
    Out Drivin' Gumball's Avatar
    Join Date
    Feb 2011
    Location
    Blackberry Township, IL
    Posts
    2,653
    Post Thanks / Like
    Thanks - For those who took the time to read through this old thread, here's the (finally) finished car...


    Later,
    Chris

    "There are no more monsters to fear, and so, we have to build our own."
    Mk3.1 #7074

Page 4 of 4 FirstFirst ... 234

Tags for this Thread

Posting Permissions

  • You may not post new threads
  • You may not post replies
  • You may not post attachments
  • You may not edit your posts
  •  

Brown County Customs

Visit our community sponsor