Forte's

Visit our community sponsor

Thanks Thanks:  0
Likes Likes:  0
Results 1 to 14 of 14

Thread: License Plate Light and Plate Mount

  1. #1
    Senior Member
    Join Date
    Nov 2011
    Posts
    489
    Post Thanks / Like

    License Plate Light and Plate Mount

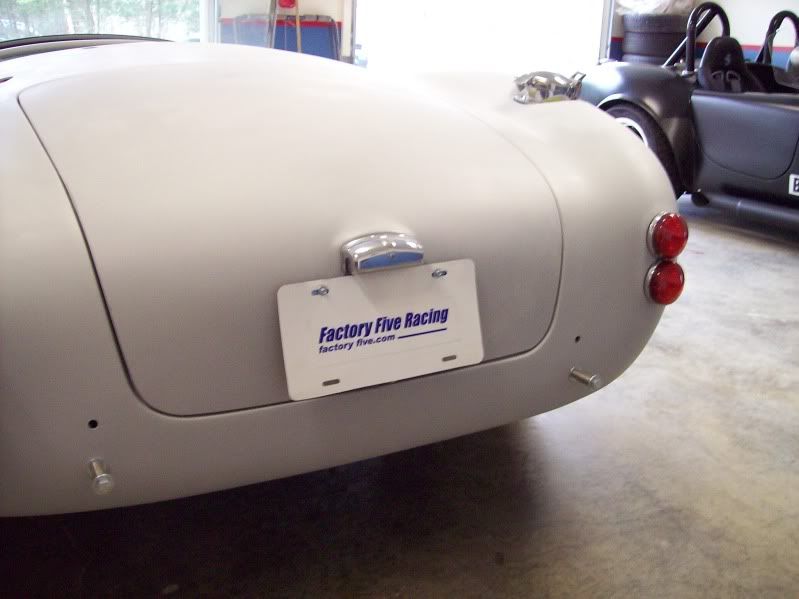
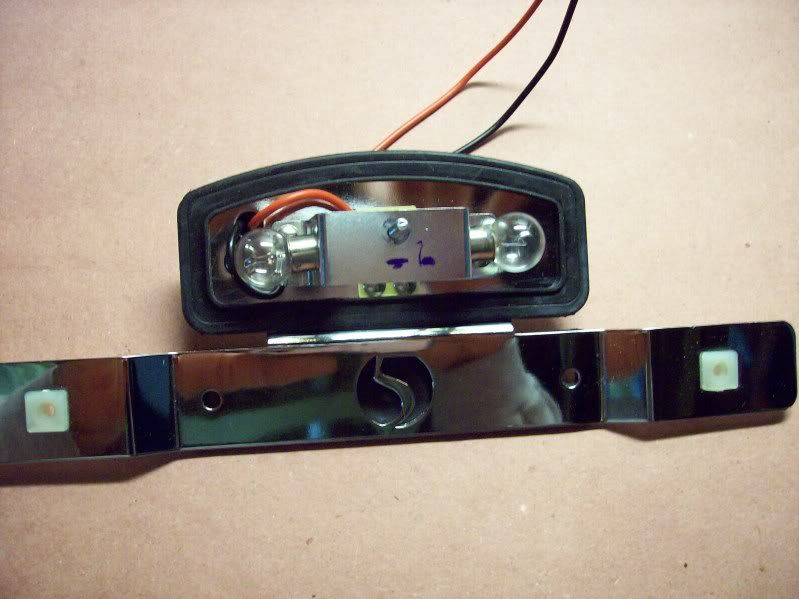
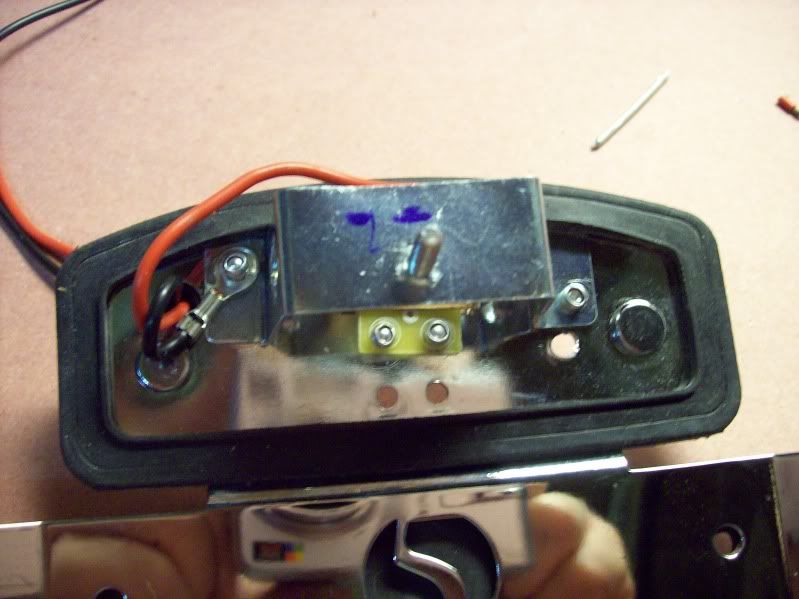
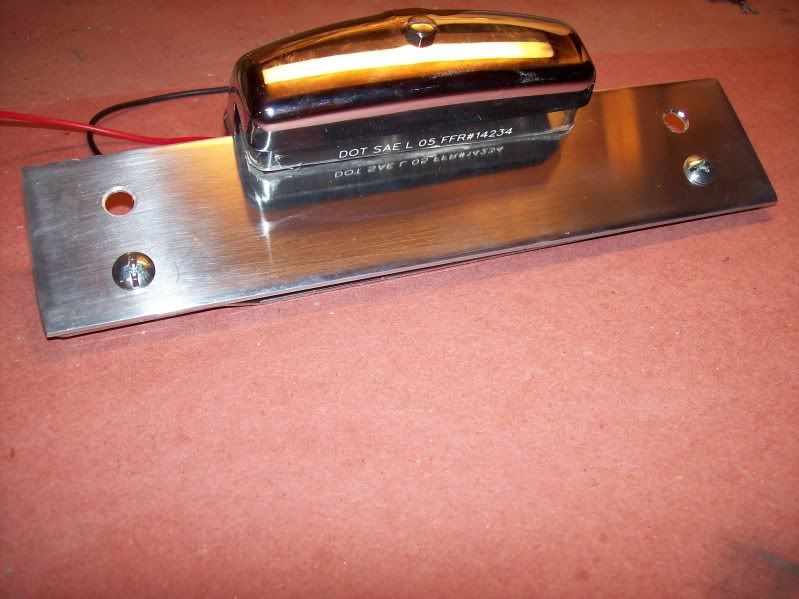
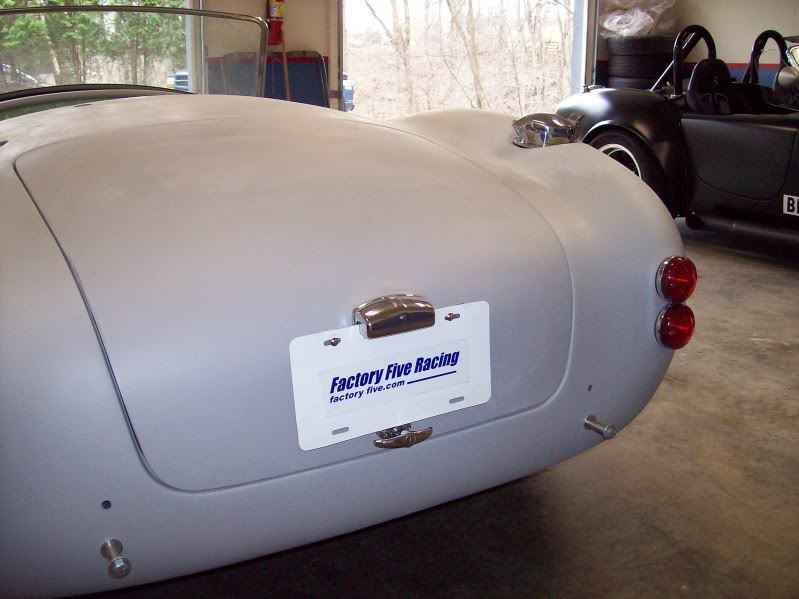
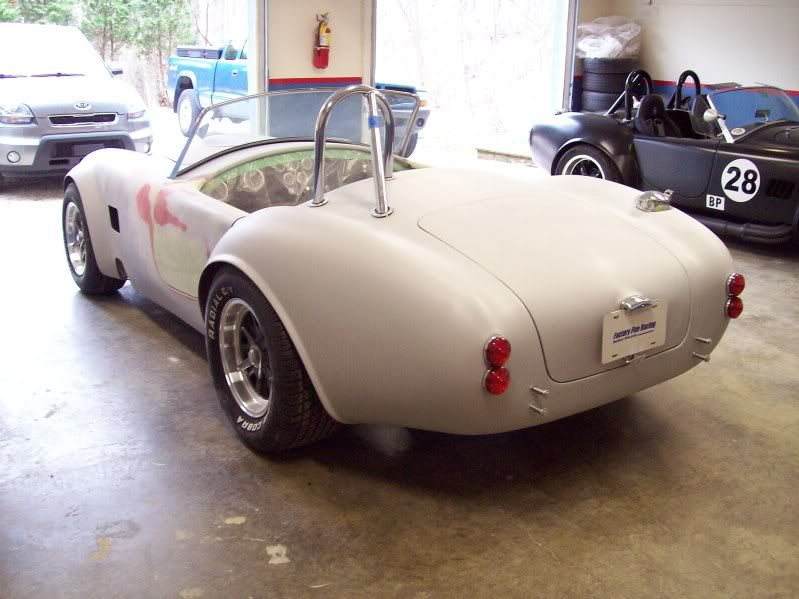
    Trying to finish up the trunk lid so I can mark it off my list. I’m looking at the FFR light/plate mount and like everyone else, realize that there will not be enough room between the bottom of the light and the trunk handle. I have found some interesting posts on modifications that can be done to the light (turn the fixture 90 degrees and cut a slit in the lens - from Jeff I think) which will certainly do the trick. In looking at pics of other cars in general, it appears that many of them have no issue at all with the plate. There doesn’t appear to be any kind of modification to the light and plenty of space between the bottom edge of the plate (some even have nice plate frames) and the top of the trunk latch. Have there been changes in the trunk lid design from the MkI to the MkIV?

    Are there other light assemblies available that don’t create this clearance issue? Just wanted to be aware of all of the options before I drilled holes in my trunk lid. I have no problem setting the FFR unit aside and purchasing a new one to avoid the clearance issue.

    Many thanks,

    Ron

  2. #2
    Tech Manager, FFR
    Join Date
    Feb 2011
    Posts
    211
    Post Thanks / Like
    Hi Ron,

    Any of the clearance issues with the plate would be on a Mk4, where the Mk1-3 would have enough room for the US-style plate. In going back to the original shape for the Mk4 body, that tighter clearance was one of the results. It looks a lot better, but leaves you to notch out the plate or devise some other solution (maybe mount it on a rear bumper).

    Give a call if you want to bounce some ideas back and forth 509-291-3443. You must be really moving along if you're working on the trunk lid - congrats!!

    Jason @ FFR

  3. #3
    USMC (Retired) Dale Claytor's Avatar
    Join Date
    May 2011
    Location
    Ocala, Florida
    Posts
    66
    Post Thanks / Like
    Blog Entries
    8
    I've heard that if you take out the tag light lense the tag will fit without further modification, but I haven't gotten to it yet to try it out. . .

  4. #4
    Not a waxer Jeff Kleiner's Avatar
    Join Date
    Feb 2011
    Location
    Bloomington, Indiana
    Posts
    8,081
    Post Thanks / Like
    Quote Originally Posted by Dale Claytor View Post
    I've heard that if you take out the tag light lense the tag will fit without further modification, but I haven't gotten to it yet to try it out. . .
    Not quite that easy but not difficult. With no modifications the plate hangs over the trunk handle like a Backdraft, meaning that you have to reach up and behind to twist the handle:


    I got looking at the light assembly, did some measuring and decided that if I could tuck an uncut plate up under the lamp hood it would clear. The light bulb holder has a stud to hold the hood and lense that is not centered vertacally:


    By drilling out the rivets that attach it I could flip it over and move it up 3/8". This put the stud back into the same position in relation to the hood (notice the blue marks which were down are now up). I drilled the rivets out of the insulator card and moved it upwards 3/8" also:


    Next I cut a slot in the back of the lense which will allow the plate to slip up inside the lamp housing and reassembled the unit:


    Finally I cut a length of aluminum stock and attached it to the existing mount then drilled holes which will hold the license plate about 1 1/8" higher:


    All done! An uncut standard size (12" by 6") license plate now tucks up behind the lamp housing, clears the handle and remains illuminated:


    Hope that helps!

    Jeff

  5. #5
    Senior Member
    Join Date
    Nov 2011
    Posts
    489
    Post Thanks / Like
    Thanks Jeff. I thought that was your modifications. I had saved the two pics of the before and after modifications to the light bracket.

    Since the clearance issue is with the MkIV trunk lid redesign, will go ahead and modify the light per Jeff.

    Had trimmed and fitted the trunk lid a few weeks ago but wanted to get the support arm and light fitted so any holes that needed to be drilled in the lid were done before I primed it. Just finished fitting the hood which turned out to be the easiest.

    Thanks again for your help,

    Ron

  6. #6
    Member
    Join Date
    Feb 2011
    Location
    Waxahachie, Tx.
    Posts
    46
    Post Thanks / Like
    Jeff's approach certainly does the trick. I followed his excellent instructions and it was a relatively easy mod. Make sure and squeeze everything as tight as you can to get the most room. I could have done a little better and ,as a result, I may still have to trim the tag a bit. But, it won't be noticeable. Great Mod Jeff!
    Last edited by Dave O; 11-15-2012 at 09:15 PM.

  7. #7
    Senior Member riptide motorsport's Avatar
    Join Date
    Feb 2011
    Location
    Fort Lauderdale Fl.
    Posts
    3,296
    Post Thanks / Like
    That tutorial should be a sticky here......perfect. Or added to the assembly manual.
    FFR Daytona Type 65 Coupe
    67 427 Cobra
    57' Belair
    72 Pinto Wagon ,306" 1/4 miler
    34 5 window coupe Ford
    2003 Mustang GT
    99' ZX9
    85 Goldwing

    All toys still in the Scuderia!


    Every Saint has a past..................every sinner a future

    Don't take yourself so seriously........no one else does.

    You never see a motorcycle parked outside a Psychiatrists office.

  8. #8
    Senior Member frankb's Avatar
    Join Date
    Feb 2014
    Location
    Marana, AZ
    Posts
    328
    Post Thanks / Like
    One more question:

    What did you use to cut the slot in the plastic lens?

  9. #9
    Junior Member
    Join Date
    Apr 2011
    Posts
    13
    Post Thanks / Like

    License plate

    Quote Originally Posted by frankb View Post
    One more question:

    What did you use to cut the slot in the plastic lens?
    I took a different tact....I used a sharp hole saw and cut a semi-circle out of the bottom center of my plate to fit around the trunk handle. My inspection agent called it different but passed it none the less. Filed and sanded the cut edges in case a little finger went astray while opening the trunk. Two years in and no problems.

  10. #10
    Not a waxer Jeff Kleiner's Avatar
    Join Date
    Feb 2011
    Location
    Bloomington, Indiana
    Posts
    8,081
    Post Thanks / Like
    Quote Originally Posted by frankb View Post
    One more question:

    What did you use to cut the slot in the plastic lens?
    Coping saw. Didn't want to use a Dremel and burn the edges. RE: cutting the plate---some states or jurisdictions frown on that so I devised this modification.

    Jeff

  11. #11
    Senior Member Avalanche325's Avatar
    Join Date
    Nov 2011
    Location
    Jax Beach, FL
    Posts
    2,103
    Post Thanks / Like
    I did Jeff's mod and it works great!!!!

    I just wanted to jump in and say thanks.

  12. #12
    Senior Member
    Join Date
    Feb 2011
    Location
    Bourne-Cape Cod, MA
    Posts
    813
    Post Thanks / Like
    I havee cut a couple, then thought........ why am I doing this? Now I just leave the plastic lens out.
    FFinisher/AKA RE63

  13. #13
    Senior Member frankb's Avatar
    Join Date
    Feb 2014
    Location
    Marana, AZ
    Posts
    328
    Post Thanks / Like
    Thanks for the info, guys. I believe I am going to cut the plate...

  14. #14
    Senior Member CraigS's Avatar
    Join Date
    Feb 2011
    Location
    Blacksburg, Va
    Posts
    4,730
    Post Thanks / Like
    If you are making an adapter plate anyway why not just make it a 1/4 inch taller and forget cutting the lens?
    FFR MkII, 408W, Tremec TKO 500, 2015 IRS, DA QA1s, Forte front bar, APE hardtop.

Posting Permissions

  • You may not post new threads
  • You may not post replies
  • You may not post attachments
  • You may not edit your posts
  •  

Replica Parts

Visit our community sponsor