BluePrint Engines

Visit our community sponsor

Thanks Thanks:  0
Likes Likes:  0
Page 5 of 11 FirstFirst ... 34567 ... LastLast
Results 161 to 200 of 408

Thread: GUNS' 818SR Build Thread

  1. #161
    Senior Member JAubin's Avatar
    Join Date
    Mar 2012
    Location
    Goffstown, NH
    Posts
    232
    Post Thanks / Like
    Grey powdercoat looks really nice! I have been thinking I'd do something similar, and that tells me I'll like how it looks!

  2. #162
    Mechie3's Avatar
    Join Date
    May 2012
    Location
    Indianapolis
    Posts
    5,174
    Post Thanks / Like
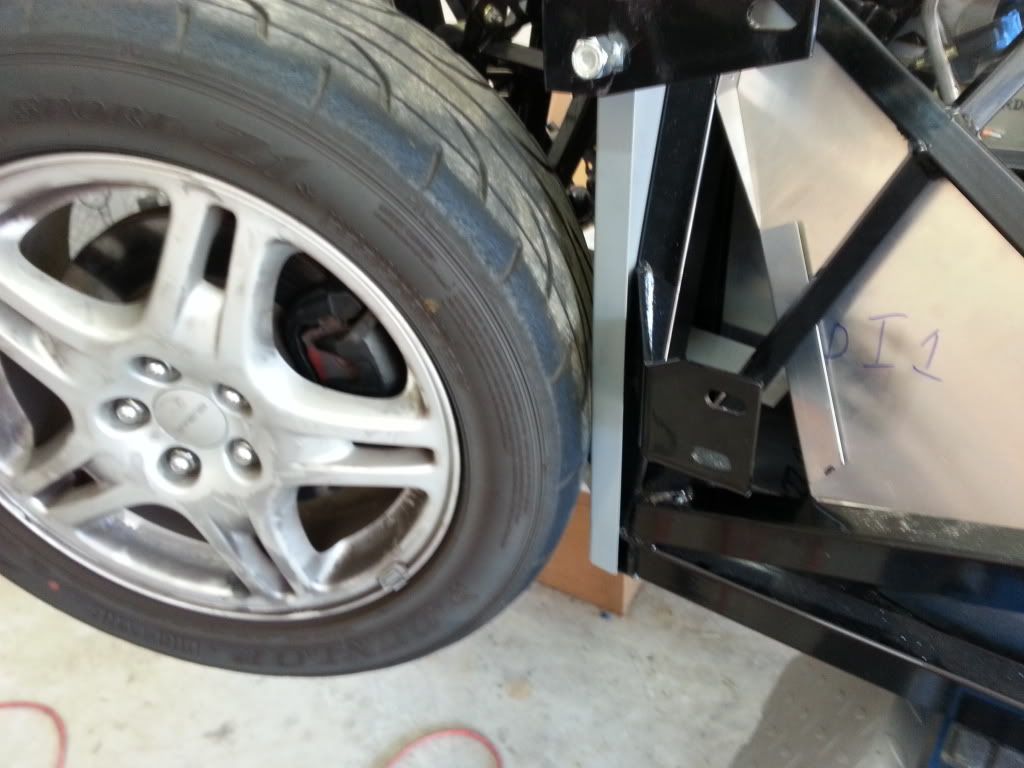
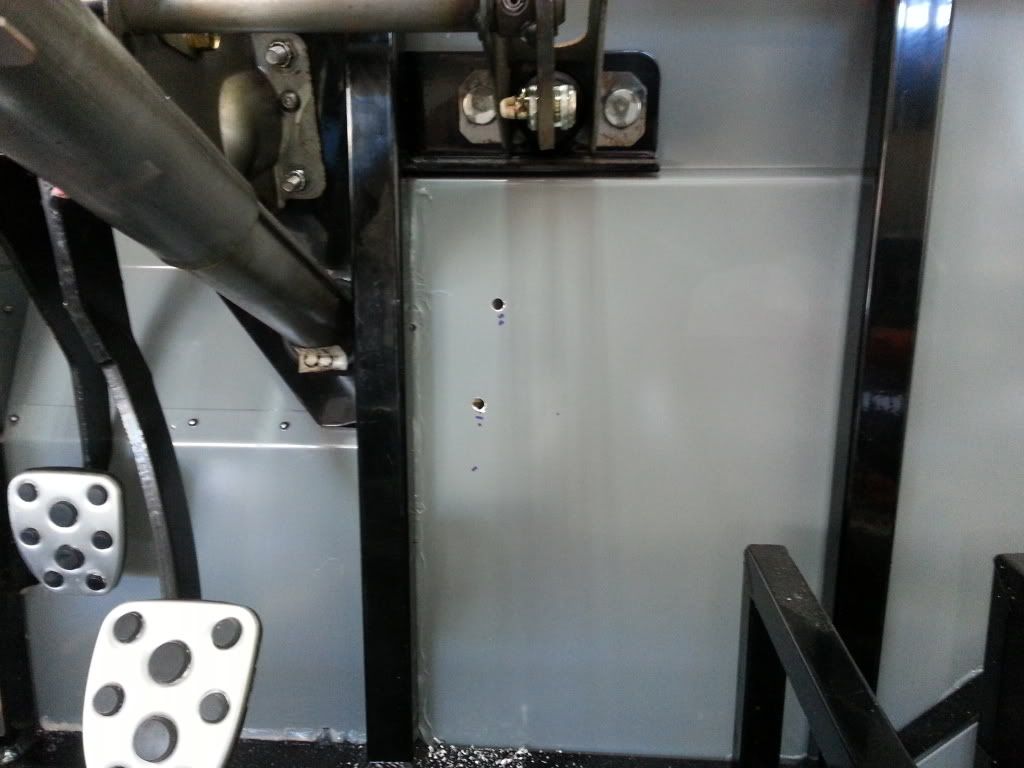
    My holes are centered, but there is a gap between the steel bracket welded to the chassis and the sheet metal. The sheet metal is bottomed out and can't move in any farther. The little overlap part towards the passenger side is lined up perfectly, so I think the panels are good. I used calipers and measured the gap. On the driver side it's about .25", on the passenger side it increases to about .375". It looks as though the steel bracket is welded on at an angle.
    Zero Decibel Motorsports
    Check out my new website!
    www.zerodecibelmotorsports.com
    www.facebook.com/zero.decibel.motorsports

  3. #163
    Senior Member
    Join Date
    Feb 2011
    Posts
    607
    Post Thanks / Like
    Been slammed this month with work and weddings and stuff so I haven't had as much time as I'd like to work on the 818. I have the steering rack all depowered and back together ready to go and have the front suspension loosely fitted. Getting ready to bolt everything down and then move to the rear. One question, what size nut are you guys using for the LCA rear bushings? I have the original bolt, but I'm pretty sure that just screwed into the subframe.

  4. #164
    Mechie3's Avatar
    Join Date
    May 2012
    Location
    Indianapolis
    Posts
    5,174
    Post Thanks / Like
    You're correct that there isnt a nut associated with those bolts. I found an m14 (i think) nut in a box and used it. It might bite me later when i need another m14 for something else.
    Zero Decibel Motorsports
    Check out my new website!
    www.zerodecibelmotorsports.com
    www.facebook.com/zero.decibel.motorsports

  5. #165
    Senior Member
    Join Date
    Feb 2011
    Posts
    607
    Post Thanks / Like
    Yea I went to Lowe's and couldn't find anything that works.

  6. #166
    Senior Member RM1SepEx's Avatar
    Join Date
    Jul 2011
    Location
    Freeport, ME
    Posts
    3,801
    Post Thanks / Like
    go to an ACE hardware, they will have what you need.
    Dan

    818S #17 Picked up 8/1/13 First start 11/1/13 Go Kart 3/28/14

  7. #167
    Senior Member Bob_n_Cincy's Avatar
    Join Date
    Sep 2012
    Location
    Cincinnati OH
    Posts
    3,904
    Post Thanks / Like
    Quote Originally Posted by GUNS View Post
    Been slammed this month with work and weddings and stuff so I haven't had as much time as I'd like to work on the 818. I have the steering rack all depowered and back together ready to go and have the front suspension loosely fitted. Getting ready to bolt everything down and then move to the rear. One question, what size nut are you guys using for the LCA rear bushings? I have the original bolt, but I'm pretty sure that just screwed into the subframe.
    Hey Guns
    I order new hardened hardware for my 2 kits from BelMetric Automotive .

    ------------------------------------------------------
    12 x WFHV16 - Hardened Flat Washer (WFHV16) = $6.12 top and bottom on bushing mounts
    4 x BH16X1.5X40 - Hex bolt 10.9 (BH16X1.5X40) = $18.24 bushing mounts
    12 x NNH16X1.5 - Class 10 Nylock (NNH16X1.5) = $15.36 bushing mounts and top strut bolt
    12 x NNH14X1.5 - Class 10 Nylock (NNH14X1.5) = $16.32 Bottom strut bolt nut
    4 x BH14X1.5X60 - Hex bolt 10.9 (BH14X1.5X60) = $18.96 Bottom strut bolt
    4 x BH16X1.5X65 - Hex bolt 10.9 (BH16X1.5X65) = $19.52 top strut bolt
    ------------------------------------------------------
    I didn't want any play in my bolt holes on the suspension. So I got bolts that fit tightly.
    Where the top cam bolt is 16.5 mm on the spindle and 16mm on the FFR bracket. So I put a 16mm fine thread hardened bolt.
    The hole in the FFR bracket is not big enough for the OEM cam bolt.
    These all arrive Monday so I'll let you know how each fit.
    Bob

  8. #168
    fasterer and furiouser longislandwrx's Avatar
    Join Date
    Aug 2012
    Location
    Long Island
    Posts
    2,540
    Post Thanks / Like
    Blog Entries
    6
    Quote Originally Posted by RM1SepEx View Post
    go to an ACE hardware, they will have what you need.

    +1 The Ace near me has more hardware than all of the other hardware stores combined.
    A well stocked beverage fridge is the key to any successful project.

  9. #169
    Senior Member
    Join Date
    Feb 2011
    Posts
    607
    Post Thanks / Like
    Yea that's a good call. I have one right near my work so I'll see what I can find. I feel like I'm getting close to getting it to a rolling status, shouldn't be too much more to do to get it there.

  10. #170
    Senior Member RM1SepEx's Avatar
    Join Date
    Jul 2011
    Location
    Freeport, ME
    Posts
    3,801
    Post Thanks / Like
    All the guys at my ACE know me... I'm there several times a week due to my multitude of projects and my house is approaching 30! They have a great selection of std and metric hardware... grade 5 through 8 for std and only high grade stuff for metric. If they don't have it I usually just go to McMaster.com and you have it the next day or two
    Dan

    818S #17 Picked up 8/1/13 First start 11/1/13 Go Kart 3/28/14

  11. #171
    Senior Member
    Join Date
    Feb 2011
    Posts
    607
    Post Thanks / Like
    Thanks for the nuggets up on ACE, they had exactly what I needed.

    I've been swamped this month, but was able to get a lot of work done over the long weekend. So far with the exception of the LCA mounts, everything has been going pretty smoothly. I got hung up on one of my front axles that took a lot of time. One came right apart and the other was seized. I managed to get it separated, but it was a PITA. I also replaced all suspension bushing with TiC Race bushings.

    So the front suspension is about 95% done. The rear is loosely bolted on mainly to test fitment. I got the pedal box and steering column mounted as well. One question, do you have to drill into the pedal box for the brake MC to mount to it?

    Next step is to button up the suspension and rebuild the brakes. I wish I paid more attention to the parking brake assembly, but I'll figure it out.

    Most importantly is I'm having a blast doing this so far and I'm excited that it's actually starting to look like a car!


    Oh, and don't worry about my brake caliper being on backwards, I was tired.

  12. #172
    Senior Member Bob_n_Cincy's Avatar
    Join Date
    Sep 2012
    Location
    Cincinnati OH
    Posts
    3,904
    Post Thanks / Like
    Hey Guns
    Looking Great, I'm a work day behind you
    Bob and Mike

  13. #173
    Mechie3's Avatar
    Join Date
    May 2012
    Location
    Indianapolis
    Posts
    5,174
    Post Thanks / Like
    Yes, you drill stuff to mount the cylinder. Its in the manual.
    Zero Decibel Motorsports
    Check out my new website!
    www.zerodecibelmotorsports.com
    www.facebook.com/zero.decibel.motorsports

  14. #174
    Senior Member
    Join Date
    May 2012
    Location
    Suisun City, CA
    Posts
    851
    Post Thanks / Like
    Is that seat sitting on the floor, or is it mounted to sliders/brackets?

  15. #175
    Senior Member
    Join Date
    Feb 2011
    Posts
    607
    Post Thanks / Like
    Mechie, thanks for the input. Wasn't sure what the manual was trying to say in regards to MC mounting.

    Seat is just on the floor for now. Hopefully will have it mounted soon.

  16. #176
    fasterer and furiouser longislandwrx's Avatar
    Join Date
    Aug 2012
    Location
    Long Island
    Posts
    2,540
    Post Thanks / Like
    Blog Entries
    6
    Guns that looks SHARP. loving the battleship grey and I still can't believe those hubs are used.

    Keep up the good work.
    A well stocked beverage fridge is the key to any successful project.

  17. #177
    Senior Member
    Join Date
    Apr 2012
    Posts
    156
    Post Thanks / Like
    Nice Corbeau seat.

    Which model is it and does the tilt of the seat match up to the rear firewall?

    Thanks,
    John

  18. #178
    Senior Member
    Join Date
    Feb 2011
    Posts
    607
    Post Thanks / Like
    Thanks for the comments.

    The seats are the FX1 Pro's and are not bolted in yet. I haven't had a proper fit test with the firewall yet, but I should be getting to that soon.
    Last edited by GUNS; 09-03-2013 at 07:24 PM.

  19. #179
    Senior Member
    Join Date
    Feb 2011
    Posts
    607
    Post Thanks / Like
    Quick update. I received a care package from FFR today! There was a bunch of stuff in there, but more importantly was a printed manual! No more running inside to check my computer. The bad news is they updated the strut mount location for the steel LCA's. I drilled/bolted at 1.75" and they have changed it to 2". Welp, I notice that the lower part of the front knuckle barely rubs the lower strut at full lock in both directions. I'm not sure how big a deal this is. I can't really re-drill the holes and they barely rub. I may leave it as is and hope for the best. This may change once the car has a load on it as well, for better or worse. Thoughts?

  20. #180
    Senior Member Steve91T's Avatar
    Join Date
    Feb 2011
    Location
    Huntersville, NC
    Posts
    284
    Post Thanks / Like
    Is the strut mounts aluminum or steel? You could find someone to weld up the holes then re drill.
    Weekends/track days
    1997 Camaro SS 380 rwhp/380 rwtq
    LT1 Stroked to 396. C5 brakes, suspension work, racing seats, roll bar
    Daily driver
    1999 Ford F250 Powerstroke 300 rwhp/600 rwtq
    Custom intake, 4" exhaust, 80 hp DP Tuner PCM tuning 20 MPG highway!

  21. #181
    PLATNUM Supporting Member
    wallace18's Avatar
    Join Date
    Apr 2012
    Location
    Trenton, Florida
    Posts
    5,382
    Post Thanks / Like
    Quote Originally Posted by GUNS View Post
    Quick update. I received a care package from FFR today! There was a bunch of stuff in there, but more importantly was a printed manual! No more running inside to check my computer. The bad news is they updated the strut mount location for the steel LCA's. I drilled/bolted at 1.75" and they have changed it to 2". Welp, I notice that the lower part of the front knuckle barely rubs the lower strut at full lock in both directions. I'm not sure how big a deal this is. I can't really re-drill the holes and they barely rub. I may leave it as is and hope for the best. This may change once the car has a load on it as well, for better or worse. Thoughts?
    I welded mine at 2" before the update. You can unbolt them and weld them yourself or have them welded for you.

  22. #182
    Senior Member
    Join Date
    Feb 2011
    Posts
    607
    Post Thanks / Like
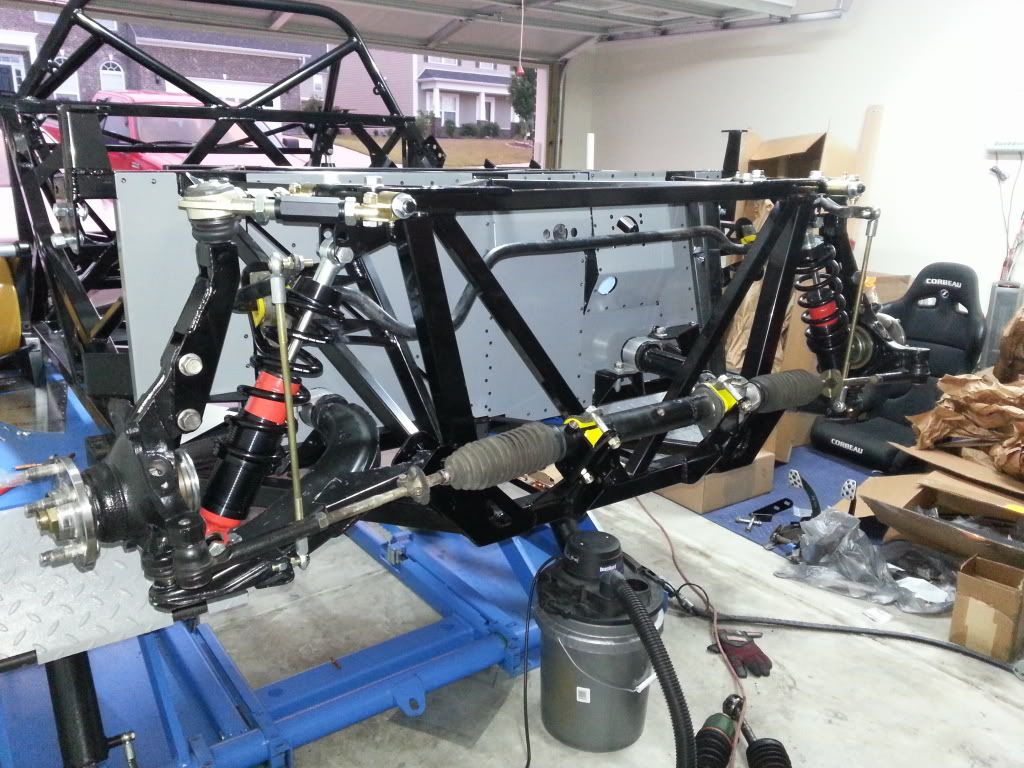
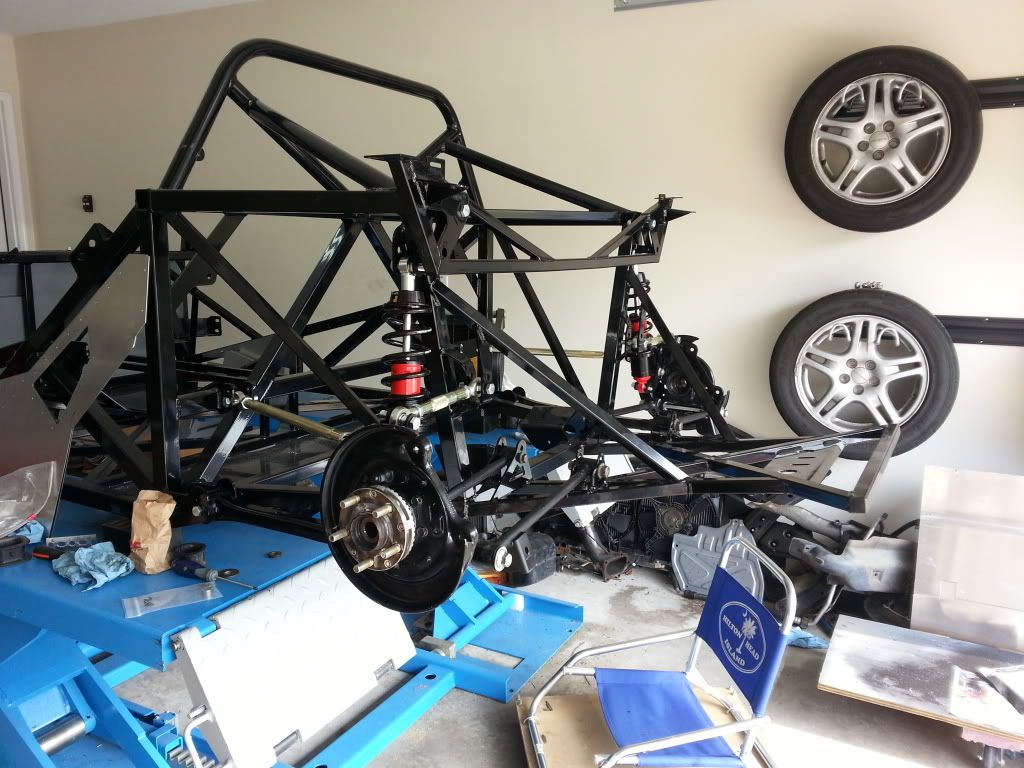
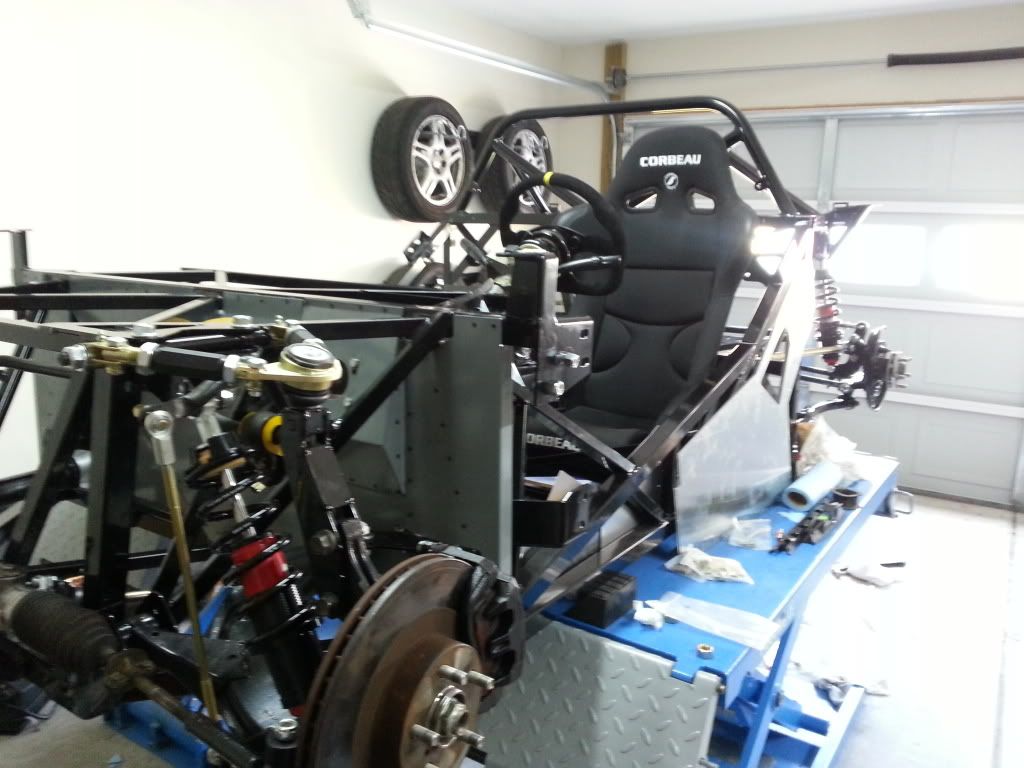
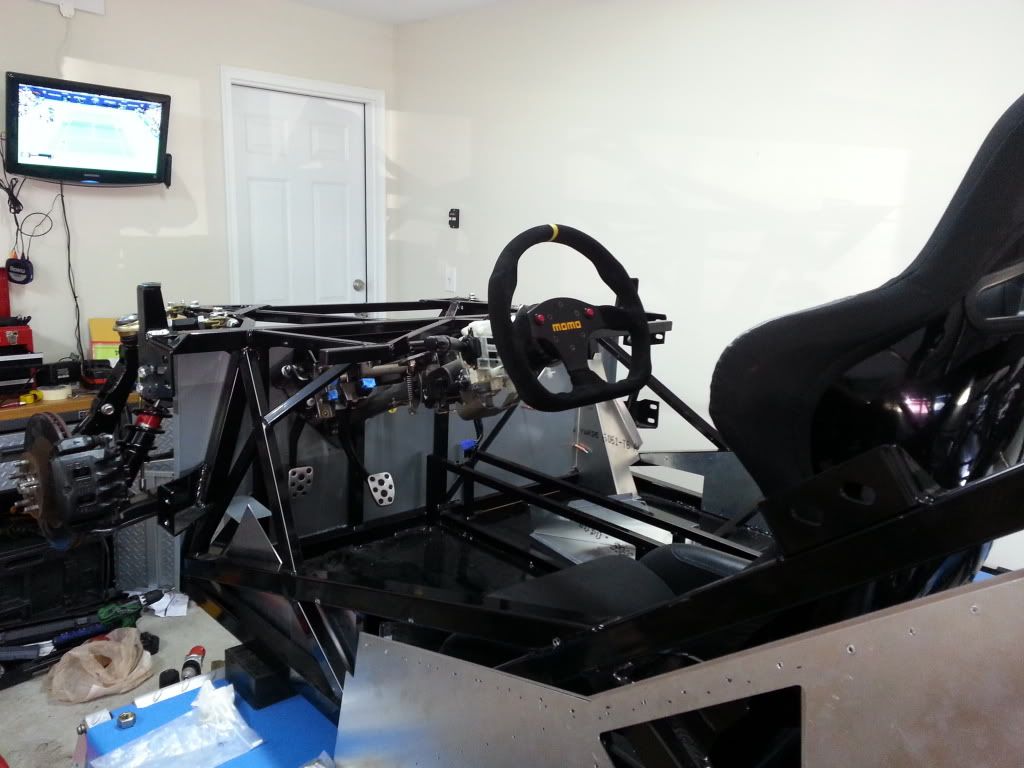
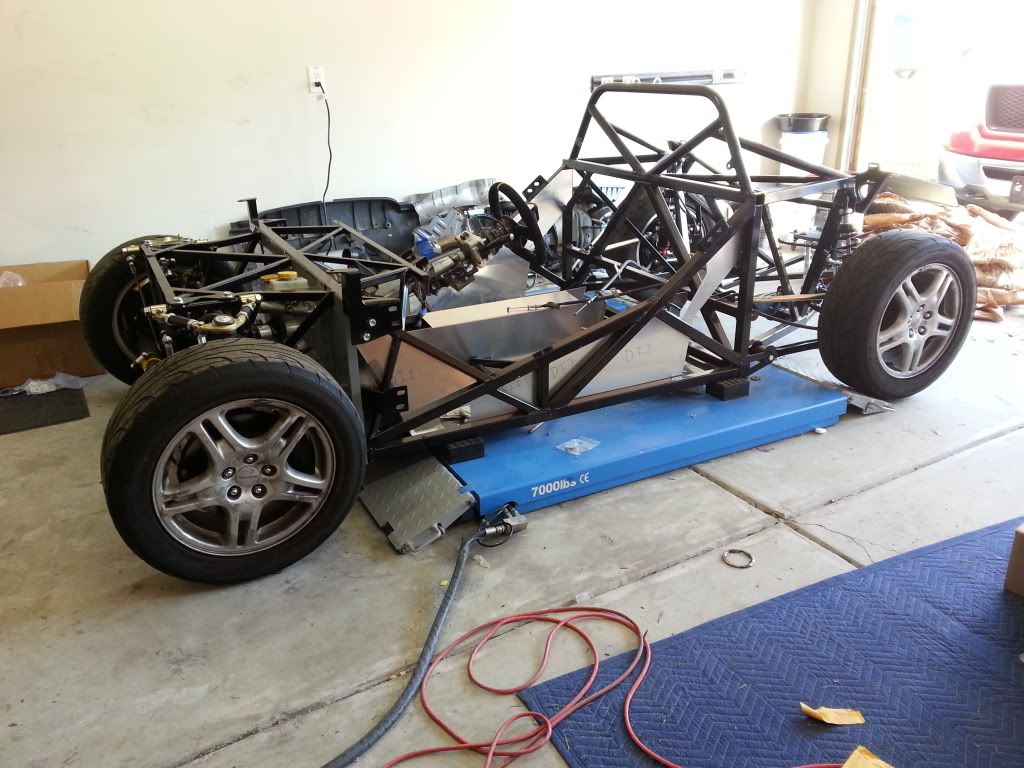
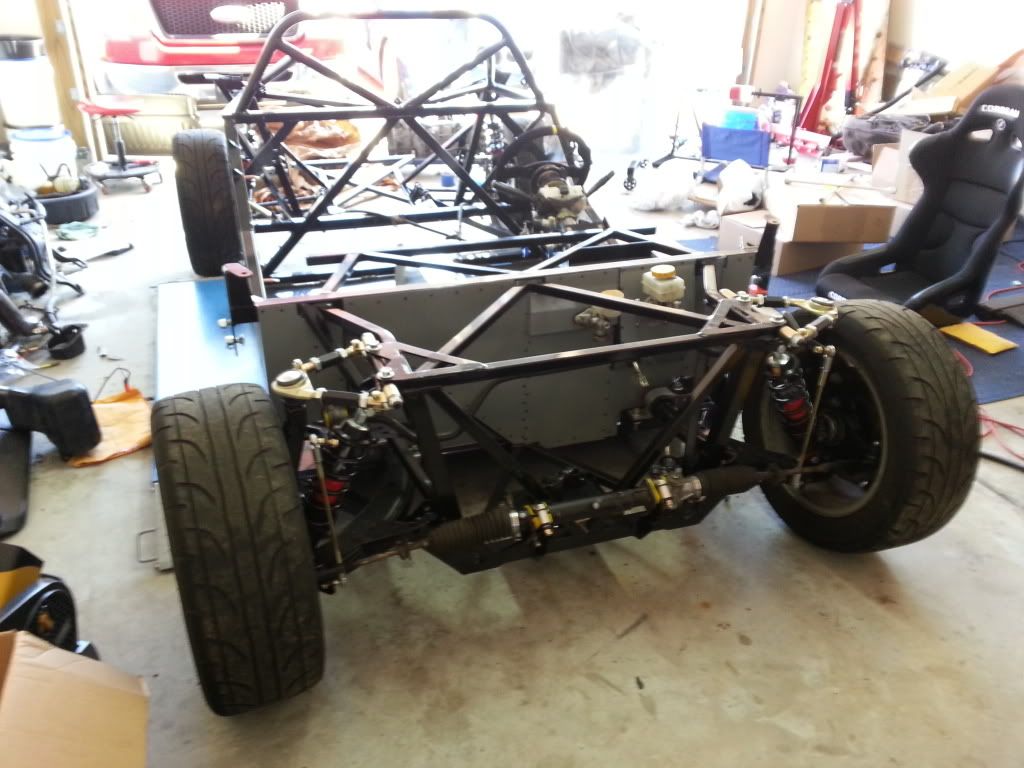
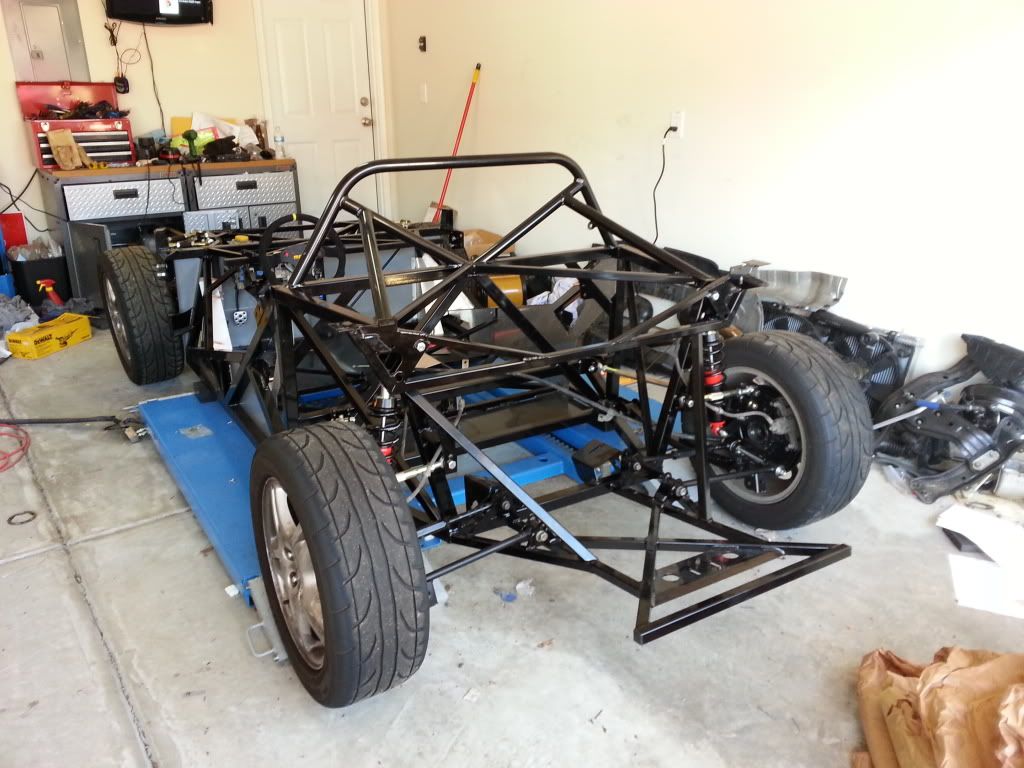
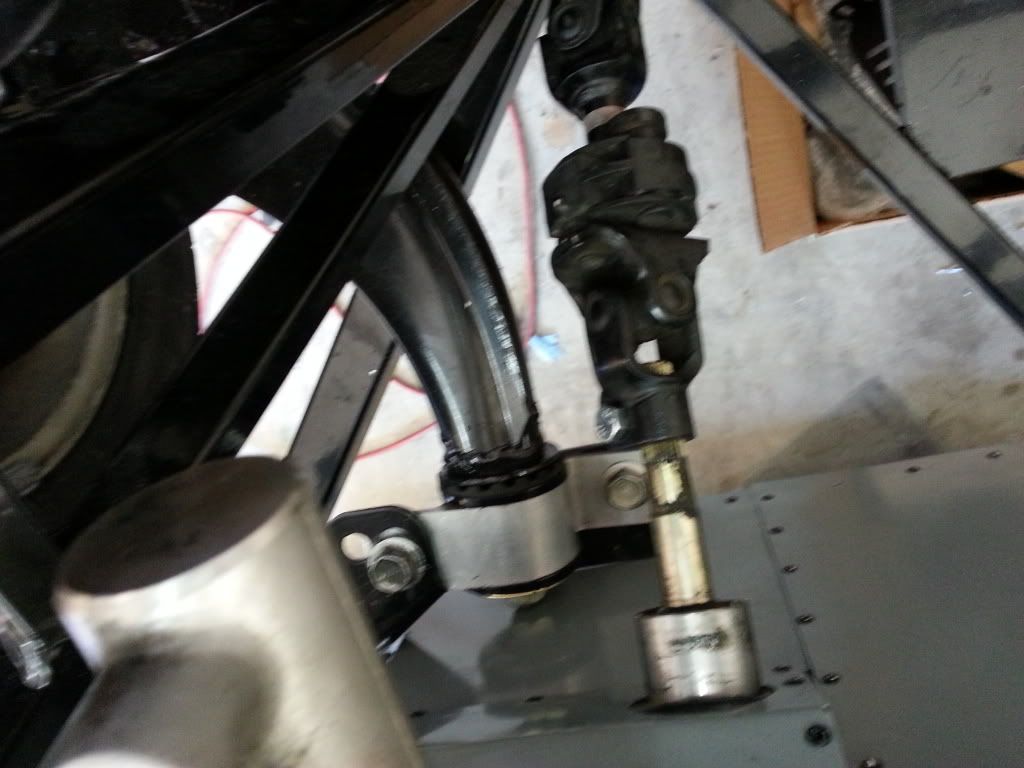
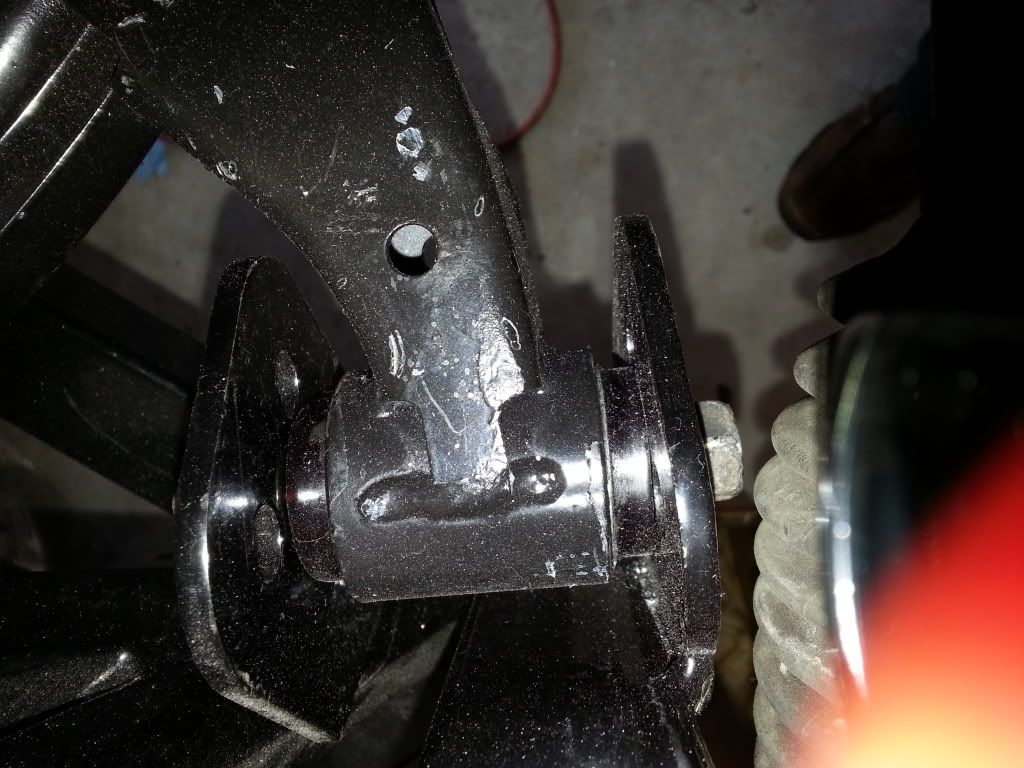
    Been a while since I've updated this thread. I've been gone for about a month and haven't worked on the 818 for over a month. It was good to get back to it. I spent a good amount of time in the garage the last few days and pretty much completed the front/rear suspension, re-assembled the parking brake (what a PITA), mounted the brakes, mounted brake and clutch MC, and started TGV deletes. I'm thinking the TGV deletes may not be worth the time involved, we'll see.

    Hoping to get the engine back together soon then work on getting the engine/trans into the car. The stock wheels are just place holders for now.

    Don't mind my messy garage:


  23. #183
    Senior Member Frank818's Avatar
    Join Date
    Jun 2013
    Location
    QC, Canada
    Posts
    5,732
    Post Thanks / Like
    Nice glider!
    Frank
    818 chassis #181 powered by a '93 VW VR6 Turbo GT3582R
    Go-karted Aug 5, 2016 - Then May 19+21, 2017
    Tracked May 27/July 26, 2017
    Build time before being driveable on Sep 27, 2019: over 6000h
    Build Completed Winter 2021

  24. #184
    Senior Member Rasmus's Avatar
    Join Date
    Mar 2012
    Location
    Las Vegas, USA
    Posts
    983
    Post Thanks / Like
    Quote Originally Posted by GUNS View Post
    BI'm thinking the TGV deletes may not be worth the time involved, we'll see.
    It's worth it. You trade time for horsepower and torque. It's free.

    Delete them and be happy. Plus you'll never have that itch in the back of you mind that you could have done a free mod when it was easy to do.

  25. #185
    Senior Member
    Join Date
    Feb 2011
    Posts
    607
    Post Thanks / Like
    Hope everyone had a great Thanksgiving.

    Back to working on the car. I got my new swaybar brackets in and was able to get the suspension all finished up...so I thought. I did a lock to lock test and it looks like the front driver side tire rubs on the firewall panel just prior to full lock. The bad thing is this is with stock wheels and tires! I'm hoping there's an easy fix to this. Anyone know how to move the entire wheel forward? Hopefully it can be fixed with an alignment, but I'm fearing it has something to do with the LCA mount issues. All the suspension pieces line up and fit, which confuses me as to why the tire rubs.


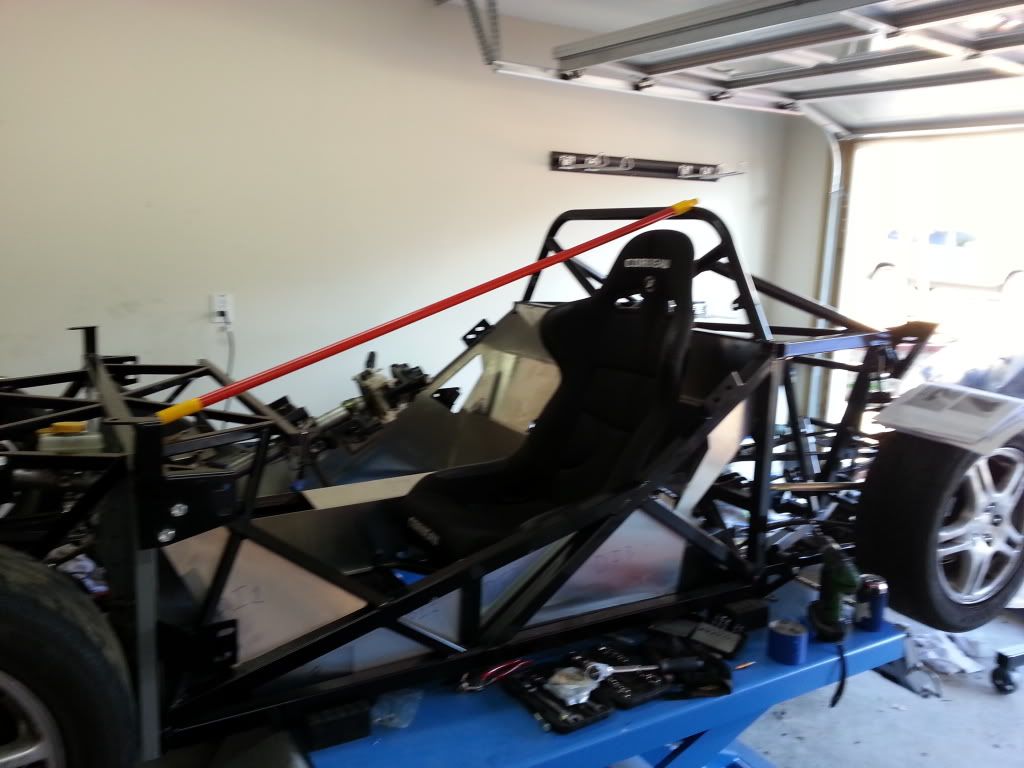
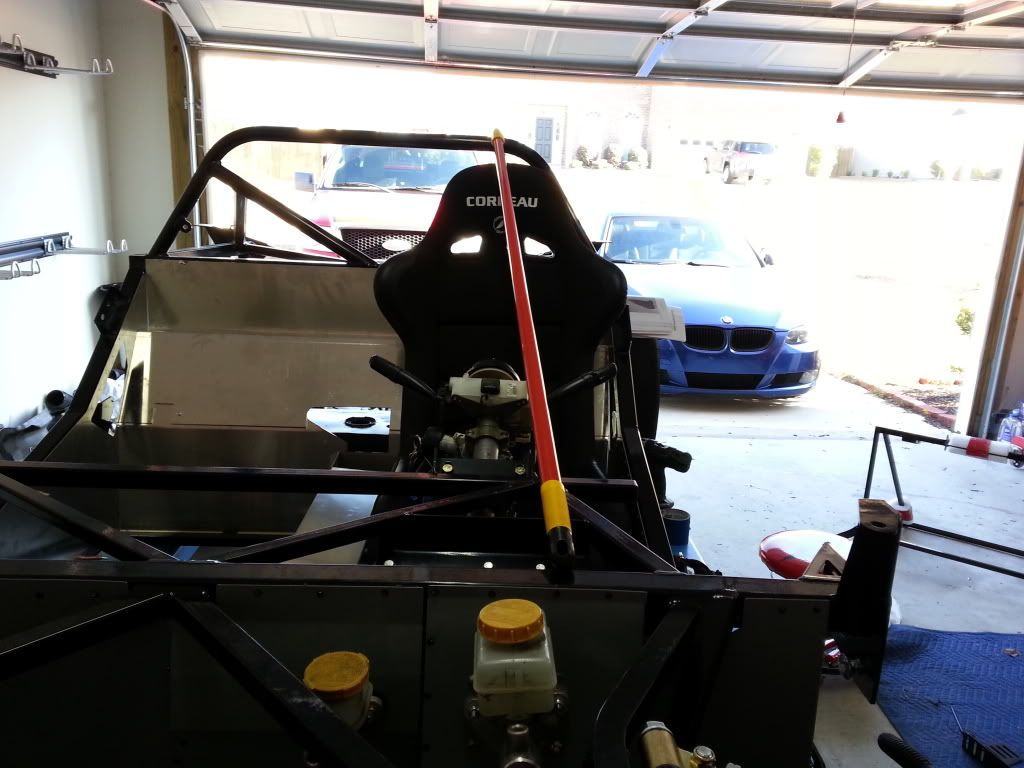
    I also got my driver seat mounted today. How are people doing their "broomstick" tests? I know it's typically done from the roll bar to windshield frame. I can't imagine the windshield in this thing would support any weight.

    This cockpit is very tight. I'm 5'11" and I barely fit in the stock location. I'd prefer to be back a few more inches, but I don't really want to drop $600 for a Boyd tank just to be a little more comfortable. I think I'll leave it as is and see how it works out.


  26. #186
    Senior Member Aloha818's Avatar
    Join Date
    Jul 2013
    Location
    Waikiki
    Posts
    544
    Post Thanks / Like
    Glad to see you back spending time on your build and posting!

    I have only eyeballed my front bits so far, but when I did a trial fit with my new wheels and tires they did not rub.

    One thing you might check is that you have to flip one side of the front top wheel adjusters, can't remember which side. Both long adjusters go to the front.
    "In wine there is wisdom, in beer there is strength, in water there is bacteria."

    818 (Chassis #34) Delivered 9/25/2013, First start 3/2/2014, First drive 4/5/2014, Registered 8/28/2015, First Dyno 3/18/2016, First SCCA event 4/3/2016, First car show HIN Honolulu 4/23/2016

  27. #187
    Senior Member Silvertop's Avatar
    Join Date
    Mar 2011
    Location
    Forest Lake MN
    Posts
    880
    Post Thanks / Like
    Quote Originally Posted by GUNS View Post
    Hope everyone had a great Thanksgiving.

    Back to working on the car. I got my new swaybar brackets in and was able to get the suspension all finished up...so I thought. I did a lock to lock test and it looks like the front driver side tire rubs on the firewall panel just prior to full lock. The bad thing is this is with stock wheels and tires! I'm hoping there's an easy fix to this. Anyone know how to move the entire wheel forward? Hopefully it can be fixed with an alignment, but I'm fearing it has something to do with the LCA mount issues. All the suspension pieces line up and fit, which confuses me as to why the tire rubs.
    The good news is there is probably nothing wrong with your LCA mount. There has been discussion on other threads about this common problem. What has been revealed is that the 818 front end is designed for use with tires that have an approximate maximum diameter of 24 inches, or possibly slightly larger. A stock WRX wheel will usually have a 205/55-16 tire on it, which has a nominal diameter of 25 inches (usually 24.9). That's why it rubs. The tire is simply too tall. If you are planning on using the stock wheels, you will want to drop down to a 205/50 on the front, which will put you into the ballpark of a 24" diameter. Then put 225/50's on the rear, and you will be good to go.......

    Obviously, if you want to use wider tires, you'll have to go to wider wheels. But whatever you do, when you select your wheel and tire sizes and tire profiles, keep that 24" front tire maximum diameter in mind.
    Last edited by Silvertop; 11-30-2013 at 02:08 AM.

  28. #188
    Senior Member
    Join Date
    Feb 2011
    Posts
    607
    Post Thanks / Like
    Quote Originally Posted by Silvertop View Post
    The good news is there is probably nothing wrong with your LCA mount. There has been discussion on other threads about this common problem. What has been revealed is that the 818 front end is designed for use with tires that have an approximate maximum diameter of 24 inches, or possibly slightly larger. A stock WRX wheel will usually have a 205/55-16 tire on it, which has a nominal diameter of 25 inches (usually 24.9). That's why it rubs. The tire is simply too tall. If you are planning on using the stock wheels, you will want to drop down to a 205/50 on the front, which will put you into the ballpark of a 24" diameter. Then put 225/50's on the rear, and you will be good to go.......

    Obviously, if you want to use wider tires, you'll have to go to wider wheels. But whatever you do, when you select your wheel and tire sizes and tire profiles, keep that 24" front tire maximum diameter in mind.
    Thanks for the response, I guess I wasn't expecting it to be such a tight fit, especially with stockers. I'm holding off on wheels/tires until I get this thing closer to being complete, hopefully that will resolve the issue.

  29. #189
    East Coast Speed Machines Erik W. Treves's Avatar
    Join Date
    Feb 2011
    Location
    Huntsville, Al
    Posts
    2,109
    Post Thanks / Like
    You also need to get your alignment done...If you have a ton of caster in it, it will rub there...I modified both sides of the fire wall and splash guard and inner to fender liner to get my huge wheels to fit...granted now I rub on the inner frame, but right at lock, btI clear all the aluminum....having said all that...mine rubs at full droop about where yours does. Put it on the ground (at ride height)and see how it looks.
    Last edited by Erik W. Treves; 11-30-2013 at 08:26 AM.
    FFR 1879, Blown DSS 306,REDLINE management, VeryCoolParts Tuned 460RWHP

    FFR 818S, The Flash, Chassis #5, 2.0L, LSD, Electromotive TEC-S, VCP Tuned, 278RWHP 265 RWTQ

    FFR 6651, Green Lantern, 408W Crate, Hellion 66mm Turbo, JGS Waste gate / Blowoff valve, Tec-GT management, VCP Tuned, 575 RWHP, 690 RWTQ

    FFR 8335, Black Mamba, 289 FIA CSX 2001 tribute car, 347, 48 IDA webers, VCP Tuned, 311 RWHP 386 RWTQ, 3-link, Trigo's

    FFR 0004, Gen 3 , Hawk Coupe, Coyote twin turbo, 683 RWHP 559 RWTQ, IRS, VCP Tuned. "not too shabby"

    US ARMY Maintenance Test Pilot (CW4 Retired)

  30. #190
    818 builder metalmaker12's Avatar
    Join Date
    Mar 2012
    Location
    Exeter R.I
    Posts
    2,834
    Post Thanks / Like
    Blog Entries
    1
    Things gets tight everywhere on this car, get used to it, 24" max dia up front

  31. #191
    Senior Member
    Join Date
    Feb 2011
    Posts
    607
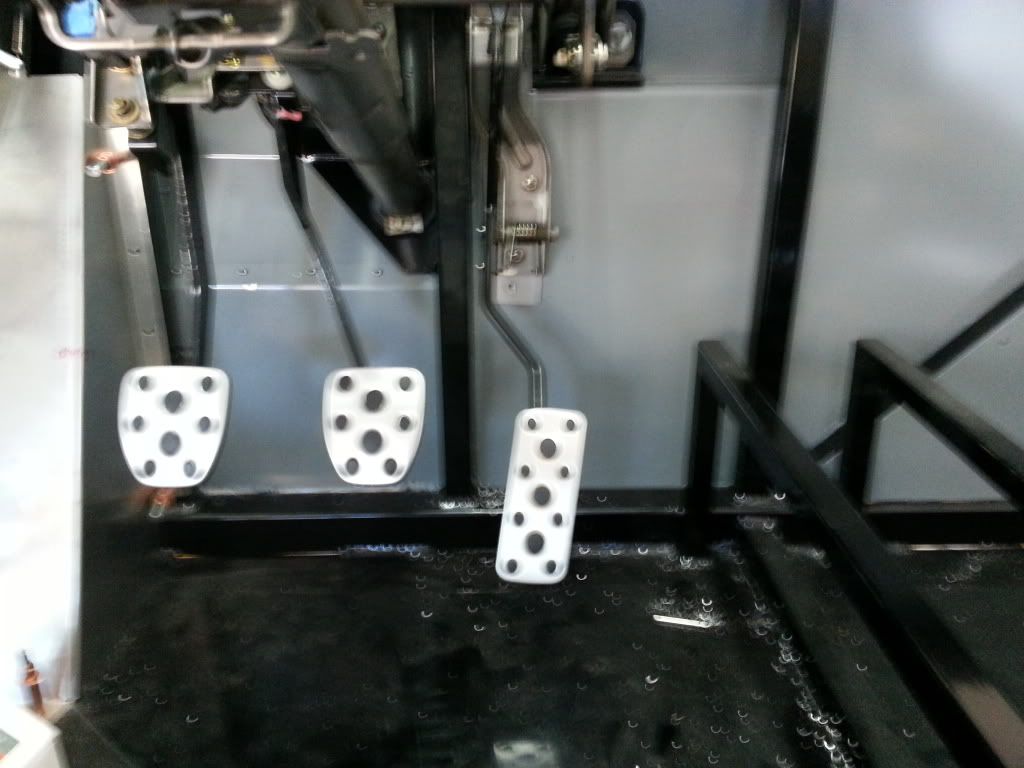
    Post Thanks / Like
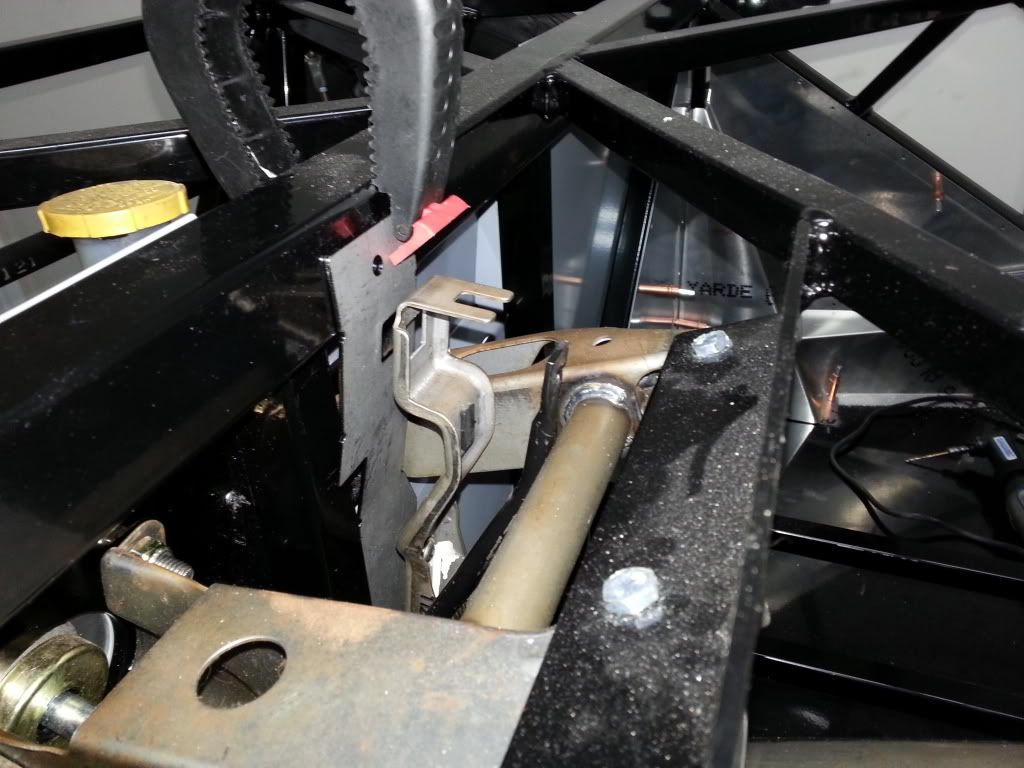
    Anyone have any suggestions on throttle pedal placement? I got it where I want it, but it hits the rest of the pedal box which translates to very little throttle pedal movement:


  32. #192
    818 builder metalmaker12's Avatar
    Join Date
    Mar 2012
    Location
    Exeter R.I
    Posts
    2,834
    Post Thanks / Like
    Blog Entries
    1
    The pedal def needs free movement, place it where it moves freely and it comfortable

  33. #193
    Senior Member RM1SepEx's Avatar
    Join Date
    Jul 2011
    Location
    Freeport, ME
    Posts
    3,801
    Post Thanks / Like
    dump the bracket and mount the pedal right to the firewall

    That's how Erik, the two cars Wayne has done and mine is... much better "feel" the FFR bracket is flexible junk.

    BTW my throttle cable was also too short to use the bracket!
    Dan

    818S #17 Picked up 8/1/13 First start 11/1/13 Go Kart 3/28/14

  34. #194
    Senior Member
    Join Date
    Feb 2011
    Posts
    607
    Post Thanks / Like
    Quote Originally Posted by RM1SepEx View Post
    dump the bracket and mount the pedal right to the firewall

    That's how Erik, the two cars Wayne has done and mine is... much better "feel" the FFR bracket is flexible junk.

    BTW my throttle cable was also too short to use the bracket!
    Thanks Dan, I'll take a look at that option tomorrow. Is the aluminum firewall sturdy enough? I'm assuming it is since you guys are all doing it that way.

  35. #195
    Senior Member
    Join Date
    Feb 2011
    Posts
    607
    Post Thanks / Like
    Got some more work done today. As you read above, I attempted to fit the gas pedal. I'll have to finish that later.

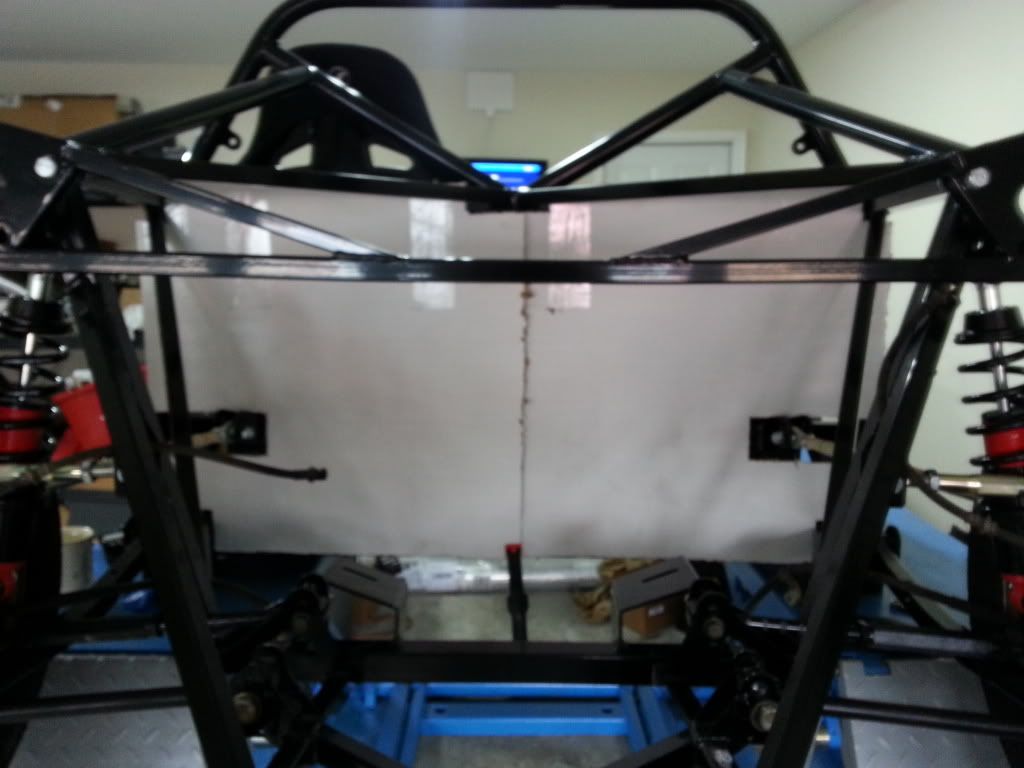
    I was able to make a template for my firewall separating the engine and fuel tank. Now I just need to source some aluminum and cut using the cardboard template:


    I also built my rear axles. It was a little but of a PITA, but not terrible. It's a big mess, so just be prepared to clean up your tools/shop when you are done. Wayne's technique in the very first post of this thread: http://thefactoryfiveforum.com/showt...tips-add-yours was money!! Thanks Wayne, you saved me a tone of time.

  36. #196
    818 builder metalmaker12's Avatar
    Join Date
    Mar 2012
    Location
    Exeter R.I
    Posts
    2,834
    Post Thanks / Like
    Blog Entries
    1
    Quote Originally Posted by RM1SepEx View Post
    dump the bracket and mount the pedal right to the firewall

    That's how Erik, the two cars Wayne has done and mine is... much better "feel" the FFR bracket is flexible junk.

    BTW my throttle cable was also too short to use the bracket!
    I did use the bracket, but modded it to be more stiff, my cable seems to be just enough to work correctly. Either way, the bracket is junk and you can do what I did or just toss it.

  37. #197
    Senior Member
    Join Date
    Feb 2011
    Posts
    607
    Post Thanks / Like
    Metal,

    Did you mount it per the manual?

  38. #198
    Senior Member
    Join Date
    Feb 2011
    Posts
    607
    Post Thanks / Like
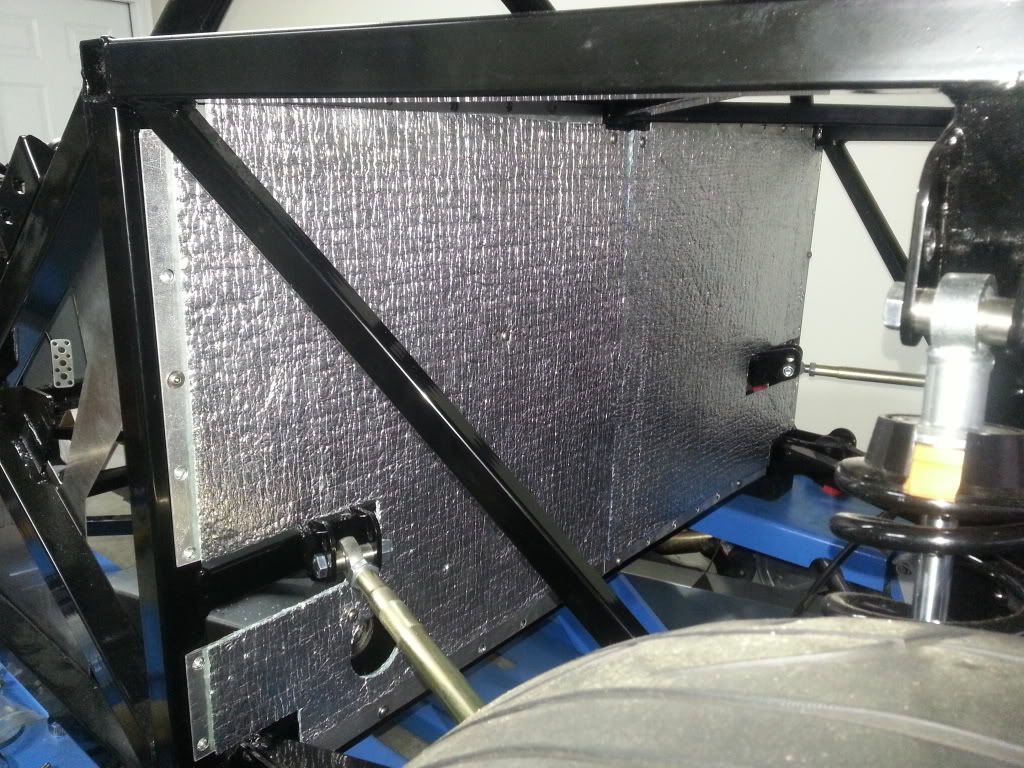
    Got the engine firewall mostly done. I ran out of RivNuts and need order some more to complete it. It's not perfect, but I think it turned out pretty good and should get the job done.


    I also mounted the throttle pedal. I trimmed the supplied bracket and used it to mount the pedal to the firewall. I probably didn't need it, but thought I'd use it to add some support. We'll see how it works out. I still need to run the cable, ran out of time.


  39. #199
    Senior Member Frank818's Avatar
    Join Date
    Jun 2013
    Location
    QC, Canada
    Posts
    5,732
    Post Thanks / Like
    Guns (and roses), that's EZCool insulation on the FW?
    Frank
    818 chassis #181 powered by a '93 VW VR6 Turbo GT3582R
    Go-karted Aug 5, 2016 - Then May 19+21, 2017
    Tracked May 27/July 26, 2017
    Build time before being driveable on Sep 27, 2019: over 6000h
    Build Completed Winter 2021

  40. #200
    Senior Member
    Join Date
    Feb 2011
    Posts
    607
    Post Thanks / Like
    Quote Originally Posted by Frank818 View Post
    Guns (and roses), that's EZCool insulation on the FW?
    Ha, I like the play on my name. Yes it is. I have a bunch of it left over, so I will probably line the backside of the main firewall (behind seat), bottom of fuel tank, and if there is any left, the front side of the firewall pictured above.

Page 5 of 11 FirstFirst ... 34567 ... LastLast

Posting Permissions

  • You may not post new threads
  • You may not post replies
  • You may not post attachments
  • You may not edit your posts
  •  

FFMetal

Visit our community sponsor