Forte's

Visit our community sponsor

Thanks Thanks:  0
Likes Likes:  0
Page 6 of 11 FirstFirst ... 45678 ... LastLast
Results 201 to 240 of 408

Thread: GUNS' 818SR Build Thread

  1. #201
    Senior Member Xusia's Avatar
    Join Date
    Oct 2011
    Location
    Eugene, OR, USA
    Posts
    2,343
    Post Thanks / Like
    Did you buy the 10' section or the 50' roll?

  2. #202
    Senior Member
    Join Date
    Jan 2012
    Posts
    1,112
    Post Thanks / Like
    How much of the ez cool did you use sq ft?

  3. #203
    Senior Member
    Join Date
    Feb 2011
    Posts
    607
    Post Thanks / Like
    Xusia,

    I bought the 10ft roll and that should be plenty for what I plan on using it for. 50ft would be a ton of this stuff!

    Fireblade,

    I think each half used about a 23in x 23.5 in square and then I trimmed as required. Roughly 8 sq ft. total.

  4. #204
    Senior Member FFRSpec72's Avatar
    Join Date
    Feb 2011
    Location
    Kirkland, WA
    Posts
    2,255
    Post Thanks / Like
    Quote Originally Posted by GUNS View Post
    I bought the 10ft roll and that should be plenty for what I plan on using it for. 50ft would be a ton of this stuff!
    I used it in my challenge car and will say I won't use it again, does not hold up, so will go w/o this for my R build
    Tony Nadalin
    2018 SOVREN Big Bore Champion
    2015 SCCA Oregon Region VP3 Champion
    2012 ICSCC ITE Class Champion
    FFR MkII Challenge Car, Spec Racer, Street Legal, SCCA, ICSCC and NASA Racing
    818R Build in progress

  5. #205
    Senior Member
    Join Date
    Feb 2011
    Posts
    607
    Post Thanks / Like
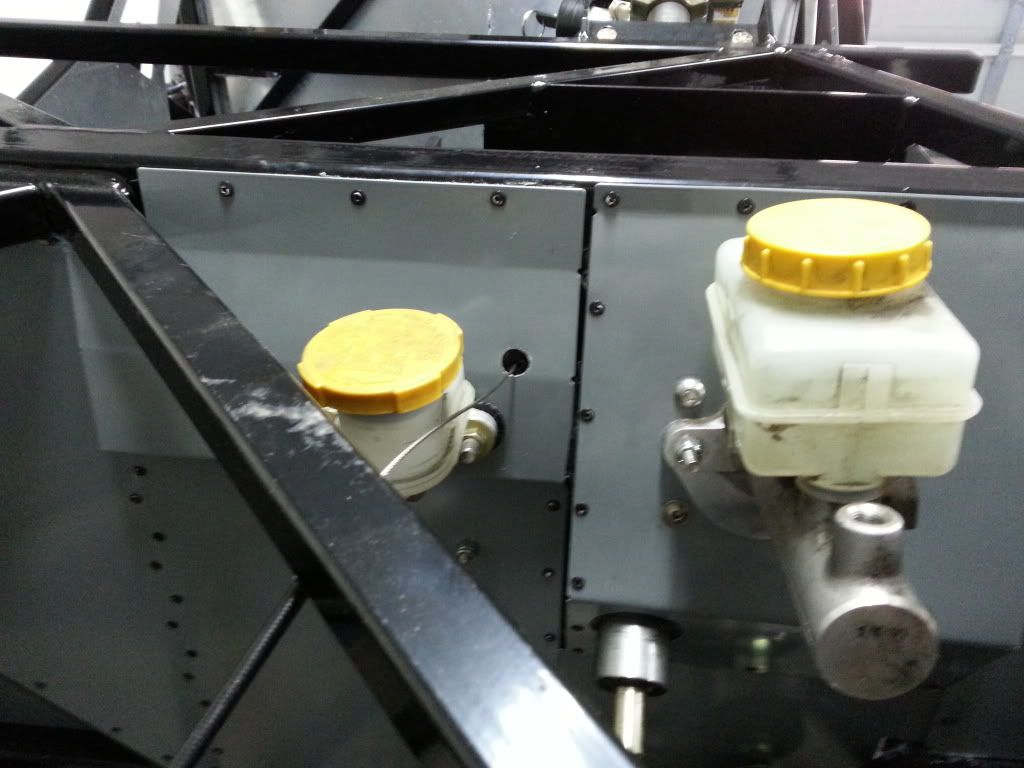
    How are you guys passing the throttle cable through the firewall? Manual says to drill a 1/4 in hole through the firewall and pass the cable through. Only problem is all of the hardware on the cable ends are >1/4 in. Maybe I'm dumb, but I can't figure it out other than drilling a much larger hole or disassembling the cable. Also, once the cable is through, how are you guys routing the cable? Thanks.

  6. #206
    Senior Member waruaki's Avatar
    Join Date
    Aug 2013
    Location
    Salem, Oregon
    Posts
    168
    Post Thanks / Like
    I don't recall the size of the top hole it just needs to be big enough to squeeze the crimped ball at the end of the cable through. The bottom ended up being a U letter drill .368 I believe the picture shows our cable placement. the cable lays in the tunnel then over the top of the tank and across the motor to the throttle body.


    P1000915a.jpg
    Last edited by waruaki; 12-27-2013 at 01:30 PM.

  7. #207
    Senior Member
    Join Date
    Feb 2011
    Posts
    607
    Post Thanks / Like
    Thanks waruaki, that helped immensely!

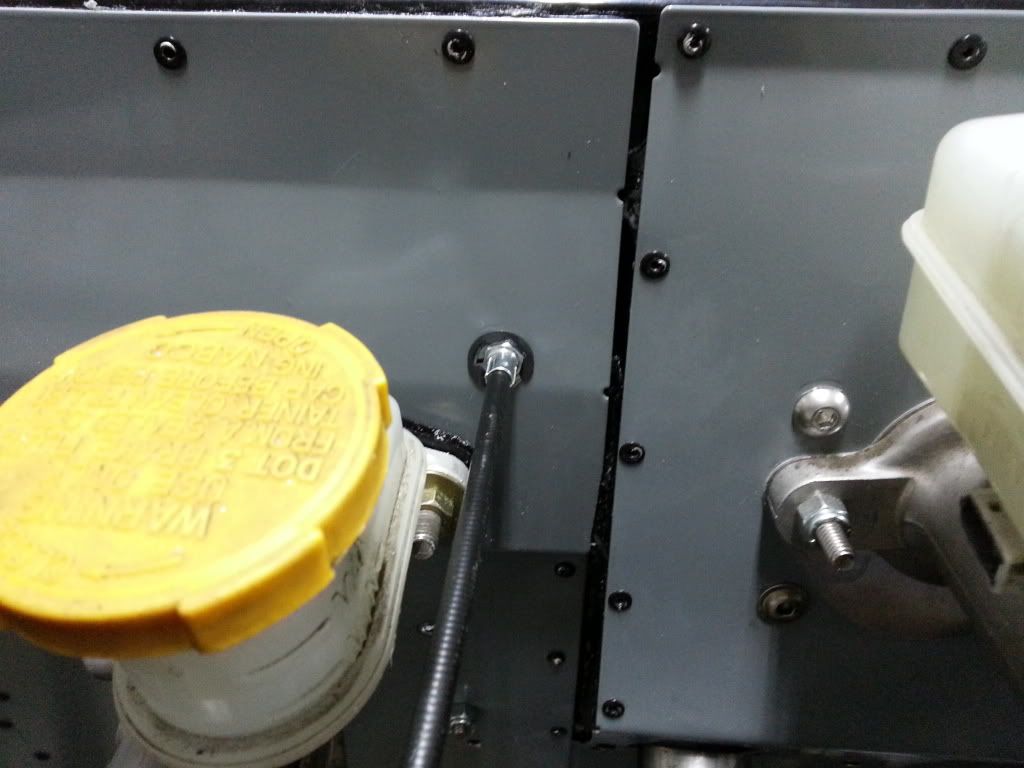
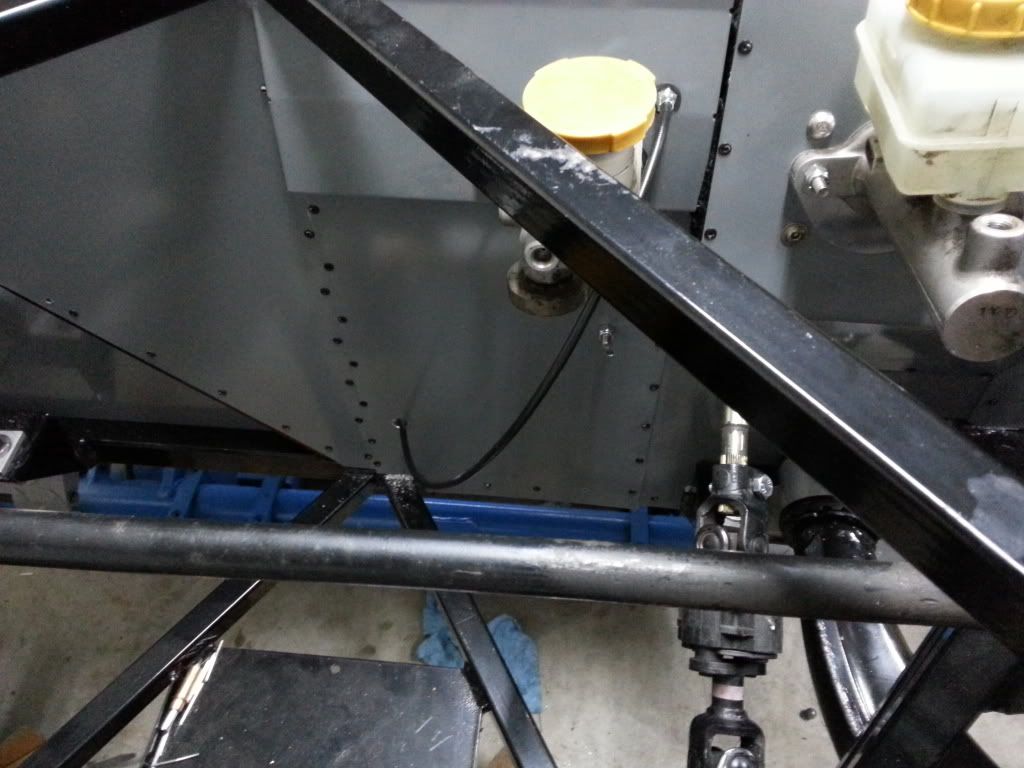
    Here's what I did. I drilled a 1/2" hole (manual says 1/4") in the firewall and had to punch the ball and plastic crimp through the hole:


    I then used a 3/8" E-Clip from lowes to act as a washer for the cable to attach to the firewall:


    I then drilled another 1/2" hole to allow the cable to pass through the trans tunnel.


  8. #208
    Senior Member
    Join Date
    Feb 2011
    Posts
    607
    Post Thanks / Like
    Well today is officially 1 year later from when I started tearing down my perfectly good WRX to prep for this project. Even though it's taking a while, I'm still having a blast and learning a lot as I go. So far I have 206 hours into this project, including the WRX teardown.

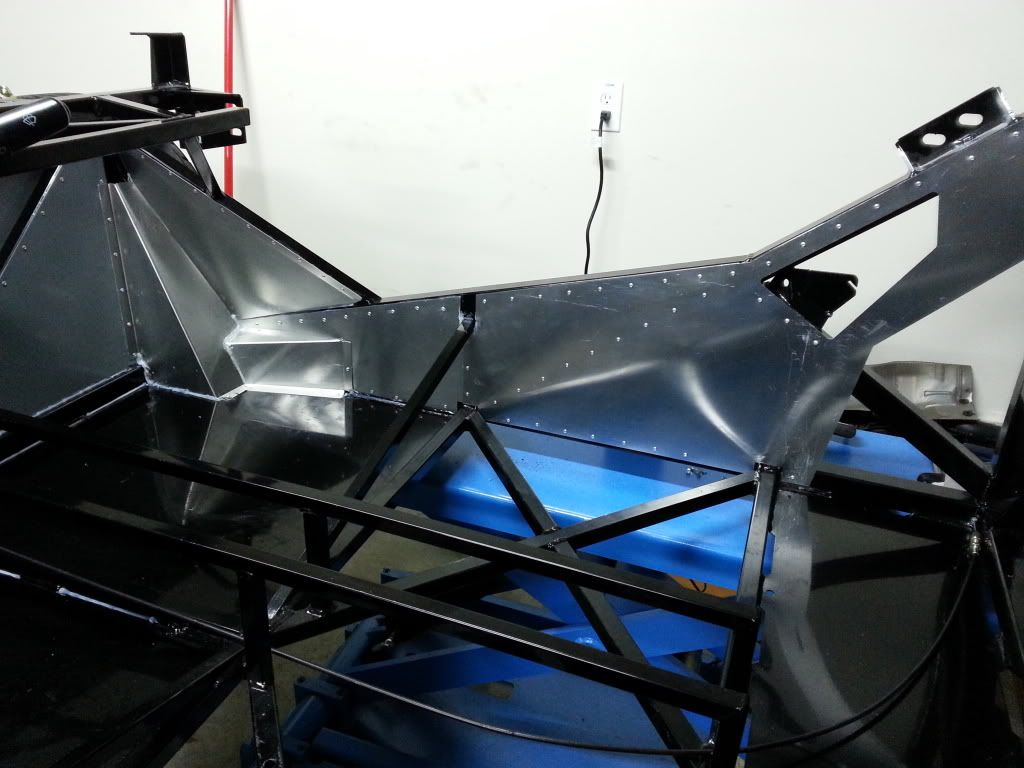
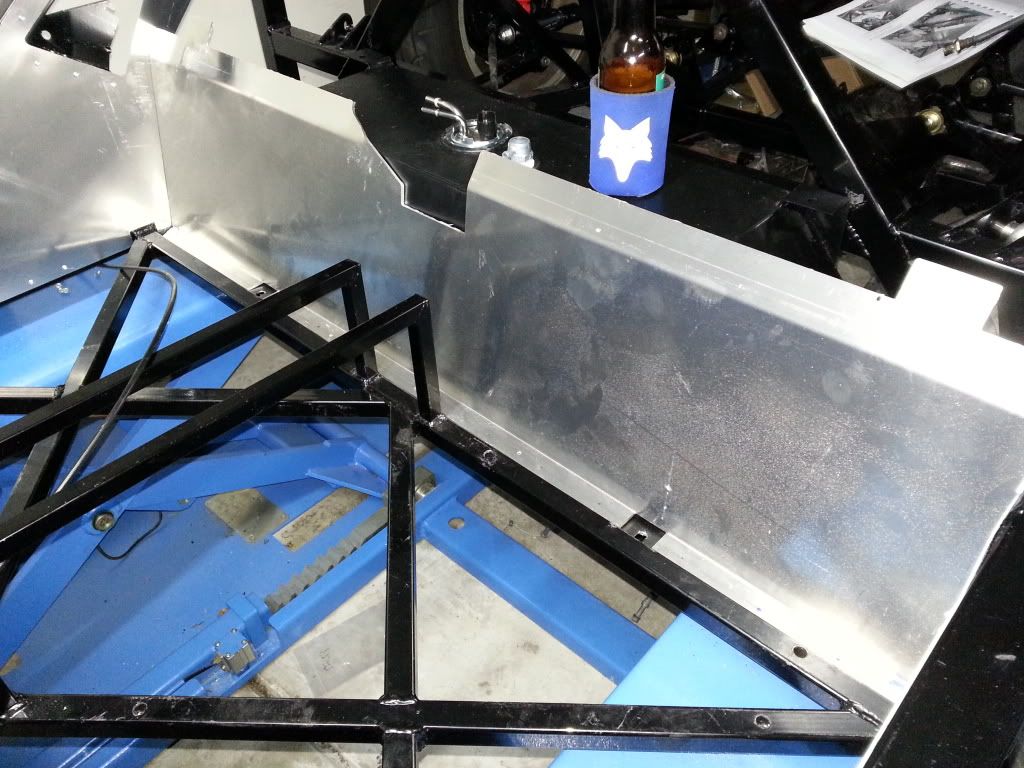
    So here's what I got done today. I finally riveted the interior aluminum. I postponed this until I was comfortable that I wouldn't need to make any changes. I'm glad I did, because it wasn't until recently that I learned there is a coolant tube cover that someone else discovered. The manual does a good job of getting you started and then just moves on to something else. It is definitely incomplete.

    Here's the passenger side. The driver side looks the same. I decided not to powder coat it since I plan to cover it in carpet. I did however give it a coat of Sharkhide to hopefully protect it from corrosion.


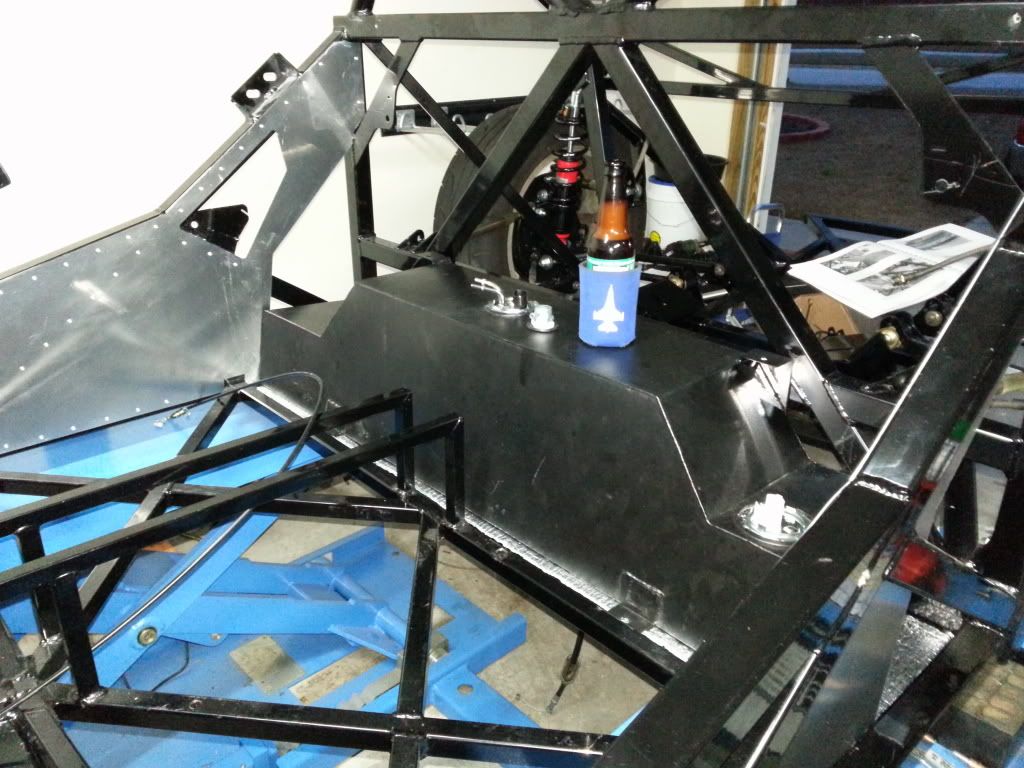
    I also put the fuel tank together using a DW200 fuel pump. It was kind of a PITA to install, but I finally got it to fit just right. I test fit a layer of EZ cool on the bottom of the tank to aid in sound deadening and heat (another stolen idea).


    The manual says to rivet the lower firewall to the floor pan. I don't like this idea as it will essentially permanently install the fuel tank. I think I'm going to go with an nut & bolt setup instead in order to have the option to remove the fuel tank if I ever need to.


    Depending on my work schedule, I'm hoping to install the engine/trans this coming week.

  9. #209
    Senior Member
    Join Date
    Feb 2011
    Posts
    607
    Post Thanks / Like
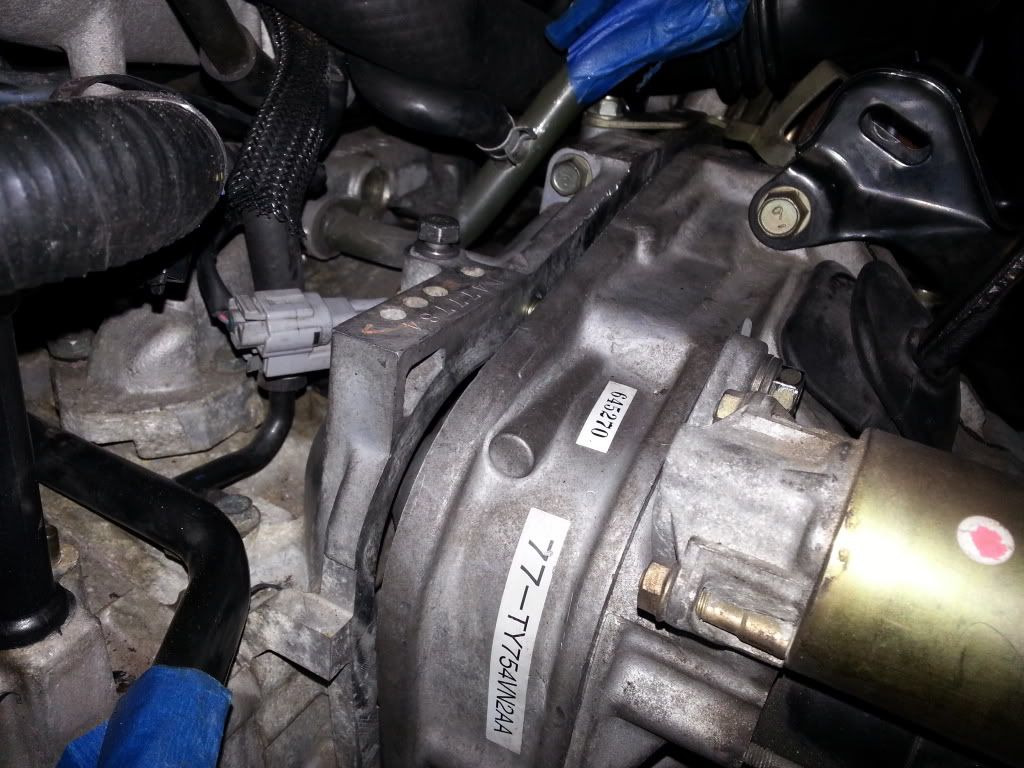
    ok guys, need a little help with mating the trans and engine back together. I've got everything lined up and all bolts threaded, but I'm getting a lot of resistance from the bolts as I get the trans & engine close. I fear that I've already done some damage to the threads and don't want to do anymore.

    Any ideas?


  10. #210
    East Coast Speed Machines Erik W. Treves's Avatar
    Join Date
    Feb 2011
    Location
    Huntsville, Al
    Posts
    2,110
    Post Thanks / Like
    I had/have the same issue....I just went slow and it finally went in. I also put a socket on the crank and rotated that while I tried to line it up...it never did slide in like I am use to.
    FFR 1879, Blown DSS 306,REDLINE management, VeryCoolParts Tuned 460RWHP

    FFR 818S, The Flash, Chassis #5, 2.0L, LSD, Electromotive TEC-S, VCP Tuned, 278RWHP 265 RWTQ

    FFR 6651, Green Lantern, 408W Crate, Hellion 66mm Turbo, JGS Waste gate / Blowoff valve, Tec-GT management, VCP Tuned, 575 RWHP, 690 RWTQ

    FFR 8335, Black Mamba, 289 FIA CSX 2001 tribute car, 347, 48 IDA webers, VCP Tuned, 311 RWHP 386 RWTQ, 3-link, Trigo's

    FFR 0004, Gen 3 , Hawk Coupe, Coyote twin turbo, 683 RWHP 559 RWTQ, IRS, VCP Tuned. "not too shabby"

    US ARMY Maintenance Test Pilot (CW4 Retired)

  11. #211
    Junior Member
    Join Date
    Nov 2012
    Location
    Zeeland, MI
    Posts
    7
    Post Thanks / Like
    Quote Originally Posted by GUNS View Post
    ok guys, need a little help with mating the trans and engine back together. I've got everything lined up and all bolts threaded, but I'm getting a lot of resistance from the bolts as I get the trans & engine close. I fear that I've already done some damage to the threads and don't want to do anymore.

    Any ideas?

    my guess is would be the trans output shaft that is splinded is not aligning with the splines on the clutch plate. it took some wiggling on mine to put it together. sometimes when you reassemble the clutch and pressure plate there is an alignment tool. I just eye balled center

  12. #212
    Senior Member
    Join Date
    Feb 2011
    Posts
    607
    Post Thanks / Like
    Thanks for the response Eric, that makes me feel a little better. I just hate wrenching on bolts that are fighting back. I definitely cross threaded one of nuts that goes on one of the lower studs. The stud actually unthreaded from the bell housing.

  13. #213
    East Coast Speed Machines Erik W. Treves's Avatar
    Join Date
    Feb 2011
    Location
    Huntsville, Al
    Posts
    2,110
    Post Thanks / Like
    Well you might need to back the tranny off and wiggle and try and poke it back in
    FFR 1879, Blown DSS 306,REDLINE management, VeryCoolParts Tuned 460RWHP

    FFR 818S, The Flash, Chassis #5, 2.0L, LSD, Electromotive TEC-S, VCP Tuned, 278RWHP 265 RWTQ

    FFR 6651, Green Lantern, 408W Crate, Hellion 66mm Turbo, JGS Waste gate / Blowoff valve, Tec-GT management, VCP Tuned, 575 RWHP, 690 RWTQ

    FFR 8335, Black Mamba, 289 FIA CSX 2001 tribute car, 347, 48 IDA webers, VCP Tuned, 311 RWHP 386 RWTQ, 3-link, Trigo's

    FFR 0004, Gen 3 , Hawk Coupe, Coyote twin turbo, 683 RWHP 559 RWTQ, IRS, VCP Tuned. "not too shabby"

    US ARMY Maintenance Test Pilot (CW4 Retired)

  14. #214
    Senior Member Bob_n_Cincy's Avatar
    Join Date
    Sep 2012
    Location
    Cincinnati OH
    Posts
    3,904
    Post Thanks / Like
    Hey Guns,
    There are two 10mm alignment pins that are use for the last 1/2" of travel. Are they damaged or corroded?
    Bob

  15. #215
    Senior Member
    Join Date
    Feb 2011
    Posts
    607
    Post Thanks / Like
    Nope, they are fine and are all lined up.

  16. #216
    East Coast Speed Machines Erik W. Treves's Avatar
    Join Date
    Feb 2011
    Location
    Huntsville, Al
    Posts
    2,110
    Post Thanks / Like
    yeah know...I just noticed...you have the starter in ....I typically wait until the tranny is seated before I install the starter. This allows me to move the flywheel ever so slightly to get the clutch disk onto the input shaft of the tranny....
    FFR 1879, Blown DSS 306,REDLINE management, VeryCoolParts Tuned 460RWHP

    FFR 818S, The Flash, Chassis #5, 2.0L, LSD, Electromotive TEC-S, VCP Tuned, 278RWHP 265 RWTQ

    FFR 6651, Green Lantern, 408W Crate, Hellion 66mm Turbo, JGS Waste gate / Blowoff valve, Tec-GT management, VCP Tuned, 575 RWHP, 690 RWTQ

    FFR 8335, Black Mamba, 289 FIA CSX 2001 tribute car, 347, 48 IDA webers, VCP Tuned, 311 RWHP 386 RWTQ, 3-link, Trigo's

    FFR 0004, Gen 3 , Hawk Coupe, Coyote twin turbo, 683 RWHP 559 RWTQ, IRS, VCP Tuned. "not too shabby"

    US ARMY Maintenance Test Pilot (CW4 Retired)

  17. #217
    Senior Member RM1SepEx's Avatar
    Join Date
    Jul 2011
    Location
    Freeport, ME
    Posts
    3,801
    Post Thanks / Like
    Mine was a PITA too, it took a ton of wiggling. I'd remove the starter too and work really slowly clamping it together with the bolts.
    Dan

    818S #17 Picked up 8/1/13 First start 11/1/13 Go Kart 3/28/14

  18. #218
    Mechie3's Avatar
    Join Date
    May 2012
    Location
    Indianapolis
    Posts
    5,174
    Post Thanks / Like
    Two of the bolts are longer than the others. I use these to pull the top together without the starter. After it's done and together I remove those bolts, put the starter back in and then bolt it together.
    Zero Decibel Motorsports
    Check out my new website!
    www.zerodecibelmotorsports.com
    www.facebook.com/zero.decibel.motorsports

  19. #219
    818 builder metalmaker12's Avatar
    Join Date
    Mar 2012
    Location
    Exeter R.I
    Posts
    2,834
    Post Thanks / Like
    Blog Entries
    1
    Quote Originally Posted by Mechie3 View Post
    Two of the bolts are longer than the others. I use these to pull the top together without the starter. After it's done and together I remove those bolts, put the starter back in and then bolt it together.
    Exactly how I do it, it works well.

  20. #220
    Senior Member
    Join Date
    Feb 2011
    Posts
    607
    Post Thanks / Like
    Thanks for the advice guys. I got it very close to sealing by slowing tightening each bolt and just when i thought I had it, one of the bolts stripped. So I took removed all the bolts, released the fork and bearing and tried to back the trans off the engine...and now it's stuck. I have a good couple of inches of separation from the bell housing to the engine, but it won't budge. I can wiggle around a bit, but it seems like the output shaft is hung up. I tried using a pry bar, but it only goes so far before I get a lot of resistance. I'm really hoping I didn't cross thread the splines or anything. Any ideas?

  21. #221
    Senior Member Bob_n_Cincy's Avatar
    Join Date
    Sep 2012
    Location
    Cincinnati OH
    Posts
    3,904
    Post Thanks / Like
    Guns
    If you have a couple of inches between the engine and transmission, you can loosen the clutch cover bolts. The will allow the clutch disk to float and should let you pull off the transmission.
    See if someone else replies here also to see if my suggestion makes sense.
    Bob

  22. #222
    Senior Member
    Join Date
    Feb 2011
    Posts
    607
    Post Thanks / Like
    Thanks Bob. I actually just did that. Got the trans off and looks like I did indeed cross-thread the splines, so now the clutch/pressure plate are stuck on the output shaft. I need to figure out how to get those off and assess how badly I damaged the output shaft. Suck.

  23. #223
    Mechie3's Avatar
    Join Date
    May 2012
    Location
    Indianapolis
    Posts
    5,174
    Post Thanks / Like
    What style of clutch? If it's a pull clutch, the bearing might have already locked onto the pressure plate. you'll have to remove teh plug on the side of teh trans near the fork and release the fork from the bearing.
    Zero Decibel Motorsports
    Check out my new website!
    www.zerodecibelmotorsports.com
    www.facebook.com/zero.decibel.motorsports

  24. #224
    Senior Member
    Join Date
    Feb 2011
    Posts
    607
    Post Thanks / Like
    Quote Originally Posted by Mechie3 View Post
    What style of clutch? If it's a pull clutch, the bearing might have already locked onto the pressure plate. you'll have to remove teh plug on the side of teh trans near the fork and release the fork from the bearing.
    Yea, i had already released the bearing. Not sure if maybe it got stuck on the pressure plate, but from what I can see i don't think it did.

  25. #225
    Senior Member
    Join Date
    Feb 2011
    Posts
    607
    Post Thanks / Like
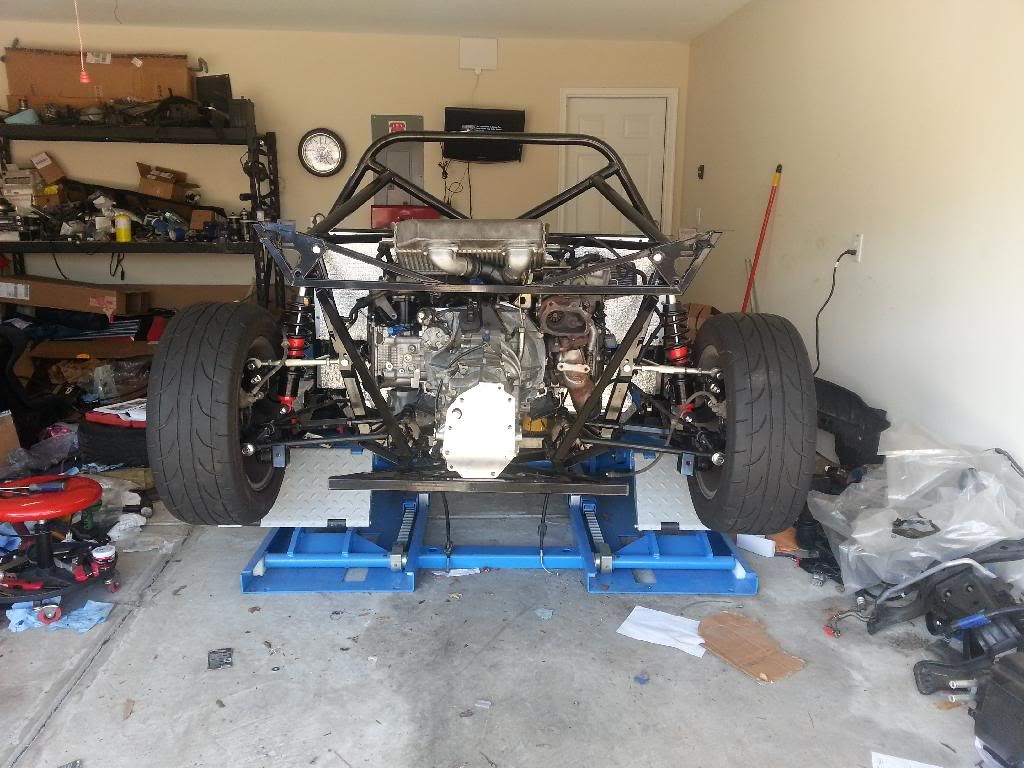
    Welp, I learned some lessons the hard way, but I was lucky that there was minimal damage. Turns out the I did cross-thread the output shaft and clutch splines which essentially fused the clutch disk to the output shaft. The clutch had to get torched to be removed, but the splines on the output shaft were not damaged. So in the end I got away with just needing a new clutch disk...could have been much worse. So as advice to anyone else doing this, make sure you use a clutch alignment tool. I did not the first time around which lead to my "issue." Because of the miss-alignment, I also stripped the threads in the engine block. I had to install Heli-Coils in all holes.

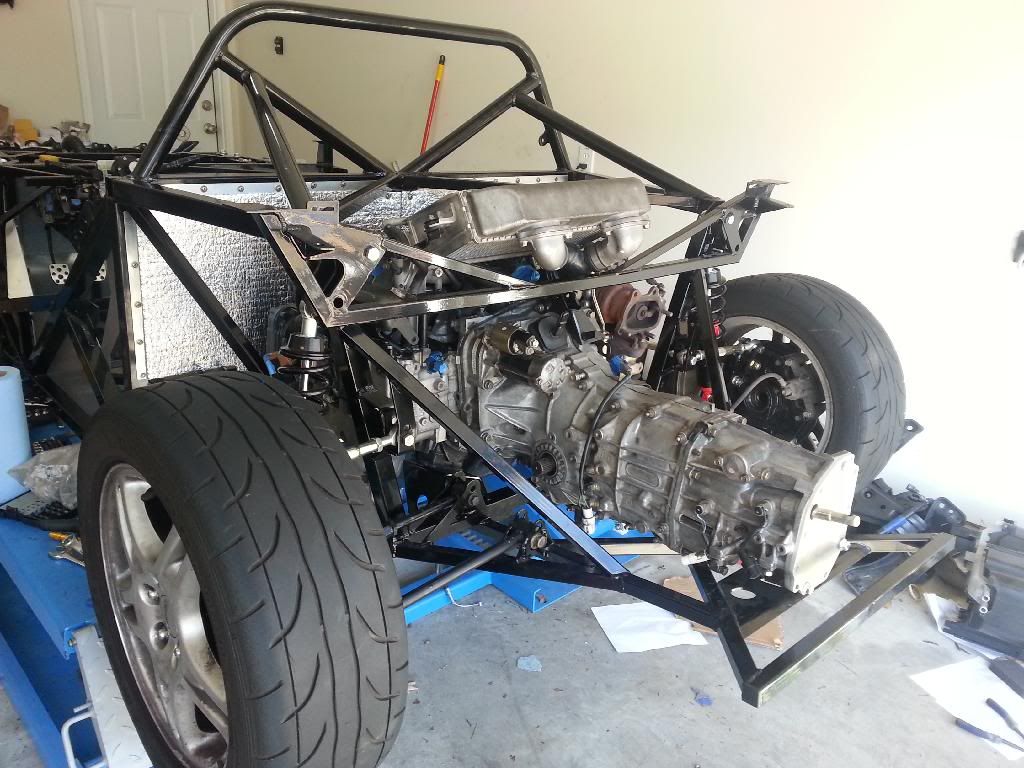
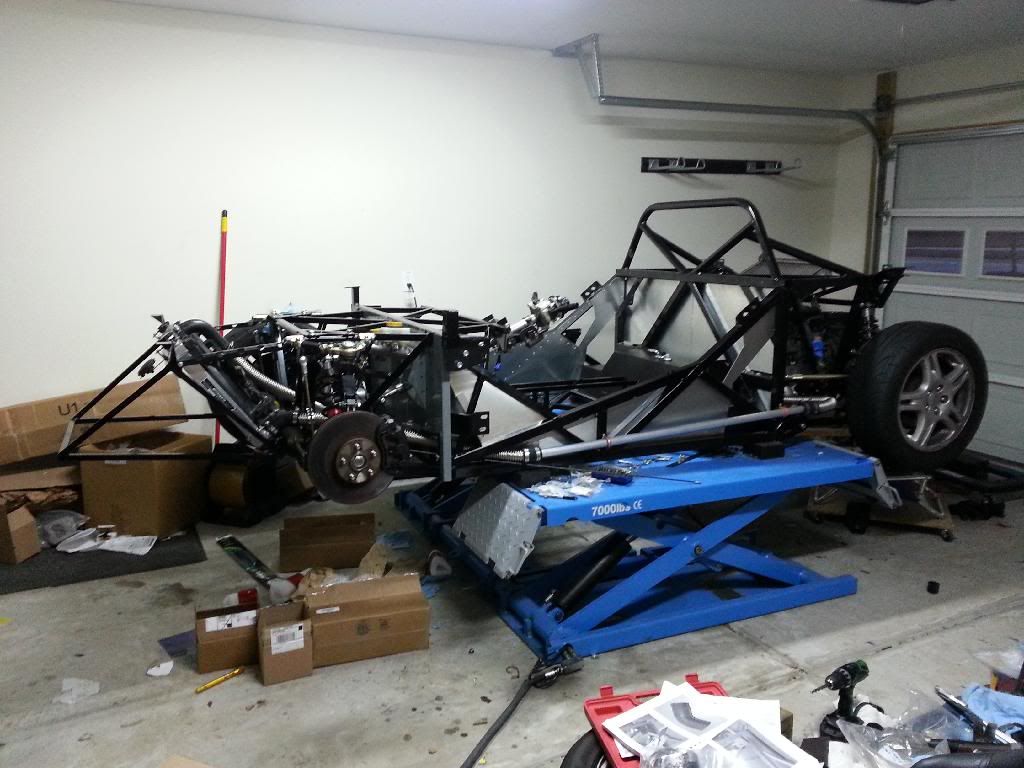
    With that being said, I finally got everything back together and got the engine & trans installed:


    The install was pretty straight forward due to the advice of others.

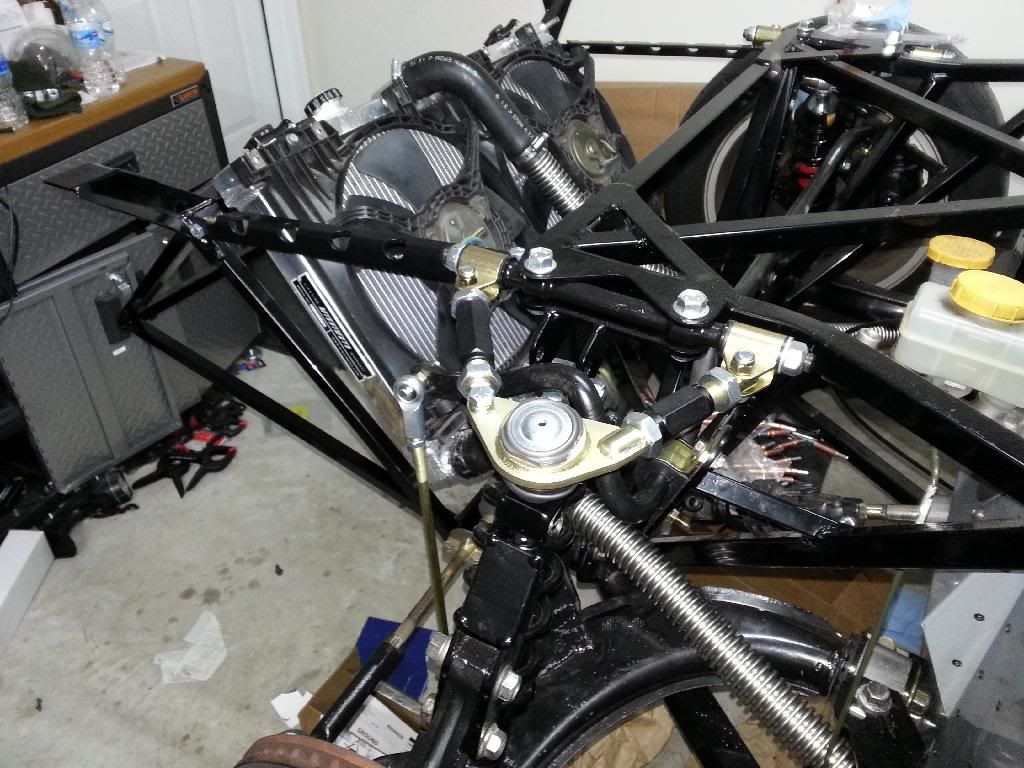
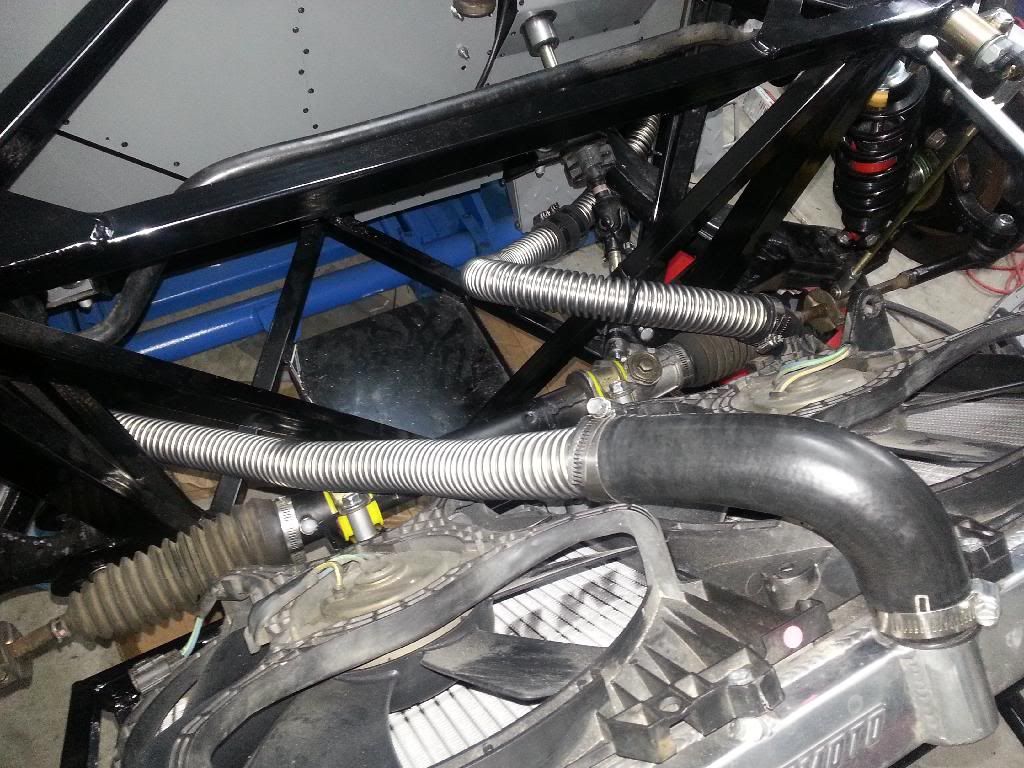
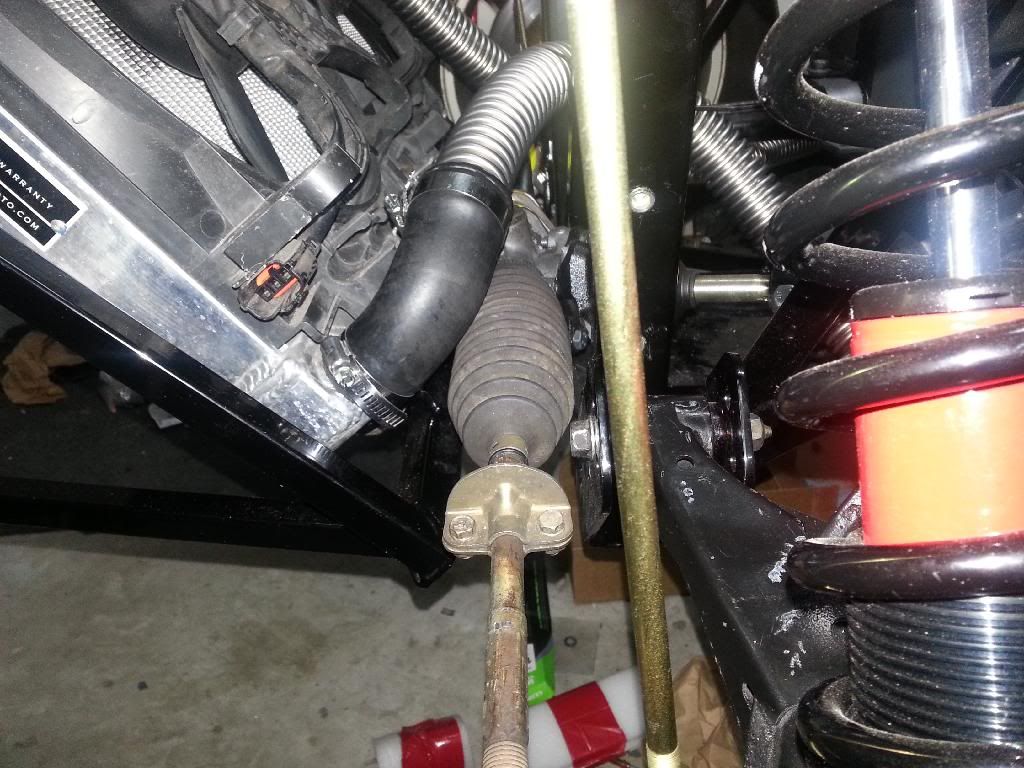
    I was also able to get the radiator installed and plumbed.


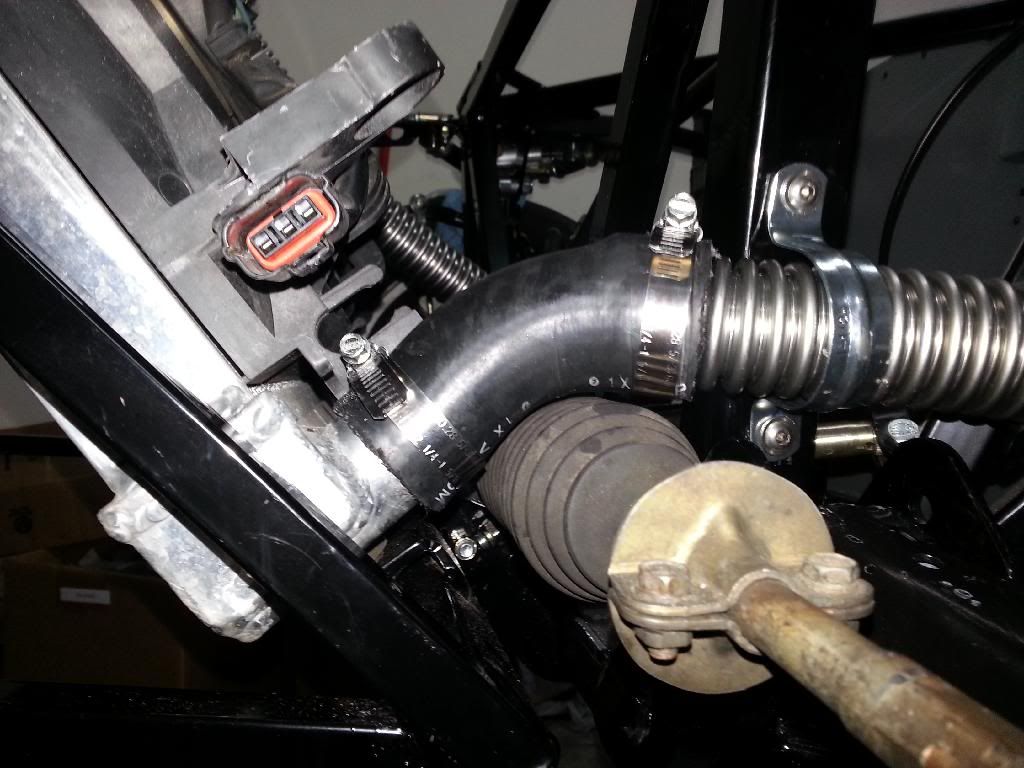
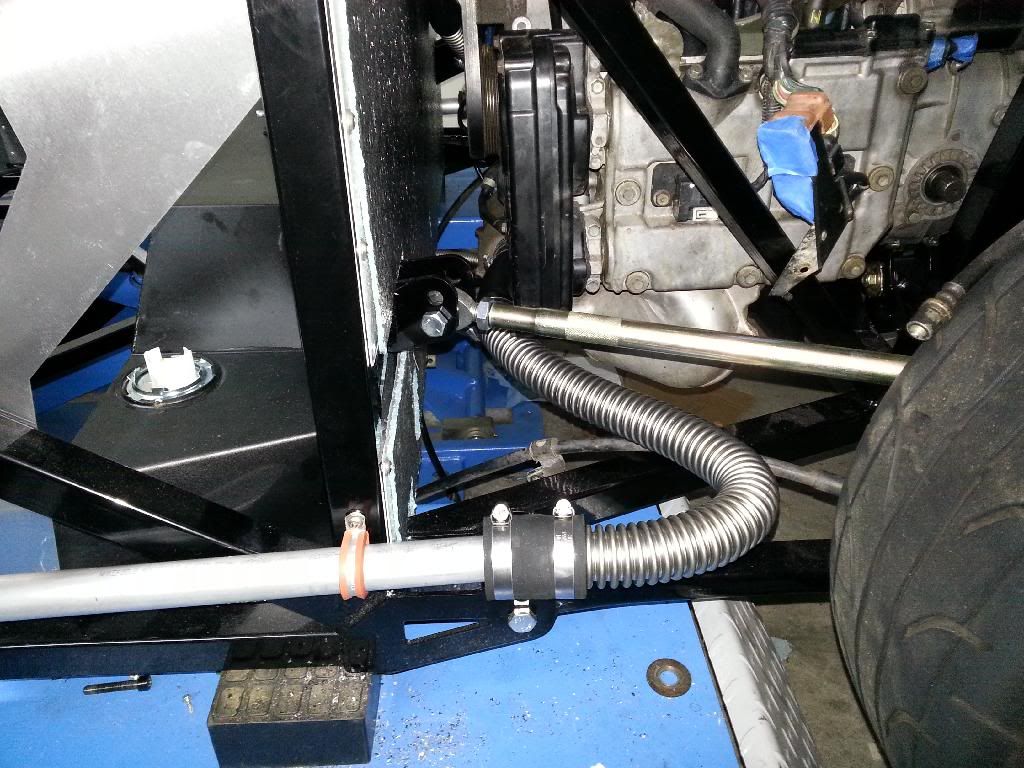
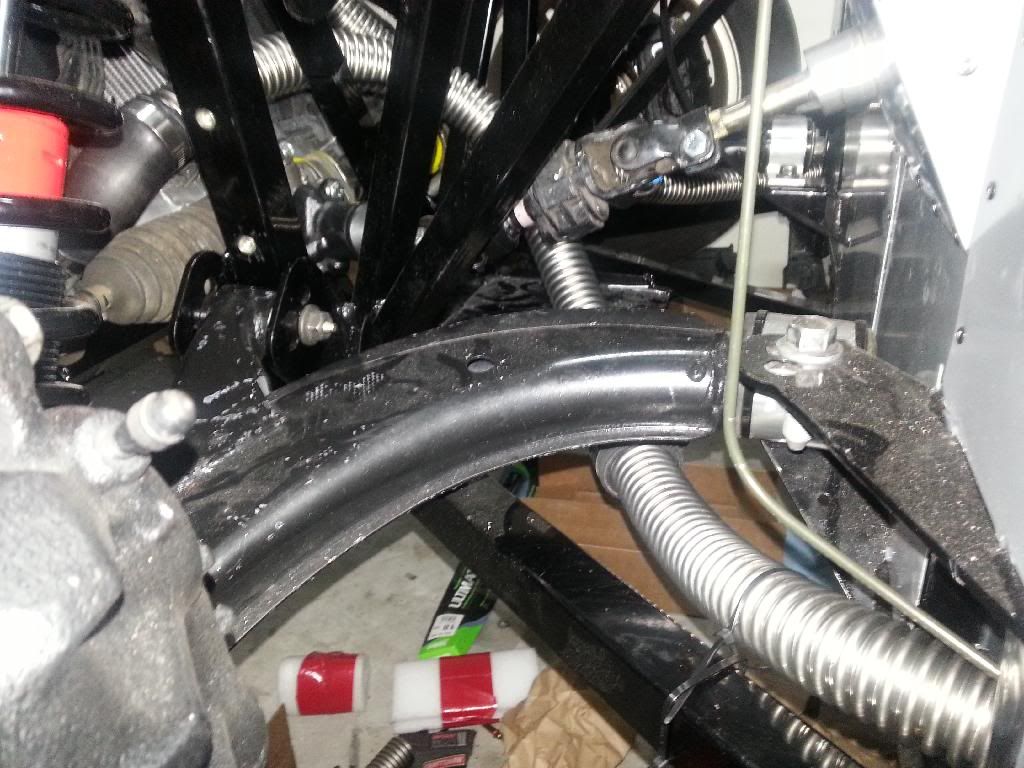
    Even with using the sifter bushings as spacers for the bottom of the radiator, I still had clearance issues with the lower Rad hose and the steering rack boot. So I installed a simple hose clamp that hold the corrugated hose up just enough to clear (hard to tell in the pic, but there's about 1/4 in of clearance):


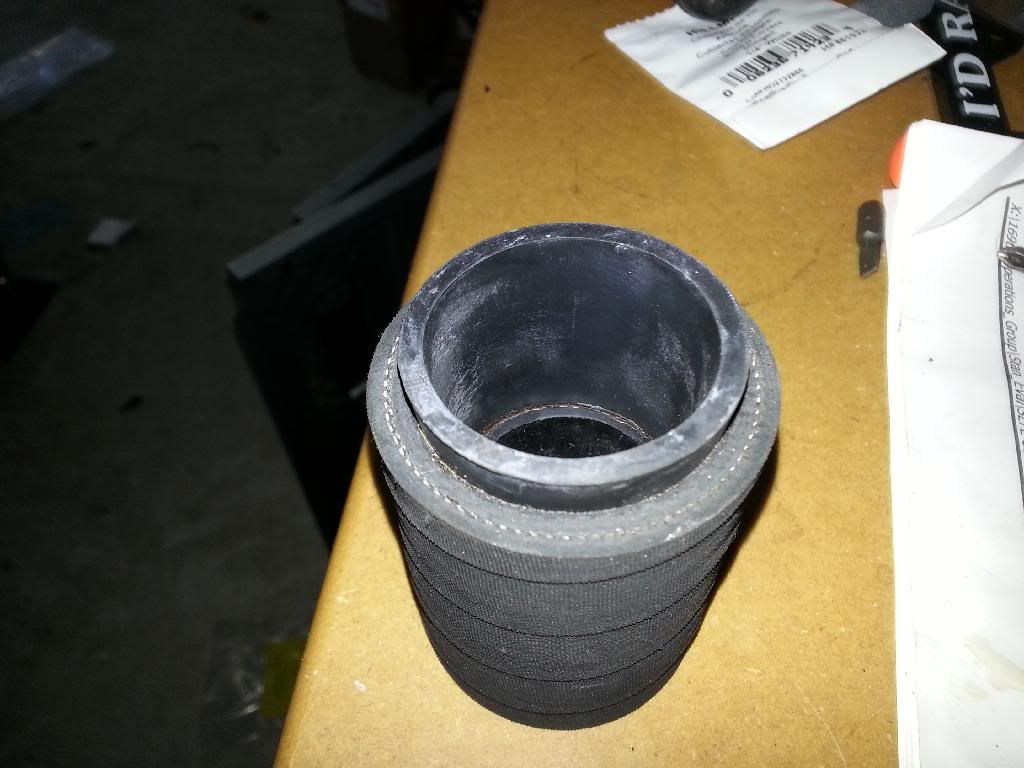
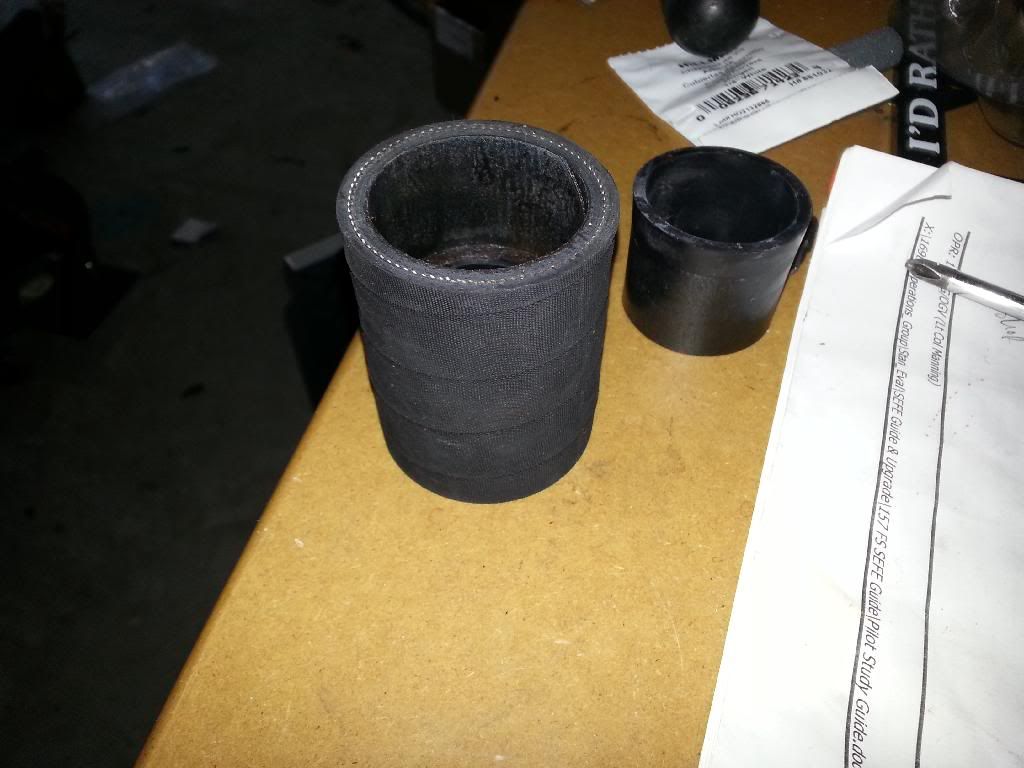
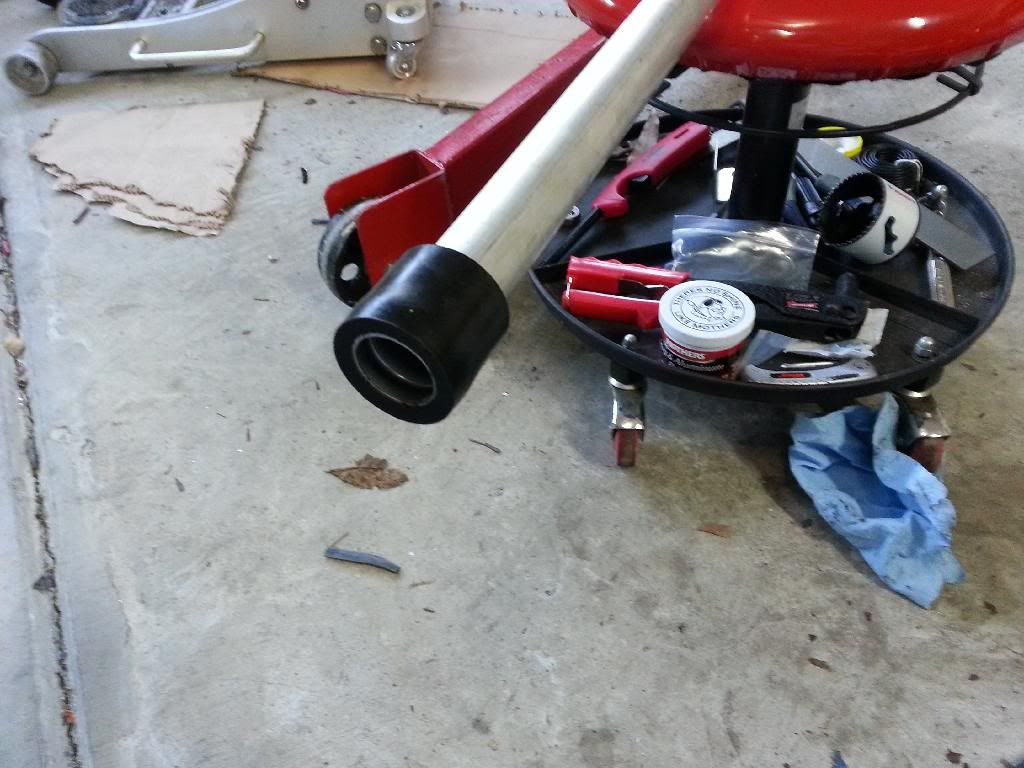
    I struggled with the hose adapters for a bit until I figured it out. The hose adapters come with sleeves. Remove the larger diameter one and discard. This is where the corrugated hose will go. Use plenty of dish soap to help get them on.


    Last edited by GUNS; 01-21-2014 at 06:52 PM.

  26. #226
    Senior Member
    Join Date
    Feb 2011
    Posts
    607
    Post Thanks / Like
    (continued)

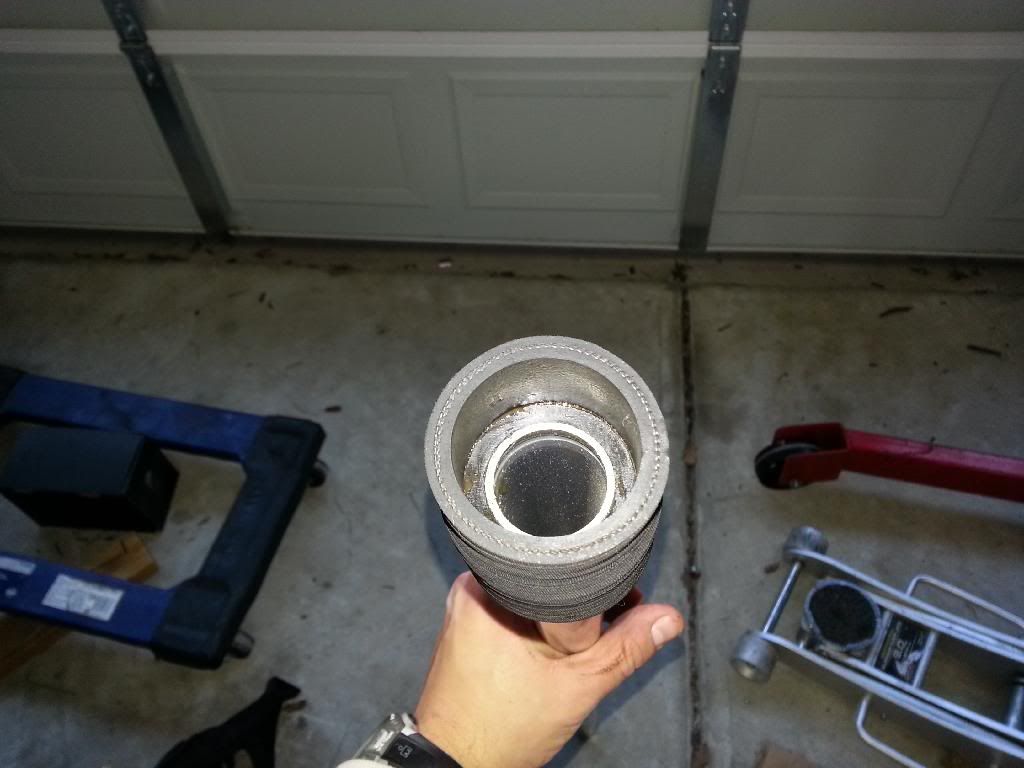
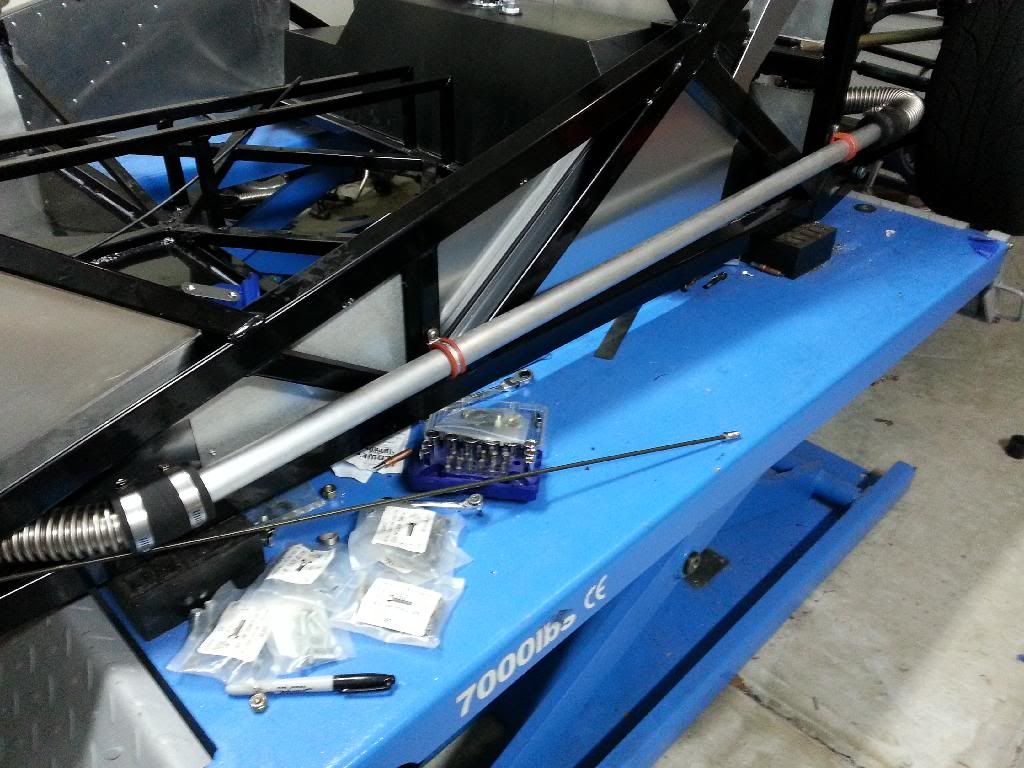
    I also recommend connected the inner sleeve to the steel tube while it's off the car. Install the inner sleeve first and then install the outer portion. I made the end of the tube flush with the inner sleeve to leave enough room for the corrugated tube.


    Here it is all done:


  27. #227
    Senior Member FFRSpec72's Avatar
    Join Date
    Feb 2011
    Location
    Kirkland, WA
    Posts
    2,255
    Post Thanks / Like
    FFR's radiator hose setup is nasty on the Cobra and it is nasty here also, which they would learn
    Tony Nadalin
    2018 SOVREN Big Bore Champion
    2015 SCCA Oregon Region VP3 Champion
    2012 ICSCC ITE Class Champion
    FFR MkII Challenge Car, Spec Racer, Street Legal, SCCA, ICSCC and NASA Racing
    818R Build in progress

  28. #228
    818 builder metalmaker12's Avatar
    Join Date
    Mar 2012
    Location
    Exeter R.I
    Posts
    2,834
    Post Thanks / Like
    Blog Entries
    1
    Not to tell you to move the drivers front flex line, but it should go on the inside of frame and the aluminum wheel wells. They are rather thin and can get damaged easy.

  29. #229
    Senior Member
    Join Date
    Feb 2011
    Posts
    607
    Post Thanks / Like
    Quote Originally Posted by metalmaker12 View Post
    Not to tell you to move the drivers front flex line, but it should go on the inside of frame and the aluminum wheel wells. They are rather thin and can get damaged easy.
    Thanks for the tip, I'll take a look at moving it. I wish the manual would have stated where to route them :/

  30. #230
    818 builder metalmaker12's Avatar
    Join Date
    Mar 2012
    Location
    Exeter R.I
    Posts
    2,834
    Post Thanks / Like
    Blog Entries
    1
    look at my thread and others, pm me anytime man

  31. #231
    Senior Member
    Join Date
    Feb 2011
    Posts
    607
    Post Thanks / Like
    Thanks Metal, I appreciate the help. I typically look through threads before starting a new section, but I sometimes miss things. It looks like it should be a relatively easy fix.

  32. #232
    818 builder metalmaker12's Avatar
    Join Date
    Mar 2012
    Location
    Exeter R.I
    Posts
    2,834
    Post Thanks / Like
    Blog Entries
    1
    Yea it's no biggy, it is looking clean so keep up the good work!!

  33. #233
    nkw8181's Avatar
    Join Date
    Sep 2013
    Location
    Dallas, TX
    Posts
    762
    Post Thanks / Like
    Looks like I found another good build thread that I missed and now must follow. keep up the good work!!
    Nolan
    65 coupe Gen 3 "Phoenix" build
    http://thefactoryfiveforum.com/showt...032#post297032

    818 s (with r windscreen ) 350 rwhp. Registered and street legal (SOLD)

  34. #234
    Senior Member
    Join Date
    Feb 2011
    Posts
    607
    Post Thanks / Like
    Re-routed my coolant hoses based on Metalmaker's suggestion. Zip ties are temporary, I'll work some kind of bracket similar to the one above.


  35. #235
    Mechie3's Avatar
    Join Date
    May 2012
    Location
    Indianapolis
    Posts
    5,174
    Post Thanks / Like
    I bought more of the orange silicone coated P clamps from mcmaster to hold my hoses.
    Zero Decibel Motorsports
    Check out my new website!
    www.zerodecibelmotorsports.com
    www.facebook.com/zero.decibel.motorsports

  36. #236
    Senior Member FFRSpec72's Avatar
    Join Date
    Feb 2011
    Location
    Kirkland, WA
    Posts
    2,255
    Post Thanks / Like
    Quote Originally Posted by GUNS View Post
    Re-routed my coolant hoses based on Metalmaker's suggestion. Zip ties are temporary, I'll work some kind of bracket similar to the one above.
    I wish there was a better way to do the hoses, as the flex hose does not hold up, as after a year on the track with my challenge car I had to replace all the stock flex hose, lucky with the challenge car I could find real hoses that worked, but here with the run so long it will be impossible, someone just has to make something

    Is that the stock WRX fan on the radiator ?
    Last edited by FFRSpec72; 01-22-2014 at 10:53 PM.
    Tony Nadalin
    2018 SOVREN Big Bore Champion
    2015 SCCA Oregon Region VP3 Champion
    2012 ICSCC ITE Class Champion
    FFR MkII Challenge Car, Spec Racer, Street Legal, SCCA, ICSCC and NASA Racing
    818R Build in progress

  37. #237
    East Coast Speed Machines Erik W. Treves's Avatar
    Join Date
    Feb 2011
    Location
    Huntsville, Al
    Posts
    2,110
    Post Thanks / Like
    the hose on driver's side at the back it too far back, it will run into the wheel well aluminum if you install it. I cut about 6 inches off the end of the aluminum tube so the coupling is where you have the clamp.

    FFR 1879, Blown DSS 306,REDLINE management, VeryCoolParts Tuned 460RWHP

    FFR 818S, The Flash, Chassis #5, 2.0L, LSD, Electromotive TEC-S, VCP Tuned, 278RWHP 265 RWTQ

    FFR 6651, Green Lantern, 408W Crate, Hellion 66mm Turbo, JGS Waste gate / Blowoff valve, Tec-GT management, VCP Tuned, 575 RWHP, 690 RWTQ

    FFR 8335, Black Mamba, 289 FIA CSX 2001 tribute car, 347, 48 IDA webers, VCP Tuned, 311 RWHP 386 RWTQ, 3-link, Trigo's

    FFR 0004, Gen 3 , Hawk Coupe, Coyote twin turbo, 683 RWHP 559 RWTQ, IRS, VCP Tuned. "not too shabby"

    US ARMY Maintenance Test Pilot (CW4 Retired)

  38. #238
    Mechie3's Avatar
    Join Date
    May 2012
    Location
    Indianapolis
    Posts
    5,174
    Post Thanks / Like
    Quote Originally Posted by FFRSpec72 View Post
    I wish there was a better way to do the hoses, as the flex hose does not hold up, as after a year on the track with my challenge car I had to replace all the stock flex hose, lucky with the challenge car I could find real hoses that worked, but here with the run so long it will be impossible, someone just has to make something

    Is that the stock WRX fan on the radiator ?
    Mike everson made some bent hard lines that replace all flex hose. He has a thread in the general 818 section with details.
    Zero Decibel Motorsports
    Check out my new website!
    www.zerodecibelmotorsports.com
    www.facebook.com/zero.decibel.motorsports

  39. #239
    Senior Member
    Join Date
    Feb 2011
    Posts
    607
    Post Thanks / Like
    Erik, thanks for the point out. I noticed that too and was planning on trimming it down if needed.

  40. #240
    Senior Member FFRSpec72's Avatar
    Join Date
    Feb 2011
    Location
    Kirkland, WA
    Posts
    2,255
    Post Thanks / Like
    Quote Originally Posted by Mechie3 View Post
    Mike everson made some bent hard lines that replace all flex hose. He has a thread in the general 818 section with details.
    Look real nice, but expen$ive (more that I can afford) ! Time to go to my roll cage builder and have him bend some aluminum tubing, even better may be a long run of the Gates Green StripeŽ Wire Inserted Coolant hose would be better than the FFR setup and you don't have to worry about all the connections and hose clamps and @ about $10 foot still cheaper.
    Last edited by FFRSpec72; 01-23-2014 at 11:16 AM.
    Tony Nadalin
    2018 SOVREN Big Bore Champion
    2015 SCCA Oregon Region VP3 Champion
    2012 ICSCC ITE Class Champion
    FFR MkII Challenge Car, Spec Racer, Street Legal, SCCA, ICSCC and NASA Racing
    818R Build in progress

Page 6 of 11 FirstFirst ... 45678 ... LastLast

Posting Permissions

  • You may not post new threads
  • You may not post replies
  • You may not post attachments
  • You may not edit your posts
  •  

Brown County Customs

Visit our community sponsor