Midwest Classic Insurance

Visit our community sponsor

Thanks Thanks:  0
Likes Likes:  0
Page 7 of 11 FirstFirst ... 56789 ... LastLast
Results 241 to 280 of 408

Thread: GUNS' 818SR Build Thread

  1. #241
    fasterer and furiouser longislandwrx's Avatar
    Join Date
    Aug 2012
    Location
    Long Island
    Posts
    2,540
    Post Thanks / Like
    Blog Entries
    6
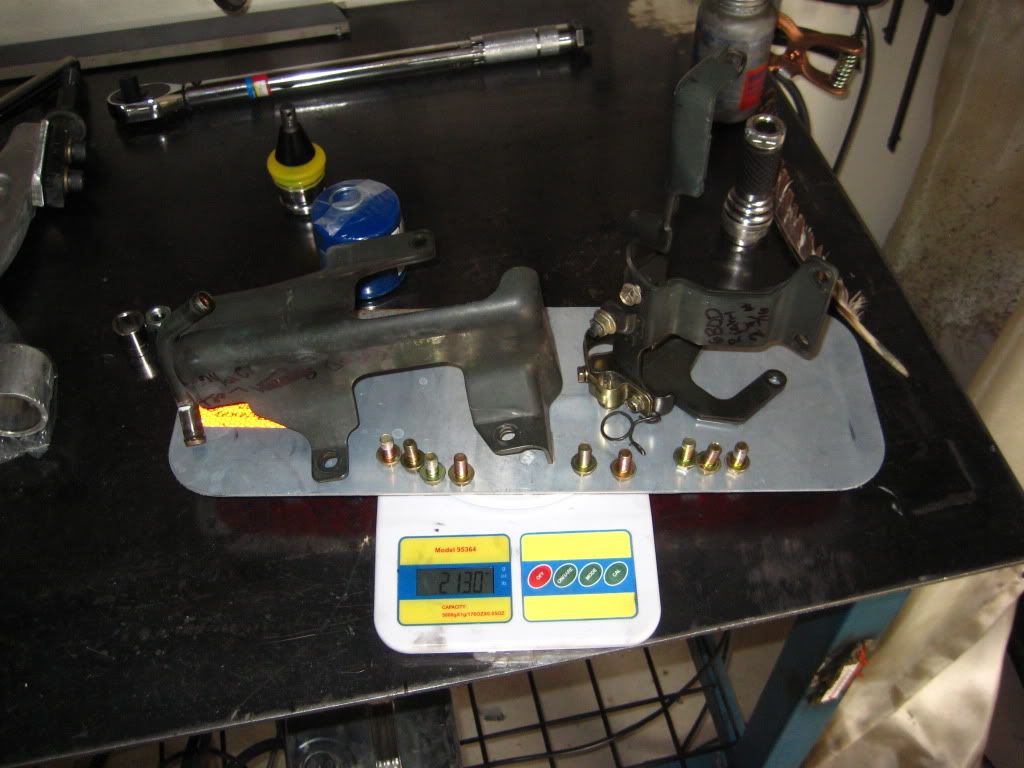
    What's the diameter of your cooling pipe that runs along the side?

    I think mine is thicker hence me having a hard time with the thicker adapter. The thin ones seem like a better fit.
    A well stocked beverage fridge is the key to any successful project.

  2. #242
    Senior Member
    Join Date
    Feb 2011
    Posts
    607
    Post Thanks / Like
    Hey guys, been a while since I've posted or even worked on the car. I just got back from a short deployment, so needless to say the 818 hasn't been worked on in the last 2 months.

    Since I've been back I've been working on the brake/clutch lines. It could be cleaner in places, but overall I'm pretty happy with the result. Any opinions on if I mounted the rear lines too high? I miss-interpreted the manual and I wanted to keep the flex lines away from the axles/suspension pieces. It visually appears that it won't be a factor for the aluminum wheel well. Thoughts?


  3. #243
    Tazio Nuvolari wannabe Scargo's Avatar
    Join Date
    Nov 2013
    Location
    south-central CT
    Posts
    1,611
    Post Thanks / Like
    I don't like seeing the brake line close to the exhaust. Perhaps the photo gives a false impression of the distance. I'd like to see you add some rubber tubing over the line where the line is near edges on the frame or move it away from those edges. Otherwise it looks pretty good. I still have trouble accepting the master cylinder tilt...

  4. #244
    Senior Member
    Join Date
    Feb 2011
    Posts
    607
    Post Thanks / Like
    Yea I was a little worried about the proximity of the lines to the exhaust as well. At most, it's about 2 in way.

  5. #245
    Senior Member
    Join Date
    Feb 2011
    Posts
    607
    Post Thanks / Like
    Yea I was a little worried about the proximity of the lines to the exhaust as well. It's not as bad as the pics make it out to be, but it's about 2 inches away.

  6. #246
    Tazio Nuvolari wannabe Scargo's Avatar
    Join Date
    Nov 2013
    Location
    south-central CT
    Posts
    1,611
    Post Thanks / Like
    My whole focus is a race car. This may be extreme for a street car.
    With my STi I worry about power steering lines, oil lines and wiring that are near the exhaust. I've seen a friend's STi catch on fire when the oil lines near the headers couldn't take the heat of constant track use. My STi caught on fire when the up-pipe exhaust sprung a leak and overheated nearby plastic. Everthing was so hot. When I pulled into the pits to get gas it got hotter. So much so that it started burning.
    Then there's always the fuel supply and heat, vibration and pressure that's exerted on it. I've found tiny little leaks in my AN fittings that were obvious from either being moist or having collected dust; probably just in time to prevent it from being a big problem. I just read in NASIOC that mounting your aftermarket fuel pressure regulator on the engine is a bad idea. Vibration of the steel ball on the seat will eat up the aluminum seat and cause irregular fuel pressure. I believe it. There's a lot to think about when building one of these.

  7. #247
    Mechie3's Avatar
    Join Date
    May 2012
    Location
    Indianapolis
    Posts
    5,174
    Post Thanks / Like
    Looks like I'll be relocating my fpr perhaps. Though it seemed to be fine being on my motor the last 5 years.
    Zero Decibel Motorsports
    Check out my new website!
    www.zerodecibelmotorsports.com
    www.facebook.com/zero.decibel.motorsports

  8. #248
    Senior Member Xusia's Avatar
    Join Date
    Oct 2011
    Location
    Eugene, OR, USA
    Posts
    2,343
    Post Thanks / Like
    fpr?
    Have you seen the 818 Registry on Google Maps?? https://www.google.com/maps/ms?msid=...a=0&dg=feature

    Want your 818 added to the Registry? https://docs.google.com/forms/d/1zmF...rNCY4/viewform

  9. #249
    Mechie3's Avatar
    Join Date
    May 2012
    Location
    Indianapolis
    Posts
    5,174
    Post Thanks / Like
    Fuel pressure regulator.
    Zero Decibel Motorsports
    Check out my new website!
    www.zerodecibelmotorsports.com
    www.facebook.com/zero.decibel.motorsports

  10. #250
    Tazio Nuvolari wannabe Scargo's Avatar
    Join Date
    Nov 2013
    Location
    south-central CT
    Posts
    1,611
    Post Thanks / Like
    Quote Originally Posted by Mechie3 View Post
    Looks like I'll be relocating my fpr perhaps. Though it seemed to be fine being on my motor the last 5 years.
    Perhaps your motor's perfectly balanced? Perhaps you located it in the engine's feng shui spot of serenity?
    Ever ride in a DeHaviland Beaver? I used to be an aircraft instrument tech. I built new instruments for Aerosonic but I also did overhauls on other items. Light aircraft (and more so helicopters) are very hard on instrumentation and controllers. It was required that we use silicone fluid around most pivot points to dampen the effects of vibration and reduce wear. Sometimes more serious solutions were required. My FPR on the STi is on the firewall and I use a silicone filled pressure gauge so it won't self-destruct.

  11. #251
    Senior Member
    Join Date
    Feb 2011
    Posts
    607
    Post Thanks / Like
    Scargo, thanks for the advice. I'll look into making up some sort of heat shield or something for that line. The line is also a little close to the exhaust as it runs along the bottom of the rear firewall.

    Here's how I did my clutch line. Like others, I did not go below the intake manifold. I followed the driver side rear line and continued toward the trans. I used the stock mounting bracket and installed a Riv-Nut on the frame.


  12. #252
    Senior Member
    Join Date
    Feb 2011
    Posts
    607
    Post Thanks / Like
    Got some more work done today. I used the "longislandwrx" method of mounting the shifter. I had to trim the sides of the housing a bit to make the hole align with the trans tunnel, but other than that it worked like a champ!


    And with the tunnel cover loosely mounted:


    I was able to get the shifter cable to hook up, but I'm not happy with how they are routed coming out of the fire wall. Anybody have suggestions on how to route them? Mine rub on the bottom of the steering u-joint.


    Thanks!
    Last edited by GUNS; 04-23-2014 at 08:33 PM.

  13. #253
    Senior Member
    Join Date
    Feb 2011
    Posts
    607
    Post Thanks / Like
    Can't believe it's been a month since I posted an update. I've been busy with work and trips and just haven't been able to put as much time into the build as I would like.

    I hooked up all of the fuel lines and vacuum lines and started on the wiring harness. I also did Wayne's de-gas mod as well:


    I tried to bleed my clutch today and ran into a slight issue....I think. Without fluid, the clutch pedal snaps to the floor and you have to pull it back up manually. I bled most of the air out and now when you depress the clutch, it goes about half way and it feels like a lot of resistance. I'm afraid it may be a release bearing issue, but everything seemed to go fine on the install so I'm a little baffled. Any inputs?

  14. #254
    818 builder metalmaker12's Avatar
    Join Date
    Mar 2012
    Location
    Exeter R.I
    Posts
    2,834
    Post Thanks / Like
    Blog Entries
    1
    You still have air in the line I bet. Make sure it is very full, Have a friend pump it and hold to get any air out ,or Vacum bleed it and see if need be.

  15. #255
    Senior Member STiPWRD's Avatar
    Join Date
    Jan 2014
    Location
    Leesburg, VA
    Posts
    1,624
    Post Thanks / Like
    If it is indeed the clutch release bearing, it may be due to aluminum that has worn away around the surface that the bearing slides on (this is a common problem on high mileage transmissions). The bearing slides on metal that is a part of the transmission housing and sticks out around the input shaft. When it wears away, it can cause the release bearing to bind or tilt - this can lead to an inconsistent feel in the clutch pedal. I actually have this problem with my trans and for the longest time I couldn't figure out why I kept breaking pressure plates and having to replace them. I'll be buying this repair kit:

    http://www.42autosports.com/Transmis...ons_p_631.html

    I'm not sure how many miles are on your trans but lets hope its just air in your system.

  16. #256
    Senior Member
    Join Date
    Feb 2011
    Posts
    607
    Post Thanks / Like
    Metalmaker,

    There is definitely still air in the system, but what I'm trying to describe doesn't sound like an air problem. There is enough pressure for the slave cylinder to push on the clutch fork, but it gets to a certain point and stops. With that being said, how much should I be able to move the fork by hand?

    Trans has 125k miles on it and worked great before I took my donor apart.

    Thanks for the help guys, hoping it's an easy fix.

  17. #257
    Mechie3's Avatar
    Join Date
    May 2012
    Location
    Indianapolis
    Posts
    5,174
    Post Thanks / Like
    For my shifter cables I used some of the P clamps to route the. Anything that can vibrate will and will eventually wear holes in other things or itself.
    Zero Decibel Motorsports
    Check out my new website!
    www.zerodecibelmotorsports.com
    www.facebook.com/zero.decibel.motorsports

  18. #258
    Senior Member
    Join Date
    Feb 2011
    Posts
    607
    Post Thanks / Like
    Welp, I put the clutch bleeding on hold for a bit and spent the long weekend working on the wiring harness. This has definitely been the most daunting part of the build for me. I have very limited experience with electrical work. The obvious choice would be to go with one of the harness solutions provided by vendors here, but as good as the quality looks, I just can't justify the $2k plus price tag.

    So with that being said, I decided to try and tackle this myself. I was able to delete the ABS, airbags, and door card wiring. In total it was about 11 lbs:


    Anything beyond this looked to me to be too complicated and time consuming to be worth the extra bulk and weight savings IMO. I decided to attempt to install the harness, mostly complete and accept that I will have extra bulk and connectors not connected to anything. So far it looks like a mess, but I'm pretty sure I have identified 99% of the connectors and have connected the ones needing connecting.

    I started out by just sort of draping the harness over the frame to figure out of things would be routed:


    I then started routing the harnesses as required (with the exception of the section that goes to the Rad/headlights).


    I ran the positive battery cable and extended the yellow starter wire that plugs into the connector on the starter. The manual talks about extending two more red starter wires the I guess originate from the fuse box and end up connecting to where the batter cable does. Can anyone elaborate on this? These wires weren't run like this on the WRX correct? The wiring diagram only shows the battery cable and yellow starter wire (as depicted below) What's the need for it now?


    Also, where's everyone running their negative cable from the battery? Just attaching to the frame up front somewhere?

    Once I'm confident everything is working properly, I'm going to bundle it all up and tuck it away to make it a bit neater

    Thanks for the help guys, I'm feeling a bit more confident with this, but still not comfortable.
    Last edited by GUNS; 05-26-2014 at 07:29 PM.

  19. #259
    818 builder metalmaker12's Avatar
    Join Date
    Mar 2012
    Location
    Exeter R.I
    Posts
    2,834
    Post Thanks / Like
    Blog Entries
    1
    Looks good man, your doing fine man

  20. #260
    Senior Member AZPete's Avatar
    Join Date
    Feb 2011
    Location
    Scottsdale, AZ
    Posts
    2,374
    Post Thanks / Like
    Guns, just do it bit by bit, terminal by terminal, and you'll be fine. I'm electrically challenged and scared of wiring but I tackled the OE harnesses. Last week I finally just hooked up my battery and there was no smoke! Everything works and it's a great feeling! You'll be fine if you take your time and use Mechie3's pics and the wiring diagram.
    818S/C : Chassis #25 with 06 WRX 2.5 turbo, ABS, cruise, PS, A/C, Apple CarPlay, rear camera, power windows & locks, leather & other complexities. Sold 10/19 with 5,800 miles.
    Mk3 Roadster #6228 4.6L, T45, IRS, PS, PB, ABS, Cruise, Koni's, 17" Halibrands, red w/ silver - 9K miles then sold @ Barrett-Jackson Jan 2011 (got back cash spent).

  21. #261
    Senior Member
    Join Date
    Oct 2012
    Posts
    556
    Post Thanks / Like
    What model Corbeau seats are those? Are they mounted super low?

  22. #262
    Junior Member
    Join Date
    Dec 2013
    Posts
    28
    Post Thanks / Like
    Quote Originally Posted by GUNS View Post
    Metalmaker,

    There is definitely still air in the system, but what I'm trying to describe doesn't sound like an air problem. There is enough pressure for the slave cylinder to push on the clutch fork, but it gets to a certain point and stops. With that being said, how much should I be able to move the fork by hand?

    Trans has 125k miles on it and worked great before I took my donor apart.

    Thanks for the help guys, hoping it's an easy fix.
    I totally couldn't move the clutch fork by hand to actually actuate the clutch. Hooking the engine and tranny back and trying to get the fork and all installed right isn't something I'm especially looking forward to.

  23. #263
    Senior Member
    Join Date
    Feb 2011
    Posts
    607
    Post Thanks / Like
    Thanks again for the support. I'm fairly confident I could fiure out the complete harness diet, especially with the help of this forum. Wayne's main selling point for his harness solution is "what's your time worth?" My answer to that is about 20lbs of extra weight and bulk. So I'm perfectly fine with leaving my harness mainly intact....assuming everything works. In addition to my other electrical questions a few posts above, does anyone know what to do with this ground strap? It was included with the fuel electrical components.


    The clutch fork install seemed to go fine when I installed it. If I push it towards the front of the car by hand, it has a "springy" feeling to it as if it is working properly. I'll mess with it later, it may just be a pedal adjustment or something.

    Seats are FX1 Pros. They are pretty low, but not on the floor. If I remove the bottom cushion, the top of my helmet is pretty much level with the roll bar. Not too happy about that, but not sure what else to do. I don't think mounting them directly to the floor will buy me much.


  24. #264
    Senior Member
    Join Date
    Jan 2012
    Posts
    1,112
    Post Thanks / Like
    You could gain whatever the thickness of your seat bracket mount by putting the flat stock on top of the seat bracket when mounting the seats that way you don't gain height. What did you use 1/4 steel or 3/8 aluminum? That's what I did for my seat mounts.

  25. #265
    fasterer and furiouser longislandwrx's Avatar
    Join Date
    Aug 2012
    Location
    Long Island
    Posts
    2,540
    Post Thanks / Like
    Blog Entries
    6
    Quote Originally Posted by GUNS View Post

    Looks like you can cut off the integrated mounts and drop it down another inch or so using the side mounts


    Ground strap connects fuel cap to frame.
    Last edited by longislandwrx; 05-29-2014 at 03:08 PM.
    A well stocked beverage fridge is the key to any successful project.

  26. #266
    Senior Member Rasmus's Avatar
    Join Date
    Mar 2012
    Location
    Las Vegas, USA
    Posts
    983
    Post Thanks / Like
    Quote Originally Posted by longislandwrx View Post
    Ground strap connects fuel cap to frame.
    That's why I don't rub balloons on my head when fueling up. Zap! (Mythbusters be damned)

  27. #267
    Senior Member
    Join Date
    Feb 2011
    Posts
    607
    Post Thanks / Like
    Thanks again for all of the help so far. I've been busy with work and other projects, but hopefully this week I can track down all of the grounds and get some life into this thing.

    As far as the seats, I never thought about cutting off the integrated mounts...I might have to try that. Also, to answer the question above, I used 1/4 in steel for the mounts.

  28. #268
    Senior Member
    Join Date
    Feb 2011
    Posts
    607
    Post Thanks / Like
    Power!


    Next step is to cleanup up a few items to get ready for the first start! After that I'll bundle up the harness and get ready for the first drive.

    In prep for the first start, I have a few questions. From what I can tell, the heater core outlets need to be looped, correct? Fortunately, I labeled these when I dissembled. Can you guys verify that what I did is correct? Follow the hose with the blue tape:


    Also, anyone know what this goes to?


    While looking at the above pic, those supplied fuel line quick disconnects don't seem too secure...is this normal?

    Thanks guys!

  29. #269
    Senior Member AZPete's Avatar
    Join Date
    Feb 2011
    Location
    Scottsdale, AZ
    Posts
    2,374
    Post Thanks / Like
    I believe that open tube in your last photo is the vacuum line to the brake booster - plug it.

    I agree that the white plastic fuel line connectors look cheap and flimsy but they work and don't leak. I've started my engine (Woohoo!) and run it quite a bit with no leaks, gas or otherwise.
    Last edited by AZPete; 06-02-2014 at 06:46 PM. Reason: gas stuff
    818S/C : Chassis #25 with 06 WRX 2.5 turbo, ABS, cruise, PS, A/C, Apple CarPlay, rear camera, power windows & locks, leather & other complexities. Sold 10/19 with 5,800 miles.
    Mk3 Roadster #6228 4.6L, T45, IRS, PS, PB, ABS, Cruise, Koni's, 17" Halibrands, red w/ silver - 9K miles then sold @ Barrett-Jackson Jan 2011 (got back cash spent).

  30. #270
    Senior Member
    Join Date
    Feb 2011
    Posts
    607
    Post Thanks / Like
    Quote Originally Posted by AZPete View Post
    I believe that open tube in your last photo is the vacuum line to the brake booster - plug it.

    I agree that the white plastic fuel line connectors look cheap and flimsy but they work and don't leak. I've started my engine (Woohoo!) and run it quite a bit with no leaks, gas or otherwise.
    Awesome, thanks for the response!

  31. #271
    Tazio Nuvolari wannabe Scargo's Avatar
    Join Date
    Nov 2013
    Location
    south-central CT
    Posts
    1,611
    Post Thanks / Like
    LOL... You have the "Green Brackets of Death!" Ditch those.

    RE, me saying I blocked off my heater lines: I used a 1/4" pipe tap and plugged my air pump exhaust outlets on the heads when I deleted all that mess related to emissions control.
    I did not mean to say I blocked the (water) heater connections in the block. I still run those to the heater in the STi and will have to do the U or similar in my 818. Sorry for my confusion.
    Last edited by Scargo; 06-03-2014 at 05:53 AM. Reason: To correct the error in my comment

  32. #272
    Senior Member wleehendrick's Avatar
    Join Date
    Jul 2012
    Location
    Encinitas, CA
    Posts
    1,653
    Post Thanks / Like
    Blog Entries
    2
    Quote Originally Posted by Scargo View Post
    I believe I used a 1/4" pipe tap and plugged my heater connections in the block. Nothing fancy/no expensive plates.
    I've read blocking the heater core connections can cause overheating; it's recommended to loop them. The kit comes with a U-hose for this.

  33. #273
    Senior Member
    Join Date
    Feb 2011
    Posts
    607
    Post Thanks / Like
    Quote Originally Posted by wleehendrick View Post
    I've read blocking the heater core connections can cause overheating; it's recommended to loop them. The kit comes with a U-hose for this.
    No U Hose included in my kit. I have a 02 donor if that makes a difference. The pics above shows the hose I used to "loop." Mine looks different than others I've seen on here.

  34. #274
    Tazio Nuvolari wannabe Scargo's Avatar
    Join Date
    Nov 2013
    Location
    south-central CT
    Posts
    1,611
    Post Thanks / Like
    See my post above. This post can be removed...
    Last edited by Scargo; 06-03-2014 at 05:55 AM.

  35. #275
    Senior Member
    Join Date
    Jan 2012
    Posts
    1,112
    Post Thanks / Like
    I also have a 02, I used a coolant crossover off of a 06 so I could loop the lines with the U shaped hose provide with my kit.

  36. #276
    Senior Member C.Plavan's Avatar
    Join Date
    Mar 2011
    Location
    Clovis, Ca
    Posts
    2,225
    Post Thanks / Like
    Quote Originally Posted by Scargo View Post
    LOL... You have the "Green Brackets of Death!" Ditch those.
    LOL! Those were the first things I saw and I made "Oooooooohhhhh" sound at the computer screen when I saw them.
    Thanks- Chad
    818R-SOLD!!!- Go Karted 7/20/14/ Officially raced NASA ST2- 2/28/15
    2016 Elan NP01 Prototype Racecar Chassis #20
    1969 Porsche 911ST Vintage Race Car
    1972 Porsche 911T (#'s matching undergoing nut & bolt resto in my garage)

  37. #277
    Senior Member Rasmus's Avatar
    Join Date
    Mar 2012
    Location
    Las Vegas, USA
    Posts
    983
    Post Thanks / Like
    I weighed those too and posted it on Nabisco:

    Quote Originally Posted by 68Cadillac
    Sorting through the shed I found an old sin I never weighed properly:


    Green Brackets of Death and hardware weight from a 2004 WRX. Whopping 2.130 kg*.

    *Yes, I tared out the old sign on which the GBoD sit.

  38. #278
    Senior Member
    Join Date
    Feb 2011
    Posts
    607
    Post Thanks / Like
    It's alive!


    My Niece came down to act as my crew chief


    The first start went pretty well! I do have a small leak in one of the corrugated hoses coming off the lower radiator and I had a fuel leak at one of the injectors. Just replaced with a new O ring and fired it right up!

  39. #279
    Senior Member Frank818's Avatar
    Join Date
    Jun 2013
    Location
    QC, Canada
    Posts
    5,732
    Post Thanks / Like
    Looks like the video is private. Must be a very sexy or porn-like video. lolll
    Frank
    818 chassis #181 powered by a '93 VW VR6 Turbo GT3582R
    Go-karted Aug 5, 2016 - Then May 19+21, 2017
    Tracked May 27/July 26, 2017
    Build time before being driveable on Sep 27, 2019: over 6000h
    Build Completed Winter 2021

  40. #280
    Senior Member
    Join Date
    Feb 2011
    Posts
    607
    Post Thanks / Like
    Fixed, thanks.

Page 7 of 11 FirstFirst ... 56789 ... LastLast

Posting Permissions

  • You may not post new threads
  • You may not post replies
  • You may not post attachments
  • You may not edit your posts
  •  

FFMetal

Visit our community sponsor