FormaCars

Visit our community sponsor

Thanks Thanks:  0
Likes Likes:  0
Page 2 of 6 FirstFirst 1234 ... LastLast
Results 41 to 80 of 201

Thread: What did you do to, about or for your coupe today?

  1. #41
    Senior Member HCP 65 COUPE's Avatar
    Join Date
    Mar 2012
    Location
    NORTH CENTRAL CT
    Posts
    145
    Post Thanks / Like
    Man those seats look great.

  2. #42
    Senior Member
    Join Date
    Feb 2011
    Location
    Gorham, ME
    Posts
    253
    Post Thanks / Like
    John,

    Those seats are awesome. That red will absolutely be a knock out with the white body.
    Bill

    Coupe #421, Picked Up 11/15/08, started 1/1/09 - Rebuilt mildly massaged 302, T5, 3 Link, and Loads of Extras

  3. #43
    Senior Member John Dol's Avatar
    Join Date
    Feb 2011
    Location
    Gorham, ME
    Posts
    1,522
    Post Thanks / Like
    Thanks guys,

    Bill thanks again for letting me try yours. I was comfortable ordering after sitting in them and knowing they fit the Coupe. I agree it will be a nice contrast with the body color.

    John
    Finished the "My Coupe, my way" project.

    http://s956.photobucket.com/albums/ae46/jdcoupe1969/
    Coupe #386,17" Team III 245 FR 315 RR, 3-link, T5, 4 wheel disk, power brakes/steering. Sniper EFI
    First start Sept. 18 2013 First go kart Sept 19 2013

  4. #44
    Junior Member Thanatopsis's Avatar
    Join Date
    May 2012
    Location
    Denison Texas
    Posts
    13
    Post Thanks / Like
    Wow John. Those look great. Are you going with red for the carpet and head liner or do you have another color in mind?

  5. #45
    Senior Member John Dol's Avatar
    Join Date
    Feb 2011
    Location
    Gorham, ME
    Posts
    1,522
    Post Thanks / Like
    Thana,

    Not sure yet. Red carpet might be cool however will show more dirt etc. Would have to carry an entrance rug with me at all times LOL.
    Probably black, but head liner might be a good idea.

    John
    Finished the "My Coupe, my way" project.

    http://s956.photobucket.com/albums/ae46/jdcoupe1969/
    Coupe #386,17" Team III 245 FR 315 RR, 3-link, T5, 4 wheel disk, power brakes/steering. Sniper EFI
    First start Sept. 18 2013 First go kart Sept 19 2013

  6. #46
    Junior Member psych's Avatar
    Join Date
    Jan 2013
    Posts
    20
    Post Thanks / Like
    Getting started on #600. After etching and priming the frame I shot it today with Acrylic Enamel. Had previously fitted and drilled many of the panels.
    002 (1280x960).jpg

  7. #47
    Senior Member Rodster's Avatar
    Join Date
    Nov 2011
    Location
    Orange County, CA
    Posts
    280
    Post Thanks / Like

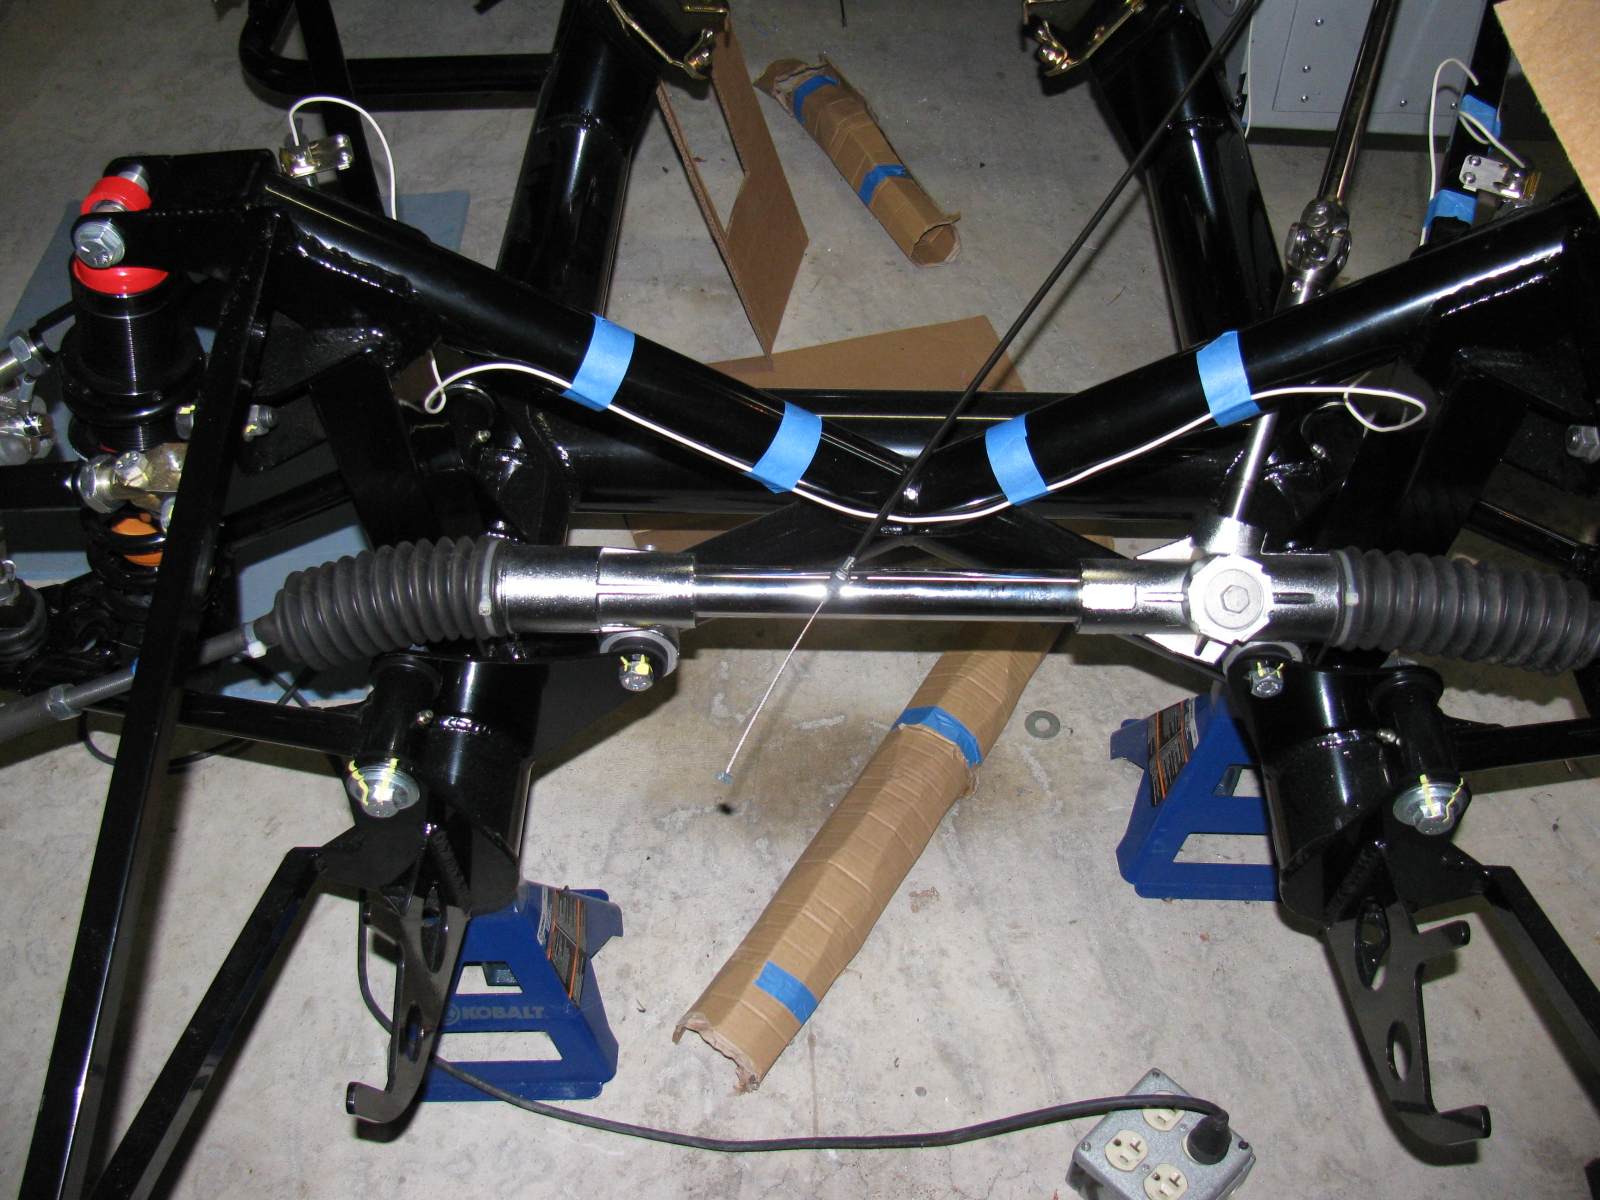
    Brake line mock-up

    I decided to practice running the brake lines today. I used some scrap number 12 wire, cut into five-foot lengths. The copper wire is much more flexible than the brake lines, but at least I can do a mock-up before I bend the real thing. Masking tape indicates where those clips would go.

    For reference, I am ditching the manual and using the “FFR Type 65 Coupe build site,” by cbergquist1 on Flickr.com – click here to see Chris’ section on brake lines

    Thanks Chris!

    Here are some pictures. . .


    More details are on my WordPress site
    Ordered Type 65 Complete Kit Aug 29, 2012 - The 50-50 $ale!
    Standard Width IRS; Halibrands - 17x9, 17x10.5
    Kit Arrived: Oct 9, 2012; Build Started: Oct 28, 2012
    WordPress: http://wayne-yoshida-kh6wz.com/
    LinkedIn: www.linkedin.com/in/waynetyoshida
    YouTube: http://www.youtube.com/user/kh6wz?feature=results_main

  8. #48
    Senior Member Fluge's Avatar
    Join Date
    Mar 2011
    Location
    Ontario
    Posts
    260
    Post Thanks / Like
    I just noticed the line running along the outside of the driver's side square tube. That may get in the way of the front lower wheel well aluminum and the steel pontoon brace piece that attaches to that same square tube. I ran mine on the inside but under it would work well too I guess.

    The holes on the outside of the tube on the left are where the wheel well aluminum attaches to.

    Marc
    The third picture is on the passenger side but you can see where the aluminum and pontoon piece attach...same on the driver's side....unless you are doing something very different of course...


    Last edited by Fluge; 05-20-2013 at 02:00 PM.
    It's just A Matter Of Time

    Marc

    FFR Coupe 434, 347ci, Power Brakes, SAI Mod, 3 link rear

  9. #49
    Senior Member Rodster's Avatar
    Join Date
    Nov 2011
    Location
    Orange County, CA
    Posts
    280
    Post Thanks / Like

    Front brake line routing

    Thanks Marc - So glad I did a mock-up before drilling and mounting!
    -wayne
    Ordered Type 65 Complete Kit Aug 29, 2012 - The 50-50 $ale!
    Standard Width IRS; Halibrands - 17x9, 17x10.5
    Kit Arrived: Oct 9, 2012; Build Started: Oct 28, 2012
    WordPress: http://wayne-yoshida-kh6wz.com/
    LinkedIn: www.linkedin.com/in/waynetyoshida
    YouTube: http://www.youtube.com/user/kh6wz?feature=results_main

  10. #50
    Senior Member HCP 65 COUPE's Avatar
    Join Date
    Mar 2012
    Location
    NORTH CENTRAL CT
    Posts
    145
    Post Thanks / Like

    Fuel Rail Mockup

    The last few weekends I machined the fuel rail and brackets for the Stack Injection.

    The mockup looks pretty good, but the bracket holes need to be slotted out a little as they are pulling down on the injector's a little harder than I would like, maybe I can get to it monday.

    Any ways here are some picks of the progress.

    FUEL RAIL 009.JPG


    FUEL RAIL 010.JPG
    Last edited by HCP 65 COUPE; 05-28-2013 at 03:07 PM.

  11. #51
    Member crossle45f33cf's Avatar
    Join Date
    Feb 2011
    Location
    Tucson, AZ, US of A
    Posts
    39
    Post Thanks / Like
    Incredibly beautiful work!!
    I've always loved the cross-ram configuration but it's usually only found on those Bowtie engines...
    Looking forward to seeing the completed installation in the coupe.
    Thanks for posting the pics, definitely inspirational.
    Trout <ş{{{><

    Imagination is more important than knowledge...
    Al Einstein

    Coupe S/N 377 Purchased April 4, 2008 from John Cameron, Agua Dulce, CA

    Photobucket site:http://s885.photobucket.com/albums/a...20in%20Tucson/

    The Plan: 398 ci Cleveland, CHI Heads & Intake, Crane Roller Lifters, T&D Rockers, Ferrea Valves, TKO600, Quicktime Bellhousing, IRS, 3.55, Torsen, FuelSafe, ISIS, Kirkeys, Konis, 17" Team III LT-III, Wilwood triple m/c & pedals, Orange w/ Silver Stripes

  12. #52
    Senior Member HCP 65 COUPE's Avatar
    Join Date
    Mar 2012
    Location
    NORTH CENTRAL CT
    Posts
    145
    Post Thanks / Like
    A cross ram setup on a sbf is pretty tough to get right because of the front distributor, and the cylinder spacing and offset does not leave alot to work with as far as space is concerned, the packaging is pretty tight especially with the limited room our cars have to deal with. It's been a fun challange so far . It's nearly complete now just have the trumpets and filter box's left. After that is going to go out for polishing and plate. I have not decided to anodize or to just clear coat the polished aluminum yet. I keep changing my mind. I guess I will decide that after I see what the polishing looks like.

  13. #53
    Junior Member psych's Avatar
    Join Date
    Jan 2013
    Posts
    20
    Post Thanks / Like

    Kirkey Low backs

    Mounted the KIRKEY Low backs today. Used Speedway sliders with homemade side mount brackets. In my case the left front passenger mount fit in the same hole that is used by the rear hand brake bracket bolt. With the seat turned slightly to the outside it fit great. I had to fabricate a mounting bracket for the left rear seat bracket hole. Right front bolt went in the seat mounting pan, left rear went in the 2x2 square tube behind the seat mounting pan. I could leave the hand brake in the original position and have full travel.

  14. #54
    Senior Member John Dol's Avatar
    Join Date
    Feb 2011
    Location
    Gorham, ME
    Posts
    1,522
    Post Thanks / Like
    Received my Lokar brake handle set. Let's see if I can this to work as I was unsuccesfull with the stock mustang set up.

    John
    Finished the "My Coupe, my way" project.

    http://s956.photobucket.com/albums/ae46/jdcoupe1969/
    Coupe #386,17" Team III 245 FR 315 RR, 3-link, T5, 4 wheel disk, power brakes/steering. Sniper EFI
    First start Sept. 18 2013 First go kart Sept 19 2013

  15. #55
    Supreme Cobra Commander TimC's Avatar
    Join Date
    Feb 2011
    Location
    Flowery Branch, Ga.
    Posts
    317
    Post Thanks / Like
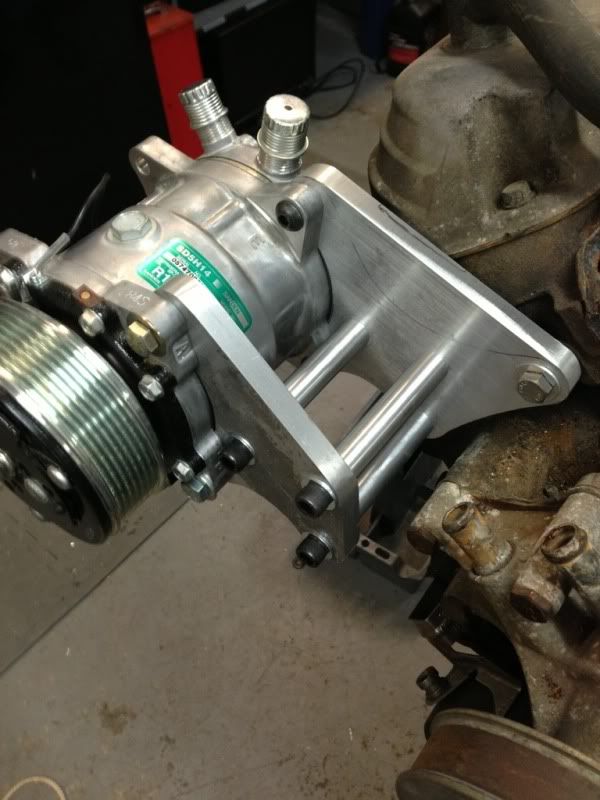
    Almost finished the AC compressor bracket. Got a little cleaning then finish the alternator bracket then I check this off the list.

    Tim.

    Knowledge is good-Faber.

    I'm so broke I can hardly pay attention-Me.

  16. #56

    Average Moderator
    Garry Bopp's Avatar
    Join Date
    Feb 2011
    Location
    Covington, Georgia
    Posts
    1,202
    Post Thanks / Like
    Beautiful work, Tim!

    Garry
    I sure miss my coupe!

    F5R1004503SP 2004 Challenge Car, 331 Stroker

    Coupe # 031, 422" Windsor stroker by Southern Automotive (Dash autographed by Peter Brock)***SOLD***
    Unique 427 Roadster, 482" Aluminum FE by Southern Automotive***SOLD***

  17. #57
    Senior Member CHOTIS BILL's Avatar
    Join Date
    May 2011
    Posts
    427
    Post Thanks / Like
    Blog Entries
    1
    HPC 65 COUPE,

    Thanks for the update. Any timeframe for getting your injectors on a dyno?

    Bill Lomenick
    Chotis Bill

  18. #58
    Supreme Cobra Commander TimC's Avatar
    Join Date
    Feb 2011
    Location
    Flowery Branch, Ga.
    Posts
    317
    Post Thanks / Like
    Thanks Garry. Just like Johnny Cash-One piece at a time.
    Tim.

    Knowledge is good-Faber.

    I'm so broke I can hardly pay attention-Me.

  19. #59
    Senior Member HCP 65 COUPE's Avatar
    Join Date
    Mar 2012
    Location
    NORTH CENTRAL CT
    Posts
    145
    Post Thanks / Like
    Bill,

    I'm hoping to get it on the dyno this fall but we will see I still have alot of work to do and my job seems to always keep me pretty busy.

  20. #60
    Senior Member John Dol's Avatar
    Join Date
    Feb 2011
    Location
    Gorham, ME
    Posts
    1,522
    Post Thanks / Like
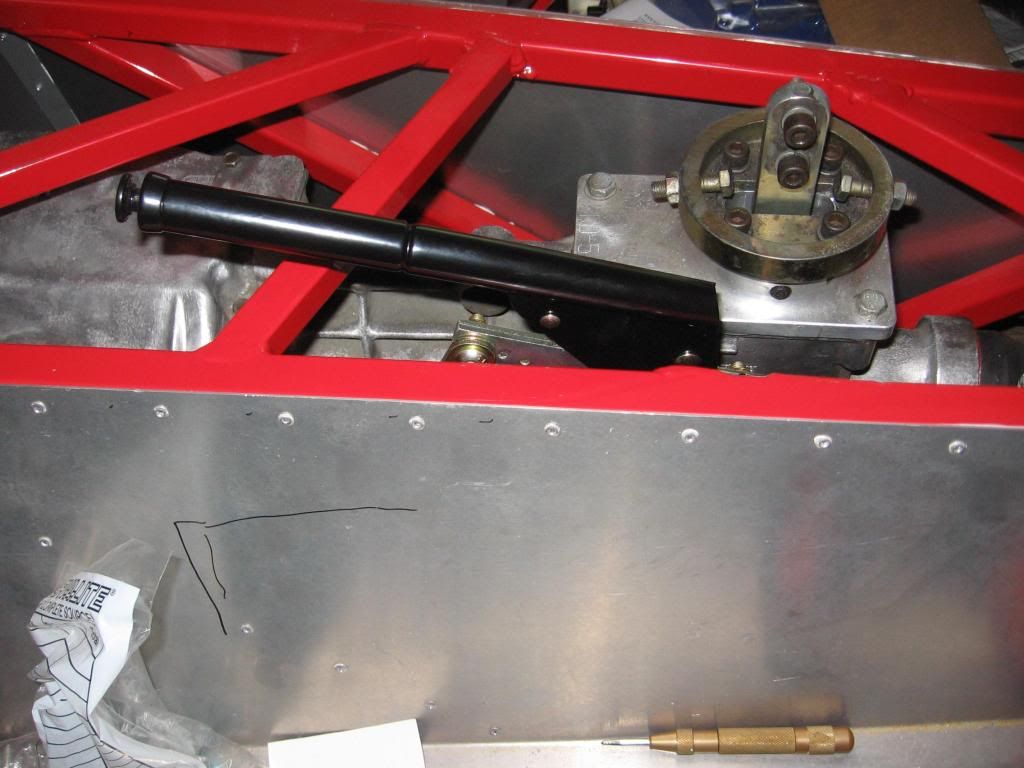
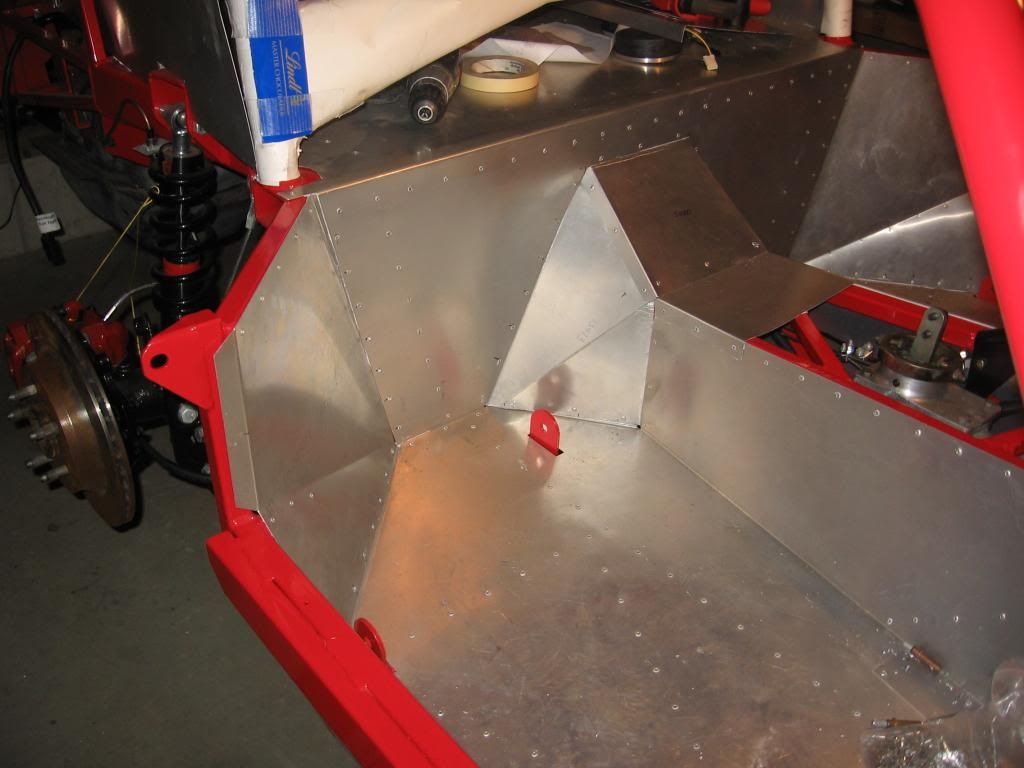
    After receiving my lokar e-brake kit I finally put my longest running frustration to bed. The e-brake is working which allowed me to finish up the rear aluminum panels.


    Now it's on to the seats.

    John
    Finished the "My Coupe, my way" project.

    http://s956.photobucket.com/albums/ae46/jdcoupe1969/
    Coupe #386,17" Team III 245 FR 315 RR, 3-link, T5, 4 wheel disk, power brakes/steering. Sniper EFI
    First start Sept. 18 2013 First go kart Sept 19 2013

  21. #61
    Senior Member
    Join Date
    Feb 2011
    Location
    Gorham, ME
    Posts
    253
    Post Thanks / Like
    John

    Wonder what the hieroglyphics on the tunnel side in pic #1 is???

    Bill
    Bill

    Coupe #421, Picked Up 11/15/08, started 1/1/09 - Rebuilt mildly massaged 302, T5, 3 Link, and Loads of Extras

  22. #62
    Senior Member John Dol's Avatar
    Join Date
    Feb 2011
    Location
    Gorham, ME
    Posts
    1,522
    Post Thanks / Like
    LOL Bill,

    It means #@$%&* in Dutch!
    I was looking if I could make the seat mod to the tunnel like you did. That's the approx. area for the cut. However my hand brake brace is in the way.

    John
    Finished the "My Coupe, my way" project.

    http://s956.photobucket.com/albums/ae46/jdcoupe1969/
    Coupe #386,17" Team III 245 FR 315 RR, 3-link, T5, 4 wheel disk, power brakes/steering. Sniper EFI
    First start Sept. 18 2013 First go kart Sept 19 2013

  23. #63
    Senior Member CJBergquist's Avatar
    Join Date
    Feb 2011
    Location
    Palo Alto, CA
    Posts
    230
    Post Thanks / Like
    Hi John. Just a quick thought. I see in the second photo that you have installed the rear splash guards (rear cockpit pieces on the sides). When you mount the body they will get partially covered up. I did the same thing but ended up pulling them off and mounting them over body. I think it gives a more finished look. Before and after photos....


    Last edited by CJBergquist; 06-15-2013 at 01:20 PM.
    Chris
    If it's too LOUD....you're too OLD!!

    Build Site >> http://www.flickr.com/photos/51103049@N00/collections/

    FFR#0441CP Complete Coupe kit, IRS, T-5, 392ci 351W, Webers, Delivered 4/29/09

  24. #64
    Senior Member John Dol's Avatar
    Join Date
    Feb 2011
    Location
    Gorham, ME
    Posts
    1,522
    Post Thanks / Like
    Thanks Chris,

    Will have to debate it when I cross that bridge I suppose. Definitely food for thought.
    Maybe I'll leave it, and then put a piece over top???

    Thanks,

    John
    Finished the "My Coupe, my way" project.

    http://s956.photobucket.com/albums/ae46/jdcoupe1969/
    Coupe #386,17" Team III 245 FR 315 RR, 3-link, T5, 4 wheel disk, power brakes/steering. Sniper EFI
    First start Sept. 18 2013 First go kart Sept 19 2013

  25. #65
    Senior Member
    Join Date
    Feb 2011
    Location
    Gorham, ME
    Posts
    253
    Post Thanks / Like
    Sat morning was a body reinstallation party at the body shop. Paint and undercoating was finished Friday afternoon. Even was able to coat the inner body at the exhaust area with a thick coat of Lizard Skin! Monday will be a half day off from work to get the body secured at the various mounting points, the front clip rubber cowl bumpers installed, hinges adjusted and trailer the beast home for final assembly. I see this faint ray of light at the end of the tunnel!!!

    John: I did exactly what you did with the rear splash gaurds and the body went on fine. I will be making the last two plastic panels for this area that butt up against the body for the finished look as you saw on the footboxes when you last visited. I think mounting the body this way looks just fine if you add interior panels.
    Bill

    Coupe #421, Picked Up 11/15/08, started 1/1/09 - Rebuilt mildly massaged 302, T5, 3 Link, and Loads of Extras

  26. #66
    Member exwestracer's Avatar
    Join Date
    Jun 2013
    Location
    New Derry, PA about an hour east of PGH.
    Posts
    59
    Post Thanks / Like
    Quote Originally Posted by HCP 65 COUPE View Post
    The last few weekends I machined the fuel rail and brackets for the Stack Injection.

    FUEL RAIL 010.JPG
    That TPS driver linkage is flat cool...
    Straightening out a hack job build on a Type 65 Coupe...HELP!

  27. #67
    Junior Member psych's Avatar
    Join Date
    Jan 2013
    Posts
    20
    Post Thanks / Like

    Filling Seams

    Filled the seams on the front end today. After cleaning the seams and removing the wet Gel Coat I used NAPA Fibre Strand 6371 for the first coat. I used medium pressure and made sure the filler stayed only in the groove. The stuff is hard to sand. Three minutes of sanding with 80 grit and a second coat of 6371 was applied, still only in the groove. A few more minutes of sanding and a coat of Rage applied with a wider applicator. Fourth coat was also Rage with a different color hardener to help me "read" the lows. Finally, the Icing on the cake. Total process took about four hours. Tomorrow I'll sand the Icing, touch up any flaws and it will be ready for two wet coats of Grey Primer-Filler and one wet coat of Black Primer-Filler.
    Attached Images Attached Images

  28. #68
    Member
    Join Date
    Sep 2011
    Location
    San Diego, CA
    Posts
    72
    Post Thanks / Like
    Here's a little something I've been working on the past couple months. (Adding a second set of fuel rails / bungs into the manifold.)

  29. #69
    Member
    Join Date
    Mar 2011
    Posts
    73
    Post Thanks / Like
    Found a great car security force.

    The Marines @ Marine Corps Mountain Warfare Training Center (MCMWTC) Bridgeport, CA

    1012763_4802423190042_397588443_n.jpg

  30. #70
    Senior Member HCP 65 COUPE's Avatar
    Join Date
    Mar 2012
    Location
    NORTH CENTRAL CT
    Posts
    145
    Post Thanks / Like
    Over the past week I machined all the components left for my cross ram stack injection. Now I need to make mounts for my LS2 coils and I can tear it all down and send it for polishing.
    Sorry about the crap I phone pics they are a little blurry.

    Btw Dave that setup looks awsome. Is that Victor Sr intake?

    Thx West got the Idea working on one of my RC car's LOL.


    AIR BOX.JPG

    INLET.JPG

    TRUMPETS TOP.JPG

    TRUMPETS SIDE.JPG
    Last edited by HCP 65 COUPE; 06-30-2013 at 05:13 PM.

  31. #71
    Member
    Join Date
    Sep 2011
    Location
    San Diego, CA
    Posts
    72
    Post Thanks / Like
    Thanks HCP 65 COUPE! Yes, its an Edelbrock Vic Jr. Manifold. I've had it running on a dual fuel system now for roughly a month, so far so good! The accessory drive set up you've got on there looks wicked!

  32. #72
    Senior Member CHOTIS BILL's Avatar
    Join Date
    May 2011
    Posts
    427
    Post Thanks / Like
    Blog Entries
    1
    HCP,

    Just when I think you can’t make it any cooler you do. Even it that setup makes less HP I would run it just for the looks.

    Bill Lomenick
    Chotis Bill

  33. #73
    Senior Member HCP 65 COUPE's Avatar
    Join Date
    Mar 2012
    Location
    NORTH CENTRAL CT
    Posts
    145
    Post Thanks / Like
    Thx guys, It means alot coming from you guys you are all top level craftsman in my book. The parts are coming out looking better than I imagined and that is pretty rare for me (I'm pretty tough on my self).

  34. #74
    Senior Member HCP 65 COUPE's Avatar
    Join Date
    Mar 2012
    Location
    NORTH CENTRAL CT
    Posts
    145
    Post Thanks / Like
    Here is one more pic with Both Air Boxes installed.

    BOTH BOX'S.JPG

  35. #75
    Senior Member xlr8or's Avatar
    Join Date
    Feb 2011
    Location
    San Diego CA
    Posts
    316
    Post Thanks / Like
    Beautiful setup you have there HCP.
    It's never too early to start beefing up your obituary.

  36. #76
    Senior Member HCP 65 COUPE's Avatar
    Join Date
    Mar 2012
    Location
    NORTH CENTRAL CT
    Posts
    145
    Post Thanks / Like
    Ok all the parts came back from polish and I decided with my painter to powder coat every thing, and man he nudged me the right way cause it looks great I could not be happier with the look.

    Any ways here are some pics of final assembly under way. Im on vaction for the next 2 weeks and hoping to put a huge dent in the car. More to come.

    Final assembly 002.JPG

    Final assembly 003.JPG

    Final assembly 004.JPG

    Final assembly 005.JPG

    Final assembly 006.JPG

    Final assembly 007.JPG

    Final assembly 001.JPG My super Cutie Stella

  37. #77
    Senior Member Fluge's Avatar
    Join Date
    Mar 2011
    Location
    Ontario
    Posts
    260
    Post Thanks / Like
    You are in another league (edit...I should have said...out of my league)...Looks fantastic.

    Marc
    It's just A Matter Of Time

    Marc

    FFR Coupe 434, 347ci, Power Brakes, SAI Mod, 3 link rear

  38. #78
    Senior Member HCP 65 COUPE's Avatar
    Join Date
    Mar 2012
    Location
    NORTH CENTRAL CT
    Posts
    145
    Post Thanks / Like
    Fluge,

    With how clean your build is coming I would not say that at all. Every one has certain skill sets this one just happens to be mine, I just hope that I can make the rest of the car come out looking this good. My welding and sheetmetal fab work could use some tuning.

  39. #79
    Senior Member John Dol's Avatar
    Join Date
    Feb 2011
    Location
    Gorham, ME
    Posts
    1,522
    Post Thanks / Like
    That engine is smoking HOT!!!!

    John
    Finished the "My Coupe, my way" project.

    http://s956.photobucket.com/albums/ae46/jdcoupe1969/
    Coupe #386,17" Team III 245 FR 315 RR, 3-link, T5, 4 wheel disk, power brakes/steering. Sniper EFI
    First start Sept. 18 2013 First go kart Sept 19 2013

  40. #80
    Senior Member QSL's Avatar
    Join Date
    Nov 2011
    Location
    CORONA, CA
    Posts
    700
    Post Thanks / Like
    that engine doesn't do a thing for me, what was wrong with the original? LOL. Freaking awesome man!!! too bad the stacks get covered though.
    MK4 delivery 12/17/11
    Build thread: HERE
    Epic First start video HERE

    Type 65 Coupe Ordered 01/17/13
    Build thread: HERE

Page 2 of 6 FirstFirst 1234 ... LastLast

Posting Permissions

  • You may not post new threads
  • You may not post replies
  • You may not post attachments
  • You may not edit your posts
  •  

FFMetal

Visit our community sponsor