Forte's

Visit our community sponsor

Thanks Thanks:  0
Likes Likes:  0
Page 4 of 6 FirstFirst ... 23456 LastLast
Results 121 to 160 of 201

Thread: What did you do to, about or for your coupe today?

  1. #121
    Senior Member Rodster's Avatar
    Join Date
    Nov 2011
    Location
    Orange County, CA
    Posts
    280
    Post Thanks / Like

    Fuel Lines started Coupe with 302 and MSD Atomic EFI

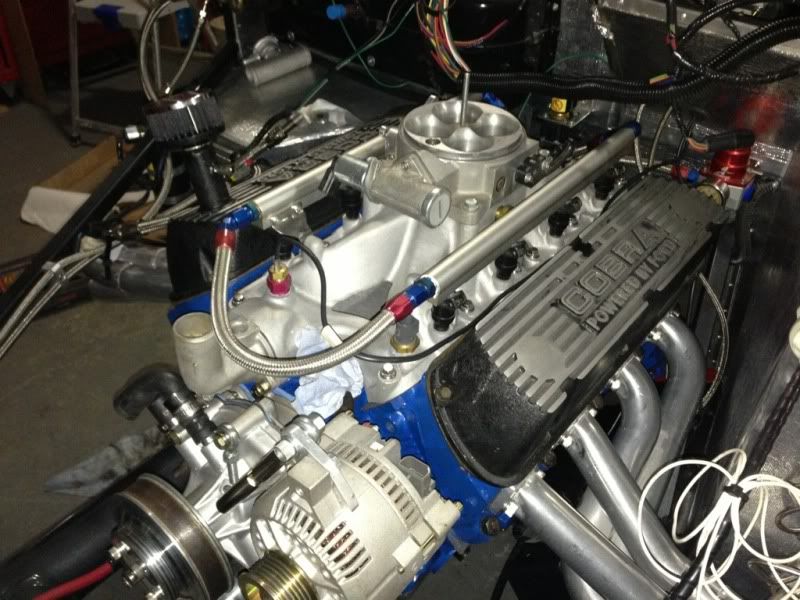
    Anyone running an MSD Atomic EFI system? I am. I have not found much info on this and that forum, so I will post stuff as I make my way thru it. Anyway, the Atomic system comes with fuel pump and filters, these are 3/8-inch. But the Complete Kit tank and fittings are 5/16. . . so I got some adapters from Summit.

    Anyway - today I started to mock up where to mount the external fuel pump and how to run the lines. Didn't get too far, I need to figure out what and how to do this. Here are some pictures of my fuel pump mounting plate.

    Other than making sure nothing will hit or crunch the filters, pump and lines - are there any other precautions or hints that I should be aware of? The flex fuel line will run along the passenger side chassis rail, like most builders have been doing. The second filter will mount near the passenger seat area, but have not decided on the final location.

    kh6wz-fuel-system1-004.jpg

    kh6wz-fuel-system1-005.jpg

    More details on my WordPress site:

    http://wayneyoshida-kh6wz.com/2013/1...system-begins/
    Ordered Type 65 Complete Kit Aug 29, 2012 - The 50-50 $ale!
    Standard Width IRS; Halibrands - 17x9, 17x10.5
    Kit Arrived: Oct 9, 2012; Build Started: Oct 28, 2012
    WordPress: http://wayne-yoshida-kh6wz.com/
    LinkedIn: www.linkedin.com/in/waynetyoshida
    YouTube: http://www.youtube.com/user/kh6wz?feature=results_main

  2. #122
    Senior Member John Dol's Avatar
    Join Date
    Feb 2011
    Location
    Gorham, ME
    Posts
    1,522
    Post Thanks / Like
    Just make sure you can get to it where ever you put it!

    John
    Finished the "My Coupe, my way" project.

    http://s956.photobucket.com/albums/ae46/jdcoupe1969/
    Coupe #386,17" Team III 245 FR 315 RR, 3-link, T5, 4 wheel disk, power brakes/steering. Sniper EFI
    First start Sept. 18 2013 First go kart Sept 19 2013

  3. #123
    Junior Member Dick Z's Avatar
    Join Date
    Oct 2012
    Posts
    12
    Post Thanks / Like

    First Drive

    http://www.youtube.com/watch?v=PuMuB...ature=youtu.be

    First go kart drive!

    Complete Type 65 Coupe kit, Ford Racing 306, T5/S10 tranny, IRS. Received 1/24/13.

  4. #124
    Senior Member Fluge's Avatar
    Join Date
    Mar 2011
    Location
    Ontario
    Posts
    260
    Post Thanks / Like
    Congratulations Dick. I was so excited on my first go-kart that I forgot to record it.

    I had to make an additional access panel through the trunk floor in order to access the fuel filter from above. The fuel pump can be accessed from above or below.

    Marc
    It's just A Matter Of Time

    Marc

    FFR Coupe 434, 347ci, Power Brakes, SAI Mod, 3 link rear

  5. #125
    Senior Member Rodster's Avatar
    Join Date
    Nov 2011
    Location
    Orange County, CA
    Posts
    280
    Post Thanks / Like

    Does this count?

    Been busy with work, business travel, holidays and some kind of flu. But got a chance to hang these inside the house - -

    kh6wz-001.jpg


    kh6wz-002.jpg


    In the garage: Started making a new bracket for the external fuel pump (again), decided to run a return fuel line system, will be installing that this weekend. Planning on where the access panels will go in the trunk area.

    Coupe builders with IRS - Mark VIII / Ford Racing pumpkin and FFMetal battery box:
    How do you fill/drain the rear end? I noticed at my last work session the battery box blocks the fill and drain plugs in the rear. Not too big of a deal, but this means the rivets will have to be replaced with screws/nuts or - removable pins or something.

    I am thinking of adding a threaded rod or something on one end of the battery box, creating a hinge point, then I can remove some screws on the opposite side and tilt the battery box up to access the pumpkin fill and drain holes.

    This is not a great picture showing what I mean - but take a look anyway:

    kh6wz-003.jpg

    Any suggestions are welcome.....

    Thanks and Happy New Year.
    Ordered Type 65 Complete Kit Aug 29, 2012 - The 50-50 $ale!
    Standard Width IRS; Halibrands - 17x9, 17x10.5
    Kit Arrived: Oct 9, 2012; Build Started: Oct 28, 2012
    WordPress: http://wayne-yoshida-kh6wz.com/
    LinkedIn: www.linkedin.com/in/waynetyoshida
    YouTube: http://www.youtube.com/user/kh6wz?feature=results_main

  6. #126
    Senior Member Rodster's Avatar
    Join Date
    Nov 2011
    Location
    Orange County, CA
    Posts
    280
    Post Thanks / Like
    Dick Z - she sounds great! Congrats on the significant mile stone!
    Ordered Type 65 Complete Kit Aug 29, 2012 - The 50-50 $ale!
    Standard Width IRS; Halibrands - 17x9, 17x10.5
    Kit Arrived: Oct 9, 2012; Build Started: Oct 28, 2012
    WordPress: http://wayne-yoshida-kh6wz.com/
    LinkedIn: www.linkedin.com/in/waynetyoshida
    YouTube: http://www.youtube.com/user/kh6wz?feature=results_main

  7. #127
    Senior Member John Dol's Avatar
    Join Date
    Feb 2011
    Location
    Gorham, ME
    Posts
    1,522
    Post Thanks / Like
    Dick,

    Congrats on the go cart, I can remember mine like it was 4 months ago. That's probably because it was 4 months ago.
    Is that Citroen yours? Growing up they were the car of choice for college students since they were cheap and good on gas. Don't see those much here though. Always felt like you were tipping over when cornering.

    John
    Finished the "My Coupe, my way" project.

    http://s956.photobucket.com/albums/ae46/jdcoupe1969/
    Coupe #386,17" Team III 245 FR 315 RR, 3-link, T5, 4 wheel disk, power brakes/steering. Sniper EFI
    First start Sept. 18 2013 First go kart Sept 19 2013

  8. #128
    Junior Member Dick Z's Avatar
    Join Date
    Oct 2012
    Posts
    12
    Post Thanks / Like
    No 2CV's for me, John, but I love seeing them when we're in France. They're just the antithesis of the coupe.

  9. #129
    Senior Member Austexican's Avatar
    Join Date
    Mar 2013
    Location
    Texas
    Posts
    119
    Post Thanks / Like
    Today, I installed my Russ Thompson sun visors and my wife and I joined up with some of the Austin Cobra Club at the Cars and Coffee meet at the Oasis Restaurant on Lake Travis. Even at a meet that draws a number or Ferraris, Aston Martins, Jaguars, Maseratis, Vipers, various Cobra roadster replicas, a Lotus, and one McLaren; the only Daytona Coupe draws a crowd! The most unusual vehicle was a 1959 Volkswagen pickup. The three sides of the bed fold down to form a flat bed truck. I wonder if the VW's load rating would allow it to serve as a car transporter for the Daytona? That would be a comical combination.
    Attached Images Attached Images
    Last edited by Austexican; 01-12-2014 at 09:01 PM.

  10. #130
    Senior Member Rodster's Avatar
    Join Date
    Nov 2011
    Location
    Orange County, CA
    Posts
    280
    Post Thanks / Like

    Sheet Aluminum, Fuel Lines

    Finally got back to the garage to get some work done. Got all the interior sheet metal drilled and Cleco'ed. Here's something that bugged me for a while, but as I was drilling this area, I pushed the "A" piece inward from under the chassis, and closed that gap between the floor and the A-piece. This is the area I am talking about:

    img_8007-kh6wz-65-coupe-cockpit-al-fixed-space.jpg

    And a closer view:

    img_8008-kh6wz-65-coupe-cockpit-al-fixed-space.jpg

    Question:
    Does something cover this area, or do I need to fabricate a new piece? Both sides are the same. This is the driver side at the rear of where the door would go:
    img_8005-kh6wz-65-coupe-cockpit-al-correct-or-not.jpg

    Does something fill that small triangular space?

    Started running fuel lines. My 302 has an Atomic EFI and I will be running return lines. That should be easy....
    Ordered Type 65 Complete Kit Aug 29, 2012 - The 50-50 $ale!
    Standard Width IRS; Halibrands - 17x9, 17x10.5
    Kit Arrived: Oct 9, 2012; Build Started: Oct 28, 2012
    WordPress: http://wayne-yoshida-kh6wz.com/
    LinkedIn: www.linkedin.com/in/waynetyoshida
    YouTube: http://www.youtube.com/user/kh6wz?feature=results_main

  11. #131
    Senior Member Fluge's Avatar
    Join Date
    Mar 2011
    Location
    Ontario
    Posts
    260
    Post Thanks / Like
    Trial fit the door sill pieces. They have to be installed after the body so don't drill the holes yet. You'll be able to see what kind of overlap there is between the sill piece and the piece you are asking about.

    Marc
    It's just A Matter Of Time

    Marc

    FFR Coupe 434, 347ci, Power Brakes, SAI Mod, 3 link rear

  12. #132
    Senior Member
    Join Date
    Feb 2011
    Location
    Gorham, ME
    Posts
    253
    Post Thanks / Like
    The floor area in mine at the 4" tube did not fit qnd I ended up fabricating a piece to cover the gap. One of the many pieces you'll find that needs to be fabricated. before long you'll be an old hand at it!!
    Bill

    Coupe #421, Picked Up 11/15/08, started 1/1/09 - Rebuilt mildly massaged 302, T5, 3 Link, and Loads of Extras

  13. #133
    Supreme Cobra Commander TimC's Avatar
    Join Date
    Feb 2011
    Location
    Flowery Branch, Ga.
    Posts
    317
    Post Thanks / Like
    I put the engine back in.
    Tim.

    Knowledge is good-Faber.

    I'm so broke I can hardly pay attention-Me.

  14. #134
    Senior Member snakebit31's Avatar
    Join Date
    Feb 2011
    Location
    Virginia Beach, VA
    Posts
    168
    Post Thanks / Like
    Blog Entries
    1
    Quote Originally Posted by Timb View Post
    Wet sanded the whole body
    Timb,
    I have no experience with the red bodied coupes, just my grey body roadster and coupe. When I did my seams, they had to be ground out and leveled with filler. I uses a glass strand filler mix (kitty hair), then sanded and filled the body as needed. With you wet snading, are you going right to paint?

    Rob

  15. #135
    Senior Member
    Join Date
    Feb 2011
    Location
    Cumming, GA
    Posts
    232
    Post Thanks / Like
    Hi Rob
    I ground down the seams as well but my thought was I should wetsand/scuff the whole body before applying the filler to promote a better bond. I am deep in rage gold and sanding right now

  16. #136
    Senior Member John Dol's Avatar
    Join Date
    Feb 2011
    Location
    Gorham, ME
    Posts
    1,522
    Post Thanks / Like
    Finally a break in the weather between two storms. Thirty degrees outside and with my little heater made it do-able to not freeze my tongue to the frame.
    Worked on my wiring, and so far my horns are working. I have the Russ Thompson turn stalk so it complicates things a little. Getting close though to finishing that up. I ended up wiring the horn to the stalk button, and the plan is to use a foot switch for the brights. Keeping my fingers crossed for more mild winter days!

    John
    Finished the "My Coupe, my way" project.

    http://s956.photobucket.com/albums/ae46/jdcoupe1969/
    Coupe #386,17" Team III 245 FR 315 RR, 3-link, T5, 4 wheel disk, power brakes/steering. Sniper EFI
    First start Sept. 18 2013 First go kart Sept 19 2013

  17. #137
    Senior Member jkrueger's Avatar
    Join Date
    Feb 2011
    Location
    DFW, TX
    Posts
    432
    Post Thanks / Like
    I added some engine compartment cooling vents.


    Factory Five Type-65 Coupe:"Race Spec" coupe, Ordered 1/12, picked-up 5/12, roller 5/12, first start 10/12, finished 4/13
    Factory Five Roadster: Sold 12/2011.
    http://www.25tires.com

  18. #138
    Senior Member
    Join Date
    Feb 2011
    Location
    Gorham, ME
    Posts
    253
    Post Thanks / Like
    How do these vents work facing downward? Does the air coming through the radiator catch on the vents and is forced through them? Seems as though the air would take the easiest route straight up the chute.
    Bill

    Coupe #421, Picked Up 11/15/08, started 1/1/09 - Rebuilt mildly massaged 302, T5, 3 Link, and Loads of Extras

  19. #139
    Senior Member jkrueger's Avatar
    Join Date
    Feb 2011
    Location
    DFW, TX
    Posts
    432
    Post Thanks / Like
    Yes, that is the intended effect. I want air that is coming through the radiator to be forced into the engine compartment then for that air to go out the side vents or under the car.

    JC
    Factory Five Type-65 Coupe:"Race Spec" coupe, Ordered 1/12, picked-up 5/12, roller 5/12, first start 10/12, finished 4/13
    Factory Five Roadster: Sold 12/2011.
    http://www.25tires.com

  20. #140
    Member Owlknight360's Avatar
    Join Date
    Nov 2011
    Location
    KY
    Posts
    52
    Post Thanks / Like
    Hey JC,

    I thought the whole point of the air channel from the nose opening, through the radiator and out the hood was to take the hot air and expel it. By adding the louvers in that area, I would think you would pull the hot air just exspelled from the radiator and soak it back into the engine. I would think that pulling air from under the nose or through the hood before the radiator discharge would be the best method.

    Just my thoughts...

  21. #141
    Senior Member jkrueger's Avatar
    Join Date
    Feb 2011
    Location
    DFW, TX
    Posts
    432
    Post Thanks / Like
    The air coming through the radiator though hot, has to be cooler that what is under the hood. It is not any different than an OEM car with air coming through the radiator and into the engine compartment. I just want to get some air moving by the engine to help cool the engine compartment. I have wire loom melting that is 8-12" from the exhaust pipes. We will see how it works the next time on the track.

    JC
    Factory Five Type-65 Coupe:"Race Spec" coupe, Ordered 1/12, picked-up 5/12, roller 5/12, first start 10/12, finished 4/13
    Factory Five Roadster: Sold 12/2011.
    http://www.25tires.com

  22. #142
    Senior Member Austexican's Avatar
    Join Date
    Mar 2013
    Location
    Texas
    Posts
    119
    Post Thanks / Like
    I picked up my coupe from Phil Clarkson at South 1st Performance in Austin who installed FFR IRS with Lincoln rear and 3.23 gears (prev 3.73 and four point). Tomorrow I will test the setup at Harris Hill Raceway in San Marcos as a participant in the Texas Cobra Club Spring Meet track day.

  23. #143
    Senior Member Rodster's Avatar
    Join Date
    Nov 2011
    Location
    Orange County, CA
    Posts
    280
    Post Thanks / Like

    Bracket Fabrication!

    I made some brackets out of 1/8-in. aluminum plate: A fuel pump mount, and 2 "bulkhead" plates that mount to the triangular mounts for the IRS upper arms. These will be used to route/fasten the fuel lines (supply and return) and the e-brake cable on the passenger side. An identical bracket (mirror image) on the driver side will hold the other e-brake cable and the rear wiring harness.

    Looks like this:
    img_8404-kh6wz-triangle-bracket-installed-p-side.jpg

    Another view:
    img_8406-kh6wz-triangle-bracket-fuel-line.jpg

    Mounted the fuse panel under the dash. Has anyone noticed how flimsy this panel is? I didn't like the flexing, so I added a small bracket to screw into, like this - see the little silver bracket in there?
    img_8422-kh6wz-added-bracket-for-fuse-panel.jpg

    How about that e-brake? My cables are about 4 inches too short! I ordered a kit from North Race Cars....
    img_8370-kh6wz-e-brake-assy1.jpg

    More details on my WordPress site....
    Ordered Type 65 Complete Kit Aug 29, 2012 - The 50-50 $ale!
    Standard Width IRS; Halibrands - 17x9, 17x10.5
    Kit Arrived: Oct 9, 2012; Build Started: Oct 28, 2012
    WordPress: http://wayne-yoshida-kh6wz.com/
    LinkedIn: www.linkedin.com/in/waynetyoshida
    YouTube: http://www.youtube.com/user/kh6wz?feature=results_main

  24. #144
    Senior Member John Dol's Avatar
    Join Date
    Feb 2011
    Location
    Gorham, ME
    Posts
    1,522
    Post Thanks / Like
    Wired the driver front lights. Used the weather pack connectors. Have to secure it to the body yet.


    The loose wired are for the extra front blinkers that will be frenched in to to nose.

    John
    Finished the "My Coupe, my way" project.

    http://s956.photobucket.com/albums/ae46/jdcoupe1969/
    Coupe #386,17" Team III 245 FR 315 RR, 3-link, T5, 4 wheel disk, power brakes/steering. Sniper EFI
    First start Sept. 18 2013 First go kart Sept 19 2013

  25. #145
    Member
    Join Date
    Feb 2011
    Location
    The hills of TN
    Posts
    81
    Post Thanks / Like
    Picked up my wheels from the powdercoater. Undercoated my hood to cover the overspray from painting 3 years ago. Installed a Canton road race oil pan and fixed radiator sheet metal that broke at speed one day.
    If in doubt......flat out-Colin McRae

    Coupe #485

  26. #146
    Junior Member
    Join Date
    Nov 2012
    Location
    Newberg, Oregon
    Posts
    25
    Post Thanks / Like
    Blog Entries
    1
    Finished running the brake lines, installed the fuel tank and riveted the passenger floor and footbox in place. Good days work for me.
    brake lines 477.jpgbrake lines 478.jpgbrake lines 480.jpgfootbox 479.jpg
    Sorry, my first attempt to attach photos.
    Attached Images Attached Images
    Last edited by Bradyman; 04-06-2014 at 02:30 AM.

  27. #147
    Senior Member
    Join Date
    Feb 2011
    Location
    Cumming, GA
    Posts
    232
    Post Thanks / Like
    After much trimming, grinding, reglassing and sanding I got the rear spoiler to a shape and fit I was happy with.


  28. #148

    Average Moderator
    Garry Bopp's Avatar
    Join Date
    Feb 2011
    Location
    Covington, Georgia
    Posts
    1,202
    Post Thanks / Like
    Lookin' good, Tim!

    Garry
    I sure miss my coupe!

    F5R1004503SP 2004 Challenge Car, 331 Stroker

    Coupe # 031, 422" Windsor stroker by Southern Automotive (Dash autographed by Peter Brock)***SOLD***
    Unique 427 Roadster, 482" Aluminum FE by Southern Automotive***SOLD***

  29. #149
    Member
    Join Date
    Nov 2011
    Location
    Bay Area California
    Posts
    44
    Post Thanks / Like
    Hey Bradyman, tell us about the paint on your aluminum foot box panels. Looks nice? Is it powder coat? Spray paint? What's the color?

    Thanks!

    Jeff

  30. #150
    Junior Member
    Join Date
    Nov 2012
    Location
    Newberg, Oregon
    Posts
    25
    Post Thanks / Like
    Blog Entries
    1
    Hey Bradyman, tell us about the paint on your aluminum foot box panels. Looks nice? Is it powder coat? Spray paint? What's the color?

    Thanks!

    Jeff
    Hi Jeff. It is a Martin Senour paint with clearcoat. Color is Sterling Gray Metallic #56-82209-A.
    This is the same color that I will put on the body. The stripe color is still undecided but I have a Phoenix Yellow BMW M3 that I will sell when the car is finished and I may paint the stripe the M3 color in its honor.

  31. #151
    Member
    Join Date
    Nov 2011
    Location
    Bay Area California
    Posts
    44
    Post Thanks / Like
    Thanks for the info Bradyman! It looks fantastic. And I think a coupe that color with Phoenix Yellow stripes is gonna be wicked!

  32. #152
    Junior Member
    Join Date
    Nov 2012
    Location
    Newberg, Oregon
    Posts
    25
    Post Thanks / Like
    Blog Entries
    1
    Thanks Cobrakai, we are as much as a year away from paint so who knows how many times I'll change my mind on the stripe color. At least the body color is set.

  33. #153
    Member
    Join Date
    Nov 2011
    Location
    Bay Area California
    Posts
    44
    Post Thanks / Like
    Quote Originally Posted by Bradyman View Post
    Thanks Cobrakai, we are as much as a year away from paint so who knows how many times I'll change my mind on the stripe color. At least the body color is set.
    I hear you! I change my mind about color a lot. I always end up back with the classic guardsman blue and wimbledon white. I'm keeping everything else neutral just in case.

    I thought of this car when you mentioned your color scheme. I love it.

    BDR857.6.jpg

  34. #154
    Junior Member
    Join Date
    Nov 2012
    Location
    Newberg, Oregon
    Posts
    25
    Post Thanks / Like
    Blog Entries
    1
    That is a beautiful car! My main color is a bit lighter and the stripe has less orange but it would be very similar.

  35. #155
    Member
    Join Date
    Nov 2011
    Location
    Bay Area California
    Posts
    44
    Post Thanks / Like
    Yeah, it looks good. If I ever decide to get a roadster I honestly think I'd go Backdraft Racing, in that color scheme. It's about 41K completely built. You just add the motor and tranny and go! They are really beautiful cars. Can't wait to see yours Bradyman!

  36. #156
    Senior Member
    Join Date
    Feb 2011
    Location
    Gorham, ME
    Posts
    253
    Post Thanks / Like
    Blasphemy!!!!!!!!!!!!
    Bill

    Coupe #421, Picked Up 11/15/08, started 1/1/09 - Rebuilt mildly massaged 302, T5, 3 Link, and Loads of Extras

  37. #157
    Member
    Join Date
    Nov 2011
    Location
    Bay Area California
    Posts
    44
    Post Thanks / Like
    Quote Originally Posted by loeffler1 View Post
    Blasphemy!!!!!!!!!!!!
    I know Bill!!! But keep in mind I'm about 8 months into a coupe build and the thought of doing another one is just too much at the moment. Gimme a couple of years after this one is done and I bet I'm ready for another!

    jeff

  38. #158
    Member
    Join Date
    Feb 2011
    Location
    The hills of TN
    Posts
    81
    Post Thanks / Like
    Put wheels and new Nitto NT05s on today, moved oil temp sensor to new oil pan, replaced freshly painted sidepipes, washed and waxed.
    If in doubt......flat out-Colin McRae

    Coupe #485

  39. #159
    Junior Member
    Join Date
    Nov 2012
    Location
    Newberg, Oregon
    Posts
    25
    Post Thanks / Like
    Blog Entries
    1
    Finished running the hard fuel lines and took it off the rotisserie.
    fuel lines 485.jpgfuel lines 483.jpgfuel lines clamp 484.jpglowering 488.jpg
    Last edited by Bradyman; 04-14-2014 at 02:14 AM.

  40. #160
    Member
    Join Date
    Nov 2011
    Location
    Bay Area California
    Posts
    44
    Post Thanks / Like
    Looks good Bradyman. Where did you get the sweet fuel line clips?

    jeff

Page 4 of 6 FirstFirst ... 23456 LastLast

Posting Permissions

  • You may not post new threads
  • You may not post replies
  • You may not post attachments
  • You may not edit your posts
  •  

Stewart Transport

Visit our community sponsor