-
Out Drivin'

Windshield - reasemmbly and fitting to chassis - hoping to avoid cracks
UPDATED 6/3/16 - Today's TTT on an old how-to is one that will always have relevance due to the continued issues of cracking windshields. Not to scare any of the new (or prospective) builders, but this is one area where spending some additional time during your build will help reduce the risk of cracks in your windshield due to screws that are too long or from stresses on the windshield frame.
NOTE - the pics below in this first post were from the initial test fittings... the final spacers are solid pieces (not washers) and the hardware uses mechanical lock nuts, not wing nuts (which were just for ease of multiple test-fits).
Original Text Follows.....
Still working on getting my chassis ready for what will (hopefully) be the last body-on phase of bodywork for me before taking it back off and sending it out for paint. The most recent project was reassembly of my windshield. I previously posted about taking the glass out and having a local glass company chamfer and polish the edges in hopes of staving off cracks. Since I now need to install the windshield as part of my last body fitting, I tackled grinding down all of the screws that protrude into the frame and try to occupy the same area as the glass - which is obviously not a good thing.
I previously did the one-screw-at-a-time method of testing and grinding the four screws that hold the frame to the side posts. This method was highlighted on a build-school video that I found thorugh a link somewhere on this site. In it, the instructor suggested installing all four screws, then backing them off just a little until the side post can be slightly wiggled. Then, one-at-a-time, tighten each screw and check to make sure that the wiggle goes away. If it doesn't, then that screw is bottoming out and needs to be ground down a bit.
With the side posts done, I then had to grind down all of the other screws. I didn't realize there'd be so many, though, but by my count there were TWENTY(!) that needed attention - four per bottom corner (plus smoothing the brass angle pieces), two in the bottom center for the post bracket, two each (x4) for the sun visors, and two for the British manufacturer's tag that I added to the top frame rail. Once these were all ground down so that they were flush with the inside of the frame, I used a dremel to de-burr the inside of the channel in quite a few places, including all of the holes.
Finally, I reinstalled the glass using the original rubber "U" molding as well as a generous amount of 3M windshield bedding and glazing goo.
The next step was to fit the entire thing to the chassis. As many others before me have done, my goal was to ensure that there is no stress at all on the windshield from the side posts. To do this, I first mocked everything up without the glass in the frame, then double checked it after the glass was installed. What I have now is the two side posts bolted firmly to the chassis in an orientation that is positioned so that the windshield (glass and frame) lines-up perfectly with the sides (including the hocky-stick like bends at the top).
To accomplish this fit, I bent the side posts so that they'd be parallel to the chassis mounting points, then gave them a slight twist so that they'd be square to the chassis, too. I then centered the windshield (with the help of two other people) and figured out how thick the spacers would need to be.
The final result, as tested with two helpers, was that they could hold the windshield (glass and frame) in place between the mounted posts and I was able to install the four screws on each side without any stress, pushing, pulling, etc... As a final fitting step, I also slightly bent the top hocky stick area of the driver's side (by hand) so that it mated-up to the top recess in the windshield frame properly.
From all of the posts on the subject, I'm sure that this is no guarantee against cracking. But, if nothing else, at least I have the peace of mind of having done everything I could do to make sure the windshield is installed properly and without any stresses on the frame or glass.
Here are a few pics:
A sample of the before and after of grinding screws inside the frame channel - the one on the left is done:

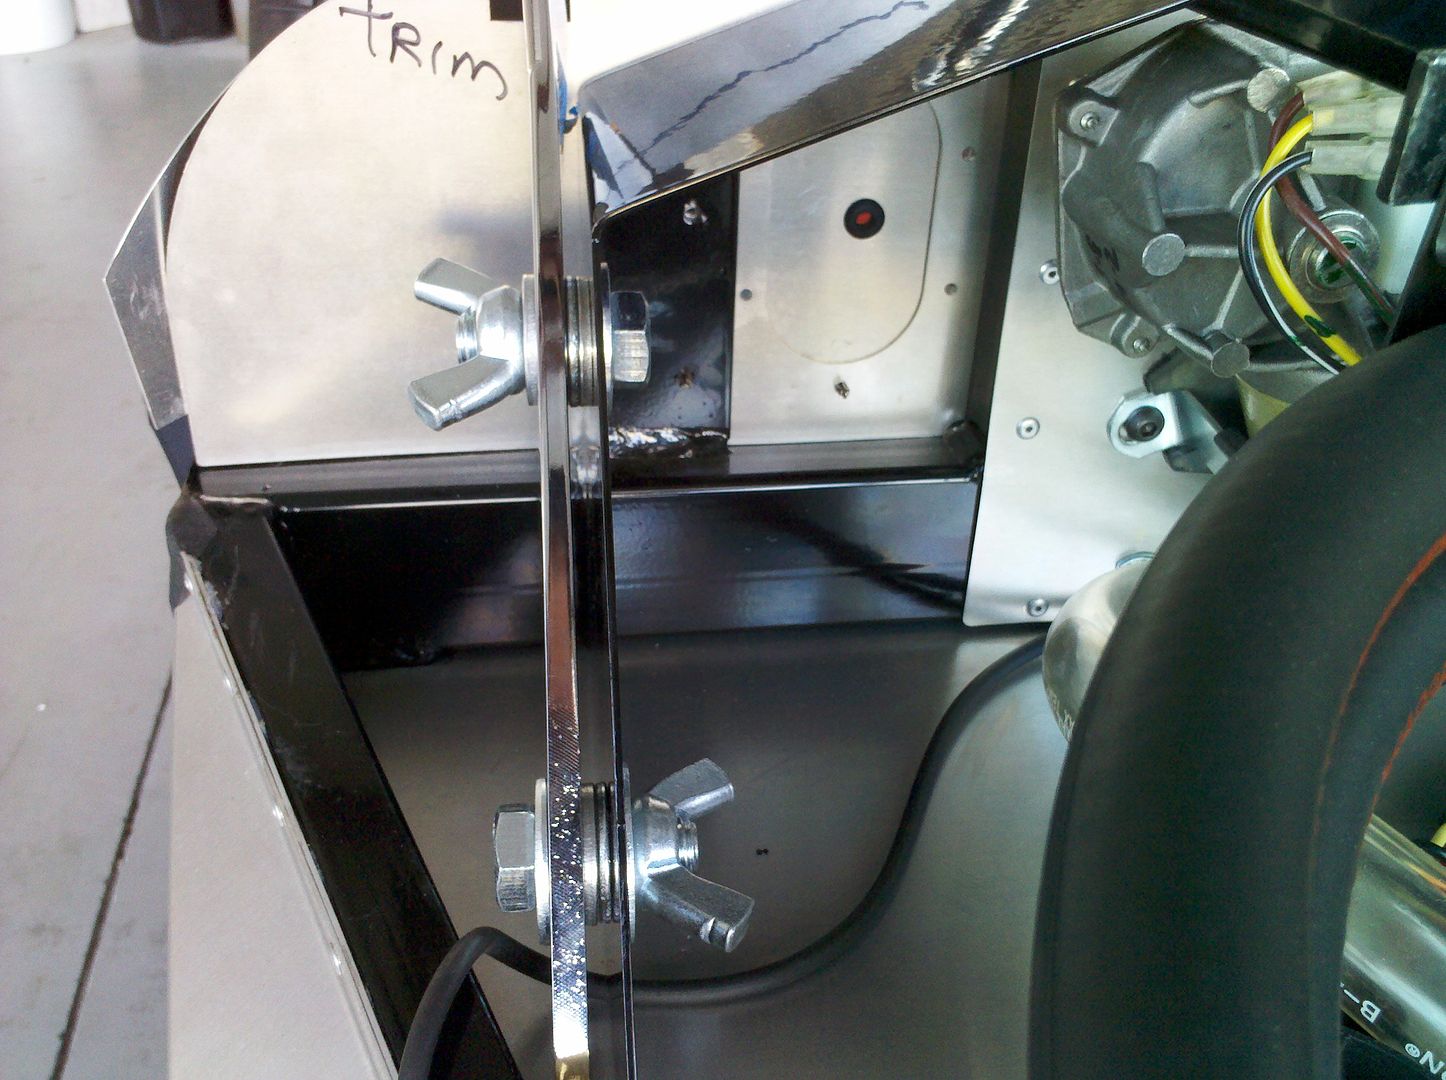
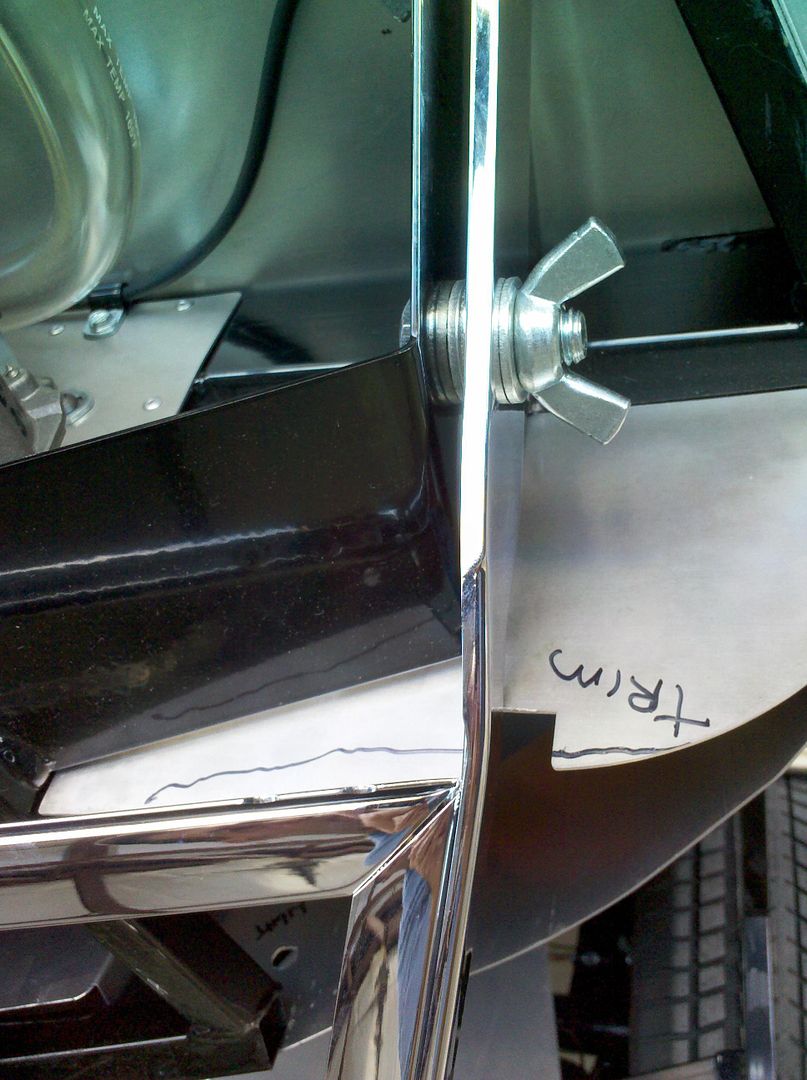
Pass side windshield post at the chassis - ignore the wing nuts... just there to make the on-and-off process a bit easier during the fitting:
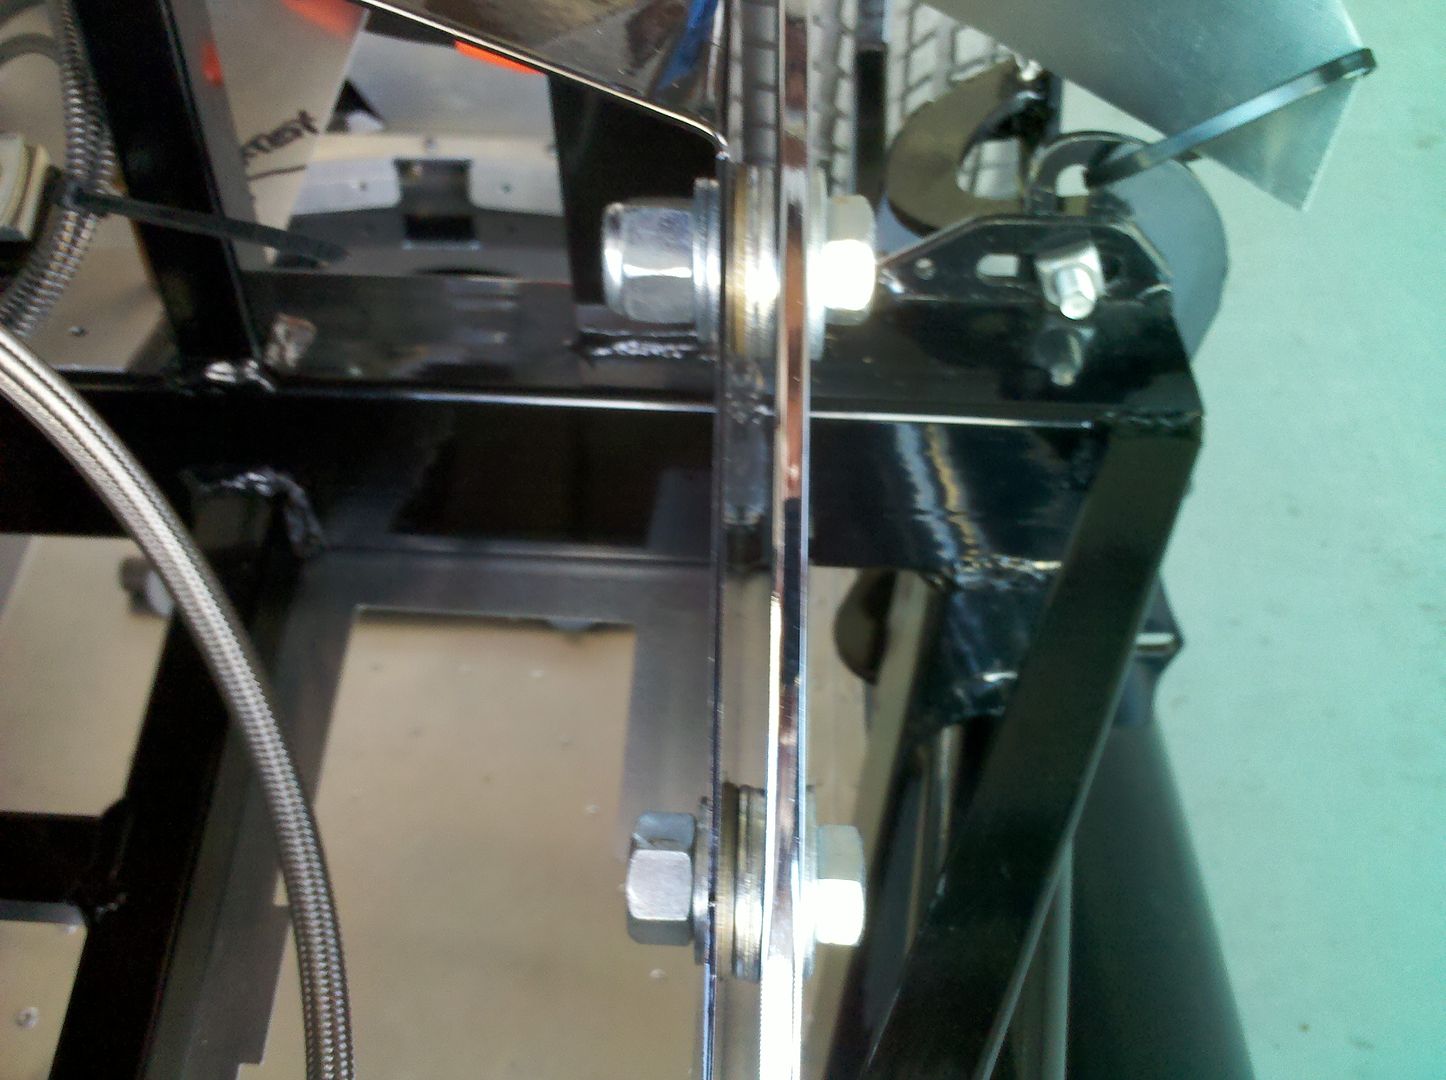
Driver's side post at the chassis:
This one shows the twist that I had to put in the side posts to get them completely plumb/square/parallel to the chassis - I accomplished this using my Harbor Freight press and a bit of creative clamping/blocking to get the brass to move where I wanted:
Last edited by Gumball; 06-03-2016 at 10:32 AM.
Later,
Chris
"There are no more monsters to fear, and so, we have to build our own."
Mk3.1 #7074
-
Looks great Chris.
Since I got my MkIV with no cut outs, I had to locate and cut the slots for the windshield posts. Ended up having to refill some of the slot because there was nothing for the cover plate screw to hold to. A layer of fiberglass mat and some fiberglass filler fixed this before painting. Make sure the cover plate fits properly. Since FFR supplies two of the same instead a left and right side, I bought a pair from Finish Line along with their rubber gaskets.
It will become evident if your windshield is under any kind of tension when you fit it with the body on. I thought I had done a pretty good job of fitting the windshield until I put it on after the body was painted. I kept getting a gap between the bottom of the frame and the top of the cowl when I tightened up the large bolts. Turns out I didn't have enough spacers between the posts and the chassis brackets. I slipped in a large washer between the two which pushed the posts outwards and pulled the bottom edge of the frame down towards the cowl. So far, everything looks fine.
Ron
-
Senior Member

Great work. I think that the WS being under stress is the reason there are so many cracks. It doesn't help that, once the body is on, access is so difficult. It is very hard to get to the nuts/bolts but nearly impossible to see the detail of how the side posts fit (or don't) to the frame. I think you have hit on a very good procedure. It will be interesting to see how this works once the body is on and whether the holes line up.
FFR MkII, 408W, Tremec TKO 500, 2015 IRS, DA QA1s, Forte front bar, APE hardtop.
-
Senior Member

Chris, did u post pictures(?) I'm not seeing them. (but it may be on my end, my company determined that Photobucket was a restricted site over the weekend. WTH??)
F5R #7446: MK4, 302, T5 midshift, 3.55 Posi IRS, 17" Halibrands
Delivered 4/4/11, First start 9/29/12, Licensed 4/24/13, off to PAINT 2/15/14!! Wahoo!
-
Out Drivin'
Here is today's TTT on an old how-to thread that should raise awareness on a number of steps that can be taken to ensure that your windshield is installed in a way that will (hopefully) minimize the risk of cracking.
The first post references an earlier thread on the glass preparation, so here are a few additional pics showing that prep, as well as some of the final installation.
1) Glass edge after being removed from the frame and beveled by a local glass shop - when I first took it out of the frame, the edge was very sharp in places and definitely had not been deburred or polished in any way at the time of manufacture - the glass shop said that some of the little chip areas along the rough edges could have easily resulted in cracks over time.....

2) The lower corners of the windshield frame have these small brass 45 degree corners - seems amazing that these are inside the frame where they can apply pressure to the corner of the glass, so I smoothed all of the sharp edges on the brass and then made sure that the screws didn't protrude through them by grinding down the screws a bit - a tedious process, but important since I noticed that the windshield gasket actually had impressions of the ends of the screws... meaning that there was unwanted pressure there from the factory.....

3) Spacer on the chassis that replaced the temporary washers shown above - I made one of these for each side out of 3/16" plate aluminum - they include holes large enough for the mounting mounting bolts to pass through (and provide wiggle room for adjustment of the windshield for rake) and are held in place by two small button head screws from the opposite side (to allow a smooth mounting surface for the windshield frame legs) - note also the beveled edges to ensure that the windshield frame slides over them easily when installing it down through the body.....

4) The body should not touch the windshield frame at all - for this reason, it is important to test fit the windshield during the bodywork phase with the body on the car and bolted in place - I had to glass over the FFR pre-cuts and re-do the slots to get it just right - during final assembly, the gaps were filled with 3M strip caulk, covered with the escutcheons (and gaskets), and some additional 3M strip caulk was pushed into place from below - critical on the driver's side especially, due to the proximity to the fuse panel.....

5) Top corners of the windshield to side leg transition - this is an area that often doesn't get addressed during a build... in fact even the silver early Mk4 in the FFR gallery shows horrible misalignment between those two pieces - I corrected this with some very delicate bending of the top "hockey stick" portion of the side legs to ensure that it lined up with the top of the windshield frame - much care is needed, since the brass is soft and the chrome plating is brittle - but, this little step will go a long way to keeping eyes from being drawn to a misaligned part and will make your car look so much better.....

In the end, I have quite a few hours in my windshield frame, but I think it was more than worth it. As part of the last test fit, I confirmed that by removing just the four screws on each side leg, the windshield and frame can be removed from the car and the side legs don't move in or out at all. This validates that there is no stress being applied to the windshield.
Later,
Chris
"There are no more monsters to fear, and so, we have to build our own."
Mk3.1 #7074
-

Steve >> aka: GoDadGo

Thanks For Posting This Information!
I'm about to start the fitting process and I really think this thread will help me a lot.
-
Senior Member

How hard was it to pull out the glass from the frame and to reinstall it?
-
Senior Member


Originally Posted by
chmhasy

How hard was it to pull out the glass from the frame and to reinstall it?
Actually very easy, I followed the Fast Freddie Lexan instructions
MK4 #9121 - Complete kit - Stroked 351, T5x, 3.55 Rear End, 3-Link - Pickup 6/17/17, 1st start 12/2/17, Go-Kart 12/9/17, Road Worthy 4/27/18
-
Out Drivin'
Agreed - very easy! The bottom of the frame comes off from the rest and the sides and top are one-piece that comes right off.
Later,
Chris
"There are no more monsters to fear, and so, we have to build our own."
Mk3.1 #7074
-
Senior Member
IMG_20180719_124807.jpg
I pulled the frame off and here is what I found. To the touch it felt fine but when I got a reflection off the lights it looks bad
I received my kit in 2012
Here is what I have done I pulled off the frame. cleaned the glass, My local glass shops web page says that they will cut Lexan sheets to size. So I made a paper template of the glass to which I will make a plywood template in the event the glass cracks at some point in the future I can get a Lexan windsheld.
Last edited by chmhasy; 07-19-2018 at 07:12 PM.
-
Senior Member
Jwebb, if you used a glass shop who did you use? the place close to me didn't want to touch it
Thanks
-
Post Thanks / Like - 0 Thanks, 1 Likes
-
Senior Member
Originally Posted by
chmhasy
Jwebb, if you used a glass shop who did you use? the place close to me didn't want to touch it
Thanks
Did it myself, very easy
MK4 #9121 - Complete kit - Stroked 351, T5x, 3.55 Rear End, 3-Link - Pickup 6/17/17, 1st start 12/2/17, Go-Kart 12/9/17, Road Worthy 4/27/18
-
Senior Member
Thanks, I thought about doing it, but ending bringing it to another shop in east windsor. They did a great job


 Thanks:
  Likes:


 Reply With Quote


