BluePrint Engines

Visit our community sponsor

Thanks Thanks:  0
Likes Likes:  0
Page 2 of 2 FirstFirst 12
Results 41 to 63 of 63

Thread: Does anyone have a Gen-I GTM hatch that they aren't planning to use?

  1. #41
    Senior Member The Stig's Avatar
    Join Date
    Feb 2011
    Location
    Charlotte, NC
    Posts
    2,004
    Post Thanks / Like
    I spoke to Jason two or three days ago, and it sounds like the hatch is coming along well. I can't wait to see the finished product.

    I have the car scheduled to have some paint scratches fixed, as soon as I get it back from wiring.

    Who knows? It may turn out that I can have the hatch painted at the same time. Then I can get them switched out on the car. While I have the hatch off the car, I'm going to have the hatch hinge pieces powder coated black.

    Once the paint is corrected, I'm going to have the final cut and buff done, to bring the paint to a true show finish.
    The Stig

    Some say, that I only know two facts about ducks, (both being wrong); and that if I could be bothered, I could solve the "da Vinci Code" in 47 seconds...
    All I know is that I'm called "The Stig".
    GTM #0081

  2. #42
    LCD Gauges's Avatar
    Join Date
    Apr 2011
    Location
    Toronto, Ontario
    Posts
    1,545
    Post Thanks / Like
    Blog Entries
    3
    No sketch, or sneak peek of the progress?! Throw us a little bone please.
    Custom LCD Gauges , Data Loggers, Control Touch Screens
    www.LCDdash.com \\ 647-522-9953 \\ Voice & Text
    Proud new owner of GTM Gen 1., #105 - 08/27/11
    LQ9 Powered, G96.00 6 speed transaxle

  3. #43
    Senior Member The Stig's Avatar
    Join Date
    Feb 2011
    Location
    Charlotte, NC
    Posts
    2,004
    Post Thanks / Like
    LOL... It's coming. I don't have sketches either. I'm working purely on my trust in Jason's ability to execute our plan. I believe it's going to be really cool. Literaly!

    It's going to look cool and also allow all of the trapped heat in the engine bay to dissipate from the top of the engine bay. So it'll be fully functional as well.

    Believe me, I'll post pictures as soon as I can. For now, just refer to post #36 and look at the hatch of the Ferrari F12. That's the design inspiration.

    Mike
    Last edited by The Stig; 11-04-2013 at 10:15 PM.
    The Stig

    Some say, that I only know two facts about ducks, (both being wrong); and that if I could be bothered, I could solve the "da Vinci Code" in 47 seconds...
    All I know is that I'm called "The Stig".
    GTM #0081

  4. #44
    Senior Member The Stig's Avatar
    Join Date
    Feb 2011
    Location
    Charlotte, NC
    Posts
    2,004
    Post Thanks / Like
    Quote Originally Posted by Lukn4trbl View Post
    No sketch, or sneak peek of the progress?! Throw us a little bone please.
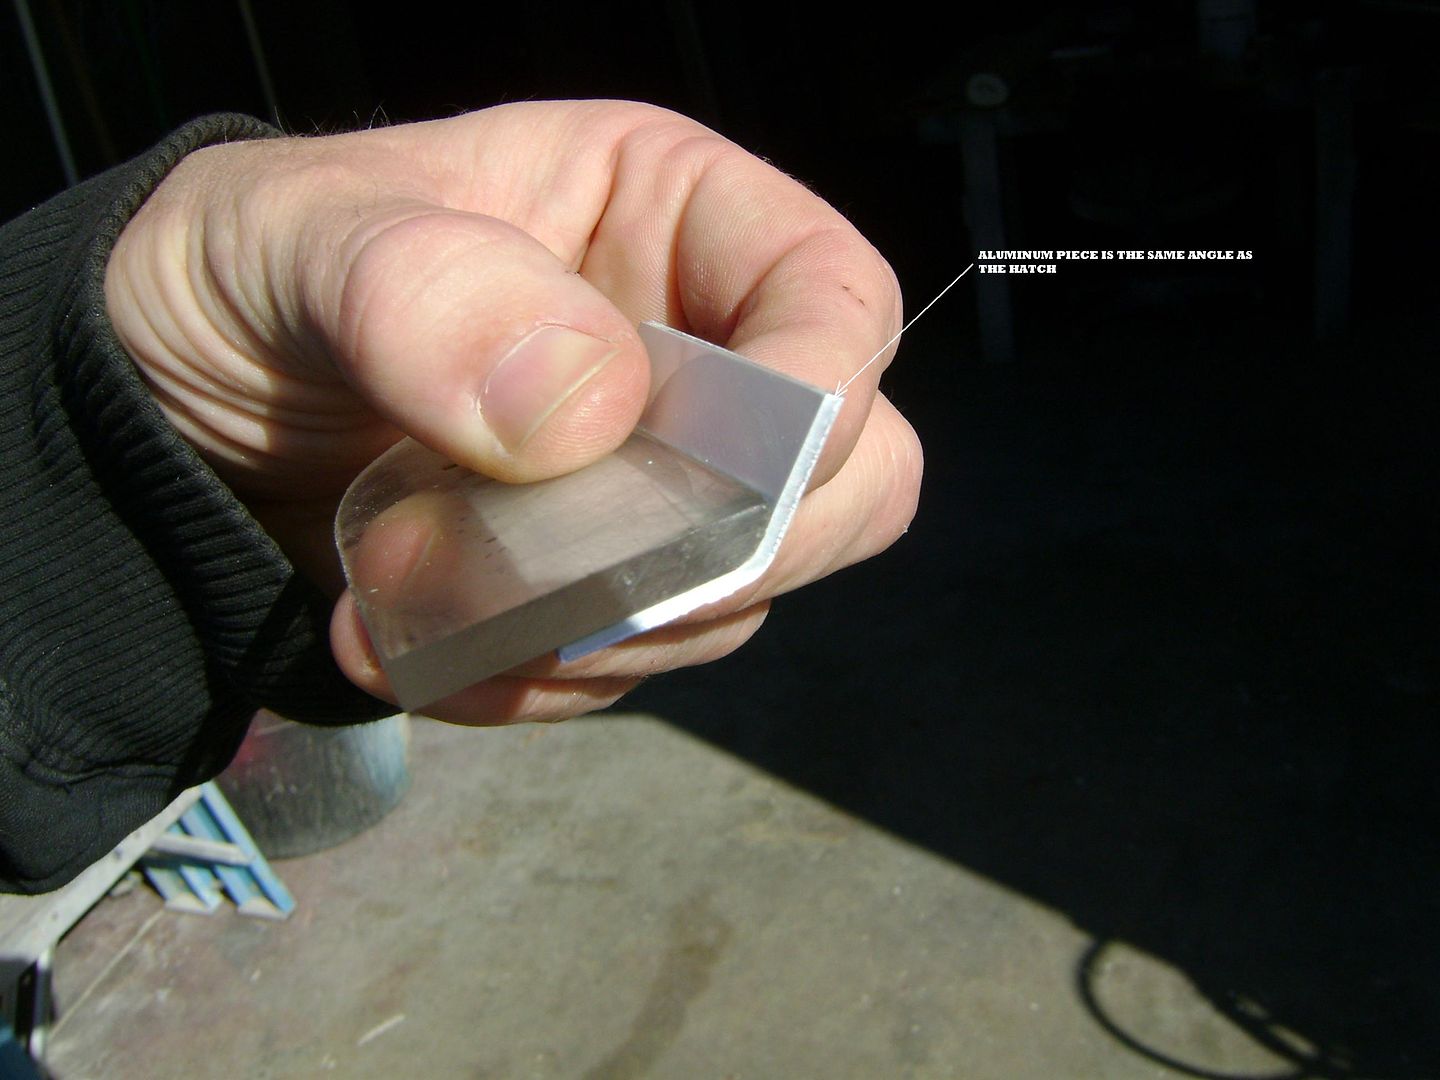
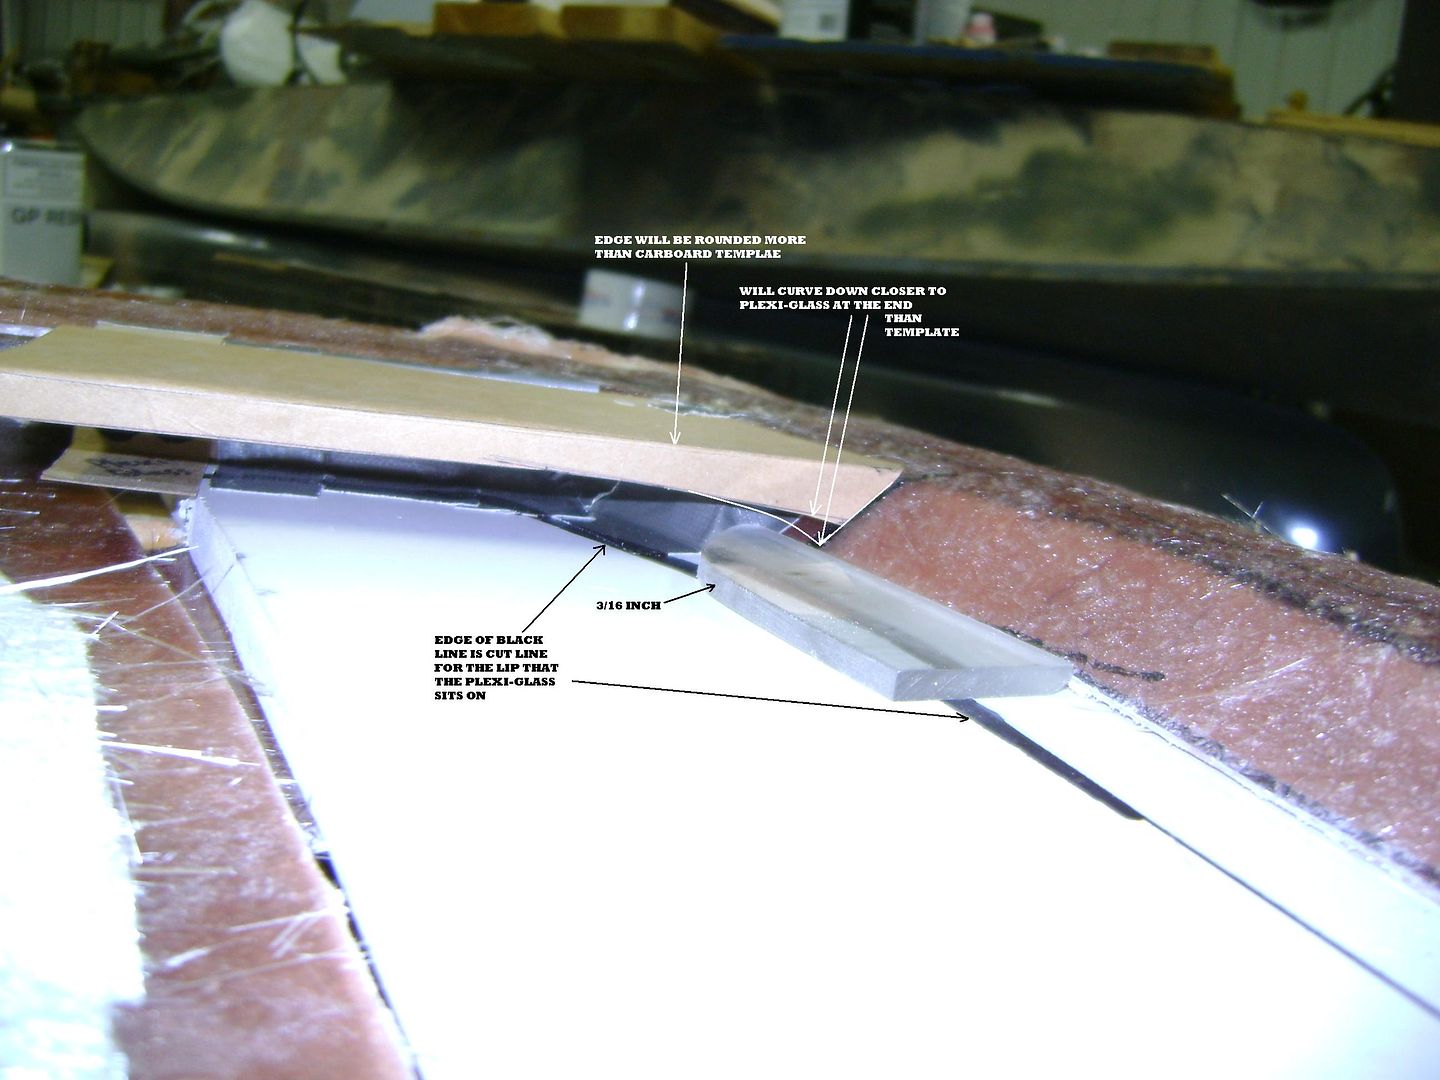
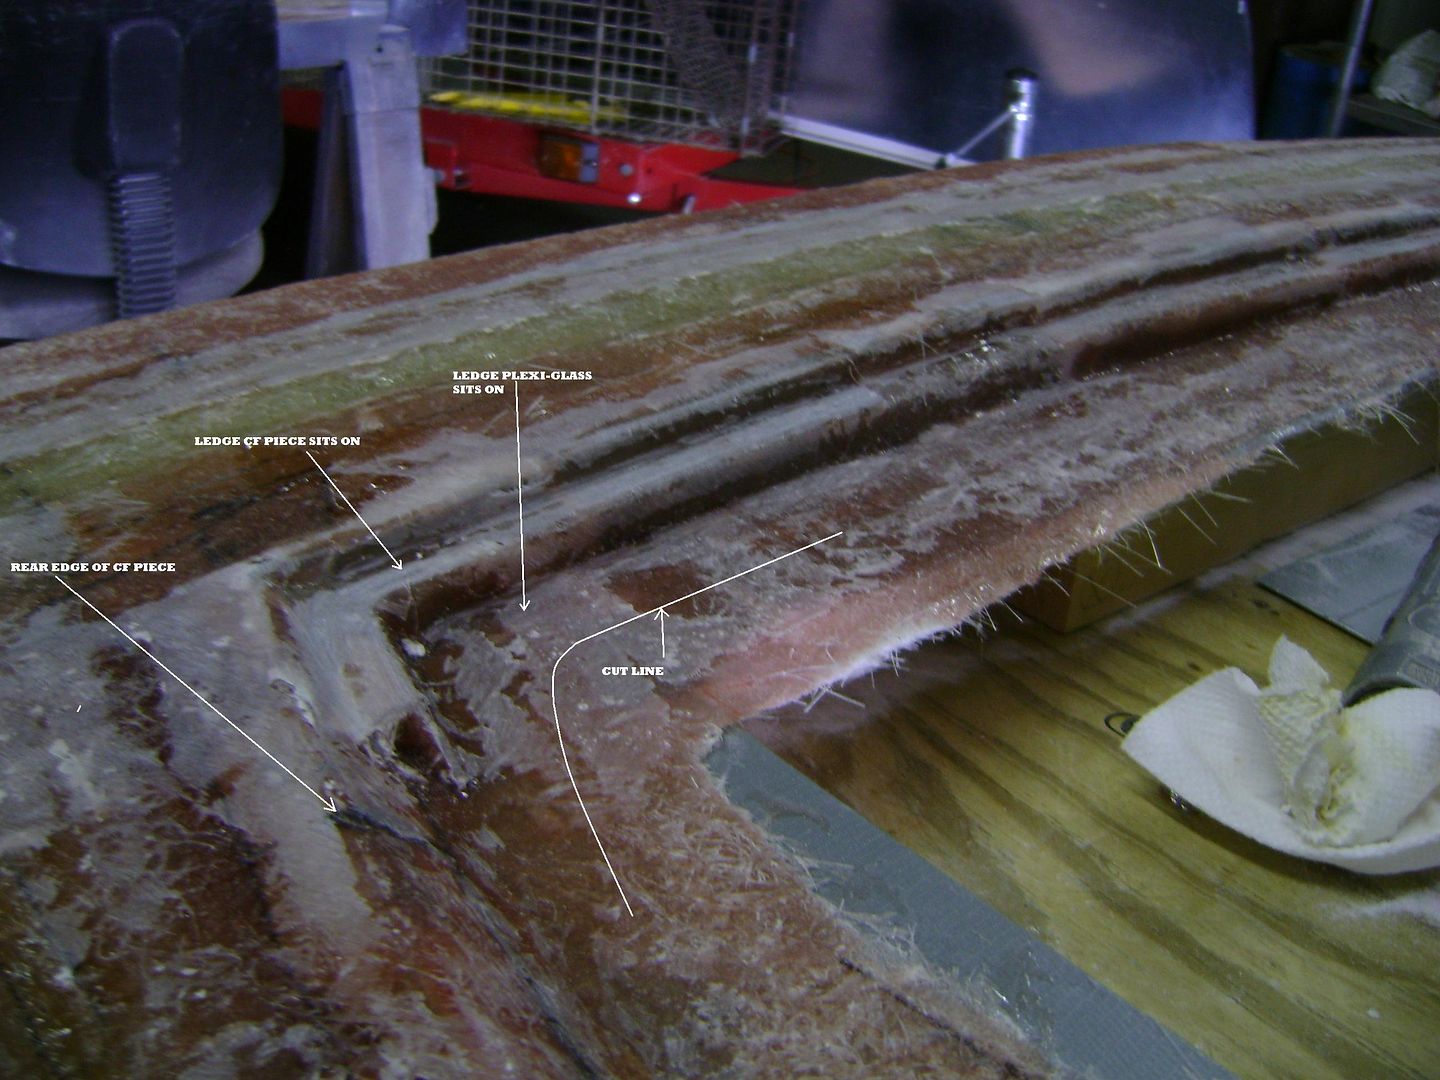
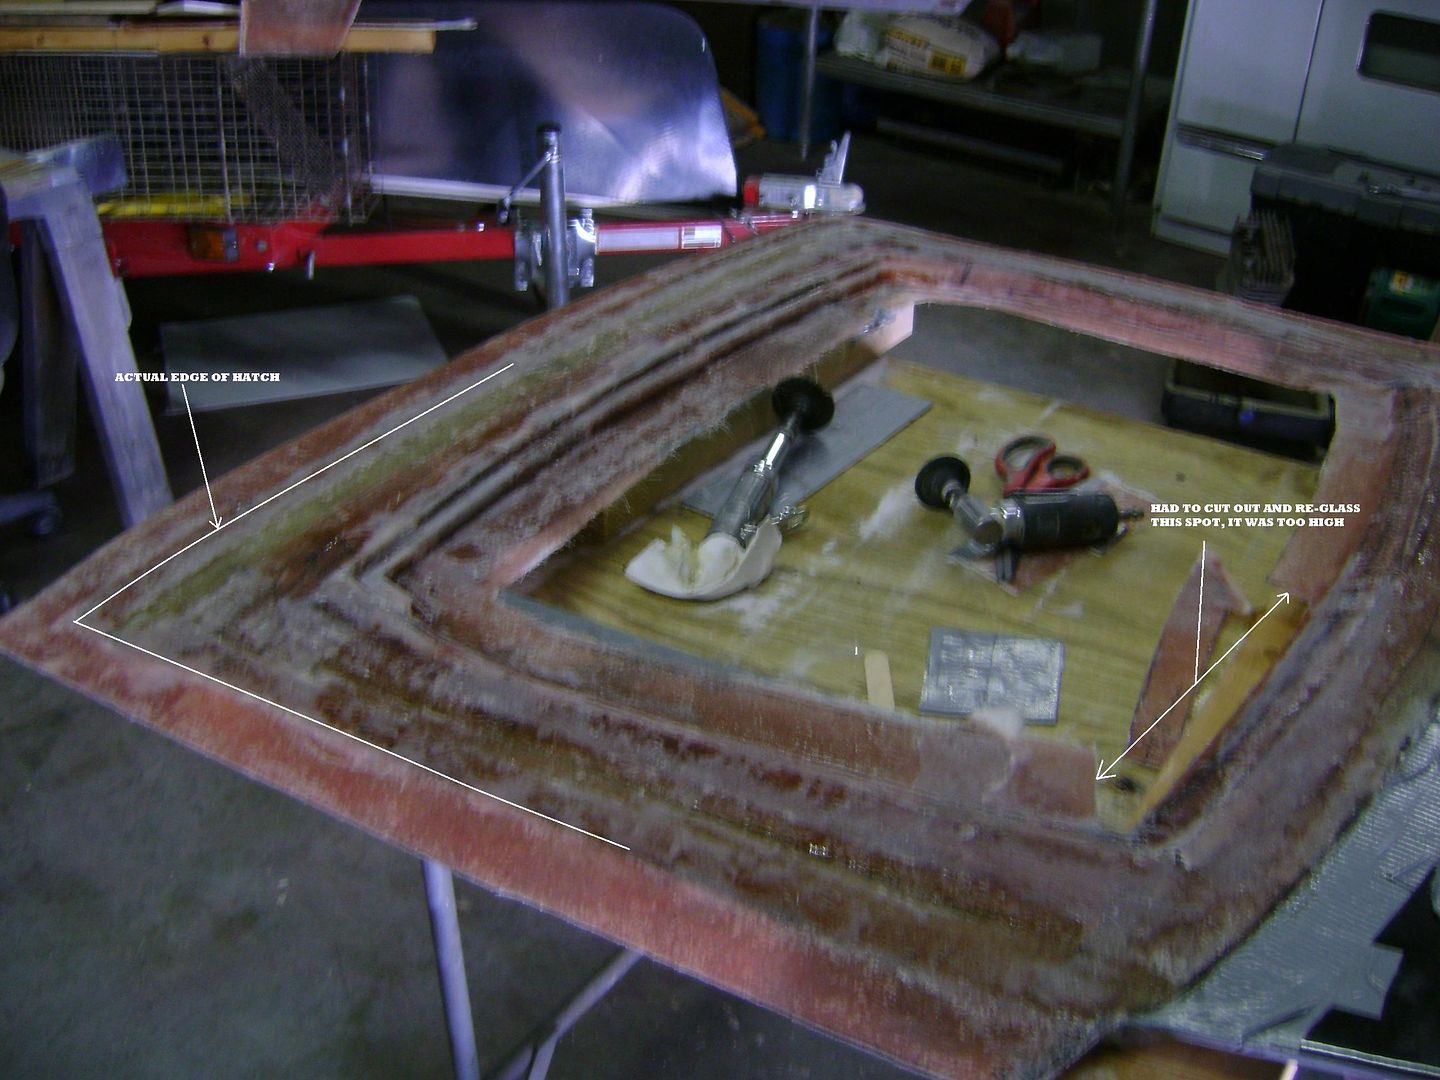
    Here are a few pictures of the design ...


    You can see the angled edge of the polycarbonate, and how it will fit right up against the angle of the hatch. The aluminum piece in this picture is the same angle as the window edge of the hatch.


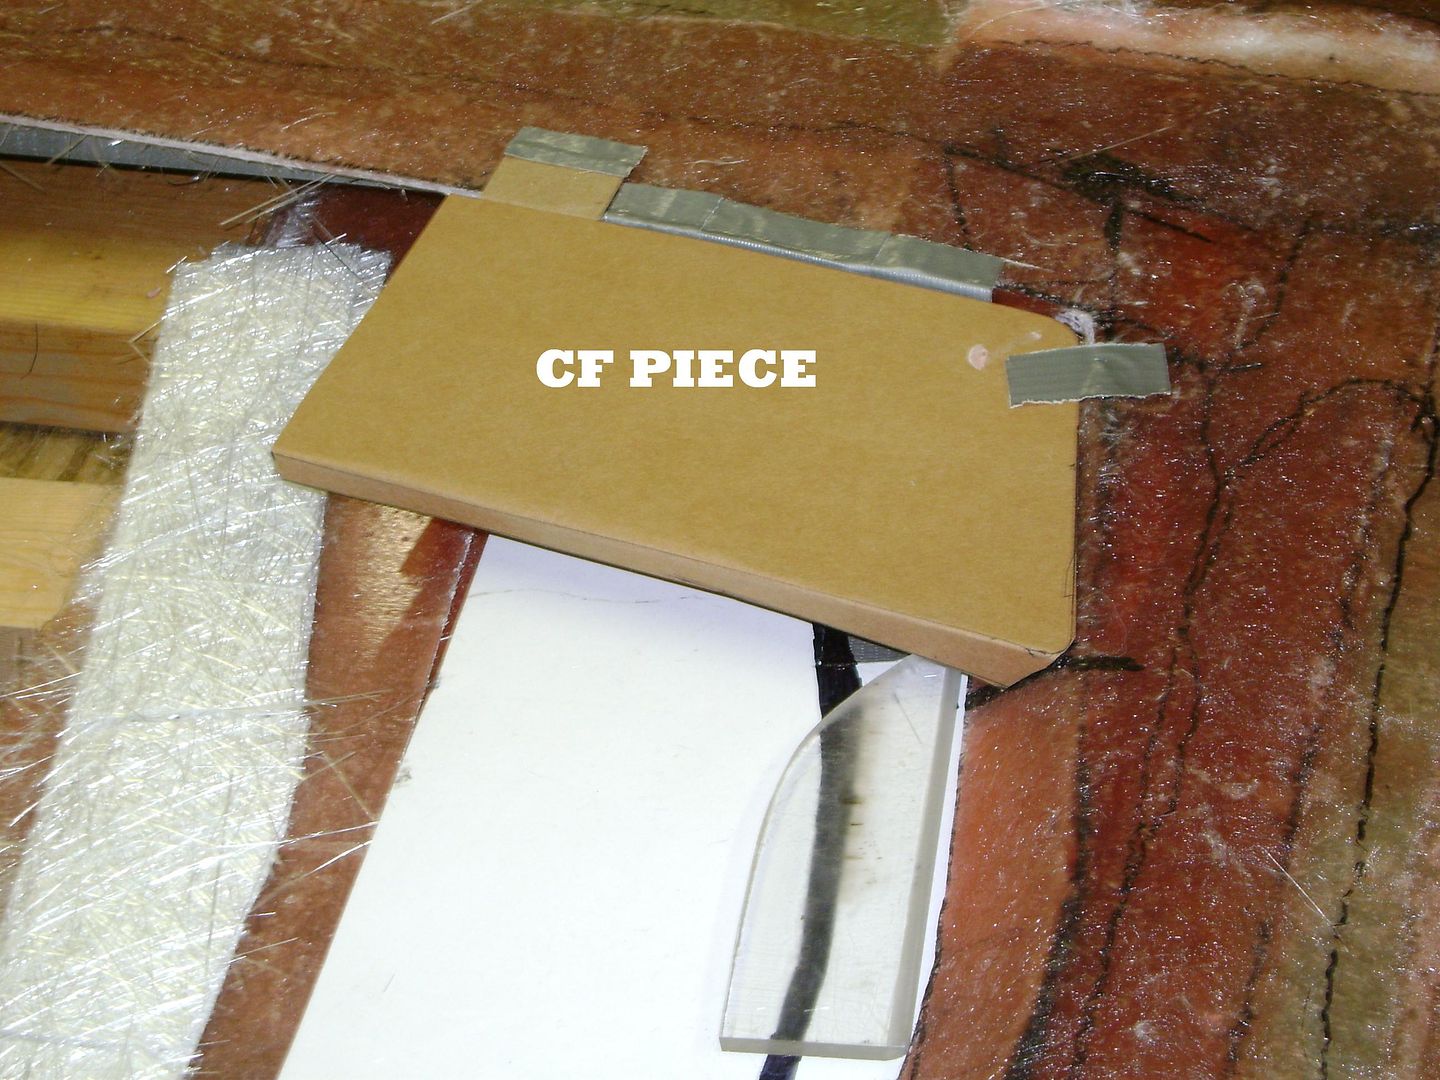
    The pressed wood template at the top of the hatch, will be made of carbon fiber, and will be a cover for vent holes that will be drilled into the top edge of the polycarbonate window. It will fit flush to the body/roof edge, spanning to each side of the window where it fits the beveled angle on the side of the hatch.


    In this picture, you can see the different layers/levels where the polycarbonate will rest, and where the carbon fiber "cover" will rest.


    Jason has left the edges a little long, so they can be trimmed for perfect gaps, and will fit flush against the body edges and lines.


    Here you can get a sense of how the polycarbonate window will fit into the lower slots where it will be bonded to the hatch. The top of the window will have holes drilled that will allow the heat to escape from the engine compartment. The carbon fiber cover will span the top of the window, hiding the holes that have been drilled. This will allow heat to escape freely, and still protect the engine bay enough that I can wash the car without soaking the coils and other electrical bits.

    Jason Cecil (and Ferrari) is responsible for the design, and I'm all in. As he said earlier today; the early stages of fiber glass work is ugly, but when it's sanded and prepped, it starts to come to life. I'm pretty pumped already. I can see how this will work, and I think it's going to have an over the top look, yet still stay close to the original idea of the GTM design.

    We're all going to have to be patient for the next round of pictures. But I'm sure that they'll be worth the wait.

    Thanks Jason!
    Last edited by The Stig; 11-05-2013 at 08:54 AM.
    The Stig

    Some say, that I only know two facts about ducks, (both being wrong); and that if I could be bothered, I could solve the "da Vinci Code" in 47 seconds...
    All I know is that I'm called "The Stig".
    GTM #0081

  5. #45
    Banned
    Join Date
    Aug 2011
    Posts
    669
    Post Thanks / Like
    keep in mind too, this is going to be the plug, from which i'll make a mold. that's the reason for the extra width around the perimeter. the actual part will be made from the mold in fiberglass/gelcoat and bonded to the ffr hatch. i'm doing the body filler and block sanding now.
    Last edited by carbon fiber; 11-05-2013 at 10:14 AM.

  6. #46
    Senior Member
    Join Date
    Feb 2011
    Location
    San Diego
    Posts
    1,961
    Post Thanks / Like
    Since someone is going to the trouble to make a plug and mold for the hatch, have you also gone to the trouble to fix the gapping issue with the FFR glass window? That would be a great added benefit and take very little extra work to the plug.

    Sorry if you already addressed this as I haven't read the entire thread.
    www.myraceshop.com

    GTM solution kits
    Corvette and Race parts

  7. #47
    Banned
    Join Date
    Aug 2011
    Posts
    669
    Post Thanks / Like
    i'm assuming you're talking about the glass not blending with the body, as far as the convex shape of the glass. the fit and the venting hot air were considerations when redoing it. i'm keeping the top profile low and flat. i'm keeping the outside edges down around the sides and top, so after it's bonded to the hatch it won't be up higher than the body. is that what you meant?img_0056.jpg
    Last edited by carbon fiber; 11-05-2013 at 11:31 AM.

  8. #48
    Senior Member
    Join Date
    Feb 2011
    Location
    San Diego
    Posts
    1,961
    Post Thanks / Like
    No. I'm referring to the fact that the "stock" glass interfers with the hatch in the lower corners. I know this for a fact on the Gen Is and I believe that the Gen IIs changed slightly but still have the issue, which usually requires either sanding of the glass, which can cause it to shatter, or cutting out some of the fiberglass in the hatch and reglassing to gap the window properly. Since you are making a plug and a mold, my suggestion was to make this modification to the plug/mold so that your hatch solves this issue as well. I understand that you may not be using the original glass in your creation, but it looks like you could still use it, and if you solved the fitment issue as well it would just be another reason for builders to use your hatch.
    www.myraceshop.com

    GTM solution kits
    Corvette and Race parts

  9. #49
    Banned
    Join Date
    Aug 2011
    Posts
    669
    Post Thanks / Like
    the polycarbonate won't be at the outside edges of the hatch like the stock glass is. the edge of the hatch will be in fiberglass, so just sand until you have the right gap and it's level with the body. it'll be slightly oversized all the way around (more on the top and sides) so it can be sanded to fit the car.
    Last edited by carbon fiber; 11-06-2013 at 01:43 PM.

  10. #50
    Senior Member The Stig's Avatar
    Join Date
    Feb 2011
    Location
    Charlotte, NC
    Posts
    2,004
    Post Thanks / Like
    Quote Originally Posted by crash View Post
    I understand that you may not be using the original glass in your creation, but it looks like you could still use it, and if you solved the fitment issue as well it would just be another reason for builders to use your hatch.
    Mike. I intentionally made the decision to use the polycarbonate because I can't stand the hump that the kit glass forces you to endure, as well as not being able to align the glass flush with the body without major re-glassing, filler build up, and block sanding as others have had to do. This entire exercise is a way to create a heat vent for the hatch without having to cut, the body, rework and repaint it. So far, everything is exactly as I had hoped it would be. I couldn't be happier with it!
    The Stig

    Some say, that I only know two facts about ducks, (both being wrong); and that if I could be bothered, I could solve the "da Vinci Code" in 47 seconds...
    All I know is that I'm called "The Stig".
    GTM #0081

  11. #51
    Senior Member The Stig's Avatar
    Join Date
    Feb 2011
    Location
    Charlotte, NC
    Posts
    2,004
    Post Thanks / Like


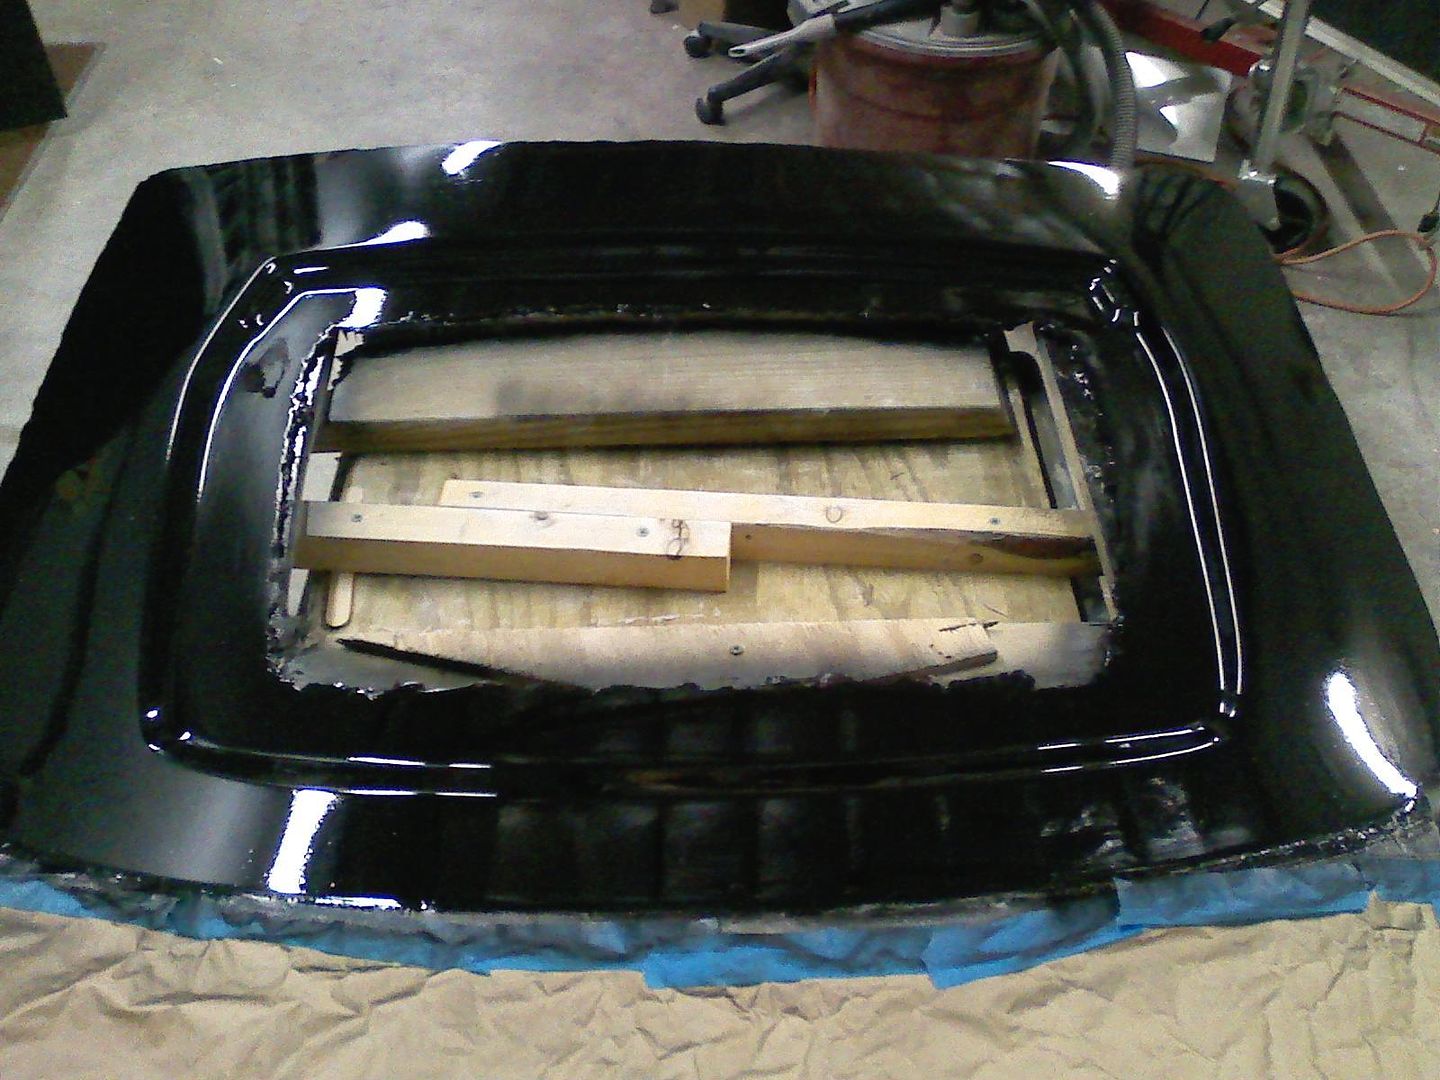
    Filler... Sanding... Filler... Sanding... Shaping... Sanding


    It's getting there!

    M.
    Last edited by The Stig; 11-11-2013 at 09:54 PM.
    The Stig

    Some say, that I only know two facts about ducks, (both being wrong); and that if I could be bothered, I could solve the "da Vinci Code" in 47 seconds...
    All I know is that I'm called "The Stig".
    GTM #0081

  12. #52
    Banned
    Join Date
    Aug 2011
    Posts
    669
    Post Thanks / Like
    mike, you left out a few fills, sands, and shapings! i'm working on the inner section now and i'll have some more pics when i get it in primer. then comes the plug for the carbon fiber "blade" that runs across the top, and making the molds. also have to make a prototype polycarbonate that i'll make patterns off the top and bottom of, to get the exact angles on the sides and back to come out right.

  13. #53
    Senior Member The Stig's Avatar
    Join Date
    Feb 2011
    Location
    Charlotte, NC
    Posts
    2,004
    Post Thanks / Like
    Quote Originally Posted by carbon fiber View Post
    mike, you left out a few fills, sands, and shapings! i'm working on the inner section now and i'll have some more pics when i get it in primer. then comes the plug for the carbon fiber "blade" that runs across the top, and making the molds. also have to make a prototype polycarbonate that i'll make patterns off the top and bottom of, to get the exact angles on the sides and back to come out right.
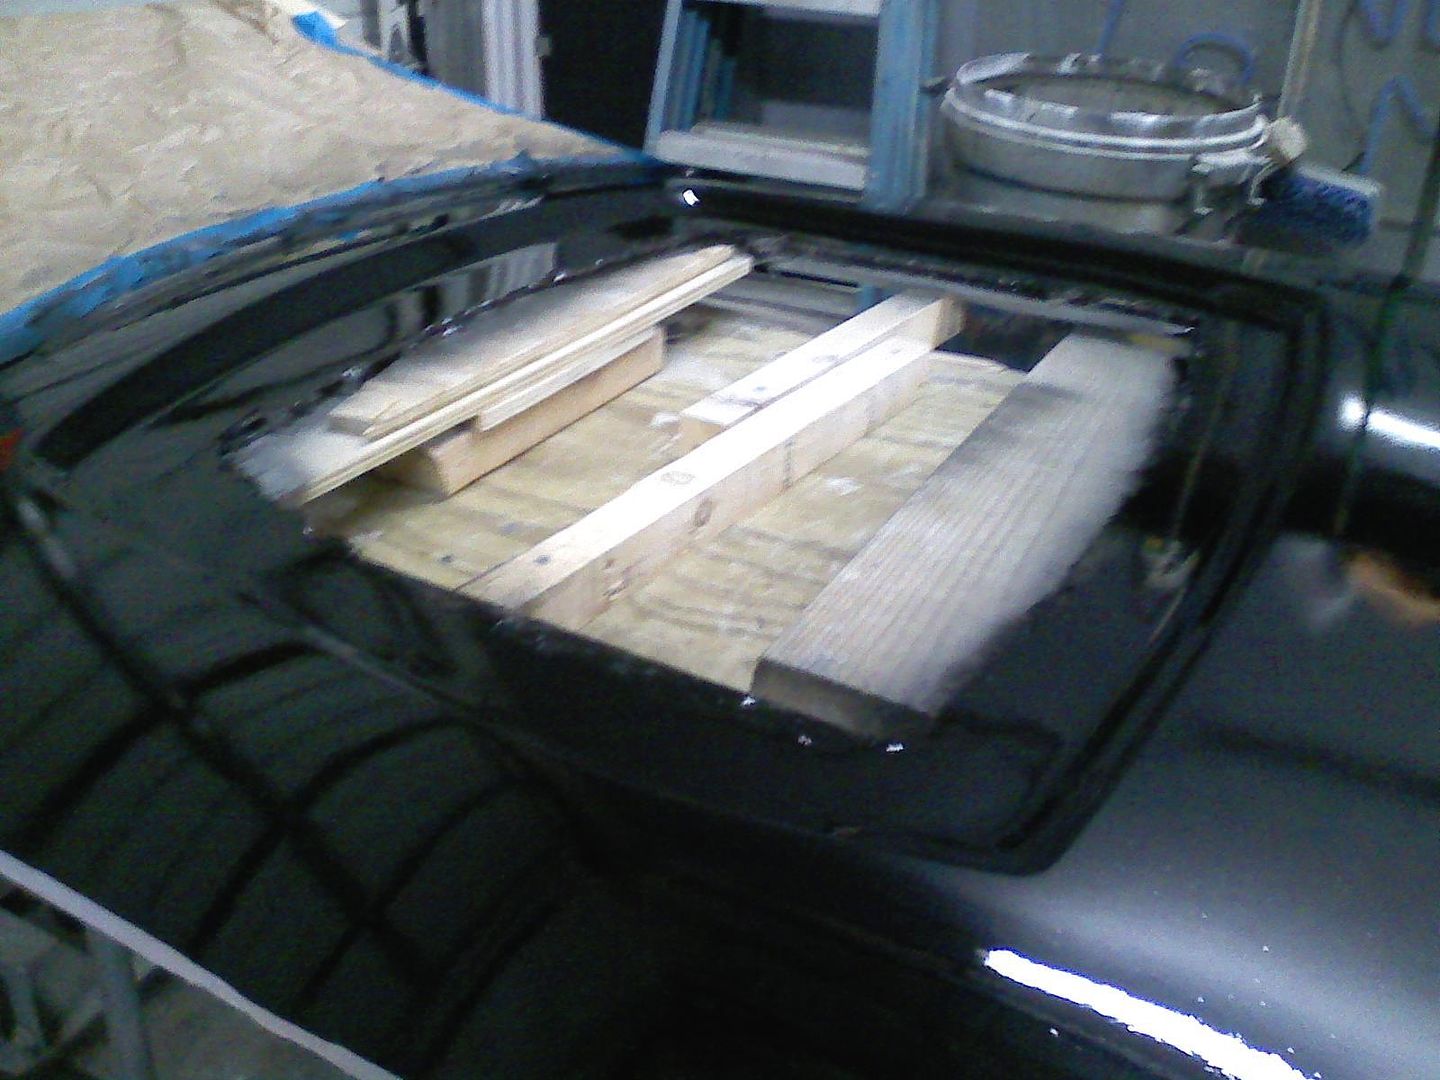
    As I said... It's getting there!
    The Stig

    Some say, that I only know two facts about ducks, (both being wrong); and that if I could be bothered, I could solve the "da Vinci Code" in 47 seconds...
    All I know is that I'm called "The Stig".
    GTM #0081

  14. #54
    Banned
    Join Date
    Aug 2011
    Posts
    669
    Post Thanks / Like
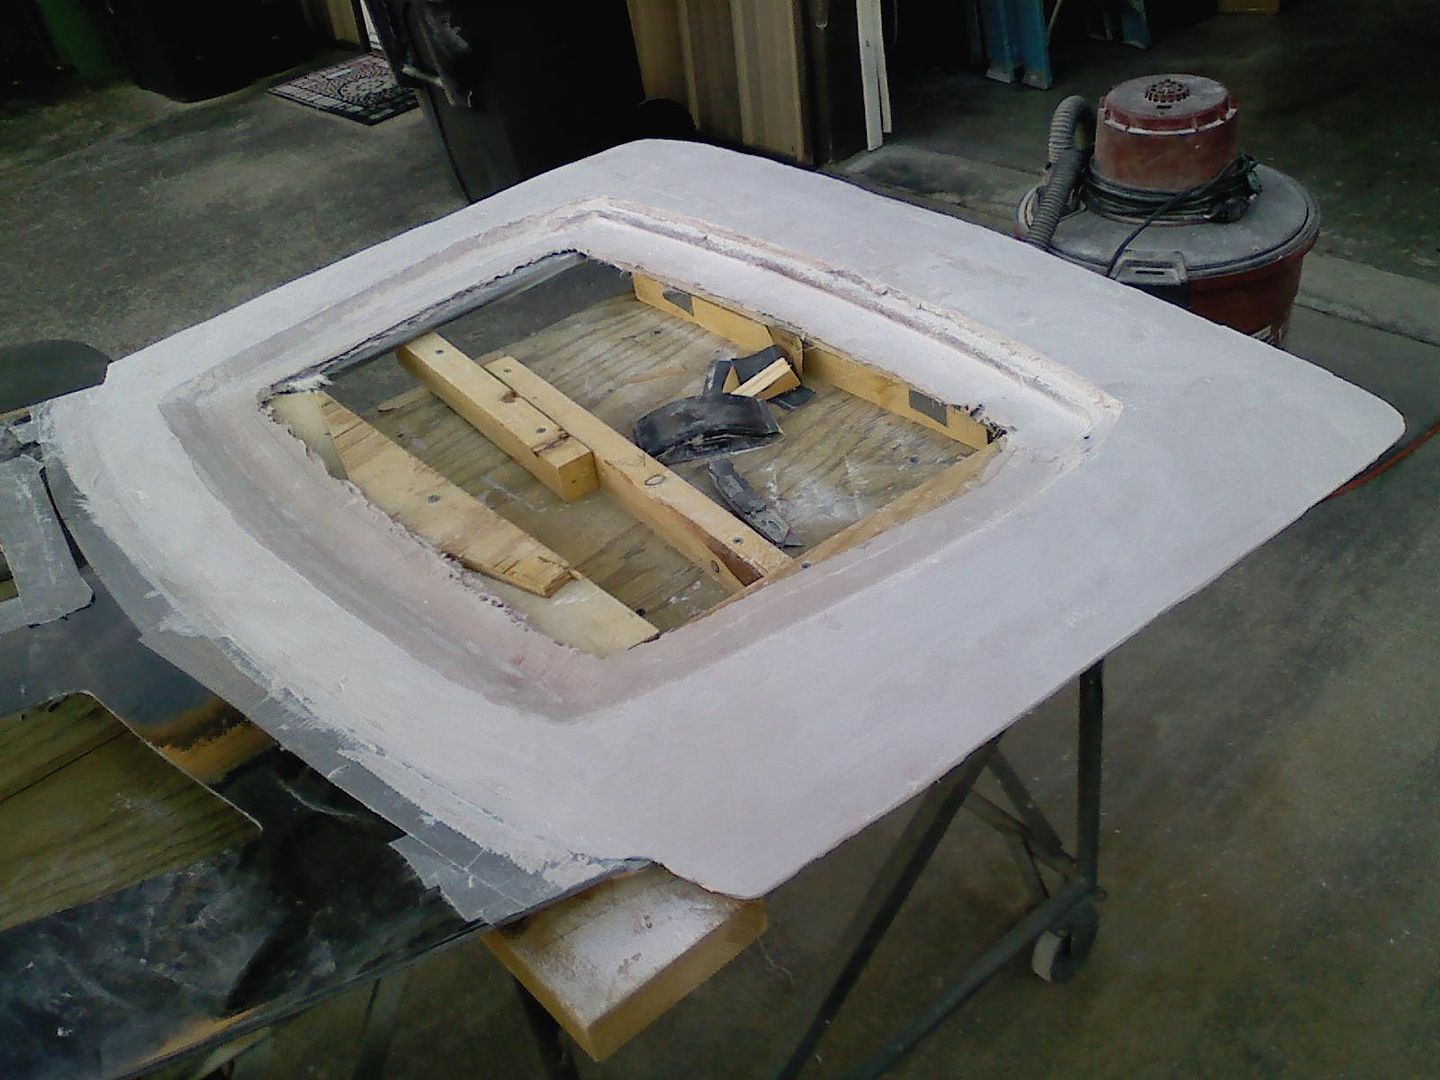
    plug is done, some pics. hatch 5 009.jpg
    Last edited by carbon fiber; 11-19-2013 at 09:52 AM.

  15. #55
    Senior Member The Stig's Avatar
    Join Date
    Feb 2011
    Location
    Charlotte, NC
    Posts
    2,004
    Post Thanks / Like
    Here are the rest of the pics of the plug. There is obviously some trimming that needs to be taken care of, but it's looking great! Making progress.


    The Stig

    Some say, that I only know two facts about ducks, (both being wrong); and that if I could be bothered, I could solve the "da Vinci Code" in 47 seconds...
    All I know is that I'm called "The Stig".
    GTM #0081

  16. #56
    Senior Member The Stig's Avatar
    Join Date
    Feb 2011
    Location
    Charlotte, NC
    Posts
    2,004
    Post Thanks / Like
    Got a text from Jason today. The plug is finished and painted, and he's ready to lay up the new hatch. Yes... I am excited. Can you tell?
    The Stig

    Some say, that I only know two facts about ducks, (both being wrong); and that if I could be bothered, I could solve the "da Vinci Code" in 47 seconds...
    All I know is that I'm called "The Stig".
    GTM #0081

  17. #57
    Senior Member
    Join Date
    Apr 2011
    Posts
    641
    Post Thanks / Like
    I am too, can't wait to see what you've dreamed up.

  18. #58
    Banned
    Join Date
    Aug 2011
    Posts
    669
    Post Thanks / Like
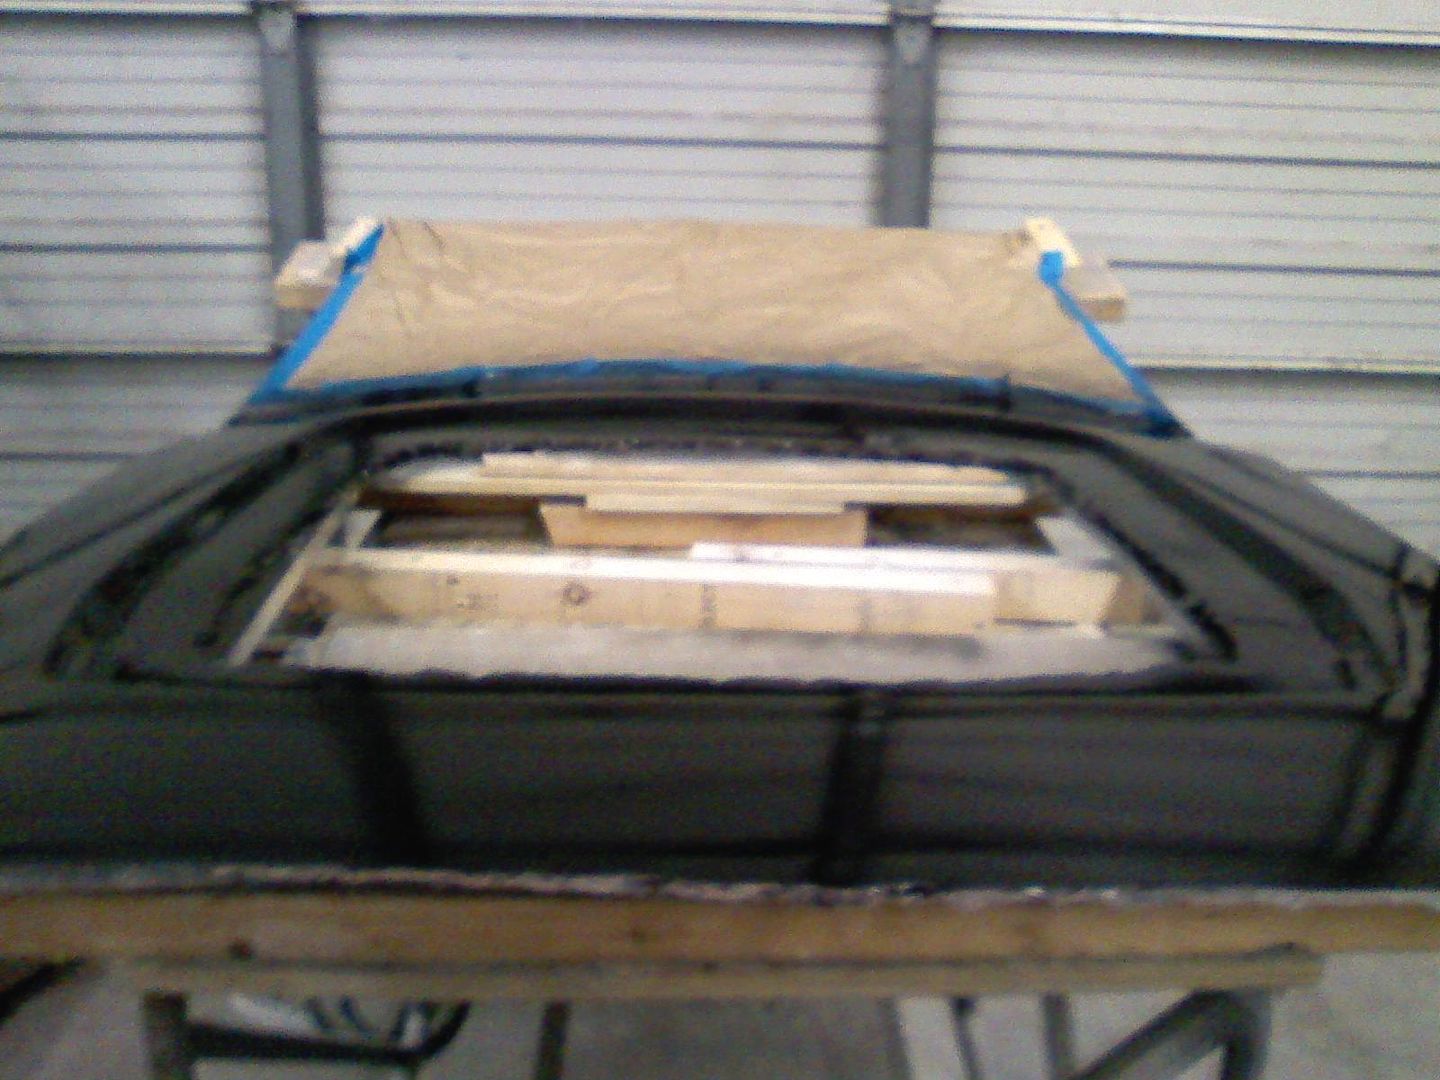
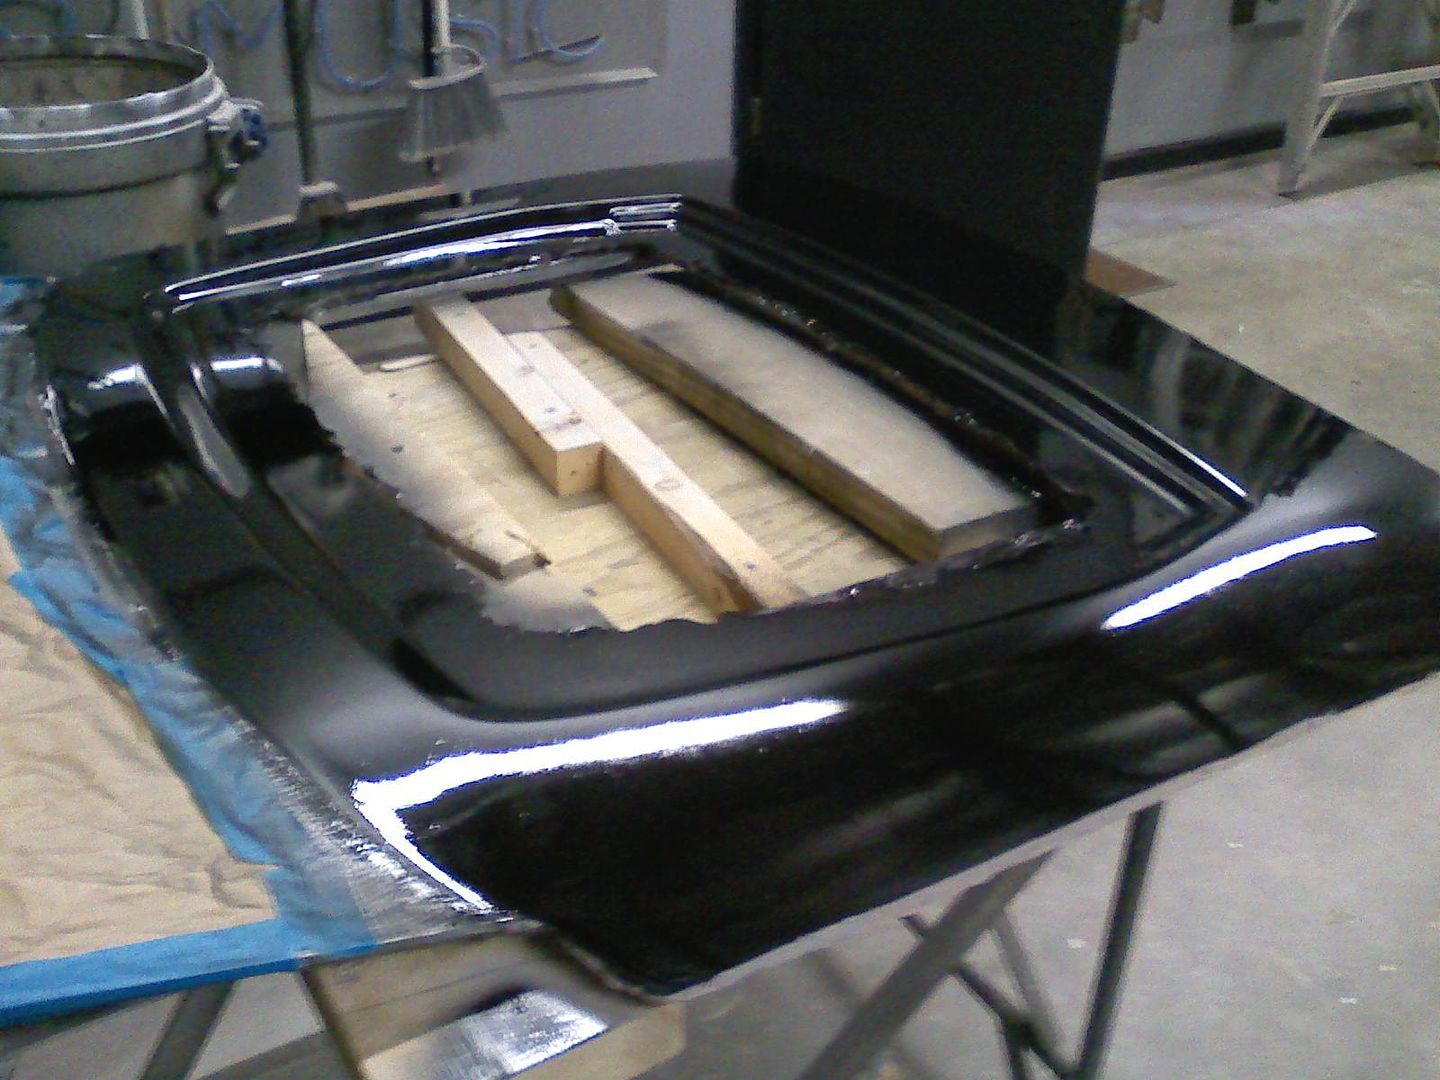
    I've got the 2nd plug done and painted. next is making the molds and parts. won't be long now.hatch 6 002.jpghatch 6 001.jpg
    Last edited by carbon fiber; 12-05-2013 at 05:30 PM.

  19. #59
    Senior Member The Stig's Avatar
    Join Date
    Feb 2011
    Location
    Charlotte, NC
    Posts
    2,004
    Post Thanks / Like
    Quote Originally Posted by carbon fiber View Post
    I've got the 2nd plug done and painted. next is making the molds and parts. won't be long now.hatch 6 002.jpghatch 6 001.jpg
    It's looking good Jason. The grey area above the "louver" cover; is that a form made from the rear of your GTM roof? It matches up perfectly! If that's what it is, I am completely stoked to know that it will finally be fitted to the shape of the roof. (As long as the Gen-I and Gen-II Body sections are the same... And I believe that they are.

    Thanks for your work, talent, and efforts! It's coming together!

    Mike
    Last edited by The Stig; 12-07-2013 at 09:53 AM.
    The Stig

    Some say, that I only know two facts about ducks, (both being wrong); and that if I could be bothered, I could solve the "da Vinci Code" in 47 seconds...
    All I know is that I'm called "The Stig".
    GTM #0081

  20. #60
    Banned
    Join Date
    Aug 2011
    Posts
    669
    Post Thanks / Like
    that's a piece of sign plastic. the gray part sticking out is what i didn't cover with fg and body filler. (wider than i needed) I used a template made from the 1st plug where the cf piece meets it to get the exact shape to match to the larger part.

  21. #61
    Senior Member VD2021's Avatar
    Join Date
    Feb 2011
    Location
    Central, FL
    Posts
    958
    Post Thanks / Like
    Blog Entries
    2
    Guys,

    I'm eagerly awaiting the pics of the 1st hatch as I am having trouble visualizing it from the plugs.

    C,

    Is a Gen2 version in the possible future?
    R/s
    Vidal
    CURRENT STATUS: Interior Rework and Bodywork.
    GenII GTM #331. Delivered (23/9/10)
    BUILD LOG AND WEBSITE:
    http://gtmbuild.weebly.com/ .

  22. #62
    Senior Member The Stig's Avatar
    Join Date
    Feb 2011
    Location
    Charlotte, NC
    Posts
    2,004
    Post Thanks / Like
    Quote Originally Posted by VD2021 View Post
    Guys,

    I'm eagerly awaiting the pics of the 1st hatch as I am having trouble visualizing it from the plugs.

    C,

    Is a Gen2 version in the possible future?
    Hi Vidal! How the heck are you?

    Apparently I'm not seeing it as I thought either. It's tough to see the vision through the plugs, but I have the obvious advantage of working through the design questions with Jason. I really believe this is going to turn out really nice and sleek, and give me what I'm looking for for heat disipation in the engine bay. I'm also pumped about the fact that it will be flush to the GTM body. The poly-carbonate will fit flush to the hatch. So it will be a well thought out solution that looks like it should have been there all along.

    All I can point you toward right now, is the rear window of the Ferrari F-12. Bevelled sides that drop down an inch or so from the top edge and almost flush at the bottom. That's the sourse of the design, and integrated into the GTM design. Jason's doing an awesome job.

    Stay tuned Buddy... It's getting closer.

    Mike
    The Stig

    Some say, that I only know two facts about ducks, (both being wrong); and that if I could be bothered, I could solve the "da Vinci Code" in 47 seconds...
    All I know is that I'm called "The Stig".
    GTM #0081

  23. #63
    Banned
    Join Date
    Aug 2011
    Posts
    669
    Post Thanks / Like
    the plugs are oversized. the larger plug is oversized outside and inside. there will be a 3/4" lip left on the inside where the polycarbonate rests. the outside will be trimmed flush with the edge of the hatch itself. the cf part will be cut from the shape created by the smaller plug. it will fit gen I and gen II cars, as it replaces the glass. maybe these pics will help.
    Attached Images Attached Images
    Last edited by carbon fiber; 12-11-2013 at 08:33 AM.

Page 2 of 2 FirstFirst 12

Posting Permissions

  • You may not post new threads
  • You may not post replies
  • You may not post attachments
  • You may not edit your posts
  •  

Breeze

Visit our community sponsor