Forte's

Visit our community sponsor

Thanks Thanks:  10
Likes Likes:  65

View Poll Results: How to finish the mesh panels?

Voters
57. You may not vote on this poll
  • Gloss Black

    47 82.46%
  • Unfinished Aluminum

    10 17.54%
Page 5 of 16 FirstFirst ... 3456715 ... LastLast
Results 161 to 200 of 619

Thread: mikeb75's build thread

  1. #161
    Moonlight Performance
    Hindsight's Avatar
    Join Date
    May 2014
    Location
    Atlanta
    Posts
    3,402
    Post Thanks / Like
    Quote Originally Posted by mikeb75 View Post
    On the other hand I had originally planned to gloss black them so they’d match the color scheme. I'm not sure how they would match up if I changed the car color (to say an atomic orange with the same gloss black accents).
    Opinions?
    Gosh I dunno.....

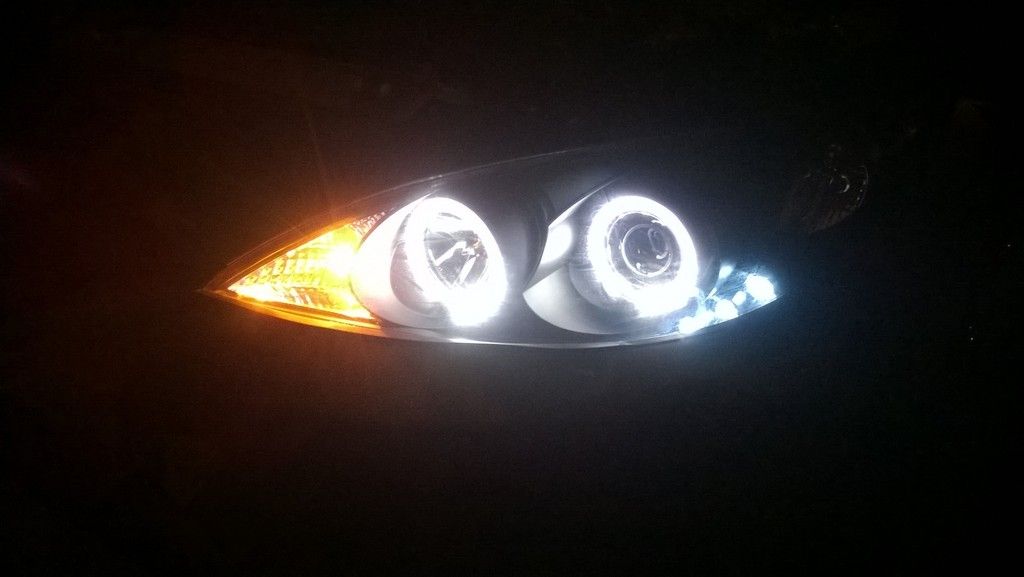
    porsche-carrera-gt3-rs-06.jpg

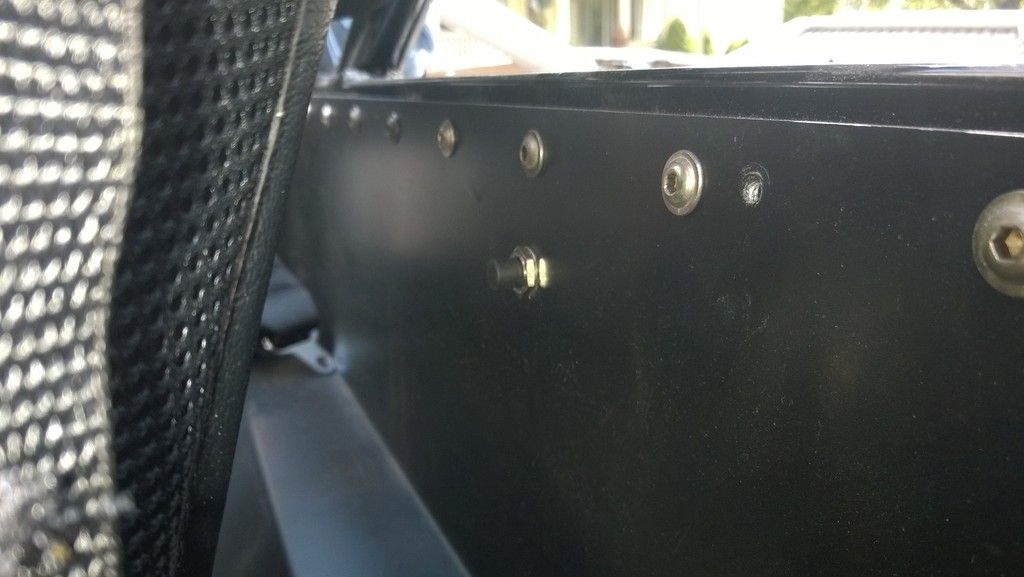
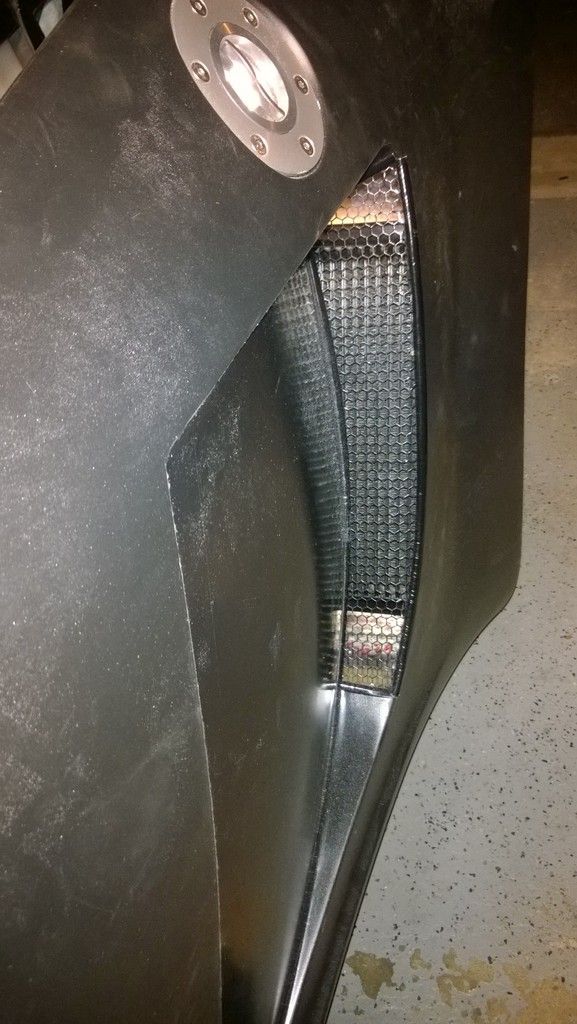
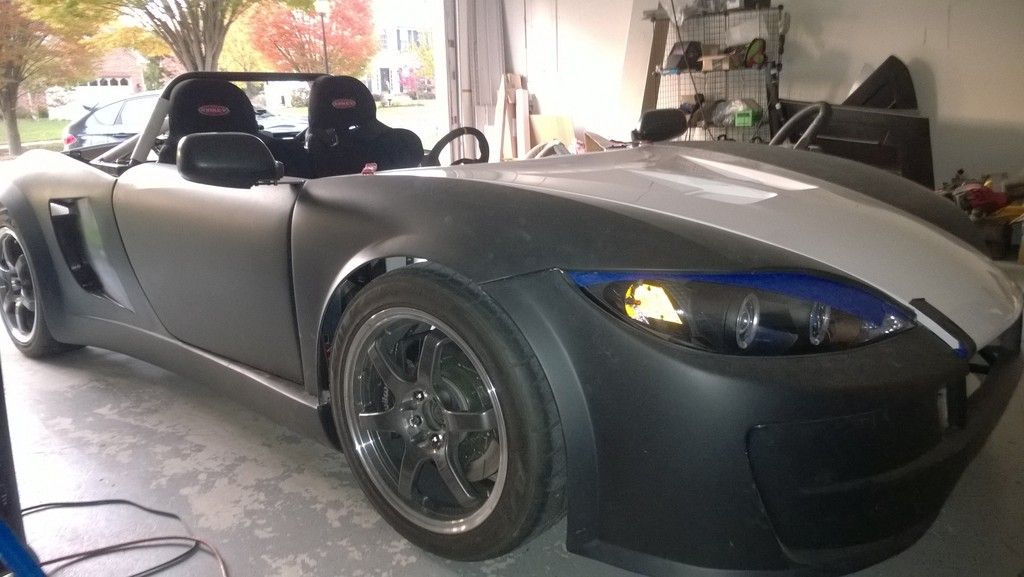
    Gloss black accents go with everything, even flat black. Good to have some sheen contrast.

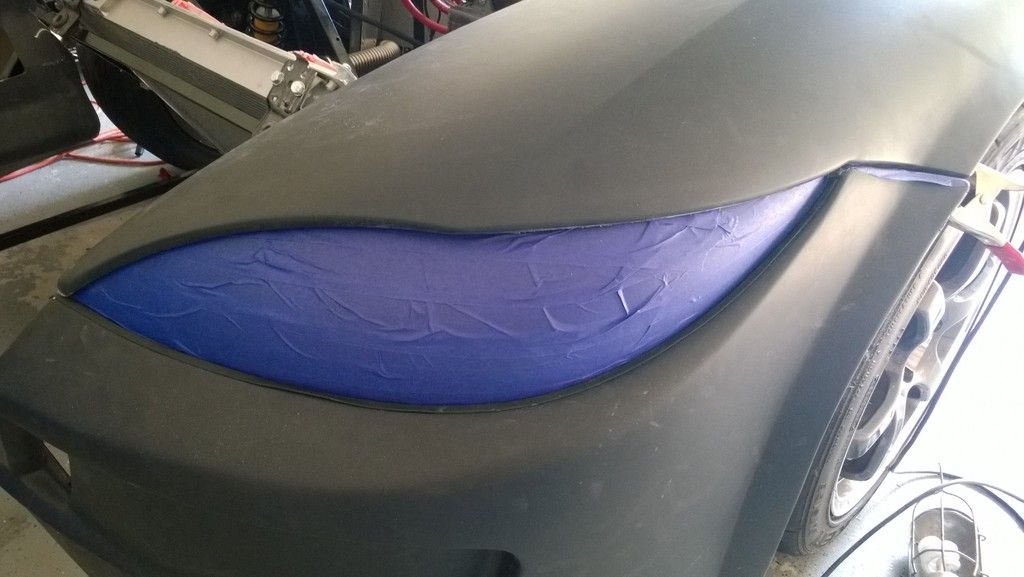
    Did you spray the dip with the "DipYourCar" sprayer or did you use conventional equipment with an air compressor? It looks good. Curious as to why you needed to thin the dip.... doesn't it come pre-thinned?

  2. #162
    Senior Member mikeb75's Avatar
    Join Date
    Sep 2013
    Posts
    685
    Post Thanks / Like
    You can buy dip pre-thinned, but it costs only a little less than original (full strength) Plasti-dip.

    So, by my maths:
    1 gallon original Plasti-dip $68.00
    1 gallon Xylene $20
    Total $88 and 2 gallons of material

    vs
    2 gallons of pre-thinned (ready to spray) Plasti-dip from the Bay-of-E $99

    every dollar counts... plus I got majorly high doing the mixing

    I already had a Harbor Freight HVLP; but didn't use it. Instead I used a Wagner "Control Spray" picked up from the rain-forest place, worked just fine. I'm sure the DYC equipment would do a fine job also, just more 'spensive. I actually think DYC used the Wagner gun a long time ago.
    818SC chassis #206 EJ207 2.0L VF37 twin scroll || Cusco type RS 1.5 LSD || Wilwood pedal box (firewall attach) || Wilwood superlite front calipers
    BUILD Phase 1: 6/6/2014 car delivered || 5/24/2015 first start || 6/7/2015 go karted || 4/20/2016 hard-top-topped || 10/25/2016 registered || 11/18/2016 inspected & complete
    BUILD Phase 2: 3/8/2017 EJ207v8 || 5/29/2017 re-first re-start || 7/17/2017 re-assembled with race car bits

  3. #163
    Moonlight Performance
    Hindsight's Avatar
    Join Date
    May 2014
    Location
    Atlanta
    Posts
    3,402
    Post Thanks / Like
    Looks like I picked the wrong week to stop sniffing glue.

    Thanks for the info. It really turned out nicely!

  4. #164
    Senior Member
    Join Date
    Mar 2011
    Location
    Denver, CO
    Posts
    1,362
    Post Thanks / Like
    Car looks great! Go black mesh.

  5. #165
    Senior Member Flamshackle's Avatar
    Join Date
    Jun 2011
    Location
    Aotearoa (New Zealand)
    Posts
    648
    Post Thanks / Like
    Love the plastic black. Car is looking great!
    __________________________________________________ _____________

    That man is no fool, who gives what he cannot keep to gain what he cannot lose
    __________________________________________________ _____________

  6. #166
    Senior Member mikeb75's Avatar
    Join Date
    Sep 2013
    Posts
    685
    Post Thanks / Like

    Quick Notes

    After having the exhaust reviewed (and found to be not terrible) by the mechanics I wrapped the downpipe and catalytic converter with some DEI Titanium wrap (matches the headers & up-pipe). Yes, there is the likelihood that the cat will overheat and could break down. Regardless; wrapping seems like a very good idea. After heating it up and cooking out some of the resin and taking a test drive I found the engine bay appreciably cooler than before I had wrapped it.


    Added an e-bay special 3rd brake light; had to take the harness out and re-verify the T I added for the 3rd (had no voltage) and fix the turn signal connector as 1 of the pins lost the wire (not fully crimped). I’ve also followed other builder’s leads and epoxied some wire stays to route the wiring harness in the rear.


    Looking at the pictures of the rear of the car; if I had to do it over (more likely -when) I think I'd gloss black the entire upper insert area where the lights and upper mesh panel is. I'll also try looking for gloss black vinyl instead of paint.
    818SC chassis #206 EJ207 2.0L VF37 twin scroll || Cusco type RS 1.5 LSD || Wilwood pedal box (firewall attach) || Wilwood superlite front calipers
    BUILD Phase 1: 6/6/2014 car delivered || 5/24/2015 first start || 6/7/2015 go karted || 4/20/2016 hard-top-topped || 10/25/2016 registered || 11/18/2016 inspected & complete
    BUILD Phase 2: 3/8/2017 EJ207v8 || 5/29/2017 re-first re-start || 7/17/2017 re-assembled with race car bits

  7. #167
    Senior Member Frank818's Avatar
    Join Date
    Jun 2013
    Location
    QC, Canada
    Posts
    5,732
    Post Thanks / Like
    Wooo!! Nice matte black on the car, man!! Nice, really nice!
    Frank
    818 chassis #181 powered by a '93 VW VR6 Turbo GT3582R
    Go-karted Aug 5, 2016 - Then May 19+21, 2017
    Tracked May 27/July 26, 2017
    Build time before being driveable on Sep 27, 2019: over 6000h
    Build Completed Winter 2021

  8. #168
    Senior Member shinn497's Avatar
    Join Date
    Aug 2011
    Posts
    578
    Post Thanks / Like
    Blog Entries
    1
    I'm going to follow this build enthusiastically. Are you going to leave your car matte or use any of their gloss topcoats? I think the latter would look great on this car.

  9. #169
    Senior Member mikeb75's Avatar
    Join Date
    Sep 2013
    Posts
    685
    Post Thanks / Like
    Matte because race car (or something like that).

    Am discovering why you dip the car after it's built; scratches when moving the panels around the garage to finished the mesh installation. BTW; gloss black won & looks pretty bad@$$, haven't quite finished side vents, but they look better than I expected.

    I have a few spray cans of P-D (use it on my helmet and other things), so going to try to patch it... should work since it's a textured & matte finish.
    818SC chassis #206 EJ207 2.0L VF37 twin scroll || Cusco type RS 1.5 LSD || Wilwood pedal box (firewall attach) || Wilwood superlite front calipers
    BUILD Phase 1: 6/6/2014 car delivered || 5/24/2015 first start || 6/7/2015 go karted || 4/20/2016 hard-top-topped || 10/25/2016 registered || 11/18/2016 inspected & complete
    BUILD Phase 2: 3/8/2017 EJ207v8 || 5/29/2017 re-first re-start || 7/17/2017 re-assembled with race car bits

  10. #170
    Senior Member mikeb75's Avatar
    Join Date
    Sep 2013
    Posts
    685
    Post Thanks / Like

    Cribbing from the Best

    I had been planning doing this for a while –had ordered aluminum sheets from an online remnant dealer and was just waiting for the body panels to be sort of attached.

    Whatever! Taking inspiration from the Andrew & Tamra build I’ve boxed in the passenger side scoop and routed the intake filter from it. The panel facing the engine/turbo has a sheet of Thermo-Tec Heat Barrier on it to try to reject some heat.

    I maximized the opening in the side vent & used a hex-extruded aluminum to allow the best airflow into the air box. Got this done just before the re-scheduled tune tomorrow morning -and glad I did; I think any adjustment to the inlet pipe before the MAF could do funky things to a completed tune.


    -_- there’s an airfilter hiding in there
    Still need to finish the top panel on the airbox; but it’s good enough to get tuned!
    818SC chassis #206 EJ207 2.0L VF37 twin scroll || Cusco type RS 1.5 LSD || Wilwood pedal box (firewall attach) || Wilwood superlite front calipers
    BUILD Phase 1: 6/6/2014 car delivered || 5/24/2015 first start || 6/7/2015 go karted || 4/20/2016 hard-top-topped || 10/25/2016 registered || 11/18/2016 inspected & complete
    BUILD Phase 2: 3/8/2017 EJ207v8 || 5/29/2017 re-first re-start || 7/17/2017 re-assembled with race car bits

  11. #171
    Senior Member Frank818's Avatar
    Join Date
    Jun 2013
    Location
    QC, Canada
    Posts
    5,732
    Post Thanks / Like
    Yeah! Nice fit! I wonder if such a box would change the sound on acceleration... sometimes "airbox" do.
    Frank
    818 chassis #181 powered by a '93 VW VR6 Turbo GT3582R
    Go-karted Aug 5, 2016 - Then May 19+21, 2017
    Tracked May 27/July 26, 2017
    Build time before being driveable on Sep 27, 2019: over 6000h
    Build Completed Winter 2021

  12. #172
    Senior Member AZPete's Avatar
    Join Date
    Feb 2011
    Location
    Scottsdale, AZ
    Posts
    2,374
    Post Thanks / Like
    Nice work, Mike. I've already got the same hex screen in my body vents so I may copy your air box.
    818S/C : Chassis #25 with 06 WRX 2.5 turbo, ABS, cruise, PS, A/C, Apple CarPlay, rear camera, power windows & locks, leather & other complexities. Sold 10/19 with 5,800 miles.
    Mk3 Roadster #6228 4.6L, T45, IRS, PS, PB, ABS, Cruise, Koni's, 17" Halibrands, red w/ silver - 9K miles then sold @ Barrett-Jackson Jan 2011 (got back cash spent).

  13. #173
    Senior Member Tamra's Avatar
    Join Date
    Apr 2014
    Location
    Shelton, CT
    Posts
    1,011
    Post Thanks / Like
    Looks great! We noticed a difference in temperatures with our box installed. Let us know how the tune goes!
    Tamra
    Building 818SR #297 picked up 10/25/14 with Andrew (xxguitarist)
    First start 12/21/14, First "drive" 1/17/15
    First Dyno at EFI Logics 3/7/15- 310whp at 15psi for break in, full spool by ~3500rpm!
    First autocross 3/29/15
    1st Registered 818 in Connecticut 7/24/2015. 9 months - 1 day from kit pickup!

  14. #174
    Senior Member mikeb75's Avatar
    Join Date
    Sep 2013
    Posts
    685
    Post Thanks / Like

    224@18 psi 7k

    Tune session didn’t go exactly to plan… go figure. Got the car hooked up and the tuner worked out the fueling tables to deal with the wonky injectors. Finishing a pull one of the water lines out of the pump let go and we dumped a cars worth of coolant on the dyno floor. A touch embarrassing…

    After replacing the bad rubber elbow (YUGE thanks to Andrewtech for the replacement hose & note to self –replace all the 200K mile rubber hoses!), we refilled with water and burped the cooling system and were back in business.

    The next issue we encountered was heat soak of the intercooler – Everyone currently building an 818 already knows this - there is NO WAY a stock WRX A2A intercooler will work in the stock location / venting. The IC was reading ~ 150F between runs with no rear engine cover before we got a fan blowing straight over it. We should have a pretty good plan to deal with this once the hard-top is installed.

    Our ebay throttle body has an issue on return to idle. Seems like the throttle plate rubs the inner bore, could be tolerances/heat related, will disassemble and check clearances.

    Next and the killer we had dropping oil pressure. I can only assume we were low in total oil level and without any cooler hooked up we probably just exceeded the thermal capacity of the system and the Shell Rotella T6 thinned out. Need to move up our plans to add the oil cooler; just ordered from ebay. Could also consider changing up to 5w50 weight.

    So the tune session was ended at that point; we pulled 224 HP @ 7K RPM (estimated 140 MPH in 4th gear at red line). The turbo boost curve was promising –once it spooled up it held a flat 18 PSI to redline; no taper or fall off. Looks like there is some extra headroom in the turbo. However, the tuner was a little puzzled/disappointed – he expects 280-300 HP from a 2L + VF39, so something is going on that causes our engine to behave very differently from a standard EJ205 (little surprise there given all the Franken-work we've done; it's pretty much a miracle the engine runs/idles).

    I don’t know what the injector duty cycle was or advance & detonation retard; so I don’t know how much we left on the table. The tune seems pretty drivable and linear once the turbo is spooled; but we didn’t capture any graphs or data to review (session ended a bit abruptly when the oil pressure issue was noticed). The CEL codes have been disabled for TGV & evap control system. I'll consider this a good starting point, but it's going to be a work in progress. After we knock out the issues we'll schedule a trip back to take another swing at a home run.

    What We Learned:
    • Check coolant lines (replace any originals left on the car)
    • The stock WRX A2A intercooler is pretty much totally inadequate in the default build location with body work and lack of venting
    • The engine/turbo puts out a ton of heat when pulling to redline
    • The radiator can dump a lot of heat with modest airflow (just the fans)
    • A VF39 can supply 18 PSI (don't know CFM) on a 2L bock up to redline with no fall-off
    • Anything that can go wrong will go wrong when your car is sitting on a dyno; it's a good time to have friends close by
    • Dyno sessions are a good learning tool for the car; running it up to 140 will expose weak points -better to find them before risking my life on a track a few hours from home
    818SC chassis #206 EJ207 2.0L VF37 twin scroll || Cusco type RS 1.5 LSD || Wilwood pedal box (firewall attach) || Wilwood superlite front calipers
    BUILD Phase 1: 6/6/2014 car delivered || 5/24/2015 first start || 6/7/2015 go karted || 4/20/2016 hard-top-topped || 10/25/2016 registered || 11/18/2016 inspected & complete
    BUILD Phase 2: 3/8/2017 EJ207v8 || 5/29/2017 re-first re-start || 7/17/2017 re-assembled with race car bits

  15. #175
    Senior Member STiPWRD's Avatar
    Join Date
    Jan 2014
    Location
    Leesburg, VA
    Posts
    1,624
    Post Thanks / Like
    Mike, thanks for sharing your results. I'm guessing you went to turboxs for the tune? That's probably where I'll end up eventually. Can you post the dyno plot?

  16. #176
    Senior Member Frank818's Avatar
    Join Date
    Jun 2013
    Location
    QC, Canada
    Posts
    5,732
    Post Thanks / Like
    A lot of learning went through that dyno test, hey Mike? Things like that always happen, especially on a hand built car. But we know next time will be better!
    Frank
    818 chassis #181 powered by a '93 VW VR6 Turbo GT3582R
    Go-karted Aug 5, 2016 - Then May 19+21, 2017
    Tracked May 27/July 26, 2017
    Build time before being driveable on Sep 27, 2019: over 6000h
    Build Completed Winter 2021

  17. #177
    Senior Member mikeb75's Avatar
    Join Date
    Sep 2013
    Posts
    685
    Post Thanks / Like
    Yes on TurboXS; Jermaine was doing the tune

    No on dyno plot; nothing was captured or provided since the tune session was pretty much aborted. Only a few full pulls were done to 7K, and I didn't really look at the graphs much; was spending more time looking under/around the car for more leaks or issues.

    Finally, yea, the tune was a bit more stressful (to me) than I expected; never been through one of those before. Jermaine was pretty much unphased by all the events; I guess he's seen much worse before. Me, very phased. Not quite as bad as the delivery of my kids... but the same kind of stress; just less sleeping on a hospital couch (delivery 1 was a 23.5 hour ordeal, number 2 was a bit less).
    818SC chassis #206 EJ207 2.0L VF37 twin scroll || Cusco type RS 1.5 LSD || Wilwood pedal box (firewall attach) || Wilwood superlite front calipers
    BUILD Phase 1: 6/6/2014 car delivered || 5/24/2015 first start || 6/7/2015 go karted || 4/20/2016 hard-top-topped || 10/25/2016 registered || 11/18/2016 inspected & complete
    BUILD Phase 2: 3/8/2017 EJ207v8 || 5/29/2017 re-first re-start || 7/17/2017 re-assembled with race car bits

  18. #178
    Senior Member Tamra's Avatar
    Join Date
    Apr 2014
    Location
    Shelton, CT
    Posts
    1,011
    Post Thanks / Like
    The best news is, you learned a lot and didn't blow up the car. Now you can fix a few things and go back more prepared.

    I'm curious on your dropping oil pressure issue. Was it a steady decline as the car heated up? I thought the T6 was supposed to be good for not thinning out.
    Tamra
    Building 818SR #297 picked up 10/25/14 with Andrew (xxguitarist)
    First start 12/21/14, First "drive" 1/17/15
    First Dyno at EFI Logics 3/7/15- 310whp at 15psi for break in, full spool by ~3500rpm!
    First autocross 3/29/15
    1st Registered 818 in Connecticut 7/24/2015. 9 months - 1 day from kit pickup!

  19. #179
    Senior Member
    Join Date
    Jul 2013
    Location
    Richmond, VA
    Posts
    127
    Post Thanks / Like
    Mike, good info. Sorry the dyno didn't go as planned. 224 @ 18psi does seem low. Two things come to mind. One is compression, have you checked? The other is more of a left field guess, because I don't know where the 18psi is measured. Is that what is programmed for the boost solenoid or what is measured? My point being that if the computer asks for 18, doesn't mean it was getting it. I think a bad boost solenoid would throw a code, but would a leak in tubing? A wastegate not closing perhaps? A boost gauge would confirm your pressure.
    818S - #200

    "To finish first, you must first finish"
    "If the car feels like it is on rails, you are probably driving too slow." -Ross Bentley
    "Never run out of real estate, ideas and traction at the same time."

  20. #180
    Senior Member mikeb75's Avatar
    Join Date
    Sep 2013
    Posts
    685
    Post Thanks / Like
    Good ideas but...

    -compression was checked before engine was re-assembled. Read between 155 and 160 across all 4 cylinders (was actually shocked at that). Leak down test was not performed... Compression numbers were not re-confirmed after engine was 'completed' or installed; but we never split the block or removed the heads. Only the valve covers & timing belt cover were removed (timing belt, water & oil pumps replaced).

    -boost numbers were read by T-ing a connection off the BPV to a sensor tied into the dyno hardware/software. This was confirmed by a dedicated add-on gauge on the dash and the AccessPort itself.

    -Definitely a stumper on the T6 issue; always thought it was a stout oil... but the pressures definitely went down as the tuning session went on and the engine & systems were heated. Since we didn't have any an oil cooler installed, I guess there was no where for the heat to go... the oil temp gauge (again, an add on plumbed into the block at the front oil galley plug, and the pressure gauge plumbed into the block at the rear oil galley plug) read heat going up over the session, but never got to what I consider critical; didn't see it over 230... but I admit the gauges were never tested/base-lined before installation.

    On start yesterday OP was reading 35 at idle up to 83 @ 4000RPM00. I did see the idle pressure level drop after I performed the oil filter re-locate, but that is expected as I added a few feet of -AN10 hose. Will definitely re-check numbers after oil cooler is installed.
    818SC chassis #206 EJ207 2.0L VF37 twin scroll || Cusco type RS 1.5 LSD || Wilwood pedal box (firewall attach) || Wilwood superlite front calipers
    BUILD Phase 1: 6/6/2014 car delivered || 5/24/2015 first start || 6/7/2015 go karted || 4/20/2016 hard-top-topped || 10/25/2016 registered || 11/18/2016 inspected & complete
    BUILD Phase 2: 3/8/2017 EJ207v8 || 5/29/2017 re-first re-start || 7/17/2017 re-assembled with race car bits

  21. #181
    Senior Member Bob_n_Cincy's Avatar
    Join Date
    Sep 2012
    Location
    Cincinnati OH
    Posts
    3,904
    Post Thanks / Like
    Quote Originally Posted by mikeb75 View Post
    -Definitely a stumper on the T6 issue; always thought it was a stout oil... but the pressures definitely went down as the tuning session went on and the engine & systems were heated. Since we didn't have any an oil cooler installed, I guess there was no where for the heat to go... the oil temp gauge (again, an add on plumbed into the block at the front oil galley plug, and the pressure gauge plumbed into the block at the rear oil galley plug) read heat going up over the session, but never got to what I consider critical; didn't see it over 230... but I admit the gauges were never tested/base-lined before installation.

    On start yesterday OP was reading 35 at idle up to 83 @ 4000RPM00. I did see the idle pressure level drop after I performed the oil filter re-locate, but that is expected as I added a few feet of -AN10 hose. Will definitely re-check numbers after oil cooler is installed.
    Mike
    We also use T6.
    At 80* (cold idle) we run 80 psi, At 180* (hot idle) we run 24psi.
    The oil temp of any oil will make a big difference.
    The rule of thump I hear is that > 10 PSI per 1000 RPM is good.
    Bob
    818S #22 Candy Blue Frame, Front Gas Tank, 2.5L Turbo, Rear radiator, Shortened Transmission, Wookiee Compatible, Console mounted MR2 Shifter, Custom ECU panel, AWIC soon
    My Son Michael's Turbo ICE Build X22 http://thefactoryfiveforum.com/showt...rts-818S-Build
    My Electric Supercar Build X21 (on hold until winter) http://thefactoryfiveforum.com/showt...e-Build-Thread

  22. #182
    Senior Member mikeb75's Avatar
    Join Date
    Sep 2013
    Posts
    685
    Post Thanks / Like
    Quote Originally Posted by Bob_n_Cincy View Post
    Mike
    We also use T6.
    At 80* (cold idle) we run 80 psi, At 180* (hot idle) we run 24psi.
    The oil temp of any oil will make a big difference.
    The rule of thump I hear is that > 10 PSI per 1000 RPM is good.
    Bob
    Thanks for the confirm Bob. I remember seeing ~80 @ cold idle before the oil filter relocate.

    I'll be taking notes on the oil pressure & temperatures until I'm satisfied the system is working properly.
    818SC chassis #206 EJ207 2.0L VF37 twin scroll || Cusco type RS 1.5 LSD || Wilwood pedal box (firewall attach) || Wilwood superlite front calipers
    BUILD Phase 1: 6/6/2014 car delivered || 5/24/2015 first start || 6/7/2015 go karted || 4/20/2016 hard-top-topped || 10/25/2016 registered || 11/18/2016 inspected & complete
    BUILD Phase 2: 3/8/2017 EJ207v8 || 5/29/2017 re-first re-start || 7/17/2017 re-assembled with race car bits

  23. #183
    Senior Member
    Join Date
    Mar 2015
    Location
    Belmar, NJ
    Posts
    364
    Post Thanks / Like
    Quote Originally Posted by mikeb75 View Post
    Thanks for the confirm Bob. I remember seeing ~80 @ cold idle before the oil filter relocate.

    I'll be taking notes on the oil pressure & temperatures until I'm satisfied the system is working properly.
    what intake filter are you using?
    where can I get that?
    818S #343 Delivered 5-20-2015
    First Start 10-17-2015
    First Drive 10-17-2017 ( 100 feet back and forth until I can get off driveway)
    First Drive with a non leaking tuned motor 11-12-2015 (wow)
    Passed NJ State constructed inspection 8/30/2016

  24. #184
    Senior Member mikeb75's Avatar
    Join Date
    Sep 2013
    Posts
    685
    Post Thanks / Like

    Good Idea/Bad Idea

    Dumb idea? I have lots of them…
    The purge control solenoid, valve and venting to the charcoal canister were removed from the car, who want to deal with all that crap.


    But I did install a charcoal canister and vented the fuel tank to it –no one likes an explodey garage.


    So I’ve been bothered by not having a way to purge the canister; so I looked into a way I could have something to perform a purge – even if I had to do it manually. This may be totally wrong, but here it goes (for your review and (dis)approval):
    1 Normally Closed, Momentary 2 way valve + 2 hose barbs of the correct size + Some tubing


    = a user activated purge circuit. Just remember to let the engine warm up and hold it open for a minute or so every once in a while.
    818SC chassis #206 EJ207 2.0L VF37 twin scroll || Cusco type RS 1.5 LSD || Wilwood pedal box (firewall attach) || Wilwood superlite front calipers
    BUILD Phase 1: 6/6/2014 car delivered || 5/24/2015 first start || 6/7/2015 go karted || 4/20/2016 hard-top-topped || 10/25/2016 registered || 11/18/2016 inspected & complete
    BUILD Phase 2: 3/8/2017 EJ207v8 || 5/29/2017 re-first re-start || 7/17/2017 re-assembled with race car bits

  25. #185
    Senior Member Quiny's Avatar
    Join Date
    Sep 2013
    Location
    Massachusetts
    Posts
    400
    Post Thanks / Like
    I was considering the same thing. I did leave the OEM purge solenoid and I plumbed my purge line hose to it. I just don't know if it will ever activate without the tank pressure sensor or tank temperature sensor hooked up.

  26. #186
    Senior Member mikeb75's Avatar
    Join Date
    Sep 2013
    Posts
    685
    Post Thanks / Like

    Welding be Dangerous

    A tale of total noobishness follows; I’m a bit embarrassed to post it, but I’ll take my punishment; safety reminders for everyone. The story it doesn’t end too badly. (Amazingly):

    Was welding some support brackets in to fit an oil cooler. I did a search online about recommendations for welding on a car. I had questions about safety when there was gas in the tank. The majority of the information I found described making sure the battery was disconnected… no one seemed overly concerned about fuel.

    I’m putting the oil cooler on the driver’s side, and that happens to be pretty @$*& close to the fuel filler neck. I was welding along on the lower support, having covered the (immediate) work area with damp towels – but didn’t cover it well enough. A bit of slag spalled on the corrugated coolant pipe –and burned through.

    Much better a coolant than a fuel or oil line…

    Cleaned up, replaced the coolant line, covered all the sensitive bits a lot better and got back to work. I think I still need to triangulate the upper part of the cooler; but overall I’m pretty happy with the results. I can mock up the thermostat now and plan the lines and order the (correct) fittings…

    I am going to need to figure out a way to get more air into the cooler; only about 1/3 of it is exposed in the side vent.


    818SC chassis #206 EJ207 2.0L VF37 twin scroll || Cusco type RS 1.5 LSD || Wilwood pedal box (firewall attach) || Wilwood superlite front calipers
    BUILD Phase 1: 6/6/2014 car delivered || 5/24/2015 first start || 6/7/2015 go karted || 4/20/2016 hard-top-topped || 10/25/2016 registered || 11/18/2016 inspected & complete
    BUILD Phase 2: 3/8/2017 EJ207v8 || 5/29/2017 re-first re-start || 7/17/2017 re-assembled with race car bits

  27. #187
    Senior Member STiPWRD's Avatar
    Join Date
    Jan 2014
    Location
    Leesburg, VA
    Posts
    1,624
    Post Thanks / Like
    I too learned a lesson about welding 2 weeks ago when installing lower harness tabs. I didn't have any fuel in the tank at the time but I did stupidly use cardboard to shield things, which quickly caught fire. Luckily my house didn't burn down but at least now I'll never take safety for granted again. Now I use sheet metal as a shield and have a water hose on standby, wet rags are a good idea.

  28. #188
    Senior Member Tamra's Avatar
    Join Date
    Apr 2014
    Location
    Shelton, CT
    Posts
    1,011
    Post Thanks / Like
    Glad nothing major happened. We had a similarly embarrassing moment with the coolant line earlier in the build when we accidentally touched it to the battery... Say the least we had a lot of cleanup to do and had to replace a section of the corrugated hose. No welding mishaps yet but then again we haven't welded anything directly on the chassis.

    The oil cooler looks great there.
    Tamra
    Building 818SR #297 picked up 10/25/14 with Andrew (xxguitarist)
    First start 12/21/14, First "drive" 1/17/15
    First Dyno at EFI Logics 3/7/15- 310whp at 15psi for break in, full spool by ~3500rpm!
    First autocross 3/29/15
    1st Registered 818 in Connecticut 7/24/2015. 9 months - 1 day from kit pickup!

  29. #189
    Senior Member
    Join Date
    Oct 2013
    Location
    Canton, MI
    Posts
    106
    Post Thanks / Like
    Quote Originally Posted by Tamra View Post
    Glad nothing major happened. We had a similarly embarrassing moment with the coolant line earlier in the build when we accidentally touched it to the battery... Say the least we had a lot of cleanup to do and had to replace a section of the corrugated hose. No welding mishaps yet but then again we haven't welded anything directly on the chassis.

    The oil cooler looks great there.
    My brother did the same thing lol. JB weld fixes everything.

  30. #190
    Senior Member mikeb75's Avatar
    Join Date
    Sep 2013
    Posts
    685
    Post Thanks / Like
    In my defense, I always keep a fire extinguisher close by when welding - and I've never had to use it (touch wood)
    818SC chassis #206 EJ207 2.0L VF37 twin scroll || Cusco type RS 1.5 LSD || Wilwood pedal box (firewall attach) || Wilwood superlite front calipers
    BUILD Phase 1: 6/6/2014 car delivered || 5/24/2015 first start || 6/7/2015 go karted || 4/20/2016 hard-top-topped || 10/25/2016 registered || 11/18/2016 inspected & complete
    BUILD Phase 2: 3/8/2017 EJ207v8 || 5/29/2017 re-first re-start || 7/17/2017 re-assembled with race car bits

  31. #191
    Senior Member Frank818's Avatar
    Join Date
    Jun 2013
    Location
    QC, Canada
    Posts
    5,732
    Post Thanks / Like
    That was close. But I doubt it would have burn through the fuel pipe, but probably a fuel line!
    I also had bad moments when I was laying under the car and welding, couldn't move my head with the mask and I was smelling something and seeing white smoke on the far edger of my peripheral vision. Took time to move and remove mask, my thick cloth has caught on fire. Got lucky.

    You may need a fan on that cooler to get more air in.
    Frank
    818 chassis #181 powered by a '93 VW VR6 Turbo GT3582R
    Go-karted Aug 5, 2016 - Then May 19+21, 2017
    Tracked May 27/July 26, 2017
    Build time before being driveable on Sep 27, 2019: over 6000h
    Build Completed Winter 2021

  32. #192
    Senior Member mikeb75's Avatar
    Join Date
    Sep 2013
    Posts
    685
    Post Thanks / Like
    Quote Originally Posted by Frank818 View Post
    You may need a fan on that cooler to get more air in.
    Agreed! Haven't fitted it yet, but the cooler came with one.

    Welding under the car was the worst! I didn't have a Smokey experience, that would have freaked me out.
    818SC chassis #206 EJ207 2.0L VF37 twin scroll || Cusco type RS 1.5 LSD || Wilwood pedal box (firewall attach) || Wilwood superlite front calipers
    BUILD Phase 1: 6/6/2014 car delivered || 5/24/2015 first start || 6/7/2015 go karted || 4/20/2016 hard-top-topped || 10/25/2016 registered || 11/18/2016 inspected & complete
    BUILD Phase 2: 3/8/2017 EJ207v8 || 5/29/2017 re-first re-start || 7/17/2017 re-assembled with race car bits

  33. #193
    Senior Member mikeb75's Avatar
    Join Date
    Sep 2013
    Posts
    685
    Post Thanks / Like

    Finishing Oil Cooler

    Finished the install a few days ago, just been busy with other stuff.

    Welded in a support for the oil thermostat. Finally, a weld I’m not totally embarrassed by.


    Plumbing the oil lines was a bit challenging. I'm mostly happy with the final setup except the thermostat being the highest part of the system, but it’s pressurized; should be OK. Will be interesting to see what this does to the oil pressure issue we saw earlier.


    A question about plumbing the cooler - I have the hot oil going in the bottom and the cooled oil coming out the top. Is that backwards? What is the preferred direction?


    For the time being we will run the oil cooler fan and other fans we’re planning off switches & relays from the control panel. Eventually, I want to add some logic that runs the fans based on temperatures with the toggles being used as overrides.
    818SC chassis #206 EJ207 2.0L VF37 twin scroll || Cusco type RS 1.5 LSD || Wilwood pedal box (firewall attach) || Wilwood superlite front calipers
    BUILD Phase 1: 6/6/2014 car delivered || 5/24/2015 first start || 6/7/2015 go karted || 4/20/2016 hard-top-topped || 10/25/2016 registered || 11/18/2016 inspected & complete
    BUILD Phase 2: 3/8/2017 EJ207v8 || 5/29/2017 re-first re-start || 7/17/2017 re-assembled with race car bits

  34. #194
    Senior Member mikeb75's Avatar
    Join Date
    Sep 2013
    Posts
    685
    Post Thanks / Like

    Updates and Downdates

    Took a while to fix some issues in the cooling loop. I had to replace and re-do a hunch of the rubber joins. Then it took a long while to completely bleed the cooling system, but with that taken care of it was back to plugging away. And I replaced the center console control panel, made something a little more useful to my driving position; I'll cover it in a later post I guess.

    Soooo, headlights. Worst part of the build –evar. Using the Bob-technique I was able to get the front of the car lined up properly. Another day or two and it should be completely mocked-up.

    Right now, looks a little like a skunk, or Sebastian from Josie and the Pu$$ycats (really?? can't type Pu$$ycats).


    Am a little concerned on the sight-lines out the front of the car. The seating position may be too low, I can’t locate the corners properly (neither can FIL). Anyone else have this issue where the bonnet seems too high?
    818SC chassis #206 EJ207 2.0L VF37 twin scroll || Cusco type RS 1.5 LSD || Wilwood pedal box (firewall attach) || Wilwood superlite front calipers
    BUILD Phase 1: 6/6/2014 car delivered || 5/24/2015 first start || 6/7/2015 go karted || 4/20/2016 hard-top-topped || 10/25/2016 registered || 11/18/2016 inspected & complete
    BUILD Phase 2: 3/8/2017 EJ207v8 || 5/29/2017 re-first re-start || 7/17/2017 re-assembled with race car bits

  35. #195
    Senior Member Rasmus's Avatar
    Join Date
    Mar 2012
    Location
    Las Vegas, USA
    Posts
    983
    Post Thanks / Like
    Quote Originally Posted by mikeb75 View Post
    I am going to need to figure out a way to get more air into the cooler; only about 1/3 of it is exposed in the side vent.
    I'd suggest a bit of custom duct work. Get out your stiff cardboard and thin aluminum and build a small, expanding, duct to feed the front of the cooler. By expanding the duct as it gets to the face, the velocity of the air will slow down but the pressure will increase. Which is what you want. High* pressure in front of the fins wanting a place to go.

    *may be only a 0.5 psi difference from atmospheric but, hey.


    Here's how a Stock Car radiator duct looks. Notice how it expands. Just make sure to seal it to the bodywork and heat-exchanger with weatherstripping or the like. That way the pressure has no where to go but through the fins.
    Fast Cars, Fast Women, Fast Haircuts!

  36. #196
    Senior Member Frank818's Avatar
    Join Date
    Jun 2013
    Location
    QC, Canada
    Posts
    5,732
    Post Thanks / Like
    That's a nice duct!!
    Frank
    818 chassis #181 powered by a '93 VW VR6 Turbo GT3582R
    Go-karted Aug 5, 2016 - Then May 19+21, 2017
    Tracked May 27/July 26, 2017
    Build time before being driveable on Sep 27, 2019: over 6000h
    Build Completed Winter 2021

  37. #197
    Senior Member mikeb75's Avatar
    Join Date
    Sep 2013
    Posts
    685
    Post Thanks / Like

    Gremlins

    Have not had a lot of progress to show lately, between travel and spending two weeks tracking down and killing electrical gremlins. But now, I think I’ve finished the last of the electrical everything works properly when tested. I re-bundled the wiring harness and re-installed the dash.

    The headlights are installed in the buckets; I need to do a little finishing here – I’m thinking of using some of the ‘loop’ side of adhesive backed Velcro to insulate/pad the headlight assembly & clear plastic from the fender bodywork. But I’m happy with how it looks.


    I’ve started fitting the doors. So far it’s been mostly going well. The lack of correct screw hardware required 2 trips to the store and I had to do some trimming/profiling of the door latches to have them fit properly on the door par assembly. The functional part of the doors works well (hinges & latching) – even if the drivers side latch brace didn’t fit as cleanly as the passenger. Hopefully it hasn’t bowed out the sail bodywork too far when I tightened everything cause interference with the door skin.

    I want to get the door skins mocked up shortly so I can finish drilling the locating holes and get them painted while the weather is still warm.

    818SC chassis #206 EJ207 2.0L VF37 twin scroll || Cusco type RS 1.5 LSD || Wilwood pedal box (firewall attach) || Wilwood superlite front calipers
    BUILD Phase 1: 6/6/2014 car delivered || 5/24/2015 first start || 6/7/2015 go karted || 4/20/2016 hard-top-topped || 10/25/2016 registered || 11/18/2016 inspected & complete
    BUILD Phase 2: 3/8/2017 EJ207v8 || 5/29/2017 re-first re-start || 7/17/2017 re-assembled with race car bits

  38. #198
    Senior Member mikeb75's Avatar
    Join Date
    Sep 2013
    Posts
    685
    Post Thanks / Like

    This is my good side

    Passenger side came out looking pretty good. Everything lined up with a minimum of trouble.


    The drivers side isn't quite the same story...
    818SC chassis #206 EJ207 2.0L VF37 twin scroll || Cusco type RS 1.5 LSD || Wilwood pedal box (firewall attach) || Wilwood superlite front calipers
    BUILD Phase 1: 6/6/2014 car delivered || 5/24/2015 first start || 6/7/2015 go karted || 4/20/2016 hard-top-topped || 10/25/2016 registered || 11/18/2016 inspected & complete
    BUILD Phase 2: 3/8/2017 EJ207v8 || 5/29/2017 re-first re-start || 7/17/2017 re-assembled with race car bits

  39. #199
    Senior Member Canadian818's Avatar
    Join Date
    Nov 2011
    Location
    Edmonton, Alberta
    Posts
    1,378
    Post Thanks / Like
    Looks fantastic! I've always been set on going flat black, and now I'm sold for sure. Still dunno if it'll be dipped or wrapped though.
    Adam _____ Instagram @PopesProjects____ YouTube Channel
    818 SRX - #91
    Arrived 01/02/2014
    First Start 10/31/2016
    First Drive 05/22/2017
    Registered 10/25/2019 BRAP818

  40. #200
    Junior Member
    Join Date
    Jul 2012
    Posts
    16
    Post Thanks / Like
    Subscribed.

Page 5 of 16 FirstFirst ... 3456715 ... LastLast

Posting Permissions

  • You may not post new threads
  • You may not post replies
  • You may not post attachments
  • You may not edit your posts
  •  

FFMetal

Visit our community sponsor