Boig Motorsports

Visit our community sponsor

Thanks Thanks:  0
Likes Likes:  1
Page 1 of 3 123 LastLast
Results 1 to 40 of 96

Thread: Charles's '33 build Page

  1. #1
    Senior Member crspdsk8's Avatar
    Join Date
    May 2011
    Location
    Antelope, Ca
    Posts
    155
    Post Thanks / Like

    Charles's '33 build Page

    Hi there!

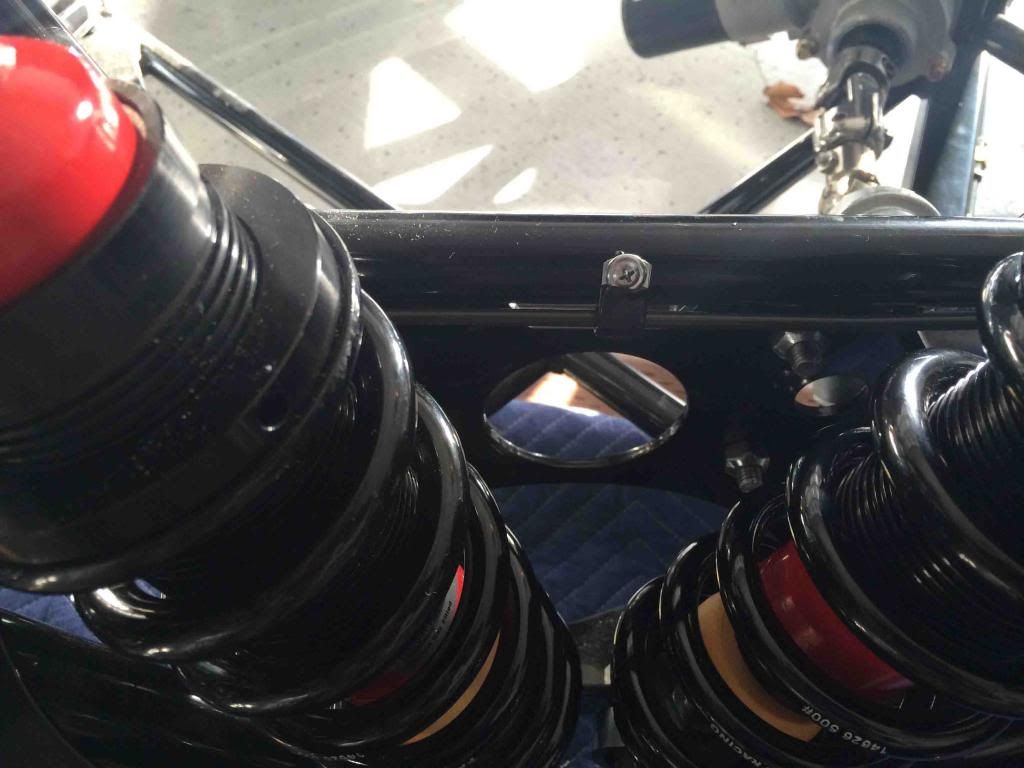
    I am out in Antelope, CA (just outside of Sacramento) and I have been wanting to build a FFR roadster from the 1st time I saw one until they came out with the 33. The 33 Ford is one of my dream cars and after lurking on here for years & dreaming of the day to actually build one, I have decide to take the plunge and order the 33 kit and make my dream a reality! After patiently waiting about 5 weeks, my kit finally arrived on late Monday! It appears to be kit #600, but doesn't make since I have seen other builds on the forum that are in the mid 600's? Do they not do this in order and jump around on #'s?
    This is a build that will include 3 generations of our name which has been passed down including myself, my father and my 8 year old son is the 5th generation to have our name passed down too! I am not a huge car nut when it comes to actually building one so I am sure I will have a ton of questions along the way. I have learned a lot just from watching other build threads and hopefully learn from others on what to do and not to do.


    I have pretty much completed the inventory, which some bags/parts were not marked, and found some parts missing and of course the notorious FFR backorders which include the parts I was planning on starting with but I plan on shifting my plan and get started in other areas. One of the things I was thinking of putting in place is the firewall. Does anybody have any recommendations on getting this done 1st or waiting until later? Is it best to set in place before removing the main body or with out the body on? My concern is to make sure they fit together as nicely as possible.

    My plan is to use this thread to document my build progression and hope to get input from others especially working around any issues that may come up during the build. I am looking forward to this build and getting to know others here on the forum! I will try to keep this up to date along the way as much as I can. I have never attached pics to a thread before so hopefully this works.
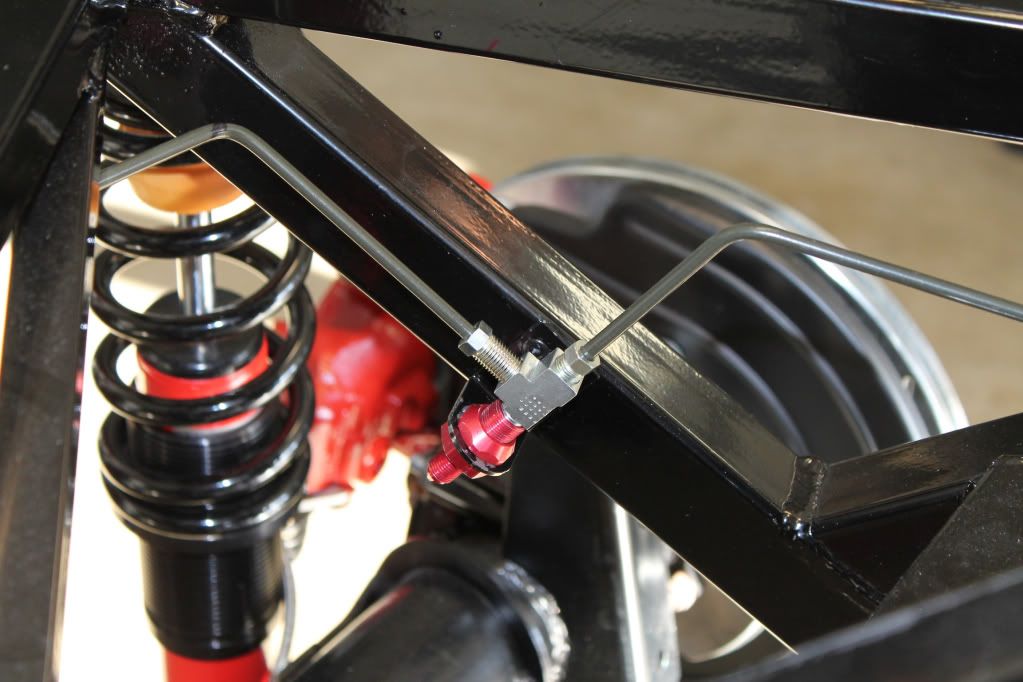
    IMG_1275 cropped.jpgphoto_6.jpg

  2. #2
    Senior Member 68GT500MAN's Avatar
    Join Date
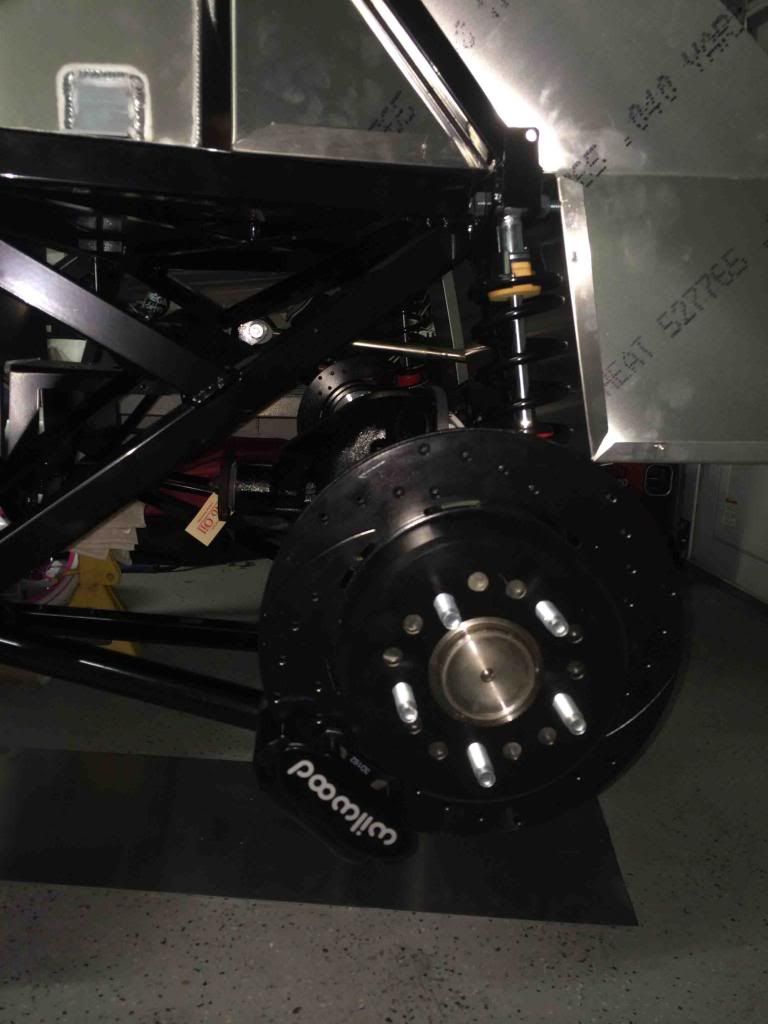
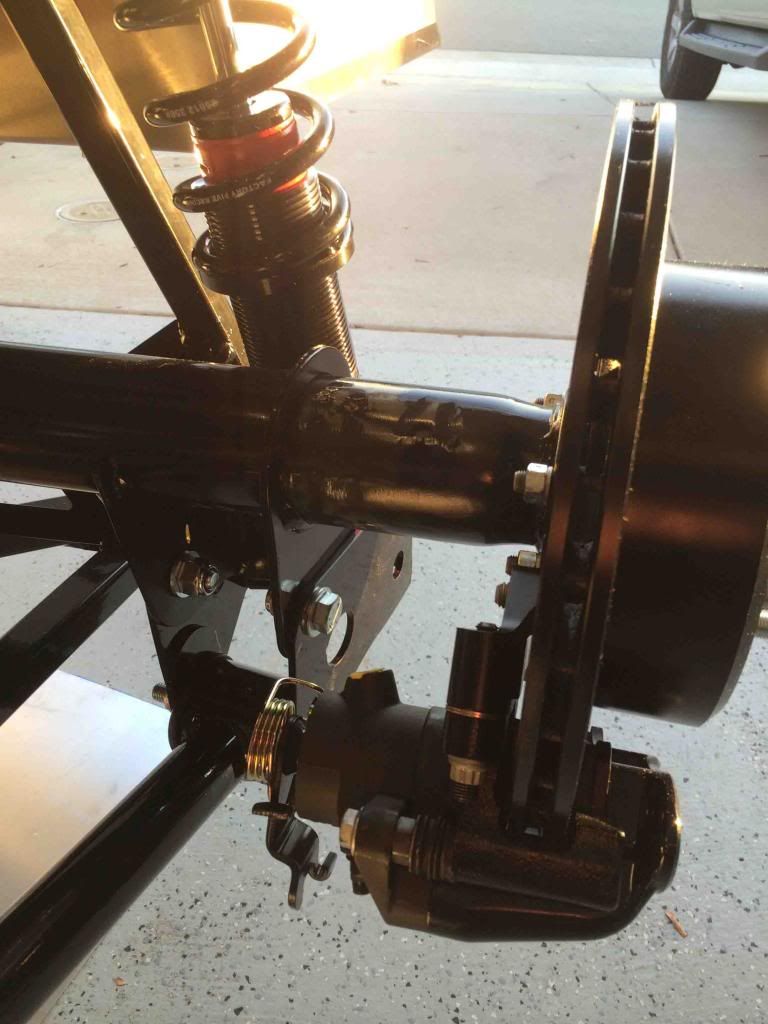
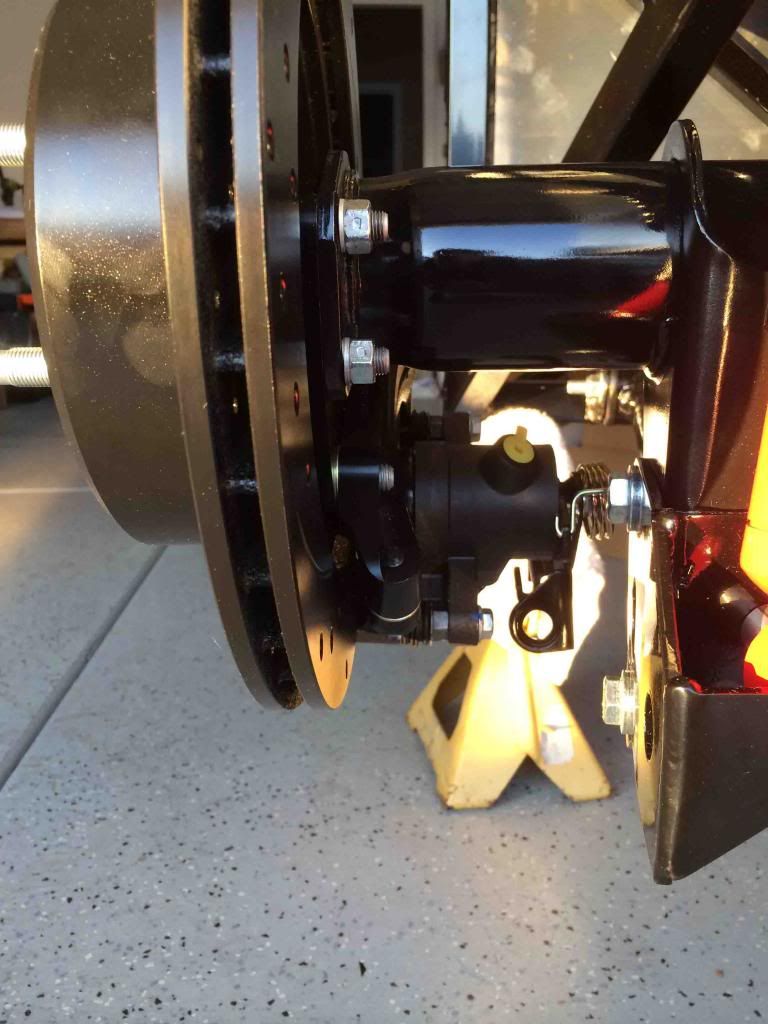
    Feb 2011
    Location
    Fresno, CA
    Posts
    1,808
    Post Thanks / Like
    Congratulations on the delivery and the start of your dream build. I live South of you in Fresno so I may have to drive on up and see your build in progress.
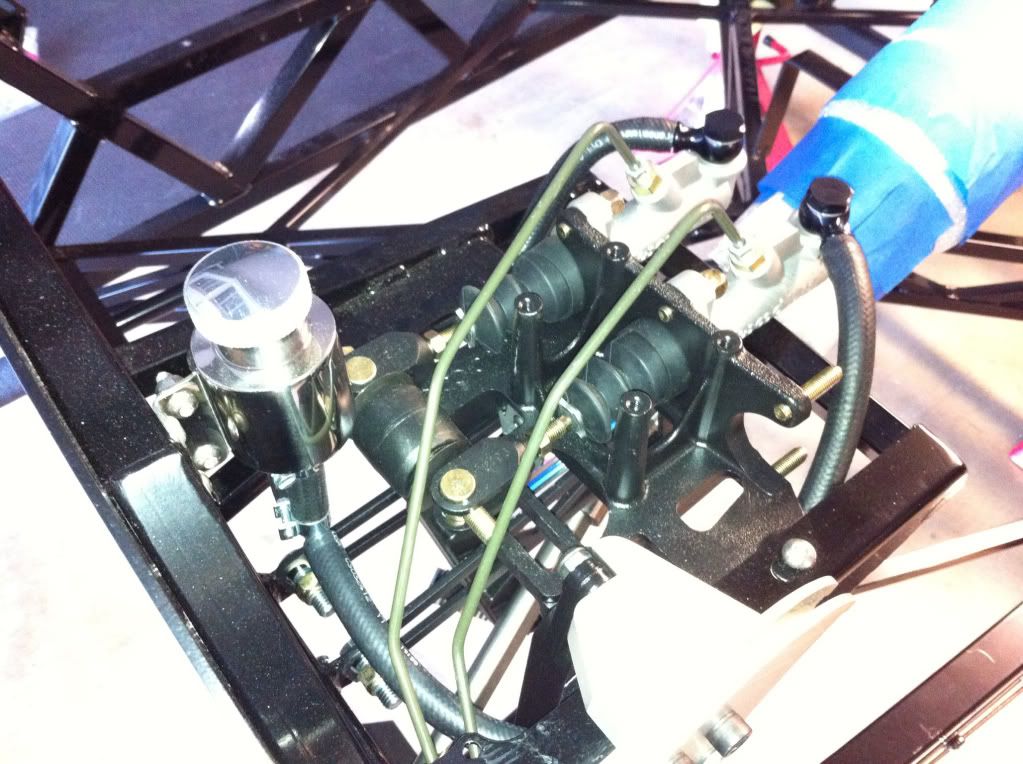
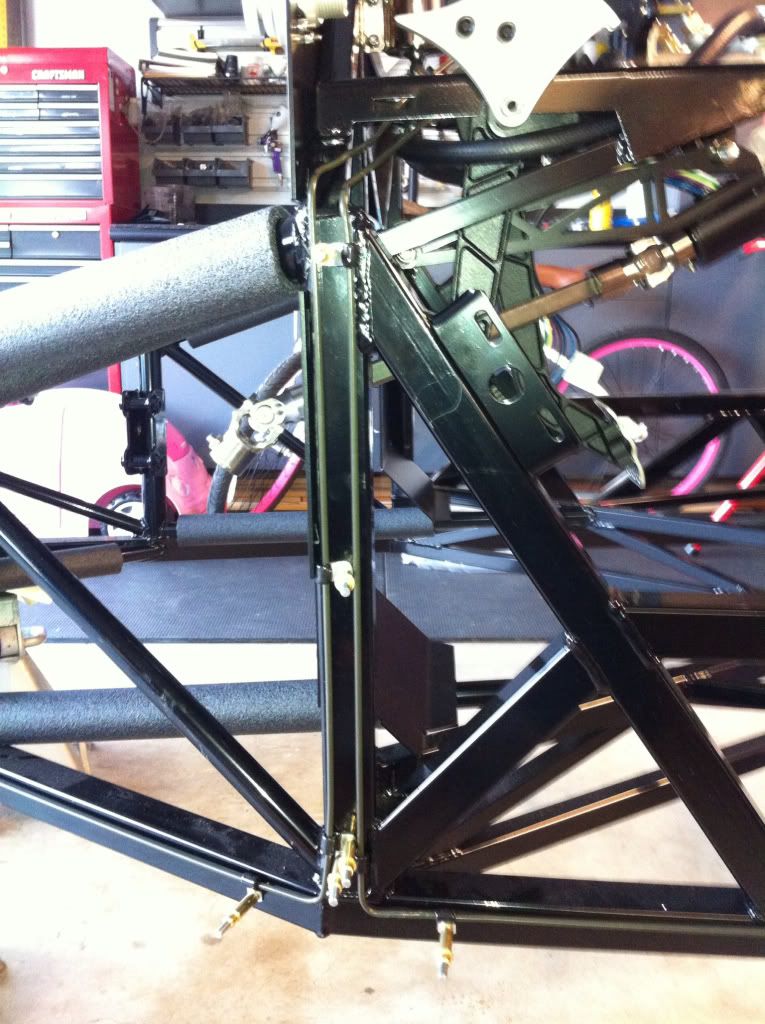
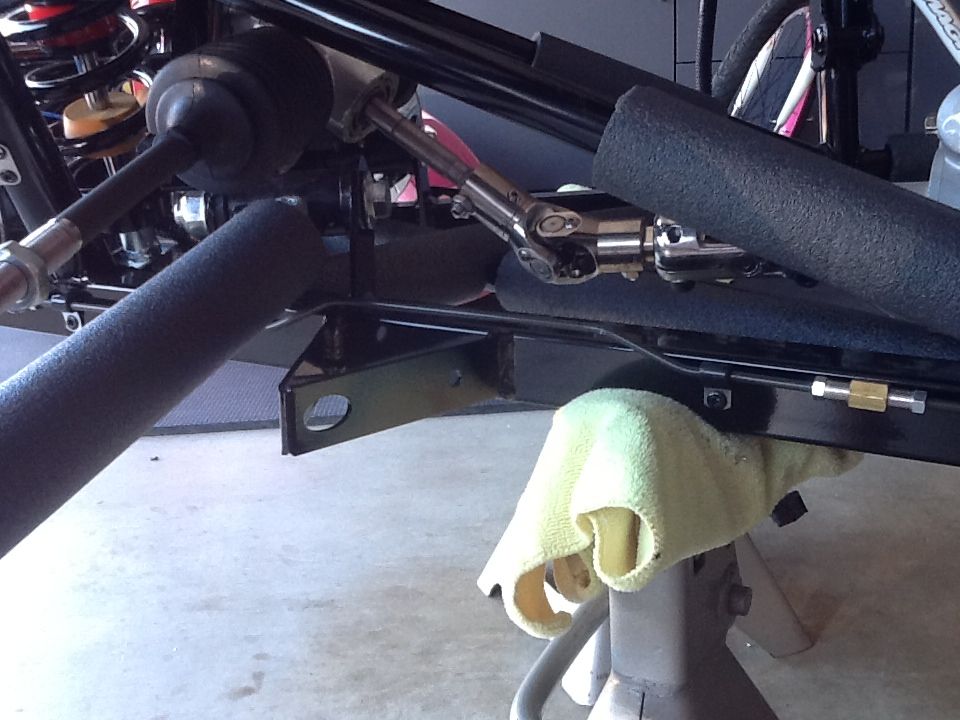
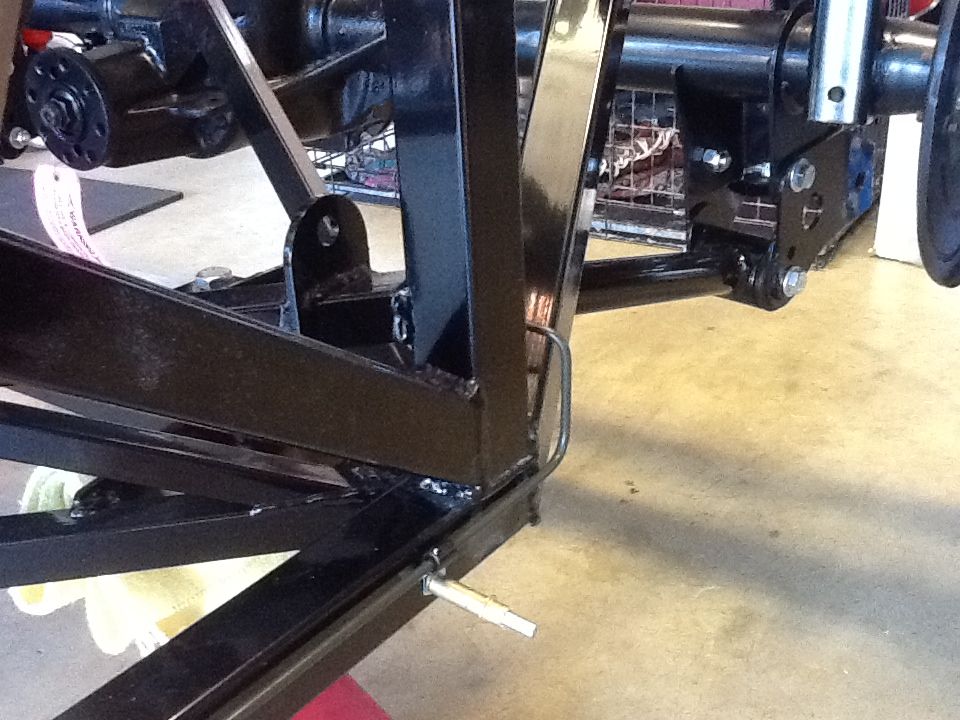
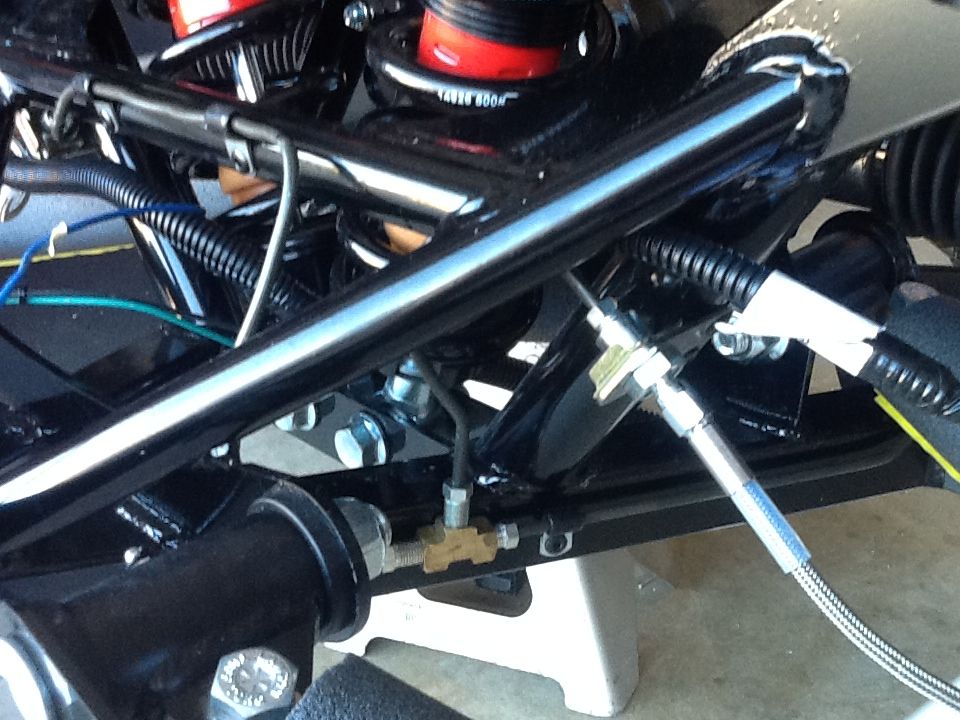
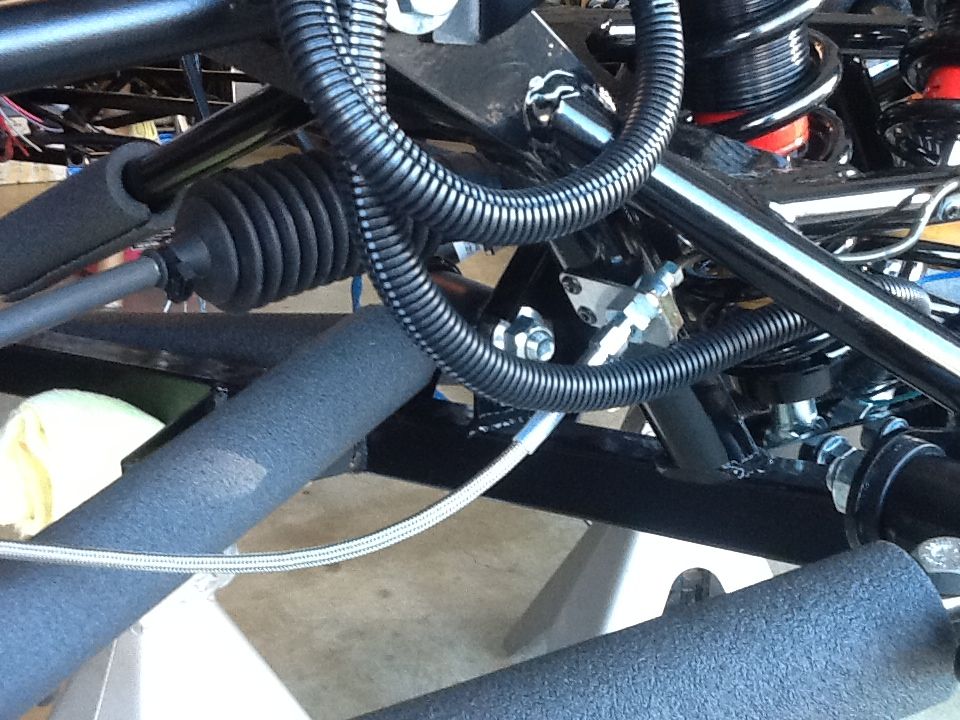
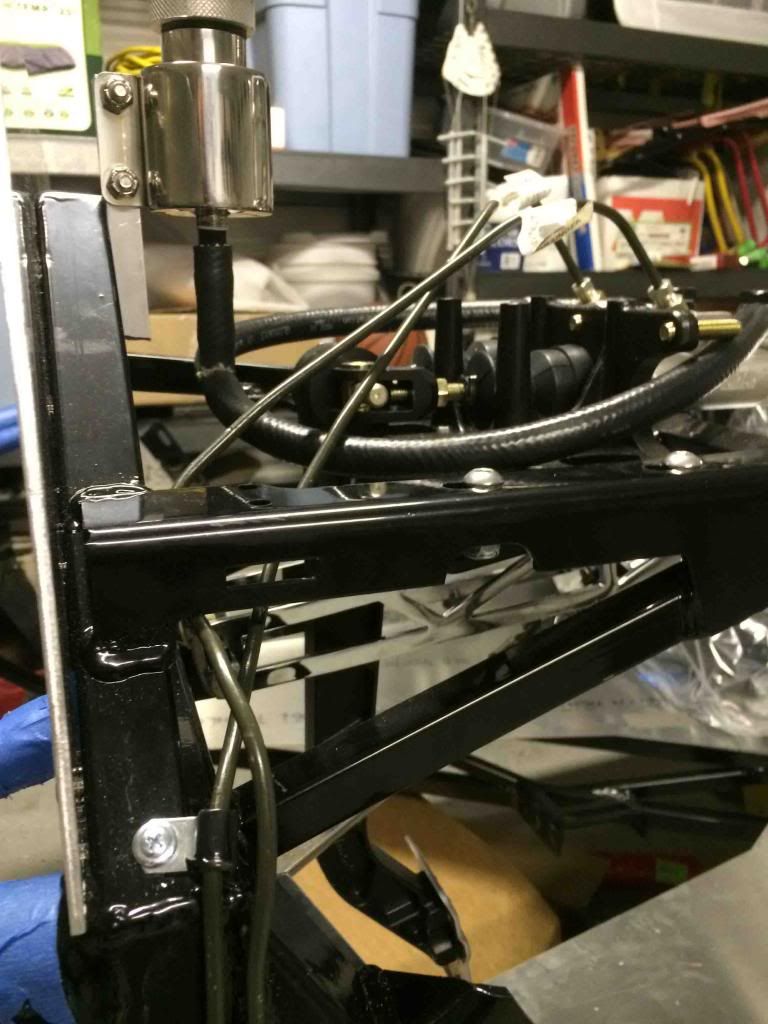
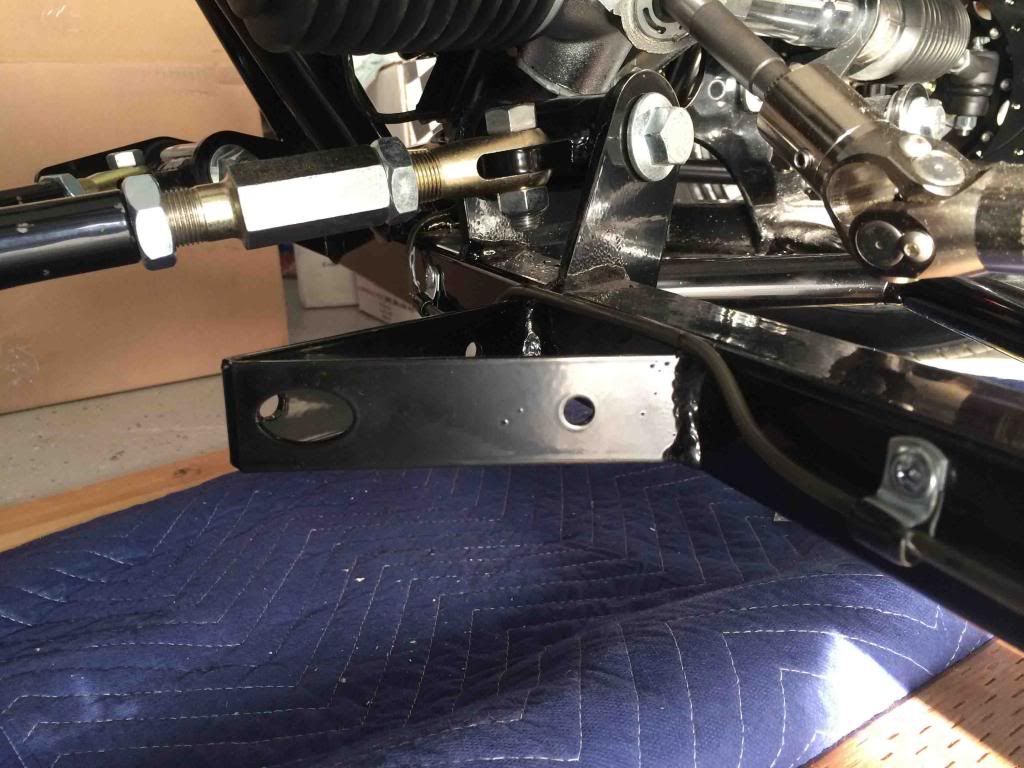
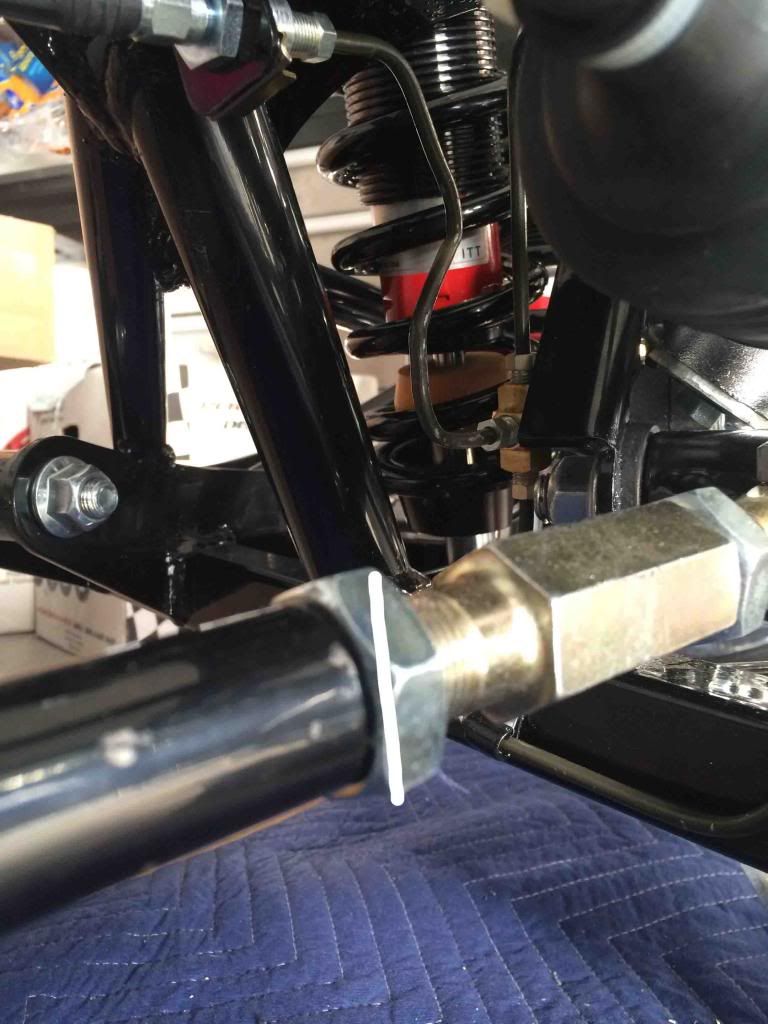
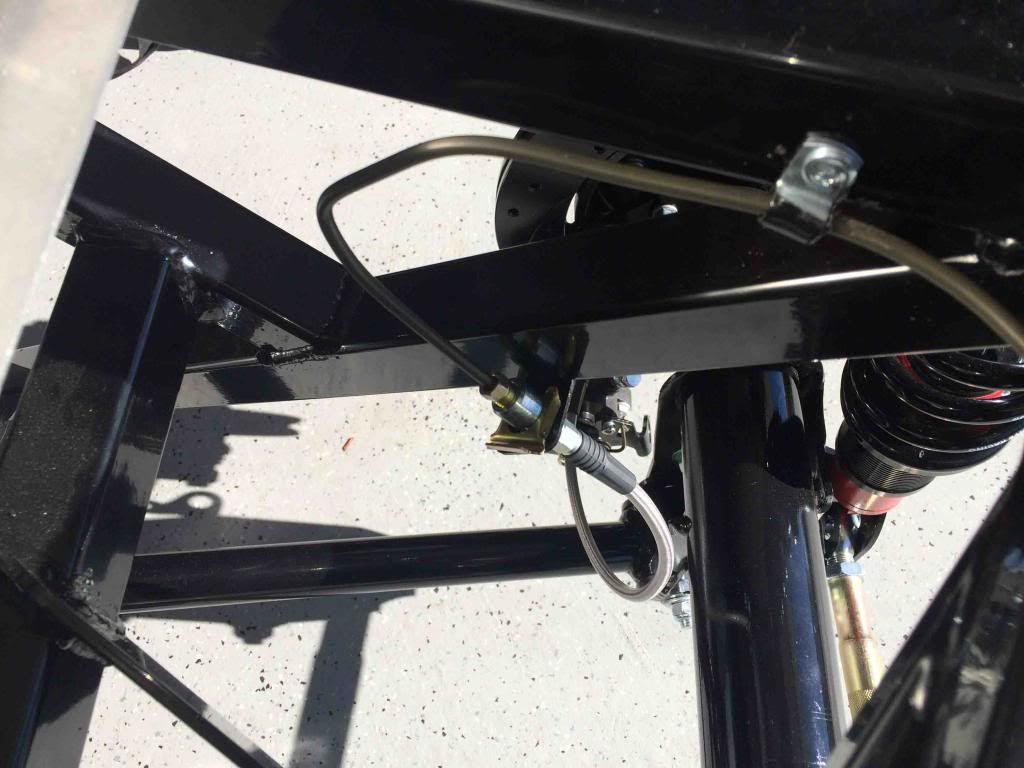
    Doug

  3. #3
    Senior Member kraftee's Avatar
    Join Date
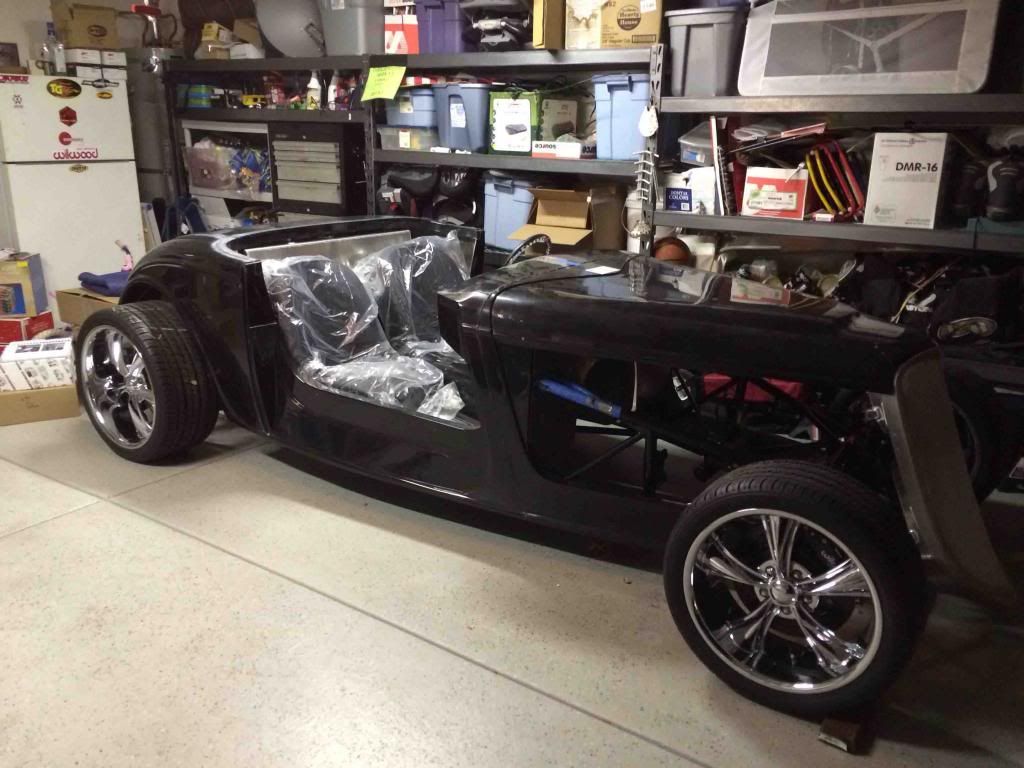
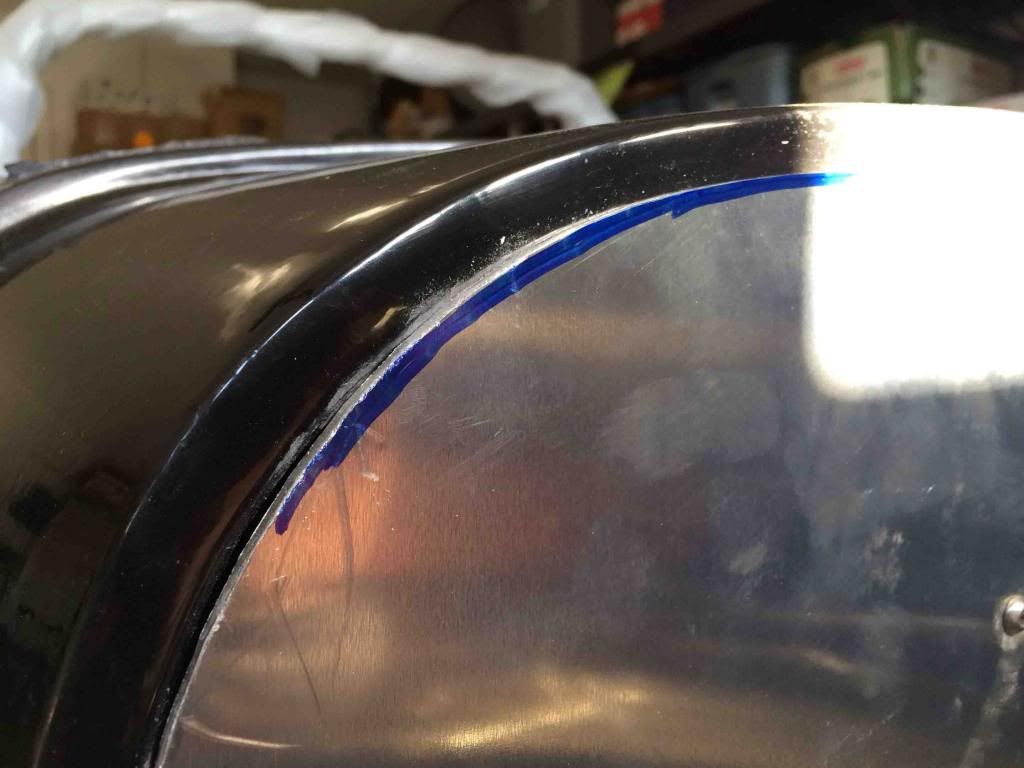
    May 2013
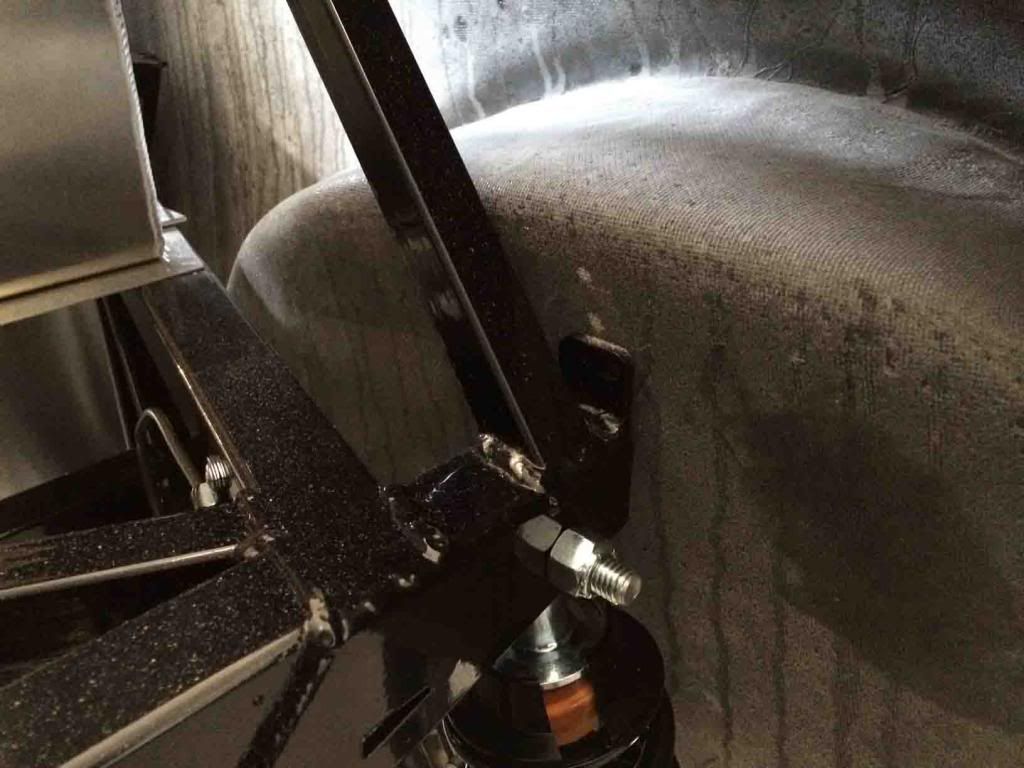
    Location
    Gainesville, Florida
    Posts
    288
    Post Thanks / Like
    Congratulations Charles! You will LOVE the build. I picked up my '33 in early September at the FFR factory and am almost to the go-kart stage. I have loved every minute of my build - but I haven't started the body work yet!

    My car is #583, so your car a month later at #600 makes sense. Now, evidently, there were some mid-600s serial numbers earlier in the year - but I pretty sure that was a FFR screw-up.

    At any rate, have a great time with your build! ERIC
    "If everything seems to be coming your way, you're probably in the wrong lane."

  4. #4
    Senior Member crspdsk8's Avatar
    Join Date
    May 2011
    Location
    Antelope, Ca
    Posts
    155
    Post Thanks / Like
    Quote Originally Posted by 68GT500MAN View Post
    Congratulations on the delivery and the start of your dream build. I live South of you in Fresno so I may have to drive on up and see your build in progress.
    Doug
    Thanks Doug! Yeah if your ever up this way or passing through town, let me know and swing on by!

  5. #5
    Senior Member crspdsk8's Avatar
    Join Date
    May 2011
    Location
    Antelope, Ca
    Posts
    155
    Post Thanks / Like
    Quote Originally Posted by kraftee View Post
    Congratulations Charles! You will LOVE the build. I picked up my '33 in early September at the FFR factory and am almost to the go-kart stage. I have loved every minute of my build - but I haven't started the body work yet!

    My car is #583, so your car a month later at #600 makes sense. Now, evidently, there were some mid-600s serial numbers earlier in the year - but I pretty sure that was a FFR screw-up.

    At any rate, have a great time with your build! ERIC
    Thanks Eric! Yeah, I am really looking forward to it and so is my son. I think he may even be more excited than me!
    I have been following your build also and you have given me a lot of motivation since yours is coming together fairly quickly! I am not looking forward to the body work either and guess I will deal with it when the time comes. I was thinking about going power brakes since you mentioned that they went together pretty well. If you don't mind me asking, about how much do the power brake set up run?

    Thanks and looking forward to watching you finish your build and get that 33 on the road!

    Charles

  6. #6
    Senior Member Boz1911's Avatar
    Join Date
    May 2013
    Location
    Peachtree City
    Posts
    344
    Post Thanks / Like
    Congrats, with the manual, on-line manual, and the forums there is a lot of help available. Have fun !!

  7. #7
    Senior Member kraftee's Avatar
    Join Date
    May 2013
    Location
    Gainesville, Florida
    Posts
    288
    Post Thanks / Like
    The Whitby power brake kit was $495. Easy installation and frees up a lot of space under dash. Looking forward to the go-kart stage so I can test them out!
    "If everything seems to be coming your way, you're probably in the wrong lane."

  8. #8
    Senior Member crspdsk8's Avatar
    Join Date
    May 2011
    Location
    Antelope, Ca
    Posts
    155
    Post Thanks / Like
    Quote Originally Posted by Boz1911 View Post
    Congrats, with the manual, on-line manual, and the forums there is a lot of help available. Have fun !!
    Thanks, I am really looking forward to it!

  9. #9
    Senior Member crspdsk8's Avatar
    Join Date
    May 2011
    Location
    Antelope, Ca
    Posts
    155
    Post Thanks / Like
    Quote Originally Posted by kraftee View Post
    The Whitby power brake kit was $495. Easy installation and frees up a lot of space under dash. Looking forward to the go-kart stage so I can test them out!
    Thanks Eric, I will have to look into that. Originally I am one of those that didn't really like the look of it but I plan on driving this car really want the car to stop well. I have heard others talk about the number of issues with the normal brake set up. I am going with Wilwood brakes all the way around.
    I am anxious to hear from you on how well they work once you get to road test it!

  10. #10
    Senior Member crspdsk8's Avatar
    Join Date
    May 2011
    Location
    Antelope, Ca
    Posts
    155
    Post Thanks / Like
    Body off Chassis.jpgBody off.jpgFirewall in place.jpgWell I am off to a really slow start. I am waiting on a number of parts which include parts of the front and rear suspension, pedal box and also parts for the brakes and steering. I sent the parts that I do have off to be powder coated and should have those back by the end of the week. It seems I can't really do much until I get some more parts.
    Today I did take the body off and was able to fit the firewall and traced our the frame on the floor panels. I only had one issue with the passenger side foot panel. One of the welds on the frame prevented the panel to sit flush. I cleaned up the weld just a bit and was able to get the panel to sit flush! I did not drill the holes on the firewall yet until I decide how I want to mount it. I would like to have easier access to under the dash so I plan on using screws for the top panel and rivets for the lower. I also have not decided on going with the spacing FFR suggest or going farther apart to have less screws. I have seen others use less screws/rivets to get a cleaner look, but I am concerned that if their isn't enough that it may rattle some. I would love to hear from others of what they did and how it worked out.

    While I am on a little bit of a hold with the chassis because of parts, I am going to try and work on the body and get the seems cleaned up.

    Hopefully the parts I am missing will come quick and can start to get some real progress done!

  11. #11
    Senior Member Boz1911's Avatar
    Join Date
    May 2013
    Location
    Peachtree City
    Posts
    344
    Post Thanks / Like
    I used 10/32 button head screws for the upper and lower firewalls and skipped the "V" part of the upper firewall for the cleaner look. I still think I ended up with 70 holes altogether though. My final step will be to Loctite them but with the hour or so of running time so far I don't think rattle will be an issue at all. I've used a lot of those 10/32 button head screws on this car and if you use something like that buy some extra taps because sooner or later you'll break one, or two, or three.......

  12. #12
    Senior Member crspdsk8's Avatar
    Join Date
    May 2011
    Location
    Antelope, Ca
    Posts
    155
    Post Thanks / Like
    Quote Originally Posted by Boz1911 View Post
    I used 10/32 button head screws for the upper and lower firewalls and skipped the "V" part of the upper firewall for the cleaner look. I still think I ended up with 70 holes altogether though. My final step will be to Loctite them but with the hour or so of running time so far I don't think rattle will be an issue at all. I've used a lot of those 10/32 button head screws on this car and if you use something like that buy some extra taps because sooner or later you'll break one, or two, or three.......
    Thanks! That was something along the lines of what I was thinking of doing!

  13. #13
    Senior Member crspdsk8's Avatar
    Join Date
    May 2011
    Location
    Antelope, Ca
    Posts
    155
    Post Thanks / Like
    Charlie fuel.jpgCharlie fan.jpgDoor frames.jpgGrill.jpgRadiator complete.jpgTail lights.jpgWell while I sitting around just staring at this beautiful chassis in my garage, I took sometime to go through the manual and find something or anything to do while waiting for parts to arrive. I was able to put the taillights in, install the gas cap, painted the door frames and stand offs and also got the electric fan and radiator installed on to the grill. I know I am far from needing these items, but it should leave me less to do later and hopefully make up for the down time that I have now.

    I am getting my son involved more and got him working on some of the "nuts and bolts" of things! He was pretty excited to work on the car!!

  14. #14
    Senior Member Boz1911's Avatar
    Join Date
    May 2013
    Location
    Peachtree City
    Posts
    344
    Post Thanks / Like
    That's what I did while I was waiting on some crucial parts. Flip through the manual and there's always something you can do. I located the raw steel parts and deburred all of them so there were no sharp edges or corners.

  15. #15
    Senior Member crspdsk8's Avatar
    Join Date
    May 2011
    Location
    Antelope, Ca
    Posts
    155
    Post Thanks / Like
    I have been pretty busy with work and the kids soccer lately, so I haven't had much time to work on the car but this is what I have managed to get done with what little time I had.

    I received the pedal box and installed it including the master cylinders and brake reservoir. Like I have said before I am no gear head but the brake reservoir seems to sit a little low. The bottom of where the fluid hose comes out, it sits a lot lower the master cylinders and the fluid has to travel up to them. Will this be an issue and should I modify it to sit higher than the master cylinders? I have seen other builders pics and I have it mounted in the same place as them so I assume that it will be OK.

    I have decided to mount the firewall with 10-32 button head screws to have ability to remove any piece of it if needed. Down the road I would also like to apply Lizard Skin to it to help with the heat and sound so having screws will make it easier to do this then having to drill out the rivets to remove the firewall. I originally was going to run less screws but decided to go with what FFR suggest to make sure I never have a rattle issue.

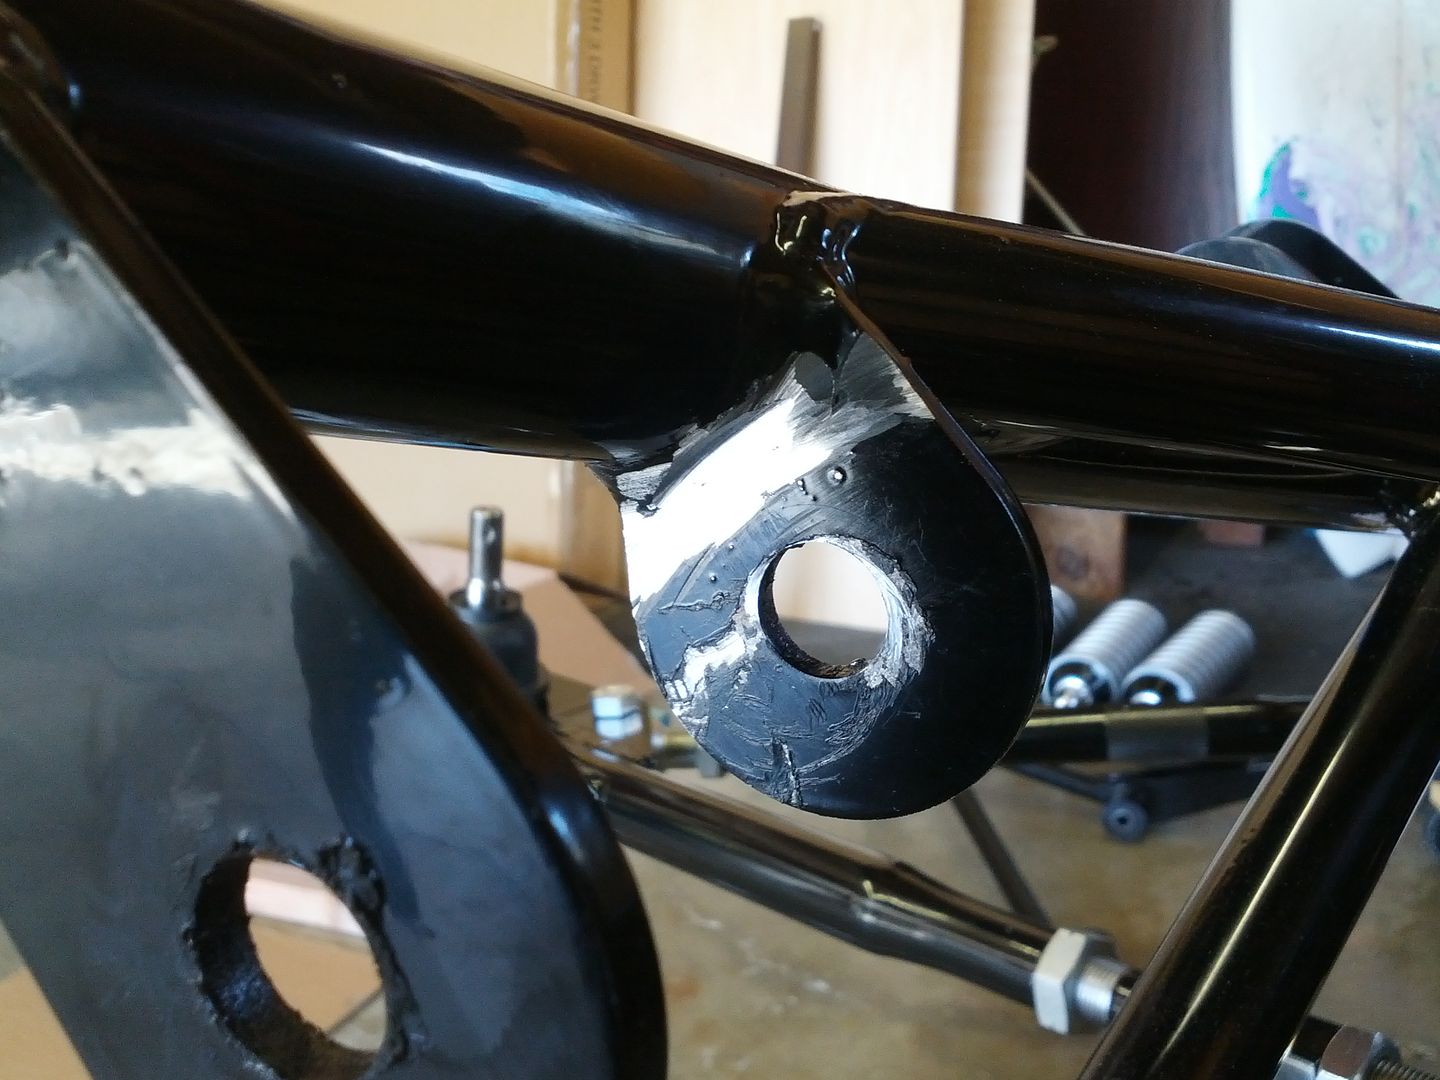
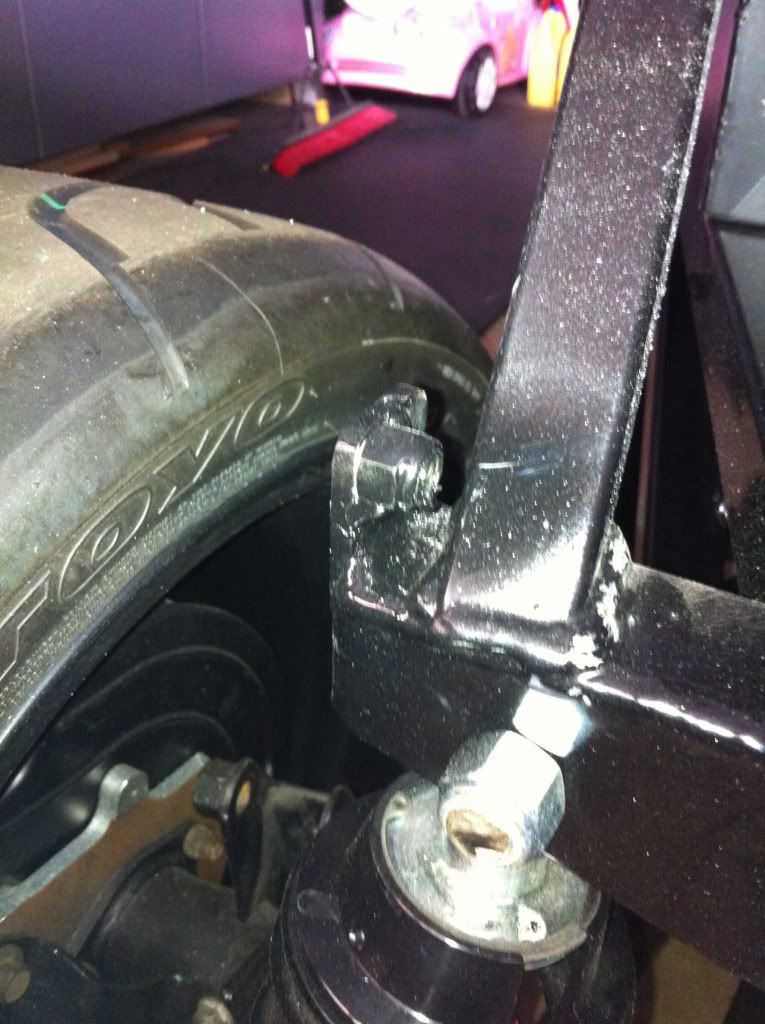
    I am still waiting for my clevis's before installing the entire suspension but got the upper front suspension installed and event the kids helped with installing the rubber bushings. Of course I had to grind down the welds on both sides to get them to line up and get the bolt through. ON the driver side, I was able to get the bolt through but the weld is still pressing up against the bushing. Please see picture. Is this going to be an issue down the road and cause this bushing to go bad? I figured I would ask before I go and grind more of the weld. I would rather not grind the weld down more unless it will be a problem. I am afraid of grinding too much and then having a bigger issue.


    That's about it so far. I am expecting more parts to come in tomorrow and Friday. It's coming along a little slower than I would like but hopefully once I get all the parts and more free time in a couple weeks, things will really get rolling.

    Bushing hitting weld.jpgFirewall marked.jpgKids Helping.jpgFront uppers.jpg
    Last edited by crspdsk8; 10-29-2013 at 01:16 AM.

  16. #16
    Senior Member kraftee's Avatar
    Join Date
    May 2013
    Location
    Gainesville, Florida
    Posts
    288
    Post Thanks / Like
    Charles. At the Build School, they really emphasized the importance of getting grease to the faces of all those large suspension bushings. Helps the suspension work properly and not bind. It's a little time-consuming, but you will notice that INSIDE the bushings, there are grease channels molded in. Simply use a Dremel with a cut-off wheel to extend those channels out (like a star pattern) across the faces of the bushings. I found it easiest to put the bushings in a vise and then just grind away. Takes thirty or forty seconds per bushing. When finished, it will allow the grease you pump into the zerk fitting to travel to ALL the bearing surfaces of the bushing - not just the inside ones. Don't know how many other guys are doing this... ERIC
    "If everything seems to be coming your way, you're probably in the wrong lane."

  17. #17
    Senior Member crspdsk8's Avatar
    Join Date
    May 2011
    Location
    Antelope, Ca
    Posts
    155
    Post Thanks / Like
    Quote Originally Posted by kraftee View Post
    Charles. At the Build School, they really emphasized the importance of getting grease to the faces of all those large suspension bushings. Helps the suspension work properly and not bind. It's a little time-consuming, but you will notice that INSIDE the bushings, there are grease channels molded in. Simply use a Dremel with a cut-off wheel to extend those channels out (like a star pattern) across the faces of the bushings. I found it easiest to put the bushings in a vise and then just grind away. Takes thirty or forty seconds per bushing. When finished, it will allow the grease you pump into the zerk fitting to travel to ALL the bearing surfaces of the bushing - not just the inside ones. Don't know how many other guys are doing this... ERIC
    Thanks Eric for the tip! I was looking at those and it didn't look to me that the grease would travel in there very well. That makes perfect sense and great idea! Thanks...Charles

  18. #18
    Senior Member crspdsk8's Avatar
    Join Date
    May 2011
    Location
    Antelope, Ca
    Posts
    155
    Post Thanks / Like
    I just keep plucking away with where I can and when I can. Some how since my last post, I gotten a few more things done.
    I made a bracket to raise the brake reservoir some to sit just under the dash, installed the front shocks which I had to grind a little off the spacers to fit properly, got all the floor pans marked and drilled, and finally found a rear end and got it all cleaned up. I will be picking the rear end up from the shop on Friday as I had it completely rebuilt with new 31 spline axles, a new posi and new bearings and seals. I am running a 700r4 tranny and went with 3.73's in the rear.

    I also have a tracking number for the last of the back ordered parts including the clevis's for the front suspension which of course I need to finish up the front. With those coming in and the rear end being completed, I should have a rolling chassis by the end of next week!! I have the wheels and tires picked out and just need to make a phone call and I will have them the next day. I decided to go with the Eagle Boss 338's with 18"x 8" in the front and 20" X 10" in the rear.

    After hearing all the complaints about the supplied FFR fuel tank and apparent design flaw, I decided to go with the Boyd tank and it should be here next week as well!

    I also started running brake lines and did them the way the manual states but I am not sure I really like it. I have seen a lot of builders just running them on the outside of the chassis rail and I am thinking of doing the same. If you have pictures to share of how you ran them, I would love to see them. I have a lot of the 1st line coming off the master cylinders but would like to see more of how/where they were ran back to the inside and finished up.
    I also have a stupid question as it wasn't clear in the manual. The ends of these supplied brake lines are different length threads on each end. Does it matter which end goes in to the master cylinder and if so, which one. The longer threaded piece of the shorter one. Any help or suggestions with running the brakes is appreciated! FYI, I am running the Wilwood brakes front and back.

    Hopefully I will reach my 1st major milestone next week with the car sitting on her own!!

  19. #19
    PLATNUM Supporting Member
    wallace18's Avatar
    Join Date
    Apr 2012
    Location
    Trenton, Florida
    Posts
    5,382
    Post Thanks / Like
    I do not think it matters which end you use. It is up to you for looks IMO.

  20. #20
    Senior Member kraftee's Avatar
    Join Date
    May 2013
    Location
    Gainesville, Florida
    Posts
    288
    Post Thanks / Like
    Tom's right. The threads don't actually go all the way into the fitting anyway. The seal is all about the double flare at the end of the pipe. In most cases, I put the short fittings into the brake master cylinder and calipers. I put the long fittings into the brake line connectors and blocks. Just for the sake of consistency and, as Tom pointed out, looks.
    "If everything seems to be coming your way, you're probably in the wrong lane."

  21. #21
    Senior Member
    Join Date
    Feb 2011
    Posts
    334
    Post Thanks / Like
    Blog Entries
    1
    Welcome to the madness !!!! We have a number of parts to make the end product a little nicer. I'm also available by phone to help with your build. If I can help in any way, send me a pm with a phone number and I can give you a call.

    Tim Whittaker

  22. #22
    Senior Member esff32's Avatar
    Join Date
    Oct 2012
    Location
    La Verne, Ca
    Posts
    560
    Post Thanks / Like
    Quote Originally Posted by crspdsk8 View Post
    I just keep plucking away with where I can and when I can. Some how since my last post, I gotten a few more things done.
    I made a bracket to raise the brake reservoir some to sit just under the dash, installed the front shocks which I had to grind a little off the spacers to fit properly, got all the floor pans marked and drilled, and finally found a rear end and got it all cleaned up. I will be picking the rear end up from the shop on Friday as I had it completely rebuilt with new 31 spline axles, a new posi and new bearings and seals. I am running a 700r4 tranny and went with 3.73's in the rear.

    I also have a tracking number for the last of the back ordered parts including the clevis's for the front suspension which of course I need to finish up the front. With those coming in and the rear end being completed, I should have a rolling chassis by the end of next week!! I have the wheels and tires picked out and just need to make a phone call and I will have them the next day. I decided to go with the Eagle Boss 338's with 18"x 8" in the front and 20" X 10" in the rear.

    After hearing all the complaints about the supplied FFR fuel tank and apparent design flaw, I decided to go with the Boyd tank and it should be here next week as well!

    I also started running brake lines and did them the way the manual states but I am not sure I really like it. I have seen a lot of builders just running them on the outside of the chassis rail and I am thinking of doing the same. If you have pictures to share of how you ran them, I would love to see them. I have a lot of the 1st line coming off the master cylinders but would like to see more of how/where they were ran back to the inside and finished up.
    I also have a stupid question as it wasn't clear in the manual. The ends of these supplied brake lines are different length threads on each end. Does it matter which end goes in to the master cylinder and if so, which one. The longer threaded piece of the shorter one. Any help or suggestions with running the brakes is appreciated! FYI, I am running the Wilwood brakes front and back.

    Hopefully I will reach my 1st major milestone next week with the car sitting on her own!!
    This is how I ran my brake lines. Let me know if you need any detailed photos.


  23. #23
    33 Hot Rod #664 BrentM's Avatar
    Join Date
    May 2013
    Posts
    63
    Post Thanks / Like
    Quote Originally Posted by crspdsk8 View Post
    I am still waiting for my clevis's before installing the entire suspension but got the upper front suspension installed and event the kids helped with installing the rubber bushings. Of course I had to grind down the welds on both sides to get them to line up and get the bolt through. ON the driver side, I was able to get the bolt through but the weld is still pressing up against the bushing. Please see picture. Is this going to be an issue down the road and cause this bushing to go bad? I figured I would ask before I go and grind more of the weld. I would rather not grind the weld down more unless it will be a problem. I am afraid of grinding too much and then having a bigger issue.

    Bushing hitting weld.jpgFirewall marked.jpgKids Helping.jpgFront uppers.jpg
    I ground mine down to fit, I think a lot of guys have had to do it.


    Nice job on the build, Have fun.

    Brent

  24. #24
    Senior Member crspdsk8's Avatar
    Join Date
    May 2011
    Location
    Antelope, Ca
    Posts
    155
    Post Thanks / Like
    Sorry for not staying on top of this thread and thank you for all who replied helping me with some questions I had. Well I have been busy with work and really busy working on the car every chance I get and therefor haven's had much time to get on here but here is an update on my build progress.
    I finally got all my back ordered parts rear end back from the shop not much to hold me back now except a motor, tranny & some money! I finally got a photo bucket account so hopefully I can figure this out and get bigger pics on here. So here it goes, hope it works!

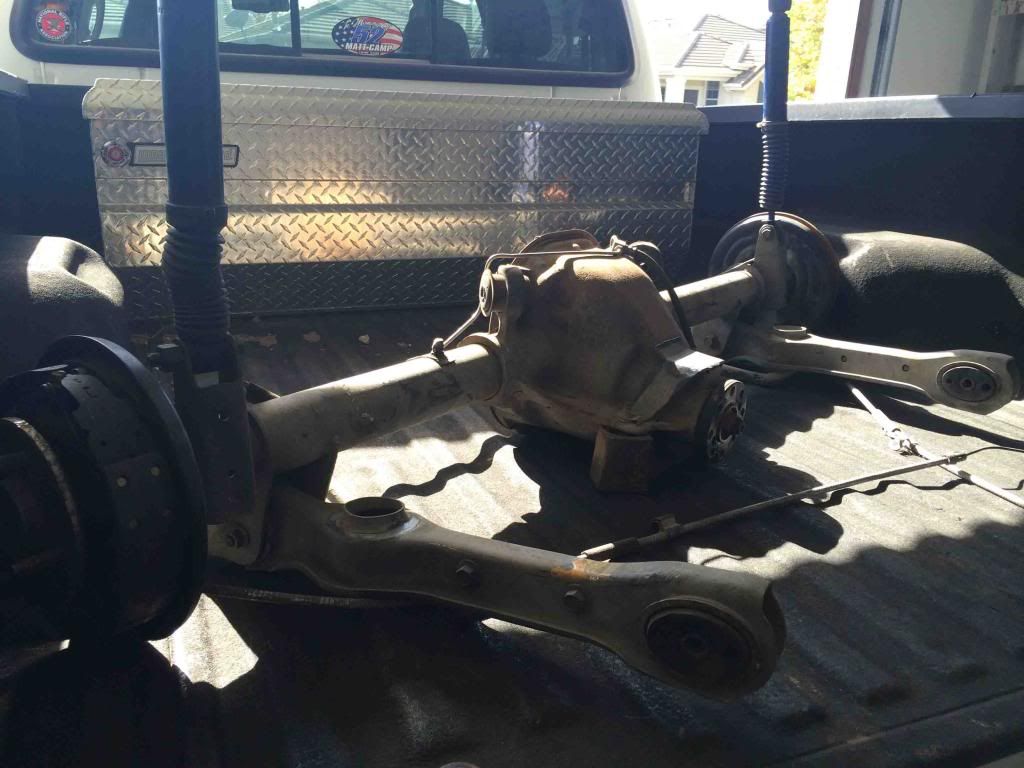
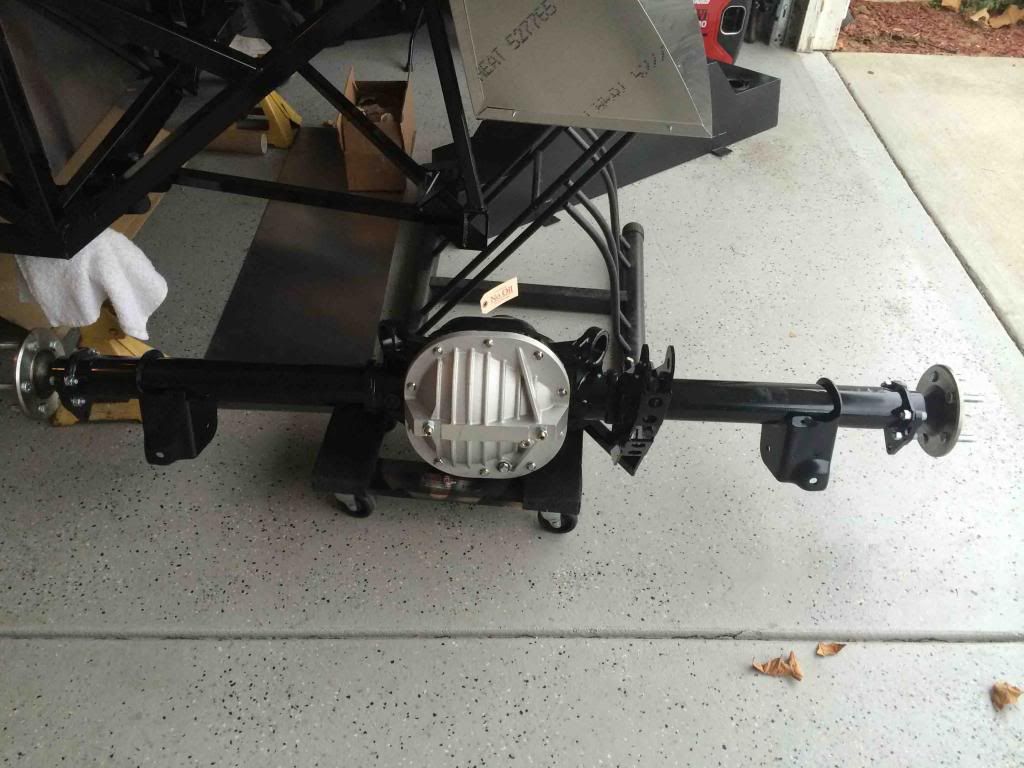
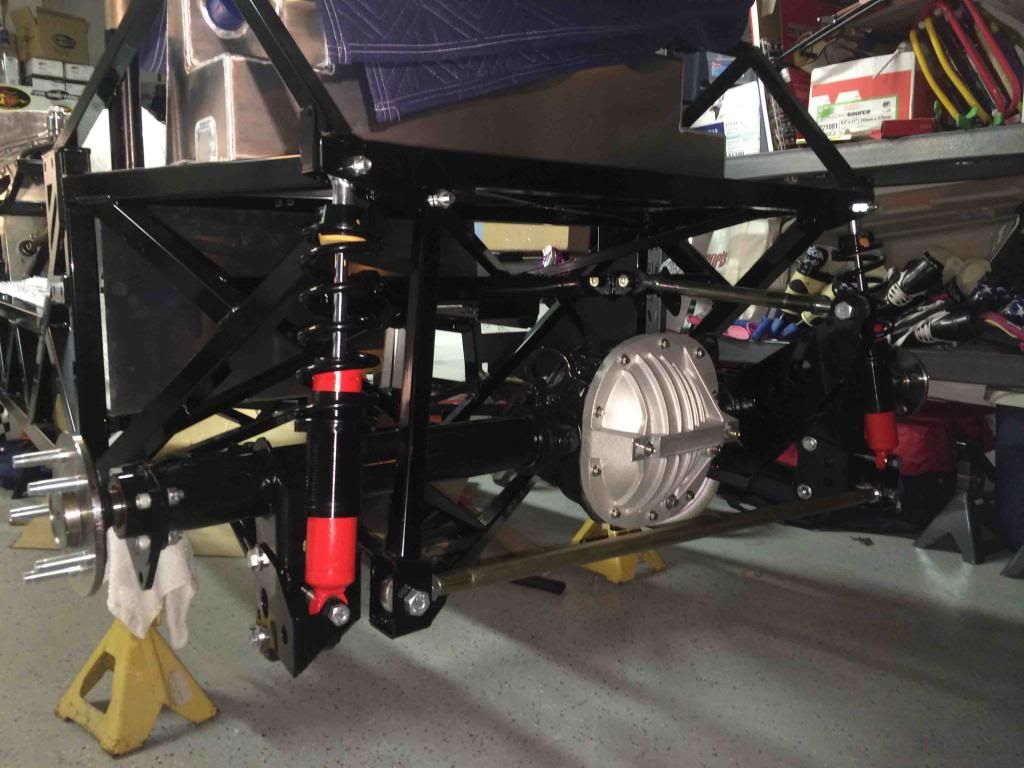
    Here is the rear end before & after:


  25. #25
    Senior Member crspdsk8's Avatar
    Join Date
    May 2011
    Location
    Antelope, Ca
    Posts
    155
    Post Thanks / Like
    Well that photo upload worked so here are some more!

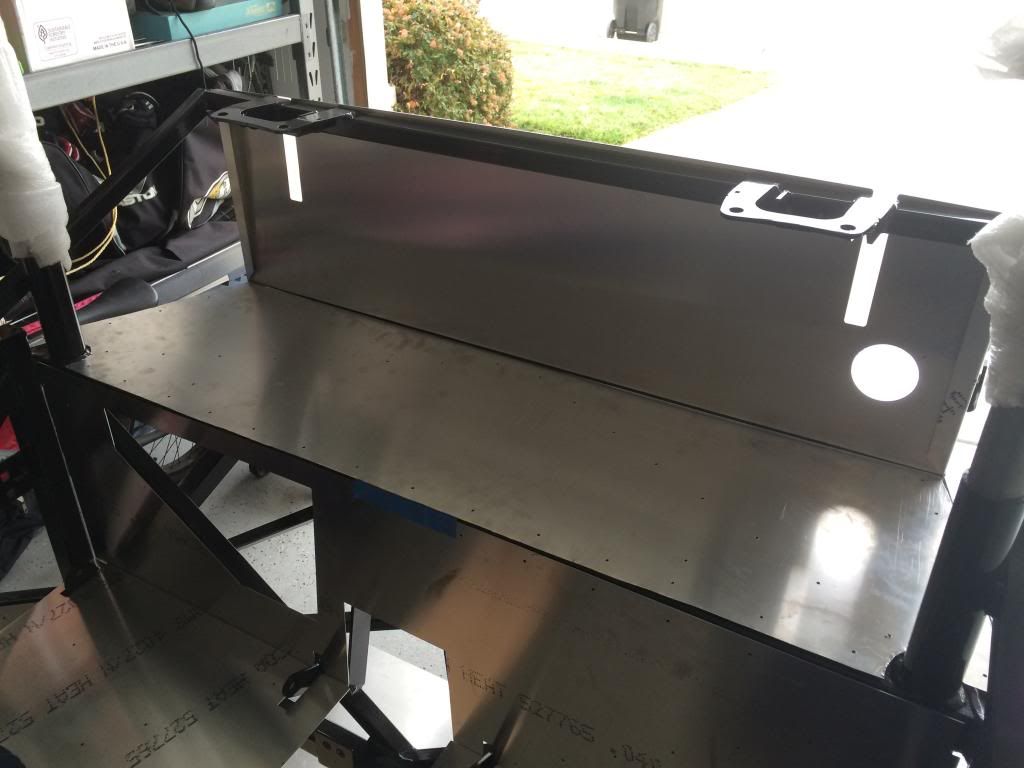
    I had some aluminum left over from another project and fabricated a piece to go under the Boyd fuel tank and to finish inclosing the underside of the car.


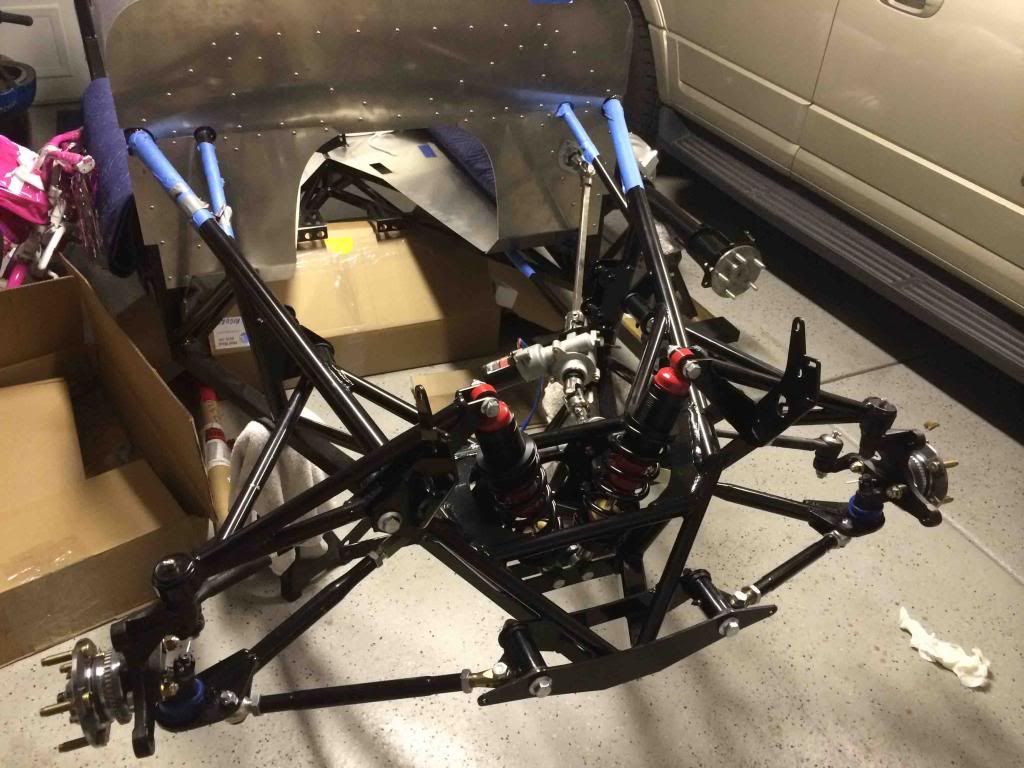
    Front suspension in place.


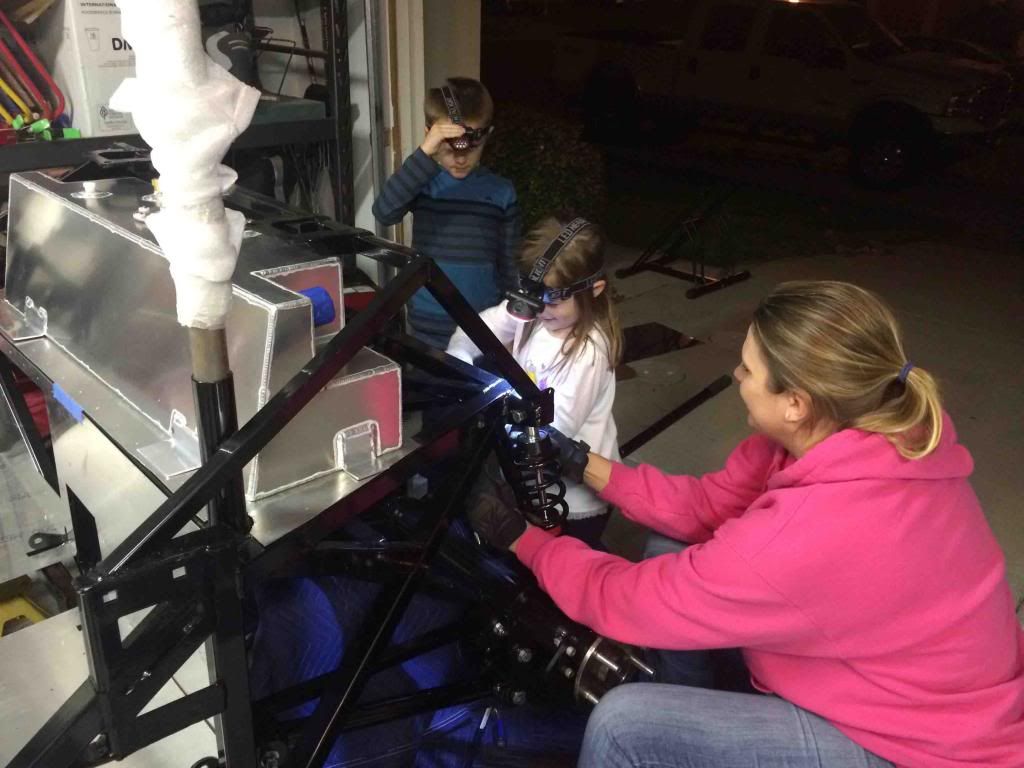
    Rear 3 link installed, with some help from the family.


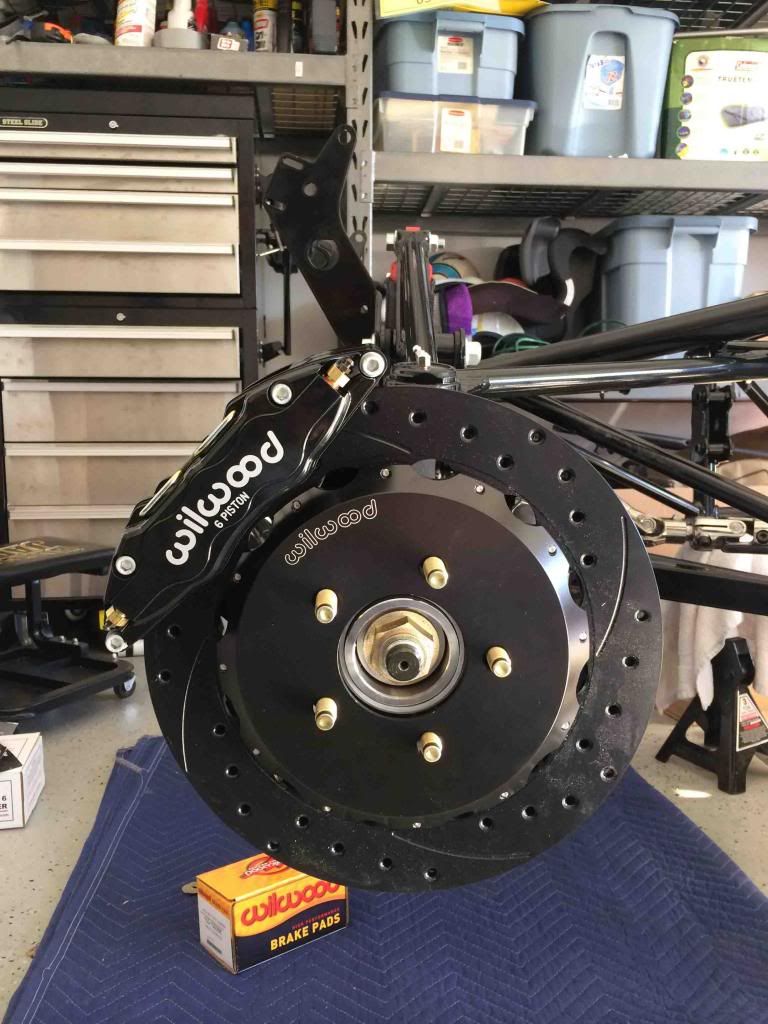
    Front Brakes


    Rear Brakes

  26. #26
    Senior Member crspdsk8's Avatar
    Join Date
    May 2011
    Location
    Antelope, Ca
    Posts
    155
    Post Thanks / Like
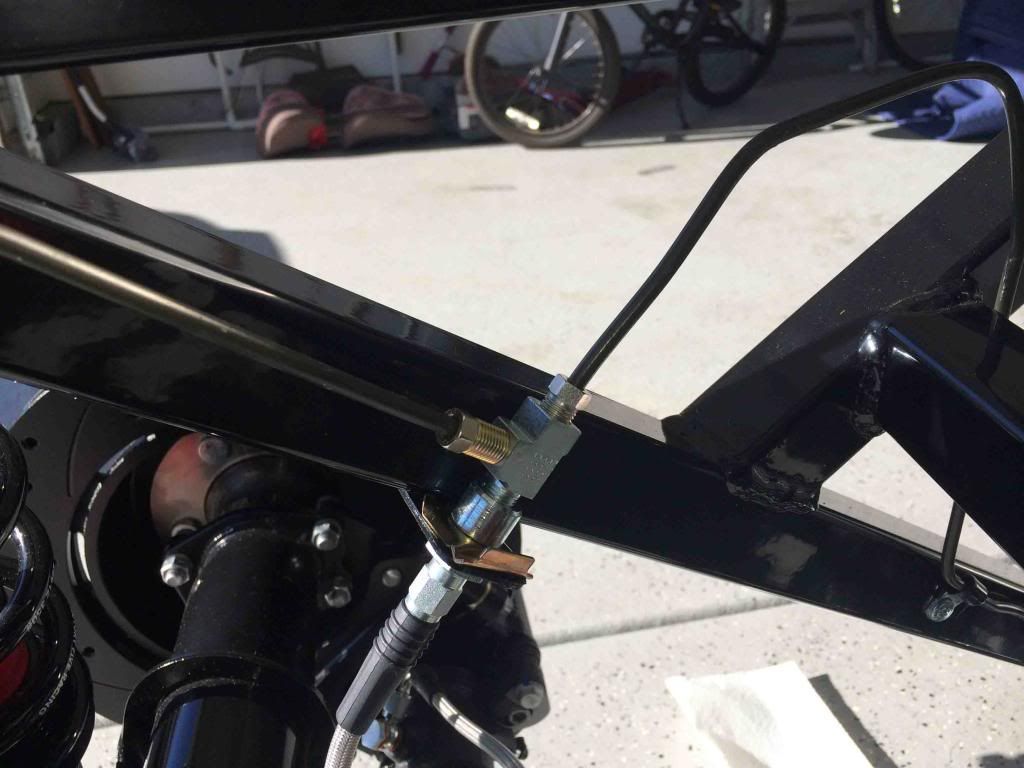
    I didn't like the way the brakes lines I initially ran looked and after help from others on here this is how I started mine.


    Here is the rear calipers installed. I would like some input if these are on the correct sides as the instructions were not real clear. Thanks!


  27. #27
    Senior Member crspdsk8's Avatar
    Join Date
    May 2011
    Location
    Antelope, Ca
    Posts
    155
    Post Thanks / Like
    I finally got the front and rear suspension in place and just need some wheels and tires. I set the seats in place and of course the kids just could wait to test them out.
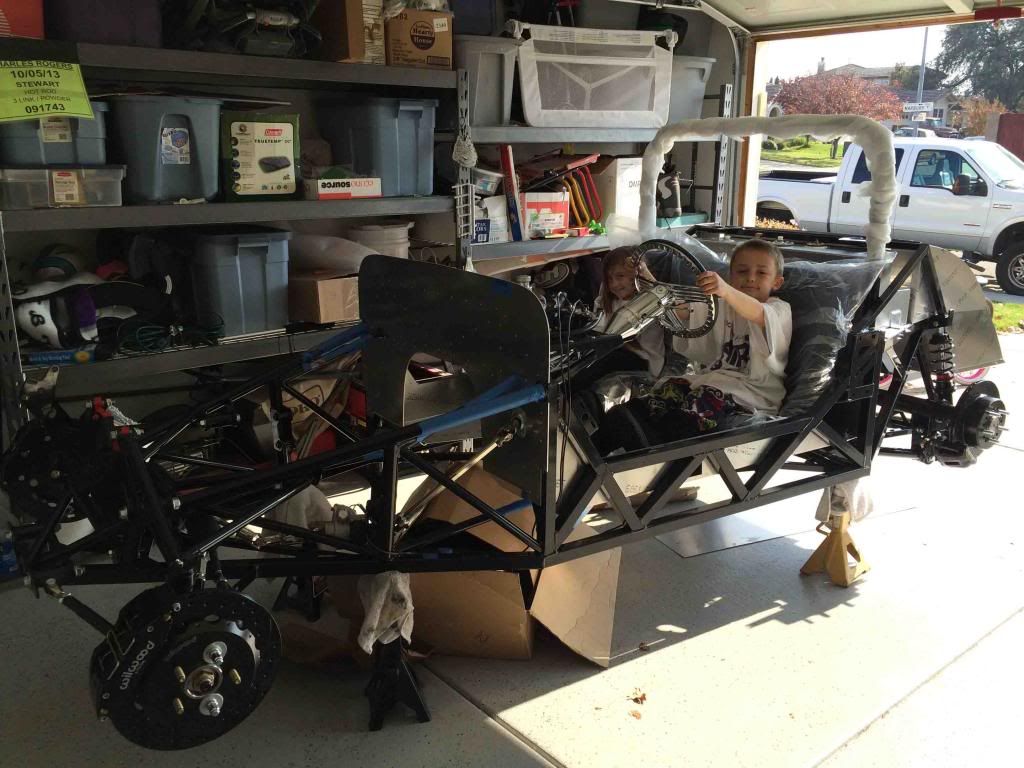


    Now to some eye candy! lol. I was previously was going to go with some FOOSE wheels but after looking into it more, I decided to go with some Eagle's Boss 338's paired with Toyo Proxes 4+ tires. I went with 255/35ZR-18 on 18"x8" up front and 295/30ZR-20 on 20"x10" in the rear. Before I had the tires mounted I test fitted the fronts to make sure they cleared the brakes as I went with a 4.5" offset to try and get the deepest look I can get.

    Here's the result, they fit perfectly!
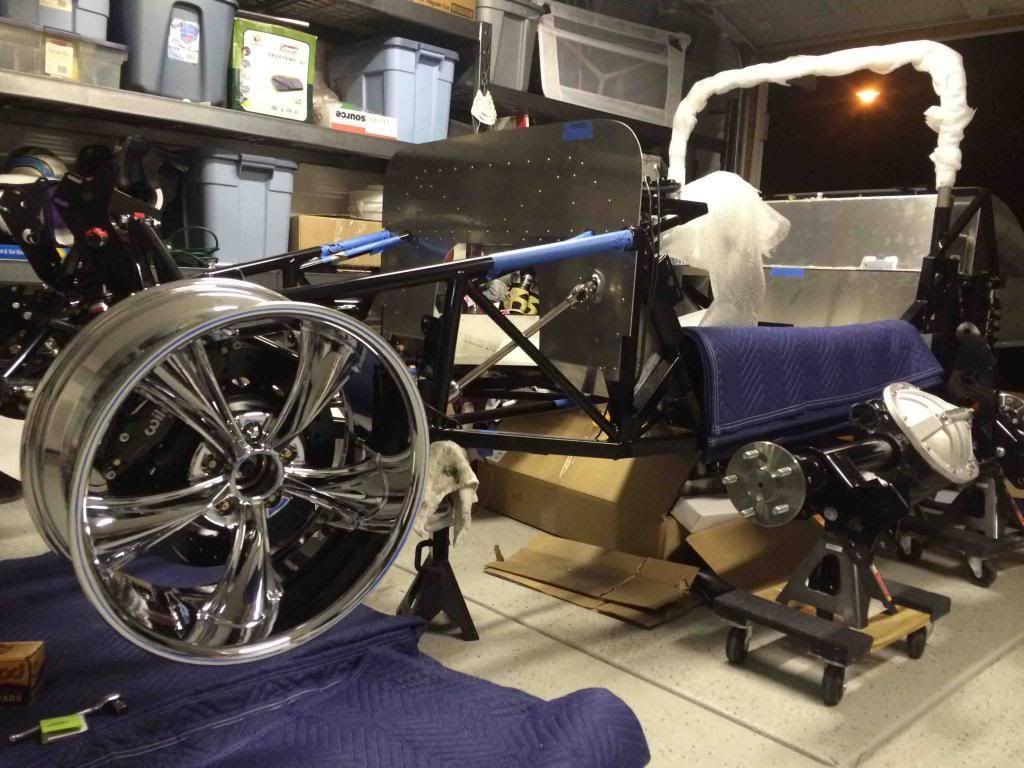

    I took the wheel back the next day and had the tire mounted and couldn't wait to get it on the ground!
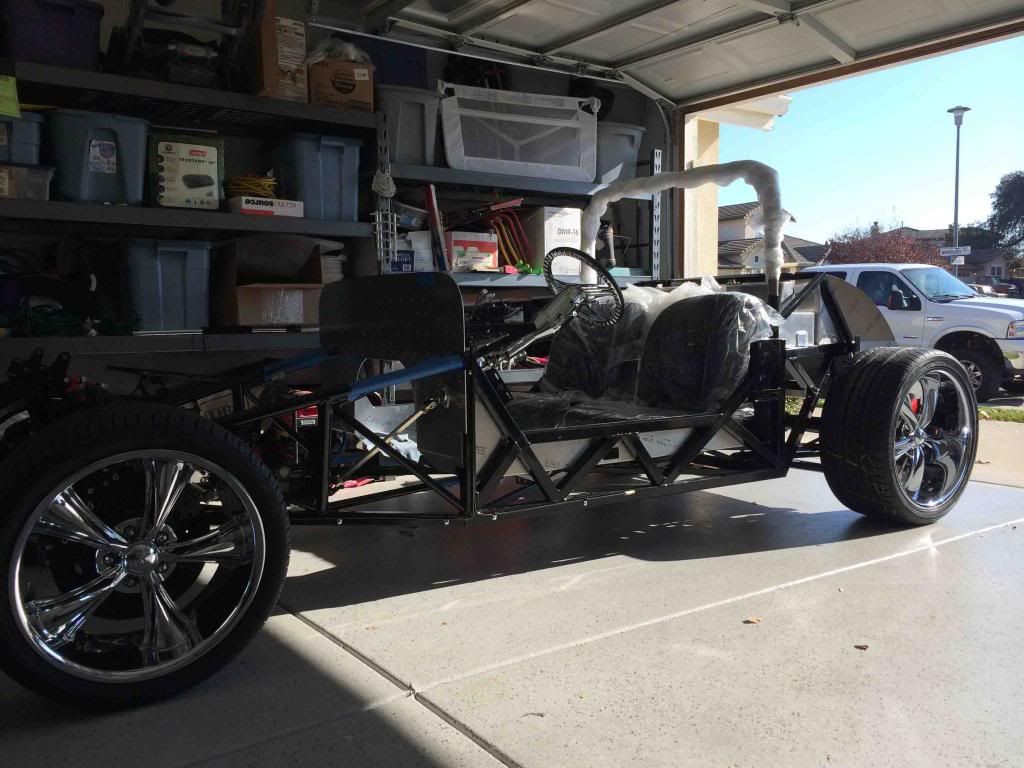

    Then I had to ask the wife since she always says this to me... Does my tires make my "rear" look to big? lol

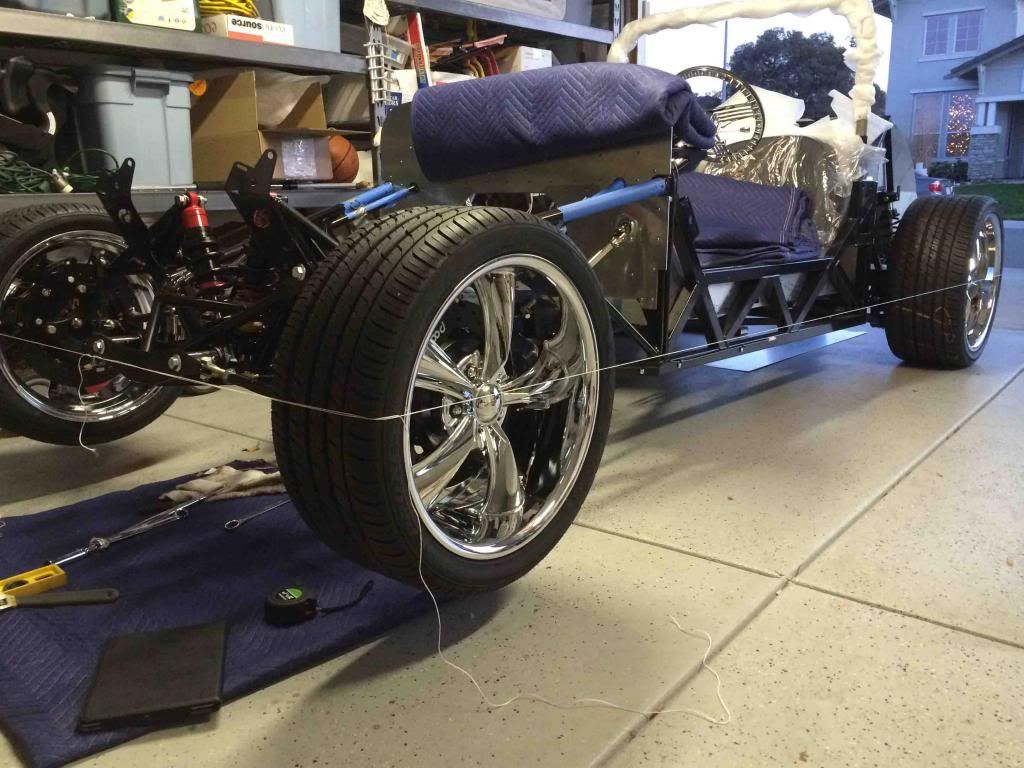
    When I had it on the ground of course the alignment was really off. After reading the thread that Dr. Ruth had posted on doing an alignment I made the suggested adjustments and I think I got it pretty close. A little trick I had learn from my dad when I was younger to adjust the toe was to run a string around all 4 tires and then you can see how off you are and which way you it needs to be adjusted. Hopefully soon I will get a motor/tranny and can test how well I did on this alignment then will probably take it by the shop to really get it tuned in. These tires are expensive and want to get the most life I can out of them.

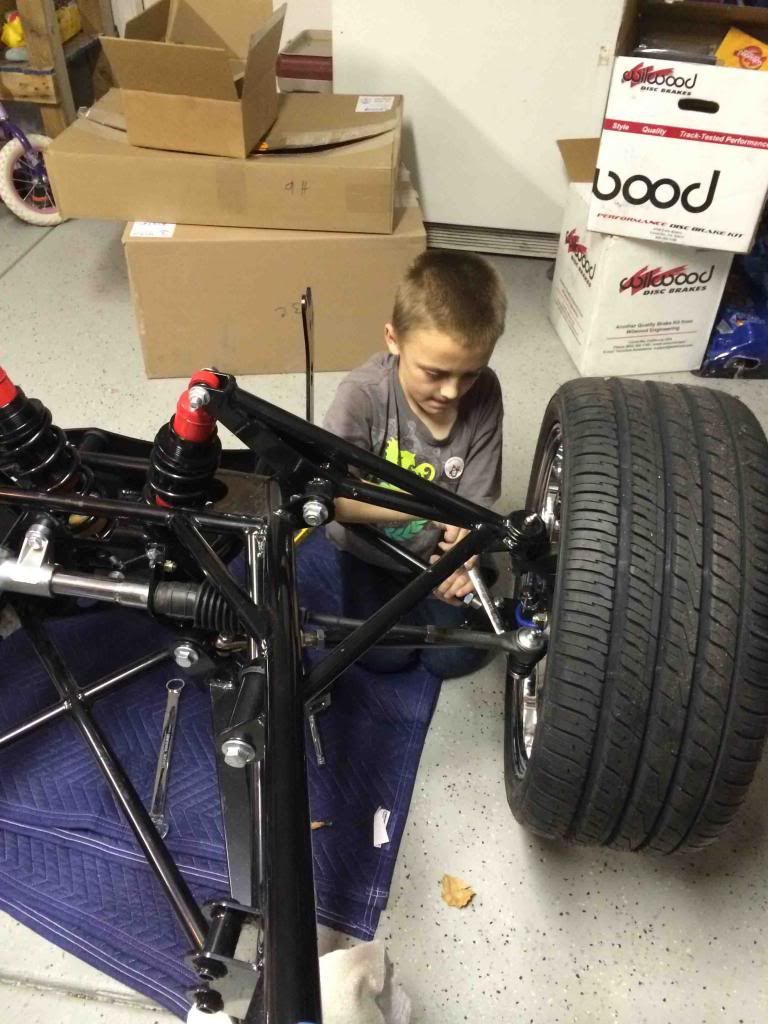
    Once we got everything adjusted, my son help get everything tighten down.

    That is where I stand for now. The next couple days I hope to finish up running the brakes lines, bleed them and get them dialed in as much as I can so they are ready to be tested when I eventually get to go-kart it! Also while I am waiting to get a motor, I want to get the fuel tank drilled and bolted, and I will try and tackle the wiring harness. I am not very knowledgeable in this area by any means and hopefully with some help, I can get this going and speed things up down the road when the motor is in.

    So far, I think the build is going pretty smoothly with the exception of being sore from using a rubber mallet to install the suspension and getting everything torqued down. I am really enjoying it so far and turns out being a build that the entire family can help along the way.
    Charles

  28. #28
    PLATNUM Supporting Member
    wallace18's Avatar
    Join Date
    Apr 2012
    Location
    Trenton, Florida
    Posts
    5,382
    Post Thanks / Like
    Car is looking great so far. I like your helpers! Nothing like starting them early. LOL.

  29. #29
    EFI Rules and Carbs Drool Arrowhead's Avatar
    Join Date
    Feb 2011
    Location
    Stillwater, NY
    Posts
    599
    Post Thanks / Like
    Looks like your moving along pretty good. Couple things kind of stick out though. First, the string method your Dad used to do might work with a car that has the same track width front ot rear, but your car the rear is no doubt wider than the front so the strings are not parallel side to side - so that will throw off your toe measurement. If you take a couple of jack stands and stand them up ahead of the front tires, you can use them as corner posts to wrap the string around. You can move the stands around until the string is parallel to the chassis center line, then do your toe measurements. However, you really should have all the weight of the car on the wheels with the engine and transmission in. Same goes for when you do caster and camber. Besides that, the toe is the last thing to set, although I know it's disturbing to be working on the car or showing it to someone and having the tires pointing all directions.

    The rear brakes don't look right, they need to be mounted at the 10 or 2 o'clock positions. I can't think of a caliper that would be mounted in the down position like that, they will be impossible to bleed air out of.

    A small detail, the rear rotors are on the "wrong" side. The directional slots should angle out in the direction of rotation to match the way you have the front. A small thing and more aesthetic than anything

    Hate giving you list of issues, but easier to fix now than later.
    Last edited by Arrowhead; 11-26-2013 at 08:27 AM.

  30. #30
    Senior Member crspdsk8's Avatar
    Join Date
    May 2011
    Location
    Antelope, Ca
    Posts
    155
    Post Thanks / Like
    Quote Originally Posted by Arrowhead View Post
    Looks like your moving along pretty good. Couple things kind of stick out though. First, the string method your Dad used to do might work with a car that has the same track width front ot rear, but your car the rear is no doubt wider than the front so the strings are not parallel side to side - so that will throw off your toe measurement. If you take a couple of jack stands and stand them up ahead of the front tires, you can use them as corner posts to wrap the string around. You can move the stands around until the string is parallel to the chassis center line, then do your toe measurements. However, you really should have all the weight of the car on the wheels with the engine and transmission in. Same goes for when you do caster and camber. Besides that, the toe is the last thing to set, although I know it's disturbing to be working on the car or showing it to someone and having the tires pointing all directions.

    The rear brakes don't look right, they need to be mounted at the 10 or 2 o'clock positions. I can't think of a caliper that would be mounted in the down position like that, they will be impossible to bleed air out of.

    A small detail, the rear rotors are on the "wrong" side. The directional slots should angle out in the direction of rotation to match the way you have the front. A small thing and more aesthetic than anything

    Hate giving you list of issues, but easier to fix now than later.
    Thanks for the input Arrohead. I understand that the alignment needs to be done once the it is under it's full weight once the motor and tranny are in but I just wanted to get it somewhere in the ball park so it doesn't look so bad and was planning on doing it again before go karting. The whole rear end being wider than the front didn't really cross my mind, oops. lol

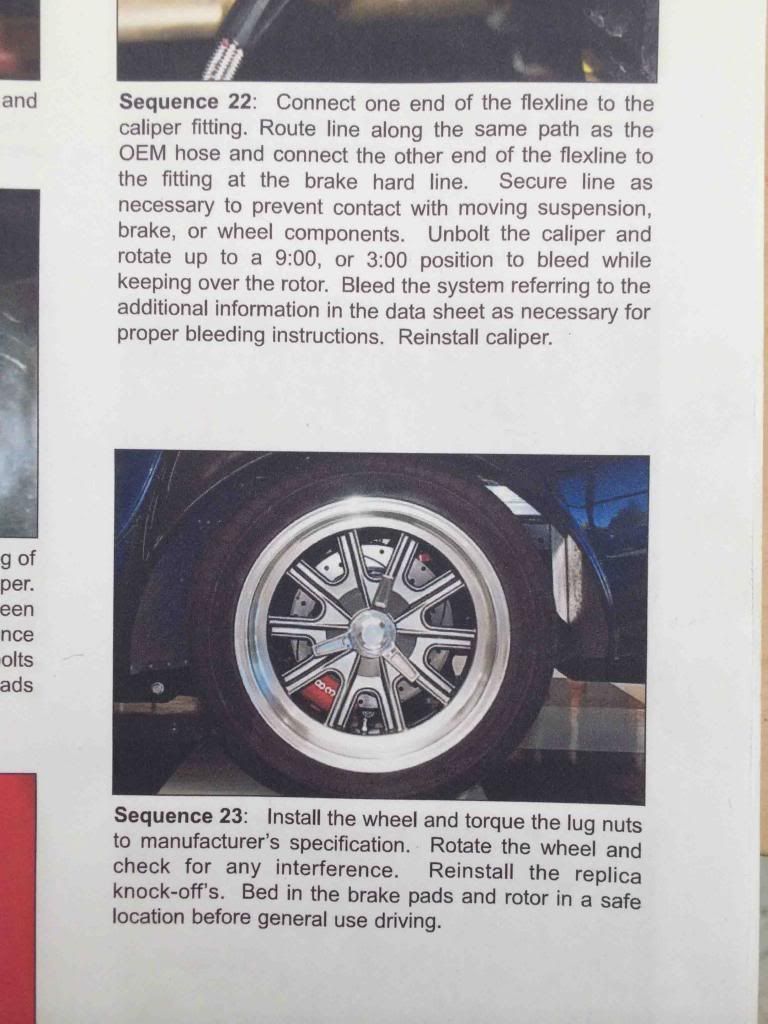
    As for the brakes, I was thinking the same as you when it came to the direction of the slots on the rotor and the orientation of the rear calipers. I was going to install them the way I thought made the most sense but decided to install them per the instructions from Wilwood that came with the brakes. Considering they are in the brake business I figured they have been down this road and their may be a reason to install them as they suggest, so that's what I did. The rotor actually has an arrow etched in to the rotor in indicate rotation direction to install them. When it comes to bleeding the brakes, it says to rotate the caliper to the to a 9:00 or 3:00 position, bleed them and bolt back on to the brackets.

    I was thinking of switching the rear axle brackets from side to side which should would put the calipers in the 10:00 position and still have the mounts for the E brake cable facing the same direction.
    Here is a picture from the Wilwood instructions that says about the bleeding them and also how they look installed on a roadster. Note that the slots on the rotors and calipers are in the same position as they way I installed mine.
    Last edited by crspdsk8; 11-26-2013 at 03:57 PM.

  31. #31
    Senior Member esff32's Avatar
    Join Date
    Oct 2012
    Location
    La Verne, Ca
    Posts
    560
    Post Thanks / Like
    Your build is looking awesome Charles. I love those 6 piston calipers and you can't beat the black finish. I just might have to upgrade down the road. Nice job.

    Evan

  32. #32
    EFI Rules and Carbs Drool Arrowhead's Avatar
    Join Date
    Feb 2011
    Location
    Stillwater, NY
    Posts
    599
    Post Thanks / Like
    Ok, I've been official schooled! But those are the most effed up bleeding instruction ever though. Why would they design brakes that need to be unbolted to bleed? If it were me, I'd be flipping those brackets around so the calipers are on top.

  33. #33
    Senior Member crspdsk8's Avatar
    Join Date
    May 2011
    Location
    Antelope, Ca
    Posts
    155
    Post Thanks / Like
    Finally finished plumbing the brake lines! This was one of those task that I wasn't really looking forward to as I wasn't sure how well I would do with it and how well it would look in the end. I tried to find someone I know who has some experience doing this to help, but nobody had anymore experience then I do. I don't like the way FFR suggest running them and the pics in the manual didn't look very professional so I took the challenge and I am pretty happy with how they turned out. Thanks to Evan (esff32) who provided some pics, I ran mine very similar. I used self tapping screws in the clamps along the way to help hold the brake line in place. Once I bleed the brakes, and make sure they are not in the way of the body, I will go back through to replace the screws with rivets.

    Front Brake lines


    Rear Brake lines


    Thank You to all of you have helped with input on this. I appreciate all of the help. Now I am off to bleeding them and make sure I don't have any leaks.

  34. #34
    Senior Member esff32's Avatar
    Join Date
    Oct 2012
    Location
    La Verne, Ca
    Posts
    560
    Post Thanks / Like
    Looks great Charles!

  35. #35
    Senior Member hdnik's Avatar
    Join Date
    Oct 2012
    Location
    Welland, Ontario Canada
    Posts
    342
    Post Thanks / Like
    Quote Originally Posted by crspdsk8 View Post
    I finally got the front and rear suspension in place and just need some wheels and tires. I set the seats in place and of course the kids just could wait to test them out.


    Now to some eye candy! lol. I was previously was going to go with some FOOSE wheels but after looking into it more, I decided to go with some Eagle's Boss 338's paired with Toyo Proxes 4+ tires. I went with 255/35ZR-18 on 18"x8" up front and 295/30ZR-20 on 20"x10" in the rear. Before I had the tires mounted I test fitted the fronts to make sure they cleared the brakes as I went with a 4.5" offset to try and get the deepest look I can get.

    Here's the result, they fit perfectly!


    I took the wheel back the next day and had the tire mounted and couldn't wait to get it on the ground!


    Then I had to ask the wife since she always says this to me... Does my tires make my "rear" look to big? lol


    When I had it on the ground of course the alignment was really off. After reading the thread that Dr. Ruth had posted on doing an alignment I made the suggested adjustments and I think I got it pretty close. A little trick I had learn from my dad when I was younger to adjust the toe was to run a string around all 4 tires and then you can see how off you are and which way you it needs to be adjusted. Hopefully soon I will get a motor/tranny and can test how well I did on this alignment then will probably take it by the shop to really get it tuned in. These tires are expensive and want to get the most life I can out of them.


    Once we got everything adjusted, my son help get everything tighten down.


    That is where I stand for now. The next couple days I hope to finish up running the brakes lines, bleed them and get them dialed in as much as I can so they are ready to be tested when I eventually get to go-kart it! Also while I am waiting to get a motor, I want to get the fuel tank drilled and bolted, and I will try and tackle the wiring harness. I am not very knowledgeable in this area by any means and hopefully with some help, I can get this going and speed things up down the road when the motor is in.

    So far, I think the build is going pretty smoothly with the exception of being sore from using a rubber mallet to install the suspension and getting everything torqued down. I am really enjoying it so far and turns out being a build that the entire family can help along the way.
    Charles
    if I could ask... What backspace did you go with on the rear. Also does the 4.5" backspace on fronts allow wheels to turn full lock without hitting the upper control arms... I assume so.

    lovely rims.
    Nick Sebastian - 33 Hot Rod #495
    Factory Five Forums - hdnik
    FFCars - lowntubd

    Build Site/Blog - www.nicks33hotrod.com

  36. #36
    Senior Member crspdsk8's Avatar
    Join Date
    May 2011
    Location
    Antelope, Ca
    Posts
    155
    Post Thanks / Like
    Quote Originally Posted by hdnik View Post
    if I could ask... What backspace did you go with on the rear. Also does the 4.5" backspace on fronts allow wheels to turn full lock without hitting the upper control arms... I assume so.

    lovely rims.
    Thanks Nick! The backspacing for the rears are 5.50". With the steering at full lock, the tires are about 3/4" from hitting the upper control arms.

  37. #37
    Senior Member crspdsk8's Avatar
    Join Date
    May 2011
    Location
    Antelope, Ca
    Posts
    155
    Post Thanks / Like
    Since business has been pretty slow recently and my Hot Rod funds are not replenishing as quickly as I hoped, I am waiting to purchase the motor and tranny. Hopefully business turns around and I can make that purchase soon. In the meantime, I installed the main fuse panel and put the E brake handle together and decided to maybe start on getting the body mounted. I have heard some say that its better to do this while you don't have the motor/tranny installed as their is less in the way.
    The body install is a little out of my league so I don't want to just dive into first without maybe getting some guidance and some Help. I am planning on driving this car and it won't a show car by any means but I still want the body to fit properly and not look like it was just thrown on there.
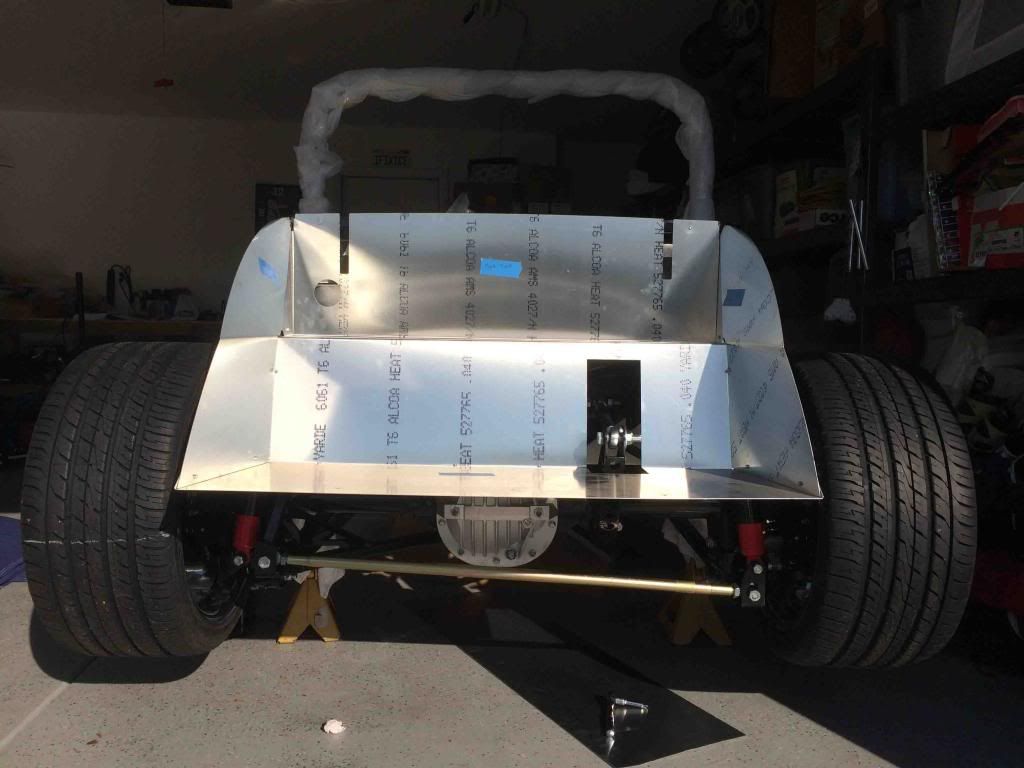
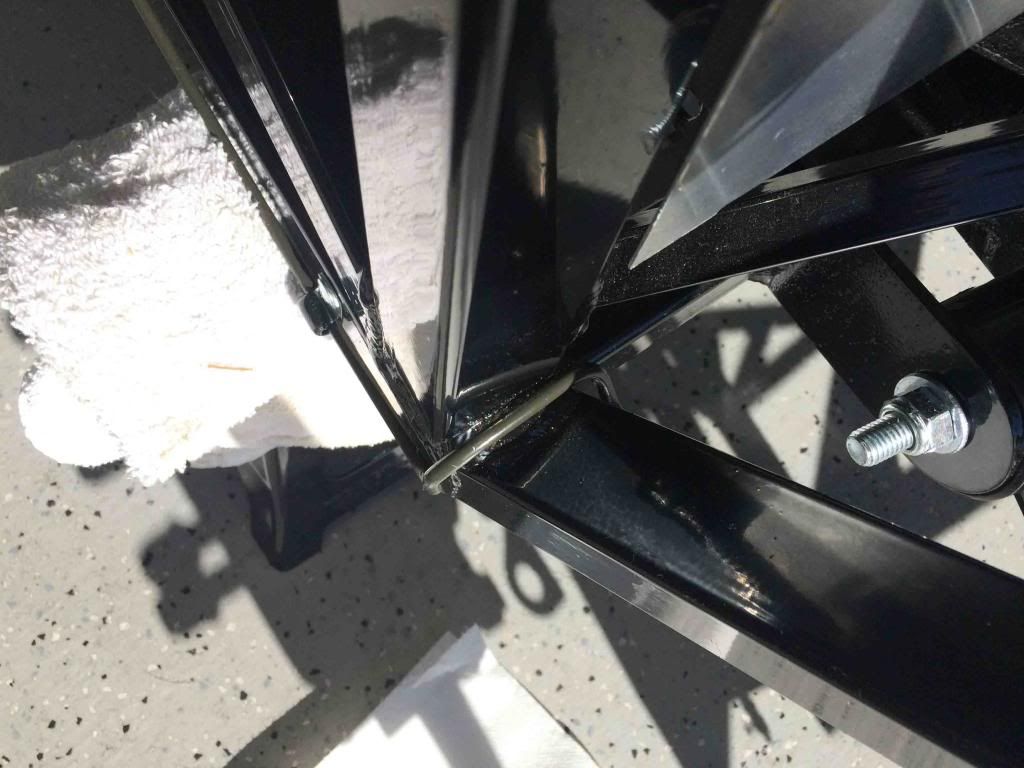
    As you see below, I installed the grill and the body for the first time and found a few issues. I cant get it lined up with the screw holes the body was installed at the factory but at the same time I have heard that if you use those holes, the body wont line up and sit correctly. I already installed the firewall with out the body on and found out what everybody has been talking about and that is the passenger side of the firewall needs to be trimmed to fit the radius of the body. Looks like that might be the 1st thing to do before moving forward.


    Does this marked area look right for the area that others needed to trim on the firewall?


    Is their any reference points to use to make sure the body is installed in the right position? For example on the inside rear fender mounts, is their a measurement to use from the top of the wheel well to where the mounting hole should be?


    Is their any other points on the chassis to use to get the body I in the right place? Are the door sills of the body suppose be flat or have a gap between the body and frame?

    Thank you for any recommendations you have and I appreciate all your help!
    Charles

  38. #38
    Senior Member esff32's Avatar
    Join Date
    Oct 2012
    Location
    La Verne, Ca
    Posts
    560
    Post Thanks / Like
    Charles,

    Thats exactly where I sanded down on the firewall, even further around the radius downward on the passenger side. As for locating reference points...I can't help you with any tricks there as I am very close to this stage myself. From what I have read, its a measurement from the rear of the cabin to the dash. The rear body tabs on the backside of the upper wheel well, I tapped the hole for a 3/8" bolt. I also took it a step further and tack welded a nyloc on the backside to give it more threads and help lock the body in place.


  39. #39
    Senior Member Barrel's Avatar
    Join Date
    Aug 2011
    Location
    Mornington, Victoria, Australia
    Posts
    162
    Post Thanks / Like

    IMHO there is no need to do anything to the firewall if you just remove enough material from the side notch on the passenger side footbox to increase that notch by 1/4". This allows you to lift the body enough to sit on the top of the firewall and keeps it all symmetrical. If the picture is confusing it's because my car is right hand drive.

  40. #40
    Senior Member crspdsk8's Avatar
    Join Date
    May 2011
    Location
    Antelope, Ca
    Posts
    155
    Post Thanks / Like
    I was planning on threading the hole but thanks Evan for the tip about welding the nylock. That should give it more strength as the metal is not very thick at the mount. I will have to get a buddy of mine over to tack weld that on for me. On that note, I just might get a metal spacer for the body and have him weld that also. This way it should be easier to put the body back on if I ever needed to after the car is finished and then not have to take the carpet & trunk aluminum out to access that spot.

Page 1 of 3 123 LastLast

Posting Permissions

  • You may not post new threads
  • You may not post replies
  • You may not post attachments
  • You may not edit your posts
  •  

Stewart Transport

Visit our community sponsor