Very Cool Parts

Visit our community sponsor

Thanks Thanks:  8
Likes Likes:  31
Page 21 of 26 FirstFirst ... 111920212223 ... LastLast
Results 801 to 840 of 1012

Thread: Frank's 818R build

  1. #801
    Senior Member Pearldrummer7's Avatar
    Join Date
    Feb 2014
    Location
    Asheville, NC
    Posts
    1,230
    Post Thanks / Like
    Quote Originally Posted by Hindsight View Post
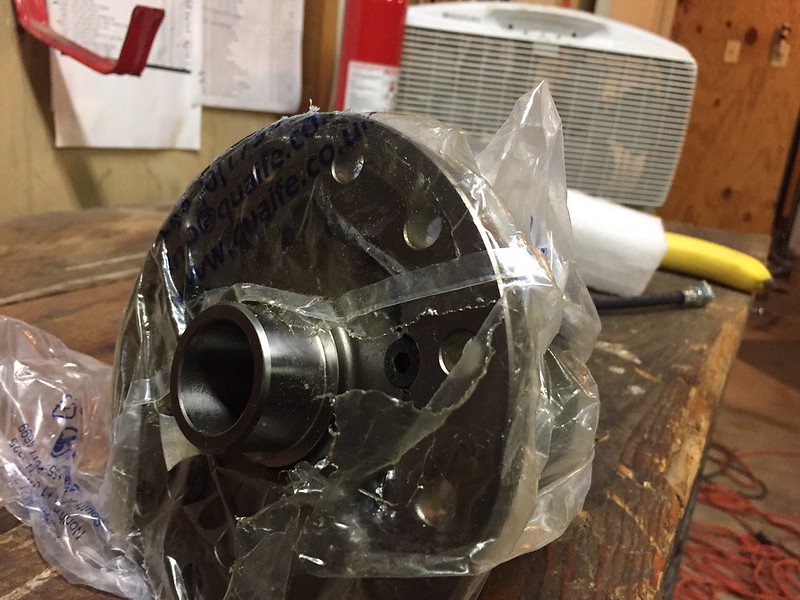
    Nice, I love my Quaife. Puts the power down very nicely on turn exits. How much does a heat treated R&P run? Any torque strength estimates on it?
    No torque estimates. It was $350 for a new R&P(OEM) and $425 for a heat treated set. I figure that it should make them last quite a bit longer and hopefully be able to withstand the power. Also, less burnouts. A lot less burnouts.
    Also-
    bearings for just the output shaft were about $250, plus the labor to swap diffs, replace bearings/ring/pinion, reseal everything.
    Last edited by Pearldrummer7; 09-23-2016 at 08:33 AM.
    Frank - Build thread

  2. #802
    Senior Member Pearldrummer7's Avatar
    Join Date
    Feb 2014
    Location
    Asheville, NC
    Posts
    1,230
    Post Thanks / Like
    Totally off-topic:


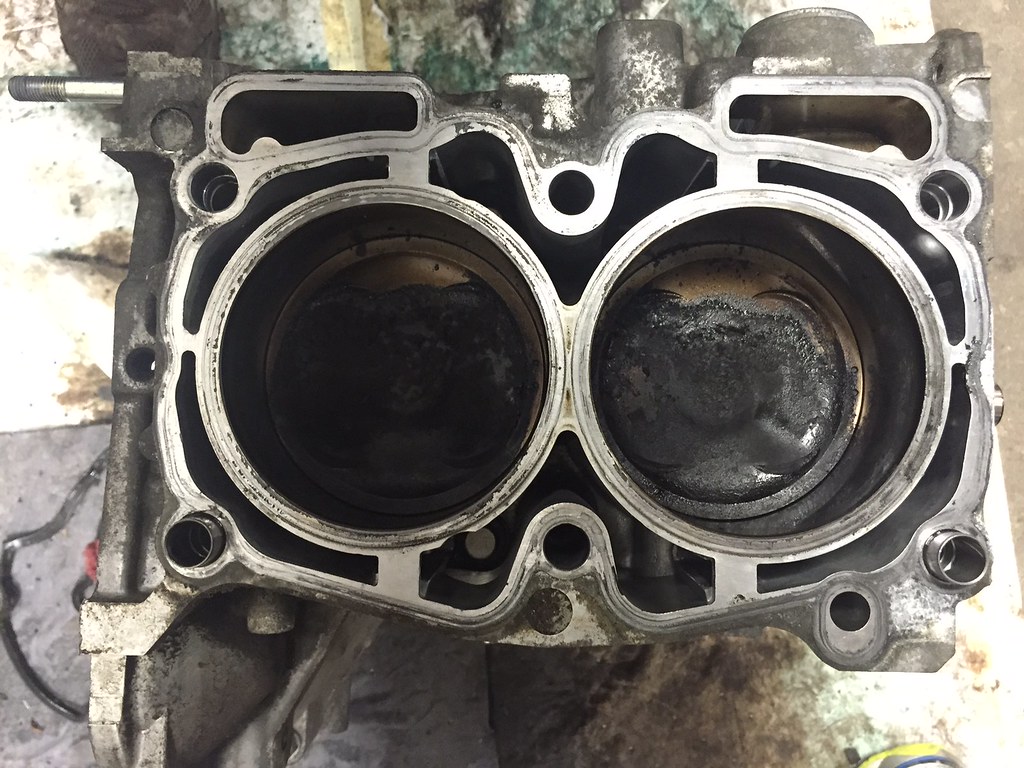
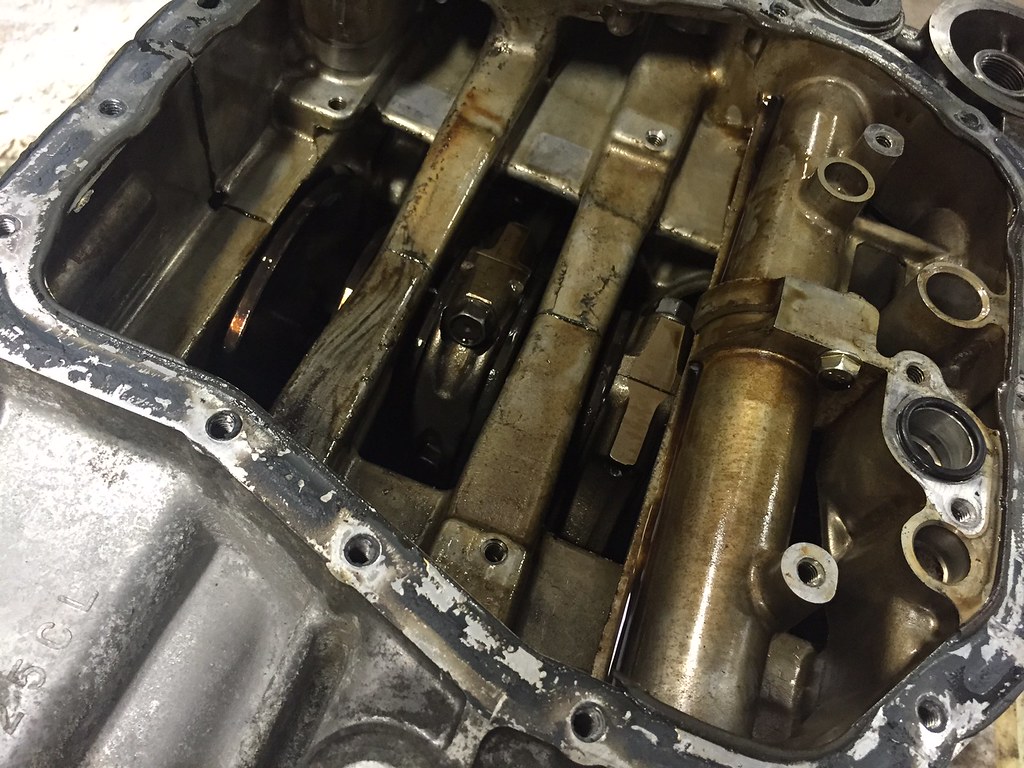
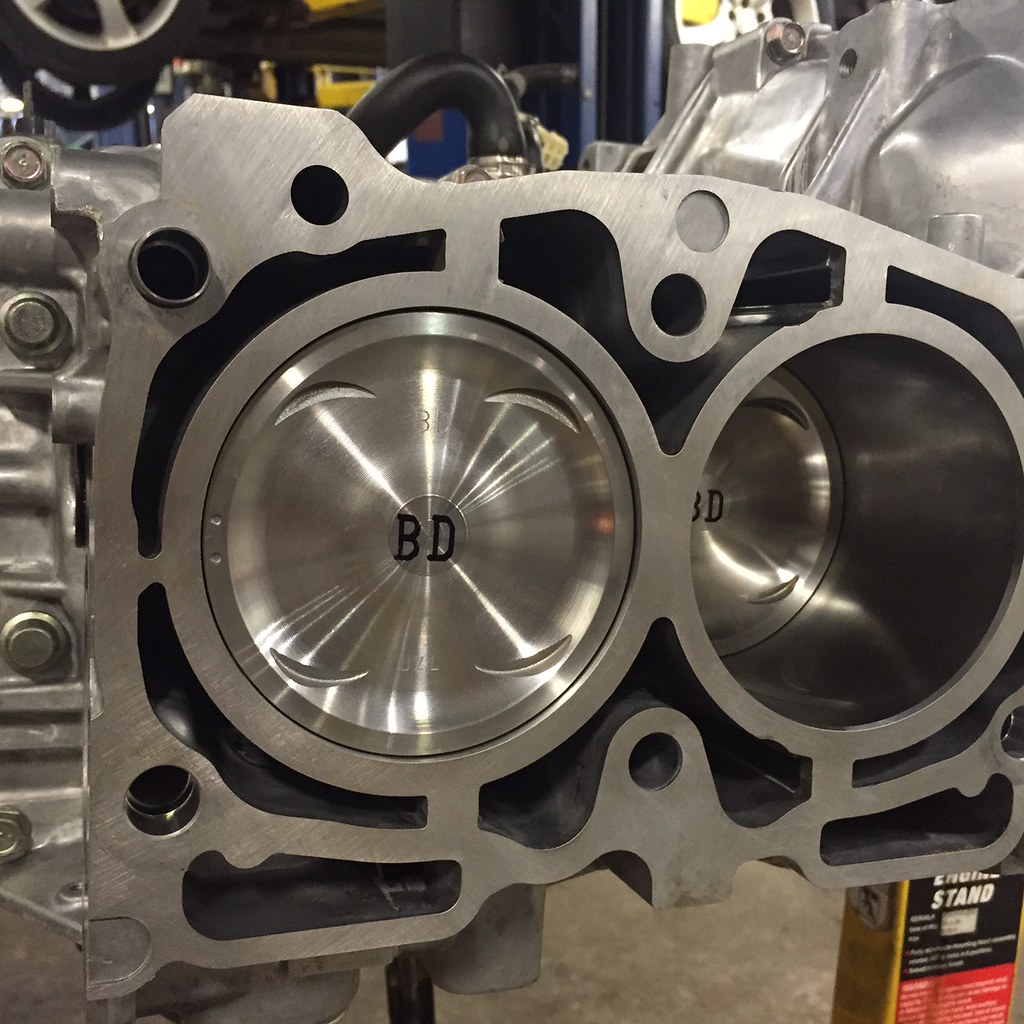
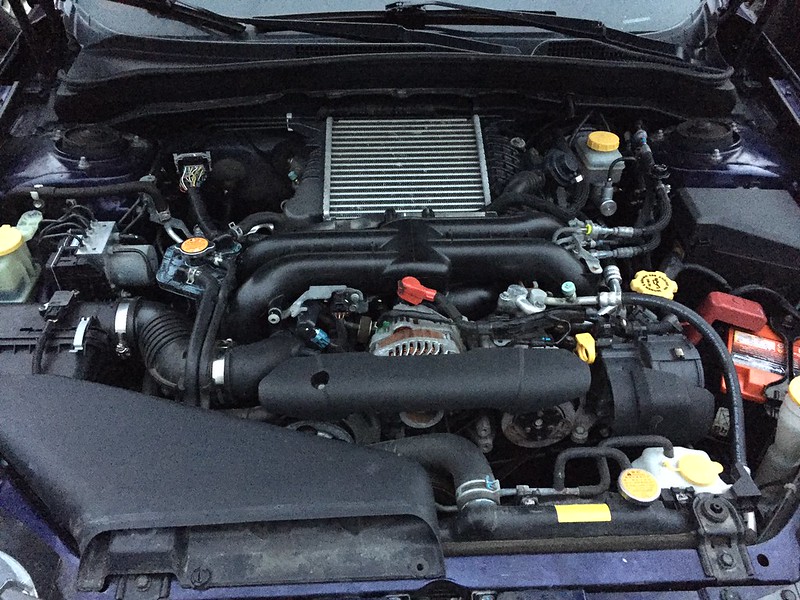
    I got cold feet on the truck I ordered. I really want to wait and get an 8' bed, not settle for a 6.5'. By the time one would get here it'd be winter and I'm trying not to let the new truck see salt. So, I took the WRX to the dealership, and long story short my blown engine is being replaced under warranty.


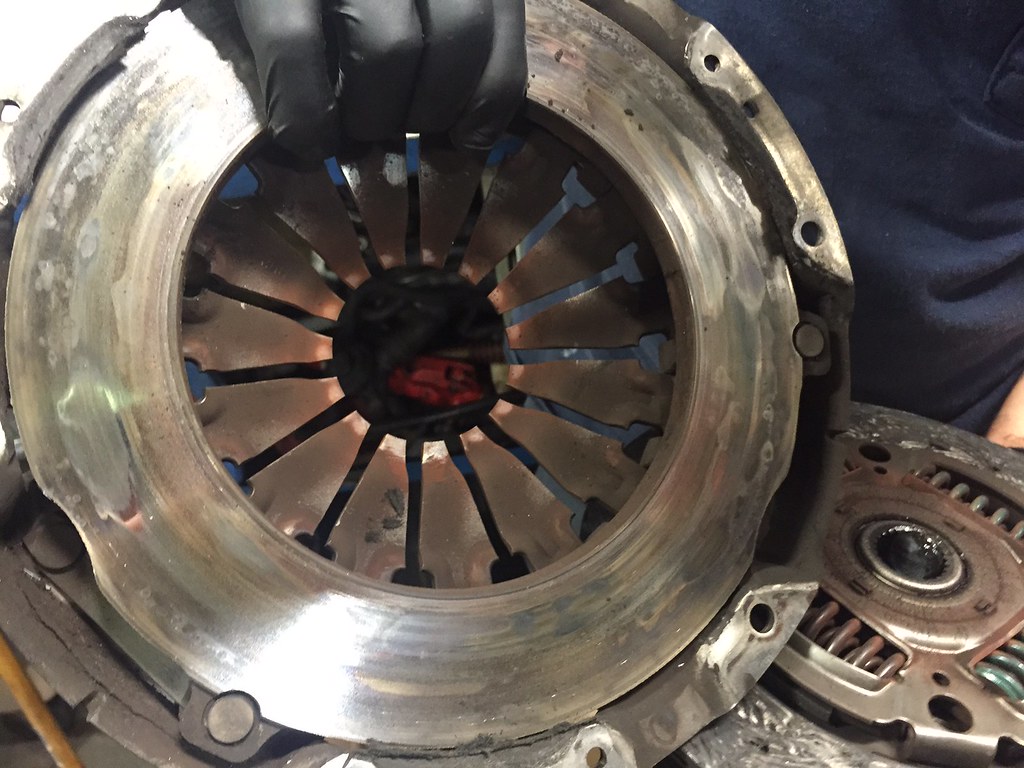
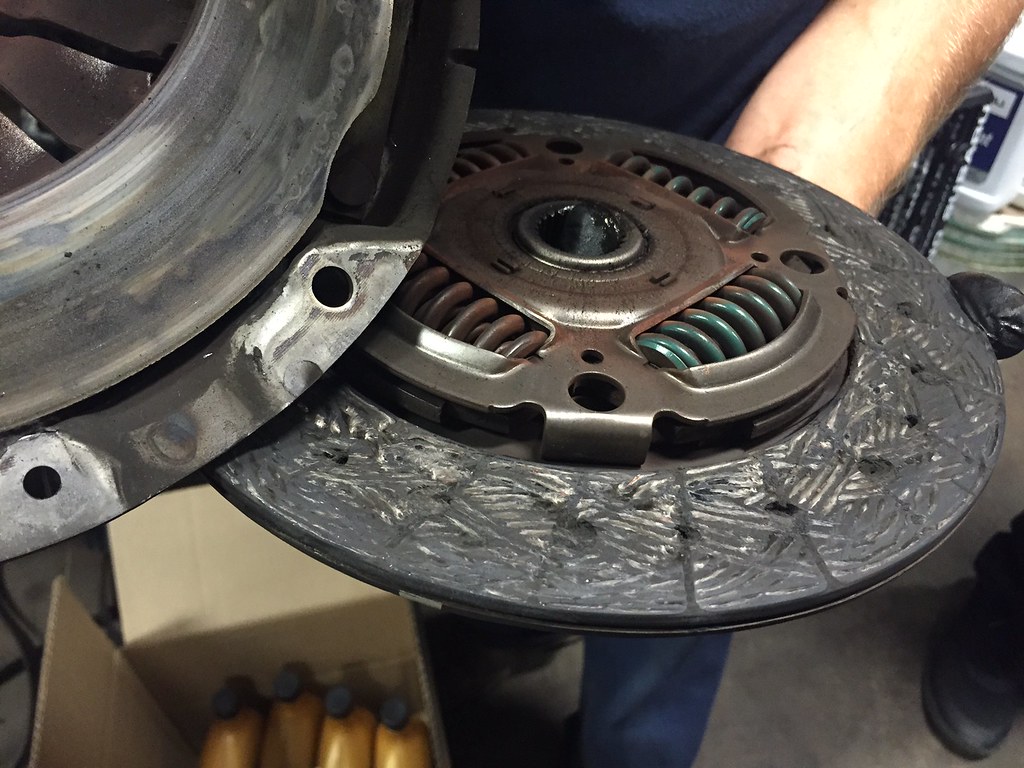
    Clutch is totally roasted


    new and shiny:
    Frank - Build thread

  3. #803
    Senior Member Frank818's Avatar
    Join Date
    Jun 2013
    Location
    QC, Canada
    Posts
    5,732
    Post Thanks / Like
    What the hell did you do to the clutch?

    How can the dealer let you take pix of the engine dismantled?
    Frank
    818 chassis #181 powered by a '93 VW VR6 Turbo GT3582R
    Go-karted Aug 5, 2016 - Then May 19+21, 2017
    Tracked May 27/July 26, 2017
    Build time before being driveable on Sep 27, 2019: over 6000h
    Build Completed Winter 2021

  4. #804
    Moonlight Performance
    Hindsight's Avatar
    Join Date
    May 2014
    Location
    Atlanta
    Posts
    3,402
    Post Thanks / Like
    Wow, congrats on the warranty coverage! That's huge.

  5. #805
    Senior Member Pearldrummer7's Avatar
    Join Date
    Feb 2014
    Location
    Asheville, NC
    Posts
    1,230
    Post Thanks / Like
    Quote Originally Posted by Frank818 View Post
    What the hell did you do to the clutch?

    How can the dealer let you take pix of the engine dismantled?
    I have some friends at the dealership

    Quote Originally Posted by Hindsight View Post
    Wow, congrats on the warranty coverage! That's huge.


    Wouldn't guess she has nearly 60K miles on it

    My diff just arrived! Time to schedule an appointment with the guys to get her installed


    I also got the opportunity to coach at the track the other weekend. I drove some peoples' cars. oh MAN is that GTR fast and EASY to drive.

    Last edited by Pearldrummer7; 09-30-2016 at 12:06 PM.
    Frank - Build thread

  6. #806
    Senior Member Frank818's Avatar
    Join Date
    Jun 2013
    Location
    QC, Canada
    Posts
    5,732
    Post Thanks / Like
    Your so called GTR is a Quaiffe on the 2nd picture. Are you trying to lie to us? lolll
    Frank
    818 chassis #181 powered by a '93 VW VR6 Turbo GT3582R
    Go-karted Aug 5, 2016 - Then May 19+21, 2017
    Tracked May 27/July 26, 2017
    Build time before being driveable on Sep 27, 2019: over 6000h
    Build Completed Winter 2021

  7. #807
    Senior Member Pearldrummer7's Avatar
    Join Date
    Feb 2014
    Location
    Asheville, NC
    Posts
    1,230
    Post Thanks / Like
    Quote Originally Posted by Frank818 View Post
    Your so called GTR is a Quaiffe on the 2nd picture. Are you trying to lie to us? lolll
    Good find! I meant it to be an actual GTR lol
    Frank - Build thread

  8. #808
    Senior Member Frank818's Avatar
    Join Date
    Jun 2013
    Location
    QC, Canada
    Posts
    5,732
    Post Thanks / Like
    Monster green GTR, never seen that before. Pretty ecstatic! That's a word, right?

    Now, the question we are all eager to ask and for which we WANT an answer: is the green monster faster than your R? Does it grip better? Does it brake better? Does it launch better? I'll fill up that last one: oh damn F yeah it does.
    Frank
    818 chassis #181 powered by a '93 VW VR6 Turbo GT3582R
    Go-karted Aug 5, 2016 - Then May 19+21, 2017
    Tracked May 27/July 26, 2017
    Build time before being driveable on Sep 27, 2019: over 6000h
    Build Completed Winter 2021

  9. #809
    Senior Member Pearldrummer7's Avatar
    Join Date
    Feb 2014
    Location
    Asheville, NC
    Posts
    1,230
    Post Thanks / Like
    Quote Originally Posted by Frank818 View Post
    Monster green GTR, never seen that before. Pretty ecstatic! That's a word, right?

    Now, the question we are all eager to ask and for which we WANT an answer: is the green monster faster than your R? Does it grip better? Does it brake better? Does it launch better? I'll fill up that last one: oh damn F yeah it does.
    Launch: LOL GTR
    Brake: 818R
    Grip: debatable. A lot easier to find the limits of grip and super super forgiving when you surpass them on the GTR. Electronics save your *** every time.
    Ease of driving: GTR
    Faster: not sure, NYST track record is a 1:33.95 in a GTR black edition with race tires. I can run a very consistent 1:38 with zero aero, balding street tires, autozone brakes, an open diff, and a passenger. I think the rest of the time is there to take the record and prove the lightweight 818 can take on Godzilla. Really the stiffest competition that appears at that track.
    Frank - Build thread

  10. #810
    Senior Member Frank818's Avatar
    Join Date
    Jun 2013
    Location
    QC, Canada
    Posts
    5,732
    Post Thanks / Like
    What is your definition of "ease of driving"?

    Then if you think you can take on the record what are you waiting for? Oh yeah, that gearbox and bumper, but after that, you will, right?
    Frank
    818 chassis #181 powered by a '93 VW VR6 Turbo GT3582R
    Go-karted Aug 5, 2016 - Then May 19+21, 2017
    Tracked May 27/July 26, 2017
    Build time before being driveable on Sep 27, 2019: over 6000h
    Build Completed Winter 2021

  11. #811
    Senior Member Pearldrummer7's Avatar
    Join Date
    Feb 2014
    Location
    Asheville, NC
    Posts
    1,230
    Post Thanks / Like
    Quote Originally Posted by Frank818 View Post
    What is your definition of "ease of driving"?

    Then if you think you can take on the record what are you waiting for? Oh yeah, that gearbox and bumper, but after that, you will, right?
    Ease of driving...it's like playing Forza on easy mode. There are assists everywhere. Can't get it too loose or it'll fix it, can't overcook the brakes, can't steer so hard you push...it just fixes any mistake you make with electronics. The 818 obviously does none of that. Which is great because it's simple, lighter, and makes you a better driver. It's worse because it's harder to drive haha

    I'm getting an LSD, slicks, some aero, and better brakes. Oh! And a better shifter. And of course replacing/repairing the body work. Then I should be able to take the record at that (mostly bike) track without too much difficulty, I think
    Frank - Build thread

  12. #812
    Senior Member Frank818's Avatar
    Join Date
    Jun 2013
    Location
    QC, Canada
    Posts
    5,732
    Post Thanks / Like
    Ha I see, I prefer the hard way then. I build my 818 as a toy and I want it to be super hard to drive (maybe that's why my shift pattern is reversed loll), the most raw possible. One small mistake and "you" (well, "I") have to fix it, unless anything mechanical is forgiven enough, like a proper balanced weight, suspension, aero and alignment.

    What aero pieces are you targeting?
    Don't forget to get a bigger fuel tank too!!!!!! looooolllllllllllllll Running gag.

    That'd be so cool to have your name (same as mine!) on the TOP1 record of all times!
    Frank
    818 chassis #181 powered by a '93 VW VR6 Turbo GT3582R
    Go-karted Aug 5, 2016 - Then May 19+21, 2017
    Tracked May 27/July 26, 2017
    Build time before being driveable on Sep 27, 2019: over 6000h
    Build Completed Winter 2021

  13. #813
    Senior Member Pearldrummer7's Avatar
    Join Date
    Feb 2014
    Location
    Asheville, NC
    Posts
    1,230
    Post Thanks / Like
    Quote Originally Posted by Frank818 View Post
    Ha I see, I prefer the hard way then. I build my 818 as a toy and I want it to be super hard to drive (maybe that's why my shift pattern is reversed loll), the most raw possible. One small mistake and "you" (well, "I") have to fix it, unless anything mechanical is forgiven enough, like a proper balanced weight, suspension, aero and alignment.

    What aero pieces are you targeting?
    Don't forget to get a bigger fuel tank too!!!!!! looooolllllllllllllll Running gag.

    That'd be so cool to have your name (same as mine!) on the TOP1 record of all times!
    I too like it better, and I like learning while optimizing it.

    Fuel gauge is definitely an important mod

    It would be so cool. I like some competition so this is just fueling my fire!
    Frank - Build thread

  14. #814
    Senior Member Frank818's Avatar
    Join Date
    Jun 2013
    Location
    QC, Canada
    Posts
    5,732
    Post Thanks / Like
    Fuel gauge, sorry yeah, easier than a bigger tank.

    And about your aero, whatcha got in mind?
    Frank
    818 chassis #181 powered by a '93 VW VR6 Turbo GT3582R
    Go-karted Aug 5, 2016 - Then May 19+21, 2017
    Tracked May 27/July 26, 2017
    Build time before being driveable on Sep 27, 2019: over 6000h
    Build Completed Winter 2021

  15. #815
    Senior Member Pearldrummer7's Avatar
    Join Date
    Feb 2014
    Location
    Asheville, NC
    Posts
    1,230
    Post Thanks / Like
    Quote Originally Posted by Frank818 View Post
    Fuel gauge, sorry yeah, easier than a bigger tank.

    And about your aero, whatcha got in mind?
    Big wing and splitter maybe diffuser too. I have the canards already
    Frank - Build thread

  16. #816
    Senior Member Frank818's Avatar
    Join Date
    Jun 2013
    Location
    QC, Canada
    Posts
    5,732
    Post Thanks / Like
    Yeah splitter and big wing, you should gain with that. Plz add the diffuser too. Car will look twice as kick ***! You're actually going the Chad way, you'll be missing front fender louvers, rear bottom bumper anti-parachute vents and large door vent inserts. Yeah I know, bank account, bank account...
    Frank
    818 chassis #181 powered by a '93 VW VR6 Turbo GT3582R
    Go-karted Aug 5, 2016 - Then May 19+21, 2017
    Tracked May 27/July 26, 2017
    Build time before being driveable on Sep 27, 2019: over 6000h
    Build Completed Winter 2021

  17. #817
    Senior Member Pearldrummer7's Avatar
    Join Date
    Feb 2014
    Location
    Asheville, NC
    Posts
    1,230
    Post Thanks / Like
    Quote Originally Posted by Frank818 View Post
    Yeah splitter and big wing, you should gain with that. Plz add the diffuser too. Car will look twice as kick ***! You're actually going the Chad way, you'll be missing front fender louvers, rear bottom bumper anti-parachute vents and large door vent inserts. Yeah I know, bank account, bank account...
    Ah, I have the vent inserts....cool stuff coming that way whenever I get time to go in the machine shop at work. I already have the CP anti-parachute vents. Notice how I have the cheap parts already, and not the pricey ones
    Frank - Build thread

  18. #818
    Senior Member Frank818's Avatar
    Join Date
    Jun 2013
    Location
    QC, Canada
    Posts
    5,732
    Post Thanks / Like
    Frank, your new truck is great, check out what you did at 47sec!

    Frank
    818 chassis #181 powered by a '93 VW VR6 Turbo GT3582R
    Go-karted Aug 5, 2016 - Then May 19+21, 2017
    Tracked May 27/July 26, 2017
    Build time before being driveable on Sep 27, 2019: over 6000h
    Build Completed Winter 2021

  19. #819
    Senior Member Pearldrummer7's Avatar
    Join Date
    Feb 2014
    Location
    Asheville, NC
    Posts
    1,230
    Post Thanks / Like
    So, I'm sad to post since I have had 818 posts in my thread for a while but eventually I have to keep working on the car, I suppose!

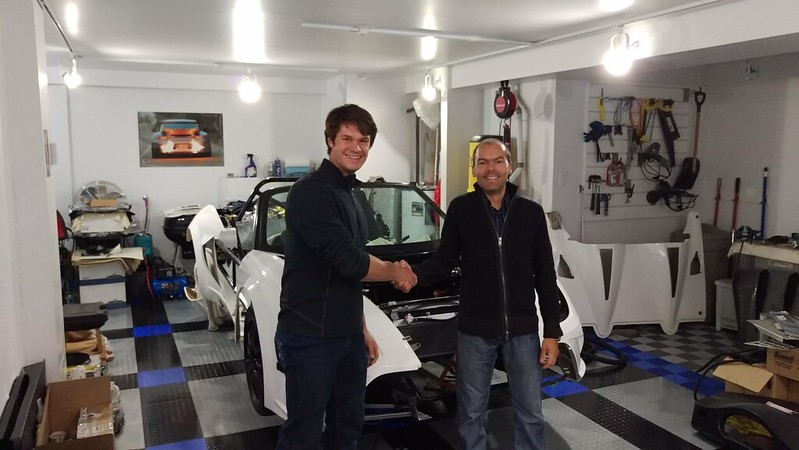
    First and foremost, I took a trip to Montreal (with my friend frank...no joke!) and met my evil Canadian twin, Frank! Bought an extra front end from him, and saw how amazingly super clean his build was!


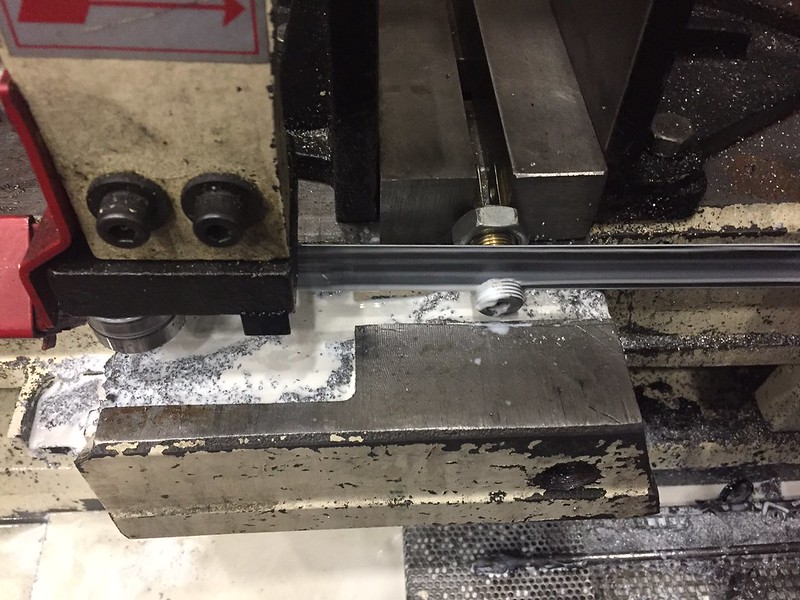
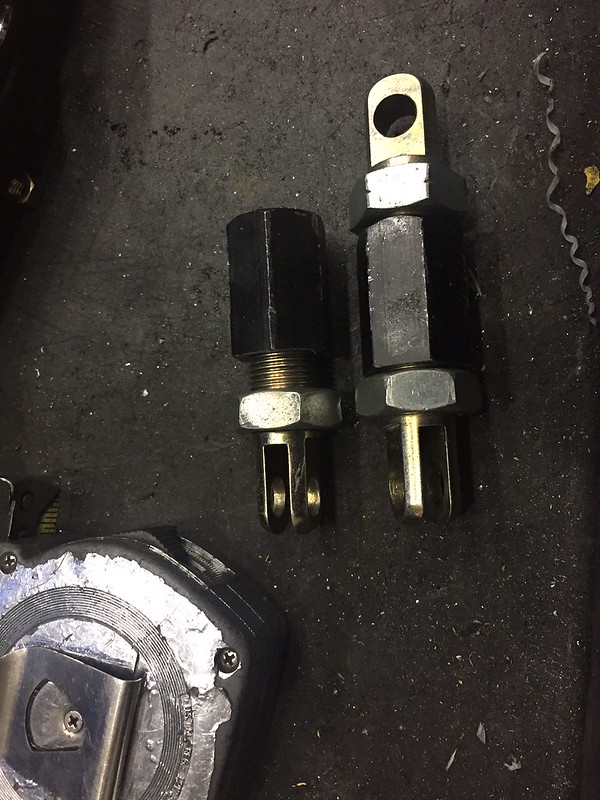
    I also chopped up my upper front A-arm pieces.


    The threads now just bottom out on the slightly shorter black adjustment pieces, giving me more caster/camber than before (I was already bottomed out on the longer ones)


    How much did you take off, Frank?
    I cut the black aluminum pieces at the end of the hex section on the OD

    I took off 3/8" on the solid end of the smaller piece, ~1/4" on the "split" end of the smaller arm, nothing off of the non-welded longer arm, and needed to remove ~0.70" off of the welded part of the long arm.
    Last edited by Pearldrummer7; 10-31-2016 at 05:57 AM. Reason: clarification on measurements
    Frank - Build thread

  20. #820
    Senior Member Canadian818's Avatar
    Join Date
    Nov 2011
    Location
    Edmonton, Alberta
    Posts
    1,378
    Post Thanks / Like
    How much caster/camber are you trying to achieve? I really can't wrap my head around why some people need to cut these down and others don't. Hard to believe the chassis are that different.
    Adam _____ Instagram @PopesProjects____ YouTube Channel
    818 SRX - #91
    Arrived 01/02/2014
    First Start 10/31/2016
    First Drive 05/22/2017
    Registered 10/25/2019 BRAP818

  21. #821
    Senior Member Pearldrummer7's Avatar
    Join Date
    Feb 2014
    Location
    Asheville, NC
    Posts
    1,230
    Post Thanks / Like
    Quote Originally Posted by Canadian818 View Post
    How much caster/camber are you trying to achieve? I really can't wrap my head around why some people need to cut these down and others don't. Hard to believe the chassis are that different.
    The absolute max I could get out of the car was 3.4* caster with -0.5* camber before I was fully bottomed out. This is with aluminum STI control arms that have a 3.75mm spacer on them and the flipped bracket. I don't know why I can't get more but I'd like 4.0* caster and -2.5 camber or so. I had to take away from one to get the other, though when I was bottomed out.
    Frank - Build thread

  22. #822
    Senior Member Frank818's Avatar
    Join Date
    Jun 2013
    Location
    QC, Canada
    Posts
    5,732
    Post Thanks / Like
    Well this w-e I'm going your place to buy your cutting machine, I need that.

    Plz let us know once you get numbers off of your newly perfectly cut a-arms.
    Frank
    818 chassis #181 powered by a '93 VW VR6 Turbo GT3582R
    Go-karted Aug 5, 2016 - Then May 19+21, 2017
    Tracked May 27/July 26, 2017
    Build time before being driveable on Sep 27, 2019: over 6000h
    Build Completed Winter 2021

  23. #823
    Senior Member Canadian818's Avatar
    Join Date
    Nov 2011
    Location
    Edmonton, Alberta
    Posts
    1,378
    Post Thanks / Like
    Quote Originally Posted by Pearldrummer7 View Post
    The absolute max I could get out of the car was 3.4* caster with -0.5* camber before I was fully bottomed out. This is with aluminum STI control arms that have a 3.75mm spacer on them and the flipped bracket. I don't know why I can't get more but I'd like 4.0* caster and -2.5 camber or so. I had to take away from one to get the other, though when I was bottomed out.
    Do you have any pics of your upper A arms when they were at 3.4*/-0.5*? I'm just curious about all this. I was able to get 6* caster and -1.5* camber without cutting, and my long arm still has threads left exposed. Maybe ffr has had a verity of different sizes come through, perhaps the manufacturers QC is lacking.
    Adam _____ Instagram @PopesProjects____ YouTube Channel
    818 SRX - #91
    Arrived 01/02/2014
    First Start 10/31/2016
    First Drive 05/22/2017
    Registered 10/25/2019 BRAP818

  24. #824
    Senior Member Pearldrummer7's Avatar
    Join Date
    Feb 2014
    Location
    Asheville, NC
    Posts
    1,230
    Post Thanks / Like
    My arms all had threads exposed, they were just bottomed out in the heim joint. I don't have a pic of it in that alignment, but my threads were much too long to fully thread into the joints on the long arm

    Frank- borrowing machines at work to do this!
    Last edited by Pearldrummer7; 10-26-2016 at 05:39 AM.
    Frank - Build thread

  25. #825
    Senior Member FFRSpec72's Avatar
    Join Date
    Feb 2011
    Location
    Kirkland, WA
    Posts
    2,255
    Post Thanks / Like
    Quote Originally Posted by Canadian818 View Post
    Do you have any pics of your upper A arms when they were at 3.4*/-0.5*? I'm just curious about all this. I was able to get 6* caster and -1.5* camber without cutting, and my long arm still has threads left exposed. Maybe ffr has had a verity of different sizes come through, perhaps the manufacturers QC is lacking.
    To get 6 degrees caster you needsome modification, I agree on the 1.5 camber w/o modification
    Tony Nadalin
    2018 SOVREN Big Bore Champion
    2015 SCCA Oregon Region VP3 Champion
    2012 ICSCC ITE Class Champion
    FFR MkII Challenge Car, Spec Racer, Street Legal, SCCA, ICSCC and NASA Racing
    818R Build in progress

  26. #826
    Senior Member Canadian818's Avatar
    Join Date
    Nov 2011
    Location
    Edmonton, Alberta
    Posts
    1,378
    Post Thanks / Like
    Quote Originally Posted by FFRSpec72 View Post
    To get 6 degrees caster you needsome modification, I agree on the 1.5 camber w/o modification
    I didn't, which is what's baffling me. And some, like hindsight, have had to resort to more drastic modifications to achieve results that others got easily.
    Adam _____ Instagram @PopesProjects____ YouTube Channel
    818 SRX - #91
    Arrived 01/02/2014
    First Start 10/31/2016
    First Drive 05/22/2017
    Registered 10/25/2019 BRAP818

  27. #827
    Senior Member C.Plavan's Avatar
    Join Date
    Mar 2011
    Location
    Clovis, Ca
    Posts
    2,225
    Post Thanks / Like
    Each chassis is different. It just means they are not all straight.
    Thanks- Chad
    818R-SOLD!!!- Go Karted 7/20/14/ Officially raced NASA ST2- 2/28/15
    2016 Elan NP01 Prototype Racecar Chassis #20
    1969 Porsche 911ST Vintage Race Car
    1972 Porsche 911T (#'s matching undergoing nut & bolt resto in my garage)

  28. #828
    Senior Member Pearldrummer7's Avatar
    Join Date
    Feb 2014
    Location
    Asheville, NC
    Posts
    1,230
    Post Thanks / Like
    Quote Originally Posted by C.Plavan View Post
    Each chassis is different. It just means they are not all straight.
    I believe during the alignment (I can't quite remember exactly how much) one side was able to go far past that, and one wasn't. I'd rather have them both too low than different side-to-side. I think it's a lack of frame straightness, like Chad said.

    Quote Originally Posted by Canadian818 View Post
    I didn't, which is what's baffling me. And some, like hindsight, have had to resort to more drastic modifications to achieve results that others got easily.
    Quote Originally Posted by FFRSpec72 View Post
    To get 6 degrees caster you needsome modification, I agree on the 1.5 camber w/o modification
    I could've had a little more camber if I traded some caster, IIRC, however it wouldn't have been nearly what I wanted either way. Here's to hoping this alignment works out better for me.
    Frank - Build thread

  29. #829
    Senior Member Pearldrummer7's Avatar
    Join Date
    Feb 2014
    Location
    Asheville, NC
    Posts
    1,230
    Post Thanks / Like
    So I played with the car a bit this weekend, and found my rear driver wheel bearing to be sloppy again. For recollection: that wheel bearing catastrophically failed on my first track day of the year this year. I replaced the entire hub since the race was chewed up.

    Now, this was just a random hub with a "fairly new bearing" in it. My first question to you fine folks is this:

    Is there any reason or way for premature wheel bearing failures on the same corner with different hubs?

    My second question is:

    Can I upgrade to the newer cartridge style bearings with my current axles and suspension pieces? What needs to change if not?
    Frank - Build thread

  30. #830
    Senior Member Frank818's Avatar
    Join Date
    Jun 2013
    Location
    QC, Canada
    Posts
    5,732
    Post Thanks / Like
    Is the bearing failing always the one opposite of the corners? I mean, if your track is a clockwise track is the bearing the left one?
    Frank
    818 chassis #181 powered by a '93 VW VR6 Turbo GT3582R
    Go-karted Aug 5, 2016 - Then May 19+21, 2017
    Tracked May 27/July 26, 2017
    Build time before being driveable on Sep 27, 2019: over 6000h
    Build Completed Winter 2021

  31. #831
    Senior Member Pearldrummer7's Avatar
    Join Date
    Feb 2014
    Location
    Asheville, NC
    Posts
    1,230
    Post Thanks / Like
    Hm, yes. The two failures I've had are on the right side, and the track is counter-clockwise. Is that common? Fronts seem totally fine so far.
    Frank - Build thread

  32. #832
    Senior Member Frank818's Avatar
    Join Date
    Jun 2013
    Location
    QC, Canada
    Posts
    5,732
    Post Thanks / Like
    Sorry unable to answer the question but it's still odd that it fails always on the same side.

    Now, checking on the new bumper?
    Frank
    818 chassis #181 powered by a '93 VW VR6 Turbo GT3582R
    Go-karted Aug 5, 2016 - Then May 19+21, 2017
    Tracked May 27/July 26, 2017
    Build time before being driveable on Sep 27, 2019: over 6000h
    Build Completed Winter 2021

  33. #833
    Senior Member Pearldrummer7's Avatar
    Join Date
    Feb 2014
    Location
    Asheville, NC
    Posts
    1,230
    Post Thanks / Like
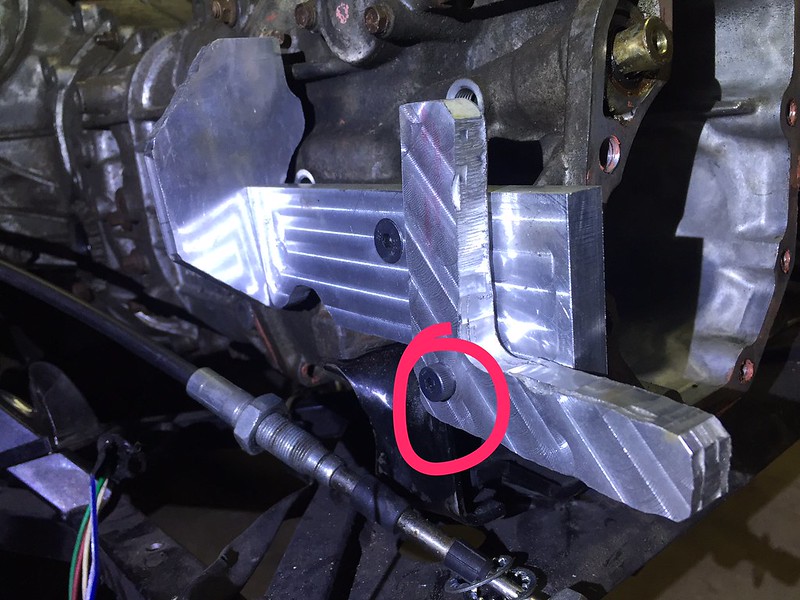
    Did some more shifter mockup recently... ran into a little problem that I'd love to run by you guys!

    This bolt keeps loosening/tightening whenever I rotate that. I have a brass washer between the aluminum pieces, but I can't seem to get it right. Is the right solution a longer bolt so I can put a nut on the other side of it? The bolt is a shoulder bolt that threads into the larger aluminum piece.


    Is buying a bearing (like this one) the best bet?
    Last edited by Pearldrummer7; 12-27-2016 at 10:14 AM.
    Frank - Build thread

  34. #834
    Moonlight Performance
    Hindsight's Avatar
    Join Date
    May 2014
    Location
    Atlanta
    Posts
    3,402
    Post Thanks / Like
    Hey Frank, looking good!

    I used a nut (did not thread the base). I used a long bolt that goes all the way through the bellcrank and the base, then put a lock-nut on the other side. I used three brass washers, one under the head of the bolt, one between the bellcrank and the base plate, and one under the nut. Snug the nut JUST tight enough to take up any play. I had some grease on the threads of my bolt and even with the lock nut, it was loosening up over time but after putting a new lock nut on and ensuring there was no grease on the bolt, it's held tight for over 1,000 miles and lots of shifting.

    If you want to get REALLY fancy, you will do what Craig did and drill a bigger hole for an actual roller bearing to be pressed into the base piece. One day I might do that, but the setup I have shifts pretty darn smooth as is.... no complaints.

  35. #835
    Senior Member fastzrex's Avatar
    Join Date
    Oct 2015
    Location
    Oklahoma City
    Posts
    152
    Post Thanks / Like
    Have built other 'lever' assemblies and have had the same problem. My cure was to install brass bushings in the 'lever', cut to the right length so the lever may move freely when the bolt is tight. Add LockTite to the bolt. I have had luck finding bushings at Ace Hardware; if not, an Internet search will find a variety.

    ~ Mark

    Quote Originally Posted by Pearldrummer7 View Post
    Did some more shifter mockup recently... ran into a little problem that I'd love to run by you guys!

    This bolt keeps loosening/tightening whenever I rotate that. I have a brass washer between the aluminum pieces, but I can't seem to get it right. Is the right solution a longer bolt so I can put a nut on the other side of it? The bolt is a shoulder bolt that threads into the larger aluminum piece.


    Is buying a bearing (like this one) the best bet?

  36. #836
    Senior Member C.Plavan's Avatar
    Join Date
    Mar 2011
    Location
    Clovis, Ca
    Posts
    2,225
    Post Thanks / Like
    I'm surprised you are having so many wheel bearing issues. I replaced mine with new OEM units when I built my car, raced the heck out of it, and never had an issue with them.
    Thanks- Chad
    818R-SOLD!!!- Go Karted 7/20/14/ Officially raced NASA ST2- 2/28/15
    2016 Elan NP01 Prototype Racecar Chassis #20
    1969 Porsche 911ST Vintage Race Car
    1972 Porsche 911T (#'s matching undergoing nut & bolt resto in my garage)

  37. #837
    Tazio Nuvolari wannabe Scargo's Avatar
    Join Date
    Nov 2013
    Location
    south-central CT
    Posts
    1,611
    Post Thanks / Like
    Ideally, you should use a flanged bearing. Perhaps this one? Even bigger would be better so you could get something like a 3/8" thread into the aluminum.
    If not you should use a shouldered bushing and would want a steel washer under the cap screw head (as a bearing/wear surface).

    As is, can you thin or spot-face the lever so you can fully tighten the cap screw (along with using an anaerobic adhesive, AKA Locktite) and still have the lever free to move? Or get the next longer cap screw.
    While I'm making suggestions, I like using a clevis end (double shear) rather than a ball-joint linkage like most are doing. Or, use a Steel Ball Joint Rod End with a double-shear lever end.

    I worry about the eventual loosening and wallowing out of threads with the ball screwed into the side of an aluminum lever, and especially when 1/4" threaded studs are used.

    shear.png

  38. #838
    Senior Member
    Join Date
    Jun 2015
    Posts
    678
    Post Thanks / Like
    Locktite a stud in, use a nyloc nut on the outside with nylon washers between each piece

  39. #839
    Senior Member
    Join Date
    Feb 2015
    Location
    Reno, NV
    Posts
    191
    Post Thanks / Like
    Or use a shoulder screw. www.mcmaster.com/#91259a624/=15niu64
    Thread the base and drill the arm to match the shoulder diameter. Choose a shoulder length long enough so the screw can be fully tightened and still have a little free play axially. For better longevity use a bushing in the arm.
    818R Build date 10/31/15

  40. #840
    Senior Member
    Join Date
    Jun 2015
    Posts
    678
    Post Thanks / Like
    I love those, but they can still turn unless you drill hole through the head and safety wire it. Don't forget to anti seize whatever you use, the alum will gall onto the bolt otherwise after continued use.

    I like personally like the bearing idea, there are a ton of them to choose from and the feel would be perfect.

    Because we used an RSX race shifter, we had some reversing of action to do, but the shifting is perfect! No deflection at all, and only used 3/16" material.
    IMG_0741.JPGIMG_0740.JPG

Page 21 of 26 FirstFirst ... 111920212223 ... LastLast

Tags for this Thread

Posting Permissions

  • You may not post new threads
  • You may not post replies
  • You may not post attachments
  • You may not edit your posts
  •  

Brown County Customs

Visit our community sponsor