Midwest Classic Insurance

Visit our community sponsor

Thanks Thanks:  0
Likes Likes:  0
Page 2 of 3 FirstFirst 123 LastLast
Results 41 to 80 of 99

Thread: BillJr212 - WRX 818-S build thread

  1. #41
    Senior Member billjr212's Avatar
    Join Date
    Feb 2011
    Location
    Frankfort, IL
    Posts
    734
    Post Thanks / Like
    Quote Originally Posted by shinn497 View Post
    Is this the first build thread for a red gel coat 818?
    oh, i hope not - that sounds like a lot of pressure. haha. could be though. I think they switched to the red panels about 2 or 3 weeks before my production date, so there are certainly a few earlier ones out there, but not sure where they are with the build threads.

    I did notice the corners around the trunk lid are pretty rough, but the panels themselves look good for the most part. There are also a few blotchy areas and 1 drip-looking spot in the hood, but I'm thinking once I undercoat the body panels (going to use the 3M rubberized undercoating for this as well) it may minimize some of these imperfections since they were mainly noticeable when there was a little bit of back-lighting. As you can see in the 1 photo above, there is a good bit of shine to the red. Still not to the level of a finished product, but good enough to enjoy the car for a season or 2 before pulling the body back off for paint.

  2. #42
    Senior Member billjr212's Avatar
    Join Date
    Feb 2011
    Location
    Frankfort, IL
    Posts
    734
    Post Thanks / Like
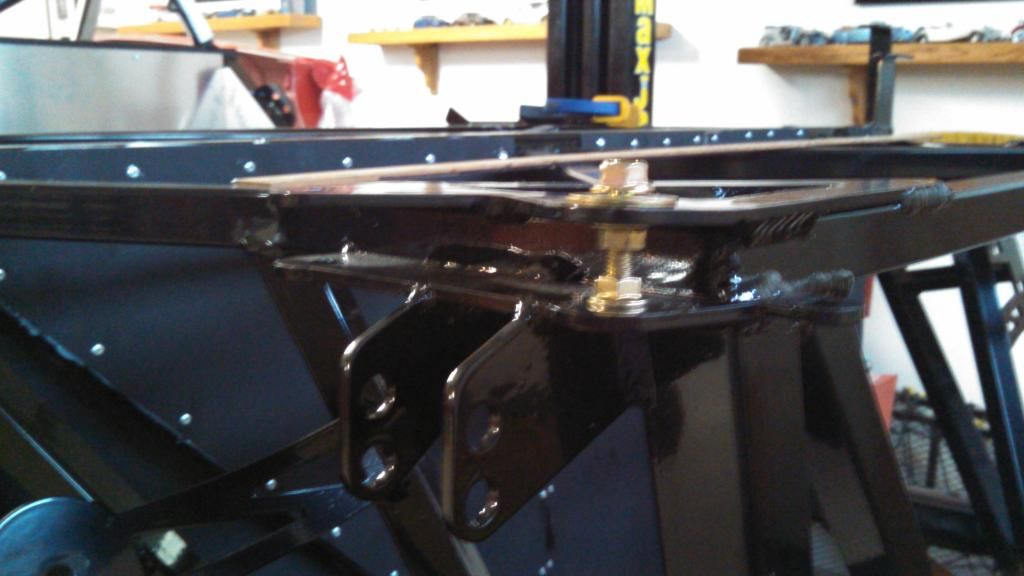
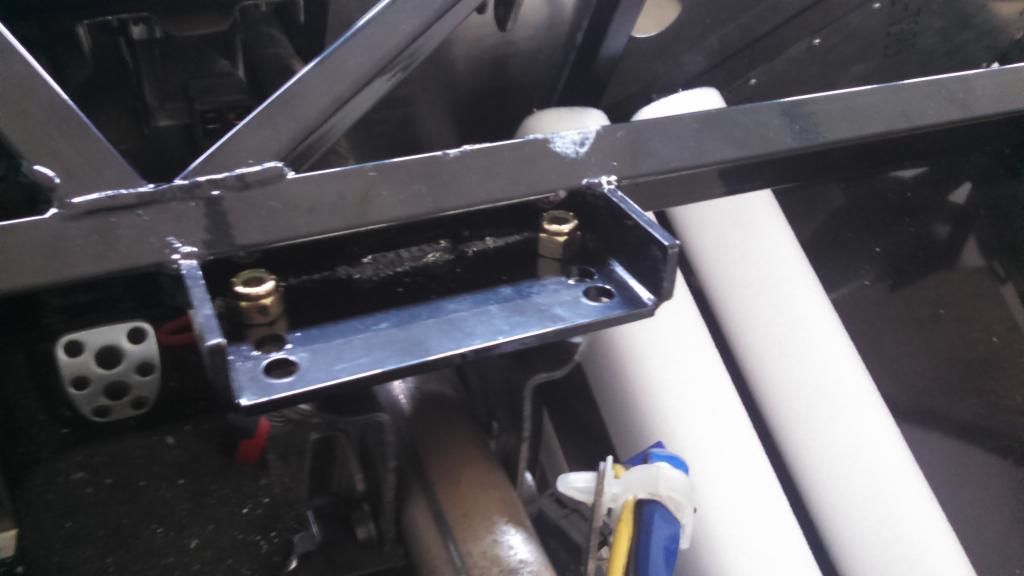
    Continuing my "work smarter, not harder" theme, I used this basic trick to spread the upper a arm brackets on the frame just a bit rather than trying to pound in the a arms. Sorry for the blurry photo, but I think you can get the idea. Just a small bolt left over from the donor and a couple flanged nuts. "Tighten" with a couple wrenches heading in opposite directions.

  3. #43
    Senior Member billjr212's Avatar
    Join Date
    Feb 2011
    Location
    Frankfort, IL
    Posts
    734
    Post Thanks / Like
    I'll need to get some more pictures in here, but thought I'd post a quick update.

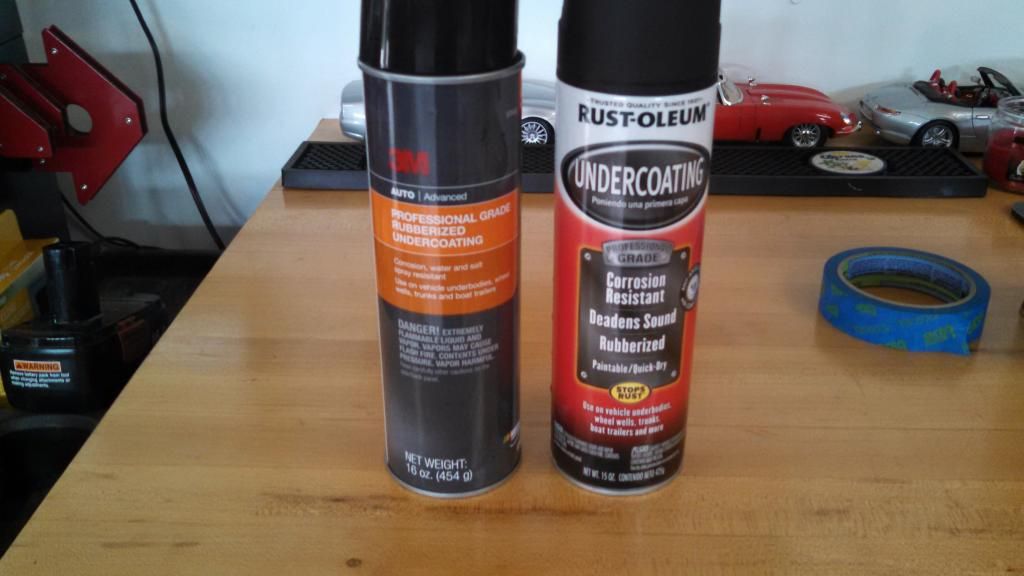
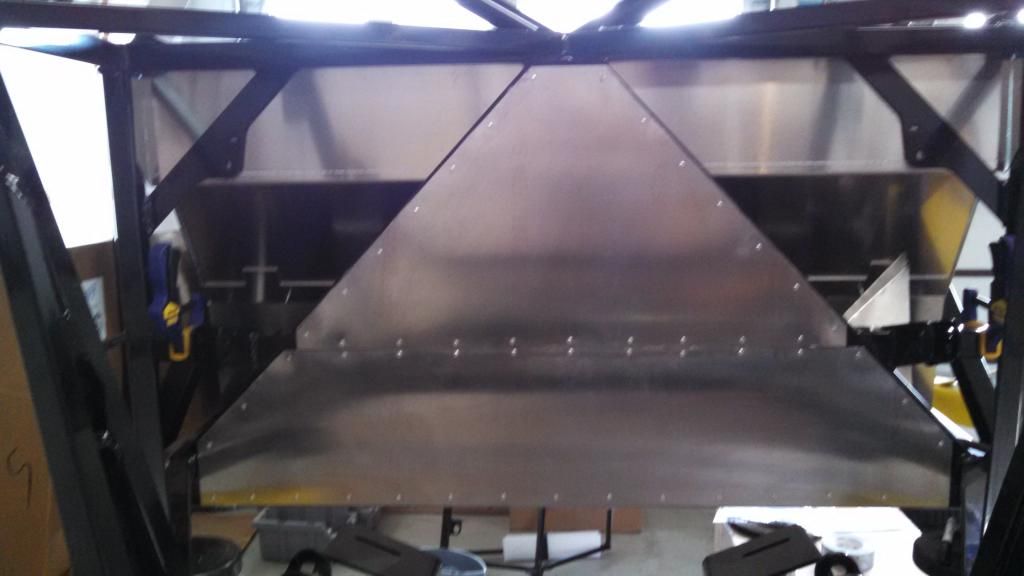
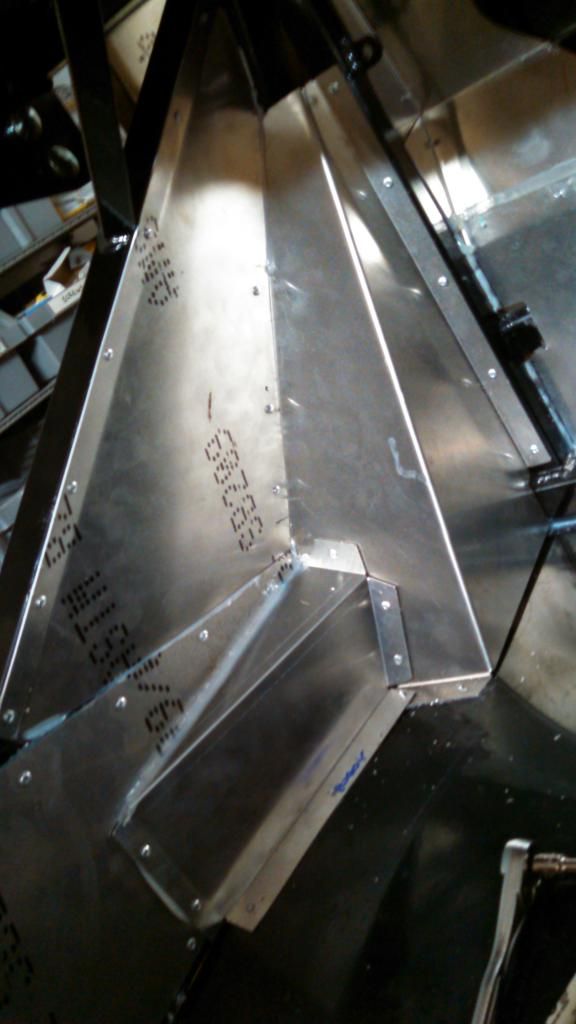
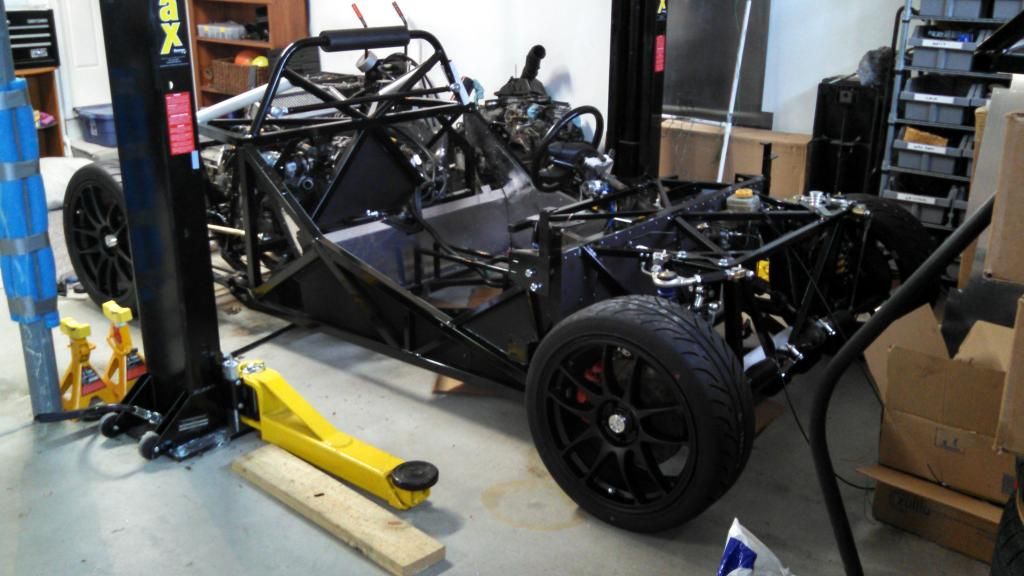
    I finished up the extra firewall between the engine and fuel tank (I only filled the center triangle, left the upper corners open for the time being for accessibility). As a quick note, I have now used both 3M professional grade rubberized undercoating and Rustoleum professional grade rubberized undercoating - the Rustoleum seemed to bond a little better, but the 3M product definitely takes the "rubberized" portion of its title much more seriously and has a lot more build and texture to it (and thus, I suspect, better sound deadening qualities). The Rustoleum sits very flat in comparison and doesn't spray very long before clogging up the nozzle and causing drips.

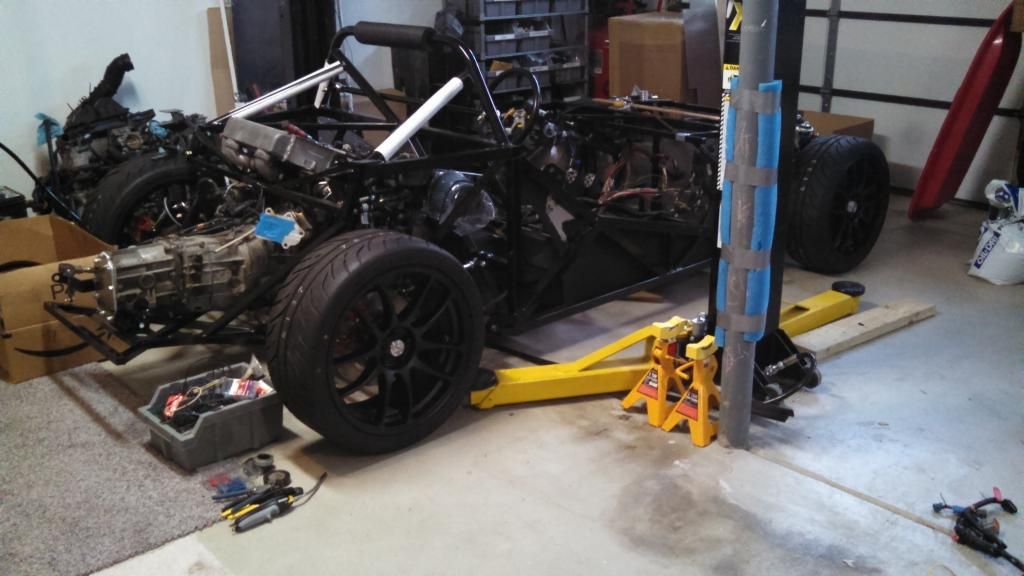
    I also put the engine in last night - it "can" be done without removing the exhaust manifold, but I wouldn't recommend it. Scratched up the powder coating in a few places. If you decide to be brave (stupid) like me and try it, be sure to remove the coolant reservoir and the motor mounts first. Once you get past the upper frame bars, you can raise the motor to the upper frame bars and slip the motor mounts in from underneath and bolt them up. Once my new clutch arrives this week, I will be able to bolt it up to the flywheel and add the transmission.

    I ended up going with a JDM EJ205 from JDM Racing Motors.com. They were very easy to work with and shipping was extremely fast. I'll report back once it's up and running to confirm how that goes. I will say they do a ridiculously good job of cleaning the outside of the motors, so at least it's pretty.

    I also went with Group N motor and transmission mounts and ordered myself a set of poly mounts for the steering rack since the original rubber ones were in pretty sad shape when I went to install the steering rack.

  4. #44
    Senior Member billjr212's Avatar
    Join Date
    Feb 2011
    Location
    Frankfort, IL
    Posts
    734
    Post Thanks / Like

  5. #45
    Senior Member wleehendrick's Avatar
    Join Date
    Jul 2012
    Location
    Encinitas, CA
    Posts
    1,653
    Post Thanks / Like
    Blog Entries
    2
    The 3M product is what I've been using on the chassis aluminum; definitely seems to deaden the resonance, and I'd recommend it as well. I also use it on the backside of my fiberglass panels, after sanding and a quick acetone wipe it bonds well, removes the transparency, and looks nicely finished.

  6. #46
    Senior Member billjr212's Avatar
    Join Date
    Feb 2011
    Location
    Frankfort, IL
    Posts
    734
    Post Thanks / Like
    Excellent. I grabbed the Rustoleum version at Menard's as a test (used it on the tank side of my motor/tank firewall) and based on the difference, I plan to order more of the 3M for the backside of the fiberglass. Good to hear that it should work out as planned. On the aluminum panels, I was actually doing a quick acetone wipe before and after sanding, since the oils (both factory and fingerprints) on the bare aluminum seemed to initially prevent getting a good tooth in the aluminum.

  7. #47
    Senior Member wleehendrick's Avatar
    Join Date
    Jul 2012
    Location
    Encinitas, CA
    Posts
    1,653
    Post Thanks / Like
    Blog Entries
    2
    I order it from Amazon Prime. I don't know if it makes a difference in adhesion, but I like to spray it on when the resin is still tacky from the acetone wipe down. Here's how it comes out:

    60_Trunk.jpg

  8. #48
    Senior Member billjr212's Avatar
    Join Date
    Feb 2011
    Location
    Frankfort, IL
    Posts
    734
    Post Thanks / Like
    Looks good. So you decided to spray it on before cutting the openings? How did that work out?

    I also bought my first two cans on amazon prime. Make sure to check out smile.Amazon.com if you are not using the mobile app. That way a portion goes to your choice of charities. No (direct) impact on the price charged.

  9. #49
    Senior Member wleehendrick's Avatar
    Join Date
    Jul 2012
    Location
    Encinitas, CA
    Posts
    1,653
    Post Thanks / Like
    Blog Entries
    2
    That panel I sprayed first, and it was fine, just had to clean up the dust from cutting the fiberglass. Some other panels I cut before coating, which has the advantage of blackening the edge, but requires additional masking, obviously. Either way works!

  10. #50
    Member
    Join Date
    Apr 2014
    Posts
    79
    Post Thanks / Like
    Quote Originally Posted by billjr212 View Post
    Make sure to check out smile.Amazon.com if you are not using the mobile app. That way a portion goes to your choice of charities. No (direct) impact on the price charged.
    This is cool. I never knew about it.

  11. #51
    Senior Member billjr212's Avatar
    Join Date
    Feb 2011
    Location
    Frankfort, IL
    Posts
    734
    Post Thanks / Like
    It's been way too long since I posted so I thought I'd pop in for a quick update. Our firewall at work is now blocking Photobucket, and posting decent pictures from my phone is a pain so I've been an absentee build thread-er. Anyway, I'm moving along nicely again now that my garage is heated.

    Recently started a thread on my troubles with the throttle cable. To summarize, spin nuts are the devil. Do yourself a favor and cut a slot in a normal nut with a rotozip to install the throttle cable through the firewall. Also, make sure to drill out the pedal a bit before jamming the plastic retaining bucket/clip through it...or you will break it. Go me for breaking the same part twice in 2 different ways.

    I got my wheels/tires paired up yesterday by the local firestone dealership after NTB refused to do it. Ordered the Black wheels from FFR and got myself a set of Dunlop Direzza ZII Star Spec's from Tire Rack.

    I also discovered that even at 5' 9", I was very unlikely to clear the roll bar with a helmet on in the stock seat, even with modifications, so I ordered a Sparco R100 on Amazon (they had a used one through warehouse deals at a ridiculously low price and with the safety net of Prime, I figured it was a win win). Some of the plastic around the tilt handle was cracked, but since it is buried in the 818, it doesn't make a difference to me. I like the fit of it and will order a matching one when the time comes. Garage space is at a premium right now though since the temperature has plummeted and I am jamming my daily driver into the garage.

    For the steering rack, I ended up compressing the column 1.25" and drilling a 3rd set of holes in the frame to run the bolts through. I did not like how in my face the steering wheel was in the "stock" position.

  12. #52
    Moonlight Performance
    Hindsight's Avatar
    Join Date
    May 2014
    Location
    Atlanta
    Posts
    3,402
    Post Thanks / Like
    Quote Originally Posted by billjr212 View Post
    Dunlop Direzza ZII Star Spec's from Tire Rack.
    Nice tires... I plan on running the same.

    Congrats on the progress too!

  13. #53
    Senior Member billjr212's Avatar
    Join Date
    Feb 2011
    Location
    Frankfort, IL
    Posts
    734
    Post Thanks / Like
    thought i'd post a few photos since i'm working from home this morning and enduring a slow start to a conference call right now.

    firewall in place:


    getting the rear shock perches ready for the springs:


    new holes drilled for steering column where the nuts are sitting:


    dead pedal aluminum:


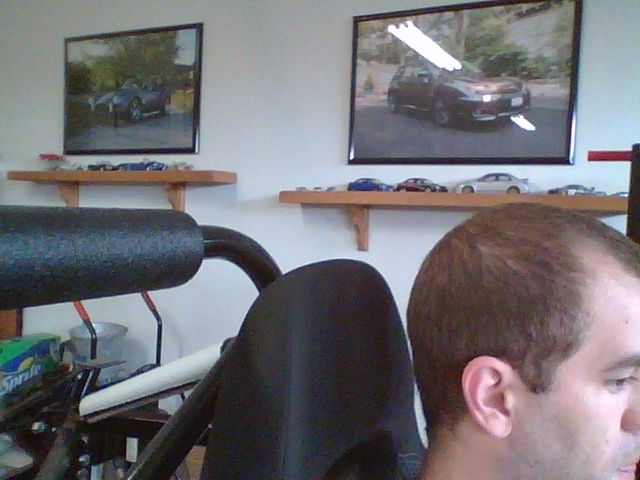
    stock seats - no roll bar clearance:


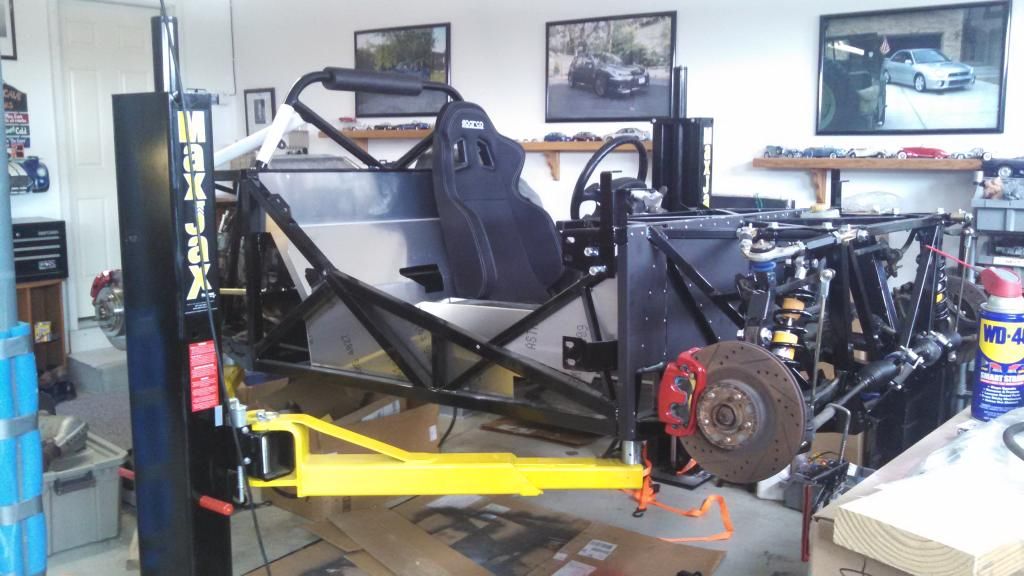
    general shot - starting to look like something:

  14. #54
    fasterer and furiouser longislandwrx's Avatar
    Join Date
    Aug 2012
    Location
    Long Island
    Posts
    2,540
    Post Thanks / Like
    Blog Entries
    6
    What all your friends and relatives will be getting this December
    cards.JPG
    A well stocked beverage fridge is the key to any successful project.

  15. #55
    Senior Member billjr212's Avatar
    Join Date
    Feb 2011
    Location
    Frankfort, IL
    Posts
    734
    Post Thanks / Like
    haha - wait, is that not acceptable?

  16. #56
    Senior Member billjr212's Avatar
    Join Date
    Feb 2011
    Location
    Frankfort, IL
    Posts
    734
    Post Thanks / Like
    Finished installing the fuel tank this morning before work. What a pain in the neck - it really didn't want to fit. Trimmed the tabs back to the point where the factory holes were essentially gone and drilled new holes. Even then, it didn't want to sit flat on the floor (which was very wavy) or flat against the back frame (rear of fuel tank is ballooned out). Also, I had to slide it as far towards the passenger side as possible to clear the filler tube from the frame. Wish I would have realized the filler comes inside that lower triangle rather than outside. Had to dig out the big hole saw bit to go through the added firewall.

    I went ahead and sprayed the top of the floor pan and the front of the frame rails with the rubberized undercoating once everything was fit up and all holes drilled.

    All is well that ends well though. Seems very secure and I'm ready to move on to the fuel lines.

  17. #57
    Senior Member billjr212's Avatar
    Join Date
    Feb 2011
    Location
    Frankfort, IL
    Posts
    734
    Post Thanks / Like
    I'm also having some buyers remorse about the Sparco R100 seat as I go through the mental gymnastics of how to mount the seat and lap belts. I may switch over to the Sparco Sprint V. Anybody sat in both that can compare the sizing/comfort? I'm okay with snug, but I don't want something quite as tough to climb/belt in and out of as the Kirkey's.

  18. #58
    K3LAG's Avatar
    Join Date
    May 2013
    Location
    Greensburg, PA
    Posts
    552
    Post Thanks / Like
    Quote Originally Posted by billjr212 View Post
    I'm also having some buyers remorse about the Sparco R100 seat as I go through the mental gymnastics of how to mount the seat and lap belts. I may switch over to the Sparco Sprint V. Anybody sat in both that can compare the sizing/comfort? I'm okay with snug, but I don't want something quite as tough to climb/belt in and out of as the Kirkey's.
    Look at my build thread at how I mounted my Sparco Chrono Roads and seatbelt. The R100's should be able to be mounted similarly. It will be on the last page or two of my thread.

    Larry

  19. #59
    Senior Member billjr212's Avatar
    Join Date
    Feb 2011
    Location
    Frankfort, IL
    Posts
    734
    Post Thanks / Like
    i've decided to switch up my original seating plan a bit and somehow got approval from the boss to do it.

    I picked up a pair of Sparco Sprint V's but also kept my 1 Sparco R100 to use day to day as the drivers seat. I'll then swap out the driver seat with the 2nd Sprint V. Passenger gets the Sprint V all the time. My wife fits in it comfortably, and my friends can suffer through it.

    I'm using 2 pieces of 4 x 3 x 1/4 6061 structural aluminum angle bolted to the chassis and then to the seat itself. From my initial assessment, I should be able to drill a second set of holes through the aluminum angle to mount both seat options with only the 1 set of holes through the frame rails. While I know my overall plan wouldn't qualify for competitive/timed racing, that's not my game, and I'm certain the overall system will be more robust than most mounts used in "normal" cars.

    I'm fairly certain I was going to have trouble squeezing my helmet under the roll bar with the R100, even bolted (nearly) directly to the floor with flat stock. After I get the Sprint V's bolted up, I will reevaluate them from a comfort standpoint and may still give the R100 the boot, but it's nice to have the fall back pre-approved. I got a great deal on the R100 from Amazon warehouse deals, so the investment in having 2 seats for the driver is very small.

  20. #60
    Senior Member billjr212's Avatar
    Join Date
    Feb 2011
    Location
    Frankfort, IL
    Posts
    734
    Post Thanks / Like
    oh, and I've been working on brake lines - if anybody needs to replace pieces of the hard line that they bent improperly, decided to route differently, etc, O'Reilly's carries the exact same lines supplied with the kit.

  21. #61
    Senior Member billjr212's Avatar
    Join Date
    Feb 2011
    Location
    Frankfort, IL
    Posts
    734
    Post Thanks / Like
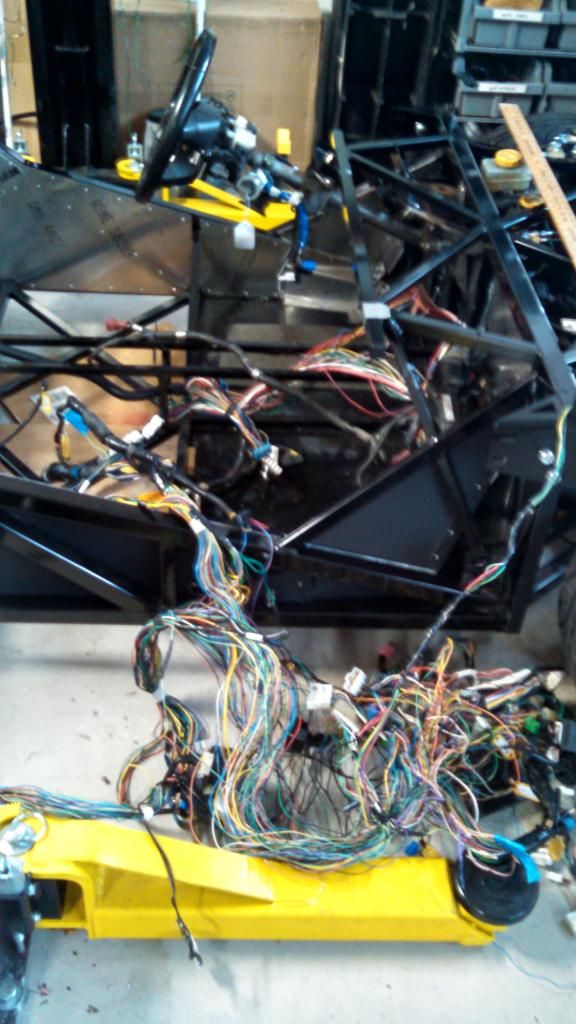
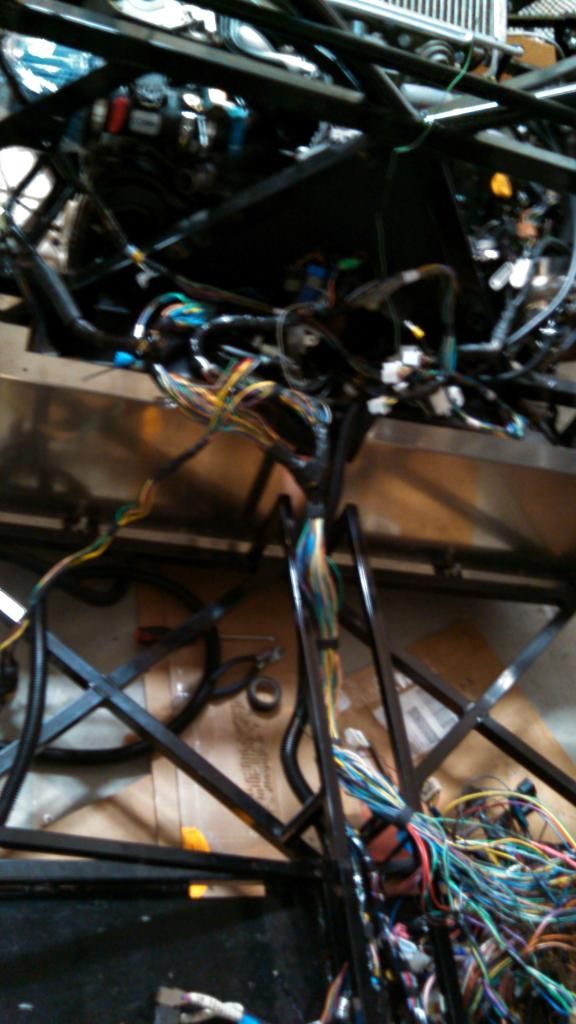
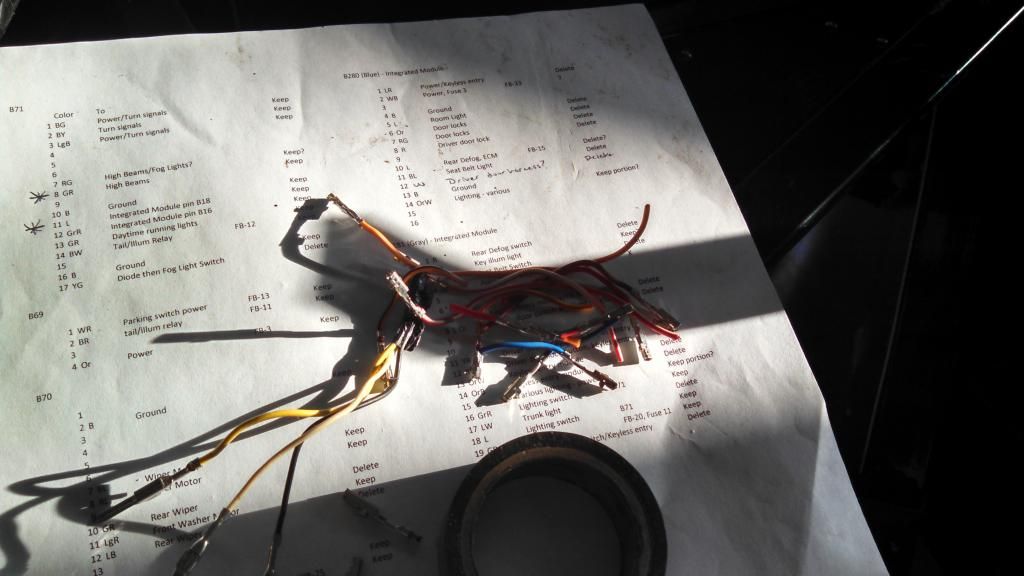
    Just between toiling away on the wiring for the last week. Every time I think I'm close, I find more wires I can remove.


  22. #62
    Senior Member billjr212's Avatar
    Join Date
    Feb 2011
    Location
    Frankfort, IL
    Posts
    734
    Post Thanks / Like
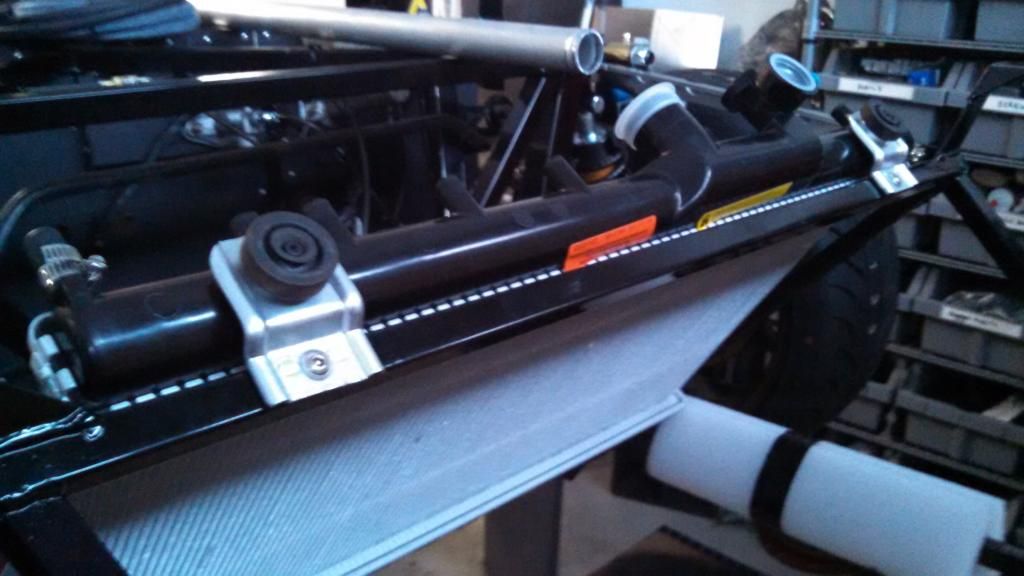
    Just about done with the wiring and decided to take a mental break and work on the cooling system. Realized that the factory upper brackets fit perfectly just by flipping them versus the manual and flipping the rubber bushings.

  23. #63
    Senior Member billjr212's Avatar
    Join Date
    Feb 2011
    Location
    Frankfort, IL
    Posts
    734
    Post Thanks / Like
    I may flip the bushings back and cut them thinner to fit, but they seem secure this way.

  24. #64
    Senior Member
    Join Date
    Oct 2012
    Posts
    556
    Post Thanks / Like
    I see you are using the Maxjax. What do you think of it? Convienient? Reliable? Safe? Does it allow enough room to work beneath the car?

  25. #65
    Senior Member billjr212's Avatar
    Join Date
    Feb 2011
    Location
    Frankfort, IL
    Posts
    734
    Post Thanks / Like
    I like it. It is convenient. Installation was relatively easy with a hammer drill and decent concrete bits. For now, I've been leaving the arms in place, so putting car up and down is easy and quick. I have it set up in the single door bay of a 3 car garage. Theoretically, I could pull the post near the middle of the garage, but it's right next to a support post anyway, so not all that intrusive and the other post is up near the wall, so it's also out of the way. Their claim of "portable" is a little dubious by the time you factor in putting the shims in place to level it. If I didn't leave the posts in at all times, it certainly wouldn't be worth it for something quick like an oil change.

    Once the 818 is done, I'll pull the lift arms off on the one post so I don't trip over them, but probably still leave the posts themselves in place, since they aren't all that intrusive.

    Safety wise, the weight rating is certainly there and the locking method is a big bar slid through under the lifting post, so no worries (see the red handled thing in post #53 - that picture is at the 1st locked level). The first locked level is perfect working height for switching over to summer/winter tires and brake work. It doesn't go super high, but at the 2nd (top) locking position, I can easily scoot around under it sitting on a rolling chair.

    Overall, I'm very happy with it. Definitely worth the investment for me between tire switches, oil changes, the 818, and whatever random other projects pop up. One catch - if you live in a southern state where the concrete isn't required to be as thick, you may need to cut out a square of concrete to put in a deeper section. Current code in Illinois meant I automatically met the depth and quality level needed.

  26. #66
    Senior Member billjr212's Avatar
    Join Date
    Feb 2011
    Location
    Frankfort, IL
    Posts
    734
    Post Thanks / Like
    Got this reminder today (my birthday) that I need to get back to work on the car

  27. #67
    Senior Member Frank818's Avatar
    Join Date
    Jun 2013
    Location
    QC, Canada
    Posts
    5,732
    Post Thanks / Like
    Well Happy BDay man!
    Too bad it's not 10 times a month, you could work on the car at least 10 times a month.
    Frank
    818 chassis #181 powered by a '93 VW VR6 Turbo GT3582R
    Go-karted Aug 5, 2016 - Then May 19+21, 2017
    Tracked May 27/July 26, 2017
    Build time before being driveable on Sep 27, 2019: over 6000h
    Build Completed Winter 2021

  28. #68
    Senior Member billjr212's Avatar
    Join Date
    Feb 2011
    Location
    Frankfort, IL
    Posts
    734
    Post Thanks / Like
    quick update on what i've been up to for the past month.

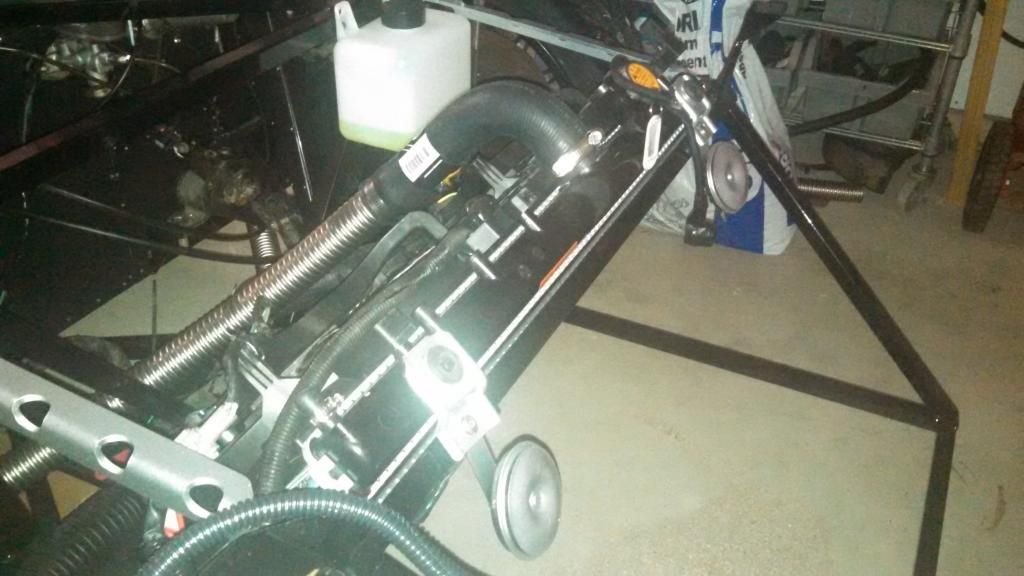
    New radiator installed.


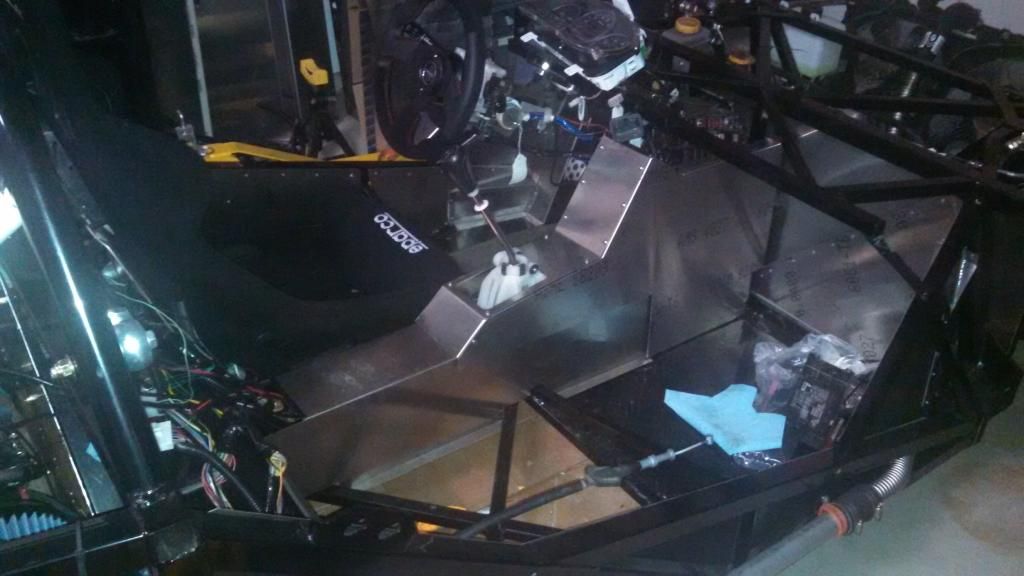
    Center console roughed in - bent the aluminum in on the passenger side to open up the footwell. Fuse panel will be underneath the upper center section, which is removable.


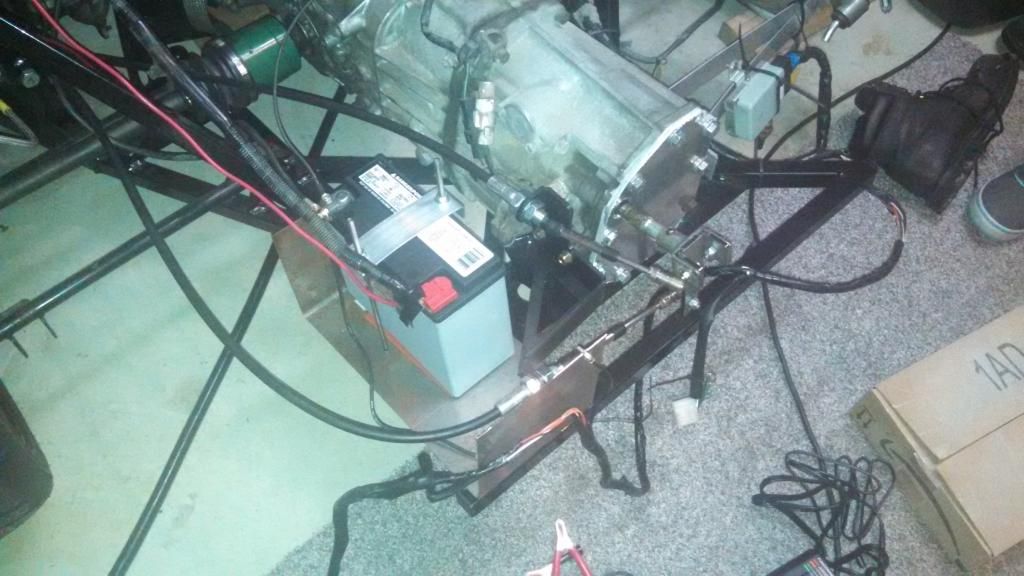
    Battery tray and lightweight battery installed. I actually ordered the generic "BigCrank ETX18L" battery on Amazon and they sent me the name brand version (exact same battery anyway)


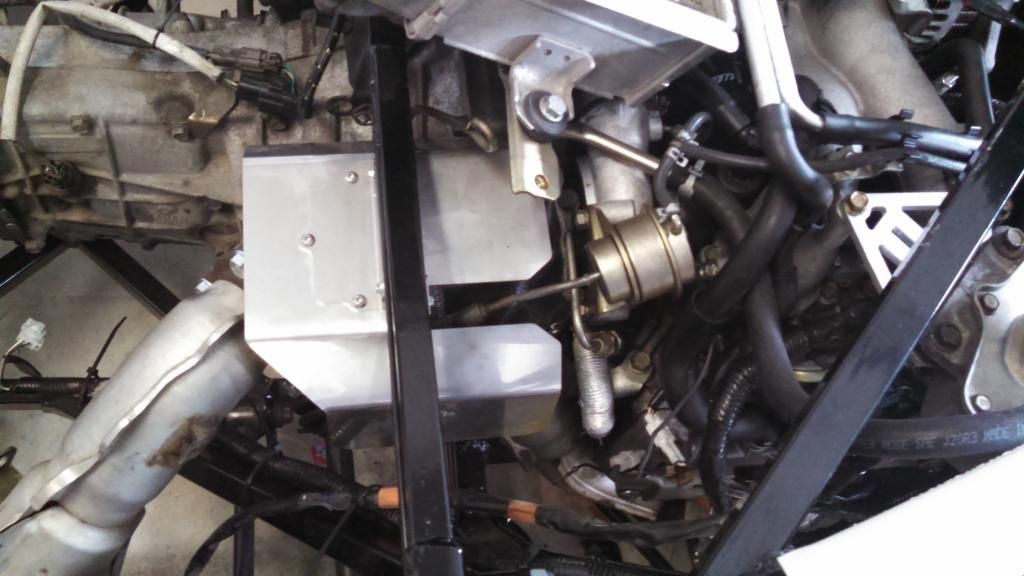
    PTP Turbo blanket and 0DB heat shield installed
    Last edited by billjr212; 02-14-2015 at 12:30 AM.

  29. #69
    Senior Member billjr212's Avatar
    Join Date
    Feb 2011
    Location
    Frankfort, IL
    Posts
    734
    Post Thanks / Like
    I changed paths on the center console and decided again to try to use the WRX center console after seeing the great results others have had. I got far enough along that I'm going to go ahead and start on the body so I can get a better idea on where the dash is going to land and do the final referencing off that point for the center console.

    This is just dropping it in place - no trimming. Obviously it hangs up on the angled aluminum that the parking brake attaches to.


    This is with some trimming across the back and a little trimming of the front bracket since it was landing on the shifter cables.


    It's still sitting up fairly high, but I think I like it. My elbow can rest on top of the center glove box without bumping it while shifting. The bottom edge on the sides just covers the top rail of the FFR center console, so I'll still have to run the FFR aluminum on the sides. At this point, I'm going to go ahead and hang the body panels roughly in place to get pictures of the car to start the registration process moving and also allow me to finalize the position of the dash/center console so they all line up.

  30. #70
    Senior Member billjr212's Avatar
    Join Date
    Feb 2011
    Location
    Frankfort, IL
    Posts
    734
    Post Thanks / Like
    still plugging away at the body, so nothing exciting to report until I manage to confirm it all falls into place correctly. The headlights are the stuff of nightmares. I'm also getting close to the inspection by the state of Illinois and thought I'd post this little solution that some might find useful.

    Illinois requires license plate lights, but does not require a 3rd brake light. I am not a big fan of the little license plate lights FFR provides with the kit. Found this on Amazon that has both integrated into a license plate frame. You do need to drill a small hole through the plate to run the wires, but it's hidden by the frame, of course. I grabbed a plate off the wall from a previous car just to do the test fit. I think I may paint it black later, but all efforts are focused on getting on the road now so I can enjoy the summer driving season.

    https://www.youtube.com/watch?v=WDWlqhPaLgQ

    This is where I found it: http://smile.amazon.com/Custom-Acces...dp/B007LICGLK/
    (obviously I have no idea how great the quality is long term, just that it works for now)

  31. #71

    Join Date
    Oct 2013
    Location
    Puyallup, WA
    Posts
    576
    Post Thanks / Like
    Nice find with the license plate trim. I may have to give that a shot.

  32. #72
    Senior Member Frank818's Avatar
    Join Date
    Jun 2013
    Location
    QC, Canada
    Posts
    5,732
    Post Thanks / Like
    Yeah it's a great idea for cheap! Might have less effect if the plate is located at the bottom of the bumper (behind the trans), but if it's between the tail lights, really nice to integrate both lights.
    Frank
    818 chassis #181 powered by a '93 VW VR6 Turbo GT3582R
    Go-karted Aug 5, 2016 - Then May 19+21, 2017
    Tracked May 27/July 26, 2017
    Build time before being driveable on Sep 27, 2019: over 6000h
    Build Completed Winter 2021

  33. #73
    Research Calibrator sponaugle's Avatar
    Join Date
    Apr 2013
    Location
    Portland, OR
    Posts
    401
    Post Thanks / Like
    Quote Originally Posted by Kurk818 View Post
    Nice find with the license plate trim. I may have to give that a shot.
    nice find! Just ordered one.

  34. #74
    Senior Member billjr212's Avatar
    Join Date
    Feb 2011
    Location
    Frankfort, IL
    Posts
    734
    Post Thanks / Like
    just got the call from the State of Illinois - inspection scheduled for Wednesday!! Geez, I hope the doors go on smoothly (I've already rough fitted them, just need to mount the actual strike and the skin to the door frame). I think I mounted the body on a little too far back because I was having some struggles getting the angle piece mounted to the frame, but a little time with the grinder to open up the holes should get me there.

    Also - did anybody have any weird issues with the final headlight wiring? I've got the headlight housings in and the wiring in place, but have not had a chance to look if I need to buy any new sockets/bulbs, etc.

  35. #75
    Senior Member billjr212's Avatar
    Join Date
    Feb 2011
    Location
    Frankfort, IL
    Posts
    734
    Post Thanks / Like
    Inspection complete! License plates should be here by the end of next week.

  36. #76

    Join Date
    Oct 2013
    Location
    Puyallup, WA
    Posts
    576
    Post Thanks / Like
    Quote Originally Posted by billjr212 View Post
    Inspection complete! License plates should be here by the end of next week.
    Congrats. Wish mine went as smooth yesterday. :/

  37. #77
    Senior Member Frank818's Avatar
    Join Date
    Jun 2013
    Location
    QC, Canada
    Posts
    5,732
    Post Thanks / Like
    Awesome!!!
    Frank
    818 chassis #181 powered by a '93 VW VR6 Turbo GT3582R
    Go-karted Aug 5, 2016 - Then May 19+21, 2017
    Tracked May 27/July 26, 2017
    Build time before being driveable on Sep 27, 2019: over 6000h
    Build Completed Winter 2021

  38. #78
    Senior Member billjr212's Avatar
    Join Date
    Feb 2011
    Location
    Frankfort, IL
    Posts
    734
    Post Thanks / Like
    Kurk - that stinks. What happened?

    In Illinois, the Secretary of State Police come to your house and just run through a quick checklist - confirm frame #, engine and trans serial #'s, check for various features to be sure they are working (brake lights, headlights, license plate light, turn signals, horn, wipers, parking brake), and check for the presence of a couple things (seat belts, mirrors, DOT stamp on windshield glass). Then they attach a VIN tag on the door sill with special rivets and send in their stamp of approval to the state to issue the plates. Probably took 15-20 minutes total.

  39. #79

    Join Date
    Oct 2013
    Location
    Puyallup, WA
    Posts
    576
    Post Thanks / Like
    Quote Originally Posted by billjr212 View Post
    Kurk - that stinks. What happened?

    In Illinois, the Secretary of State Police come to your house and just run through a quick checklist - confirm frame #, engine and trans serial #'s, check for various features to be sure they are working (brake lights, headlights, license plate light, turn signals, horn, wipers, parking brake), and check for the presence of a couple things (seat belts, mirrors, DOT stamp on windshield glass). Then they attach a VIN tag on the door sill with special rivets and send in their stamp of approval to the state to issue the plates. Probably took 15-20 minutes total.
    I believe the WSP officer just didnt know any better. He used the homemade vehicle classification instead of the Kit Vehicle classification which does not call for airbags

    http://www.wsp.wa.gov/traveler/docs/...it_vehicle.pdf

    http://www.wsp.wa.gov/traveler/docs/...or_vehicle.pdf

    I mentioned to them that they are the ones that rivet on the vin panel and his reply was that they do no such thing. Which was also not something i was expecting to hear.

    Im going to a different facility later in the month and hopefully that goes smoother.

  40. #80
    Senior Member billjr212's Avatar
    Join Date
    Feb 2011
    Location
    Frankfort, IL
    Posts
    734
    Post Thanks / Like
    Finally received my plates yesterday! They are just boring random number plates for now, but I'll apply for a personalized plate in due course.

    Also got Replica Parts (Mike Everson) engine cover hinge installed. It fits great and I can't believe I considered skipping this. Completely worth it. I need to figure out a hood prop at some point, but that is pretty easy.

    Last night I worked on my trunk lid pins as well. As others have mentioned, they stick up *way* too high through the trunk lid. Out of stubborness and not wanting to move my brackets, I came up with an easy solution, actually. I drilled out the top nut and welded it up high on the post, near where the locking pin goes through. Then I just used a couple washers to fine tune the height. I'll try to snap a couple photos tonight.

    Frankfort has a weekly cruise night on Thursdays, so I'm hoping to make it this week. Interior is pretty barren (no center console, no dash, and no door panels) but it is looking to be a beautiful day here tomorrow, so I can't resist.

Page 2 of 3 FirstFirst 123 LastLast

Posting Permissions

  • You may not post new threads
  • You may not post replies
  • You may not post attachments
  • You may not edit your posts
  •  

Stewart Transport

Visit our community sponsor