Midwest Classic Insurance

Visit our community sponsor

Thanks Thanks:  0
Likes Likes:  0
Page 6 of 6 FirstFirst ... 456
Results 201 to 220 of 220

Thread: David's Mk4 Build Thread

  1. #201
    Junior Member
    Join Date
    Sep 2013
    Posts
    1
    Post Thanks / Like
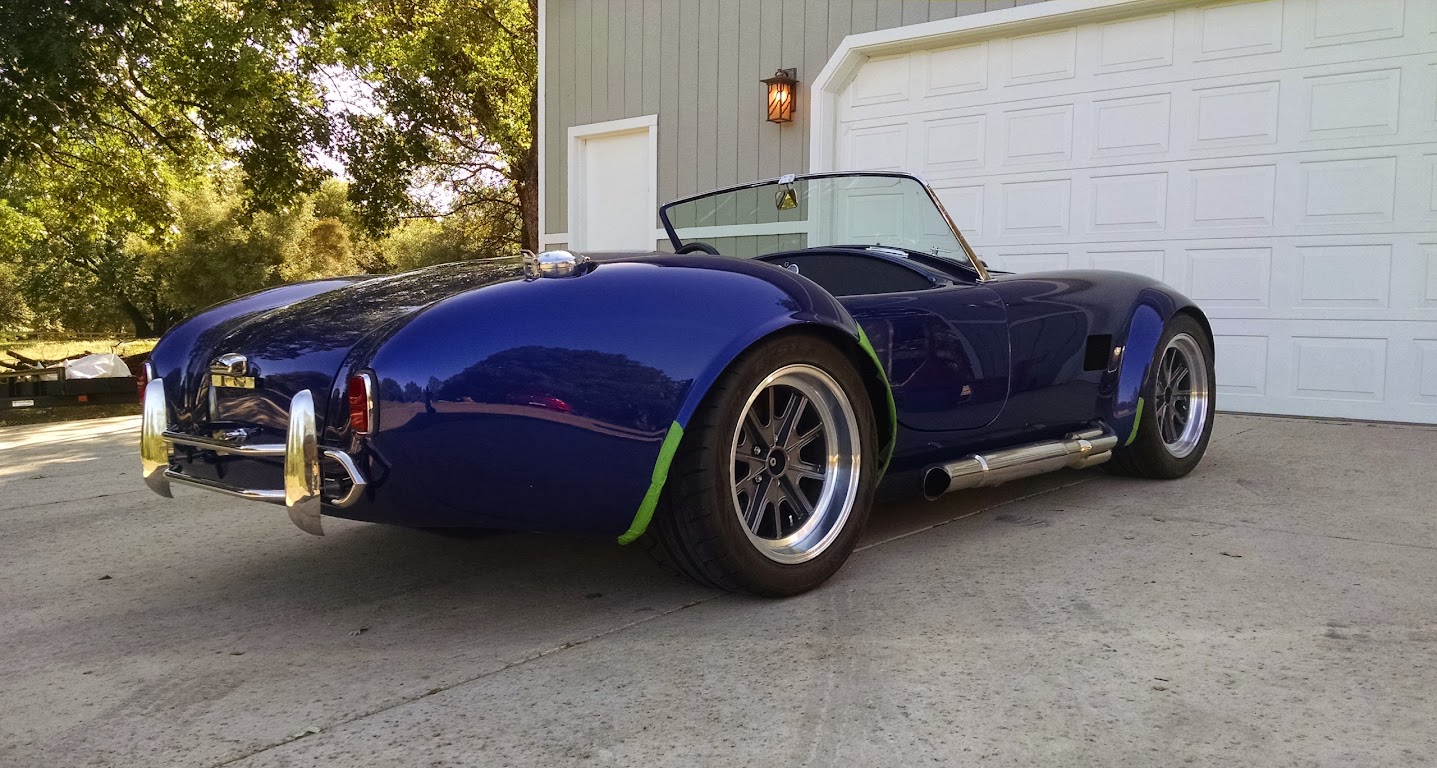
    Wow! That looks amazing! You must be stoked, I can just imagine the excitement and anticipation of turning the last nut and then... being finished! Great job!

  2. #202
    Administrator David's Avatar
    Join Date
    Feb 2011
    Location
    Eldo CA
    Posts
    443
    Post Thanks / Like
    Thanks Edward... Yeah, its pretty exciting!
    Mk4 Build Thread: http://thefactoryfiveforum.com/showthread.php?141-David-s-Mk4-Build-Thread

    GTM Project Build site: http://www.gtmbuild.com

    Few Cool GTM Parts: http://www.gtmbuild.com/parts.htm

  3. #203
    Senior Member The Stig's Avatar
    Join Date
    Feb 2011
    Location
    Charlotte, NC
    Posts
    2,004
    Post Thanks / Like
    Dude... The stance is incredible.

    And it's just amazing to me that the Coyote really does fit in there. It looks like a beast trying to get out.

    That color choice is dead on for this car. Ken really does some nice work.

    Congrats Dave. I know you're stoked, and who in the world could blame you!

    Mike
    The Stig

    Some say, that I only know two facts about ducks, (both being wrong); and that if I could be bothered, I could solve the "da Vinci Code" in 47 seconds...
    All I know is that I'm called "The Stig".
    GTM #0081

  4. #204
    Senior Member R Thomas's Avatar
    Join Date
    Jan 2015
    Location
    Myrtle Beach, SC
    Posts
    153
    Post Thanks / Like
    Blog Entries
    22
    Taking a look at your chassis mods I was wondering have you had the front wheels on with them and checked for interference?

  5. #205
    Junior Member
    Join Date
    Jun 2012
    Location
    Santee, CA
    Posts
    21
    Post Thanks / Like
    Blog Entries
    1
    David, that color is outstanding!! coyote looks right at home in the engine bay! Looking forward to see it a HB!

  6. #206
    Administrator David's Avatar
    Join Date
    Feb 2011
    Location
    Eldo CA
    Posts
    443
    Post Thanks / Like
    Mike, thanks!! Yeah it fits.. barely .

    See you soon

    R Thomas. Oops, forget to check... He he ... Yeah I checked that very early on. Tires hit the F panels before anything else. (275's)

    Howling... Thanks you... Look forward to meeting you in HB....

    Another night til10pm on the car tonight. With help of my g9d friend Matt, we got all the front lights wired. I was able to figure out a socket to use and made some light boxes for my rectangular tail lights out of a highly polished stainless Russ gave me.... Will post pics soon.

    David
    Mk4 Build Thread: http://thefactoryfiveforum.com/showthread.php?141-David-s-Mk4-Build-Thread

    GTM Project Build site: http://www.gtmbuild.com

    Few Cool GTM Parts: http://www.gtmbuild.com/parts.htm

  7. #207
    Administrator David's Avatar
    Join Date
    Feb 2011
    Location
    Eldo CA
    Posts
    443
    Post Thanks / Like
    Passed a significant milestone today. Drove 12 miles round trip to get a brake and light inspection. $160 to check the lights and brakes work and adjust the headlights, about 40 minutes... at this point I was happy to pay it and move on.


    Home safe..

    Another week of working in the shop till 10-11pm after work. My friend Dan Pellow came up from the bay area and we logged another 48 hours on the car over Sat and Sun. Friends Dan LePage and Uwe gave a good chunk of their weekend as well helping with various projects.

    A short list of things we accomplished:


    Cut the front hoop apart and narrowed and clocked the mounting tabs on the hoop. It was a good 3/8" too wide for the mounting holes. No way to mount it as it was.

    Ive done very little TIG welding of SS and havent been behind the torch for months. Overall Im happy enough with the outcome. I had to fill some 1/8 gaps or better in the back due to required rotation of the mounting tab. It turned out pretty good.


    We made up a lower rad hose support that mounts to the chassis


    Friend Uwe created templates and made some panels to fill the gap between the body and the chassis in front of the rear wheel.


    Welded the rear leg support on the roll bar and it caused the bar to draw in about .25" Using a floor jack, we had to spread the bar well over an inch to account for spring back.

    Had to re-fabricate the side pipe mounts... massive job. Took my friend Dan P the better part of the entire day to complete it.

    Had to re-populate a few pins on the PCM. Not so easy with the body on 
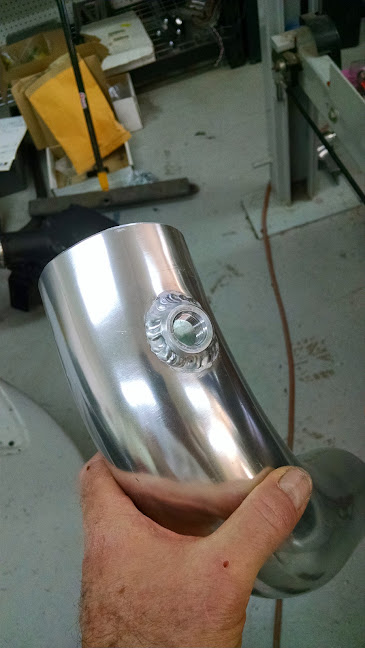
Lower radiator mount was re-fitted and welded after tweaking a few things up front along with fitting the lower radiator aluminum. Mounted the drivers seat and lap belts. Fitted the rear elephant ears. Lowered the fuel tank to get access to one overrider bolt that was not accessible when we installed the body. Installed door panels and some dynamat behind them.

    Again, cant thank my friends enough for all the help... Just no possible way I would be able to make this timeline without their assistance.

    Tomorrow AM, I will be visiting the CHP for a VIN inspection, and a DMV appt to hopefully get a 30 day permit that I will be able to use to shake the car down further and get passed my BAR appt.
    Mk4 Build Thread: http://thefactoryfiveforum.com/showthread.php?141-David-s-Mk4-Build-Thread

    GTM Project Build site: http://www.gtmbuild.com

    Few Cool GTM Parts: http://www.gtmbuild.com/parts.htm

  8. #208
    Senior Member
    Join Date
    Mar 2014
    Location
    Pass Christian, Mississippi
    Posts
    122
    Post Thanks / Like
    David,
    Wonderful build. Example of what's great about this hobby. Innovation. Love the color. May be leaning this way. BTW still waiting for "
    Although a bit expensive, decided to go with the Moroso PS pump remote reservoir as it matched the expansion tank used for the cooling system. Will post images of the installation once it arrives and is installed. Toying with mounting it to the passenger side head or near the f-panel."
    Please give us a pic of this mount. Looks like you either have to grind off the rear mounting tab on the reservoir or fab a bracket. Thanks. Henry
    MK IV complete kit delivered August 21st, 2014. Ford Racing 427w with X heads. IRS. Upgraded Wilwoods, 6 piston front and 4 rear. Tremec t600 and Ram Dual clutch. Holley Terminator EFI.

  9. #209
    cobra Handler skullandbones's Avatar
    Join Date
    Jul 2011
    Location
    Superstition Mtn foothills 5 miles west of Gold Canyon AZ
    Posts
    2,686
    Post Thanks / Like
    Blog Entries
    19
    Hi David,

    Glad to hear you will be at HB. I didn't know you could put a car together that fast! It looks great.

    Good luck finishing up the details.

    WEK.
    FFR MkIII 302 (ATK), EFI 75mm TB with custom box plenum chamber, 24# injectors, 4 tube BBK ceramic, cold air sys, alum flywheel, crane roller rockers, T5, Wilwood pedals, custom five link with Watt's link, 4 rotors, coil overs, power steering with Heidt valve, alum FFR rad, driver's crash bar mod, mini dead pedal mod, quick release steering wheel hub #6046

  10. #210
    Junior Member
    Join Date
    Feb 2011
    Posts
    4
    Post Thanks / Like
    Quote Originally Posted by David View Post
    Cool... Yeah a new thread would be good I think. When you post it, let us know, or post a link in this thread. Thanks! David
    Had a note sitting to do this for a while, but just posted the ABS thread in off-topic:

    http://thefactoryfiveforum.com/showt...-M3-ABS-System

  11. #211
    Senior Member The Stig's Avatar
    Join Date
    Feb 2011
    Location
    Charlotte, NC
    Posts
    2,004
    Post Thanks / Like
    Hi Dave.

    Still winning awards, I see! Your car is spectacular. I really hate that I wasn't able to be there.

    Congrats on building another high-bar example for the rest of us to strive for!

    Take care. Hope to see you guys before long.

    Mike
    The Stig

    Some say, that I only know two facts about ducks, (both being wrong); and that if I could be bothered, I could solve the "da Vinci Code" in 47 seconds...
    All I know is that I'm called "The Stig".
    GTM #0081

  12. #212
    Senior Member
    Join Date
    Apr 2012
    Location
    Wilmington, CA
    Posts
    112
    Post Thanks / Like
    Wow! That's all I can say. Wow!

  13. #213
    Administrator David's Avatar
    Join Date
    Feb 2011
    Location
    Eldo CA
    Posts
    443
    Post Thanks / Like
    The last 6 weeks has been a literal blur…but… WE MADE OUR GOAL!

    It had been a huge thrash to get the car done in time for the HB event, but with a huge amount of help from Dan Lepage, Matt Menning, Dan Pellow and Ken Pike and team for turning on the afterburners to complete the gorgeous paint job, it would not have happened. I am sincerely thankful for all your help. These guys gave weekends and evenings for over a month...

    Car looked like this just over a month ago


    Then like this about two - three weeks ago.


    Then this a week later. She sorta looks complete but there was a TON left to do including the full interior.


    Countless hours since were spent on several details covering wiring, interior tasks and several other things that needed attn such as the intake.

    The MAF had to be brought closer to the TB and a PCV bung needed to be welded in after the MAF and before the TB per Ford Motorsports. Man I get nervous welding Alum in such a visible place. Turned out OK this time… Per Ford, not having this will throw the mixture way off.


    After moving the MAF and adding the PCV connection in front of the TB, the engine ran much cleaner.

    1am the night before the leaving for HB, Matt and I decided to throw in the towel and felt we got the car close enough to make the trip.

    After taking care of some work in the morning, Dan, Farhad and myself headed towards HB and on our way to pick up Dan Pellow at our meeting spot in Patterson CA.

    Trying to decompress and hoping nothing goes wrong as we head to LA…

    Mk4 Build Thread: http://thefactoryfiveforum.com/showthread.php?141-David-s-Mk4-Build-Thread

    GTM Project Build site: http://www.gtmbuild.com

    Few Cool GTM Parts: http://www.gtmbuild.com/parts.htm

  14. #214
    Administrator David's Avatar
    Join Date
    Feb 2011
    Location
    Eldo CA
    Posts
    443
    Post Thanks / Like
    Ooops… spoke to soon…


    Only had a couple issues on the road. Failed electrical component and the fuel pump died on a lonely strip of Hwy 156 about 2 hours out. We were able to troubleshoot and fix in about 30 minutes.


    Made it out to the PCH we took in the sites and eventually stopped to stretch our legs and took in the view…


    Good friend Dan taking on some driving duties


    After getting to HB a bit late, we got some dinner at Fred’s and went back to the parking garage and removed the “Road Warrior” paint protection. We werent sure what to expect, but were super impressed how easy it came off. After removing, I had one TINY little nick after nearly 600 miles on the road road with fresh fresh paint… Im a believer…

    Mk4 Build Thread: http://thefactoryfiveforum.com/showthread.php?141-David-s-Mk4-Build-Thread

    GTM Project Build site: http://www.gtmbuild.com

    Few Cool GTM Parts: http://www.gtmbuild.com/parts.htm

  15. #215
    Administrator David's Avatar
    Join Date
    Feb 2011
    Location
    Eldo CA
    Posts
    443
    Post Thanks / Like
    The morning of the show, we woke, positioned the cars and then had breakfast on Main Street downtown HB. What a perfect morning…


    Great friends Farhad(Embo), Dan LePage and Dan Pellow…

    Here she is… in one piece and looking pretty good IMHO.


    We were presented with the “Best Engine” trophy… It was a big big suprise but very much appreciated..


    Packed up early Sunday morning and made the over 10 hour 570 mile drive home up 101 and then 5 without an issue. We couldn’t have asked for better weather. It was just incredible…


    David
    Mk4 Build Thread: http://thefactoryfiveforum.com/showthread.php?141-David-s-Mk4-Build-Thread

    GTM Project Build site: http://www.gtmbuild.com

    Few Cool GTM Parts: http://www.gtmbuild.com/parts.htm

  16. #216
    Senior Member CraigS's Avatar
    Join Date
    Feb 2011
    Location
    Blacksburg, Va
    Posts
    4,732
    Post Thanks / Like
    Great report David. From what I have read your leaving early Sunday made you miss a downpour so that worked out great. Congrats on the car and the trophy!
    FFR MkII, 408W, Tremec TKO 500, 2015 IRS, DA QA1s, Forte front bar, APE hardtop.

  17. #217
    Senior Member The Stig's Avatar
    Join Date
    Feb 2011
    Location
    Charlotte, NC
    Posts
    2,004
    Post Thanks / Like
    OMG! Fresh built, 0 miles MkIV. Driven 570 miles to Huntington Beach, and 570 miles back home...? That's gutsy Dave.

    That must have been A BLAST!!!!! Especially to be able make the trip down with friends!!!

    Way to go Buddy! That's what these cars are all about.

    Mike
    The Stig

    Some say, that I only know two facts about ducks, (both being wrong); and that if I could be bothered, I could solve the "da Vinci Code" in 47 seconds...
    All I know is that I'm called "The Stig".
    GTM #0081

  18. #218
    Administrator David's Avatar
    Join Date
    Feb 2011
    Location
    Eldo CA
    Posts
    443
    Post Thanks / Like
    Thanks Craig and Mike!

    Mike, I did have one earlier shake down ride about a week before when a group of us drove over the hill to Tahoe before the car was nearly complete. Good thing as I learned that the steering system needed some work!

    ... oh and we got caught in this


    Still need to clean the under side of the car.
    Mk4 Build Thread: http://thefactoryfiveforum.com/showthread.php?141-David-s-Mk4-Build-Thread

    GTM Project Build site: http://www.gtmbuild.com

    Few Cool GTM Parts: http://www.gtmbuild.com/parts.htm

  19. #219
    Administrator David's Avatar
    Join Date
    Feb 2011
    Location
    Eldo CA
    Posts
    443
    Post Thanks / Like
    I had kept the wind wings from the FFR1046 and wanted to use them on the new build. After trying to mount them using the original method of using the windshield screws, it became apparent that it they would not work.

    The new design with the pinch clamps looked great so decided to make a set for the car.

    Heres a picture of the process and also of the finished part.


    On the drive home from HB, we started to hear a pretty loud rattling noise that got louder and more frequent with time. Figured that something had come loose. The other day when driving in the neighborhood I started trying to isolate it, and it appears that it is coming from the FFR stainless side pipes I bought with the kit. Both of them appear to have a rattle when tapping on them but will investigate furthure.

    I did a search and see that there was a problem with the baffles coming loose them around the time that I purchased the kit and it appeared that FFR was good about replacing them so need to give them a call. Ugh...

    David
    Mk4 Build Thread: http://thefactoryfiveforum.com/showthread.php?141-David-s-Mk4-Build-Thread

    GTM Project Build site: http://www.gtmbuild.com

    Few Cool GTM Parts: http://www.gtmbuild.com/parts.htm

  20. #220
    Not a waxer Jeff Kleiner's Avatar
    Join Date
    Feb 2011
    Location
    Bloomington, Indiana
    Posts
    8,094
    Post Thanks / Like
    David,
    RE: Sidepipe rattle. Yes, the loose baffle is a long standing problem in both the stainless as well as mild steel pipes however I have encountered another source of a rattling noise on two different cars with SS pipes. Both had cracked where the hanger tab is welded to the muffler section. Neither had torn completely loose but as the pipes moved the split creaked and rattled. The same has been known to occur with the mild steel pipes as well but I think the stainless is even more prone to it. With either type I ALWAYS recommend to install them with only one bolt rather than 2 at the pipe to hanger connection and to make it snug rather than clamping the hanger tight to the tab. By doing this the weight is supported but the pipes have more freedom of movement rotationally. With both bolts clamped tight it is not uncommon for the tab to fatigue from movement and tear out of the muffler.

    Cheers,
    Jeff

Page 6 of 6 FirstFirst ... 456

Posting Permissions

  • You may not post new threads
  • You may not post replies
  • You may not post attachments
  • You may not edit your posts
  •  

FFMetal

Visit our community sponsor