FormaCars

Visit our community sponsor

Thanks Thanks:  0
Likes Likes:  3
Page 4 of 12 FirstFirst ... 23456 ... LastLast
Results 121 to 160 of 477

Thread: JJ's 818s Build

  1. #121
    Senior Member Tamra's Avatar
    Join Date
    Apr 2014
    Location
    Shelton, CT
    Posts
    1,011
    Post Thanks / Like
    Quote Originally Posted by TouchStone View Post
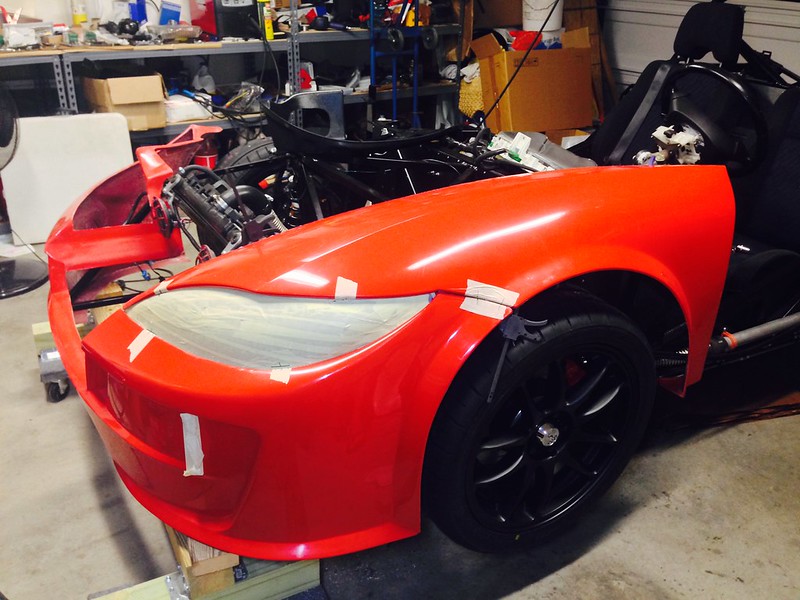
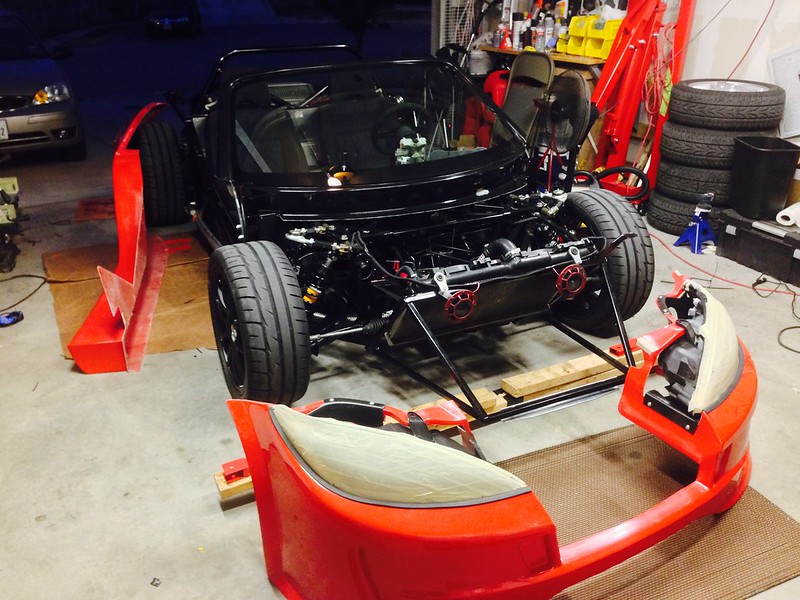
    Started the headlight installation. This is not an easy task. I can imagine that once everything is finally seated well, then the headlight alignment will be way off.
    Just wait until you add the hood and the windshield into the mix...
    Tamra
    Building 818SR #297 picked up 10/25/14 with Andrew (xxguitarist)
    First start 12/21/14, First "drive" 1/17/15
    First Dyno at EFI Logics 3/7/15- 310whp at 15psi for break in, full spool by ~3500rpm!
    First autocross 3/29/15
    1st Registered 818 in Connecticut 7/24/2015. 9 months - 1 day from kit pickup!

  2. #122
    Senior Member TouchStone's Avatar
    Join Date
    Sep 2014
    Location
    Dallas, TX
    Posts
    512
    Post Thanks / Like
    Blog Entries
    1
    Quote Originally Posted by 07FIREBLADE View Post
    Since when did wayne offer an exhaust? Specs, sounds pretty good.
    That was my reaction as well. It is a stainless steel bellmouth into a 3" Vibrant muffler. I believe it is this part: http://vibrantperformance.com/catalo...products_id=29
    818S Chassis #288 2.5L 323hp
    Ordered: 9/19/14 Received Kit: 11/2/14 First Start: 5/31/15 First Drive: 6/7/15 Registered: 3/10/2016 Completed: 2/10/2017
    Status: Complete Build Thread Sold 9/22/2017
    joshuajach.com

  3. #123
    Senior Member TouchStone's Avatar
    Join Date
    Sep 2014
    Location
    Dallas, TX
    Posts
    512
    Post Thanks / Like
    Blog Entries
    1
    Quote Originally Posted by Tamra View Post
    Just wait until you add the hood and the windshield into the mix...
    Thanks for the good news. Took me a full day to get that one headlight in.
    818S Chassis #288 2.5L 323hp
    Ordered: 9/19/14 Received Kit: 11/2/14 First Start: 5/31/15 First Drive: 6/7/15 Registered: 3/10/2016 Completed: 2/10/2017
    Status: Complete Build Thread Sold 9/22/2017
    joshuajach.com

  4. #124
    Senior Member
    Join Date
    Jan 2012
    Posts
    1,112
    Post Thanks / Like
    Also wait until you go and aim the headlights. You cant reach the adjusters with everything bolt together. Its a real pain good luck you will be fine.

    On another note how do you like his exhaust, have you driven with it in gocart form or just threw it on there. If given the choice would you go quieter to get rid of drone. Only reason why Im asking is because I esentially have the same setup if its from vibrant just routed different and mine drones like no other when cruising. How much was his setup? Its not listed on his site.

  5. #125
    Senior Member TouchStone's Avatar
    Join Date
    Sep 2014
    Location
    Dallas, TX
    Posts
    512
    Post Thanks / Like
    Blog Entries
    1
    The video is everything I've done with it. At idle it is just as loud as the donor cat but the vibrant muffler makes a smoother sound. I wont be driving it until I get the car tuned on the 20th, will have more video then. Wayne sold it for $375.
    818S Chassis #288 2.5L 323hp
    Ordered: 9/19/14 Received Kit: 11/2/14 First Start: 5/31/15 First Drive: 6/7/15 Registered: 3/10/2016 Completed: 2/10/2017
    Status: Complete Build Thread Sold 9/22/2017
    joshuajach.com

  6. #126
    nkw8181's Avatar
    Join Date
    Sep 2013
    Location
    Dallas, TX
    Posts
    762
    Post Thanks / Like
    Looks like you will beat me to the tune. Looking good.
    Nolan
    65 coupe Gen 3 "Phoenix" build
    http://thefactoryfiveforum.com/showt...032#post297032

    818 s (with r windscreen ) 350 rwhp. Registered and street legal (SOLD)

  7. #127
    Junior Member
    Join Date
    Jul 2015
    Posts
    3
    Post Thanks / Like
    Keep up the great, fast paced work! What's the quickest someone has ever put one of these together?

  8. #128
    Senior Member Bob_n_Cincy's Avatar
    Join Date
    Sep 2012
    Location
    Cincinnati OH
    Posts
    3,903
    Post Thanks / Like
    Quote Originally Posted by ZenitramNaes View Post
    Keep up the great, fast paced work! What's the quickest someone has ever put one of these together?
    I think Wayne (super human) has done a lot of Factory five cars. He is trying to do one in 40 hour.
    The first timers are taking 200 to 800 hours. (my wild guess) A lot depends on how stock you want to go.
    Bob
    818S #22 Candy Blue Frame, Front Gas Tank, 2.5L Turbo, Rear radiator, Shortened Transmission, Wookiee Compatible, Console mounted MR2 Shifter, Custom ECU panel, AWIC soon
    My Son Michael's Turbo ICE Build X22 http://thefactoryfiveforum.com/showt...rts-818S-Build
    My Electric Supercar Build X21 (on hold until winter) http://thefactoryfiveforum.com/showt...e-Build-Thread

  9. #129
    Senior Member TouchStone's Avatar
    Join Date
    Sep 2014
    Location
    Dallas, TX
    Posts
    512
    Post Thanks / Like
    Blog Entries
    1
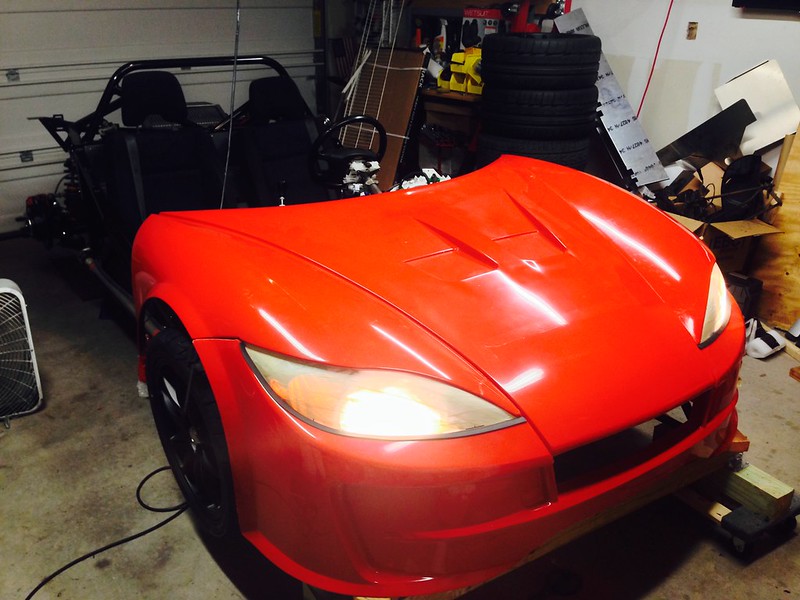
    Worked on the other headlight. Took a time-lapse this time, it is ridiculous the number of times we installed and removed the headlight to get it to fit right.


    Only the have the buckets and headlights bolted in.

    818S Chassis #288 2.5L 323hp
    Ordered: 9/19/14 Received Kit: 11/2/14 First Start: 5/31/15 First Drive: 6/7/15 Registered: 3/10/2016 Completed: 2/10/2017
    Status: Complete Build Thread Sold 9/22/2017
    joshuajach.com

  10. #130
    Senior Member Tamra's Avatar
    Join Date
    Apr 2014
    Location
    Shelton, CT
    Posts
    1,011
    Post Thanks / Like
    That looks great! Were you able to get the hood to sit flush? Be prepared to do a bit more trimming when you install the windshield, as it pushes everything out and forward in awkward ways.
    Tamra
    Building 818SR #297 picked up 10/25/14 with Andrew (xxguitarist)
    First start 12/21/14, First "drive" 1/17/15
    First Dyno at EFI Logics 3/7/15- 310whp at 15psi for break in, full spool by ~3500rpm!
    First autocross 3/29/15
    1st Registered 818 in Connecticut 7/24/2015. 9 months - 1 day from kit pickup!

  11. #131
    Senior Member TouchStone's Avatar
    Join Date
    Sep 2014
    Location
    Dallas, TX
    Posts
    512
    Post Thanks / Like
    Blog Entries
    1
    Quote Originally Posted by Tamra View Post
    That looks great! Were you able to get the hood to sit flush? Be prepared to do a bit more trimming when you install the windshield, as it pushes everything out and forward in awkward ways.
    The hood looks like it sits 2-4mm too high all around. What is a good way to trim the bottom edge of the hood and get it even. How about the wiper kit, is there any major body alignment that needs to happen to get the wiper kit installed?
    818S Chassis #288 2.5L 323hp
    Ordered: 9/19/14 Received Kit: 11/2/14 First Start: 5/31/15 First Drive: 6/7/15 Registered: 3/10/2016 Completed: 2/10/2017
    Status: Complete Build Thread Sold 9/22/2017
    joshuajach.com

  12. #132
    Senior Member TouchStone's Avatar
    Join Date
    Sep 2014
    Location
    Dallas, TX
    Posts
    512
    Post Thanks / Like
    Blog Entries
    1


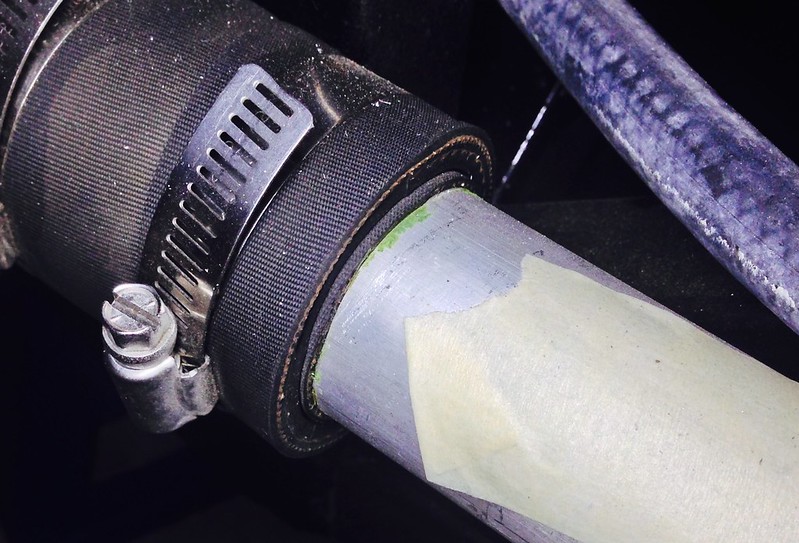
    Is this a slow coolant leak? The clam is very tight.
    818S Chassis #288 2.5L 323hp
    Ordered: 9/19/14 Received Kit: 11/2/14 First Start: 5/31/15 First Drive: 6/7/15 Registered: 3/10/2016 Completed: 2/10/2017
    Status: Complete Build Thread Sold 9/22/2017
    joshuajach.com

  13. #133
    Senior Member
    Join Date
    Aug 2013
    Posts
    121
    Post Thanks / Like
    Try replacing the worm clamp with an oem spring type clamp. Often times what happens is the rubber starts to give a little after tightening, especially when heated, the worm clamps cant apply any more tension, then they leak.

  14. #134
    Moonlight Performance
    Hindsight's Avatar
    Join Date
    May 2014
    Location
    Atlanta
    Posts
    3,402
    Post Thanks / Like
    I'm a huge fan of the constant tension spring clamps icky mentioned. You can get them from mcMaster or there is also a seller on Amazon who sells them (same ones as mcMaster). They are rated for their ideal EXPANDED diameter. So take some calipers to the hose (which has been attached to whatever you attach it to) and get a measurement then find the closest spring clamp to it. Nearly all (if not all) OEMs use these exclusively and have for decades.

    I will say that what you show above might not be an issue. Many coolants are designed to self-seal when exposed to air (like blood), and a very tiny amount of crusted coolant showing right at the edge of the hose is not necessarily an issue, at least, not in my experience. I see that on two of my cars and haven't had to add coolant in over two years to either of them.

    The other option is instead of using those dual layer adapter/coupler setups from FFR, you can just buy another WRX radiator hose and cut it. Do that and you don't need any of the couplers. I have a pic of it in my build thread.

  15. #135
    Senior Member TouchStone's Avatar
    Join Date
    Sep 2014
    Location
    Dallas, TX
    Posts
    512
    Post Thanks / Like
    Blog Entries
    1

    Tuning

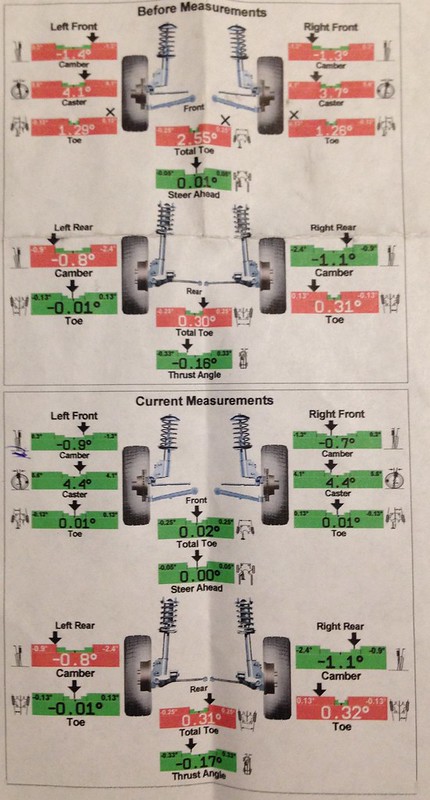
    A stressful couple of days. I attempted to arrange an alignment and tune at two different shops on the same day to minimize time off from work and trailer rental. Needless to say that didn't go as planned. The alignment shop wasn't able to fix the front camber since I mounted the lower control arms on the wrong points. However, they were able to align the rears which was good enough to get it tuned. Then at the tuning shop their main tuner was out sick . Next day, had the shop moved the lower control arms outward and then put it on the dyno.


    It pulled about 205hp, due to the injectors being too small and needing an 3port boost solenoid.

    Then took it back to the alignment shop for the front, no problem there except that the aluminum panel on the bottom caught on the uhaul trailer on the last load .


    A couple stressful days but at the end of it I'm still very happy. Nothing major wrong and the car goes like hell!
    Last edited by TouchStone; 07-21-2015 at 10:49 PM.
    818S Chassis #288 2.5L 323hp
    Ordered: 9/19/14 Received Kit: 11/2/14 First Start: 5/31/15 First Drive: 6/7/15 Registered: 3/10/2016 Completed: 2/10/2017
    Status: Complete Build Thread Sold 9/22/2017
    joshuajach.com

  16. #136
    Senior Member Tamra's Avatar
    Join Date
    Apr 2014
    Location
    Shelton, CT
    Posts
    1,011
    Post Thanks / Like
    Congrats!!!!

    What were your final alignment settings? Also, which control arms do you have and which points did you have to move them to?

    We wanted more camber out of our aluminum arms, but when we tried to move them to the outer hole we ran out of the tie rod length, so instead we had to cut the upper arms shorter to bring the top in.
    Tamra
    Building 818SR #297 picked up 10/25/14 with Andrew (xxguitarist)
    First start 12/21/14, First "drive" 1/17/15
    First Dyno at EFI Logics 3/7/15- 310whp at 15psi for break in, full spool by ~3500rpm!
    First autocross 3/29/15
    1st Registered 818 in Connecticut 7/24/2015. 9 months - 1 day from kit pickup!

  17. #137
    Senior Member Tamra's Avatar
    Join Date
    Apr 2014
    Location
    Shelton, CT
    Posts
    1,011
    Post Thanks / Like
    Oh yeah, and we had the exact same panel get bent on the u-haul trailer one time. Those trailers are not made for sports cars!
    Tamra
    Building 818SR #297 picked up 10/25/14 with Andrew (xxguitarist)
    First start 12/21/14, First "drive" 1/17/15
    First Dyno at EFI Logics 3/7/15- 310whp at 15psi for break in, full spool by ~3500rpm!
    First autocross 3/29/15
    1st Registered 818 in Connecticut 7/24/2015. 9 months - 1 day from kit pickup!

  18. #138
    818 builder metalmaker12's Avatar
    Join Date
    Mar 2012
    Location
    Exeter R.I
    Posts
    2,834
    Post Thanks / Like
    Blog Entries
    1
    I
    Quote Originally Posted by TouchStone View Post
    A stressful couple of days. I attempted to arrange an alignment and tune at two different shops on the same day to minimize time off from work and trailer rental. Needless to say that didn't go as planned. The alignment shop wasn't able to fix the front camber since I mounted the lower control arms on the wrong points. However, they were able to align the rears which was good enough to get it tuned. Then at the tuning shop their main tuner was out sick . Next day, had the shop moved the lower control arms outward and then put it on the dyno.


    It pulled about 205hp, due to the injectors being too small and needing an 3port boost solenoid.

    Then took it back to the alignment shop for the front, no problem there except that the aluminum panel on the bottom caught on the uhaul trailer on the last load .


    A couple stressful days but at the end of it I'm still very happy. Nothing major wrong and the car goes like hell!
    What turbo are you running to need bigger injectors and you can tune with the stock boost solenoid no prob, so I am confused. But any how congrats on getting the alignment sorted
    818S frame #13 Jdm version 8 ej207

  19. #139
    Senior Member TouchStone's Avatar
    Join Date
    Sep 2014
    Location
    Dallas, TX
    Posts
    512
    Post Thanks / Like
    Blog Entries
    1
    Quote Originally Posted by metalmaker12 View Post
    What turbo are you running to need bigger injectors and you can tune with the stock boost solenoid no prob, so I am confused. But any how congrats on getting the alignment sorted
    The injectors came from my 2.0L donor, which has been rebuilt as a 2.5L hybrid. This is also the reason I was only getting 10psi of boost. They only recommended a boost solenoid and a bigger turbo (currently TD04) for even more hp.

    Quote Originally Posted by Tamra View Post
    Congrats!!!!

    What were your final alignment settings? Also, which control arms do you have and which points did you have to move them to?

    We wanted more camber out of our aluminum arms, but when we tried to move them to the outer hole we ran out of the tie rod length, so instead we had to cut the upper arms shorter to bring the top in.
    I've got control arms from a 2003 wagon. They were mounted on the inner lower points and I could not shorten the uppers enough had a lot of positive camber. The correct position was the lower outer mount points. This was good news to me since it will largely fix my terrible turning radius.

    The "Before Measurements" would be the maximum camber I could get with the lower arms on the outer holes and the upper arms as short as possible (no cutting).

    818S Chassis #288 2.5L 323hp
    Ordered: 9/19/14 Received Kit: 11/2/14 First Start: 5/31/15 First Drive: 6/7/15 Registered: 3/10/2016 Completed: 2/10/2017
    Status: Complete Build Thread Sold 9/22/2017
    joshuajach.com

  20. #140
    Senior Member TouchStone's Avatar
    Join Date
    Sep 2014
    Location
    Dallas, TX
    Posts
    512
    Post Thanks / Like
    Blog Entries
    1
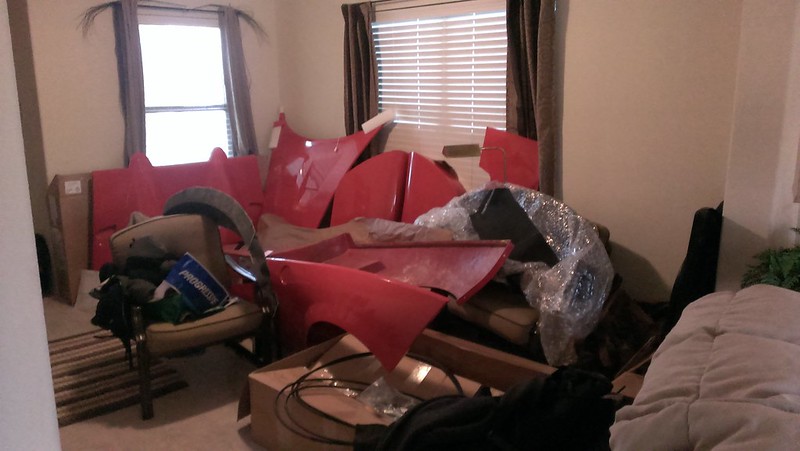
    Windshield installed and cleaned.


    Finally starting to get these things off the floor. Its been this way for seven months.

    818S Chassis #288 2.5L 323hp
    Ordered: 9/19/14 Received Kit: 11/2/14 First Start: 5/31/15 First Drive: 6/7/15 Registered: 3/10/2016 Completed: 2/10/2017
    Status: Complete Build Thread Sold 9/22/2017
    joshuajach.com

  21. #141
    Senior Member Flamshackle's Avatar
    Join Date
    Jun 2011
    Location
    Aotearoa (New Zealand)
    Posts
    648
    Post Thanks / Like
    Quote Originally Posted by TouchStone View Post
    Windshield installed and cleaned.


    Finally starting to get these things off the floor. Its been this way for seven months.

    This is awesome! hahaha
    __________________________________________________ _____________

    That man is no fool, who gives what he cannot keep to gain what he cannot lose
    __________________________________________________ _____________

  22. #142
    Senior Member wleehendrick's Avatar
    Join Date
    Jul 2012
    Location
    Encinitas, CA
    Posts
    1,653
    Post Thanks / Like
    Blog Entries
    2
    Quote Originally Posted by TouchStone View Post
    Finally starting to get these things off the floor. Its been this way for seven months.
    Ha, the next time my wife complains about paying for a storage unit (where my body panels are) I'll show her that!

  23. #143
    nkw8181's Avatar
    Join Date
    Sep 2013
    Location
    Dallas, TX
    Posts
    762
    Post Thanks / Like
    Looking good!
    Nolan
    65 coupe Gen 3 "Phoenix" build
    http://thefactoryfiveforum.com/showt...032#post297032

    818 s (with r windscreen ) 350 rwhp. Registered and street legal (SOLD)

  24. #144
    Senior Member TouchStone's Avatar
    Join Date
    Sep 2014
    Location
    Dallas, TX
    Posts
    512
    Post Thanks / Like
    Blog Entries
    1
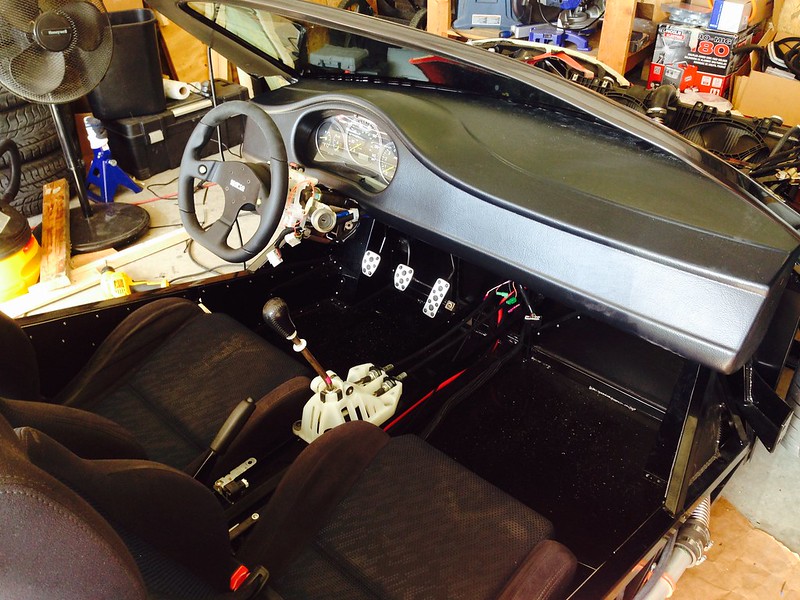
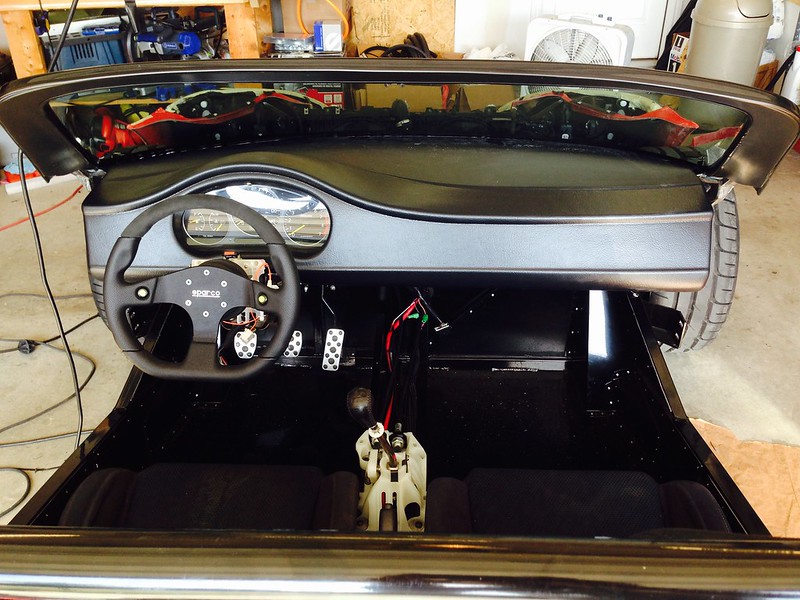
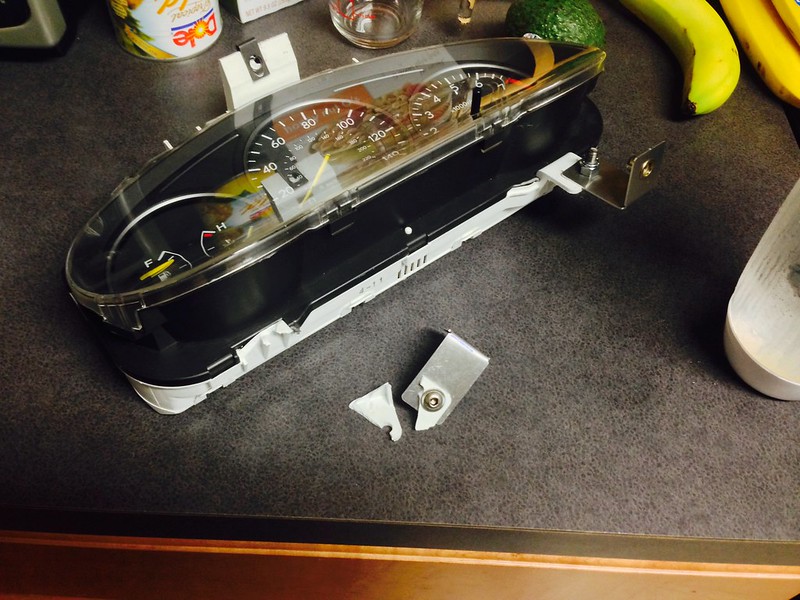
    Got the dash installed. Made a couple stupid mistakes like breaking off a tab on the gauge cluster and drilling some badly aligned holes. A bit of epoxy will have to do.

    I'm concerned about the dash having only 2 screws to hold the front up. I don't plan on having a center console to help hold the middle either so I'm worried a single afternoon in the Texas sun will be enough to deform the dash and sag around the mount points. Anyone have a solution for better securing the dash?


    818S Chassis #288 2.5L 323hp
    Ordered: 9/19/14 Received Kit: 11/2/14 First Start: 5/31/15 First Drive: 6/7/15 Registered: 3/10/2016 Completed: 2/10/2017
    Status: Complete Build Thread Sold 9/22/2017
    joshuajach.com

  25. #145
    Moonlight Performance
    Hindsight's Avatar
    Join Date
    May 2014
    Location
    Atlanta
    Posts
    3,402
    Post Thanks / Like
    The padded dash looks very nice. You've progressed very quickly on this build!

  26. #146
    Senior Member billjr212's Avatar
    Join Date
    Feb 2011
    Location
    Frankfort, IL
    Posts
    734
    Post Thanks / Like
    To better support the dash, you can just make an extra bracket or 2 from thin aluminum that look like the FFR ones. Doesn't have to be super thick, just use something in the range of the aluminum that is all over the rest of the car. Just make them wider. I replaced the right side bracket with one that is about 4-5 inches wide and attaches to the frame in 2 spots and the bottom of the dash in 2 spots because the FFR one wasn't the right size for where my dash ended up. I am going to have a center console though to support the middle.

    But you could just as easily keep the 2 FFR brackets on the end, and make something 6-8 inches wide with 2 or 3 mount points and tuck it under the center of the dash.

    Suggest putting your doors on first though to make sure the dash lines up right.

    I also put a strip of foam weatherstripping on the cowl where the dash sits near the windshield plus a piece of rubber moulding on the leading edge of the dash, so it tucks up tight with the windshield. Then I put a black 1/4-20 bolt through each corner of the dash to the fiberglass cowl to keep it in place. No need for a rivnut as it's easy to reach up under the dash even with the doors in place.

  27. #147
    Senior Member TouchStone's Avatar
    Join Date
    Sep 2014
    Location
    Dallas, TX
    Posts
    512
    Post Thanks / Like
    Blog Entries
    1
    Quote Originally Posted by Hindsight View Post
    The padded dash looks very nice. You've progressed very quickly on this build!
    Ah...but it is not padded.

    Quote Originally Posted by billjr212 View Post
    To better support the dash, you can just make an extra bracket or 2 from thin aluminum that look like the FFR ones. Doesn't have to be super thick, just use something in the range of the aluminum that is all over the rest of the car. Just make them wider. I replaced the right side bracket with one that is about 4-5 inches wide and attaches to the frame in 2 spots and the bottom of the dash in 2 spots because the FFR one wasn't the right size for where my dash ended up. I am going to have a center console though to support the middle.

    But you could just as easily keep the 2 FFR brackets on the end, and make something 6-8 inches wide with 2 or 3 mount points and tuck it under the center of the dash.

    Suggest putting your doors on first though to make sure the dash lines up right.

    I also put a strip of foam weatherstripping on the cowl where the dash sits near the windshield plus a piece of rubber moulding on the leading edge of the dash, so it tucks up tight with the windshield. Then I put a black 1/4-20 bolt through each corner of the dash to the fiberglass cowl to keep it in place. No need for a rivnut as it's easy to reach up under the dash even with the doors in place.
    I like the FFR styled brackets since they mount at a single point, which allows for a slight adjustment of the dash left and right. I think I'll install a couple more of these and see how it holds up. Once the doors go on I'm thinking possibly an aluminum angle beam from the leftovers I used on the front bumper. I've thought of the weather stripping as well .
    818S Chassis #288 2.5L 323hp
    Ordered: 9/19/14 Received Kit: 11/2/14 First Start: 5/31/15 First Drive: 6/7/15 Registered: 3/10/2016 Completed: 2/10/2017
    Status: Complete Build Thread Sold 9/22/2017
    joshuajach.com

  28. #148
    Senior Member Tamra's Avatar
    Join Date
    Apr 2014
    Location
    Shelton, CT
    Posts
    1,011
    Post Thanks / Like
    We put velcro under the dash along the windshield edge (out of sight) and it feels much more secure now.
    Tamra
    Building 818SR #297 picked up 10/25/14 with Andrew (xxguitarist)
    First start 12/21/14, First "drive" 1/17/15
    First Dyno at EFI Logics 3/7/15- 310whp at 15psi for break in, full spool by ~3500rpm!
    First autocross 3/29/15
    1st Registered 818 in Connecticut 7/24/2015. 9 months - 1 day from kit pickup!

  29. #149
    Moonlight Performance
    Hindsight's Avatar
    Join Date
    May 2014
    Location
    Atlanta
    Posts
    3,402
    Post Thanks / Like
    Quote Originally Posted by TouchStone View Post
    Ah...but it is not padded.
    Really? It looks exactly like my padded dash. The padding is very thin.... 1/8" maybe a little less. Guess it's tough to tell from a pic.

    Love those white body panels though

  30. #150
    Senior Member billjr212's Avatar
    Join Date
    Feb 2011
    Location
    Frankfort, IL
    Posts
    734
    Post Thanks / Like
    Quote Originally Posted by TouchStone View Post
    I like the FFR styled brackets since they mount at a single point, which allows for a slight adjustment of the dash left and right. I think I'll install a couple more of these and see how it holds up. Once the doors go on I'm thinking possibly an aluminum angle beam from the leftovers I used on the front bumper. I've thought of the weather stripping as well .
    The bigger issue I had with the doors went on was actually up and down. If the height isn't just right, it's really obvious/awkward at the point where the dash and door meet. The super rigid FFR brackets don't provide a lot of flexibility in that without stacking loads of washers here or there. That's why I suggested door panels first before fixing the location of the dash.

  31. #151
    Senior Member TouchStone's Avatar
    Join Date
    Sep 2014
    Location
    Dallas, TX
    Posts
    512
    Post Thanks / Like
    Blog Entries
    1
    Quote Originally Posted by billjr212 View Post
    The bigger issue I had with the doors went on was actually up and down. If the height isn't just right, it's really obvious/awkward at the point where the dash and door meet. The super rigid FFR brackets don't provide a lot of flexibility in that without stacking loads of washers here or there. That's why I suggested door panels first before fixing the location of the dash.
    Ah good to know, I'll wait until I get the doors on before I secure it with more brackets.
    818S Chassis #288 2.5L 323hp
    Ordered: 9/19/14 Received Kit: 11/2/14 First Start: 5/31/15 First Drive: 6/7/15 Registered: 3/10/2016 Completed: 2/10/2017
    Status: Complete Build Thread Sold 9/22/2017
    joshuajach.com

  32. #152
    Senior Member TouchStone's Avatar
    Join Date
    Sep 2014
    Location
    Dallas, TX
    Posts
    512
    Post Thanks / Like
    Blog Entries
    1
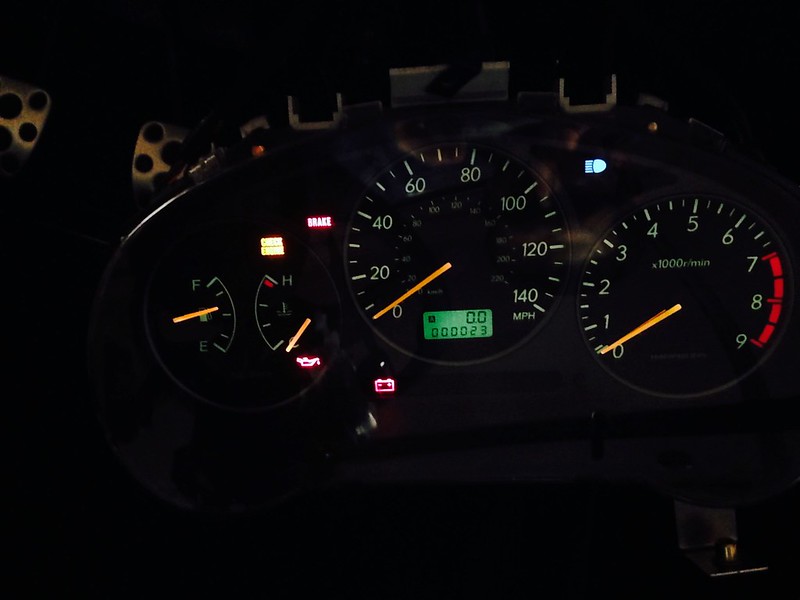
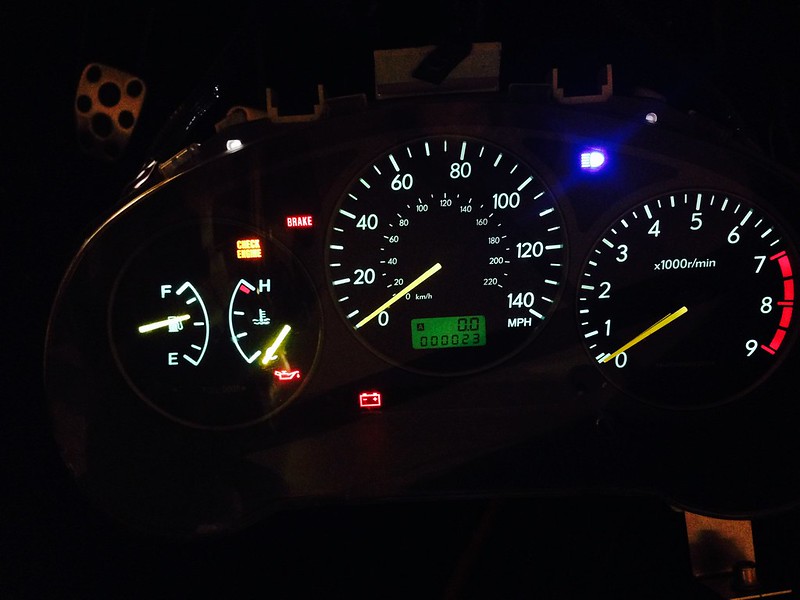
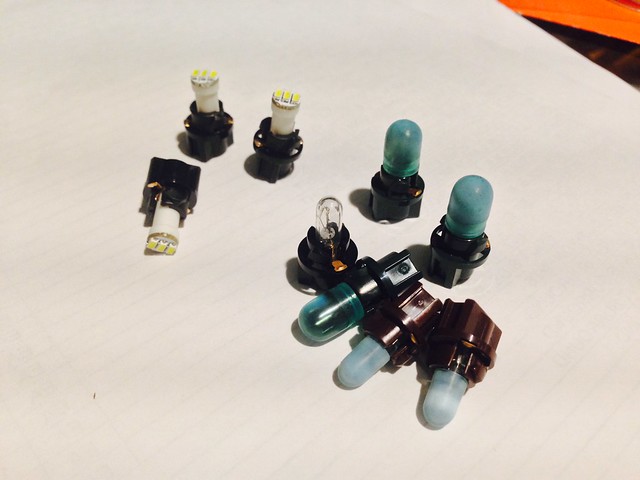
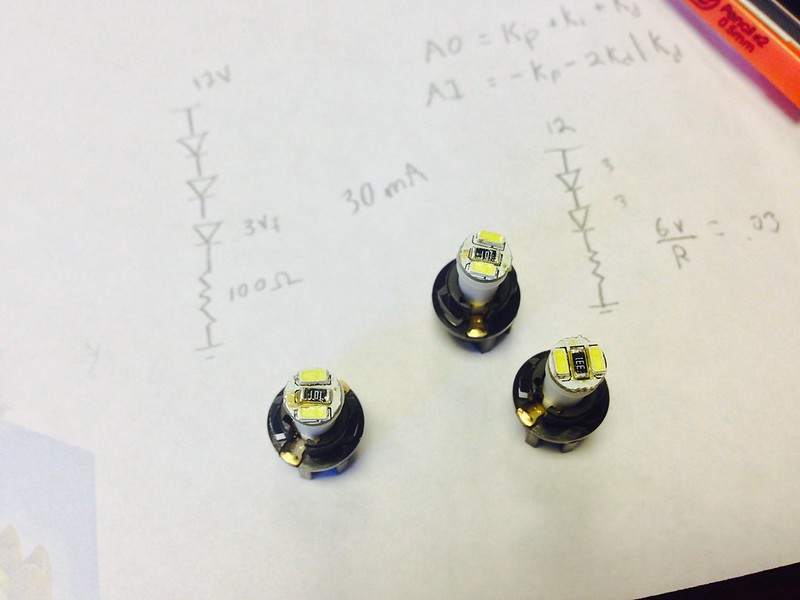
    Changed out my gauge cluster lights with some LED lights I found on amazon. $10 http://www.amazon.com/gp/product/B00...ilpage_o00_s00
    The color and brightness look much better. Some locations ended up being too bright so I left the old bulbs in.

    Picture comparison is not great since my camera kept adjusting the brightness. For reference the brake,battery,oil and MIL lights did not change in brightness.
    Before:


    After: I think the fuel and temp gauge is too bright, will probably try to de-solder one of the led elements.


    Last edited by TouchStone; 07-30-2015 at 10:20 PM.
    818S Chassis #288 2.5L 323hp
    Ordered: 9/19/14 Received Kit: 11/2/14 First Start: 5/31/15 First Drive: 6/7/15 Registered: 3/10/2016 Completed: 2/10/2017
    Status: Complete Build Thread Sold 9/22/2017
    joshuajach.com

  33. #153
    Senior Member TouchStone's Avatar
    Join Date
    Sep 2014
    Location
    Dallas, TX
    Posts
    512
    Post Thanks / Like
    Blog Entries
    1
    More stuff to fix! Previous epoxy fix already failed.

    818S Chassis #288 2.5L 323hp
    Ordered: 9/19/14 Received Kit: 11/2/14 First Start: 5/31/15 First Drive: 6/7/15 Registered: 3/10/2016 Completed: 2/10/2017
    Status: Complete Build Thread Sold 9/22/2017
    joshuajach.com

  34. #154
    Senior Member mikeb75's Avatar
    Join Date
    Sep 2013
    Posts
    685
    Post Thanks / Like
    Really like the new LED lighting in the cluster. More money to spend
    818SC chassis #206 EJ207 2.0L VF37 twin scroll || Cusco type RS 1.5 LSD || Wilwood pedal box (firewall attach) || Wilwood superlite front calipers
    BUILD Phase 1: 6/6/2014 car delivered || 5/24/2015 first start || 6/7/2015 go karted || 4/20/2016 hard-top-topped || 10/25/2016 registered || 11/18/2016 inspected & complete
    BUILD Phase 2: 3/8/2017 EJ207v8 || 5/29/2017 re-first re-start || 7/17/2017 re-assembled with race car bits

  35. #155

    Join Date
    Oct 2013
    Location
    Puyallup, WA
    Posts
    576
    Post Thanks / Like
    Try this for the plastic bonding. Ive had great results with it

    http://www.homedepot.com/p/Loctite-P...1925/100371829

  36. #156
    K3LAG's Avatar
    Join Date
    May 2013
    Location
    Greensburg, PA
    Posts
    552
    Post Thanks / Like
    I found that pvc cement worked well for the plastic in the cluster. It melted the pieces together as it should. It took overnight to fully harden. It does attack the plastic so don't get it where you don't want it.

    Larry

  37. #157
    Senior Member TouchStone's Avatar
    Join Date
    Sep 2014
    Location
    Dallas, TX
    Posts
    512
    Post Thanks / Like
    Blog Entries
    1
    Modded the cluster lights to be a bit dimmer. All the gauges now have a fairly even brightness.

    818S Chassis #288 2.5L 323hp
    Ordered: 9/19/14 Received Kit: 11/2/14 First Start: 5/31/15 First Drive: 6/7/15 Registered: 3/10/2016 Completed: 2/10/2017
    Status: Complete Build Thread Sold 9/22/2017
    joshuajach.com

  38. #158
    Senior Member Frank818's Avatar
    Join Date
    Jun 2013
    Location
    QC, Canada
    Posts
    5,732
    Post Thanks / Like
    I did that kind of thing on my Corrado cluster years ago. It turned out awesome and very reliable too. You'll love it.
    Frank
    818 chassis #181 powered by a '93 VW VR6 Turbo GT3582R
    Go-karted Aug 5, 2016 - Then May 19+21, 2017
    Tracked May 27/July 26, 2017
    Build time before being driveable on Sep 27, 2019: over 6000h
    Build Completed Winter 2021

  39. #159
    Senior Member TouchStone's Avatar
    Join Date
    Sep 2014
    Location
    Dallas, TX
    Posts
    512
    Post Thanks / Like
    Blog Entries
    1
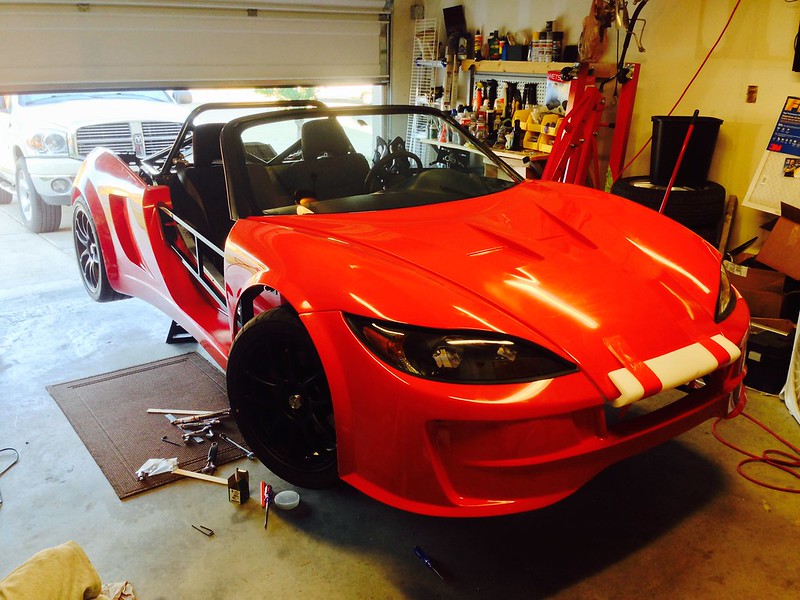
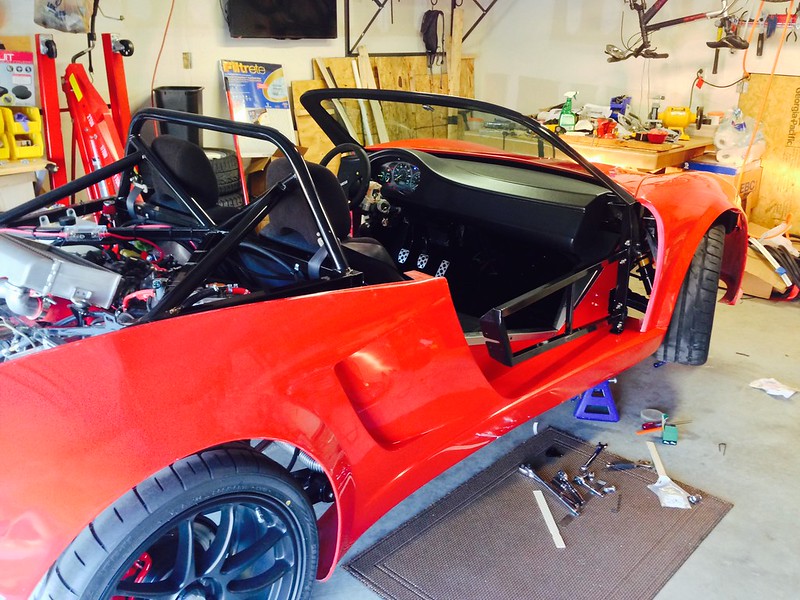
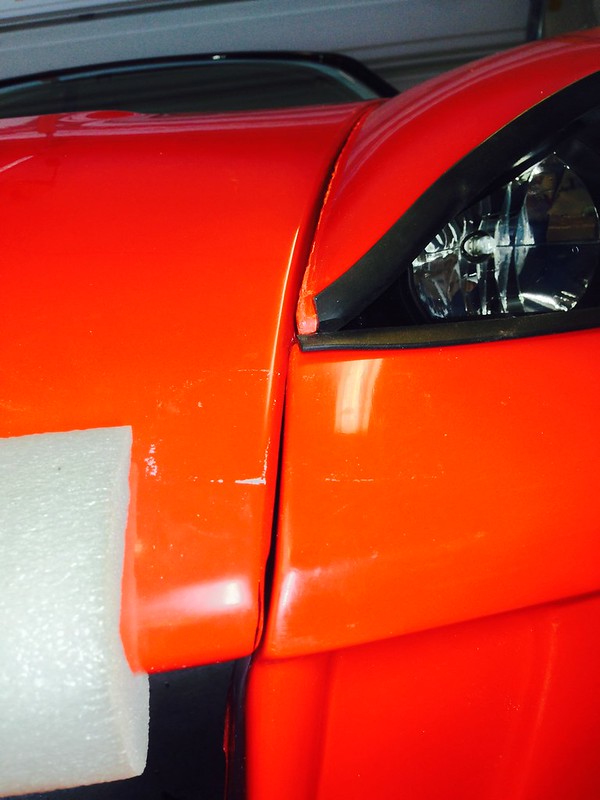
    Aligned and bolted the front bumper, fenders and passenger side body panels. Lots of trimming, adjusting, multiple assembly and removal, and lots of time! Other than that pretty easy.


    The dreaded bumper/hood/fender/light intersection. Not perfect, but good enough for now.

    818S Chassis #288 2.5L 323hp
    Ordered: 9/19/14 Received Kit: 11/2/14 First Start: 5/31/15 First Drive: 6/7/15 Registered: 3/10/2016 Completed: 2/10/2017
    Status: Complete Build Thread Sold 9/22/2017
    joshuajach.com

  40. #160
    nkw8181's Avatar
    Join Date
    Sep 2013
    Location
    Dallas, TX
    Posts
    762
    Post Thanks / Like
    Sooooo how's the injector install going?
    Nolan
    65 coupe Gen 3 "Phoenix" build
    http://thefactoryfiveforum.com/showt...032#post297032

    818 s (with r windscreen ) 350 rwhp. Registered and street legal (SOLD)

Page 4 of 12 FirstFirst ... 23456 ... LastLast

Posting Permissions

  • You may not post new threads
  • You may not post replies
  • You may not post attachments
  • You may not edit your posts
  •  

Brown County Customs

Visit our community sponsor