Boig Motorsports

Visit our community sponsor

Thanks Thanks:  0
Likes Likes:  3
Page 9 of 12 FirstFirst ... 7891011 ... LastLast
Results 321 to 360 of 477

Thread: JJ's 818s Build

  1. #321
    Senior Member TouchStone's Avatar
    Join Date
    Sep 2014
    Location
    Dallas, TX
    Posts
    512
    Post Thanks / Like
    Blog Entries
    1
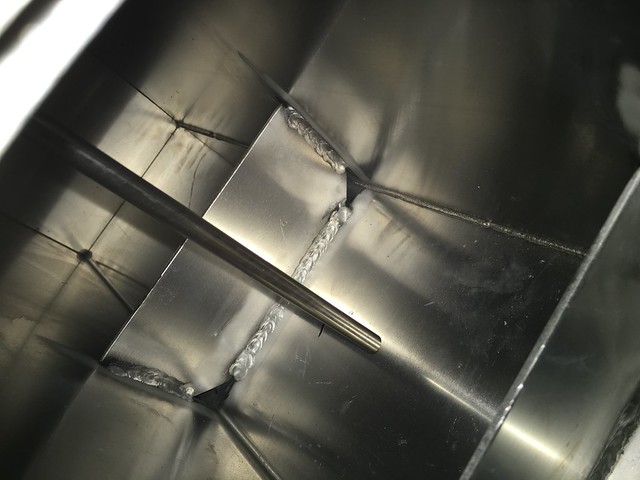
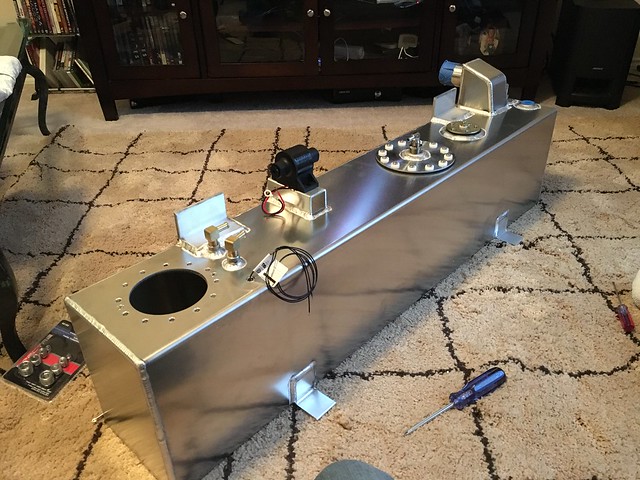
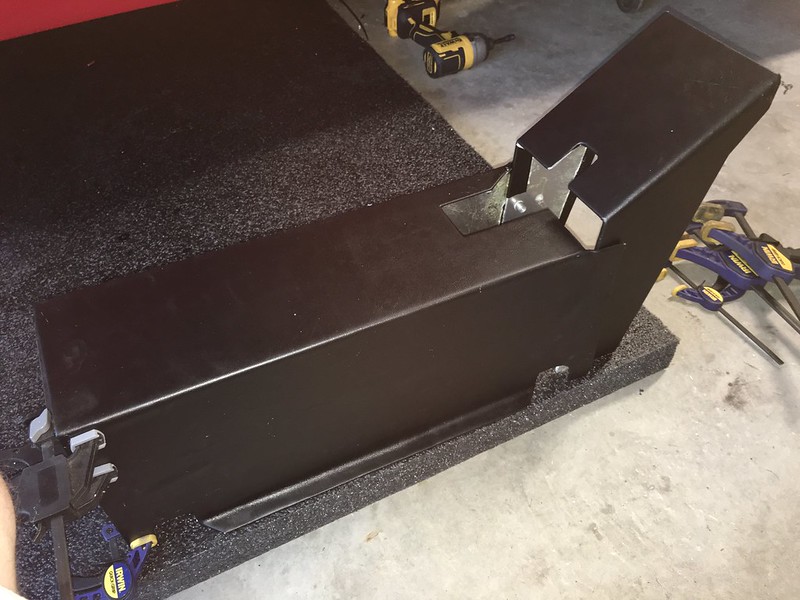
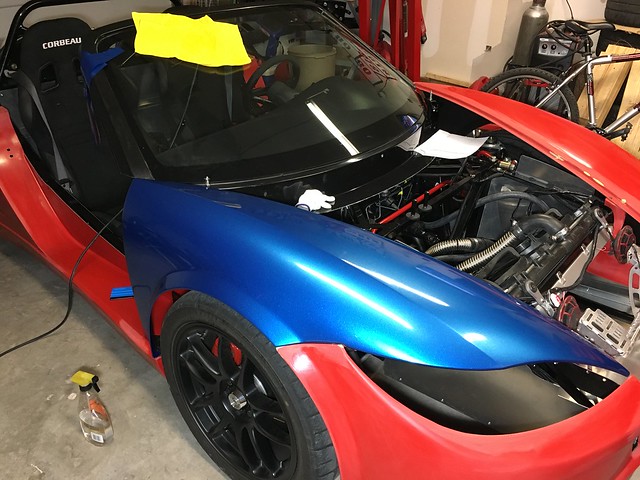
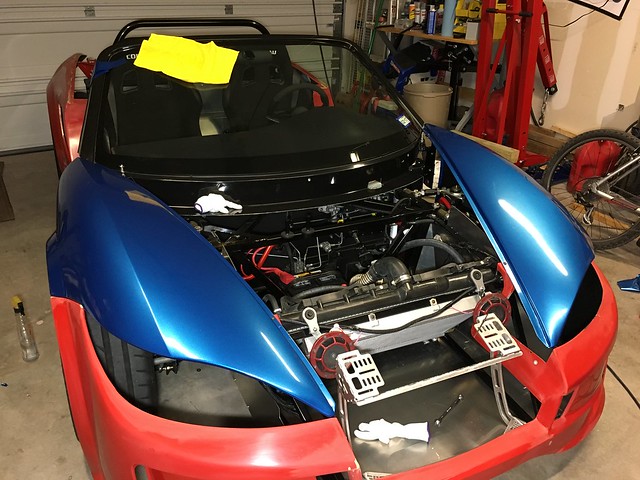
    I received my fuel tank from Boyd welding, design courtesy of Craig at Zero Decibel Motorsports. The assembly looks great and is very sturdy.


    Last edited by TouchStone; 06-04-2016 at 11:02 PM. Reason: fixed image
    818S Chassis #288 2.5L 323hp
    Ordered: 9/19/14 Received Kit: 11/2/14 First Start: 5/31/15 First Drive: 6/7/15 Registered: 3/10/2016 Completed: 2/10/2017
    Status: Complete Build Thread Sold 9/22/2017
    joshuajach.com

  2. #322
    Senior Member
    Join Date
    Jan 2012
    Posts
    1,112
    Post Thanks / Like
    Looks good. I might have to hit Craig up for the design too. How much was this setup again.

  3. #323
    Senior Member
    Join Date
    Feb 2014
    Posts
    278
    Post Thanks / Like
    Quote Originally Posted by TouchStone View Post
    I'm not saying the welding is bad in fact it looks really good. What I mean to say is that the powdercoat will cover up poorly cleaned metal.

    I'm just disappointed at all the little things that have added up related to the powdercoat. On delivery there was a large scuffed area on the roll bar. Welding splatter is sharp and detracts from the look. Now finding rust under the powdercoat.

    It basically adds up to the fact that I should have had the powdercoat applied locally.
    There was powder coat flaking off my frame when it was delivered.

    As of when I went out to FFR, the frames received zero prep before powder and they were not outgassed prior to curing.

    The worst spots will be where several tubes come together. The blued areas around the weld outgas during the cure. The resulting bubbles hold gas against the steel and rust builds up under the powder coat flaking it off.

    I went without the powder for my second frame and had it done locally. Blasted, outgassed and then coated. Zero problems.

  4. #324
    Mechie3's Avatar
    Join Date
    May 2012
    Location
    Indianapolis
    Posts
    5,174
    Post Thanks / Like
    Quote Originally Posted by 07FIREBLADE View Post
    Looks good. I might have to hit Craig up for the design too. How much was this setup again.
    Josh's has a few additional/different features than mine but I think both of ours started at $375. Where it gets expensive for the non machine shop able people is the tank mounting plates from Boyd are $349 and you need two (with a $110 pump included). You need two of those. I went with Walbro 255 ($75/ea) and made my own plates (probably $75 in materials). If you don't care how pretty the plates are it would be easy to make your own with a band saw and drill press as they're mostly just flat plates.
    Zero Decibel Motorsports
    Check out my new website!
    www.zerodecibelmotorsports.com
    www.facebook.com/zero.decibel.motorsports

  5. #325
    Senior Member TouchStone's Avatar
    Join Date
    Sep 2014
    Location
    Dallas, TX
    Posts
    512
    Post Thanks / Like
    Blog Entries
    1
    Finally finished my seat mount brackets, paint is drying as I write this. Once the aluminum floor panel is back in place it would have been impossible to bolt in the seats so I welded in some mounting tabs with nuts welded to the underside of each tab. I have to move the firewall back an inch in order to fit the seats I ordered fortunately the new fuel tank has just enough clearance to let everything fit.

    818S Chassis #288 2.5L 323hp
    Ordered: 9/19/14 Received Kit: 11/2/14 First Start: 5/31/15 First Drive: 6/7/15 Registered: 3/10/2016 Completed: 2/10/2017
    Status: Complete Build Thread Sold 9/22/2017
    joshuajach.com

  6. #326
    Senior Member TouchStone's Avatar
    Join Date
    Sep 2014
    Location
    Dallas, TX
    Posts
    512
    Post Thanks / Like
    Blog Entries
    1
    Made a bit of progress these last two weekends. Adjusted the fuel fill neck. I was able to use FFR fill tube by cutting out a section and shortening one end. Wired up the fuel tank and transfer pump. I switched out the transfer pump from a K&N pump to Airtex E8016S, the noise that the K&N pump made was very loud and obnoxious. Added indicator for low fuel in surge tank. Added wiring for heated seats. Added sound mat and carpet under the seat area. Added vinyl upholstery to the center console.


    818S Chassis #288 2.5L 323hp
    Ordered: 9/19/14 Received Kit: 11/2/14 First Start: 5/31/15 First Drive: 6/7/15 Registered: 3/10/2016 Completed: 2/10/2017
    Status: Complete Build Thread Sold 9/22/2017
    joshuajach.com

  7. #327
    Moonlight Performance
    Hindsight's Avatar
    Join Date
    May 2014
    Location
    Atlanta
    Posts
    3,402
    Post Thanks / Like
    Looking very clean as always. Where did you source the vinyl and are you happy with it? I think it looks really good.

  8. #328
    Senior Member TouchStone's Avatar
    Join Date
    Sep 2014
    Location
    Dallas, TX
    Posts
    512
    Post Thanks / Like
    Blog Entries
    1
    Quote Originally Posted by Hindsight View Post
    Looking very clean as always. Where did you source the vinyl and are you happy with it? I think it looks really good.
    I got the vinyl from HobbyLobby, they only had one option for textured vinyl so I went with it. It has a fabric backing which adds strength and prevents it from stretching, also has a small amount of cushion which makes it feel more expensive. I'm using the same vinyl to make a custom boot for the e-brake handle. I'll see how it holds up to the Texas heat.
    818S Chassis #288 2.5L 323hp
    Ordered: 9/19/14 Received Kit: 11/2/14 First Start: 5/31/15 First Drive: 6/7/15 Registered: 3/10/2016 Completed: 2/10/2017
    Status: Complete Build Thread Sold 9/22/2017
    joshuajach.com

  9. #329
    Moonlight Performance
    Hindsight's Avatar
    Join Date
    May 2014
    Location
    Atlanta
    Posts
    3,402
    Post Thanks / Like
    Very cool! Plenty of Hobby Lobbys around here so I may give it a shot for some trim pieces.

  10. #330
    Senior Member Frank818's Avatar
    Join Date
    Jun 2013
    Location
    QC, Canada
    Posts
    5,732
    Post Thanks / Like
    Shortening one end on the filler neck? Yeah that would help but it also needs to be turned on the left side (fwd) in order to face about 3" fwd than what it does originally. How did you fix that? Simply twisting counter clockwise a quarter of a turn or so the upper part after shortening?
    Frank
    818 chassis #181 powered by a '93 VW VR6 Turbo GT3582R
    Go-karted Aug 5, 2016 - Then May 19+21, 2017
    Tracked May 27/July 26, 2017
    Build time before being driveable on Sep 27, 2019: over 6000h
    Build Completed Winter 2021

  11. #331
    Senior Member TouchStone's Avatar
    Join Date
    Sep 2014
    Location
    Dallas, TX
    Posts
    512
    Post Thanks / Like
    Blog Entries
    1
    Quote Originally Posted by Frank818 View Post
    Shortening one end on the filler neck? Yeah that would help but it also needs to be turned on the left side (fwd) in order to face about 3" fwd than what it does originally. How did you fix that? Simply twisting counter clockwise a quarter of a turn or so the upper part after shortening?
    I removed the lower 45 deg. bend which left me with an L piece and a S piece. I cut 1-2 inches off of the longer part of the L so both ends were about the same in length. Then I rotated the 90 deg. part until it fit close enough. The alignment was off by about 3-5 deg. which is close enough for the rubber coupling pieces to compensate for.
    818S Chassis #288 2.5L 323hp
    Ordered: 9/19/14 Received Kit: 11/2/14 First Start: 5/31/15 First Drive: 6/7/15 Registered: 3/10/2016 Completed: 2/10/2017
    Status: Complete Build Thread Sold 9/22/2017
    joshuajach.com

  12. #332
    Senior Member TouchStone's Avatar
    Join Date
    Sep 2014
    Location
    Dallas, TX
    Posts
    512
    Post Thanks / Like
    Blog Entries
    1
    Center console is in and finished! It's inevitable but I still hope I wont have to take it apart since I spun a rivnut
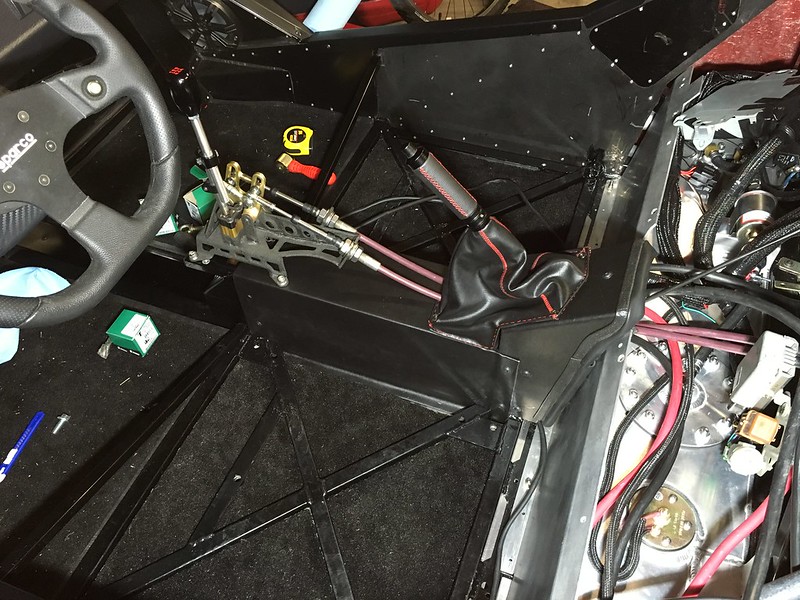
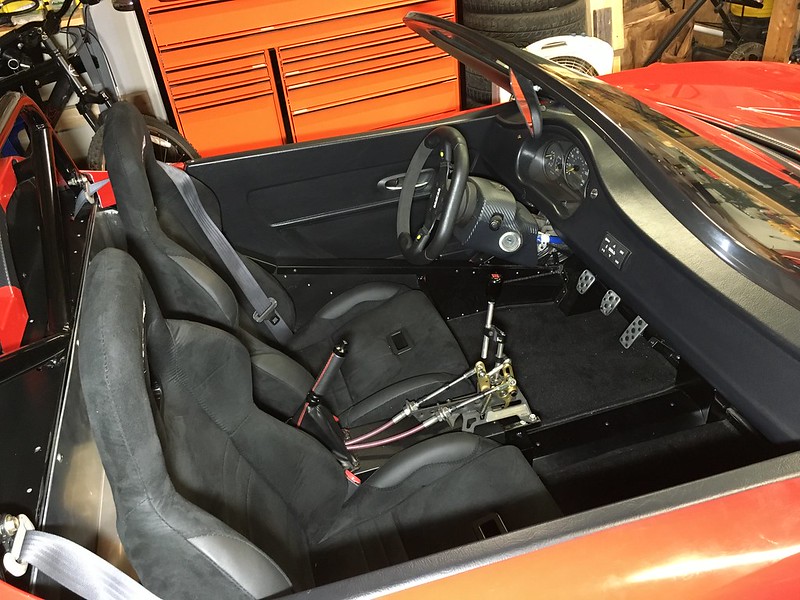
. The center console has switches to control the heated seats and a hidden security switch.
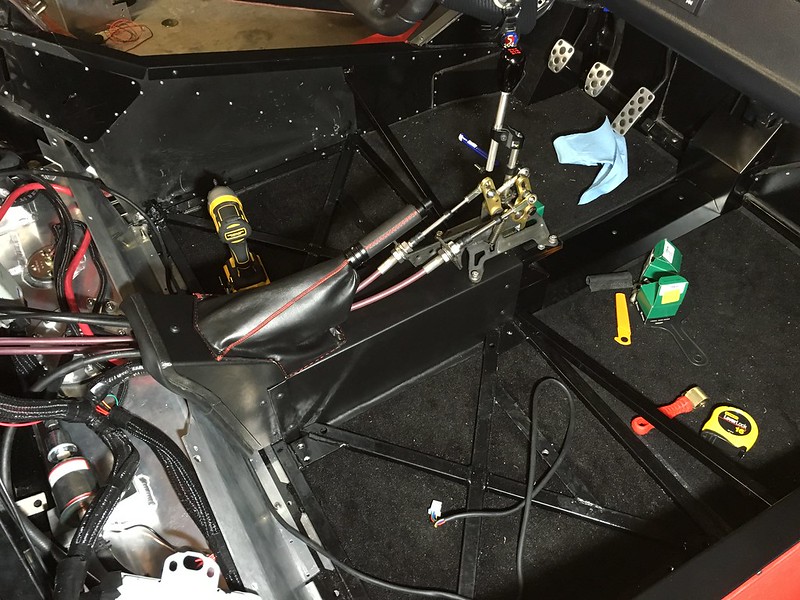


    818S Chassis #288 2.5L 323hp
    Ordered: 9/19/14 Received Kit: 11/2/14 First Start: 5/31/15 First Drive: 6/7/15 Registered: 3/10/2016 Completed: 2/10/2017
    Status: Complete Build Thread Sold 9/22/2017
    joshuajach.com

  13. #333
    Moonlight Performance
    Hindsight's Avatar
    Join Date
    May 2014
    Location
    Atlanta
    Posts
    3,402
    Post Thanks / Like
    Very nice and clean. Looks like a good seal on the e-brake cover to firewall too.

  14. #334
    Senior Member UnhipPopano's Avatar
    Join Date
    Mar 2016
    Posts
    344
    Post Thanks / Like
    What caused the Rivnut to spin? Was it not fully seated?

  15. #335
    Senior Member TouchStone's Avatar
    Join Date
    Sep 2014
    Location
    Dallas, TX
    Posts
    512
    Post Thanks / Like
    Blog Entries
    1
    Quote Originally Posted by UnhipPopano View Post
    What caused the Rivnut to spin? Was it not fully seated?
    The rivnut was not centered well and I used a power tool while cross threading the bolt.
    818S Chassis #288 2.5L 323hp
    Ordered: 9/19/14 Received Kit: 11/2/14 First Start: 5/31/15 First Drive: 6/7/15 Registered: 3/10/2016 Completed: 2/10/2017
    Status: Complete Build Thread Sold 9/22/2017
    joshuajach.com

  16. #336
    Senior Member TouchStone's Avatar
    Join Date
    Sep 2014
    Location
    Dallas, TX
    Posts
    512
    Post Thanks / Like
    Blog Entries
    1
    Done with the interior.


    818S Chassis #288 2.5L 323hp
    Ordered: 9/19/14 Received Kit: 11/2/14 First Start: 5/31/15 First Drive: 6/7/15 Registered: 3/10/2016 Completed: 2/10/2017
    Status: Complete Build Thread Sold 9/22/2017
    joshuajach.com

  17. #337
    Senior Member Bob_n_Cincy's Avatar
    Join Date
    Sep 2012
    Location
    Cincinnati OH
    Posts
    3,903
    Post Thanks / Like
    Quote Originally Posted by TouchStone View Post
    Done with the interior.


    Very Nice,
    I really like your shifter, Very cool. What is the functions of the springs?
    Bob
    818S #22 Candy Blue Frame, Front Gas Tank, 2.5L Turbo, Rear radiator, Shortened Transmission, Wookiee Compatible, Console mounted MR2 Shifter, Custom ECU panel, AWIC soon
    My Son Michael's Turbo ICE Build X22 http://thefactoryfiveforum.com/showt...rts-818S-Build
    My Electric Supercar Build X21 (on hold until winter) http://thefactoryfiveforum.com/showt...e-Build-Thread

  18. #338
    Senior Member matteo92065's Avatar
    Join Date
    Feb 2014
    Location
    Ramona, CA
    Posts
    417
    Post Thanks / Like
    clean looking!

  19. #339
    Senior Member TouchStone's Avatar
    Join Date
    Sep 2014
    Location
    Dallas, TX
    Posts
    512
    Post Thanks / Like
    Blog Entries
    1
    Quote Originally Posted by Bob_n_Cincy View Post
    Very Nice,
    I really like your shifter, Very cool. What is the functions of the springs?
    Bob
    They are centering springs.
    818S Chassis #288 2.5L 323hp
    Ordered: 9/19/14 Received Kit: 11/2/14 First Start: 5/31/15 First Drive: 6/7/15 Registered: 3/10/2016 Completed: 2/10/2017
    Status: Complete Build Thread Sold 9/22/2017
    joshuajach.com

  20. #340
    Senior Member AZPete's Avatar
    Join Date
    Feb 2011
    Location
    Scottsdale, AZ
    Posts
    2,374
    Post Thanks / Like
    Cool outside door handles. What are they?

    Edit: I found them in your earlier post. They are Fiat Barchetta handles from Ebay . . . thanks.

    For other guys who also like these handles:
    Left and Right were sold separately:
    http://www.ebay.com/itm/371064017334...%3AMEBIDX%3AIT
    http://www.ebay.com/itm/271493405643...%3AMEBIDX%3AIT
    Last edited by AZPete; 08-12-2016 at 01:26 PM. Reason: info found
    818S/C : Chassis #25 with 06 WRX 2.5 turbo, ABS, cruise, PS, A/C, Apple CarPlay, rear camera, power windows & locks, leather & other complexities. Sold 10/19 with 5,800 miles.
    Mk3 Roadster #6228 4.6L, T45, IRS, PS, PB, ABS, Cruise, Koni's, 17" Halibrands, red w/ silver - 9K miles then sold @ Barrett-Jackson Jan 2011 (got back cash spent).

  21. #341
    Senior Member Frank818's Avatar
    Join Date
    Jun 2013
    Location
    QC, Canada
    Posts
    5,732
    Post Thanks / Like
    Love the result. Love the seats. Love the handles.

    Pete, your links are destroyed.
    Frank
    818 chassis #181 powered by a '93 VW VR6 Turbo GT3582R
    Go-karted Aug 5, 2016 - Then May 19+21, 2017
    Tracked May 27/July 26, 2017
    Build time before being driveable on Sep 27, 2019: over 6000h
    Build Completed Winter 2021

  22. #342
    Senior Member TouchStone's Avatar
    Join Date
    Sep 2014
    Location
    Dallas, TX
    Posts
    512
    Post Thanks / Like
    Blog Entries
    1
    Thanks guys, I have a few things left to do before I call it complete. Its a bit early but I've started looking for my next build.
    818S Chassis #288 2.5L 323hp
    Ordered: 9/19/14 Received Kit: 11/2/14 First Start: 5/31/15 First Drive: 6/7/15 Registered: 3/10/2016 Completed: 2/10/2017
    Status: Complete Build Thread Sold 9/22/2017
    joshuajach.com

  23. #343
    Senior Member Frank818's Avatar
    Join Date
    Jun 2013
    Location
    QC, Canada
    Posts
    5,732
    Post Thanks / Like
    What is your next build?
    Frank
    818 chassis #181 powered by a '93 VW VR6 Turbo GT3582R
    Go-karted Aug 5, 2016 - Then May 19+21, 2017
    Tracked May 27/July 26, 2017
    Build time before being driveable on Sep 27, 2019: over 6000h
    Build Completed Winter 2021

  24. #344
    Senior Member
    Join Date
    Jul 2014
    Location
    Strathroy, Ontario Canada
    Posts
    479
    Post Thanks / Like
    how do you like the BOSS bluetooth control? does it just run to an amp? I have been looking at a Kenwood Blutooth amp with remote.

  25. #345
    Senior Member TouchStone's Avatar
    Join Date
    Sep 2014
    Location
    Dallas, TX
    Posts
    512
    Post Thanks / Like
    Blog Entries
    1
    Quote Originally Posted by Lumpyguy View Post
    how do you like the BOSS bluetooth control? does it just run to an amp? I have been looking at a Kenwood Blutooth amp with remote.
    The BOSS does everything I want feature wise. Just not powerful enough for an open top loud engine car.
    818S Chassis #288 2.5L 323hp
    Ordered: 9/19/14 Received Kit: 11/2/14 First Start: 5/31/15 First Drive: 6/7/15 Registered: 3/10/2016 Completed: 2/10/2017
    Status: Complete Build Thread Sold 9/22/2017
    joshuajach.com

  26. #346
    Senior Member TouchStone's Avatar
    Join Date
    Sep 2014
    Location
    Dallas, TX
    Posts
    512
    Post Thanks / Like
    Blog Entries
    1
    Quote Originally Posted by Frank818 View Post
    What is your next build?
    Haven't decided. GTM or maybe Ecoboost 818C, if FFR releases it.
    818S Chassis #288 2.5L 323hp
    Ordered: 9/19/14 Received Kit: 11/2/14 First Start: 5/31/15 First Drive: 6/7/15 Registered: 3/10/2016 Completed: 2/10/2017
    Status: Complete Build Thread Sold 9/22/2017
    joshuajach.com

  27. #347
    Senior Member TouchStone's Avatar
    Join Date
    Sep 2014
    Location
    Dallas, TX
    Posts
    512
    Post Thanks / Like
    Blog Entries
    1
    Ran an autocross today. Car performed really well no fuel starvation at 1/4 to half tank. However with good news comes bad, around my fourth run I started getting a large amount of smoke out of the tailpipe every time I applied throttle from idle. I haven't determined the cause yet.

    Fastest Run:


    All Runs:
    https://youtu.be/cm_S2wZfQHU
    818S Chassis #288 2.5L 323hp
    Ordered: 9/19/14 Received Kit: 11/2/14 First Start: 5/31/15 First Drive: 6/7/15 Registered: 3/10/2016 Completed: 2/10/2017
    Status: Complete Build Thread Sold 9/22/2017
    joshuajach.com

  28. #348
    Senior Member Frank818's Avatar
    Join Date
    Jun 2013
    Location
    QC, Canada
    Posts
    5,732
    Post Thanks / Like
    Hum that video is blocked at work here but what color was that smoke?
    Frank
    818 chassis #181 powered by a '93 VW VR6 Turbo GT3582R
    Go-karted Aug 5, 2016 - Then May 19+21, 2017
    Tracked May 27/July 26, 2017
    Build time before being driveable on Sep 27, 2019: over 6000h
    Build Completed Winter 2021

  29. #349
    Senior Member TouchStone's Avatar
    Join Date
    Sep 2014
    Location
    Dallas, TX
    Posts
    512
    Post Thanks / Like
    Blog Entries
    1
    Quote Originally Posted by Frank818 View Post
    Hum that video is blocked at work here but what color was that smoke?
    It was white.
    818S Chassis #288 2.5L 323hp
    Ordered: 9/19/14 Received Kit: 11/2/14 First Start: 5/31/15 First Drive: 6/7/15 Registered: 3/10/2016 Completed: 2/10/2017
    Status: Complete Build Thread Sold 9/22/2017
    joshuajach.com

  30. #350
    Senior Member Frank818's Avatar
    Join Date
    Jun 2013
    Location
    QC, Canada
    Posts
    5,732
    Post Thanks / Like
    Coolant leak somewhere?
    Frank
    818 chassis #181 powered by a '93 VW VR6 Turbo GT3582R
    Go-karted Aug 5, 2016 - Then May 19+21, 2017
    Tracked May 27/July 26, 2017
    Build time before being driveable on Sep 27, 2019: over 6000h
    Build Completed Winter 2021

  31. #351
    Senior Member TouchStone's Avatar
    Join Date
    Sep 2014
    Location
    Dallas, TX
    Posts
    512
    Post Thanks / Like
    Blog Entries
    1
    Problem is caused by oil in the intake. Pulled off the AWIC and found their was enough oil build up in the AWIC housing to leak into the intake manifold. I highly suspect the Perrin AOS installation to be at fault. I found that the included plastic NPT fittings were all very loose and needed 2-3 more rotations to re-tighten. I'm also raising the height of the AOS about an inch to improve oil drain. This does however interfere with the engine cover gas bar I previously installed. Cleaned out the pooled up oil and drove around the block and it was much better, (no smoke) I'll have to keep an eye on it for awhile as the oil build up is pretty slow.
    818S Chassis #288 2.5L 323hp
    Ordered: 9/19/14 Received Kit: 11/2/14 First Start: 5/31/15 First Drive: 6/7/15 Registered: 3/10/2016 Completed: 2/10/2017
    Status: Complete Build Thread Sold 9/22/2017
    joshuajach.com

  32. #352
    Senior Member TouchStone's Avatar
    Join Date
    Sep 2014
    Location
    Dallas, TX
    Posts
    512
    Post Thanks / Like
    Blog Entries
    1
    Finally making some decent progress on the body. All the uncured gelcoat and resin has been removed and filled with fiberglass reinforcement or body filler. Corners and edges have been restored. Panel insides have been coated with rubberized under-body paint. I also added a support to the engine cover to reinforce a thin area that had started to crack.


    818S Chassis #288 2.5L 323hp
    Ordered: 9/19/14 Received Kit: 11/2/14 First Start: 5/31/15 First Drive: 6/7/15 Registered: 3/10/2016 Completed: 2/10/2017
    Status: Complete Build Thread Sold 9/22/2017
    joshuajach.com

  33. #353
    Moonlight Performance
    Hindsight's Avatar
    Join Date
    May 2014
    Location
    Atlanta
    Posts
    3,402
    Post Thanks / Like
    Looks great. What kind of underbody spray did you use and does it seem like it will stand up to heat of the engine?

    I had to reinforce my engine cover due to cracking in the same area.

  34. #354
    Senior Member Frank818's Avatar
    Join Date
    Jun 2013
    Location
    QC, Canada
    Posts
    5,732
    Post Thanks / Like
    Nice paint. That's the 3M rubberized underbody paint? No asphalt?
    Frank
    818 chassis #181 powered by a '93 VW VR6 Turbo GT3582R
    Go-karted Aug 5, 2016 - Then May 19+21, 2017
    Tracked May 27/July 26, 2017
    Build time before being driveable on Sep 27, 2019: over 6000h
    Build Completed Winter 2021

  35. #355
    Senior Member TouchStone's Avatar
    Join Date
    Sep 2014
    Location
    Dallas, TX
    Posts
    512
    Post Thanks / Like
    Blog Entries
    1
    Quote Originally Posted by Frank818 View Post
    Nice paint. That's the 3M rubberized underbody paint? No asphalt?
    Asphalt??

    Rust-Oleum Rubberized Undercoating. According to their tech sheet the main ingredient is SBR rubber which is good up to 212F. There is a PRO version of this paint that cost twice as much I could not tell a difference from the label other than the pro version can have the second coat applied after only 2 mins.

    Actually...I just checked the can the cheaper stuff can also be reapplied after just a couple mins. So I have no idea what the difference is.

    Rust-Oleum Rubberized Undercoating SKU 248657
    Rust-Oleum® Professional Undercoating SKU 248656
    Last edited by TouchStone; 11-22-2016 at 11:31 PM.
    818S Chassis #288 2.5L 323hp
    Ordered: 9/19/14 Received Kit: 11/2/14 First Start: 5/31/15 First Drive: 6/7/15 Registered: 3/10/2016 Completed: 2/10/2017
    Status: Complete Build Thread Sold 9/22/2017
    joshuajach.com

  36. #356
    Senior Member Frank818's Avatar
    Join Date
    Jun 2013
    Location
    QC, Canada
    Posts
    5,732
    Post Thanks / Like
    Yeah asphalt, some products are asphalt based but I assumed it was pretty nasty stuff and wanted to stay away.

    I currently have some truck bed liner stuff but I'm unsure it's as good as rubberized underbody and rocker panel stuff. Will try to find the rusto or sometihng similar.

    tnx!
    Frank
    818 chassis #181 powered by a '93 VW VR6 Turbo GT3582R
    Go-karted Aug 5, 2016 - Then May 19+21, 2017
    Tracked May 27/July 26, 2017
    Build time before being driveable on Sep 27, 2019: over 6000h
    Build Completed Winter 2021

  37. #357
    Tazio Nuvolari wannabe Scargo's Avatar
    Join Date
    Nov 2013
    Location
    south-central CT
    Posts
    1,611
    Post Thanks / Like
    Perhaps TMI? "Professional", Alkyd: DRY & RECOAT TIMES... Dry and recoat times are based on 70°F and 50% relative humidity. Dries to touch in 10 minutes. Allow more time in cooler temperatures. The surface can be recoated within 1 hour or after 24 hours. Allow 72 hours for full cure. Has temp rating of 200°F/93°C.
    The "non-professional" SBR (styrene-butadiene rubber) coating does not list a service temperature but I've seen some listed as low as 180°F. Polystyrene can be thermoformed as low as 260°F. Realistically, there might not be much difference in the two, performance-wise. SBR might be less chemical/fuel resistant.
    I found this discussion on undercoats. There is asphalt undercoater. I think it's very old technology, can be hard and brittle and melts with low VOC solvents (including gasoline or kerosene).
    With either product be sure and have really good ventilation and/or painter's mask.

  38. #358
    Senior Member Frank818's Avatar
    Join Date
    Jun 2013
    Location
    QC, Canada
    Posts
    5,732
    Post Thanks / Like
    Tnx for the info Scargo. I really hope you find a way to get your health back.
    Frank
    818 chassis #181 powered by a '93 VW VR6 Turbo GT3582R
    Go-karted Aug 5, 2016 - Then May 19+21, 2017
    Tracked May 27/July 26, 2017
    Build time before being driveable on Sep 27, 2019: over 6000h
    Build Completed Winter 2021

  39. #359
    Senior Member TouchStone's Avatar
    Join Date
    Sep 2014
    Location
    Dallas, TX
    Posts
    512
    Post Thanks / Like
    Blog Entries
    1
    Wrap in progress. This is not easy.


    6 hours earlier:
    818S Chassis #288 2.5L 323hp
    Ordered: 9/19/14 Received Kit: 11/2/14 First Start: 5/31/15 First Drive: 6/7/15 Registered: 3/10/2016 Completed: 2/10/2017
    Status: Complete Build Thread Sold 9/22/2017
    joshuajach.com

  40. #360
    Tazio Nuvolari wannabe Scargo's Avatar
    Join Date
    Nov 2013
    Location
    south-central CT
    Posts
    1,611
    Post Thanks / Like
    But it's looking great and you will pick up speed. Have you watched how easy it is on YouTube?? 
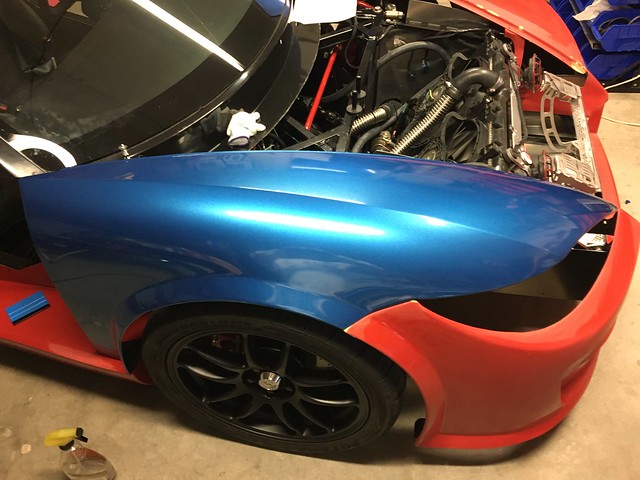
I am still on the fence. I have painting equipment and know how to do that.

Page 9 of 12 FirstFirst ... 7891011 ... LastLast

Posting Permissions

  • You may not post new threads
  • You may not post replies
  • You may not post attachments
  • You may not edit your posts
  •  

Replica Parts

Visit our community sponsor