BluePrint Engines

Visit our community sponsor

Thanks Thanks:  0
Likes Likes:  1
Page 1 of 3 123 LastLast
Results 1 to 40 of 106

Thread: Not Another Build Thread

  1. #1
    Senior Member mjazzka's Avatar
    Join Date
    Jun 2014
    Location
    Katy, TX
    Posts
    173
    Post Thanks / Like

    Not Another Build Thread

    It's all finally started...

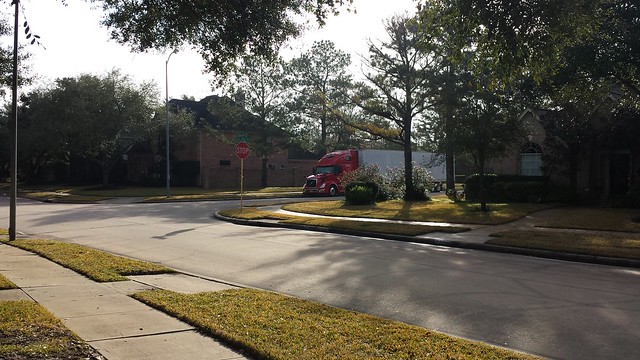
    First step was to transform the 0-car garage we have back into the 3-car it once was. Got it back to 2-car Pictures will follow later of the renovation.

    Ordered my kit on 10/14/14 during the Fall Special. $2,500 off options, off to a great start. Thanks Dave, Sally, Vinny, Jay, and all of the FFR Team!

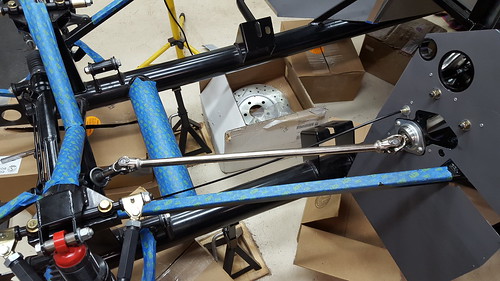
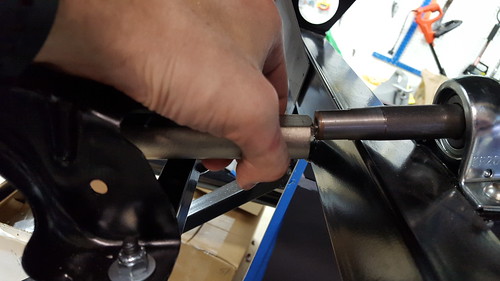
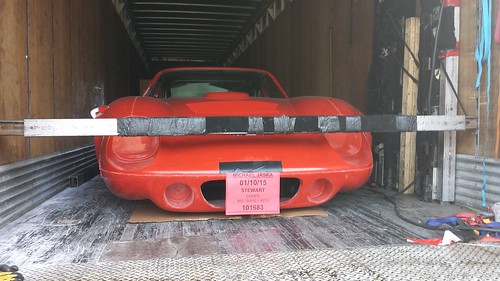
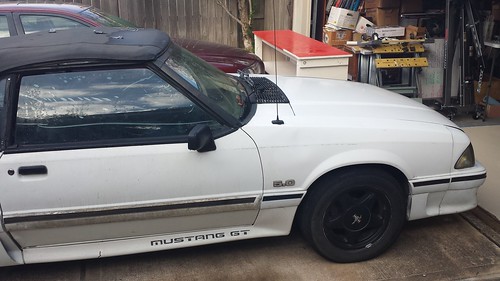
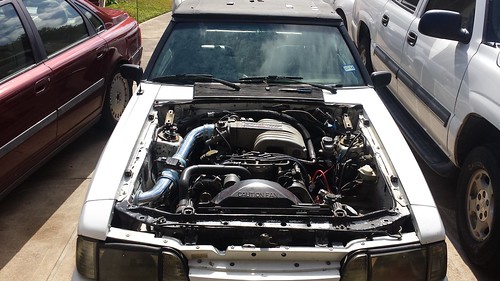
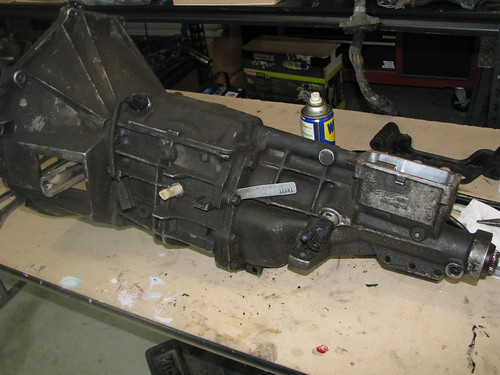
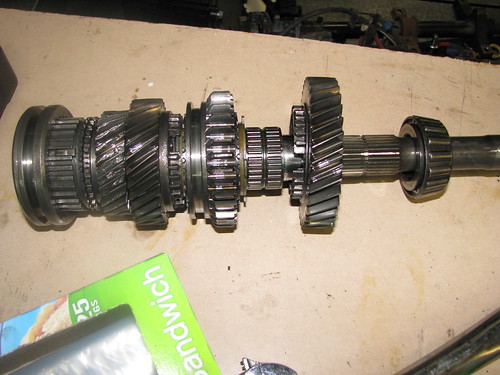
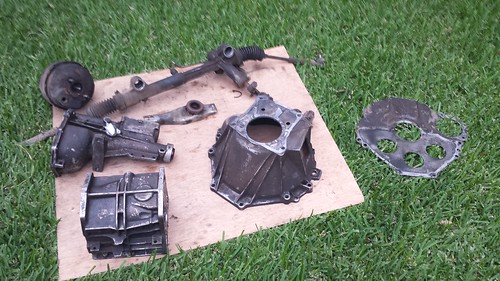
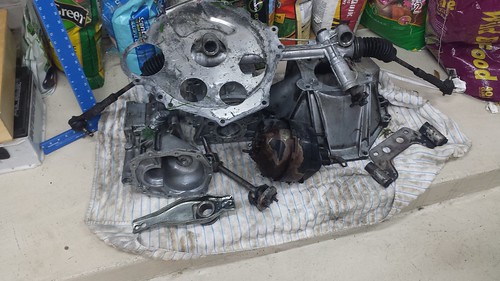
    Bought a donor ("Peggy") on 1/20/15, Type 65 Coupe #675 arrived on 1/29/15. So far all I've done is inventory of the kit and moved a couple things around, but I hope to get moving a little quicker soon. Organ donor Peggy's time has come! I'm still having a lot of trouble tracking down the rear end components for the IRS, I called 10 places recently and no one had anything.

    This was a great thing to see Thursday morning. I've got to say, Stewart Transportation is second to none, and Jim the driver was hilarious. Everything went smoothly, and I was more than happy with the service.


    The car!


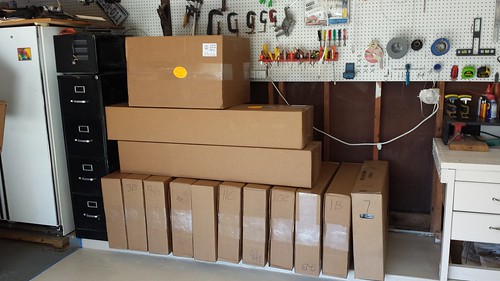
    The boxes... In the kit all I was missing was two cotter pins and the stuff on backorder. They also sent me a wood and aluminum wheel instead of the leather one I ordered, but Vinny at FFR is taking of it for me. Other than that, no complaints!


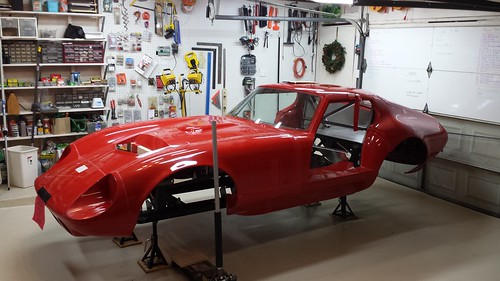
    Here she is, sittin' pretty. Still working on a name, deciding between "Eloise" and "Virginia".


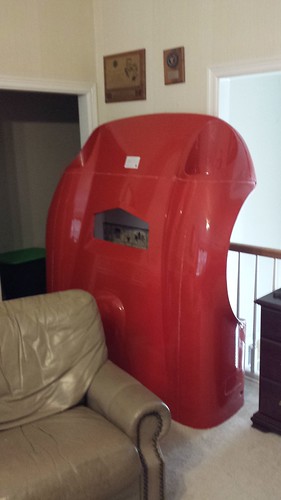
    Nose goes in the game room for the foreseeable future. Cannot believe how massive it is. It really makes me want to do a "Mach Five" paint job...


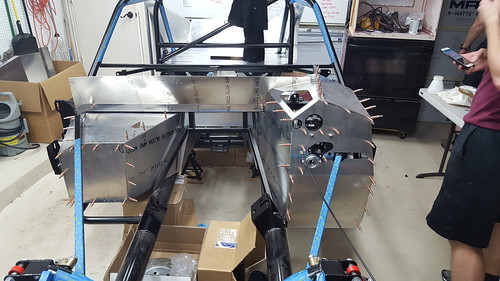
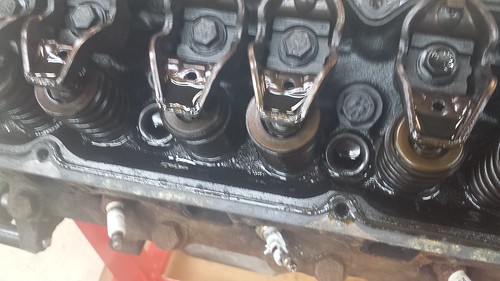
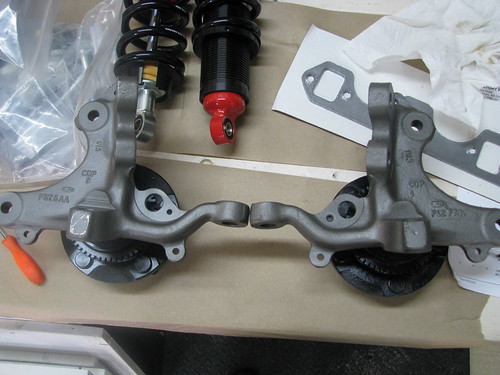
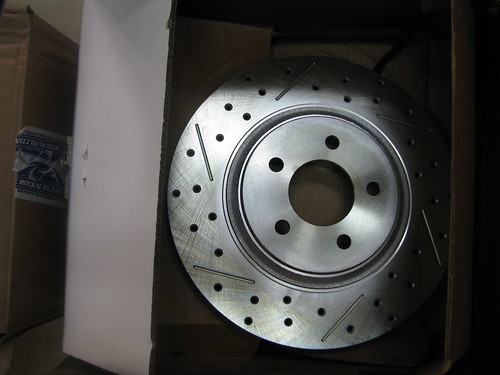
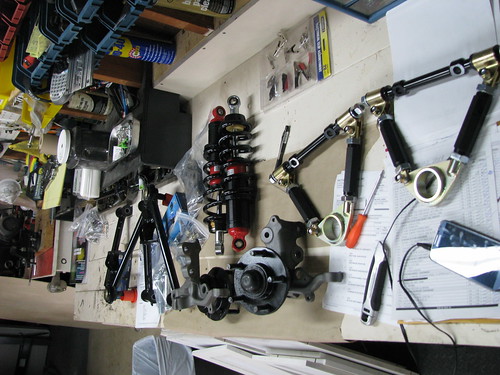
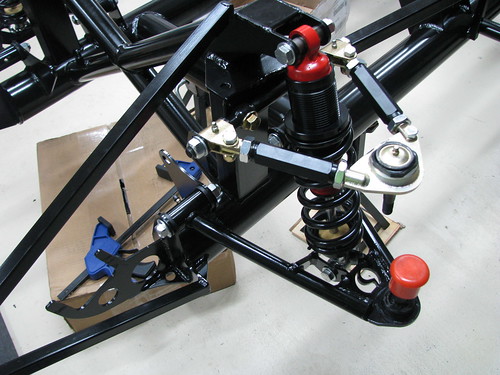
    So the plan is to keep a tight budget, use as much of the donor as possible (Mark Dougherty is rapidly ruining this part of the plan), and get it done in under a year. Nothing too fancy, IRS, might do some work on the stock 302, will try undercar exhaust, power steering & brakes, Kirkey seats, and maybe some nifty electronics and engraved parts at the end of the build.

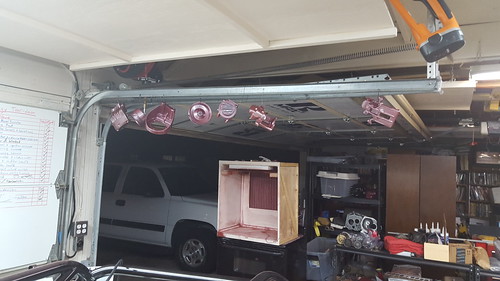
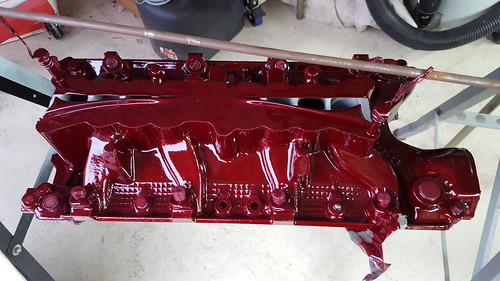
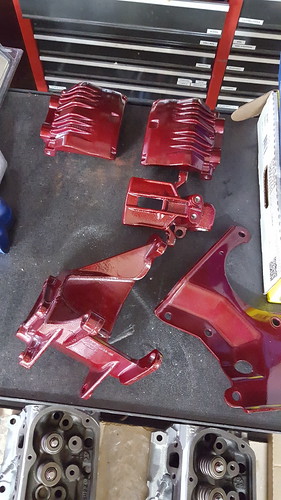
    I am going to go with a red and black theme. The outer color I think will be a metallic dark red like this Audi below, with the almost ubiquitous stripes (matte black?). I plan on powder coating myself as much as I can along this theme.
    http://gallsource.com/cars-wallpaper...d-wallpaper-2/

    Thanks to everyone who's been a part of this process so far, especially Garry Bopp (Maybe I should have just bought his?) and Mark Dougherty. I look forward to learning from everyone in the FFR Community, and will try to keep you all updated as much as possible. I live 30 minutes west of Houston, so feel free to come see the build and help out if you're in the area.

    Thanks,

    Michael (or Mike, just as long as you remember one of them!)
    Last edited by mjazzka; 05-31-2015 at 08:40 PM.

  2. #2
    Senior Member mjazzka's Avatar
    Join Date
    Jun 2014
    Location
    Katy, TX
    Posts
    173
    Post Thanks / Like
    Reserved

  3. #3
    Mark Dougherty's Avatar
    Join Date
    Feb 2011
    Location
    Hershey PA
    Posts
    722
    Post Thanks / Like
    Mike
    congrats I am glad you have her home.
    You will enjoy this next part of actually building.
    I will be watching over your shoulder

    PS: You have love a guy who has a library in his garage
    The traveling Builder
    717-773-5624

  4. #4

    Average Moderator
    Garry Bopp's Avatar
    Join Date
    Feb 2011
    Location
    Covington, Georgia
    Posts
    1,202
    Post Thanks / Like
    Congrats, Michael, on the delivery of your coupe. I think everyone should have a coupe nose in their game room! HaHa!

    I just listed my coupe for sale on consignment with Motorcar Studio in Atlanta ...

    Have fun with the build ... Mark D is an incredible resource for any FFR build!

    Garry
    I sure miss my coupe!

    F5R1004503SP 2004 Challenge Car, 331 Stroker

    Coupe # 031, 422" Windsor stroker by Southern Automotive (Dash autographed by Peter Brock)***SOLD***
    Unique 427 Roadster, 482" Aluminum FE by Southern Automotive***SOLD***

  5. #5
    Senior Member mjazzka's Avatar
    Join Date
    Jun 2014
    Location
    Katy, TX
    Posts
    173
    Post Thanks / Like
    Working on a Powder Coating booth to do my own, coming out pretty good so far. All of the sides will have smooth plywood on the inside, and there will be a cheap Home Depot fan sucking air through the filter in the back. After I'm done, I'll simply open the gate and sweep excess powder back into its container. Also have a caster with the wheel taken off for part rotation, will also connect wires for the ground so I don't have to clip it to the actual part.

    Turned out almost exactly like my design in Solidworks


    Capture.PNG
    You might need to click on this one to see the detail
    Last edited by mjazzka; 05-31-2015 at 08:42 PM.
    Michael
    Coupe #675 "Eloise"


    10/14/14 Coupe Ordered - 1/29/15 Coupe Delivered - 5/1/16 First Start
    Build Thread - Flickr

  6. #6
    Senior Member QSL's Avatar
    Join Date
    Nov 2011
    Location
    CORONA, CA
    Posts
    700
    Post Thanks / Like
    cool stuff! Congrats and let it be known, that you have just entered into one of the best experiences you will ever have in your life. Enjoy every step of the way!!!!
    MK4 delivery 12/17/11
    Build thread: HERE
    Epic First start video HERE

    Type 65 Coupe Ordered 01/17/13
    Build thread: HERE

  7. #7
    Senior Member John Dol's Avatar
    Join Date
    Feb 2011
    Location
    Gorham, ME
    Posts
    1,522
    Post Thanks / Like
    I like the red you chose (may want to choose a different link though or is that "Peggy"?) LOL
    Speaking of which, no pics of the donor? I went the donor route also, which worked pretty good for me.
    Sounds like you have a good plan in hand, and Mark is great!
    I like your powder coat booth.

    john
    Finished the "My Coupe, my way" project.

    http://s956.photobucket.com/albums/ae46/jdcoupe1969/
    Coupe #386,17" Team III 245 FR 315 RR, 3-link, T5, 4 wheel disk, power brakes/steering. Sniper EFI
    First start Sept. 18 2013 First go kart Sept 19 2013

  8. #8
    Senior Member mjazzka's Avatar
    Join Date
    Jun 2014
    Location
    Katy, TX
    Posts
    173
    Post Thanks / Like
    Quote Originally Posted by QSL View Post
    cool stuff! Congrats and let it be known, that you have just entered into one of the best experiences you will ever have in your life. Enjoy every step of the way!!!!
    Thank you, I am already enjoying the hell out of it! Friends coming over to help, managing the logistics of parts coming in and out, budgeting the car, every step has been enjoyable and worthwhile. I just hope I enjoy it as much as you guys have enjoyed Scoopy and Coupey!

    Quote Originally Posted by John Dol View Post
    I like the red you chose (may want to choose a different link though or is that "Peggy"?) LOL
    Speaking of which, no pics of the donor? I went the donor route also, which worked pretty good for me.
    Sounds like you have a good plan in hand, and Mark is great!
    I like your powder coat booth.

    john
    Thanks for the kind words, John. Here's the picture of Peggy, I could have swore that I posted one earlier! If I had an Audi like that, I probably wouldn't be building this car lol. She looks pretty good in the front and has no rust in the engine bay. There's a nice layer of grime though, which is good and bad. The back window is smashed in too (not pictured), which makes her look AWFUL. Funny story: I brought the car home in working condition, and started taking parts off a week later. Well, one week after that I get a letter from the HOA saying I can't have an inoperable vehicle in the driveway, and I have three days to get rid of her somewhere o.O A week earlier she was running, so how did they know?!?! I just assume it was the smashed rear window I guess, haha. But it's all good, we put her in the garage for now.

    Body


    Engine Bay


    We'll see how the PC booth turns out, but I think it'll be perfect for what I want to do. Here are the colors I ordered from Prismatic Powders (Am I allowed to post these...? I'm not sure). The Illusion Cherry will be applied as necessary to accent the black frame, with a clear coat on top. The Red Sparkle goes over the ink black, to get the effect shown on the Red Sparkle page. The Super Chrome will simply have a top clear coat and be for brackets and such.

    Illusion Cherry
    Red Sparkle
    Ink Black
    Super Chrome
    Last edited by mjazzka; 05-31-2015 at 08:43 PM. Reason: Donor Engine Bay
    Michael
    Coupe #675 "Eloise"


    10/14/14 Coupe Ordered - 1/29/15 Coupe Delivered - 5/1/16 First Start
    Build Thread - Flickr

  9. #9
    Senior Member Carlos C's Avatar
    Join Date
    Nov 2013
    Location
    Apollo Beach, FL
    Posts
    494
    Post Thanks / Like
    Hey Michael:

    Congrats on pulling the trigger. At the pace I'm going, you'll probably finish yours before me. The fact that you almost have a powder-coating booth built, is proof that you're getting ahead of the game. That's good, though. This way, I can "borrow" ideas from you... Good luck!

    Carlos
    FFR Coupe #0635; Ford 347ci, Tremec TKO500, 8.8 rear end w/ 3.27:1 gears, Cobra/SVO brakes

  10. #10
    Senior Member mjazzka's Avatar
    Join Date
    Jun 2014
    Location
    Katy, TX
    Posts
    173
    Post Thanks / Like
    All right, where there has been some stuff going on! I promise I haven't been just sittin' on my hands.

    1) Engine taken apart and sent for a hot tank and light machining. Still had factory honing, so it wasn't too bad! Heads were a little burnt, apparently, and the valve seats needed to be reground.

    20150416_210305 by Michael Jaska, on Flickr

    20150416_202144 by Michael Jaska, on Flickr

    3) Getting the footbox cleaned. De rusting electrolysis has been very helpful

    20150419_204623 by Michael Jaska, on Flickr


    4) Got Eloise back from the Powdercoater. Ended up spending more than I would with FFR, but I really don't like gloss black. This is semi-gloss (I know, a huge difference haha. Should have just gone with FFR for all the effort it was
    20150420_182600 by Michael Jaska, on Flickr

    20150420_200650 by Michael Jaska, on Flickr
    Last edited by mjazzka; 03-10-2016 at 04:06 PM.
    Michael
    Coupe #675 "Eloise"


    10/14/14 Coupe Ordered - 1/29/15 Coupe Delivered - 5/1/16 First Start
    Build Thread - Flickr

  11. #11
    Senior Member mjazzka's Avatar
    Join Date
    Jun 2014
    Location
    Katy, TX
    Posts
    173
    Post Thanks / Like
    5) Tranny taken apart to find out what's wrong with 3rd gear. Aaaaaand it's just gone. So I'll be ordering a new countershaft, 3rd gear, as well as a new 5th gear and 5th counter gear. Everything else seemed to be in great shape, although I am being careful about my budget for this. If it's too much I'll just buy a new T5.

    IMG_2064 by Michael Jaska, on Flickr

    IMG_2079 by Michael Jaska, on Flickr
    IMG_2073 by Michael Jaska, on Flickr

    This picture above you can see 3rd gear town up as well as 3rd on the countershaft. All the other gears except 5th still look pretty good. Most of the crap from 3rd gear somehow made it out the little hole connecting to the extension and screwed up 5th without messing up any of the other gears. I'm almost impressed. It'll cost $400-$500 to fix it if I do it right, methinks.

    6) Got most of the parts for the front suspension. Going with Mark Dougherty's suggestion to go with 13" front Cobra brakes. Why haven't I known about RockAuto until now??? I got two Cobra calipers cleaned and ready to go with brackets and pads for 170 shipped!!! So much great stuff there...

    IMG_2081 by Michael Jaska, on Flickr
    SN95 Spindles from eBay

    IMG_2083 by Michael Jaska, on Flickr
    13" slotted and drilled zinc plated rotors


    Stuff to put on

    IMG_2084 by Michael Jaska, on Flickr

    A very small amount of stuff that has been put on.
    IMG_2094 by Michael Jaska, on Flickr
    GREAT feeling to finally be putting it together!
    Last edited by mjazzka; 03-10-2016 at 04:09 PM.
    Michael
    Coupe #675 "Eloise"


    10/14/14 Coupe Ordered - 1/29/15 Coupe Delivered - 5/1/16 First Start
    Build Thread - Flickr

  12. #12
    Senior Member mjazzka's Avatar
    Join Date
    Jun 2014
    Location
    Katy, TX
    Posts
    173
    Post Thanks / Like
    IMG_2096 by Michael Jaska, on Flickr
    We ran into a snag with the top spindle bracket bolts. I didn't save my bolts from the struts on Peggy (my 89 donor), so I'm not sure what I need. I am also now using SN95 spindles, so I'm not sure what size they use. Help here would be appreciated.

    That's where Eloise is at right now, things are starting to come together. Slow going now, but I think I'm at the point where the preliminary things are coming to an end. We'll see.
    Last edited by mjazzka; 03-10-2016 at 04:09 PM.
    Michael
    Coupe #675 "Eloise"


    10/14/14 Coupe Ordered - 1/29/15 Coupe Delivered - 5/1/16 First Start
    Build Thread - Flickr

  13. #13
    Senior Member John Dol's Avatar
    Join Date
    Feb 2011
    Location
    Gorham, ME
    Posts
    1,522
    Post Thanks / Like
    Michael,

    Great idea on the white board!! Oh yeah and the car progress is good too
    It's nice to start putting stuff on the frame isn't it?

    John
    Finished the "My Coupe, my way" project.

    http://s956.photobucket.com/albums/ae46/jdcoupe1969/
    Coupe #386,17" Team III 245 FR 315 RR, 3-link, T5, 4 wheel disk, power brakes/steering. Sniper EFI
    First start Sept. 18 2013 First go kart Sept 19 2013

  14. #14
    Senior Member mjazzka's Avatar
    Join Date
    Jun 2014
    Location
    Katy, TX
    Posts
    173
    Post Thanks / Like
    Thanks John! That whiteboard has been a Godsend.

    And for putting stuff on the coupe, as Chuck Mangione would say, it "Feels So Good"!


    Did some cleaning tonight.

    20150428_185302 by Michael Jaska, on Flickr
    Parts Before

    20150428_185347 by Michael Jaska, on Flickr
    Tail end. Does anyone know how to take the Speedo gear and plug off?

    20150428_185426 by Michael Jaska, on Flickr
    Steering Rack

    20150428_194141 by Michael Jaska, on Flickr
    After. This picture makes them look a LOT cleaner than they actually are, but the power washer took off a ton of crap that I won't have to do myself now.

    20150428_202109 by Michael Jaska, on Flickr
    Another after picture. You can see there is still some grease on everything, but it's much more manageable now. Only about two hours of work into those.

    I will probably be getting a new Power Brake Booster. I think I'll probably put a wanted ad on the forums, see if I can get one in good shape for cheap.

    Here is a picture of one of the calipers I got from Rock Auto. Like I said, 170 including shipping for two?! Wow!
    20150428_202206 by Michael Jaska, on Flickr

    20150428_202215 by Michael Jaska, on Flickr
    Last edited by mjazzka; 03-10-2016 at 04:12 PM.
    Michael
    Coupe #675 "Eloise"


    10/14/14 Coupe Ordered - 1/29/15 Coupe Delivered - 5/1/16 First Start
    Build Thread - Flickr

  15. #15
    Senior Member mjazzka's Avatar
    Join Date
    Jun 2014
    Location
    Katy, TX
    Posts
    173
    Post Thanks / Like
    And here is a little something I'll be working on tomorrow... (hint, look how CLEAN they are!)
    20150504_200908 by Michael Jaska, on Flickr
    Last edited by mjazzka; 03-10-2016 at 04:12 PM.
    Michael
    Coupe #675 "Eloise"


    10/14/14 Coupe Ordered - 1/29/15 Coupe Delivered - 5/1/16 First Start
    Build Thread - Flickr

  16. #16
    Senior Member ehansen007's Avatar
    Join Date
    Mar 2011
    Location
    Aliso Viejo, CA
    Posts
    1,625
    Post Thanks / Like
    I love the title for this thread. Best of luck in your build. Looks like you've got a good sense of where to save money. It can be done!

  17. #17
    Senior Member CraigS's Avatar
    Join Date
    Feb 2011
    Location
    Blacksburg, Va
    Posts
    4,728
    Post Thanks / Like
    Take the rack to autozone and trade it in on one of these. I recommend the 3.0 turns version.

    #6406; 3.0 turns lock to lock
    #6439; 2.5 turns lock to lock
    #64163 2.25 turns lock to lock

    They are all right around $100.
    FFR MkII, 408W, Tremec TKO 500, 2015 IRS, DA QA1s, Forte front bar, APE hardtop.

  18. #18
    Senior Member mjazzka's Avatar
    Join Date
    Jun 2014
    Location
    Katy, TX
    Posts
    173
    Post Thanks / Like
    I planned on using it as a core with RockAuto, but AZ is actually a better deal once I take shipping into account... I'll probably go with 64163.

    Thanks Craig!

    Quote Originally Posted by CraigS View Post
    Take the rack to autozone and trade it in on one of these. I recommend the 3.0 turns version.

    #6406; 3.0 turns lock to lock
    #6439; 2.5 turns lock to lock
    #64163 2.25 turns lock to lock

    They are all right around $100.
    Michael
    Coupe #675 "Eloise"


    10/14/14 Coupe Ordered - 1/29/15 Coupe Delivered - 5/1/16 First Start
    Build Thread - Flickr

  19. #19
    Senior Member mjazzka's Avatar
    Join Date
    Jun 2014
    Location
    Katy, TX
    Posts
    173
    Post Thanks / Like
    Craig,

    I just ordered the reman steering rack (went with 6439, but I might change to 6406 as you recommended since it'll be a DD), a reman brake booster, and a reman power steering pump all from AZ for $240 including shipping. THEN they have an awesome coupon right now for 20% off and a $10 gift card, which took off $40 immediately. THEN subtract $37 for cores and that's $175 for all three!!! You just can't beat that. Thanks again!
    Last edited by mjazzka; 05-04-2015 at 12:49 PM.
    Michael
    Coupe #675 "Eloise"


    10/14/14 Coupe Ordered - 1/29/15 Coupe Delivered - 5/1/16 First Start
    Build Thread - Flickr

  20. #20
    Senior Member mjazzka's Avatar
    Join Date
    Jun 2014
    Location
    Katy, TX
    Posts
    173
    Post Thanks / Like
    A few other notes:

    1) Harbor Freight Powder Coating is a great deal for DIY PC-ing. I've done a vice too and it came out amazing. I made a few mods to mine that I'll post on here sometime.

    2) PC-ing takes a good bit of equipment. Your booth, oven, powder, plugs, cleaning materials, etc. It's not for those with small garages.

    3) You get a really nice sense of satisfaction after you are done with these things. They're powdercoated!!!

    4) It's relatively inexpensive once you have the equipment. I only used a couple ounces of both the metallic cherry and the clear coat, so probably max $5 worth of powder. I've decided saving it isn't worth it cause it gets all mixed when brushing it around in the booth. This doesn't matter much because it uses so little!


    As an aside, if anyone would like something (that fits in a kitchen oven) powder coated, send it my way and I'll do it for free. Provided you are cool with the limited choices I have in color, of course. Harbor Freight Black and Red, metallic cherry and gloss black.
    Michael
    Coupe #675 "Eloise"


    10/14/14 Coupe Ordered - 1/29/15 Coupe Delivered - 5/1/16 First Start
    Build Thread - Flickr

  21. #21
    Mark Dougherty's Avatar
    Join Date
    Feb 2011
    Location
    Hershey PA
    Posts
    722
    Post Thanks / Like
    this is awesome you are doing a great job
    sorry I have not been available for ya lately but things are just crazy here.
    The traveling Builder
    717-773-5624

  22. #22
    Senior Member jayguy's Avatar
    Join Date
    Feb 2011
    Location
    Las Vegas
    Posts
    234
    Post Thanks / Like
    Great looking build so far, love that you're doing your own powdercoating.

  23. #23
    Junior Member aarivers's Avatar
    Join Date
    Jan 2015
    Location
    Fort Myers FL
    Posts
    29
    Post Thanks / Like
    Off to a great start. I can't wait to get my parts and start rebuilding this coupe.

  24. #24
    Senior Member mjazzka's Avatar
    Join Date
    Jun 2014
    Location
    Katy, TX
    Posts
    173
    Post Thanks / Like
    Thanks for the support guys, I feel like I'm really getting into it now. And it's FUN working on it! I bet the only way to have more fun is to drive it. So far my only complaint is that the manual needs to be rewritten in places and new pictures put into it. It can be VERY confusing, especially where I need washers and spacers and such.
    Michael
    Coupe #675 "Eloise"


    10/14/14 Coupe Ordered - 1/29/15 Coupe Delivered - 5/1/16 First Start
    Build Thread - Flickr

  25. #25
    Senior Member mjazzka's Avatar
    Join Date
    Jun 2014
    Location
    Katy, TX
    Posts
    173
    Post Thanks / Like
    Update:

    My engine is done at the machine shop and ready for me to put together. They wanted to charge $200 to do the assembly. But it's all part of the learning I want, so the rest of the family engineers and I are going to have a great time putting it back together. Block was cleaned, honed, decked, new cam and pilot bearings. Pistons and rods soda blasted, checked. Apparently I have forged pistons already, so that's good. Heads were cleaned, resurfaced and assembled. New valves and springs and guides. Crankshaft was ground as well. I am going for the budget build, but I figured the engine was one thing it was all right to spend some money to get it right. I will spend around $1130 for the above (would have been cheaper, but they bought the valves and springs for me). Right now the budget is on track for $32000, but I plan on bringing it down a bit by selling some unneeded parts at some point.

    Mounted the first parts of the IRS, just the LCAs and coil overs. Still waiting on t-bird parts.
    Last edited by mjazzka; 11-05-2015 at 02:02 AM. Reason: Picture links broken and shortening
    Michael
    Coupe #675 "Eloise"


    10/14/14 Coupe Ordered - 1/29/15 Coupe Delivered - 5/1/16 First Start
    Build Thread - Flickr

  26. #26
    Senior Member
    Join Date
    Feb 2011
    Location
    Gorham, ME
    Posts
    253
    Post Thanks / Like
    Welcome to the "We need a new build manual" club. It's been this way since I took delivery of my coupe on Nov 2008. I guess the coupe people don't matter any more to FFR, as they are so busy selling GTM's, 33 Hotrods and 818's. They probably dont sell enough coupes to make it worth rewriting the manual. A shame as we are selling their goodwill also.
    Bill

    Coupe #421, Picked Up 11/15/08, started 1/1/09 - Rebuilt mildly massaged 302, T5, 3 Link, and Loads of Extras

  27. #27
    Senior Member mjazzka's Avatar
    Join Date
    Jun 2014
    Location
    Katy, TX
    Posts
    173
    Post Thanks / Like
    I've seen a few grumblings around the community, so I guess it's nothing new. I think I'll take it upon myself to annotate my build manual and ship it back to Dave and company when I'm done It's his favorite car, so in my mind it should have the best manual! It is a little sad to see the newer flashy cars taking all the spotlight, but that's just kind of the nature of them. Like you said, FFR is probably making a ton more money selling those that it's not worth working over the Coupe.

    Quote Originally Posted by loeffler1 View Post
    Welcome to the "We need a new build manual" club. It's been this way since I took delivery of my coupe on Nov 2008. I guess the coupe people don't matter any more to FFR, as they are so busy selling GTM's, 33 Hotrods and 818's. They probably dont sell enough coupes to make it worth rewriting the manual. A shame as we are selling their goodwill also.
    Michael
    Coupe #675 "Eloise"


    10/14/14 Coupe Ordered - 1/29/15 Coupe Delivered - 5/1/16 First Start
    Build Thread - Flickr

  28. #28
    Senior Member John Dol's Avatar
    Join Date
    Feb 2011
    Location
    Gorham, ME
    Posts
    1,522
    Post Thanks / Like
    Michael,

    I have a three link so my advise on the rear suspension may be out of wack, but I don't think there should be a space between the shock mount and the shock. Same for the control arms There should be a spacer there to fill the gap.
    Front suspension looks good to me.
    Adding parts to the frame is fun isn't it!?

    John
    Finished the "My Coupe, my way" project.

    http://s956.photobucket.com/albums/ae46/jdcoupe1969/
    Coupe #386,17" Team III 245 FR 315 RR, 3-link, T5, 4 wheel disk, power brakes/steering. Sniper EFI
    First start Sept. 18 2013 First go kart Sept 19 2013

  29. #29
    Member hgcars's Avatar
    Join Date
    Jan 2015
    Location
    New Jersey
    Posts
    50
    Post Thanks / Like
    Michael,

    You have the upper control arms mounted in the wrong location. With donor Mustang spindles they bolt to the horizontal part of the frame above where you have them attached. You have them on the vertical plate which you use if using FFR spindles. This will move the upper control arm in and make the hub perpendicular to the ground.

    Harold

  30. #30
    Senior Member John Dol's Avatar
    Join Date
    Feb 2011
    Location
    Gorham, ME
    Posts
    1,522
    Post Thanks / Like
    Harold is right. Mine are mounted there but I have the SAI kit so it did not look out of place to me.

    John
    Finished the "My Coupe, my way" project.

    http://s956.photobucket.com/albums/ae46/jdcoupe1969/
    Coupe #386,17" Team III 245 FR 315 RR, 3-link, T5, 4 wheel disk, power brakes/steering. Sniper EFI
    First start Sept. 18 2013 First go kart Sept 19 2013

  31. #31
    Senior Member mjazzka's Avatar
    Join Date
    Jun 2014
    Location
    Katy, TX
    Posts
    173
    Post Thanks / Like
    Awesome, thanks for the feedback gents. Exactly why I posted the pictures!

    John, I definitely agree on the spacings on the rear end components. I've put everything on according to the instructions as best as I can understand them, and it still came out like that unfortunately. It's not a big deal now, but I might have to go through some build threads to find out what other people have done.
    Michael
    Coupe #675 "Eloise"


    10/14/14 Coupe Ordered - 1/29/15 Coupe Delivered - 5/1/16 First Start
    Build Thread - Flickr

  32. #32
    Senior Member MPTech's Avatar
    Join Date
    Feb 2011
    Location
    St. Louis, MO
    Posts
    1,182
    Post Thanks / Like
    Blog Entries
    8
    Do yourself a favor and ditch the donor throttle pedal and replace it with a Russ Thompson unit. Easier now than after the FB is closed up.

    Good start on your build and nice looking powder coating, do you a paint color in mind for the body to compliment the PC?
    F5R #7446: MK4, 302, T5 midshift, 3.55 Posi IRS, 17" Halibrands
    Delivered 4/4/11, First start 9/29/12, Licensed 4/24/13, off to PAINT 2/15/14!! Wahoo!

  33. #33
    Senior Member mjazzka's Avatar
    Join Date
    Jun 2014
    Location
    Katy, TX
    Posts
    173
    Post Thanks / Like
    Smallish update... will post more pictures in a day or two. If y'all have any advice for me, in the next 48 hours I'll be painting and installing my aluminum and assembling my engine.

    1) Ordered and installed Russ Thompson's accelerator pedal. Had to bend the top part towards the center of pedal box to avoid hitting the clutch sensor mount.

    2) Mounted, drilled and clecoed footbox and cockpit floor aluminum. Trimmed the top edge of the side parts of the floor aluminum that make up the sides of the tunnel, they stuck out a little bit, as well as a few other things. Will be doing the trunk aluminum soon too, just got to cut out a hole for my trunk and battery spaces after I figure out my gas tank situation.
    20150530_162956_3 by Michael Jaska, on Flickr

    3) Am currently migrating to Flickr as my picture management, photobucket ain't working out for me. And the pictures are normal size!
    https://www.flickr.com/photos/133691...57651467539454

    4) Finished prepping everything for engine assembly. It should be ready to go!!! Might need to do some light emery cloth on the block where the heads sit, but that's about it! My dad rubbed down the stock camshaft with some 1200 grit sandpaper with some engine oil, and it looks beautiful. Can't wait for the next few days. Took the wire wheel to the head bolts after my dad came up with an ingenious jig for them, THEY came out great too. As an aside, do y'all recommend using engine oil or anti-seize on head bolts? I've seen so many opinions on that.

    20150523_120311 by Michael Jaska, on Flickr

    20150522_214129 by Michael Jaska, on Flickr

    20150531_005959 by Michael Jaska, on Flickr
    Michael
    Coupe #675 "Eloise"


    10/14/14 Coupe Ordered - 1/29/15 Coupe Delivered - 5/1/16 First Start
    Build Thread - Flickr

  34. #34
    Senior Member mjazzka's Avatar
    Join Date
    Jun 2014
    Location
    Katy, TX
    Posts
    173
    Post Thanks / Like
    5) I figured out why the powder coating came out so purple!!! I have been curing it wrong, and all I had to do was keep it in the oven longer. The instructions say I need to have it in for the stated time AFTER the substrate has gotten to 400°F, where I have been just doing it for 10 minutes TOTAL. I have a couple extra coats on a few parts, but no harm no foul and everything looks AMAZING. Now I just have a smaller batch to do, caliper brackets, belt tensioner, redo power steering pump, etc.

    20150524_230704_2 by Michael Jaska, on Flickr

    Just look at it!!!
    20150525_184954 by Michael Jaska, on Flickr

    20150525_185017_1 by Michael Jaska, on Flickr

    20150525_185024 by Michael Jaska, on Flickr


    I am getting my IRS components from another FFR guy, if USAA can ever learn how to mail a darn check. Seriously. Will also be going with some FR500 wheels. I'm blowing my budget on a few things, but so far my spreadsheet shows a fairly reasonable number at the moment (at least to me...) I am going to continue to be vigilant!

    What do you guys think about these for my mufflers? (I'm doing undercar exhaust)
    http://www.carid.com/spec-d/apexi-n1...gf1xoCPxPw_wcB
    Michael
    Coupe #675 "Eloise"


    10/14/14 Coupe Ordered - 1/29/15 Coupe Delivered - 5/1/16 First Start
    Build Thread - Flickr

  35. #35
    Senior Member MPTech's Avatar
    Join Date
    Feb 2011
    Location
    St. Louis, MO
    Posts
    1,182
    Post Thanks / Like
    Blog Entries
    8
    What do you guys think about these for my mufflers? (I'm doing undercar exhaust)
    http://www.carid.com/spec-d/apexi-n1...gf1xoCPxPw_wcB
    If you are serious, I think you're going to have clearance issues and unless that is the tailpipe, it's going to be hard finding a 3.5" pipe to clear the IRS.
    Do a couple searches, there are some good threads identifying the specific mufflers with minimum profiles for undercar.


    If you are able to stay on your budget with all of the goodies posted on these forums, you have amazing willpower!
    F5R #7446: MK4, 302, T5 midshift, 3.55 Posi IRS, 17" Halibrands
    Delivered 4/4/11, First start 9/29/12, Licensed 4/24/13, off to PAINT 2/15/14!! Wahoo!

  36. #36
    Senior Member mjazzka's Avatar
    Join Date
    Jun 2014
    Location
    Katy, TX
    Posts
    173
    Post Thanks / Like
    I was definitely planning on using them as the tailpipe, but I haven't checked to see how much room there is from the IRS to the rear of the car. I'll look into the other threads for sure!

    Quote Originally Posted by MPTech View Post
    If you are serious, I think you're going to have clearance issues and unless that is the tailpipe, it's going to be hard finding a 3.5" pipe to clear the IRS.
    Do a couple searches, there are some good threads identifying the specific mufflers with minimum profiles for undercar.


    If you are able to stay on your budget with all of the goodies posted on these forums, you have amazing willpower!
    Michael
    Coupe #675 "Eloise"


    10/14/14 Coupe Ordered - 1/29/15 Coupe Delivered - 5/1/16 First Start
    Build Thread - Flickr

  37. #37
    Senior Member mjazzka's Avatar
    Join Date
    Jun 2014
    Location
    Katy, TX
    Posts
    173
    Post Thanks / Like
    Finished the vice we needed to refurbish, painted it a nice gloss gray and greased everything up. It works really well now.

    20150605_000736 by Michael Jaska, on Flickr


    Attempted to install the steering rack, but ran into issues lining up the upper steering rack to the lower because the lower hits the brake sensor bracket in the pedal box.

    20150609_202745 by Michael Jaska, on Flickr

    It's easy to see the two parts of the shaft don't line up here.
    20150609_202752 by Michael Jaska, on Flickr

    Without pulling up on the end of the lower steering rack to line it up. You can see the gap in the red square.
    20150609_202812 by Michael Jaska, on Flickr

    While pulling up on the end of the lower steering rack to line it up. You can see the gap has closed.

    20150609_202814 by Michael Jaska, on Flickr

    What do I do here, did I miss a part of the instructions that says to remove that bracket? Thanks!
    Michael
    Coupe #675 "Eloise"


    10/14/14 Coupe Ordered - 1/29/15 Coupe Delivered - 5/1/16 First Start
    Build Thread - Flickr

  38. #38
    Senior Member mjazzka's Avatar
    Join Date
    Jun 2014
    Location
    Katy, TX
    Posts
    173
    Post Thanks / Like
    After looking at the manual some more it seems they don't even have the switch on the brake pedal that impacts the steering shaft, so I'll just Dremel it off tomorrow and be done with the steering column. Can't wait.

    Hopefully my nightmare with USAA and the USPS is over, they lost a substantial official check and it's been crazy. But hopefully the IRS and transmission I am getting together for a good price will be here soon. Will do my last batch of red powdercoating when I can get the diff cover and the T-bird spindles.

    Dropped off my driveshaft at the driveshaft shop ( I didn't know there were shops that ONLY did that). The U-joints were both bad and then after I left (of course) they called and told me the transmission yoke was bad too, so it'll be $190 for new U-joints and a new yoke and for the shortening and balancing. I actually think it's a pretty good deal.

    Got my upper intake manifold back from the machine shop, who cleaned it and some bolts I had for $45. This manifold is CLEAN. They even made the inside of the plenum spotless, which I was worried about. And hopefully it will all stay that way since I won't be running EGR on this car.

    Painted all my aluminum with my DIY LizardSkin. Sound deadening is good, the only issue is that the latex paint comes off relatively easy by scratches. However, it should be no problem to touch up when I get to a stage that is less intensive. Also, everything on the interior is going to be upholstered anyway except for right under the seats for clearance, so none of it will be seen on the inside. I might do a write up on the DIY stuff later.

    Will be doing some bead rolling for my trunk aluminum and probably doing the two piece flush dash too. I also have a (hopefully) easy idea for putting a hump on the dash so I can see the gauges.

    Also pulled the trigger on a fuel tank, all of my fuel tank equipment was trashed so I am replacing it all with an OEM 15.4 gallon. I figured 22 gallons takes a lot more driving between fillups than I want to do, and the ability to have a small trunk and also rear battery makes the OEM tank an attractive option. Plus I can just follow the manual. Undercar exhaust is still planned, just need to get some materials.

    I am definitely at the point where I think the Complete Kit is the way to go though, just for peace of mind and my ever upward trending cost... But hey, I never got anywhere by doing things the easy way
    Last edited by mjazzka; 06-09-2015 at 11:24 PM.
    Michael
    Coupe #675 "Eloise"


    10/14/14 Coupe Ordered - 1/29/15 Coupe Delivered - 5/1/16 First Start
    Build Thread - Flickr

  39. #39
    Senior Member mjazzka's Avatar
    Join Date
    Jun 2014
    Location
    Katy, TX
    Posts
    173
    Post Thanks / Like
    I mentioned I was going to do some modeling of the undercar exhaust mod, and here are some of the results. I plan on doing some other failure modes, but I'm thinking torsion as shown will be the highest risk.

    The front of the main rails was held as a fixture and 1000 lbs was applied to each of the main rail's tail ends. 1000 was kind of arbitrary, although I don't think the real car will ever see anything close to this loading.

    I will also be messing with the thickness of the through pipe I'm welding in, as well as it's positioning in the rear cross tubing.

    Note: Main rails are modeled as 4" OD .125" wt, not .120" wt as stated on FFR's website. This means the model is slightly robust in comparison to the actual chassis. For the through tubing I am using 3" Schedule 80 DOM Tubing (3.5" OD, .313"wt) which is significantly more robust than the main rails, and leaves about .2" of radius for 2.5" exhaust to go through.

    Results show that Von Mises reaches around ~35000 psi, while yield is at ~50000, so a f.o.s. of 1.43. So far so good on this though, I don't think it will be too big of an issue. The deformation shown is exaggerated, of course!


    OppositeVertical_RearView by Michael Jaska, on Flickr

    OppositeVertical_FrontView by Michael Jaska, on Flickr

    OppositeVertical_Isometric by Michael Jaska, on Flickr

    OppositeVertical_Top by Michael Jaska, on Flickr
    Michael
    Coupe #675 "Eloise"


    10/14/14 Coupe Ordered - 1/29/15 Coupe Delivered - 5/1/16 First Start
    Build Thread - Flickr

  40. #40
    PLATNUM Supporting Member
    wallace18's Avatar
    Join Date
    Apr 2012
    Location
    Trenton, Florida
    Posts
    5,382
    Post Thanks / Like
    Corvettes did that for many years with no problem. I feel you will be OK.

Page 1 of 3 123 LastLast

Posting Permissions

  • You may not post new threads
  • You may not post replies
  • You may not post attachments
  • You may not edit your posts
  •  

Brown County Customs

Visit our community sponsor