-
Senior Member

Hey Edward, I'm pleased that I'm always several steps behind you in this build, your suggestions are always very helpful, one being to pre-install and drill all the panels before sending them to get powder coated. Like you I'm powder coating all the remaining panels in the car gray to match the frame. I wanted to check if you managed to find any gray rivets that were a close match to the frame color. The gray ones I ordered from McMaster where too light. Otherwise I was just going to send some plain ones to get powder coated as well, that way I'll have a perfect match. Cheers
-
Senior Member


Originally Posted by
Paul_M

Hey Edward, I'm pleased that I'm always several steps behind you in this build, your suggestions are always very helpful, one being to pre-install and drill all the panels before sending them to get powder coated. Like you I'm powder coating all the remaining panels in the car gray to match the frame. I wanted to check if you managed to find any gray rivets that were a close match to the frame color. The gray ones I ordered from McMaster where too light. Otherwise I was just going to send some plain ones to get powder coated as well, that way I'll have a perfect match. Cheers
Initially I was going to just use the plain raw aluminum rivets. But upon further review agree having them the same color as the panels would be much better. I'm going to line some up in a block of wood and hit them with the same Rust-Oleum High Performance Wheel Paint, color 248930 GRAPHITE, mentioned earlier in my build thread. I'm using a pneumatic puller, and I found if I keep a real light touch like on the McMaster white ones I've used already, there is little/no damage to the painted rivets. Easy enough to touch up after the fact if necessary though.
My powder coat parts are supposed to be done sometime this week. Most are the matching grey color. But I have a few custom panels that will be white to match the FF supplied white panels. With the info provided by FF, I was able to get the same exact Prismatic Powders white.
Last edited by edwardb; 01-31-2016 at 09:11 AM.
Build 1: Mk3 Roadster #5125. Sold 11/08/2014.
Build 2: Mk4 Roadster #7750. Sold 04/10/2017.
Build Thread
Build 3: Mk4 Roadster 20th Anniversary #8674. Sold 09/07/2020.
Build Thread and
Video.
Build 4: Gen 3 Type 65 Coupe #59. Gen 3 Coyote. Legal 03/04/2020.
Build Thread and
Video
Build 5: 35 Hot Rod Truck #138. LS3 and 4L65E auto. Rcvd 01/05/2021. Legal 04/20/2023.
Build Thread. Sold 11/9/2023.
-
Senior Member
Instrument Panel Cover and Assembly
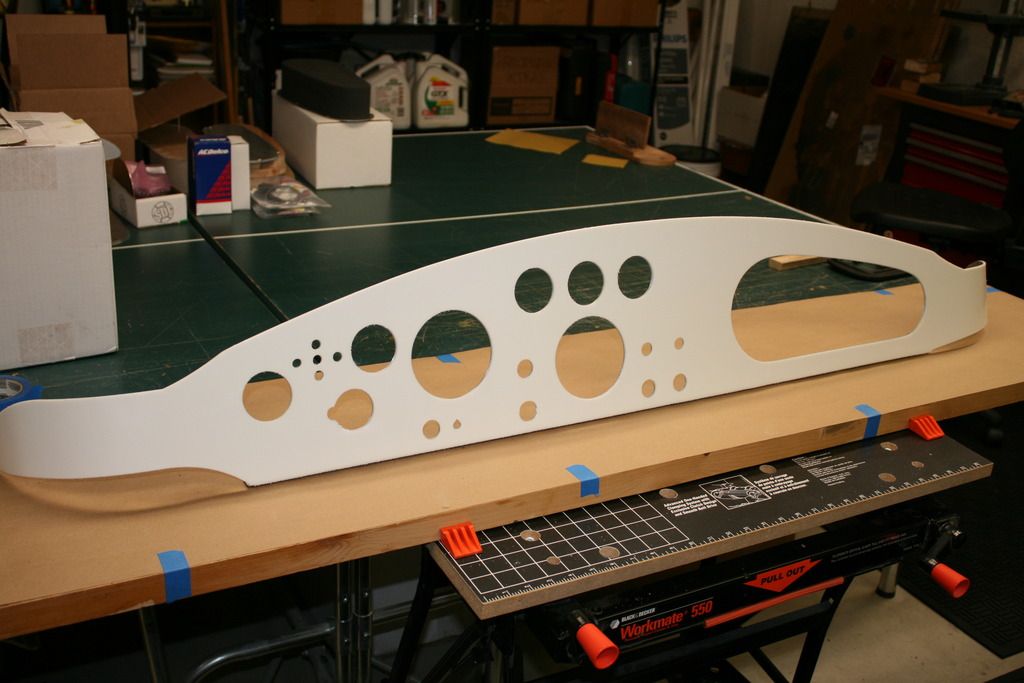
While waiting for powder coating to be finished on all my sheet metal and related, decided to tackle the instrument panel. As described in previous updates, I did a slightly modified competition layout using a blank FF panel and fabricated a glove box. I decided early on to give leather covering a try. I picked up a full hide on eBay. It’s way more than I needed, but found a source that was reasonable and figured having extra just in case wasn’t a bad thing. I’m also planning to do the transmission tunnel cover, but that will be sometime later. For my last build, I wanted to avoid the puffy look, so did two layers of vinyl and no padding. It turned out nice, but had a bit less “give” than I expected. So this time around, I decided to give thin padding a try. I bought some 1/8" thick Volara Sculpting Foam from YourAutoTrim.com. I did some testing, and was satisfied. Nice cushion but not puffy.
This is the instrument panel with the foam applied. I used DAP Weldwood Landau Top & Trim HHR (High Heat Resistant) Contact Cement also from YourAutoTrim.com. This is the stuff I’ve used before and it’s outstanding. It’s a professional product that usually is sprayed. But I’ve found it works OK if brushed or rolled. Probably not the most efficient application method, but the smallest you can buy is one gallon, so no problem with running out. If you take something to a professional upholstery or auto trim shop, guarantee this is the stuff they’ll be using.
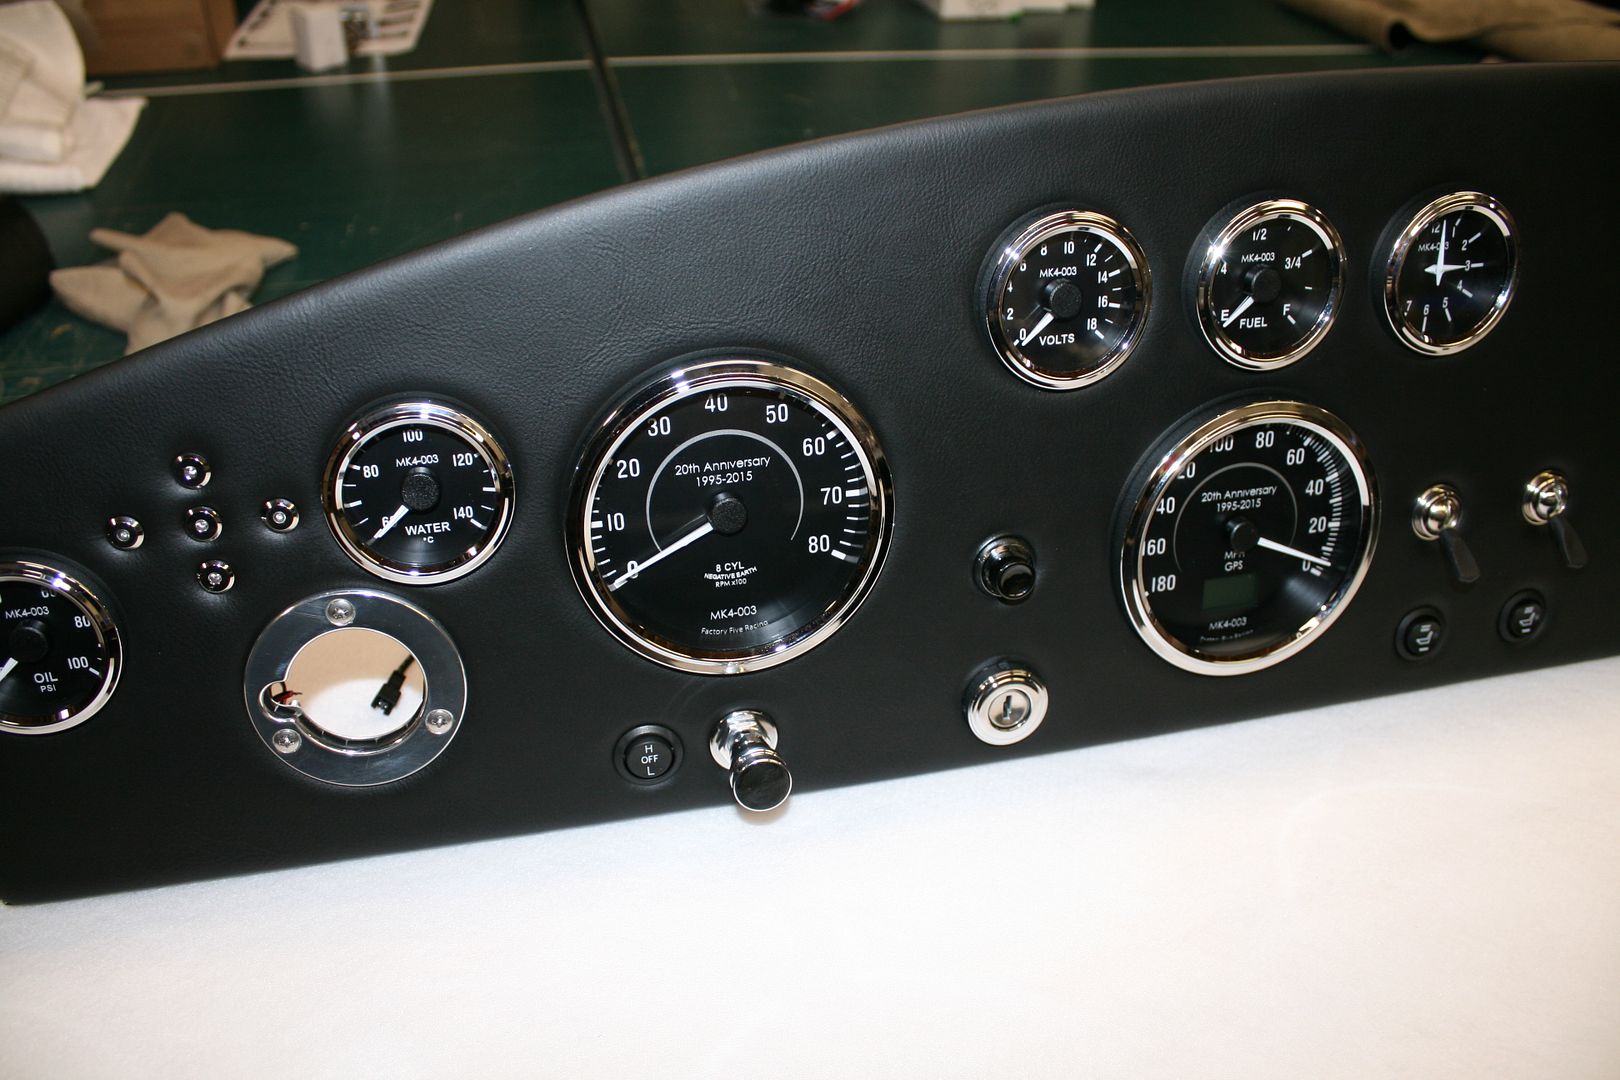
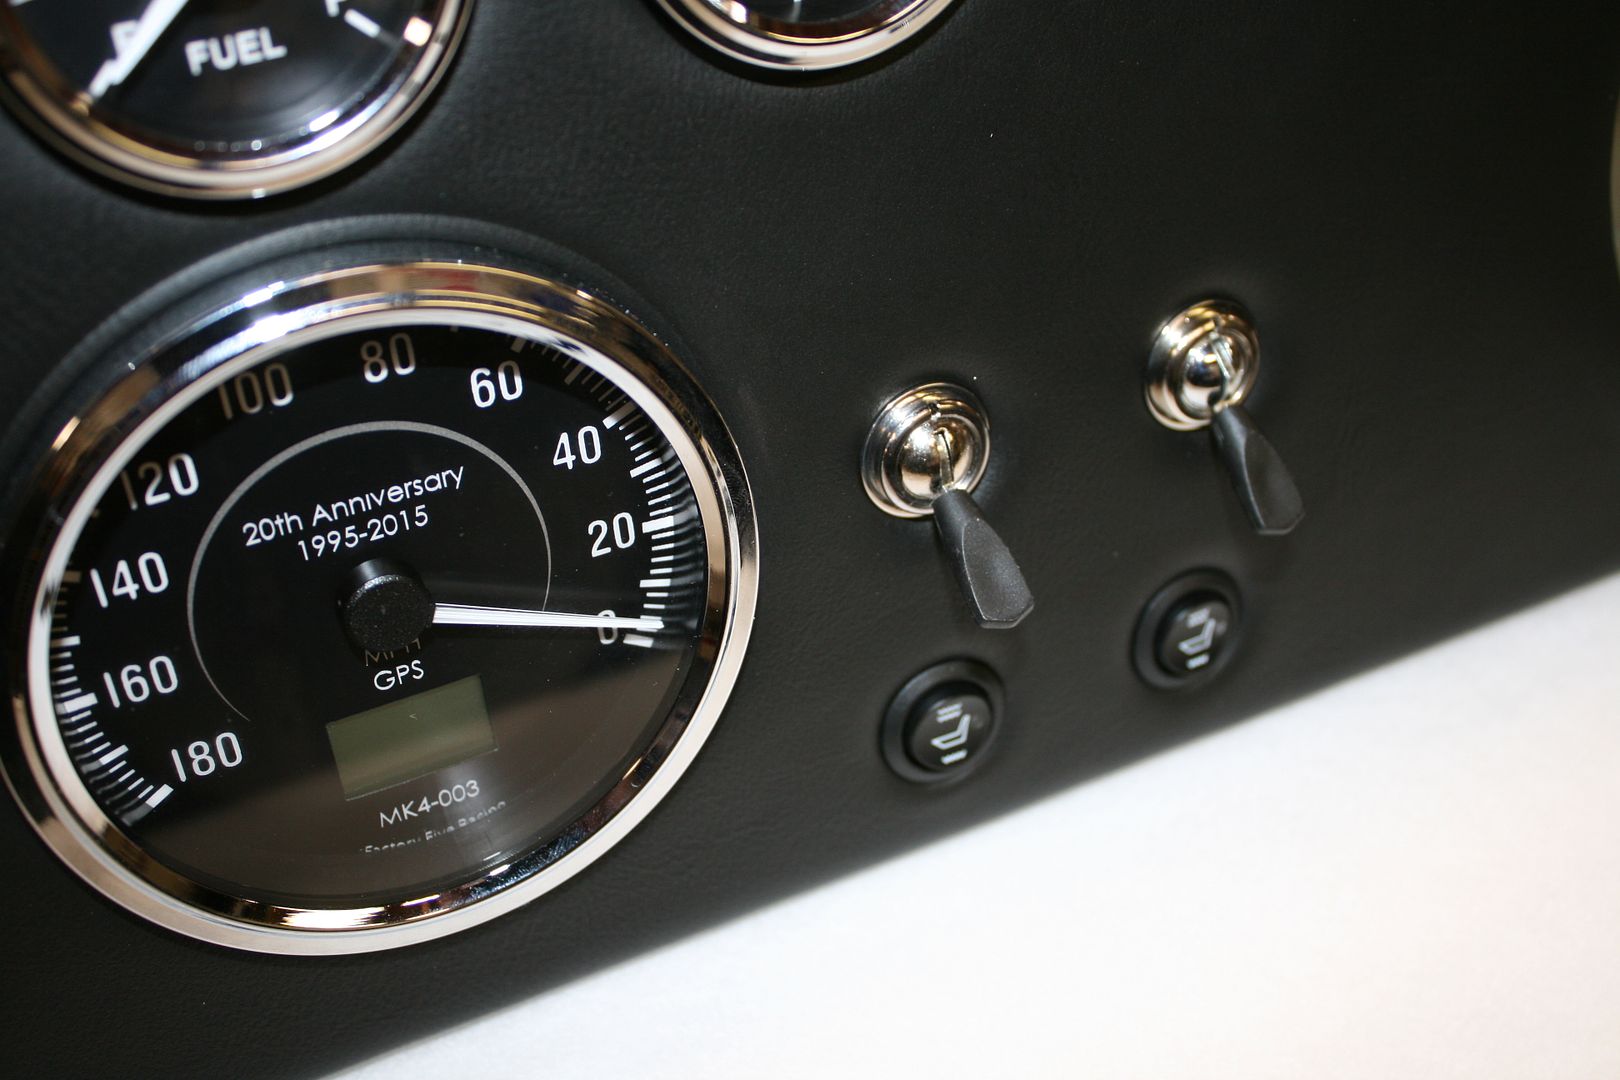
Some hours later (!), had the leather applied and everything installed. Having done a couple panels in vinyl and now leather, it’s a bit different. It goes from flat to a little wavy when the contact cement is applied. Maybe wouldn’t be as pronounced if the cement were sprayed. But with care it goes down and rolls out nice and flat. It also eats blades. I went through a stack of X-Acto blades. I pulled the leather through to the back with pie cuts on all but a couple openings where there isn't room and there's a sufficient flange or finish washer. The holes were cut taking this into account. These pictures don’t really do the leather justice. The natural grain is pretty cool. I still have work to do on the glovebox. I’m planning to line the interior with leather (have plenty) and then need to cover and hang the door. The grab handle is just bolted through the dash at this point. Once the dash is installed in the chassis, I’ll add braces down to the 2x2 dash tube as I’ve done before.

Just a little more work to do back here.
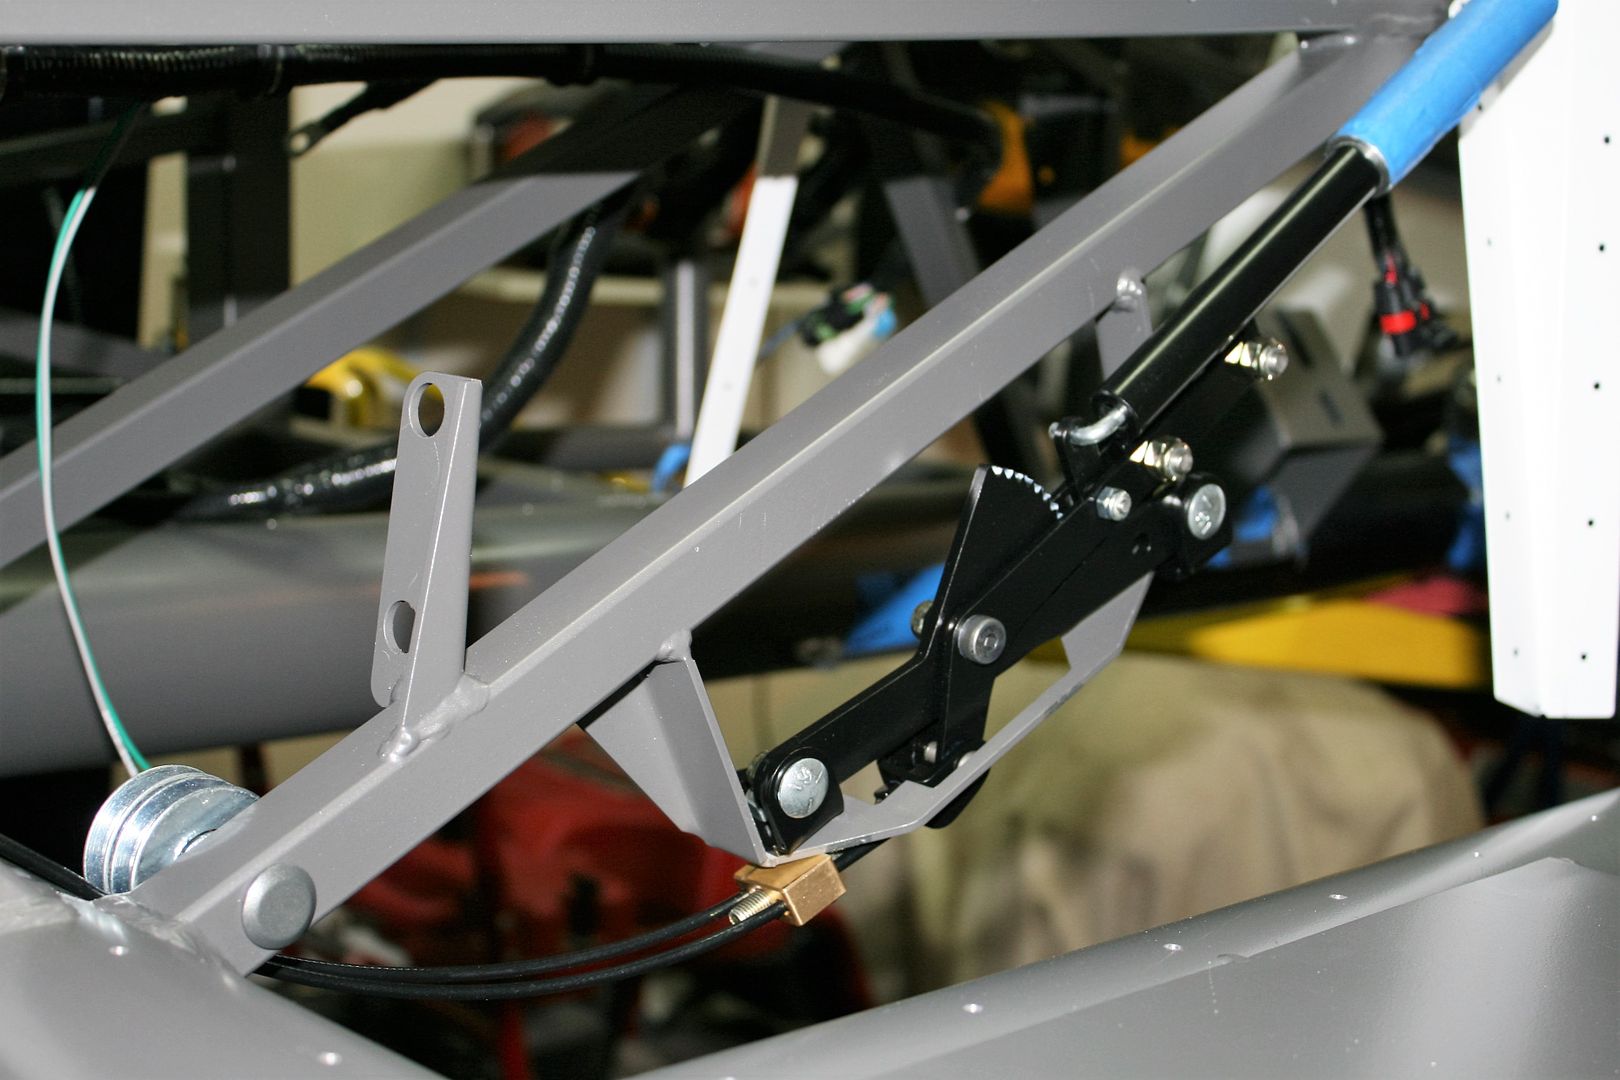
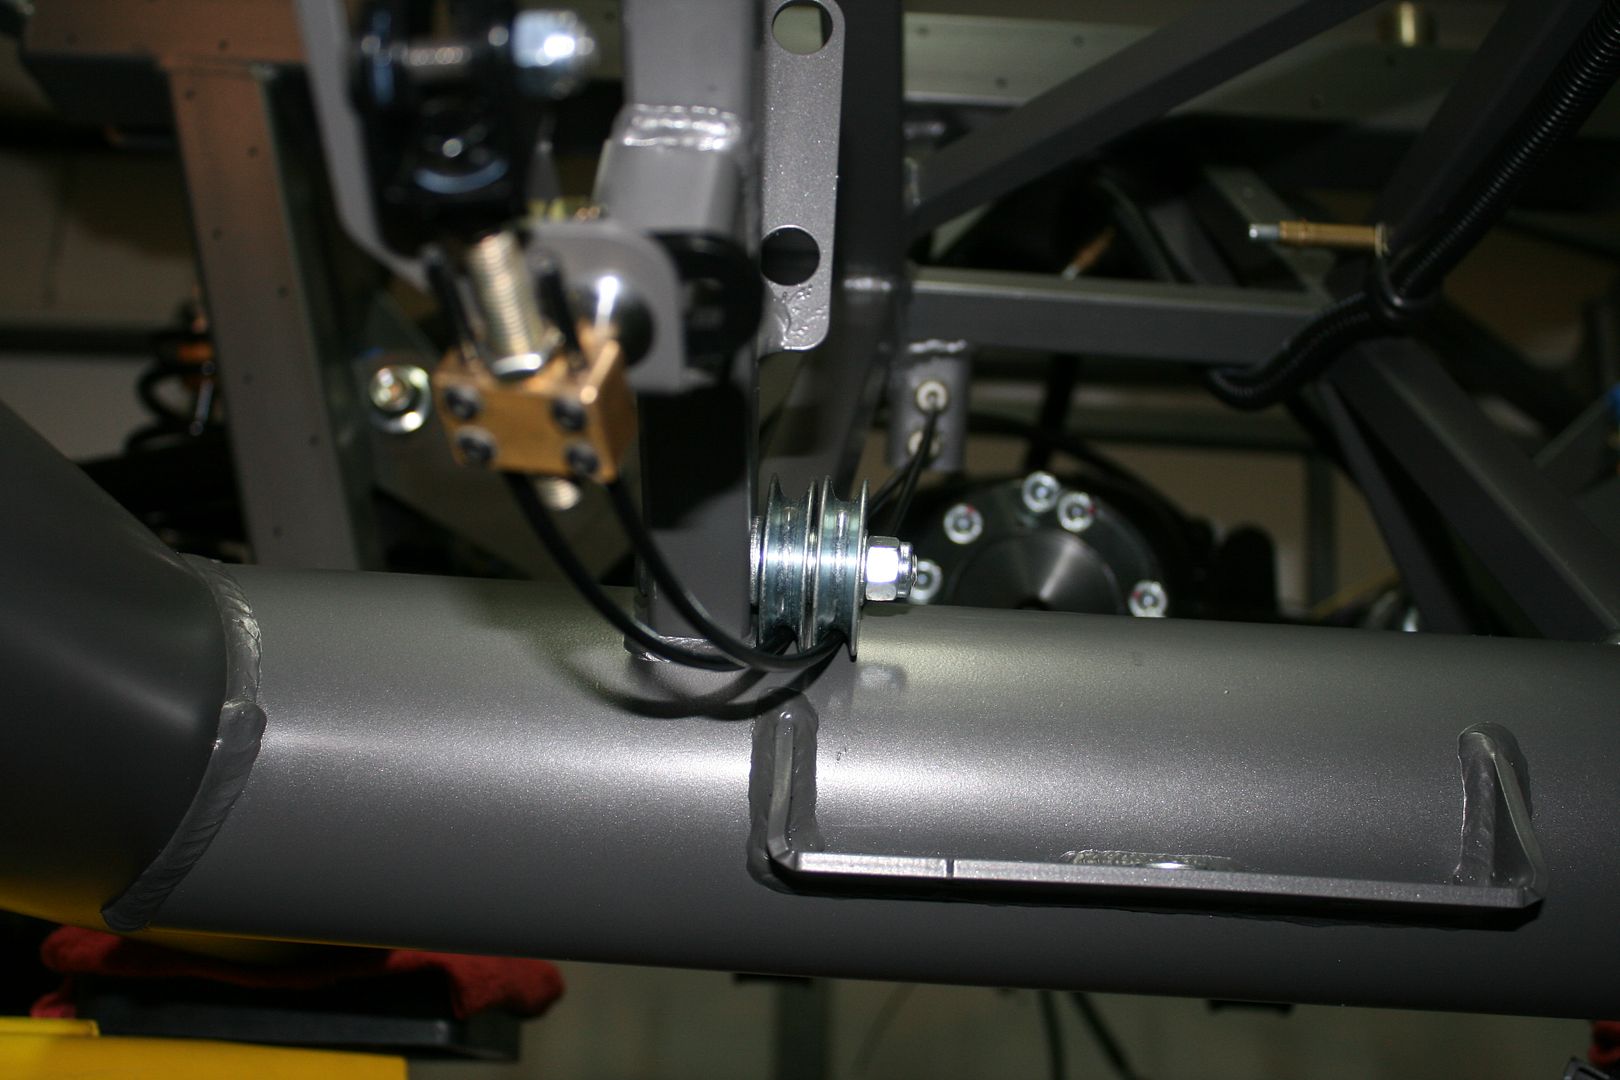
Quick follow-up to a previous update. I posted my e-brake cable routing going through pulleys instead of under the 4 inch chassis tube. Jeff Kleiner made an excellent observation that perhaps a second pulley with a cable through each might work well. After I got past the “Why didn’t I think of that…” moment, decided to give it a try. It worked OK before, but even better now. I checked as best I could with the transmission frame and mount in place, pictures I have of my other TKO installed, and all indications are I should have enough room. I’ve got the e-brake handle assembly painted and the cable routing really finalized now. It will need to come out one more time to install the aluminum panel and insulation.
Last edited by edwardb; 02-02-2016 at 10:52 PM.
Build 1: Mk3 Roadster #5125. Sold 11/08/2014.
Build 2: Mk4 Roadster #7750. Sold 04/10/2017.
Build Thread
Build 3: Mk4 Roadster 20th Anniversary #8674. Sold 09/07/2020.
Build Thread and
Video.
Build 4: Gen 3 Type 65 Coupe #59. Gen 3 Coyote. Legal 03/04/2020.
Build Thread and
Video
Build 5: 35 Hot Rod Truck #138. LS3 and 4L65E auto. Rcvd 01/05/2021. Legal 04/20/2023.
Build Thread. Sold 11/9/2023.
-
Post Thanks / Like - 1 Thanks, 0 Likes
-
Senior Member

Originally Posted by
edwardb
Some hours later (!), had the leather applied and everything installed. Having done a couple panels in vinyl and now leather, its a bit different. It goes from flat to a little wavy when the contact cement is applied. Maybe wouldnt be as pronounced if the cement were sprayed. But with care it goes down and rolls out nice and flat. It also eats blades. I went through a stack of X-Acto blades. I pulled the leather through to the back with pie cuts on all but a couple openings where there isn't room and there's a sufficient flange or finish washer. The holes were cut taking this into account. These pictures dont really do the leather justice. The natural grain is pretty cool. I still have work to do on the glovebox. Im planning to line the interior with leather (have plenty) and then need to cover and hang the door. The grab handle is just bolted through the dash at this point. Once the dash is installed in the chassis, Ill add braces down to the 2x2 dash tube as Ive done before.
ANy recommendations on how to apply the covering to avoid wrinkles and/or wavy results? my initial thought was to put the vinyl (in my case rapper extreme) face down on the ground as it lays pretty flat, spray it and the padded dash, place the dash on top, weight it down and pull the ends up around to the ends of the dash to secure. I assume pulling the ends and holding in place will keep enough tension on the vinyl to prevent wrinkling, but I wouldn't know until ti dries and I turn it over.
Another option would be to install it finish side facing up to ensure check for waves, but then I have no pressure on the vinyl to ensure it sticks. Thanks for your advice!
-
Senior Member
Originally Posted by
mmklaxer
ANy recommendations on how to apply the covering to avoid wrinkles and/or wavy results? my initial thought was to put the vinyl (in my case rapper extreme) face down on the ground as it lays pretty flat, spray it and the padded dash, place the dash on top, weight it down and pull the ends up around to the ends of the dash to secure. I assume pulling the ends and holding in place will keep enough tension on the vinyl to prevent wrinkling, but I wouldn't know until ti dries and I turn it over.
Another option would be to install it finish side facing up to ensure check for waves, but then I have no pressure on the vinyl to ensure it sticks. Thanks for your advice!
In this case, because it's leather and not particularly stretchy, I taped the leather piece back side up on my workbench. Then brushed contact cement on both surfaces and made sure the leather was as flat as possible. When both sides dry to the touch carefully dropped the dash onto the leather. The adhesion is instant but still removed and rolled out to make sure. Plus pulled around and adhered the curved ends. There were no wrinkles and all good. I'm not sure this process would be the best for yours though. I've used that rapper extreme vinyl before and it's quite stretchy and might not lay flat enough to use a similar process. I'd recommend having the dash on the bench face up and drop the vinyl onto it. I'd also recommend having a helper. Hold the vinyl piece in the air by the four corners. Drop one end and start pushing it into place holding the rest above the surface. Work to the other end slightly pulling as you go and pressing into place. If you use contact cement (spray or brush) the adhesion is instant and you shouldn't get any wrinkles. No dry time required. But you want it placed exactly right when making the first contact. My experience is if you pull it up and try to reposition, enough glue and/or foam (if you're using it) will stick and make the contacting surfaces rough enough that it shows through. Not nice. Hope that helps and good luck.
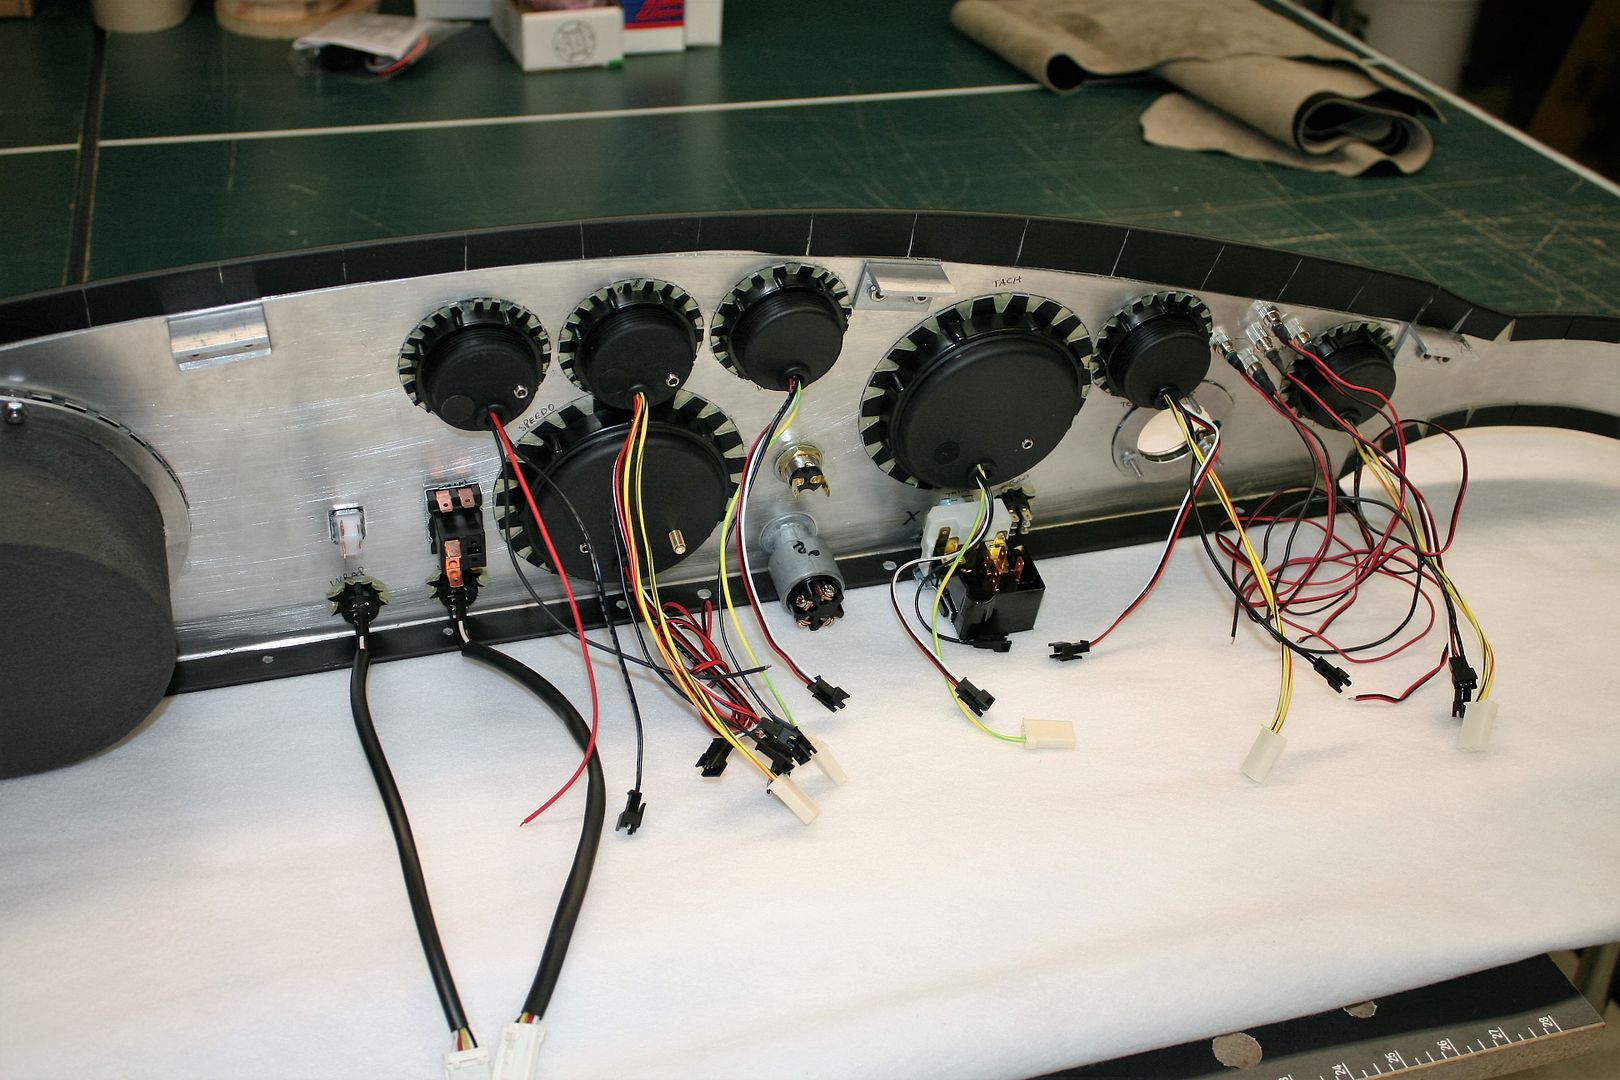
One other hint based on experience with several builds. I regularly see guys trimming the holes in the dash (gauges, switches, glovebox, etc.) to the outline of the holes. Then struggle sometimes to hide the cut edges. Don't do it that way. Make all the holes just oversize enough to pie cut the material, pull through the holes, and glue on the back side. You don't need the pie cuts to be right to the edge of the holes either. Within 1/16" or maybe a little more. Especially with the stretchy material you're using. When you pull around to the back side you'll end up with a nice clean hole, no cuts visible, and the gauges, etc. cover perfectly and will stay that way over time.
Last edited by edwardb; 02-14-2023 at 06:31 AM.
Build 1: Mk3 Roadster #5125. Sold 11/08/2014.
Build 2: Mk4 Roadster #7750. Sold 04/10/2017.
Build Thread
Build 3: Mk4 Roadster 20th Anniversary #8674. Sold 09/07/2020.
Build Thread and
Video.
Build 4: Gen 3 Type 65 Coupe #59. Gen 3 Coyote. Legal 03/04/2020.
Build Thread and
Video
Build 5: 35 Hot Rod Truck #138. LS3 and 4L65E auto. Rcvd 01/05/2021. Legal 04/20/2023.
Build Thread. Sold 11/9/2023.
-
Post Thanks / Like - 1 Thanks, 0 Likes


 Thanks:
  Likes:


 Reply With Quote


