FormaCars

Visit our community sponsor

Thanks Thanks:  0
Likes Likes:  6
Page 3 of 7 FirstFirst 12345 ... LastLast
Results 81 to 120 of 262

Thread: Redfogo's 818C build

  1. #81
    Senior Member
    Join Date
    Jul 2015
    Posts
    615
    Post Thanks / Like
    Quote Originally Posted by 07FIREBLADE View Post
    Where's your ebrake going?
    Not in yet . The location in the frs is on the drivers side a little below the shifter. I will test and see if i like that location and if it fits. If that does not work though I think I will run the lever so its on the floor by the bottom of my seat. My 944 has it in this location I dont mind it.

  2. #82
    Senior Member
    Join Date
    Jul 2015
    Posts
    615
    Post Thanks / Like
    Went out for the 1st drive! Went good and bad... Good the car runs and drives bad the after market front axle stubs I bought are machined wrong so my wheel bearing comes out. Anyone have extra stubs?

    Next up get my wires all tucked away inside and get the interior together before body time.

    13438886_10154320075692937_4384385693004331411_n_zps9m3afjhg.JPG
    13606647_10154320075682937_7032554798026822768_n_zpsvcpzgyij.JPG
    13627006_10154320075687937_1243037661983902325_n_zpse9wmks1v.JPG

    Awkward video of me not knowing what to do while looking at the camera nice revs though!
    Last edited by redfogo; 04-03-2018 at 09:24 PM.

  3. #83
    Senior Member Frank818's Avatar
    Join Date
    Jun 2013
    Location
    QC, Canada
    Posts
    5,732
    Post Thanks / Like
    You are so quick, in Feb you were wiring it up and now you are driving it! Awesome!
    Frank
    818 chassis #181 powered by a '93 VW VR6 Turbo GT3582R
    Go-karted Aug 5, 2016 - Then May 19+21, 2017
    Tracked May 27/July 26, 2017
    Build time before being driveable on Sep 27, 2019: over 6000h
    Build Completed Winter 2021

  4. #84
    Senior Member SnyderJD's Avatar
    Join Date
    Jun 2015
    Posts
    140
    Post Thanks / Like
    Looks great so far. much further along than I am...

  5. #85
    Senior Member Frank818's Avatar
    Join Date
    Jun 2013
    Location
    QC, Canada
    Posts
    5,732
    Post Thanks / Like
    You moded your fuel filler neck? Remove the black sleeve and the alu pipe doesn't seem to have the same shape as mine and doesn't seem to reach the fuel cap opening either.
    Frank
    818 chassis #181 powered by a '93 VW VR6 Turbo GT3582R
    Go-karted Aug 5, 2016 - Then May 19+21, 2017
    Tracked May 27/July 26, 2017
    Build time before being driveable on Sep 27, 2019: over 6000h
    Build Completed Winter 2021

  6. #86
    Senior Member
    Join Date
    Jul 2015
    Posts
    615
    Post Thanks / Like
    Quote Originally Posted by Frank818 View Post
    You moded your fuel filler neck? Remove the black sleeve and the alu pipe doesn't seem to have the same shape as mine and doesn't seem to reach the fuel cap opening either.
    It's a newer style FFR pipe it's not the same as the one in the manual. ATM I just have the upper rubber pipe zip tied onto the aluminum middle pipe. It's just to keep dust and stuff out of the gas tank. I have a feeling I will have to trim a lot off the rubber pipe, but I'm waiting tell I can get the body on. I'm not 100% sure if what they provided will work how I wanted.

  7. #87
    Senior Member Frank818's Avatar
    Join Date
    Jun 2013
    Location
    QC, Canada
    Posts
    5,732
    Post Thanks / Like
    Is it supposed to go upwards towards the engine like that or you just fitted it quickly like that?
    Frank
    818 chassis #181 powered by a '93 VW VR6 Turbo GT3582R
    Go-karted Aug 5, 2016 - Then May 19+21, 2017
    Tracked May 27/July 26, 2017
    Build time before being driveable on Sep 27, 2019: over 6000h
    Build Completed Winter 2021

  8. #88
    Senior Member
    Join Date
    Jul 2015
    Posts
    615
    Post Thanks / Like
    Quote Originally Posted by Frank818 View Post
    Is it supposed to go upwards towards the engine like that or you just fitted it quickly like that?
    Ohh it's just thrown on haha I would assume it's not on correct I just have it facing up so the cap dose not fall out!

  9. #89
    fasterer and furiouser longislandwrx's Avatar
    Join Date
    Aug 2012
    Location
    Long Island
    Posts
    2,540
    Post Thanks / Like
    Blog Entries
    6
    Quote Originally Posted by redfogo View Post
    Awkward video of me not knowing what to do while looking at the camera nice revs though!
    Bro, do you even Race Wars?

    https://youtu.be/sBDEE3_Z-cw?t=48

    ps I have stubs, send me a pm.
    Last edited by longislandwrx; 07-06-2016 at 12:37 PM.
    A well stocked beverage fridge is the key to any successful project.

  10. #90
    Senior Member
    Join Date
    Jul 2015
    Posts
    615
    Post Thanks / Like
    Quote Originally Posted by longislandwrx View Post
    Bro, do you even Race Wars?

    https://youtu.be/sBDEE3_Z-cw?t=48

    ps I have stubs, send me a pm.
    Should have kissed at the camera maybe next time! Hahahah

    I found some stubs last night we will see if they work! If not you will have a PM on the way!

  11. #91
    Senior Member Frank818's Avatar
    Join Date
    Jun 2013
    Location
    QC, Canada
    Posts
    5,732
    Post Thanks / Like
    Coming back on the filler, once you fit it with the side sail could you show us? If that pipe works sensibly better than the original FFR one I might change mine. I have to put so much force fwd on my pipe to give it the angle to reach the cap through the sail it's unbelievable. An old flaw for a couple hundreds of frame #s...
    Frank
    818 chassis #181 powered by a '93 VW VR6 Turbo GT3582R
    Go-karted Aug 5, 2016 - Then May 19+21, 2017
    Tracked May 27/July 26, 2017
    Build time before being driveable on Sep 27, 2019: over 6000h
    Build Completed Winter 2021

  12. #92
    Senior Member
    Join Date
    Jul 2015
    Posts
    615
    Post Thanks / Like
    Quote Originally Posted by Frank818 View Post
    Coming back on the filler, once you fit it with the side sail could you show us? If that pipe works sensibly better than the original FFR one I might change mine. I have to put so much force fwd on my pipe to give it the angle to reach the cap through the sail it's unbelievable. An old flaw for a couple hundreds of frame #s...
    Here is a picture of the pipe I believe it's on backwards but for know was only way to keep stuff out of the tank. Sorry I'm so late busy weeks away from the 818 :/ image.jpg

    Bunch of zip ties tell things get farther along I just found out my 98 trans won't work so time to swap in a 2014 wrx trans so I might be a few weeks tell I do anything new!
    Last edited by redfogo; 07-15-2016 at 09:49 AM.

  13. #93
    Senior Member UnhipPopano's Avatar
    Join Date
    Mar 2016
    Posts
    344
    Post Thanks / Like
    Frank, Fiberglass does have its limitations. Compared to a metal body it is brittle and brakes rather than bend. If there is stress on the Gas fill pipe with the fiberglass, the fiberglass may crack or elongate the hole to relieve the stress. Forcing the pipe to fit will eventually result in a failure.

  14. #94
    Senior Member Frank818's Avatar
    Join Date
    Jun 2013
    Location
    QC, Canada
    Posts
    5,732
    Post Thanks / Like
    Quote Originally Posted by UnhipPopano View Post
    Frank, Fiberglass does have its limitations. Compared to a metal body it is brittle and brakes rather than bend. If there is stress on the Gas fill pipe with the fiberglass, the fiberglass may crack or elongate the hole to relieve the stress. Forcing the pipe to fit will eventually result in a failure.
    That is exactly my concern. Which is why after forcing the pipe I will use tie-wraps and other means to keep it steady so the FB will not have to force the pipe. I don't understand Red's rubber extension, it's a long 90-deg I just don't see how it will fit on the fender? It seems to be the same alu pipe I have, just the rubber that is different but I just don't get how this one is going to fit.
    Frank
    818 chassis #181 powered by a '93 VW VR6 Turbo GT3582R
    Go-karted Aug 5, 2016 - Then May 19+21, 2017
    Tracked May 27/July 26, 2017
    Build time before being driveable on Sep 27, 2019: over 6000h
    Build Completed Winter 2021

  15. #95
    Senior Member UnhipPopano's Avatar
    Join Date
    Mar 2016
    Posts
    344
    Post Thanks / Like
    If we are talking about the same image, that was a temporary piece while he was in go cart mode. There is a section of rubber pipe on the bottom and another behind the filler cap. The two pieces allow the pipe in the middle enough room to move. For more flexibility you leave a longer distance for the rubber. If you use connect the pipe to the tank and the filler, it will not allow any movement. How much distance to leave for the rubber to move is not known and not documented in either the build manuals and the online builds.

  16. #96
    Senior Member
    Join Date
    Jul 2015
    Posts
    615
    Post Thanks / Like
    Quote Originally Posted by UnhipPopano View Post
    If we are talking about the same image, that was a temporary piece while he was in go cart mode. There is a section of rubber pipe on the bottom and another behind the filler cap. The two pieces allow the pipe in the middle enough room to move. For more flexibility you leave a longer distance for the rubber. If you use connect the pipe to the tank and the filler, it will not allow any movement. How much distance to leave for the rubber to move is not known and not documented in either the build manuals and the online builds.
    So this is what FFR sent me I called and asked them if it was right they said it was.... Once the body is on I will know better but I assume I will need to cut the rubber to fit onto the fender. Since the directions also state cutting the pipe they used to give you.

    image1(5).jpeg
    Last edited by redfogo; 08-03-2016 at 01:55 AM.

  17. #97
    Senior Member
    Join Date
    Jul 2015
    Posts
    615
    Post Thanks / Like
    Manged to get the 2014 WRX trans in I didn't feel like sourcing axles again so I bought the pre-assembled units form FFR. 2014 trans works with the 07 axles in case you need to know.

    My trans came with what looks like copies of moore blast plates. Seemed like it was worth a shot keeping plus I didn't have the original bolts so it was the best option. If your using the shift linkage set up from Zero Decibel they won't fit though. I was unwilling to give up my Zero Decibel for silly plates so I made a compromise I left one side alone and cut the other side. I have no idea if they will even help now or not, if anyone knows let me know otherwise I might just have to find some factory hardware. For now here are some pictures on how I cut and welded them to clear.
    image23_zpsdg6plrub.JPEG

    I also got a little bit farther on my center console set up looks like after I weld the tabs on the parking brake a different direction I should be able to keep the Impreza parking brake and Impreza factory parking cables without needing to adjust much. I also added an armrest storage section from a Porsche 1984 944.
    image_zpsydr7z5zs.JPG


    Finally got my coolant overflow tank mounted as well. Its 1.5qt aluminum tank.
    image32_zpsckis9h7r.JPEG
    Last edited by redfogo; 04-03-2018 at 09:28 PM.

  18. #98
    Senior Member
    Join Date
    Jul 2015
    Posts
    615
    Post Thanks / Like
    I was having fuel starvation issues going up my hill when I had 5 gallons or less of gas in the tank. My hill to my house is very steep and my fuel pickup was sucking in air and stalling out my car. I have a walbro 450 and found that holly makes a hydramat that fits the pump directly yay! So I bought a hydramat Install is very easy if you remember when you installed your pre-pump filter its exactly the same. For me it went:
    1. Take pump out.
    2. Take old filter off the pump.
    3. Place hydramat onto the fitting of the pump.
    4. Place pump back in.

    Here is a picture I couldn't really get a pic of it installed in the tank it comes with a wide range of locking clips so you can pick lots of different angles for the hydramat to be installed. (Link: to what I bought https://www.holley.com/products/fuel...s/parts/16-111)

    image_zps6vd2ltpc(1).JPG

    Finally got my floor remounted. Started to get carpet cut and my infinity box mounted. I have always been building my car around serviceability since the start. I mounted my firewall with the rivnuts along the top so it coudl be undone quick. I have also installed my carpet using industrial outdoor Velcro. I placed the "hard" side of the Velcro onto the firewall after that I just installed the carpet directly onto the velcro. You dont actually need both side just need the one "hard" side it grabs great with no issues its quick and easy to remove as well. I bought some basic indoor out door black carpet from menards. Its very light, looks good, and does not have a hard back on the carpet so its very light weight and if you really want to you can quickly remove it before you go to the track haha.

    I also made a mounting board for my infinity box that sites in the middle between the 2 seats. Used some twist locks for the mounting. Again this was made so I could quickly remove if needed.

    image_zpsnzgsjjqt.JPG


    image_zpsutsy4bew(1).JPG

    Of course my cat had to try out the new carpet...

    image_zps0dxbydgx(2).JPG
    Last edited by redfogo; 04-03-2018 at 09:31 PM.

  19. #99
    fasterer and furiouser longislandwrx's Avatar
    Join Date
    Aug 2012
    Location
    Long Island
    Posts
    2,540
    Post Thanks / Like
    Blog Entries
    6
    flux-capacitor.jpg

    your inspiration?
    A well stocked beverage fridge is the key to any successful project.

  20. #100
    Senior Member Frank818's Avatar
    Join Date
    Jun 2013
    Location
    QC, Canada
    Posts
    5,732
    Post Thanks / Like
    I recognize those IBox parts!
    Frank
    818 chassis #181 powered by a '93 VW VR6 Turbo GT3582R
    Go-karted Aug 5, 2016 - Then May 19+21, 2017
    Tracked May 27/July 26, 2017
    Build time before being driveable on Sep 27, 2019: over 6000h
    Build Completed Winter 2021

  21. #101
    Senior Member
    Join Date
    Jul 2015
    Posts
    615
    Post Thanks / Like
    Quote Originally Posted by longislandwrx View Post
    flux-capacitor.jpg

    your inspiration?
    Yep! lol

  22. #102
    Moonlight Performance
    Hindsight's Avatar
    Join Date
    May 2014
    Location
    Atlanta
    Posts
    3,402
    Post Thanks / Like
    Hi Redfogo - On the hydramat..... how did you deal with the in-tank baffle? Do you have the new or old tank? I think the old tank has a pan type baffle, and the new one has a small vertical wall running front to back. In either case, I'm curious what you did to get the hydramat onto the bottom of the tank since it seems either baffle would be in the way. Since the baffle is so small and probably not effective anyway, I was planning on just bashing it down with a hammer. Ultimately I will get a fuel cell.

  23. #103
    Senior Member
    Join Date
    Jul 2015
    Posts
    615
    Post Thanks / Like
    Quote Originally Posted by Hindsight View Post
    Hi Redfogo - On the hydramat..... how did you deal with the in-tank baffle? Do you have the new or old tank? I think the old tank has a pan type baffle, and the new one has a small vertical wall running front to back. In either case, I'm curious what you did to get the hydramat onto the bottom of the tank since it seems either baffle would be in the way. Since the baffle is so small and probably not effective anyway, I was planning on just bashing it down with a hammer. Ultimately I will get a fuel cell.
    I placed in the tank at an angle. My pump mount is kind of at an angle going up as well since I could not get the pump to fit before back when I 1st attempted to install my pump. So the pump is not flush against the floor. Mine is leaning at an angle like this -----> "/" not by much but just a little bit. Because of the angle of my pump my filter floats a little so with the hydra mat it just kind of goes up and around the baffle there is a lot of slack so it just can droops over since the baffles are so small so it makes a "W" shape. I would recommend smashing down the baffles around the pump though I’m still testing a few things out on my set up currently my implantation works great but I do think it would work even better with the baffles smashed down. That’s something I was going to mess with next in the next few weeks. So long story short yes smash them down lol
    Last edited by redfogo; 08-31-2016 at 10:22 AM.

  24. #104
    Moonlight Performance
    Hindsight's Avatar
    Join Date
    May 2014
    Location
    Atlanta
    Posts
    3,402
    Post Thanks / Like
    Cool, thanks!

  25. #105
    Senior Member Frank818's Avatar
    Join Date
    Jun 2013
    Location
    QC, Canada
    Posts
    5,732
    Post Thanks / Like
    How do you smash them down through the very little pump hole?
    Frank
    818 chassis #181 powered by a '93 VW VR6 Turbo GT3582R
    Go-karted Aug 5, 2016 - Then May 19+21, 2017
    Tracked May 27/July 26, 2017
    Build time before being driveable on Sep 27, 2019: over 6000h
    Build Completed Winter 2021

  26. #106
    Moonlight Performance
    Hindsight's Avatar
    Join Date
    May 2014
    Location
    Atlanta
    Posts
    3,402
    Post Thanks / Like
    Pump hole on the new tank is larger. You can get a hand and a hammer in there. Old one.... I would stick a pipe down in there and hammer on the end of it sticking out of the tank.

    I wouldn't do this if the tank had real baffles in it like the Boyd tank does. I just don't think the baffles in the FFR tank are going to do anything. In fact, I've proven on the track that they don't, even with the tank 3/4 full.

  27. #107
    Mechie3's Avatar
    Join Date
    May 2012
    Location
    Indianapolis
    Posts
    5,174
    Post Thanks / Like
    Aren't the FFR baffles sort of a cup that sits on the bottom? If the fuel gets below the lip of the cup, the cup won't even fill.
    Zero Decibel Motorsports
    Check out my new website!
    www.zerodecibelmotorsports.com
    www.facebook.com/zero.decibel.motorsports

  28. #108
    Senior Member Canadian818's Avatar
    Join Date
    Nov 2011
    Location
    Edmonton, Alberta
    Posts
    1,378
    Post Thanks / Like
    I really regret not baffling my tank when I had it cut open.

    Adam _____ Instagram @PopesProjects____ YouTube Channel
    818 SRX - #91
    Arrived 01/02/2014
    First Start 10/31/2016
    First Drive 05/22/2017
    Registered 10/25/2019 BRAP818

  29. #109
    Moonlight Performance
    Hindsight's Avatar
    Join Date
    May 2014
    Location
    Atlanta
    Posts
    3,402
    Post Thanks / Like
    Quote Originally Posted by Mechie3 View Post
    Aren't the FFR baffles sort of a cup that sits on the bottom? If the fuel gets below the lip of the cup, the cup won't even fill.
    In the old tank, there is a small hole in the cup. In the new tank, there is no cup. There is a wall about 2-3" high, that sits on the bottom of the tank and spans front to rear, just to the side of the fuel pump. It has a couple small holes near the bottom.

    I'd love to see the inside of a boyd tank to see how their baffles look.

  30. #110
    Mechie3's Avatar
    Join Date
    May 2012
    Location
    Indianapolis
    Posts
    5,174
    Post Thanks / Like
    If fuel is sloshing back and forth that forward (rearward?) facing hole won't get any flow. You could potentially empty the cup, have 3 " of fuel left, but no way for the fuel to get back into the cup.
    Zero Decibel Motorsports
    Check out my new website!
    www.zerodecibelmotorsports.com
    www.facebook.com/zero.decibel.motorsports

  31. #111
    Senior Member Frank818's Avatar
    Join Date
    Jun 2013
    Location
    QC, Canada
    Posts
    5,732
    Post Thanks / Like
    How many gallons is 3" high in the tank?
    Frank
    818 chassis #181 powered by a '93 VW VR6 Turbo GT3582R
    Go-karted Aug 5, 2016 - Then May 19+21, 2017
    Tracked May 27/July 26, 2017
    Build time before being driveable on Sep 27, 2019: over 6000h
    Build Completed Winter 2021

  32. #112
    Senior Member
    Join Date
    Jul 2015
    Posts
    615
    Post Thanks / Like
    Update on my interior its coming together! Sadly I have been pretty busy with rallycross at the moment so I haven't been able to get loads done, but I have managed to get half the interior done and got some of the front splash guard installed. If anyone here is attending rallycross national championships in IA let me know!

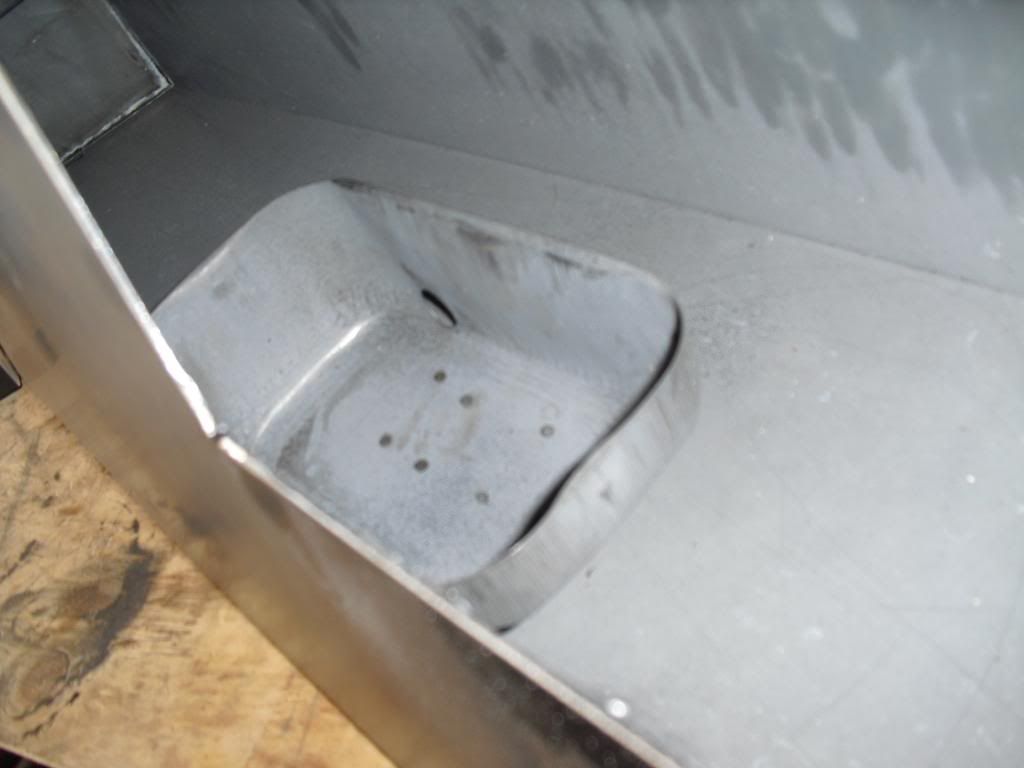
    I also uploaded a few pics of some of the front end aluminum panels as I know I have gotten a few questions in the past on where or what "X" panel is or where it should go. While its not a very fun/cool picture progress I hopefully it helps someone.

    Center console fitment went well(Note: Steering wheel is using a wireless RF transmitter I made to run the turn signals and horn. I will be posting guide once I get it all tested! I got the transmission of the signal tested so so far so good!)

    image9_zps6v11m1zi(2).JPEG

    Front nose splash guard
    image6_zpsagjtvv84.JPEG
    image4_zpshzlv7vmb(1).JPEG

    Front inner splash guard

    image5_zpsa6xcnacn(1).JPEG

    Join RallyCross its fun!
    gc-3052_zpsw7bztltc.JPG
    gc-3056_zpsyha8m4ei.JPG
    Last edited by redfogo; 04-03-2018 at 09:42 PM.

  33. #113
    Senior Member Frank818's Avatar
    Join Date
    Jun 2013
    Location
    QC, Canada
    Posts
    5,732
    Post Thanks / Like
    Nice interior so far.

    Do you have the old nose (not the retrofit)?

    Is that you 3-wheeling the subie in mud?
    Frank
    818 chassis #181 powered by a '93 VW VR6 Turbo GT3582R
    Go-karted Aug 5, 2016 - Then May 19+21, 2017
    Tracked May 27/July 26, 2017
    Build time before being driveable on Sep 27, 2019: over 6000h
    Build Completed Winter 2021

  34. #114
    Senior Member
    Join Date
    Jul 2015
    Posts
    615
    Post Thanks / Like
    Quote Originally Posted by Frank818 View Post
    Nice interior so far.

    Do you have the old nose (not the retrofit)?

    Is that you 3-wheeling the subie in mud?
    Nope I was one of the 1st 818c kits so all the new nose parts. Yes it is me doing the 3 wheel fun!

  35. #115
    Senior Member
    Join Date
    Jul 2015
    Posts
    615
    Post Thanks / Like
    Few more pics!
    After thinking about it today I noticed that the rear window aluminum had to be installed before I install the top. I am not sure how others would handle this maybe it could be done if you could slide or pull the seat forward but with a fixed back seat there is no way you would be able to install the rear window aluminum without having the top off based on what I could tell. So I would recommend installing the rear window before you get the top on "for good".

    image1_zpsv4z2jdlg.JPEG

    Used matte black paint for the rear window aluminum. I didn't want any shine to cause any sort of reflections while I was driving.
    image2_zpsdnilf8pc.JPEG

    Tabs I made to mount the harness bar lower to be more safe.
    image3_zpsp822orhm.JPEG
    Last edited by redfogo; 04-03-2018 at 09:48 PM.

  36. #116
    Senior Member
    Join Date
    Dec 2015
    Posts
    103
    Post Thanks / Like
    Car sounds great, what exhaust is that? Thanks for all the pics. I've picked up a few ideas

  37. #117
    Member jcpresto's Avatar
    Join Date
    Aug 2015
    Posts
    84
    Post Thanks / Like
    How did you determine how high to mount it so it seals against the roof? I just took my seats out so I could ensure it was snug.

  38. #118
    Senior Member
    Join Date
    Jul 2015
    Posts
    615
    Post Thanks / Like
    Quote Originally Posted by carrera1984 View Post
    Car sounds great, what exhaust is that? Thanks for all the pics. I've picked up a few ideas
    At the moment just a resonator once i get my bumper cut out I will be getting the rest of the piping installed. I don't think the sound will change much with extra pipe. I don't plan to install any other mufflers or resonators in the stream. What I used --> http://vibrantperformance.com/catalo...products_id=47
    You can find them form other venders online for a lot less just FYI.

    Quote Originally Posted by jcpresto View Post
    How did you determine how high to mount it so it seals against the roof? I just took my seats out so I could ensure it was snug.
    Good catch I had to reword my post I mean you can't really get it in once the top is on "for good". So I had to put the top on test fit and take it off. I'm still not a fan of how it seals with the roof as it really doesn't seem like it would be as soundproof and heat proof as I would like. We will see what I end up doing for that aspect. Maybe place some Heat tape around the seal from the engine bay side so people can't really see it.
    Last edited by redfogo; 09-28-2016 at 01:11 PM.

  39. #119
    Senior Member
    Join Date
    Jul 2015
    Posts
    615
    Post Thanks / Like
    Well the time has come for the body to start being installed. I have been avoiding it! With my list getting smaller and smaller I plan to get the body installed this weekend/next week. I was hopping to get most of the interior in before the body but without the top on I can't get the dashboard installed in the right spot. I plan to get the interior in after the body is all set up. But for now here is what I have done.

    I managed to get my rear brace installed to clear the VF30 turbo. I was having issues with the bar clearing the waistgate arm so I cut a notch in the brace so that it would clear the turbo. I cut the notch and then sealed up the hole by welding it back together.

    image_zpsuzfhnpgh(1).JPG
    image_zps6x0azoxb(1).JPG

    I was having issues with fuelcut because I deleted the VSS sensor(2014 WRX trans has no VSS for the trans). The Ej207 V7 ECU I guess does still require the VSS sensor. I picked up a MapDCCD wheel speed sensor that uses the OEM ABS sensors. I got the basic model(2 ABS sensor max) and am using 2 rear ABS sensors. I was going to put one in the front but for things like a dyno and such it may cause a reading error so I went with 2 in the rear. http://mapdccd.com/vss.html.

    Started to assemble my head lights. I installed some LED lighting on the edge sense I really liked the look. It fits well but not OEM perfect by any means. Overall I am happy with the results. I bought 26in long lights and cut them tell I got the length need to fit correct. They light up both amber and white. I plan to have them blink amber for my turn signal.
    image_zpsjs6owvez.JPG
    Last edited by redfogo; 04-03-2018 at 09:50 PM.

  40. #120
    Senior Member Frank818's Avatar
    Join Date
    Jun 2013
    Location
    QC, Canada
    Posts
    5,732
    Post Thanks / Like
    You bought the same tubes I did. I am not fitting mines there though and I am looking at a different solution too to replace them, for various reasons. But it's not a bad place, how do they clear inside the fender flange once installed?
    What are you going to do with the 8 eagle eye bulbs? Are they white, yellow, blue, switchbacks, other?
    Frank
    818 chassis #181 powered by a '93 VW VR6 Turbo GT3582R
    Go-karted Aug 5, 2016 - Then May 19+21, 2017
    Tracked May 27/July 26, 2017
    Build time before being driveable on Sep 27, 2019: over 6000h
    Build Completed Winter 2021

Page 3 of 7 FirstFirst 12345 ... LastLast

Posting Permissions

  • You may not post new threads
  • You may not post replies
  • You may not post attachments
  • You may not edit your posts
  •  

Stewart Transport

Visit our community sponsor