Very Cool Parts

Visit our community sponsor

Thanks Thanks:  0
Likes Likes:  0
Page 5 of 6 FirstFirst ... 3456 LastLast
Results 161 to 200 of 204

Thread: Frame Mods to Type 65 Coupe

  1. #161
    Senior Member
    Join Date
    Apr 2011
    Location
    Conroe/Cut n Shoot, Tx
    Posts
    186
    Post Thanks / Like
    Looks great Jacob!!! I can't wait to get time to work on mine again, but it gives me time to watch what you do and copy some of your improvements.

  2. #162

    Join Date
    May 2011
    Location
    Pittsburgh, PA
    Posts
    728
    Post Thanks / Like
    Thanks Tom. It sounds like you in the same situation as many of us - trying to find time to build despite a litany of other things competing for our time.

    Here are a few more pictures of the driver's footbox, now with the last two panels installed. I have to say I am pretty happy with how the fit came out; making three panels was the right choice here. I also managed to get the steering rack installed. Next will be the tie rod ends and the upper steering bearing, which will make it a roller, albeit without tires.

    Driver Footbox 5.jpg

    Driver Footbox 6.jpg

  3. #163
    Trick Tool Maker, Super Moderator Hankl's Avatar
    Join Date
    Feb 2011
    Location
    Northern CA
    Posts
    671
    Post Thanks / Like
    Blog Entries
    1
    Jake,

    That is great work, glad to see that you are making progress!!

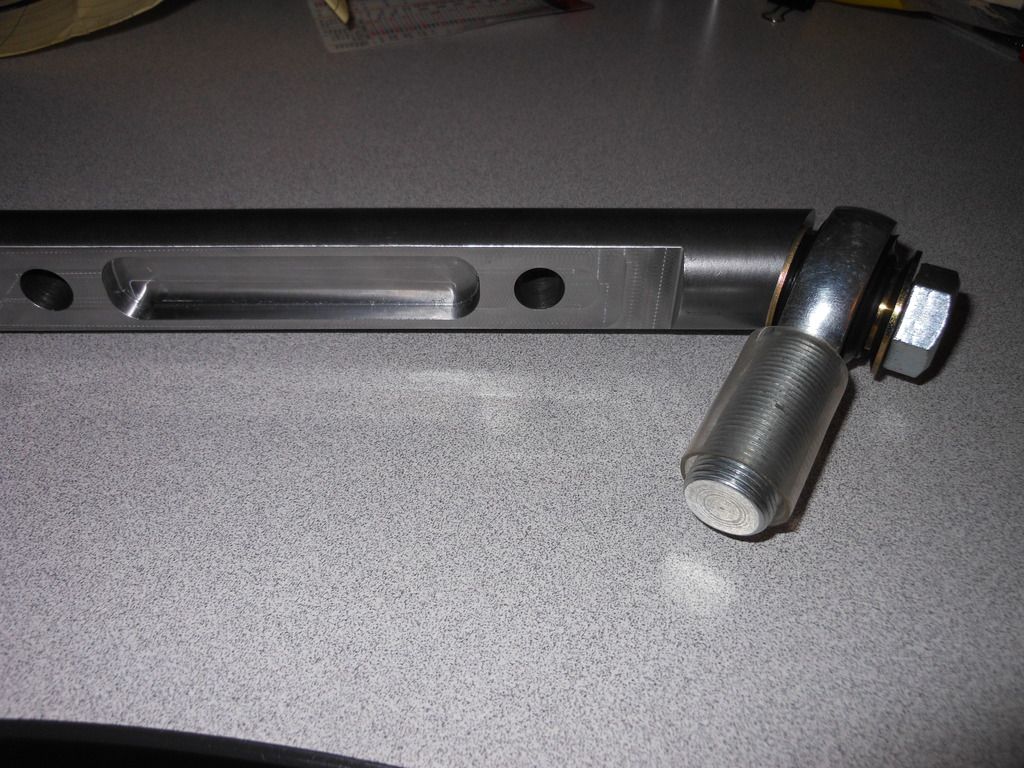
    Guess what this is......


    Hank
    Last edited by Hankl; 08-07-2016 at 07:09 PM.
    “If you didn’t have enough time to do it right the first time. How come you always have time to go back and do it again?” FFR1000186CP

    Understeer is when you hit the wall with the front of the car and oversteer is when you hit the wall with the rear of the car.
    Horsepower is how fast you hit the wall and torque is how far you take the wall with you.

  4. #164
    Senior Member
    Join Date
    Apr 2011
    Location
    Conroe/Cut n Shoot, Tx
    Posts
    186
    Post Thanks / Like
    Looks good Jacob!

    Hank, I would say you have a pretty set of uppers!!!

  5. #165
    Senior Member John Dol's Avatar
    Join Date
    Feb 2011
    Location
    Gorham, ME
    Posts
    1,522
    Post Thanks / Like
    I'm with Tom on this one Hank!

    John
    Finished the "My Coupe, my way" project.

    http://s956.photobucket.com/albums/ae46/jdcoupe1969/
    Coupe #386,17" Team III 245 FR 315 RR, 3-link, T5, 4 wheel disk, power brakes/steering. Sniper EFI
    First start Sept. 18 2013 First go kart Sept 19 2013

  6. #166

    Join Date
    May 2011
    Location
    Pittsburgh, PA
    Posts
    728
    Post Thanks / Like
    Yes, I agree that it looks like you now have custom upper control arms, to match the custom lowers if my memory serves me correctly. Very nice!

    Here is all I can offer up right now, but with heavy rain in the weekend forecast I may be stuck in the shop, rather than biking, so maybe I'll get more interior paneling and the radiator shroud finished.

    Steering Bearing Final.JPG

  7. #167
    Junior Member
    Join Date
    Jul 2016
    Posts
    22
    Post Thanks / Like
    Love your alloy panelling, gives it a very original look.
    What's better is that it won't mark or corrode!

  8. #168

    Join Date
    May 2011
    Location
    Pittsburgh, PA
    Posts
    728
    Post Thanks / Like
    Thanks, the cheap clear coat came out much better than I expected.

    Here are two photos of today's progress. I got the stainless heat shields on (1) the driver's footbox and (2) the rectangular space behind the engine installed. I will add another one in the tall, thin space between them before too long. Also, I'm happy to report that the car steers. I will post photos later, but I got the rack and tie rod ends installed, installed the steering shaft and added a quick-release kit from Breeze. Now not only can I sit in it and pretend to drive, but I can turn the wheel and pretend to drive. Good times!

    Driver Heat Shield 1.jpg

    Driver Heat Shield 2.jpg

  9. #169
    Trick Tool Maker, Super Moderator Hankl's Avatar
    Join Date
    Feb 2011
    Location
    Northern CA
    Posts
    671
    Post Thanks / Like
    Blog Entries
    1
    Jake,

    How's the emergency brake set up doing?

    Hank
    “If you didn’t have enough time to do it right the first time. How come you always have time to go back and do it again?” FFR1000186CP

    Understeer is when you hit the wall with the front of the car and oversteer is when you hit the wall with the rear of the car.
    Horsepower is how fast you hit the wall and torque is how far you take the wall with you.

  10. #170

    Join Date
    May 2011
    Location
    Pittsburgh, PA
    Posts
    728
    Post Thanks / Like
    Hank,

    I haven't worked on that system for a while, but will return to it shortly. A while ago I bought an -3 AN line and completely mocked it up, but didn't install the hydraulic handle because the fluid reservoirs for those cheap Chinese master cylinders are too wide to fit where I want the handle to go. So, I need to get a Wilwood compact master cylinder with the integrated reservoir, mount that to the handle, and set it up. I will do that in the next few weeks, in conjunction with mounting the seats.

    Here are a few more pics, namely a better shot of the driver's inner heat shield and the radiator shroud I threw together this week.

    Driver Heat Shield 3.jpg
    Fan Shroud 1.jpg
    Fan Shroud 2.jpg

    Can someone tell me if the way that the fan shroud sticks up above the radiator will cause a problem, namely interference with the hood? I can put the overhanging part on the top or the bottom, but I went with the top to not interfere with the aluminum paneling down there. Should I reverse it? Any thoughts would be appreciated. Thanks!

  11. #171
    Senior Member smithtlw's Avatar
    Join Date
    Feb 2011
    Location
    Brockport, NY
    Posts
    103
    Post Thanks / Like
    Good to see your progress Jacob - looks good! I really like the adjustable height steering.

    Todd

  12. #172

    Join Date
    May 2011
    Location
    Pittsburgh, PA
    Posts
    728
    Post Thanks / Like
    Thanks Todd; I hope you are doing well.

    Hank, here is how the hydraulic e-brake setup ultimately looks. I switched the original master cylinder to a Wilwood with an integrated reservoir. I had to put the original master cylinder's push rod on the Wilwood to maintain the correct (metric) threads for the brake handle. A banjo-to-AN bolt and fitting at the master cylinder let me run the line exactly where I wanted, and it hooks up to the caliper nicely. The caliper's pads aren't perfectly flat against the pinion rotor, but I will have to adjust that after the driveline angles are set. Here are a few photos:

    E Brake 1.jpg
    E Brake 2.jpg
    E Brake 3.jpg

    Next is finishing some interior aluminum and mounting the seats. I also found a company making kits to install 14" 07-12 GT500 front rotors and the accompanying Brembo calipers on SN95 spindles. The same kit also lets you use the bigger and dramatically cheaper 2015+ GT front calipers with those rotors. So, it looks like I may get front brakes on the car by the year's end as that fits my budget much better than Wilwood's racing brake kit.

  13. #173
    Trick Tool Maker, Super Moderator Hankl's Avatar
    Join Date
    Feb 2011
    Location
    Northern CA
    Posts
    671
    Post Thanks / Like
    Blog Entries
    1
    Jake,

    That really looks great, keeps us posted on your progress.
    “If you didn’t have enough time to do it right the first time. How come you always have time to go back and do it again?” FFR1000186CP

    Understeer is when you hit the wall with the front of the car and oversteer is when you hit the wall with the rear of the car.
    Horsepower is how fast you hit the wall and torque is how far you take the wall with you.

  14. #174
    Senior Member
    Join Date
    Apr 2011
    Location
    Conroe/Cut n Shoot, Tx
    Posts
    186
    Post Thanks / Like
    Jacob,
    I think you may have a clearance issue with the shroud up that high. I'm in the middle of putting a roadster radiator with dual fans on a Daytona for a friend. There's not much vertical real estate there. For that matter, not much real estate at all.

  15. #175

    Join Date
    May 2011
    Location
    Pittsburgh, PA
    Posts
    728
    Post Thanks / Like
    Thanks Tom; I ended up flipping the shroud upside-down and hopefully it will clear. Hopefully I won't need to move the top of the radiator forward.

    Here are the rear brake cooling ducts I threw together over the last few days. A friend's unfortunate marital woes resulted in (among other things) me storing his fabricating equipment, one of which is a Dynasty tig. This was my first attempt at tig welding aluminum, after a half hour of practice. It's not a stack of dimes (more like toothpaste flattened with a fingertip), but it should get the job done.

    Rear Brake Duct 4.JPG
    Rear Brake Duct 3.JPG
    Rear Brake Duct 1.JPG
    Rear Brake Duct 2.JPG

    Edit: Happy Thanksgiving to the everyone and their families.

  16. #176
    Trick Tool Maker, Super Moderator Hankl's Avatar
    Join Date
    Feb 2011
    Location
    Northern CA
    Posts
    671
    Post Thanks / Like
    Blog Entries
    1
    SWEET!!!

    Hankl
    “If you didn’t have enough time to do it right the first time. How come you always have time to go back and do it again?” FFR1000186CP

    Understeer is when you hit the wall with the front of the car and oversteer is when you hit the wall with the rear of the car.
    Horsepower is how fast you hit the wall and torque is how far you take the wall with you.

  17. #177

    Join Date
    May 2011
    Location
    Pittsburgh, PA
    Posts
    728
    Post Thanks / Like
    "Huge brakes" and "dirt cheap" are usually mutually exclusive, but here is a custom rear brake setup I finished today. We have cheap 14" eBay rotors from a 2012 GT500 ($137.00 for both), Aeroquip 3AN lines and related fittings ($50 or so), 4-piston front calipers from a 2015 Mustang GT, which are the size of an NFL regulation football ($140 each including core charge from Tasca Ford), and custom brackets made from $20 worth of 1/4" cold rolled steel. It took a bit of time and care to get the fit perfect, but I think it was worth it. The same parts are going on the front, with an adapter kit for SN95 spindles. Let me know what you think.

    Rear Brakes 1.JPG

    Rear Brakes 2.JPG

    Rear Brakes 3.JPG

    Rear Brakes 4.JPG

    Rear Brakes 5.JPG
    Last edited by Jacob McCrea; 01-25-2017 at 09:56 PM.

  18. #178
    Senior Member jkrueger's Avatar
    Join Date
    Feb 2011
    Location
    DFW, TX
    Posts
    432
    Post Thanks / Like
    Where is the like button! Great job.

    JC
    Factory Five Type-65 Coupe:"Race Spec" coupe, Ordered 1/12, picked-up 5/12, roller 5/12, first start 10/12, finished 4/13
    Factory Five Roadster: Sold 12/2011.
    http://www.25tires.com

  19. #179
    Senior Member CraigS's Avatar
    Join Date
    Feb 2011
    Location
    Blacksburg, Va
    Posts
    4,728
    Post Thanks / Like
    Great work. I am convinced that having the same brakes front and rear is the setup for these cars.
    FFR MkII, 408W, Tremec TKO 500, 2015 IRS, DA QA1s, Forte front bar, APE hardtop.

  20. #180
    Senior Member FMJ's Avatar
    Join Date
    Mar 2011
    Location
    Pittsburgh PA
    Posts
    167
    Post Thanks / Like
    Jacob,

    Drove past a few months ago but no one was home. My brother knew where the garage was.

    -Fred

  21. #181
    Senior Member smithtlw's Avatar
    Join Date
    Feb 2011
    Location
    Brockport, NY
    Posts
    103
    Post Thanks / Like
    Brakes and cooling ducts look great! Sounds like a great solution. I will have to check in to those especially for the front. 14 inch rotors are huge - what wheels are you running?

  22. #182

    Join Date
    May 2011
    Location
    Pittsburgh, PA
    Posts
    728
    Post Thanks / Like
    Thanks for the compliments; I thought some folks would enjoy seeing 14" brakes for under $500 an end.

    Todd, I will use either Ford wheels for a Boss 302 or GT500, or a set of RTR Tech 7 19 x 9.5" wheels. Those wheels clear the 14" Brembo brake setup of that era (aka the Ford M-2300-S brake kit), but my 2015 GT calipers are even larger than those Brembo calipers, which creates a problem. The 2015 GT rotor is recessed in from the hub face quite a bit to make up for this. So, I will likely need short wheel spacers to make even those high-spoke-clearance wheels fit. I could've avoided the problem by just installing the M-2300-S calipers, or getting remanufactured M-2300-S calipers, but I elected to try this to save some money. The adapter kit for the front is made by Fully Torqued Racing in California. I will let you know how the wheel situation turns out.

    Fred, thanks for trying to visit, stop by any time, and say hello to your brother for me when you see him. He was a great guy to work with on acquiring the adjacent property.

    Here is a seat brace I welded up from .120 aluminum; it is not fully bolted in as I am waiting for some tube clamps for it and the harnesses. Slowly but surely!

    Driver Seat Brace.JPG

  23. #183
    Trick Tool Maker, Super Moderator Hankl's Avatar
    Join Date
    Feb 2011
    Location
    Northern CA
    Posts
    671
    Post Thanks / Like
    Blog Entries
    1
    Jake,

    That is a really great execution of your idea! Those calipers are MONSTERS!

    Hank
    “If you didn’t have enough time to do it right the first time. How come you always have time to go back and do it again?” FFR1000186CP

    Understeer is when you hit the wall with the front of the car and oversteer is when you hit the wall with the rear of the car.
    Horsepower is how fast you hit the wall and torque is how far you take the wall with you.

  24. #184

    Join Date
    May 2011
    Location
    Pittsburgh, PA
    Posts
    728
    Post Thanks / Like
    Thanks, I thought monster brakes for dirt cheap would be well-received!

    Fred J. was kind enough to reach out to me and check in, and I promised I would post up some pictures of recent, albeit modest, progress. I am going to finish the interior panels and start on the wiring in the next month or so.

    Having more argon, electricity, time and aluminum than disposable income, I welded up a battery box, rather than buy one. I also bought wheels (RTR Tech 7s, 19 x 9.5"), split and mounted the dash, and finished a few other little things in the interior. From here on out I am trying to make everything as simple and by-the-book as possible as I would like to keep this under a ten-year project!

    Battery Box 1.JPG
    RTR Tech 7 1.JPG
    Seat & Harness Brackets 3.JPG
    Split Dash 1.JPG
    Split Dash 2.JPG
    Split Dash 3.JPG

  25. #185
    Senior Member John Dol's Avatar
    Join Date
    Feb 2011
    Location
    Gorham, ME
    Posts
    1,522
    Post Thanks / Like
    Jacob,

    Great progress, however I have to warn you that the cover plate for the emergency handle in the last picture infringes on the patent I have for making that exact cover many years ago!

    John
    Finished the "My Coupe, my way" project.

    http://s956.photobucket.com/albums/ae46/jdcoupe1969/
    Coupe #386,17" Team III 245 FR 315 RR, 3-link, T5, 4 wheel disk, power brakes/steering. Sniper EFI
    First start Sept. 18 2013 First go kart Sept 19 2013

  26. #186
    Member
    Join Date
    Feb 2011
    Posts
    29
    Post Thanks / Like
    Hi Jacob,

    I have been following your build since you started, but rarely if ever comment on threads... You have excellent fabrication skills, and am glad you have kept the build going.

    Paul

  27. #187

    Join Date
    May 2011
    Location
    Pittsburgh, PA
    Posts
    728
    Post Thanks / Like
    John,
    Just send me a licensing agreement for that patent!

    Paul,
    Thank you for your kind words, and I'm glad you are following along.

    This build has been going so long that I've watched (very talented) people buy kits, build them, race them, win shows, sell them, and move on to the next project. I'm surely not alone in this regard, but it's always a challenge to find large blocks of time to devote to the project. A lot of time that could go to the coupe goes to bike riding and skiing with my wife, taking proper care of multiple pieces of property, helping my parents with their fading ability to maintain their property, trying to maintain old friendships and make new ones, maintaining a fleet of things that roll about on wheels, and ten other things I could list.

    I'm not complaining; I just find myself in a constant state of motion, and the coupe project isn't in my "critical path" on any given day. But I'll keep plugging along, and I appreciate you and others following along and offering kind words of support and encouragement.

  28. #188
    Senior Member John Dol's Avatar
    Join Date
    Feb 2011
    Location
    Gorham, ME
    Posts
    1,522
    Post Thanks / Like
    Jacob,

    Agreement sent!
    But on a serious note, you are indeed not the only one. I've been at it for longer then I really wanted, but the good thing is it's there when you have time for it. And your doing a great job at it so it will get done when it gets done.

    John
    Finished the "My Coupe, my way" project.

    http://s956.photobucket.com/albums/ae46/jdcoupe1969/
    Coupe #386,17" Team III 245 FR 315 RR, 3-link, T5, 4 wheel disk, power brakes/steering. Sniper EFI
    First start Sept. 18 2013 First go kart Sept 19 2013

  29. #189

    Join Date
    May 2011
    Location
    Pittsburgh, PA
    Posts
    728
    Post Thanks / Like
    Alright, here is a little more progress: front calipers from a 2015 Mustang GT are installed thanks to a kit from Fully Torqued Racing. The big downside is that my wheel choices are almost nil due to the lack of offset between the hub surface and the rotor/friction surface, and even these 19" RTR Tech 7s required me to shave about 1/16" from the edge of the caliper. The dash is covered in thick carbon vinyl and ready for the gauges and switches. And I mounted up and partially plumbed a power steering cooler from C&R Racing, using a stainless bracket and -6AN lines from Breeze. If it rains this weekend I may get to bleeding the brakes and filling all those holes in the dash.

    Front Brakes 1.JPG

    Front Brakes 2.JPG

    Front Brakes 3.JPG

    Steering Cooler 1.JPG

    Steering Cooler 2.JPG

    Carbon Dash 1.JPG

    Carbon Dash 2.JPG

    Carbon Dash 3.JPG

  30. #190
    Trick Tool Maker, Super Moderator Hankl's Avatar
    Join Date
    Feb 2011
    Location
    Northern CA
    Posts
    671
    Post Thanks / Like
    Blog Entries
    1
    Nice wheels Jake,

    Looks like you're making steady progress.

    Hank
    “If you didn’t have enough time to do it right the first time. How come you always have time to go back and do it again?” FFR1000186CP

    Understeer is when you hit the wall with the front of the car and oversteer is when you hit the wall with the rear of the car.
    Horsepower is how fast you hit the wall and torque is how far you take the wall with you.

  31. #191

    Join Date
    May 2011
    Location
    Pittsburgh, PA
    Posts
    728
    Post Thanks / Like
    Steady progress indeed! Here is the most recent of it, thanks largely to leaving the public sector (for the second or third time now) and starting my own business. We have a 22 gallon Fuel Safe Enduro cell with a 255 lph Walbro pump sitting in a surge tank. Getting the cell to fit the chassis was an exercise in measuring twice, welding and bending five times, and I'd put a smaller cell in it if I had to do it again. The engine is a new Boss 302 (Windsor) from Ford, with the "B" cam, a Quick Time bellhousing and a Ford Performance Parts 7 quart road race pan. Alternator bracket is from Speed Doctor, and the power steering bracket is from CFR. I'm still figuring out whether the GT40 intake will clear the hood without modification. The chassis and engine are about half wired, but overall it is coming along as my limited time permits. I hope everyone's doing well and enjoying the summer.

    Fuel Cell 1.JPG

    Fuel Cell 2.JPG

    Cheap Hydro Clutch 1.JPG

    Fuel Cell Cover 1.JPG

    Boss 302 1.JPG

  32. #192
    Senior Member John Dol's Avatar
    Join Date
    Feb 2011
    Location
    Gorham, ME
    Posts
    1,522
    Post Thanks / Like
    Jacob,

    When do you think first start will be?
    I like the wheels you chose too.

    John
    Finished the "My Coupe, my way" project.

    http://s956.photobucket.com/albums/ae46/jdcoupe1969/
    Coupe #386,17" Team III 245 FR 315 RR, 3-link, T5, 4 wheel disk, power brakes/steering. Sniper EFI
    First start Sept. 18 2013 First go kart Sept 19 2013

  33. #193

    Join Date
    May 2011
    Location
    Pittsburgh, PA
    Posts
    728
    Post Thanks / Like
    Thanks John. Depending on free time I should get it to run around September. I need to make some braided AN and hard lines for the fuel, weld the O2 sensors into the headers, merge the chassis and engine harnesses, and figure out how to wire the kill switch to also shut down the 3G alternator. I also need to modify the homemade clutch slave cylinder bracketry to get more travel; it now sits too far from the transmission. It's taking a lot of pedal movement, even with a 1.125" master, to move the 7/8" slave enough to disengage the clutch. With those tasks accomplished, it should run, and even drive if I put tires on it and fit the parking brake!

  34. #194
    Trick Tool Maker, Super Moderator Hankl's Avatar
    Join Date
    Feb 2011
    Location
    Northern CA
    Posts
    671
    Post Thanks / Like
    Blog Entries
    1
    Jake,

    Some really great progress. I'm welding up a cage for my fuel cell right now.
    Having some of the same problems, but my inlet is on the passenger side of the cell.
    I need to catch up with you!!

    Hankl
    “If you didn’t have enough time to do it right the first time. How come you always have time to go back and do it again?” FFR1000186CP

    Understeer is when you hit the wall with the front of the car and oversteer is when you hit the wall with the rear of the car.
    Horsepower is how fast you hit the wall and torque is how far you take the wall with you.

  35. #195

    Join Date
    May 2011
    Location
    Pittsburgh, PA
    Posts
    728
    Post Thanks / Like
    Thanks Hank; I hope all's well with you and your family, and give a call any time.

    Progress here remains steady, although "everything almost fits" is still the theme of the project. If I had a dollar for every part that just bolted on, without cutting, fitting, bending, welding, grinding, filing, or making a custom spacer, I doubt I could buy a sandwich and a cup of coffee at Starbucks. That said, I got the engine fully wired yesterday and pretty much figured out the rest of the wiring, and fuel lines should be done this week. I'll need to fab an angled throttle body adapter so that the hood closes, as FFR did on the old "Champ Coupe," and weld in o2 bungs. And with that the thing should fire up!

    Finished Dash 1.JPG

    Wired Engine 1.JPG

    Defroster Box 1.JPG

  36. #196
    Senior Member jkrueger's Avatar
    Join Date
    Feb 2011
    Location
    DFW, TX
    Posts
    432
    Post Thanks / Like
    Progress looks great!

    JC
    Factory Five Type-65 Coupe:"Race Spec" coupe, Ordered 1/12, picked-up 5/12, roller 5/12, first start 10/12, finished 4/13
    Factory Five Roadster: Sold 12/2011.
    http://www.25tires.com

  37. #197
    Senior Member smithtlw's Avatar
    Join Date
    Feb 2011
    Location
    Brockport, NY
    Posts
    103
    Post Thanks / Like
    Looks awesome Jacob. Great to see the persistence.

  38. #198

    Join Date
    May 2011
    Location
    Pittsburgh, PA
    Posts
    728
    Post Thanks / Like
    Thanks Todd. Persistence indeed.

    Well, the thing now runs. In short, I had to fabricate an intake elbow to put the throttle body below the hood, and a bracket for the mass air meter. For the former I joined 2 EGR delete plates with some aluminum tube. The tig welds aren't beautiful but they are good enough. As for the headers and side pipes, they simply didn't fit together, despite breaking 2 exhaust pipe expanders and lot of oxygen and acetylene being applied to them. Both my patience and oxygen bottle were nearing exhaustion, so I cut the connectors off the side pipes and welded on ones that actually fit. Then the driver's side header physically impacted the footbox, and not lightly. So that got cut apart and re-fabricated, and now clears the footbox and the body nicely. This took a staggering amount of time.

    Other than some fussing with the distributor, timing, idle and belt tension & alignment, the thing started and ran fine. Fuel pressure is perfect, the alternator charges, the kill switch seems to work, etc. Now I can move on to the body work, something I really know how to do, or at least knew how to do 15 years ago.

    Thanks to everyone who has offered support, advice and encouragement over the many years of this endeavor; it is very much appreciated and will not be forgotten. I'll try to post a video of the thing running as soon as I find the patience to figure out YouTube.

    Finished Engine 1 .JPG
    Finished Engine 2 .JPG
    Driver Pipes.JPG
    Passenger Pipes.JPG

  39. #199
    Senior Member John Dol's Avatar
    Join Date
    Feb 2011
    Location
    Gorham, ME
    Posts
    1,522
    Post Thanks / Like
    Nice work Jacob, no guts no glory!!

    John
    Finished the "My Coupe, my way" project.

    http://s956.photobucket.com/albums/ae46/jdcoupe1969/
    Coupe #386,17" Team III 245 FR 315 RR, 3-link, T5, 4 wheel disk, power brakes/steering. Sniper EFI
    First start Sept. 18 2013 First go kart Sept 19 2013

  40. #200
    Senior Member FMJ's Avatar
    Join Date
    Mar 2011
    Location
    Pittsburgh PA
    Posts
    167
    Post Thanks / Like
    Hi Jake,

    Maybe a Saturday or Sunday in September we can check out your progress?

    -Fred

Page 5 of 6 FirstFirst ... 3456 LastLast

Posting Permissions

  • You may not post new threads
  • You may not post replies
  • You may not post attachments
  • You may not edit your posts
  •  

Breeze

Visit our community sponsor