Forte's

Visit our community sponsor

Thanks Thanks:  1
Likes Likes:  1
Results 1 to 40 of 201

Thread: Matt's Gen2 65 Coupe Build Thread

Hybrid View

Previous Post Previous Post   Next Post Next Post
  1. #1
    Senior Member
    Join Date
    May 2015
    Posts
    230
    Post Thanks / Like

    Carpet

    I bought the pre-cut carpet from FFR when I ordered my kit. After reading some posts and learning that the kit didn't have a piece to cover the sides of the trunk, I ordered an additional 2 yards of carpet from FFR. I needed up needing it all. Between the sides of the trunk, the inside of the doors, and various mistakes (ie. tracing wrong side of carpet, not sticking in the right spot and having to rip up, cutting too much) I used it all.

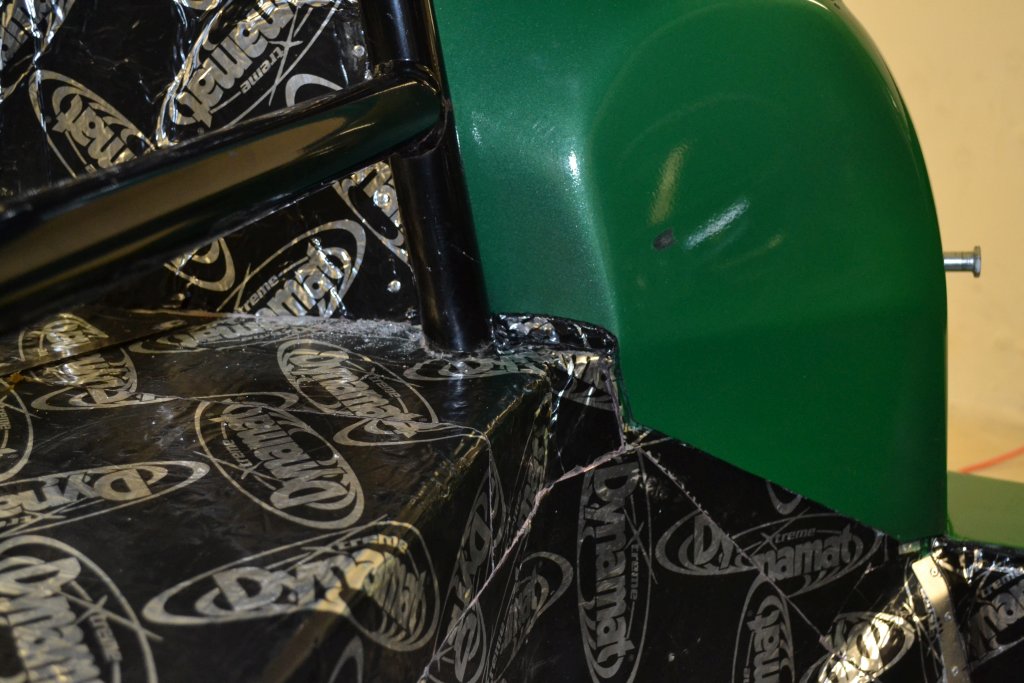
    Before starting the carpet, I needed to rivet the trunk aluminum sides to the body. This closes the gap between the outside and the inside. You can see the rivets to the left of the round tube. Also needed to patch up the holes between the body and the frame behind the seats.


    I bent up some aluminum and riveted it in.


    Then built up the inside with dynamat to make it flush with the rest of the dynamat


    I did this on both sides.

  2. #2
    Senior Member
    Join Date
    May 2015
    Posts
    230
    Post Thanks / Like

    Carpet cont.

    Now for the carpet on the floor of the trunk. The piece from FFR fit very well. I just needed to trim some off the sides to fit. I then sprayed part of the backside with adhesive. The plan was the rest would just sit flat so I could have access to the boxes in the floor,


    I sprayed more adhesive on the trunk floor and stuck that down. Then sprayed more on the parts that go down behind the seats.


    With that done it was on to the sides. Made a template with brown paper and cut and trimmed to fit. The section near the back was done with velcro to provide access to the access holes for the tail lights.


    I wrapped the carpet around above the wheel wells and stuck to the body. This covered up the edges of the trunk aluminum sides.


    -Matt

  3. #3
    Senior Member
    Join Date
    May 2015
    Posts
    230
    Post Thanks / Like

    Carpet Part 2

    Here are the rest of the carpet pictures.

    I had made the top piece of aluminum removable for the transmission tunnel, so I only glued the carpet to the top of the tunnel. I let the sides hang down and used velco to hold them.


    To finish off near the door openings, I decided to run carpet up the square 2" tube. This would hide the insulation on the outside of the footbox and close up the gap between the body and that tube. I marked in tape the location of the holes for the door straps, so I'd know where to punch the holes in the carpet once installed. Here's the before picture.


    After:

  4. #4
    Senior Member
    Join Date
    May 2015
    Posts
    230
    Post Thanks / Like

    Carpet Part 2 cont.

    Just a zoomed out shot showing carpet and templates everywhere....


    Trying to show the front, but hard to see everything with the black carpet. The only dynamat you still see is in the doors and where the rear speakers will go.


    Put some carpet in the doors.


    Carpet in the back. Again, I just glued the top section and can lift up the carpet to get to the rear access panel.


    To get access in the back, just roll up the floor carpet.


    There you have it. Done with carpet.

    -Matt

Posting Permissions

  • You may not post new threads
  • You may not post replies
  • You may not post attachments
  • You may not edit your posts
  •  

Martin's Dent and Collision Shop

Visit our community sponsor