Very Cool Parts

Visit our community sponsor

Thanks Thanks:  225
Likes Likes:  220
Page 28 of 30 FirstFirst ... 182627282930 LastLast
Results 1,081 to 1,120 of 1172

Thread: Edwardb’s Gen 3 Type 65 Coyote Coupe #59 Build: 5,000 Mile Report

  1. #1081
    Senior Member edwardb's Avatar
    Join Date
    Feb 2011
    Location
    Lake Orion, Michigan
    Posts
    10,578
    Post Thanks / Like
    Quote Originally Posted by BigShooter View Post
    Paul,
    Thanks for the descriptive on the battery wiring. Very helpful.
    You say the 'switched' side of the battery cutoff side - how do I tell which side is which on the provided FFR battery cutoff switch? (for some reason couldn't add an image to this reply). It's just a switch - so does it matter which side gets the hot battery connection?
    Also, you used a bus - are there issues with just stacking the 3 red Ron Francis connectors onto one side of a battery cutoff switch?
    As already answered, doesn't matter which post you use for hot or switched. The two posts are either open or closed depending on switch position. As far as connecting all three Ron Francis power connectors to the switch, sure you can do that. I prefer a different approach using a bus bar plus I wire the alternator differently. But those are preferences and not required it you want to stay with the harness as is.
    Build 1: Mk3 Roadster #5125. Sold 11/08/2014. Build 2: Mk4 Roadster #7750. Sold 04/10/2017. Build Thread
    Build 3: Mk4 Roadster 20th Anniversary #8674. Sold 09/07/2020. Build Thread and Video. Build 4: Gen 3 Type 65 Coupe #59. Gen 3 Coyote. Legal 03/04/2020. Build Thread and Video
    Build 5: 35 Hot Rod Truck #138. LS3 and 4L65E auto. Rcvd 01/05/2021. Legal 04/20/2023. Build Thread. Sold 11/9/2023.

  2. #1082
    Senior Member
    Join Date
    Mar 2021
    Posts
    361
    Post Thanks / Like
    Regarding car covers Paul, what key differences exist, car cover fit wise, between Gen 2 and 3? Car Cover currently only lists Gen 1/2 in cover options for the Daytona ...

    Thx!

  3. #1083
    Senior Member
    Join Date
    Mar 2021
    Posts
    361
    Post Thanks / Like
    Never mind ... After more digging, the changes are too many to count :-) Haha

  4. #1084
    Senior Member edwardb's Avatar
    Join Date
    Feb 2011
    Location
    Lake Orion, Michigan
    Posts
    10,578
    Post Thanks / Like
    Quote Originally Posted by LateApex View Post
    Regarding car covers Paul, what key differences exist, car cover fit wise, between Gen 2 and 3? Car Cover currently only lists Gen 1/2 in cover options for the Daytona ...

    Thx!
    I can't answer that question directly. When the Gen 3 was announced, Dave Smith described how they had changed some things on the body including the rear fender flares, spoiler, rear end, etc. When I talked to Car Cover World about 2-1/2 years ago, they suggested going through a design exercise with a worksheet they provided and I did a bunch of measuring. They made my cover from those measurements. I'm happy with the fit and recommend that over one of the previous generation covers. If you don't see it listed on their website, you should call them. They specifically said that others could order a Gen 3 cover using the dimensions I provided and not pay the $35 design fee. Pretty sure several have done that.
    Build 1: Mk3 Roadster #5125. Sold 11/08/2014. Build 2: Mk4 Roadster #7750. Sold 04/10/2017. Build Thread
    Build 3: Mk4 Roadster 20th Anniversary #8674. Sold 09/07/2020. Build Thread and Video. Build 4: Gen 3 Type 65 Coupe #59. Gen 3 Coyote. Legal 03/04/2020. Build Thread and Video
    Build 5: 35 Hot Rod Truck #138. LS3 and 4L65E auto. Rcvd 01/05/2021. Legal 04/20/2023. Build Thread. Sold 11/9/2023.

  5. Thanks LateApex thanked for this post
  6. #1085
    Senior Member edwardb's Avatar
    Join Date
    Feb 2011
    Location
    Lake Orion, Michigan
    Posts
    10,578
    Post Thanks / Like

    5,000 Mile Report

    Actually 5,264 miles to be precise. Since I’ve decided last Saturday’s club cars and coffee will be the last drive of the year, thought I’d post a longer-term report on my build thread. Appreciate when other build threads provide follow-up, so thought I'd do the same. Always good that the driving season can make it to November here in Michigan. Looks like at least a few more days of mild weather ahead but could change any time so decided to shut things down. The truck is being painted now (!!) so no further work there right now. Will use the available time for the usual oil change, lube, check-up, etc. The Coupe is up on the lift (pictured below) with the wheels off and work is underway. Not done yet, but so far everything looks fine. With the road dirt off, still looks brand new underneath. Brakes still have plenty of lining. All fluids topped. Chassis lube complete. Oil change still pending. Will go over all the main suspension bolts and make sure all still secure.

    Our driving was down a little bit this season due to family travel, some medical activities, etc. But still got out as much as we could. Season one was cut short by the COVID shutdown, but the last two seasons have been busy. Two London Cobra Shows. One in the Factory Five display. The other as a regular person. The Factory Five Open House, Detroit Autorama, invitations to the Detroit EyesOn Design Concours and M1 American Speed Festival where we met Peter Brock (a real honor, he loved the Coupe), two Woodward Dream Cruises, multiple Great Lakes Cobra Club events and cruises, and a number of other local shows and cars and coffees. Longest cruise to date was just over 200 miles. Which was easy and uneventful. The Coupe draws a lot of interest everywhere it goes and has won several nice awards. It remains an absolute blast to drive. Every time I get in and go somewhere I’m reminded how much I like it. My wife is a great sport and attends nearly everything with me. My sons and I are the only ones who’ve driven it, and it will stay that way. My wife says “never” so I take that as a pretty clear position. Our driving is nearly all street cruising. Did get some charity rides down Main Street in London, so got to stretch its legs a little there. Plus, we did a parade lap around the track at M1 and I was able to lay back and punch it a couple times. Nothing extreme. But I remain 100% impressed with the Gen 3 Coyote, the IRS setup, the T-56 transmission, Wilwood brakes, everything. It all just works beautifully. Congratulations to Dave Smith and the team at Factory Five (again) for a fantastic product that I'm extremely proud to own.

    I’ve only had four things that needed to be addressed during these miles. Some I mentioned previously in the build thread. First, the Digital Guard Dawg module had to be sent back because it “forgot” the emergency bypass code. Wouldn’t have discovered it if yours truly hadn’t erased all the remote key fob codes by not following the directions. But happened during winter downtime, so didn't interrupt driving. DGD sent a new module rather than reflashing the old one. Second, managed to collect a rock while cruising and broke the windshield. Was challenging to get the old one out and had to wait a bit for the replacement from Factory Five. But thankful for insurance glass coverage and all fixed. Third, the Odyssey PC925T battery started cranking slow this year. So swapped the new one I had on hand for the truck. Used the old battery for the truck build and it eventually completely died. It was 4+ years old and no amount of recovery charging would bring it back. Seems like it should have lasted longer. Fourth, my Russ Thompson turn signal assembly stopped "latching" in the RH direction. I tried unsuccessfully to fix it and so did Russ. He replaced with a new mechanism (at cost) and it's been fine ever since. He said the most recent batch of mechanisms were from a new vendor and appeared to be higher quality. Another winter time fix that didn't interrupt anything. That’s it. Absolutely no other mechanical or functional issues since new. Not bad.

    I’m impressed with how the paint is holding up. When cleaned up, still looks as good as when it came out of the shop. I’m amazed how few rock chips the nose takes compared to the Roadster. There were a few that I repaired after the first season. But none since other than a couple of real small ones along the back edge of the fenders. That Peter Brock aerodynamic shape maybe helps? I have scraped the underneath of the nose twice. First time was on the second time we had it out getting a burger at an A&W drive-in. Grrr!!! Caught another parking bumper on a cruise the following year. Both are all fixed and not visible. And I try to be much more careful with where I point the nose. It sticks out further than you realize and it’s a little hard to see.

    Negatives? Well a few maybe. Yes, it's a little hard to get in and out of. But I will say practice helps a lot. Don't even think about it any more. The quick release steering wheel helps a bunch. I highly recommend. Yes, it's also loud. We wear our ear protection all the time. Once you get over that, it's not an issue. This season I've been using Sony WF-1000XM4 Noise Canceling Wireless Earbuds. Very happy with them. I don't try to talk on my phone while driving, but nice that they're connected via Bluetooth so I know when I get a call, message, whatever. Also works fantastic when using the map function on my phone for driving directions. The prompts are right there in your ears. Could be used for music too. But I prefer not to do that. Finally, yes it's warm inside even on mild days and the Factory Five A/C I would rate as "OK." We don't have super hot weather here in Michigan, so most of the time it's fine. But on really hot days (upper 90's+, humid, etc.) at full blast it helps and is comfortable but its not going to freeze you out. I still recommend it. But don't expect it to be daily driver level. The heater, on the other hand, works great.

    Would I do anything differently if I built another one? Honestly, probably not. I'd maybe think about door poppers. But I'm pretty used to reaching in through the windows and not a big deal. But probably would be a nice touch and would integrate nicely to the DGD system. A lot of people comment about the side windows and ask whether I'd prefer roll-up windows. I just don't think it's a big deal. I'm fine with the windows as they are. With the heat and sound issues mentioned previously, I just don't know how often you'd really want the windows rolled down. At least that's the case for us. I commented earlier in the build thread I'd add more sound insulation on the outside of the chassis by the side pipes. That might help a little with the sound. But again, not a big deal since ear protection is going to be the norm IMO for all builds.

    That’s about it. Thinking about maybe doing the Detroit Autorama again this year. It's the last week in February. Would like to take the truck, but doubt it will be painted and back together by then. (Not every build or paint job gets done at Erik Treves speed... ) If the truck's not done, would take the Coupe again. I've done Autorama four times and each time with a different build. So would be a repeat for the Coupe. But I enjoy doing that show and it's a good winter diversion.

    We love our Coupe and hope it keeps giving us great rides and great service. I’ve flipped my Roadster builds. But this one isn’t going anywhere. Even though several have asked. For those that are building, keep at it. I predict you’re going to really enjoy the final result.

    Last edited by edwardb; 11-12-2022 at 09:28 AM.
    Build 1: Mk3 Roadster #5125. Sold 11/08/2014. Build 2: Mk4 Roadster #7750. Sold 04/10/2017. Build Thread
    Build 3: Mk4 Roadster 20th Anniversary #8674. Sold 09/07/2020. Build Thread and Video. Build 4: Gen 3 Type 65 Coupe #59. Gen 3 Coyote. Legal 03/04/2020. Build Thread and Video
    Build 5: 35 Hot Rod Truck #138. LS3 and 4L65E auto. Rcvd 01/05/2021. Legal 04/20/2023. Build Thread. Sold 11/9/2023.

  7. Thanks Namrups, Windsor, rhk118, Geoff H, David Williamson thanked for this post
    Likes Namrups, UpNorth, slarson, Fman, rhk118, Ted G, RR20AC liked this post
  8. #1086
    Senior Member Nigel Allen's Avatar
    Join Date
    Oct 2012
    Location
    South Australia
    Posts
    504
    Post Thanks / Like
    I use the same Sony ear buds with my roadster. They are excellent for reducing the wind noise, whilst still leaving exhaust note audible enough.
    I mostly switch to noise cancelling above 80kph. Great for music on long trips.
    Mk.4 FFR supplied Right hand drive
    Received 12/2012 completed 12/2019
    Gen1 Coyote / TKO600 / IRS
    Lots of mods to make compliant for Australian design rules

  9. Thanks edwardb thanked for this post
  10. #1087
    Not a waxer Jeff Kleiner's Avatar
    Join Date
    Feb 2011
    Location
    Bloomington, Indiana
    Posts
    8,095
    Post Thanks / Like
    Nice report Paul. Coupe looks great as always, even on the lift! I kind of figured this one was a "keeper" and haven't expected it would be going anywhere, truck or no truck So, do you suppose you can get Sharon interested in getting behind the wheel of the pickup? I'll look forward to seeing it with some color (and gee, wonder what that color might be???).

    Have a good winter!

    Jeff

  11. #1088
    Senior Member edwardb's Avatar
    Join Date
    Feb 2011
    Location
    Lake Orion, Michigan
    Posts
    10,578
    Post Thanks / Like
    Quote Originally Posted by Jeff Kleiner View Post
    Nice report Paul. Coupe looks great as always, even on the lift! I kind of figured this one was a "keeper" and haven't expected it would be going anywhere, truck or no truck So, do you suppose you can get Sharon interested in getting behind the wheel of the pickup? I'll look forward to seeing it with some color (and gee, wonder what that color might be???).

    Have a good winter!

    Jeff
    Thanks Jeff. I keep telling Sharon I configured the truck to make it easy for her to drive (automatic, PS, PB, etc.) but so far still getting the "never" answer. We'll see, but honestly not expecting that to change. Yes, the truck will be red (big surprise) but not a candy or metallic like the last several builds. More of a true red. Picked the shade out of a color book and the auto paint place mixed for us. Anxious to get it done. The amount of fiberglass parts and body work on that build were about all that I could handle. All that's left now is to put it all back together.

    You have a good winter as well.
    Last edited by edwardb; 11-08-2022 at 11:16 AM.
    Build 1: Mk3 Roadster #5125. Sold 11/08/2014. Build 2: Mk4 Roadster #7750. Sold 04/10/2017. Build Thread
    Build 3: Mk4 Roadster 20th Anniversary #8674. Sold 09/07/2020. Build Thread and Video. Build 4: Gen 3 Type 65 Coupe #59. Gen 3 Coyote. Legal 03/04/2020. Build Thread and Video
    Build 5: 35 Hot Rod Truck #138. LS3 and 4L65E auto. Rcvd 01/05/2021. Legal 04/20/2023. Build Thread. Sold 11/9/2023.

  12. #1089
    Senior Member
    Join Date
    Mar 2021
    Location
    Ohio
    Posts
    279
    Post Thanks / Like
    Quote Originally Posted by edwardb View Post
    Then to the flex attachment points.


    That’s it for brakes. For the fuel lines, I’m planning to put the adjustable regulator on the angled firewall area on the DS. So routed the lines accordingly. Here’s where they come into the engine compartment. There will be SS flex with -6AN fittings to the regulator from here. Same as at the fuel tank.


    Then through the tunnel to the back. I had to take a jog around the T-56 shifter.


    Then out the back and turned to the Trick Flow TFS-23006 fuel filter I’m using. Same (again…) as #8674.


    Now that I have the lines installed, I can make up the flex lines to the Pro-M Racing fuel pump hangar. Already mentioned that in a previous post. Has true 3/8-inch in and out and pre-installed -AN6 connections. Perfect. The rear harness is just laying there right now. Next up is get the locations finalized and I’ll install with some padded clamps. Here’s an overall view. Feels good to get this part done.


    So on to a few other points. Several have asked about the tools I use for brake and fuel lines. Based on multiple recommendations on this forum, picked up the Eastwood Professional Flaring tool during my first build. Not cheap, but they’re regularly on sale. I highly recommend. The quality of the flares are as good as any factory ones. Often better actually. Just need to practice on SS to get the right pressure mainly for the second step.


    For bending tools, I started out with an Eastwood triple head bender on my first build. I didn’t feel like it worked all that well, especially for SS. The handles are pretty short, so for 3/8 SS was literally almost more than I could do to bend. I’ve since settled on these three dedicated size benders. All work very well. Ridgid provides decent benders that are better IMO than the average run-of-the-mill benders. Not Swagelok quality, but a fraction of the cost. I use a Ridgid 36097 3/8-inch, Ridgid 36117 3/16-inch, and a smaller 3/16-inch bender from InLine Tube. It does an even tighter radius when that's needed. All highly recommended. Here are pics of each and the bends they make in SS.

    Paul,
    Where did you get your brake line tee from? Is it stainless or coated steel?

  13. #1090
    Senior Member edwardb's Avatar
    Join Date
    Feb 2011
    Location
    Lake Orion, Michigan
    Posts
    10,578
    Post Thanks / Like
    Quote Originally Posted by burchfieldb View Post
    Paul,
    Where did you get your brake line tee from? Is it stainless or coated steel?
    The tees are: J9035 Gardner-Westcott Fitting, Brake Adapter, Tee, 3/8-24 in., 3/8-24 in., 3/8-24 in., Inverted Flare, Brass, Chrome finish.
    Build 1: Mk3 Roadster #5125. Sold 11/08/2014. Build 2: Mk4 Roadster #7750. Sold 04/10/2017. Build Thread
    Build 3: Mk4 Roadster 20th Anniversary #8674. Sold 09/07/2020. Build Thread and Video. Build 4: Gen 3 Type 65 Coupe #59. Gen 3 Coyote. Legal 03/04/2020. Build Thread and Video
    Build 5: 35 Hot Rod Truck #138. LS3 and 4L65E auto. Rcvd 01/05/2021. Legal 04/20/2023. Build Thread. Sold 11/9/2023.

  14. #1091
    Senior Member
    Join Date
    Oct 2021
    Location
    Sarasota, FL
    Posts
    267
    Post Thanks / Like
    Paul,
    Can you send me that same list? I am hanging to the Coupe.
    Thanks
    Bill

  15. #1092
    Senior Member edwardb's Avatar
    Join Date
    Feb 2011
    Location
    Lake Orion, Michigan
    Posts
    10,578
    Post Thanks / Like
    Quote Originally Posted by maclonchas View Post
    Paul,
    Can you send me that same list? I am hanging to the Coupe.
    Thanks
    Bill
    PM Sent
    Build 1: Mk3 Roadster #5125. Sold 11/08/2014. Build 2: Mk4 Roadster #7750. Sold 04/10/2017. Build Thread
    Build 3: Mk4 Roadster 20th Anniversary #8674. Sold 09/07/2020. Build Thread and Video. Build 4: Gen 3 Type 65 Coupe #59. Gen 3 Coyote. Legal 03/04/2020. Build Thread and Video
    Build 5: 35 Hot Rod Truck #138. LS3 and 4L65E auto. Rcvd 01/05/2021. Legal 04/20/2023. Build Thread. Sold 11/9/2023.

  16. #1093
    Senior Member
    Join Date
    Oct 2021
    Location
    Sarasota, FL
    Posts
    267
    Post Thanks / Like
    Quote Originally Posted by edwardb View Post
    Yes, that's everything you need. Lots of people get the whole package from Factory Five like you did. With the IRS rear suspension option plus the 2015 Mustang IRS center section, spindles, and hubs, that's technically everything for the IRS. All you need to add is brakes, which you would have to anyway.

    The rest of the story is the center section comes in a number of versions. Some are iron case. Some aluminum. There are multiple ratios. 3.15, 3.31, 3.55 and 3.73. All but the 3.73 are a clutch type limited slip. The Torsen uses gears instead of clutch plates. They're roughly twice the price. The 3.73 Torsen setup is considered a higher performance option for the Mustang as part of one of their Performance Packs. How much it helps in these builds is open to some debate, how the car is used, etc. I wouldn't panic if I were you. Nearly every build (including mine to date) use the Ford traction lock clutch setup and it works fine. I would want to know which diff Factory Five is providing to you and then you need to make sure that's OK for your build. My guess is they're providing the 3.55. It's probably the most common. Run the numbers in a calculator (like this one http://www.tremec.com/calculadora.php) and confirm you're OK with it.

    Like I said, I want to use 3.73 gearing for my build so ended up with the Torsen setup by default. Which is OK since I've wanted to try it. I could have bought a lower priced non-Torsen setup and changed to 3.73 gears. But really didn't want to open and change a brand new diff. I've done it before. Not terrible, but prefer not to.
    Paul,

    Just a quick question on the IRS. If you get the IRS option for the coupe and get a complete clip for IRS from the yard (3.55 or 3.73) with the brakes rotors, emergency cables etc, am I missing something from not getting the separate brakes and IRS center etc.

    I hope this makes sense the question I am asking?

    Thanks

    Bill

  17. #1094
    Senior Member edwardb's Avatar
    Join Date
    Feb 2011
    Location
    Lake Orion, Michigan
    Posts
    10,578
    Post Thanks / Like
    Quote Originally Posted by maclonchas View Post
    Paul,

    Just a quick question on the IRS. If you get the IRS option for the coupe and get a complete clip for IRS from the yard (3.55 or 3.73) with the brakes rotors, emergency cables etc, am I missing something from not getting the separate brakes and IRS center etc.

    I hope this makes sense the question I am asking?

    Thanks

    Bill
    Other than the brakes, the only useable parts are the center section and knuckles/hubs. The brakes may be useable but I have zero experience since I've used Wilwoods on both of my IRS builds. So can't offer any advice, sorry. Many have used the newer Mustang brakes, so others should be able to offer some direction. Factory Five sells a version as well. Doubt very much whether the e-brake cables from a donor pallet will be the right length or connection. New are relatively cheap. Sure wouldn't make any decisions based on trying to reuse those.

    Bottom line for me, based on buying a complete IRS pallet for my previous 20th Anniversary Roadster, is the shipping costs exceed the added value of a complete pallet. And then you're left with trying to dispose of all the unused parts.
    Build 1: Mk3 Roadster #5125. Sold 11/08/2014. Build 2: Mk4 Roadster #7750. Sold 04/10/2017. Build Thread
    Build 3: Mk4 Roadster 20th Anniversary #8674. Sold 09/07/2020. Build Thread and Video. Build 4: Gen 3 Type 65 Coupe #59. Gen 3 Coyote. Legal 03/04/2020. Build Thread and Video
    Build 5: 35 Hot Rod Truck #138. LS3 and 4L65E auto. Rcvd 01/05/2021. Legal 04/20/2023. Build Thread. Sold 11/9/2023.

  18. #1095
    Senior Member
    Join Date
    Oct 2021
    Location
    Sarasota, FL
    Posts
    267
    Post Thanks / Like
    Paul,

    Thanks. If it sounds too good to be true... then it probable is ...

    Bill

  19. #1096
    Senior Member
    Join Date
    Oct 2021
    Location
    Sarasota, FL
    Posts
    267
    Post Thanks / Like
    Paul,

    Do not know if you have it anywhere, but what are the rough dimensions on that panel? Just noodling some different concepts and need that information to decide if what I want to do is feasible. The panel for the gauges.... sorry

    Thanks

    Bill
    Last edited by maclonchas; 12-26-2022 at 03:31 PM. Reason: Missed sentence

  20. #1097
    Senior Member edwardb's Avatar
    Join Date
    Feb 2011
    Location
    Lake Orion, Michigan
    Posts
    10,578
    Post Thanks / Like
    Quote Originally Posted by maclonchas View Post
    Paul,

    Do not know if you have it anywhere, but what are the rough dimensions on that panel? Just noodling some different concepts and need that information to decide if what I want to do is feasible. The panel for the gauges.... sorry

    Thanks

    Bill
    Measured as best I can on the finished dash -- 17-1/4" long x 6-1/4" wide. I wouldn't cut any metal or fabricate anything off those dimensions. But they're close.
    Build 1: Mk3 Roadster #5125. Sold 11/08/2014. Build 2: Mk4 Roadster #7750. Sold 04/10/2017. Build Thread
    Build 3: Mk4 Roadster 20th Anniversary #8674. Sold 09/07/2020. Build Thread and Video. Build 4: Gen 3 Type 65 Coupe #59. Gen 3 Coyote. Legal 03/04/2020. Build Thread and Video
    Build 5: 35 Hot Rod Truck #138. LS3 and 4L65E auto. Rcvd 01/05/2021. Legal 04/20/2023. Build Thread. Sold 11/9/2023.

  21. #1098
    Senior Member
    Join Date
    Oct 2021
    Location
    Sarasota, FL
    Posts
    267
    Post Thanks / Like
    Thanks

  22. #1099
    Senior Member
    Join Date
    Oct 2021
    Location
    Sarasota, FL
    Posts
    267
    Post Thanks / Like
    edwardB,

    Another silly question since I do not have my kit yet and have to go between the manual and threads to piece together the story each one tells of the install. It will be much easier when I have the kit and actually visualize the components. I think I see that the NRG Quick release has to mount to the RT turn signal or FFR provided boss. You need to drill and tap NRG to make one unit to allow the bolt to the boss or RT device. Is that correct? The adapter for the steering wheel that you bolt onto the steering wheel, does that come with the NRG kit or is that a seperate purchase?

    Sorry in advance if I missed that piece of the puzzle. Just trying to get my steps right and in my build book.

    Thanks

    Bill

  23. #1100
    Namrups's Avatar
    Join Date
    Sep 2021
    Location
    Mechanicville, NY
    Posts
    1,018
    Post Thanks / Like
    I documented the install at https://thefactoryfiveforum.com/show...l=1#post500156. Paul also documented it in his build as have others. Should answer your questions with pictures which I find helpful understanding the installation when you don't have the parts to look at.
    Scott Pregont
    Present build: 65 Daytona Coupe #393 - Forte 427 EFI crate w/TKX 2.87/ .81 - Ordered 11/16/21 - Delivered 6/23/2022
    Location: Mechanicville, NY
    Build Thread: https://thefactoryfiveforum.com/show...na-Coupe-build
    My Albums
    Special Tools, Custom Parts, misc supplies: https://thefactoryfiveforum.com/album.php?albumid=2045
    Garage Pics: https://thefactoryfiveforum.com/album.php?albumid=2041
    POR15 First Try: https://thefactoryfiveforum.com/album.php?albumid=2068
    Silicone application tips: https://thefactoryfiveforum.com/album.php?albumid=2063

  24. #1101
    Senior Member edwardb's Avatar
    Join Date
    Feb 2011
    Location
    Lake Orion, Michigan
    Posts
    10,578
    Post Thanks / Like
    Quote Originally Posted by maclonchas View Post
    edwardB,

    Another silly question since I do not have my kit yet and have to go between the manual and threads to piece together the story each one tells of the install. It will be much easier when I have the kit and actually visualize the components. I think I see that the NRG Quick release has to mount to the RT turn signal or FFR provided boss. You need to drill and tap NRG to make one unit to allow the bolt to the boss or RT device. Is that correct? The adapter for the steering wheel that you bolt onto the steering wheel, does that come with the NRG kit or is that a seperate purchase?

    Sorry in advance if I missed that piece of the puzzle. Just trying to get my steps right and in my build book.

    Thanks

    Bill
    Hopefully this explanation makes sense:

    1. The kit comes with a steering wheel boss, steering wheel, and center cap. The boss bolts to the steering shaft coming out of the dash, the steering wheel bolts to the boss, and the cap covers up the fasteners. Installed this way, some of the steering shaft is exposed and the the kit provided manual turn signal switch is typically installed on the dash.

    2. The Russ Thompson turn signal mod provides a self-cancelling turn signal stalk (what most of us are used to) and cleans up the appearance of the exposed steering shaft. Plus provides an intermittent switch button on the end of the stalk that you can use for whatever you want. Typically low/high beam switching or the horn. In order to install this mod, you send the kit provided steering wheel boss to Russ and he machines it to work with the turn signal assembly including tabs on the back for the self-cancelling function. The mod does not change how the steering wheel attaches to the boss or the provided center cap.

    3. The NRG quick release goes between the steering wheel boss and the steering wheel. Doesn't matter whether the Russ Thompson turn signal assembly is used or not. Although together they make a very nice package. Because the mounting pattern for the NRG quick release doesn't match the Factory Five parts, it's necessary to drill and tap the steering wheel boss to attach one side and the NRG piece to attach the steering wheel. Not hard to do. There are jigs being passed around although I did mine with careful measuring and a drill press. As Scott mentioned, there are multiple threads on the exact steps required.
    Build 1: Mk3 Roadster #5125. Sold 11/08/2014. Build 2: Mk4 Roadster #7750. Sold 04/10/2017. Build Thread
    Build 3: Mk4 Roadster 20th Anniversary #8674. Sold 09/07/2020. Build Thread and Video. Build 4: Gen 3 Type 65 Coupe #59. Gen 3 Coyote. Legal 03/04/2020. Build Thread and Video
    Build 5: 35 Hot Rod Truck #138. LS3 and 4L65E auto. Rcvd 01/05/2021. Legal 04/20/2023. Build Thread. Sold 11/9/2023.

  25. #1102
    Senior Member
    Join Date
    Oct 2021
    Location
    Sarasota, FL
    Posts
    267
    Post Thanks / Like
    Paul,

    That helps a lot, but what I am having trouble visualizing this part is in this picture below :

    IMG_1829.jpg

    On the back of the steering wheel, there is an attached round plate. I am trying to see what piece that item is and cannot correlate with anything from the descriptions. I am sure it is obvious, but I am not seeing it.

    Thanks

    Bill

  26. #1103
    Senior Member edwardb's Avatar
    Join Date
    Feb 2011
    Location
    Lake Orion, Michigan
    Posts
    10,578
    Post Thanks / Like
    Quote Originally Posted by maclonchas View Post
    Paul,

    That helps a lot, but what I am having trouble visualizing this part is in this picture below :

    IMG_1829.jpg

    On the back of the steering wheel, there is an attached round plate. I am trying to see what piece that item is and cannot correlate with anything from the descriptions. I am sure it is obvious, but I am not seeing it.

    Thanks

    Bill
    That's the half of the NRG piece I described in point #3 "the NRG piece to attach the steering wheel." Maybe not clear from the descriptions and pictures, I don't know. The NRG quick release has two pieces that twist and lock together. One on the steering wheel boss. One on the steering wheel. Push a button and twist to unlock, the two pieces separate, and the steering wheel is released. Twist again to lock the steering wheel back in place. Probably much easier to envision all this with the pieces in hand. But it's a straightforward and proven setup.
    Last edited by edwardb; 12-28-2022 at 10:31 AM.
    Build 1: Mk3 Roadster #5125. Sold 11/08/2014. Build 2: Mk4 Roadster #7750. Sold 04/10/2017. Build Thread
    Build 3: Mk4 Roadster 20th Anniversary #8674. Sold 09/07/2020. Build Thread and Video. Build 4: Gen 3 Type 65 Coupe #59. Gen 3 Coyote. Legal 03/04/2020. Build Thread and Video
    Build 5: 35 Hot Rod Truck #138. LS3 and 4L65E auto. Rcvd 01/05/2021. Legal 04/20/2023. Build Thread. Sold 11/9/2023.

  27. #1104
    Senior Member
    Join Date
    Oct 2021
    Location
    Sarasota, FL
    Posts
    267
    Post Thanks / Like
    Paul,

    Thanks. It was not you, but rather me not seeing that component easily. I found a video on YouTube Oak Hollow Garage (https://www.youtube.com/watch?v=4dY5SkZsQeQ) that cleared up the mystery and showed the components individually and apart.
    Thanks for your help.
    Bill

  28. #1105
    Senior Member
    Join Date
    Oct 2021
    Location
    Sarasota, FL
    Posts
    267
    Post Thanks / Like
    Quote Originally Posted by edwardb View Post
    Today I finished how I’m going to install the seats. I wanted to get this done before starting the cockpit insulation while it’s easy to see everything. Plus I need to sort out my heated seat wiring before spraying on the insulation. My normal method is to bury the wires in the corner of the floor/trans tunnel on each side. My previous builds have all been the standard Roadster seats where the bottom cushion swings up exposing the seat frame for easy access. Plus I haven’t done sliders before. Only bolted directly to the cockpit floor. With the Corbeau seats I showed earlier, no option for either. With them in place, it became very obvious reaching under the seats to install mounting bolts would be challenging if not impossible. Especially for the rear bolts. I decided to mount them with 3/8"-16 button head alloy steel screws from the bottom into the cockpit with nuts fixed to the slider frame. After looking at several options, decided to use 3/8"-16 weld nuts from McMaster (where else?) located and riveted to the frame. These: https://www.mcmaster.com/#90955a123/=1e1xnql.

    So the challenge was to establish the locations for the mounting bolts, taking into account the seat positions, slider frames, and acceptable mounting locations on the chassis. There is a seat pan welded into the chassis. But how to find the proper locations? After staring at it for a while (I do that…) decided to make cardboard patterns for each side that exactly indexed to the slider frame on three sides and extended 6-8 inches out the front. Then with the seats in the appropriate locations, marked the position of the patterns with tape. They were out in front of the seats and could be reached. Then took the seats out and used the patterns to determine the locations of each mounting bolt. As it turned out, I was able to get 3 of the 4 into the seat pan on each side. But one (the front inside on both sides) needed to go through a frame rail.

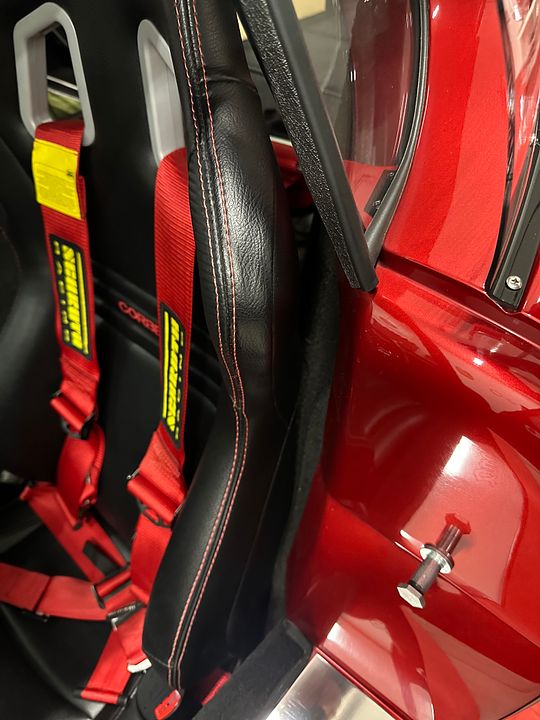
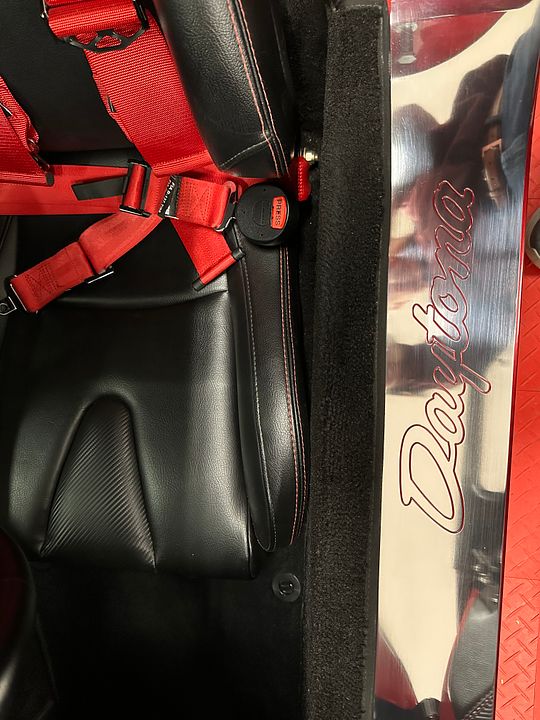
    With the locations determined, drilled the cockpit floor, matching locations in the slider frame, installed the weld nuts onto the frames, and a little while ago fit everything together. Success! I’m very happy with how this turned out, and will be relatively easy to install and remove since all four bolts are accessible from under the car. The nuts move around slightly in the retainers, so makes getting them started a little less critical. Once in and tight, the seats are rock solid. Both seats will slide forward six inches or so. But not sure how often that will be required. Even for me (5’10”) the rear position on the driver’s seat is fine. Basically the same exact distance from the steering wheel and pedals as my Roadster. Side note: These seats work very well for me (discussed before) but for taller builders may not be the best choice. Different seats could locate another couple inches at least further back than these. Another side note: Found the passenger seat was most comfortable turned slightly to the outside. The passenger footbox is slightly offset to the right, and found the seating was more comfortable slightly favored to that side. Barely noticeable. But makes a difference. And yet another side note, the seat location, the location of the underlying seat pan, plus the seat type I selected, all work together to make an anti-sub belt not practical. I'm looking right now at Schroth Profi II ASM belts. Designed to be 4-point while still providing anti-submarine function. Nice but pricey to say the least. Trying to sell my kit provided Simpsons if anyone is interested.

    With that, some pictures. This is the pattern attached to the passenger seat and the resulting index marks after determining the desired location. Same process for the drivers side.


    These are the two patterns (made from Ram Board, mentioned in a previous update) in their desired locations. Marked the location of the seat frame, tracks, underlying seat pan and frame rails, etc. From that, determined the four mounting locations for each side.


    Slider frames with the holes drilled in the frame and cockpit floor, and all eight weld nuts installed. First time checking the fit and everything aligned. Whew! I did throw a little rattle can black on the weld nuts before riveting them in place. Not visible, but plain steel.


    Seats installed now in their final locations.


    One of the interesting challenges of the Coupe is climbing in and out. Efforts to date have been a little clumsy, to say the least. Today I learned (and am relieved!) that having the seats bolted down makes a big difference. Passenger side is relatively easy. Driver’s side would be easier without the steering wheel (I can see why some guys go with a removable wheel) but I can manage OK. Obviously it will also make a difference with the body, the doors, etc. But way easier getting in and out with fixed seats versus when they were loose and sliding around.
    Paul,
    How much room did you have with your seat side bolsters? I cannot tell from your pictures. Looking at some other Corbeau seat options. Thanks Bill

  29. #1106
    Senior Member edwardb's Avatar
    Join Date
    Feb 2011
    Location
    Lake Orion, Michigan
    Posts
    10,578
    Post Thanks / Like
    Quote Originally Posted by maclonchas View Post
    Paul,
    How much room did you have with your seat side bolsters? I cannot tell from your pictures. Looking at some other Corbeau seat options. Thanks Bill
    Here are a couple of pictures I just took. The seat back is about 1-1/2" away from the inside of the body. The base is right against the inside on both sides. Does this help?


    Build 1: Mk3 Roadster #5125. Sold 11/08/2014. Build 2: Mk4 Roadster #7750. Sold 04/10/2017. Build Thread
    Build 3: Mk4 Roadster 20th Anniversary #8674. Sold 09/07/2020. Build Thread and Video. Build 4: Gen 3 Type 65 Coupe #59. Gen 3 Coyote. Legal 03/04/2020. Build Thread and Video
    Build 5: 35 Hot Rod Truck #138. LS3 and 4L65E auto. Rcvd 01/05/2021. Legal 04/20/2023. Build Thread. Sold 11/9/2023.

  30. #1107
    Senior Member
    Join Date
    Oct 2021
    Location
    Sarasota, FL
    Posts
    267
    Post Thanks / Like
    Got it and the pictures speak volumes of how tight that fit really is with that seat.

    Thanks again.

    Bill

  31. #1108
    Senior Member
    Join Date
    Oct 2021
    Location
    Sarasota, FL
    Posts
    267
    Post Thanks / Like
    Paul,
    Do you have any idea of the steering column new cutout dimensions you made for the panel. The original CAD diagram shows a 1.5” + .89” radius for this cutout.

    60315.pdf

    Thanks for the help.

    Bill

  32. #1109
    Senior Member edwardb's Avatar
    Join Date
    Feb 2011
    Location
    Lake Orion, Michigan
    Posts
    10,578
    Post Thanks / Like
    Quote Originally Posted by maclonchas View Post
    Paul,
    Do you have any idea of the steering column new cutout dimensions you made for the panel. The original CAD diagram shows a 1.5” + .89” radius for this cutout.

    Thanks for the help.

    Bill
    No, I can't provide any dimensions. Didn't record any and now too buried for meaningful measurements. I can tell you what I did though. I made a cutout in the instrument cluster panel just big enough to clear the installed steering shaft. Then, with the dash assembled, slid the Russ Thompson turn signal assembly onto the shaft and marked the required cutout. Added a little for clearance plus the vinyl wrap. Made a clean and neat installation. This was the final cutout during the build.

    Build 1: Mk3 Roadster #5125. Sold 11/08/2014. Build 2: Mk4 Roadster #7750. Sold 04/10/2017. Build Thread
    Build 3: Mk4 Roadster 20th Anniversary #8674. Sold 09/07/2020. Build Thread and Video. Build 4: Gen 3 Type 65 Coupe #59. Gen 3 Coyote. Legal 03/04/2020. Build Thread and Video
    Build 5: 35 Hot Rod Truck #138. LS3 and 4L65E auto. Rcvd 01/05/2021. Legal 04/20/2023. Build Thread. Sold 11/9/2023.

  33. #1110
    Senior Member edwardb's Avatar
    Join Date
    Feb 2011
    Location
    Lake Orion, Michigan
    Posts
    10,578
    Post Thanks / Like

    Pontoon Panels

    Inspired by preparation for taking the Coupe to the upcoming 2023 Detroit Autorama, plus other build threads, decided it was time to add some pontoon panels. Covers up the opening in the pontoons and the underlying connection of the headers to the side pipes. Plus adds a little bling. Not mandatory by any means. But something I decided to add. These things are never done, right? Including the build threads I guess. Russ Thompson sells panels for prior Coupe versions. Perhaps he also has them for the Gen 3. But didn’t ask because not particularly hard to fabricate.

    Made them from .040” 6061 aluminum. Same as all the panels from the kit. First made patterns from thin cardboard. Both sides were slightly different. I cut rough sizes from a 24 x 24 inch piece of aluminum, leaving them at least an inch oversized all around at first. Dimples close to the edge will distort the sheet. I wanted them to be shiny but didn’t go crazy. Wet sanded the oversize pieces with 1000, 1500, and 2000 wet-dry paper. Then polished with my DA using a foam pad and machine polish. Doesn’t get all the mill finish scratches out. But not bad without a lot of effort. Then covered the polished side with 2” painters’ tape and didn’t remove until completely done. Worked well. I used a 1-1/2” dimple die set pulled through 1-1/2” holes. I don’t have a shop press (maybe someday…). Put the head of a large bolt in my bench vise and squeezed with an impact driver. For thin aluminum like this pretty easy and came out perfectly formed and sharp.

    Then cut to size and after final fitting installed using chrome plated 10-32 Phillips oval head screws into nut plates on the underside held with JB Weld. The fiberglass is thick enough that self-tapping screws could work. But I’m just not a fan of those especially for something that could be repeatedly removed. Rivets are also an option and aren’t hard to drill out. But chose machine screws even though a bit more work up front. With everything done, pulled the protective tape and all was still shiny. Happy with the results. Now to put the final polish on the rest of the car for the big show Feb 24 – 26.


    Last edited by edwardb; 02-14-2023 at 07:18 AM.
    Build 1: Mk3 Roadster #5125. Sold 11/08/2014. Build 2: Mk4 Roadster #7750. Sold 04/10/2017. Build Thread
    Build 3: Mk4 Roadster 20th Anniversary #8674. Sold 09/07/2020. Build Thread and Video. Build 4: Gen 3 Type 65 Coupe #59. Gen 3 Coyote. Legal 03/04/2020. Build Thread and Video
    Build 5: 35 Hot Rod Truck #138. LS3 and 4L65E auto. Rcvd 01/05/2021. Legal 04/20/2023. Build Thread. Sold 11/9/2023.

  34. Likes GoDadGo, David Williamson, slarson liked this post
  35. #1111

    Steve >> aka: GoDadGo
    GoDadGo's Avatar
    Join Date
    Feb 2015
    Location
    Slidell, Louisiana
    Posts
    6,576
    Post Thanks / Like
    Blog Entries
    1
    They really clean up the pontoons while likely adding some stability.
    .........Functional Eye Candy That Really Is A Nice Addition!

  36. Thanks edwardb thanked for this post
  37. #1112
    Namrups's Avatar
    Join Date
    Sep 2021
    Location
    Mechanicville, NY
    Posts
    1,018
    Post Thanks / Like
    Nice addition Paul!
    Scott Pregont
    Present build: 65 Daytona Coupe #393 - Forte 427 EFI crate w/TKX 2.87/ .81 - Ordered 11/16/21 - Delivered 6/23/2022
    Location: Mechanicville, NY
    Build Thread: https://thefactoryfiveforum.com/show...na-Coupe-build
    My Albums
    Special Tools, Custom Parts, misc supplies: https://thefactoryfiveforum.com/album.php?albumid=2045
    Garage Pics: https://thefactoryfiveforum.com/album.php?albumid=2041
    POR15 First Try: https://thefactoryfiveforum.com/album.php?albumid=2068
    Silicone application tips: https://thefactoryfiveforum.com/album.php?albumid=2063

  38. #1113
    Senior Member
    Join Date
    Feb 2011
    Location
    Edmonton Alberta
    Posts
    799
    Post Thanks / Like
    I don't have your skill at fabrication so for my Gen 3 I got them from Russ T along with the sill plates.
    David W
    Mkll 4874 built in 2004
    Gen 3 coupe #16 registered 2018 painted 2019

  39. Thanks edwardb thanked for this post
  40. #1114
    Senior Member
    Join Date
    Aug 2017
    Posts
    136
    Post Thanks / Like
    Hi Paul!!! Question on the front Wheel Wells.
    Did you us the Wheel Wells that came with the update aluminum Panel kit.
    The upper part that attaches to the cowl and mounts just above the hood props?
    Keeps the mess from coming into the header side pipe area on the pontoons.

  41. #1115
    Senior Member edwardb's Avatar
    Join Date
    Feb 2011
    Location
    Lake Orion, Michigan
    Posts
    10,578
    Post Thanks / Like
    Quote Originally Posted by Automan View Post
    Hi Paul!!! Question on the front Wheel Wells.
    Did you us the Wheel Wells that came with the update aluminum Panel kit.
    The upper part that attaches to the cowl and mounts just above the hood props?
    Keeps the mess from coming into the header side pipe area on the pontoons.
    Yes, I installed those parts. Agree it would be a mess without them.
    Build 1: Mk3 Roadster #5125. Sold 11/08/2014. Build 2: Mk4 Roadster #7750. Sold 04/10/2017. Build Thread
    Build 3: Mk4 Roadster 20th Anniversary #8674. Sold 09/07/2020. Build Thread and Video. Build 4: Gen 3 Type 65 Coupe #59. Gen 3 Coyote. Legal 03/04/2020. Build Thread and Video
    Build 5: 35 Hot Rod Truck #138. LS3 and 4L65E auto. Rcvd 01/05/2021. Legal 04/20/2023. Build Thread. Sold 11/9/2023.

  42. Thanks Jeff Kleiner thanked for this post
  43. #1116
    Junior Member
    Join Date
    Jan 2023
    Location
    Stevensville Michigan
    Posts
    1
    Post Thanks / Like
    Paul - I got to see your coupe last week at London, its amazing. Didnt get a chance to say hi and thanks for all your posts as you had a line forming, haha. Anyway Im early in the planning for a coupe build and Id love to have a copy of your build sheet if its not too much trouble. Thanks for all you do here in the blogs.

  44. #1117
    Senior Member edwardb's Avatar
    Join Date
    Feb 2011
    Location
    Lake Orion, Michigan
    Posts
    10,578
    Post Thanks / Like
    Quote Originally Posted by Chad M View Post
    Paul - I got to see your coupe last week at London, its amazing. Didnt get a chance to say hi and thanks for all your posts as you had a line forming, haha. Anyway Im early in the planning for a coupe build and Id love to have a copy of your build sheet if its not too much trouble. Thanks for all you do here in the blogs.
    Hi Chad. Sorry I missed you. But glad you made it to the show and got to see my Coupe along with 200+ of my closest friend's cars. Not 100% sure what you mean by build sheet. Send me a PM with a further description and your email. You're welcome to whatever I have if it's what you're looking for but likely would have to be emailed.
    Build 1: Mk3 Roadster #5125. Sold 11/08/2014. Build 2: Mk4 Roadster #7750. Sold 04/10/2017. Build Thread
    Build 3: Mk4 Roadster 20th Anniversary #8674. Sold 09/07/2020. Build Thread and Video. Build 4: Gen 3 Type 65 Coupe #59. Gen 3 Coyote. Legal 03/04/2020. Build Thread and Video
    Build 5: 35 Hot Rod Truck #138. LS3 and 4L65E auto. Rcvd 01/05/2021. Legal 04/20/2023. Build Thread. Sold 11/9/2023.

  45. #1118
    Junior Member
    Join Date
    Jun 2023
    Posts
    23
    Post Thanks / Like
    Paul, let me also briefly express my gratitude for your contributions to this forum and for the second-to-none builds. Also, never thought I'd consider building something with wings, but now, good grief...

    I've been reading a ton, so its been a challenge to keep it all straight. The consensus seems to be one can cut a few dB's with single pipes, but Georgie's/Gas-N pipes are +/- the best dual pipe option (and look great), and maybe a little quieter than FFR's. I am not looking for a reason to not use these side pipes, I definitely like the idea of supporting those who support this community. Just, if you were to do it over again, any changes?

    I was also going to ask you for advice on an alternative to the Russ Thompson turn signal/NRG quick release, but did run across TJ's posts that he is looking to continue that great work.

    Thanks again! - Aaron

  46. #1119
    Senior Member edwardb's Avatar
    Join Date
    Feb 2011
    Location
    Lake Orion, Michigan
    Posts
    10,578
    Post Thanks / Like
    Quote Originally Posted by NotDrivingTrains View Post
    Paul, let me also briefly express my gratitude for your contributions to this forum and for the second-to-none builds. Also, never thought I'd consider building something with wings, but now, good grief...

    I've been reading a ton, so its been a challenge to keep it all straight. The consensus seems to be one can cut a few dB's with single pipes, but Georgie's/Gas-N pipes are +/- the best dual pipe option (and look great), and maybe a little quieter than FFR's. I am not looking for a reason to not use these side pipes, I definitely like the idea of supporting those who support this community. Just, if you were to do it over again, any changes?

    I was also going to ask you for advice on an alternative to the Russ Thompson turn signal/NRG quick release, but did run across TJ's posts that he is looking to continue that great work.

    Thanks again! - Aaron
    You're certainly welcome. I enjoy doing these build threads. The final product isn't too bad either. Some of the information is getting a little dated since it was finished 3+ years ago. So be cautious about that. The only side pipes Factory Five had available during my build were the plain steel ones. Mine were very poor workmanship plus they had a reputation for being super loud. So I never considered using them. When Georgie (Gas-N) offered me the chance to be the prototype user of his pipes, I jumped at the chance since I had always used his pipes on my Roadster builds and loved them. I wasn't disappointed. They really set off the car. Factory Five now has stainless steel Coupe pipes. I haven't used them or even seen them in person. So no way for me to offer any comparison. Bottom line I doubt whether you're going to be able to quiet the Coupe enough to not wear ear protection. Accept that and it's all good from there.

    I wouldn't change anything substantial if I had to do it again. I would add more insulation between the frame and body below the doors. Also would change the sequence of body fitting that maybe would yield better door gaps then what I ended up with. Talked about both of these in my build thread. I did replace the rear hatch latch with something more substantial. This was talked about in another thread. Other than that, I just drive it and wouldn't change a thing.

    Can't help you with the turn signal assembly. If I were in the build mode, I too would be watching for one of the alternatives being discussed.
    Last edited by edwardb; 08-05-2023 at 08:04 PM.
    Build 1: Mk3 Roadster #5125. Sold 11/08/2014. Build 2: Mk4 Roadster #7750. Sold 04/10/2017. Build Thread
    Build 3: Mk4 Roadster 20th Anniversary #8674. Sold 09/07/2020. Build Thread and Video. Build 4: Gen 3 Type 65 Coupe #59. Gen 3 Coyote. Legal 03/04/2020. Build Thread and Video
    Build 5: 35 Hot Rod Truck #138. LS3 and 4L65E auto. Rcvd 01/05/2021. Legal 04/20/2023. Build Thread. Sold 11/9/2023.

  47. #1120
    Junior Member
    Join Date
    Jun 2023
    Posts
    23
    Post Thanks / Like
    Thank you for the feedback. I certainly try not to be driven by fear of some future regret, and doubtful to have any with what worked so well for your build(s). And I both realize it will be loud and still expect to be a little surprised, based on what I've read. At least I want to be able to tell my wife (and neighbors) I did what I reasonably could! I do expect to tinker with the signal and insulation. Not expecting DD, but can't imagine not wanting to drive it as much as possible... getting ahead of myself already. So great you enjoy yours so much a few years into it. Thanks again and take care.

  48. Likes edwardb liked this post
Page 28 of 30 FirstFirst ... 182627282930 LastLast

Posting Permissions

  • You may not post new threads
  • You may not post replies
  • You may not post attachments
  • You may not edit your posts
  •  

Stewart Transport

Visit our community sponsor