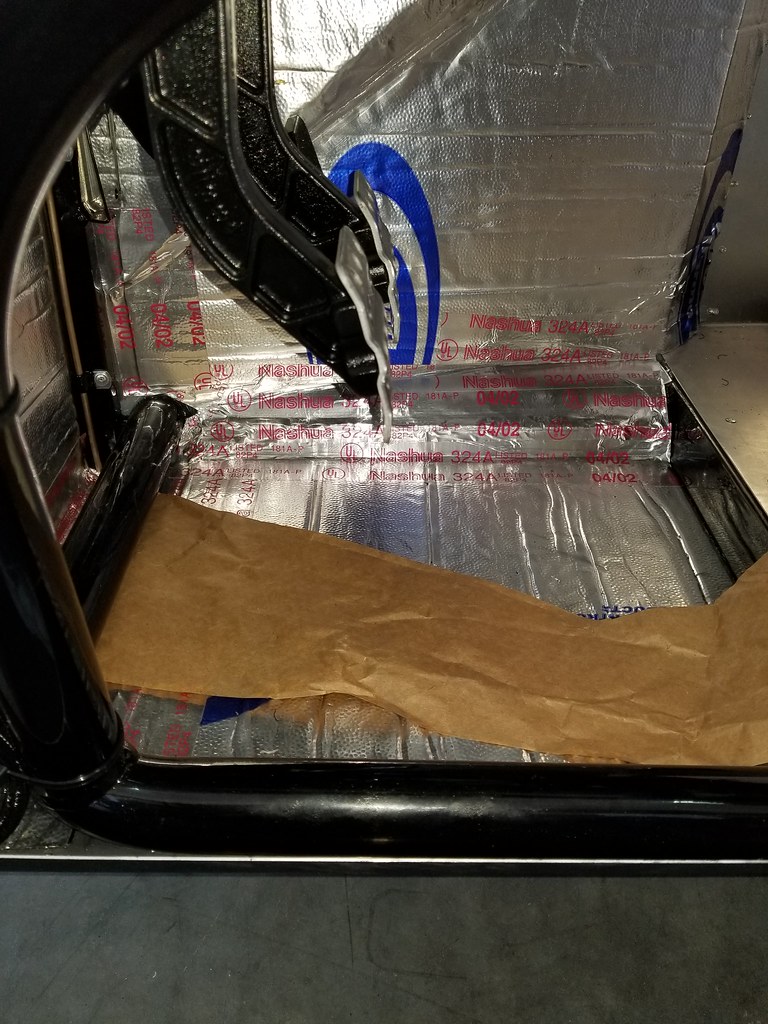
Boig Motorsports

Visit our community sponsor

Thanks Thanks:  0
Likes Likes:  0
Results 1 to 19 of 19

Thread: Separate brake reservoirs

  1. #1
    Senior Member
    Join Date
    Oct 2017
    Location
    Williamsport, IN
    Posts
    173
    Post Thanks / Like

    Separate brake reservoirs

    I followed many before me’s lead and used separate brake reservoirs for front and rear systems. I followed the logic that if one system failed, I’d still have the other. I have a question after bleeding the brakes. I am using the Wilwood pedal box and cylinders with the 13” rotors front and rear. I bled my rear set first using the CNC pressure cap. After it was bled, I pushed the pedal assuming t would be firm. It clunked to the floor to my surprise. On inspection, the adjustable bias bar had enough movement to allow the pedal to bottom out with nothing in the front. I didn’t try it the other way. I have not driven this yet. The bar is set to start pushing the rear just before the front. Did I miss something or does the rocking action of the bias bar defeat the safety of having 2 systems?
    MkIV complete kit #9259, Coyote, TKO600, IRS, Wilwoods x 4, many parts from Breeze, Forte, Russ's Garage and North Racecars
    17" Bullit style wheels, custom Kirkey seats, mid shift conversion, drop trunk, KRC power steering, Forte Hyd. clutch and slave, manual brakes
    overall build plan: build it to drive, not polish and black it out wherever possible, paint will be some shade of dark cherry

  2. #2
    Senior Member
    Join Date
    Mar 2016
    Posts
    149
    Post Thanks / Like
    That’s worth investigating!

    Are you sure the clunk is the pedal on the floor and not the bar? It may just an impression. ( Sorry for for beeing suspicious). Pedal travel is way longer than on usual car. Pedal firmness is also floor solid.

    Also, they’re is travel adjustment depending on how deep you screw in the master cylinder in the bar clevis. I maximised pedal travel.

  3. #3
    Papa's Avatar
    Join Date
    Dec 2016
    Location
    Mexico, MO
    Posts
    5,608
    Post Thanks / Like
    Did you bench bleed both master cylinders first?
    My Build Thread: http://thefactoryfiveforum.com/showt...ter-Build-9754
    (Most viewed Roadster build thread on this forum!)

    Delivered: 6/17/2017
    First Start: 12/30/2017
    Completed: 12/7/2019
    Legal: 1/30/2020

    Member of the Mile-Hi Cobra Club
    Dave's Cobra YouTube Channel: https://www.youtube.com/channel/UCbk...npK1UZHj4R-bYQ
    Agora 1:8 Scale Cobra Build: https://thefactoryfiveforum.com/show...l-Build-Thread

  4. #4
    Senior Member
    Join Date
    Oct 2017
    Location
    Williamsport, IN
    Posts
    173
    Post Thanks / Like
    Clunk was the floor. Pedal is currently set basically straight down. I haven’t measured the actual distance to the firewall. I did not bench bleed the cylinders but after bleeding the fronts the pedal is firm well before the floor. I’m sure there is a little air still in the system and I intend to rebleed it.
    MkIV complete kit #9259, Coyote, TKO600, IRS, Wilwoods x 4, many parts from Breeze, Forte, Russ's Garage and North Racecars
    17" Bullit style wheels, custom Kirkey seats, mid shift conversion, drop trunk, KRC power steering, Forte Hyd. clutch and slave, manual brakes
    overall build plan: build it to drive, not polish and black it out wherever possible, paint will be some shade of dark cherry

  5. #5
    Papa's Avatar
    Join Date
    Dec 2016
    Location
    Mexico, MO
    Posts
    5,608
    Post Thanks / Like
    It's very important that the master cylinders are bled before attempting to bleed the rest of the system.
    My Build Thread: http://thefactoryfiveforum.com/showt...ter-Build-9754
    (Most viewed Roadster build thread on this forum!)

    Delivered: 6/17/2017
    First Start: 12/30/2017
    Completed: 12/7/2019
    Legal: 1/30/2020

    Member of the Mile-Hi Cobra Club
    Dave's Cobra YouTube Channel: https://www.youtube.com/channel/UCbk...npK1UZHj4R-bYQ
    Agora 1:8 Scale Cobra Build: https://thefactoryfiveforum.com/show...l-Build-Thread

  6. #6
    Senior Member
    Join Date
    Oct 2017
    Location
    Williamsport, IN
    Posts
    173
    Post Thanks / Like
    I can see how there could be air trapped in the master. I may take it apart and bench bleed it. Maybe I don’t understand the system as well as I thought but I don’t see that affecting my original question. If one master looses all fluid and allows the rod to move forward freely, the balance bar acts as a pivot and allows the pedal to travel freely. I went back and reread the literature for the wilwood dual master setup. It answered my question. In the fine print it states that in the event of failure of one side of the system, the pedal may need to travel up to 80% of its stroke before actuating the remaining side enough to make an emergency stop. I may not have that much usable stroke before contact with the floor. I’m guessing I’m not alone. This might be an important point to anyone using the setup provided in the kit.
    Last edited by sbhunter; 03-31-2018 at 10:36 AM.
    MkIV complete kit #9259, Coyote, TKO600, IRS, Wilwoods x 4, many parts from Breeze, Forte, Russ's Garage and North Racecars
    17" Bullit style wheels, custom Kirkey seats, mid shift conversion, drop trunk, KRC power steering, Forte Hyd. clutch and slave, manual brakes
    overall build plan: build it to drive, not polish and black it out wherever possible, paint will be some shade of dark cherry

  7. #7
    Senior Member edwardb's Avatar
    Join Date
    Feb 2011
    Location
    Lake Orion, Michigan
    Posts
    10,575
    Post Thanks / Like
    First, you don't have to take much apart to bench bleed the masters. "Bench bleed" doesn't mean you need to physically remove the MC's. It's pretty easy actually. Make up a piece of brake line with a flared fitting and tube nut on one end and long enough to reach the reservoir(s). Remove the brake line from one of the masters. Replace with the temporary piece. One end on the MC and the other end into the top of the appropriate reservoir. Pump the brakes until you get a full fluid flow back into the reservoir with each pump. Then replace the permanent line. Repeat for the second MC. That's the process I've always followed, and never had any issues getting a firm pedal afterwards when doing the wheel by wheel bleed.

    I'm a little unsure why you would bleed the back and not the front. That is what you're saying, right? I hear what you're saying about needing 80% travel to get emergency braking should one side fail. No doubt it's happened sometime/somewhere, but seems pretty unlikely. Even if it did though, hard to imagine the pedal would run out of travel. My brake pedal is hard quite a long distance from the floor.
    Build 1: Mk3 Roadster #5125. Sold 11/08/2014. Build 2: Mk4 Roadster #7750. Sold 04/10/2017. Build Thread
    Build 3: Mk4 Roadster 20th Anniversary #8674. Sold 09/07/2020. Build Thread and Video. Build 4: Gen 3 Type 65 Coupe #59. Gen 3 Coyote. Legal 03/04/2020. Build Thread and Video
    Build 5: 35 Hot Rod Truck #138. LS3 and 4L65E auto. Rcvd 01/05/2021. Legal 04/20/2023. Build Thread. Sold 11/9/2023.

  8. #8
    Senior Member
    Join Date
    Oct 2017
    Location
    Williamsport, IN
    Posts
    173
    Post Thanks / Like
    I had finished bleeding the back. Just hadn’t done the front yet. When I pushed the pedal I was surprised by the movement. My pedal is hard also with both systems bled. I’m just not sure if it would have the travel to work if one side failed. I’m thinking based on what I did that mine would not. The only way to tell would be to drain one side now and try it. It may require setting the pedal a lot farther out than I would like it to be. I guess the new question is has anyone tried this or experienced failure on one end and still had brakes?
    MkIV complete kit #9259, Coyote, TKO600, IRS, Wilwoods x 4, many parts from Breeze, Forte, Russ's Garage and North Racecars
    17" Bullit style wheels, custom Kirkey seats, mid shift conversion, drop trunk, KRC power steering, Forte Hyd. clutch and slave, manual brakes
    overall build plan: build it to drive, not polish and black it out wherever possible, paint will be some shade of dark cherry

  9. #9
    Senior Member
    Join Date
    Sep 2017
    Location
    Alliston, Ontario, Canada
    Posts
    404
    Post Thanks / Like
    How low have you got the pedal set? Mine is set almost touching the crossbar when extended. If you set it much lower it will be too low compared to your throttle pedal if you want to heel toe downshifts.

  10. #10
    Senior Member
    Join Date
    Oct 2017
    Location
    Williamsport, IN
    Posts
    173
    Post Thanks / Like
    The pedal is right at 2" in front of the accelerator.

    MkIV complete kit #9259, Coyote, TKO600, IRS, Wilwoods x 4, many parts from Breeze, Forte, Russ's Garage and North Racecars
    17" Bullit style wheels, custom Kirkey seats, mid shift conversion, drop trunk, KRC power steering, Forte Hyd. clutch and slave, manual brakes
    overall build plan: build it to drive, not polish and black it out wherever possible, paint will be some shade of dark cherry

  11. #11
    Senior Member Dave Howard's Avatar
    Join Date
    Feb 2012
    Location
    North Bay, Ontario
    Posts
    534
    Post Thanks / Like
    With a brake fluid reservoir for front/back break systems you have two separate systems activated by a common pedal. If you have properly filled and bled the rear system and the front is empty, the pedal should feel firm when pressed. If the front system is filled but not bled and there is air in it, pressing the pedal with the rears complete will feel soft and will travel farther as the air in the front system is compressed.

    As for the bias bar, it should be adjusted so the front brakes are being applied prior to the rears. Tech support from Wilwood instructed me to adjust the bias with a few runs in a controlled area. Apply the brakes until the wheels lock up. If the rears lock up first, adjust the brake bias. I had 2' of snow on the ground at that point of the build so that wasn't an option. The other method suggested by Wilwood is to measure the pressure at the calipers (front/rear). I tend to remember 1,800 psi at the front and 2/3rds that at the rear. Use the bias bar to make the adjustment. Can't confirm the pressure without digging out notes. Regardless, I bought the special gauge and adaptor/fitting and set up the brakes that way. Test runs once the snow was gone revealed the brakes were bang on.

  12. #12
    Papa's Avatar
    Join Date
    Dec 2016
    Location
    Mexico, MO
    Posts
    5,608
    Post Thanks / Like
    Quote Originally Posted by sbhunter View Post
    The pedal is right at 2" in front of the accelerator.

    When I finished bleeding my system, the pedal sits about 1/8" from the cross brace. This was after shortening the length of the push rod about 1/8".


    Here is what my pedals looked like before bleeding and final adjustments:


    Dave
    Last edited by Papa; 03-31-2018 at 02:50 PM.
    My Build Thread: http://thefactoryfiveforum.com/showt...ter-Build-9754
    (Most viewed Roadster build thread on this forum!)

    Delivered: 6/17/2017
    First Start: 12/30/2017
    Completed: 12/7/2019
    Legal: 1/30/2020

    Member of the Mile-Hi Cobra Club
    Dave's Cobra YouTube Channel: https://www.youtube.com/channel/UCbk...npK1UZHj4R-bYQ
    Agora 1:8 Scale Cobra Build: https://thefactoryfiveforum.com/show...l-Build-Thread

  13. #13
    Senior Member CraigS's Avatar
    Join Date
    Feb 2011
    Location
    Blacksburg, Va
    Posts
    4,730
    Post Thanks / Like
    Quote Originally Posted by sbhunter View Post
    ...The bar is set to start pushing the rear just before the front...
    I am not sure exactly what you mean here. As a start point the bias bar should be set w/ an equal length sticking out on both sides. A should equal B.
    wilwood balance by craig stuard, on Flickr
    The individual push rod lengths should be set so that w/ moderate brake pressure the bias shaft is roughly 90 degrees to the push rods. This will usually have it at a bit of an angle at rest, and possibly a bit of an angle in the opposite direction, when the pedal is mashed. You don't want to push either MC ahead of the other. Any difference in front vs rear brake actuation is accomplished by having different sized MCs. The push rod settings above are what Wilwood recommends once the system is fully operational.
    FFR MkII, 408W, Tremec TKO 500, 2015 IRS, DA QA1s, Forte front bar, APE hardtop.

  14. #14
    Senior Member
    Join Date
    Oct 2017
    Location
    Williamsport, IN
    Posts
    173
    Post Thanks / Like
    I have not made any attempt to adjust the balance bar yet. It is as it came. I will adjust it, I just haven’t yet. When I start to push the brake pedal the rod to the rear master begins to move first. I have adjusted the master cylinder rods for length so that the rods are just slack when the pedal is fully released. After I bled the rear system using a pressure bleeder I pushed on the pedal just to see what would happen. I had not put any fluid in the front system yet. As the balance bar moved toward the master cylinders, the rear rod did not move because it was bled and firm. The balance bar continued to move because the front rod had full movement and this allowed the pedal to go all the way to the floor. The pedal at rest is just behind the 3/4” cross bar and 2” in front of the accelerator. So far from this thread and further research I have learned that I should have bench bled the masters and the balance bar isn’t centered or adjusted. After I bled the front system with a pressure bleeder the pedal is firm with about 3-4” of movement before it is hard which leads me to believe both systems are fairly well bled. The masters supplied by ffr lend themselves to purging air and aren’t as important to bench bleed although it would still be a good practice. My original question remains. If one system looses its fluid and allows that master to bottom out, will the balance bar push hard enough on the other side to provide any braking action before the pedal hits the floor?
    Last edited by sbhunter; 03-31-2018 at 05:37 PM.
    MkIV complete kit #9259, Coyote, TKO600, IRS, Wilwoods x 4, many parts from Breeze, Forte, Russ's Garage and North Racecars
    17" Bullit style wheels, custom Kirkey seats, mid shift conversion, drop trunk, KRC power steering, Forte Hyd. clutch and slave, manual brakes
    overall build plan: build it to drive, not polish and black it out wherever possible, paint will be some shade of dark cherry

  15. #15
    Seasoned Citizen NAZ's Avatar
    Join Date
    Feb 2016
    Location
    "The High Country", beautiful Flagstaff, AZ
    Posts
    2,443
    Post Thanks / Like
    Seems you've already answered that question. If one M/C is firm and the other travels to the stop and the pedal hits the floor there is little to no reserve pedal travel to pressurize the good M/C. That tells me you need a longer pedal stroke or you don't truly have a separate brake system. As for bench bleeding the Wilwood M/C's -- I've never had to do this even on a balance bar system -- am I just lucky? Or is it that I make sure to have enough pedal travel that I can still push one M/C through most of its stroke when the other is at the end of its travel? Regardless, bench bleeding won't cure what you have detailed above.

    You decide what course of action to take next but if it was me I'd make damn sure I had sufficient pedal travel so that if either M/C is bottomed out I had a comfortable reserve of pedal travel to pressurize the other M/C before hitting the floor. A pressure gauge helps with this as remember, if one system fails you will be pushing for all you're worth on the pedal to slow the car down so you're going to want all the pressure you can get not just a couple hundred PSI before bottoming the pedal on the floor.

  16. #16
    Senior Member
    Join Date
    Oct 2017
    Location
    Williamsport, IN
    Posts
    173
    Post Thanks / Like
    It is the ffr supplied Wilwood dual master setup (.75 to front, .625 to rear) with separate CNC reservoirs. They are plumbed separately. I’m wondering if my balance bar for whatever reason came set far enough to the front side to allow this or maybe one of my boys cranked it to see it how it works (much more likely). If it was cranked to the front side, it would allow more travel of the pedal in my scenario if I’m envisioning it correctly. There is no more pedal travel to be had unless I cut out the 3/4” bar and move the pedal further towards the seat which would put it in an awkward position. I plan to set the balance bar correctly, then drain the front system and see if it still hits. I will report my findings. I guess I’ve still got the parking brake.
    Last edited by sbhunter; 03-31-2018 at 06:27 PM.
    MkIV complete kit #9259, Coyote, TKO600, IRS, Wilwoods x 4, many parts from Breeze, Forte, Russ's Garage and North Racecars
    17" Bullit style wheels, custom Kirkey seats, mid shift conversion, drop trunk, KRC power steering, Forte Hyd. clutch and slave, manual brakes
    overall build plan: build it to drive, not polish and black it out wherever possible, paint will be some shade of dark cherry

  17. #17
    Senior Member rich grsc's Avatar
    Join Date
    Feb 2011
    Location
    O'Fallon, MO
    Posts
    3,094
    Post Thanks / Like
    There is no reason to drain the fronts, just open one bleed screw attach a hose to a catch can. Then try it.

  18. #18
    Seasoned Citizen NAZ's Avatar
    Join Date
    Feb 2016
    Location
    "The High Country", beautiful Flagstaff, AZ
    Posts
    2,443
    Post Thanks / Like
    What Rich said.

    Yes, you may be on to something. The balance bar is a simple lever that distributes the applied force from the pedal between the two M/C's and like any lever, if one side is multiplying a force the other side is traveling proportionally farther. If the balance bar is skewed fully to one side it can have a significant affect on the potential amount of travel on the long side. If you have twice the force on one side you have twice the travel on the other.

  19. #19
    Senior Member
    Join Date
    Mar 2016
    Posts
    149
    Post Thanks / Like
    sbhunter,

    Look at figure 4 from this pdf:
    http://www.wilwood.com/PDF/DataSheets/ds252.pdf
    "DIMENSION A+B ADDED TOGETHER MUST BE IN THE 0.20" - 0.25" RANGE"

    If it’s larger, it may allow two much balance bar travel leading to not enough pedal travel when one circuit fail.

    Alternately, if you reduce this gap, you may be able to limit balance bar travel, have the bar bind earlier and resolve the problem.

Posting Permissions

  • You may not post new threads
  • You may not post replies
  • You may not post attachments
  • You may not edit your posts
  •  

Stewart Transport

Visit our community sponsor