
Visit our community sponsor

Thanks:
0

Likes:
0
-
Senior Member

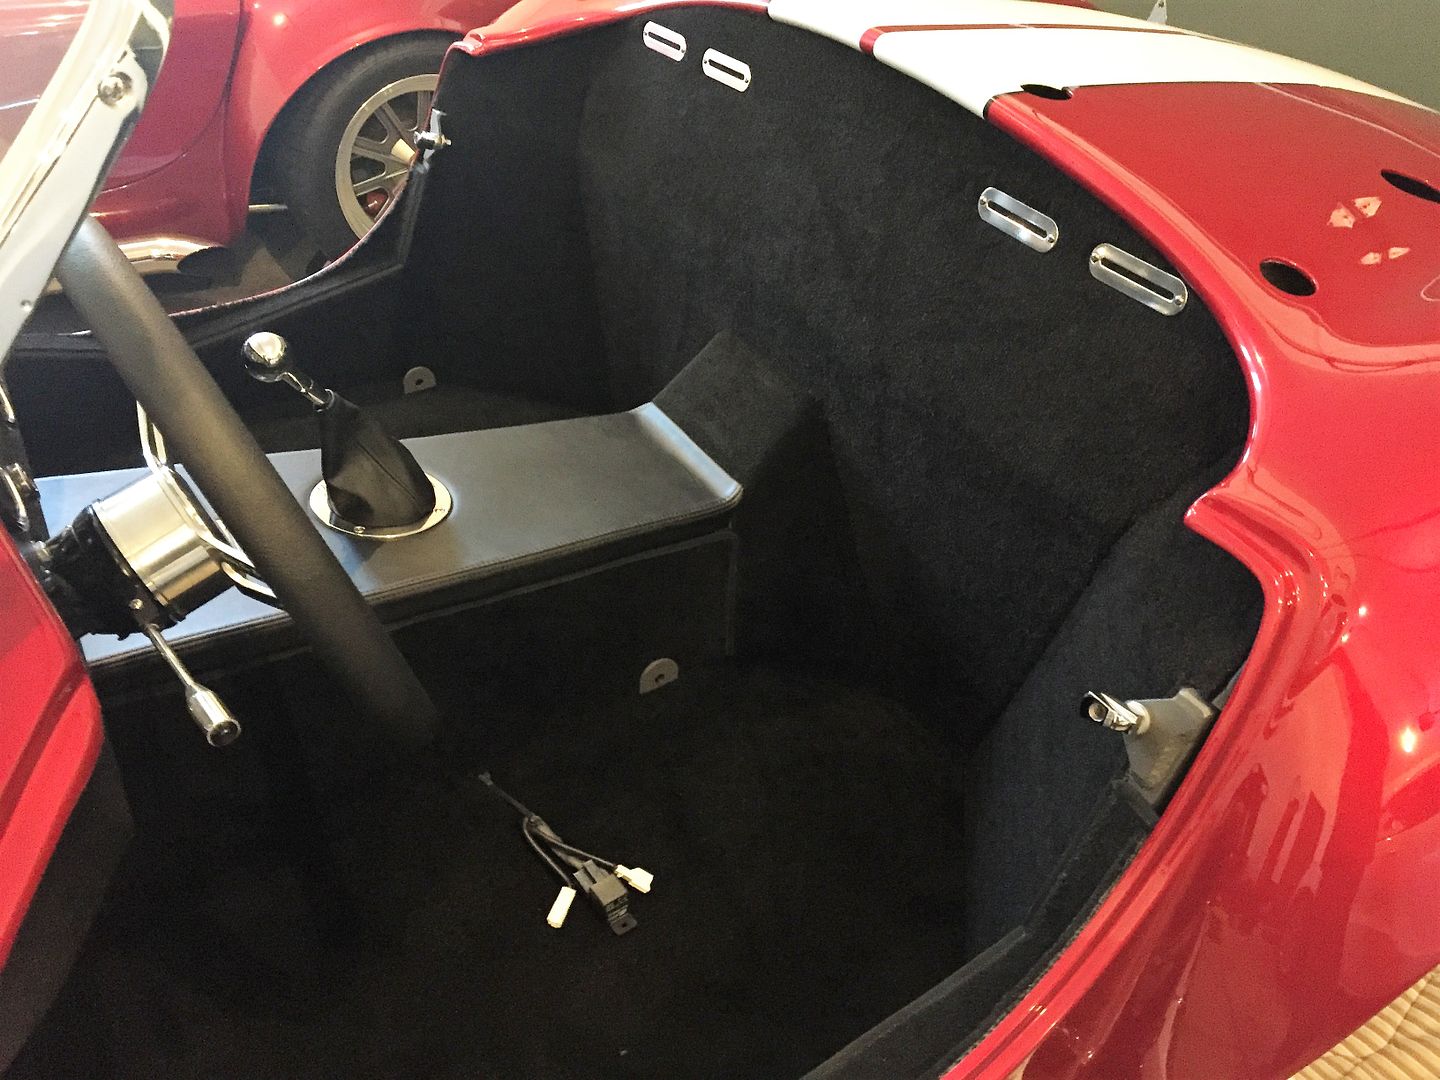
Door latch area finishing
What is the most appealing way to finish off this area near the door latch? The FFR under door aluminum and carpet doesn't cover this area.I'm thinking about filling it with seam sealer and a small piece of aluminum then painting it with POR 15 to match the power coat.

-
Senior Member

That's an area that's not easy to make look decent. On my last build, did several things. Mainly had the under door carpet edged so the raw edges don't show along the door sill and up to the latch area. Above the latch, it's possible to bring the bulb seal down almost to the latch and then put the carpet over the edge. Looks pretty finished that way. I didn't find that little piece of aluminum sticking up does much to seal that area from the wheel well. I cut it off. Pieces added inside the wheel well do a much better job. Finally, once you get the latch and door sorted out, replace the stack of washers with a spacer of the right length. I use a piece of aluminum and polish it a bit. Adds to the more finished look. Not the best picture, but if you zoom in on this you can see some of what I'm talking about.
Build 1: Mk3 Roadster #5125. Sold 11/08/2014.
Build 2: Mk4 Roadster #7750. Sold 04/10/2017.
Build Thread
Build 3: Mk4 Roadster 20th Anniversary #8674. Sold 09/07/2020.
Build Thread and
Video.
Build 4: Gen 3 Type 65 Coupe #59. Gen 3 Coyote. Legal 03/04/2020.
Build Thread and
Video
Build 5: 35 Hot Rod Truck #138. LS3 and 4L65E auto. Rcvd 01/05/2021. Legal 04/20/2023.
Build Thread. Sold 11/9/2023.
-
Senior Member


Originally Posted by
edwardb

That's an area that's not easy to make look decent. On my last build, did several things. Mainly had the under door carpet edged so the raw edges don't show along the door sill and up to the latch area. Above the latch, it's possible to bring the bulb seal down almost to the latch and then put the carpet over the edge. Looks pretty finished that way. I didn't find that little piece of aluminum sticking up does much to seal that area from the wheel well. I cut it off. Pieces added inside the wheel well do a much better job. Finally, once you get the latch and door sorted out, replace the stack of washers with a spacer of the right length. I use a piece of aluminum and polish it a bit. Adds to the more finished look. Not the best picture, but if you zoom in on this you can see some of what I'm talking about.
Console looks great Ed. Did you do that custom or does someone sell those pieces?
-
Senior Member
Originally Posted by
cv2065
Console looks great Ed. Did you do that custom or does someone sell those pieces?
It's custom. The standard kit supplied tunnel cover with 1/8-inch foam and leather wrapped. A local auto interior shop did it for me. I had no way to do the stitching myself and that really sets it off.
Build 1: Mk3 Roadster #5125. Sold 11/08/2014.
Build 2: Mk4 Roadster #7750. Sold 04/10/2017.
Build Thread
Build 3: Mk4 Roadster 20th Anniversary #8674. Sold 09/07/2020.
Build Thread and
Video.
Build 4: Gen 3 Type 65 Coupe #59. Gen 3 Coyote. Legal 03/04/2020.
Build Thread and
Video
Build 5: 35 Hot Rod Truck #138. LS3 and 4L65E auto. Rcvd 01/05/2021. Legal 04/20/2023.
Build Thread. Sold 11/9/2023.
-

Nice work,
We have been frustrated with both the appearance and the performance/reliability of the FFR latches that I think had the design last updated by Lucas in the 1950's. We recently started to develop for our builds a latch mechanism that is both reliable and will finish out very nicely. In our builds we utilize electric door actuators and the entire mechanism is covered by our inner door panel. The cable attached to the mechanism is for an emergency door release. Friday we started installing this on a Mark IV that had previously had a previously had a FFR latch mechanism installed. All of the black parts in the photos are 3D printed for validation and will be fabricated from S/S and Aluminum. Our thinking on the non-electrically actuated version, is that we will include a small cover to finish out the interior of the door. We have the cover designed for our complete door interior panel and should be able to post pics of our smaller cover in a couple of weeks.
180408 Door Latch-1.jpg180408 Door Latch-2.jpg180408 Door Latch-3.jpg180408 Door Latch-4.jpg
Thanks,
Chris
-
Senior Member
That's an area that's not easy to make look decent. On my last build, did several things. Mainly had the under door carpet edged so the raw edges don't show along the door sill and up to the latch area. Above the latch, it's possible to bring the bulb seal down almost to the latch and then put the carpet over the edge. Looks pretty finished that way. I didn't find that little piece of aluminum sticking up does much to seal that area from the wheel well. I cut it off. Pieces added inside the wheel well do a much better job. Finally, once you get the latch and door sorted out, replace the stack of washers with a spacer of the right length. I use a piece of aluminum and polish it a bit. Adds to the more finished look. Not the best picture, but if you zoom in on this you can see some of what I'm talking about.
Thanks for the input, Ive had the under door carpet binded and that will definitely look better but like you said it doesn't cover this area. I also did the backside with a small aluminum splash guard with bulb seal. I might adhere a piece of 0.04 aluminum and paint it with POR 15 to match the black frame area next to the door catch then use Dark Water aluminum door opening trim.
Nice work,
We have been frustrated with both the appearance and the performance/reliability of the FFR latches that I think had the design last updated by Lucas in the 1950's. We recently started to develop for our builds a latch mechanism that is both reliable and will finish out very nicely. In our builds we utilize electric door actuators and the entire mechanism is covered by our inner door panel. The cable attached to the mechanism is for an emergency door release. Friday we started installing this on a Mark IV that had previously had a previously had a FFR latch mechanism installed. All of the black parts in the photos are 3D printed for validation and will be fabricated from S/S and Aluminum. Our thinking on the non-electrically actuated version, is that we will include a small cover to finish out the interior of the door. We have the cover designed for our complete door interior panel and should be able to post pics of our smaller cover in a couple of weeks.
Click image for larger version. Name: 180408 Door Latch-1.jpg Views: 30 Size: 691.4 KB ID: 83824Click image for larger version. Name: 180408 Door Latch-2.jpg Views: 28 Size: 405.2 KB ID: 83825Click image for larger version. Name: 180408 Door Latch-3.jpg Views: 29 Size: 789.0 KB ID: 83826Click image for larger version. Name: 180408 Door Latch-4.jpg Views: 25 Size: 727.5 KB ID: 83823
Thanks,
Chris
That's a lot of tech to put into one of these but definitely makes it better. I'm looking forward to seeing pictures of the 80 day car build, from your build list looks like you have a ton of tech going into it...it'll be awesome! Your going to be a budget buster for sure when it comes to after market parts for these builds, exciting!
 Posting Permissions
- You may not post new threads
- You may not post replies
- You may not post attachments
- You may not edit your posts
-
Forum Rules

Visit our community sponsor


 Reply With Quote