-
Dan-
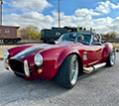
The car looks incredible, and like many of the other posts here, I really admire your craftsmanship and attention to detail! The engine compartment is awesome! I love the clean look, the color matching, the way everything is tucked away, etc. I also like the interior. So many subtle, yet classic changes; it works perfectly!
You mentioned that you mounted the e-stopp on the trans tunnel. Do you have any pics of how you did that? I didn't think there would be enough room at the top of the tunnel to fit all that hardware. I would appreciate any pics, if you don't mind. I was also hoping you might show some more detail on your hood latching/popper set-up. If you don't mind, I would like to see some more detail on that as well.
Again, terrific job; I really like what you have done! Congratulations on a great build! Thanks in advance for your help with the pics as well.
Regards,
Steve
-
E8B50D67-1BE4-4040-9033-6715353CBCA6.jpeg3331D82B-9132-4ABB-AA11-4C943123E20B.jpeg
Steve these are the only two pictures I could find on the E-Stop brake, I made a pulley system. I wish I had more pictures but the system works great..
-
Post Thanks / Like - 2 Thanks, 0 Likes
-
5F8A8DA8-7FEF-4D70-AFBA-BD56CE1652FF.jpg632C2DF9-0665-435D-BCB7-3CB3C03BD0E2.jpg
Couple more pictures, this was taken with engine and trans out. You can see the E-Brake system mounted to the top of the trans tunnel. You can also see the PVC pipe I painted black to run the wires in.
-
Post Thanks / Like - 1 Thanks, 0 Likes
 WIS89
WIS89 thanked for this post
-
-
-
AA9B7342-573D-4F96-897E-CD7D5DBA0250.jpegA7D30CAC-CF00-4E65-AEC5-42E8C74B2981.jpeg
Coyote gas pedal made to match clutch and brake, or at least I tried to get close.
-
8FA276CA-7FCB-4227-8DCA-9CADACF26ADF.jpg905042FA-EB1C-4DC8-998A-BAE7FFBBE19F.jpg7DE00A64-BA82-4F8A-A706-1495E2CD7866.jpegE8CF9883-80F9-49AB-9EBF-7F6A081F11FF.jpg
Here is a quick and cheap way to finish off the rear leg of the roll bars that you see when the trunk is open. I add some ABS plastic left after making the wheel well protector for all four wheels. I made a cardboard pattern that fit around the roll bar, transferred the pattern to a piece of ABS plastic, used a heat gun to soften up the plastic, put on a pair of welding cloves and formed it around a pipe the same diameter of the roll bar, let it cool. Cut away some of the back so you can stretch it around the roll bar, after some trimming wrapped it to match..
-
On a roll

Wow. Truly amazing build. Congratulations!
Mk IV Roadster - #8650 - delivered 7-17-2015 - first start 7-28-2018 - first go-kart 10-13-2018 - licensed and on the road 9-9-19: body/paint completed 3-17-2020.
Complete kit / 2015 Coyote / TKO600 / IRS / Wilwood brakes / Mid-Shift mod / Power Steering / Heater and Seat Heaters / RT turn signal / Breeze radiator shroud and mount
-
Dan-
Thank you very much for all the detailed pictures! I didn't think the e-brake would fit there, but it looks like it had plenty of room!
I also like the pvc you used to cover the wiring. I will try and find some of that to protect my wiring as well. Nice idea!
Thank you again for the great pics!!
Regards,
Steve
-
-
Post Thanks / Like - 1 Thanks, 0 Likes
 WIS89
WIS89 thanked for this post
-
Senior Member

Wow, the level of detail you're a true craftsman. Thanks for sharing!
Mick
-
Dan-
Thanks for the additional pics! You engineered a great system there! I will see if I can copy it a bit for my car. I really appreciate your help with this!
Regards,
Steve
-
6AD0D9B2-36D5-4BE6-88D2-BBB2436E35D4.jpgBB924AA2-510C-4C5C-9D72-587312FD7AFA.jpgFAC57724-45AB-4A68-B2A5-C6EDFBA3F08A.jpg6C58214C-43F6-4861-AFB6-F926A2BE460B.jpg
Here are a few pictures of the hood latches, if you look at the fipped over body by the hood opening you see two pads. I used 1/4 inch thick metal 3 inches square. Drill and tap two 1/4-20 all thread studs and bonded them to the body with 3M marine fiberglass bondo, this was used to attach the cables plungers mounts I made. Also of you look you see a 1/2 square metal tubing that runs between the two mounts, I used this to mount the popper.
-
Post Thanks / Like - 1 Thanks, 0 Likes
 WIS89
WIS89 thanked for this post
-
Thank you again Dan! Some great and useful pictures! You did a really terrific job, and the car looks wonderful.
Some really great ideas you came up with, and the little details make all the difference. Sincere thanks for sharing them!
Regards,
Steve
-
Post Thanks / Like - 0 Thanks, 1 Likes
 DANW
DANW liked this post
-
I keep calling the parking brake E-Brake, it is actually call E-Stopp..
-
F257C41B-073A-4FB0-807C-F4FFB0734397.jpegD4FF694A-1A84-4515-9F9C-361AF73DD939.jpgF582513F-6FC9-4F63-83D4-721AED103C11.jpg
I spent a lot of time making sure the rivet spacing was correct then cover them up with a 3/8 inch aluminum rod milled down and then milled a channel on the back side so the rivets could set inside the channel so it fit flush. After that sent to chromer and installed with 1/4 inch 3m molding tape.
Dan
-
2FFBFEAA-2E25-4CCB-8485-6142D54B5DC8.jpgFF1BE151-4B82-468E-828D-BB0CE8AF8679.jpg22D199EB-DB15-4B38-87C5-E73781E55CC4.jpg
My powder coated didn’t have a good way to powder coat the rivets. I didn’t want to give up so I made a wood box, made a sheet metal top with a tab hanging out so he good ground it. Drilled holes in the sheet metal for the rivet stems, after that installed DYNA Matt to the back side, that helped hold the rivets in place and the thin foil help ground the rivets when I pushed them from the top side..
-
I absolutely love your creation! Your dash is tasteful and very well executed. The nice touches are everywhere. The engine and engine bay are perfectly dressed. Jeff Kleiner clearly outdid himself on the paint. The entire car is stunning! You can be very proud!
-
Post Thanks / Like - 1 Thanks, 1 Likes
 DANW
DANW thanked for this post
 DANW
DANW liked this post
-
C6354355-D4BB-4F45-A218-D7EE4BC8A756.jpeg60DD6440-8D7C-48FF-A655-B6B337E5B1E0.jpegEFA3366A-5952-498D-BAA2-DE5B9946B7DA.jpeg
Here are some pictures of the two ground terminals I welded to the frame, the one is just behind the starter the other is in the trunk area. You can see I placed a copper plate over the studs. From the ground terminals different size ground wires go to other smaller terminal blocks behind the radiator, seperate ground to the alternator and starter, a ground to the engine block and heads. I’m sure it is over kill but seems like most electrical problems are ground related..
Thanks Dan
-
-
-
Super clean and wonderful build. A lot of nice touches through-out the build. Nice job!
Paul
-
Questions have been asked as to how I cut the holes in my custom dash. Plasma cutters are fairly inexpensive nowadays and it makes a nice cut. Here you go!
-
5E5A8CDF-C533-4B92-A172-52C3F0F8F336.jpeg126D4731-64C9-4C23-8EA7-995C5D4FB1E4.jpegFE3375F2-6069-44FB-9983-9D91854DD3F8.jpeg91365D70-B973-4786-9E38-317DCD806F0F.jpegCF5E3696-BAEA-46BB-9119-1DE6853884CF.jpg
I wanted to dress up and seal the front and rear fender wells. I used .08 aluminum to make the panels, and then purchased a 4x8 foot piece of ABS plastic that was cut to fit tight in the wells and secured lower front and back. Hope the pictures help explain. I didn’t take pictures of the rear fender wells during the process but will this winter.
-
-
Senior Member

There is a lot here to like. I like your interior and what you have done with the wheel wells. You've got a great build. Thanks for sharing.
-
Not a waxer

Dan, look at you go... few days ago Kay was having to coach you on posting pictures and now you're putting up vodeos  Really happy to see you showing all of these details and features so that others can see how outstanding this build truly is!
Jeff
-
Thanks Jeff, I wish I would have taken more pictures over the years including all the mistakes trying to get it right. My eyes could see what I wanted for changes or modifications but my skills had other ideas. I hope the pictures help explain some of the mods, over the years I sure appreciate all the info on this forum.
-
Senior Member

I'll join the group and say it...totally amazing
Your eye for detail is just spectacular
Enjoy the miles...you deserve it
-
-
-
56422FE8-9E09-46E3-838C-34D1F99D0BB5.jpg33CF83BA-2620-408D-9E77-14456F9A7073.jpg
Couple pictures of the seats and center console. You can see how I extended the Factory seat backs and some pictures of the wood center console that I sent to the upholstery..
Dan
-
68C79AC3-91D4-4B6B-8362-89A71ABF79F4.jpeg70C4D7AF-21AF-4F2F-8554-804FB5B0FF97.jpeg29054CB6-7261-4A0F-ABE8-F5C5E3EC9604.jpeg54C3E389-0940-4DF1-8537-80AF95DFD1F1.jpeg
Few PM’s asking how the Headers can fit on the passenger side footwell since i moved the foot well in front of the 1.5 inch round tube. The notch worked for this..
-
I wish I was your neighbor
-
Senior Member

Hey Dan,
I'm still reviewing you pic's (with envy).
I am starting the wiring for my Coyote. I really like how clean you set-up is under the hood. I am curious where you mounted the Ford Performance Power Distribution Box as I don't see it on the firewall (typical location).
Thanks in advance.
Mk4 #9165, Base Kit with lots of options, Delivery on 08/17/2017, Coyote, TKO600, 2015 IRS, 18" Halibrands, 12.99" Wilwoods

-
Senior Member

Dan, an absolutely stunning car and your attention to detail and thinking outside the box is surreal!
Congratulations on a unique and finely crafted killer snake.
Chris
Generation 3 Type 65 Daytona Coupe Complete Kit #151885 received May 6, 2022. Gen 3 Coyote, IRS, Tremec TKX, American Powertrain hydraulic throwout bearing & Wilwood brakes.
MK4 Basic Kit #7404, 347 EFI - Pro M Racing ECM, 30# injectors, 70 mm throttle body, 80 mm MAF, Edelbrock Performer aluminum heads & RPM II intake, all new G-Force T5, 3:55 gears, Pro 5.0 shifter, 3-link, carbon fiber dash/custom Speedhut gauges and paint by Da Bat.
-
Lewis
The power distribution box is mounted in the raised part of the passenger side foot box, it is directly behind the PCM. I don’t have a picture but I mounted it on rails so I could lower it into the passanger foot box if need for maintenance.
Dan
-
Thanks Chris I had a great time building this. All the members on this sight gave me a lot of inspiration. I had more pictures of the build but lost some of them in the Cloud. I’m trying to post all I come across.
Thanks again Dan
-
Senior Member

What an amazing build. I am humbled by what you created under the hood and in the cockpit. You should be winning Best in Show for years to come with this car!
-
Senior Member

Lewis
The power distribution box is mounted in the raised part of the passenger side foot box, it is directly behind the PCM. I don’t have a picture but I mounted it on rails so I could lower it into the passanger foot box if need for maintenance.
Dan
Neat idea. I was thinking about the same location but was scratching my head on how to access.
Just curious, where you located the terminal block/fuse ?
Mark
Mk4 #9165, Base Kit with lots of options, Delivery on 08/17/2017, Coyote, TKO600, 2015 IRS, 18" Halibrands, 12.99" Wilwoods


 Thanks:
  Likes:

 Reply With Quote


 Really happy to see you showing all of these details and features so that others can see how outstanding this build truly is!


