-
Senior Member

Friendly reminder, check ALL of your nuts, bolts, and SET SCREWS regularly
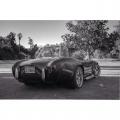
I built and licensed my roadster 5 years ago.
After driving a few hundred miles and double checking all of the nuts & bolts, my 80 year old dad & I drove it 1k miles round trip to London Cobra Show with no significant issues. A couple months later (before my next long-distance trip) I took it to a local performance shop and paid them to put it on a lift to grease, re-torque, and double-check everything.
I've never had a mechanical issue with anything loosening up, except one side pipe heat shield clamp after I initially installed it.
3 days ago I was in the garage detailing it for our upcoming Club Picnic. As I was cleaning the smudges on the steering wheel spokes, I turned the wheel and noticed a very little slop in the steering. I popped the hood, wiggled the steering back and forth and it looked like the front u-joint that connects to the steering rack was loose, so I grabbed some allen wrenches to tighten the set-screw. I was able to easily take a full turn, then cinch it down. I turned the wheel 180* to check the opposing set-screw and found the set-screw was missing. I can only assume it loosened also and fell out! I picked up 2 new set screws, applied a little blue loctite and re-installed them. I don't think the joint would have disconnected, but not diserable for sure!
This kind of scared me that I just happened upon it, but glad I was vigilant and discovered it.
Check yours too!
F5R #7446: MK4, 302, T5 midshift, 3.55 Posi IRS, 17" Halibrands
Delivered 4/4/11, First start 9/29/12, Licensed 4/24/13, off to PAINT 2/15/14!! Wahoo!
-
Senior Member

Here is a simple check list that I found, I think on the old-old forum:
Drive Line
□ Radiator hose’s - squeeze lower - checking for softness
□ Fan blades - look for cracks
□ Transmission fluid
□ Clutch cable - open cover and check end of cable - it tends to break at the lower end of the cable
(also check where cable leaves engine compartment that it's well away from exhaust!)
□ Check the 2 bolts for the shifter handle (on the T5 transmission)
□ Clutch inspection cover to have a look at the clutch disk
□ Check under side of side exhaust pipes where rear bracket welds to the side exhaust for cracks
□ Driveshaft Bolts (Grease)
□ Header Bolts, Exhaust System
□ Belt(s)/Pulleys or replace them every 70,000 miles
□ EFI, Clean out the Idle solenoid on side of throttle body/Carb’ed check-replace fuel filter(s)
□ Rear end fluid level
□ Change Oil
□ Coolant Level / Condition
□ Fuel Lines
□ Engine / Transmission Mounts
Suspension / Brakes / Steering
□ Clean and repack wheel bearings (replace them at 100,000 miles)
□ Brake fluid - flush and replace at 100,000 miles - or not a bad idea after hard day at open track event!
□ Inspect brake flex hose for rubbing on shocks and that plate you attached to the frame is still tight
□ Look closely at rear flexible brake hose - ends to be sure it's not been stretched
□ E-Brake cables that "slide" under the frame pipe - look for wear, check the short e-brake cable
□ U joints for wear - move up/down side to side - there should not be any movement in the joint
□ Tie rod ends & ball joints (Grease)
□ A-Arms (Grease)
□ Rear Control Arms (Grease)
□ Ride Height (in case of sagging) = 3.75F, 4.25R
□ Steering Rack (Grease ball joints)
□ Shocks (ride height torque = 55 max
□ Brakes pads and/or shoes
□ Calipers
□ Brake Lines
□ Steering Linkage (all fasteners)
□ 3-Link Mounts (Grease) large = 120 max, smaller = 85 max
Other
□ Battery mounts - check bolts make sure they are tight!
□ Wire connectors, all you can reach
□ Seat bolts/nuts
□ Seat Belts
□ Fire Extinguisher
□ Body Mounts
□ Bumper Mounts
□ Wind Wings / Visor mounts
□ Light Bulbs
□ Tire Pressure 23F, 25R
□ Lug Nuts Torque = 85max
□ Fuel Filler
□ Door Latches
□ Mirrors
□ License Plate Mount
Torque Specs according to FFR Build School at Mott Community College hand out material and documents
Front suspension
Upper control Arms adjustment bolts 60
Upper control Arms mounting bolts 100
Bracket (Spindle) 70
Shock (bottom) 70
LCA 110-150
Shock Bracket (Lower Arm) 55-70
Ball Joint (upper) 80-120
Ball Joint (lower) 80-120
Rear Suspension
Upper control Arm to axle 70-100
Upper control Arm to frame 80-105
Lower Control Arm to axle bracket 70-100
Lower Control Arm to frame 80-105
Lower Control Arm Bracket to axle 90
Shock Bracket, Lower 55-70
Shock, Top 25-30
Shock bottom 45-60
Quad Shock bracket to frame 56-70
Quad Shock to bracket 56-70
Quad shock to axle 56-70
Rear Suspension (3-Link)
Pan hard Bar 250
Upper frame mount 90
Rear Suspension (IRS)
Rear Axle nut 250
Shock (upper/lower) 70
Spindle attachment 100
Driveshaft to center section 70-95
Steering Rack/Shaft
Steering Rack Bolts 30-40
Tie Rod Ends 25-35
Pillow blocks 20
Exhaust
Straight Pipe 35
Engine/Transmission
Transmission Mounts (Tranny to mount) 25-35
Transmission mount (Mount to frame) 25-35
Engine mount (Engine to mount) 35-60
Engine mount (Mount to frame) 50-105
Driveshaft bolts 70-95
Lights/ Trim accessories
Windshield 90
Quick Jacks 60
Body Bolts 20
Miscellaneous
Wheel lug nuts 80-105
Pedal box (front plate upper) 35
Pedal box (Frame down tube) 10
General Guidelines (Zinc Plated Hardware)
Thread Size SAE Grade 5 (ft/lb) SAE Grade 8 (ft/lb)
¼-20 10 14
¼-28 12 16
5/16-18 21 29
5/16-24 23 33
3/8-16 37 52
3/8-24 42 59
7/16-14 59 83
7/16-24 66 93
½-13 90 127
½-20 101 144
9/16-12 129 184
9/16-18 144 205
5/8-11 179 254
5/8-14 202 287
Last edited by MPTech; 09-30-2018 at 01:34 PM.
F5R #7446: MK4, 302, T5 midshift, 3.55 Posi IRS, 17" Halibrands
Delivered 4/4/11, First start 9/29/12, Licensed 4/24/13, off to PAINT 2/15/14!! Wahoo!
-
Post Thanks / Like - 1 Thanks, 0 Likes
-
That is a really complete list! Thank you for re-posting this.
-
Seasoned Citizen

Really no reason to put a wrench on most fasteners if you use torque stripe such as this stuff from McMaster-Carr: 1476T615
Just a quick visual and if a fastener has come loose it will show up as a crack in the torque stripe. There are several suppliers of these products but all are quick drying and become brittle so that any movement at all of the fastener and it will crack. Just a small bead across the bolt head or nut and washer and base material is all it takes.
IMG_0644.JPGIMG_0645.JPG
-

Super Moderator

I did something similar to what NAZ has suggested. Painted a white stripe, about a 1/4" wide from the nut to the adjacent surface. Take a quick look and if the stripe isn't inline, something has moved.
Ray
I'm not getting gray, I'm adding chrome....
“Under-steer is when you hit the wall with the front of the car and over-steer is when you hit the wall with the rear of the car. Horsepower is how fast you hit the wall and torque is how far you take the wall with you.”
-- Jacques Schnauzee "World Famous Racecar Driver"
"If you can make black marks on a straight from the time you turn out of a corner until the braking point of the next turn, then you have enough horsepower."--Mark Donohue
-
Senior Member

Agree mark everything. Amazon sell paint markers you can use. Yellow is easy to see about $7.

-
Seasoned Citizen

For those using paint as a visual indication of a loose fastener, consider this. The advantage of using torque stripe is that it is much easier to tell if any movement has taken place as the thick bead cracks if the fastener moves. Torque stripe (AKA inspector's varnish, anti-tamper lacquer, and other names) is very thick like the consistency of spot putty and drys very quickly to a thick brittle bead. Use it on critical fasteners and things like your trailer hitch ball and if any movement (incipient loosening) takes place, the crack in the torque stripe is very easy to see. Try it and you'll never go back to paint.
-
I worked for a major Ag manufacturer and we used a product similar to what Naz suggested.
-
Tool Baron

Frank
__________________________
Factory Five Racing MKIII Super Snake Replica. Cannonball Cobra Drop Trunk Box, Horn Button and other machined Do Dads.
i.e.427 Chromed Full Width Roll Bar with integrated LED Third Brake Light.
I will never forget My Buddy Paul.
-
Senior Member

Yup, this was always my fear. A loose bolt or nut leading to a catastrophe on the highway. This is all very good advice and should be a plan for everyone. I only ever found one loose but and it was part of my front DS suspension. Doing a regular check helped me find it.
Kyle
Complete Kit pickup 09/05/2015, 351w, QF680, 3.55, 3-Link, 15" Halibrands with MT's, Painted Viking blue with Wimbledon white stripes on 03/15/2017. Sold in 08/2018 and totally regret it.
-
I think the most important point of this thread is to do a regular nut and bolt check. All the markings done will have no effect if a regular check is not done. Personally I used a red paint stick.
Doug
FFR 7995
347 SBF Prestige Mototsports, Moser 8.8 (3.31) 3 Link, TKO 600, Nitto 555s, 17" Halibrands, PS, AC, Heat, Color Redfire Pearl, with Wimbledon White Stripes


 Thanks:
  Likes:


 Reply With Quote


