-
Senior Member

Breeze Radiator top mount
I was trying to get started on the radiator install, but I think I'm confusing myself as I read the directions. I'm more of a visual learner, and was wondering if anyone had any pictures of their install that might help.
The other issue is that the instructions say to check the top 3/4 tube for level, and if it is not to cut and reweld. Is there any way around this? could spacers be placed between the pieces to straighten the line without cutting and rewelding? My welding is, let's say, suspect when it comes to strength, and the last thing I need is for the 3/4 tube to break loose from vibration. I wish I was more confident but, "a man needs to know his limitations".
Rick
-
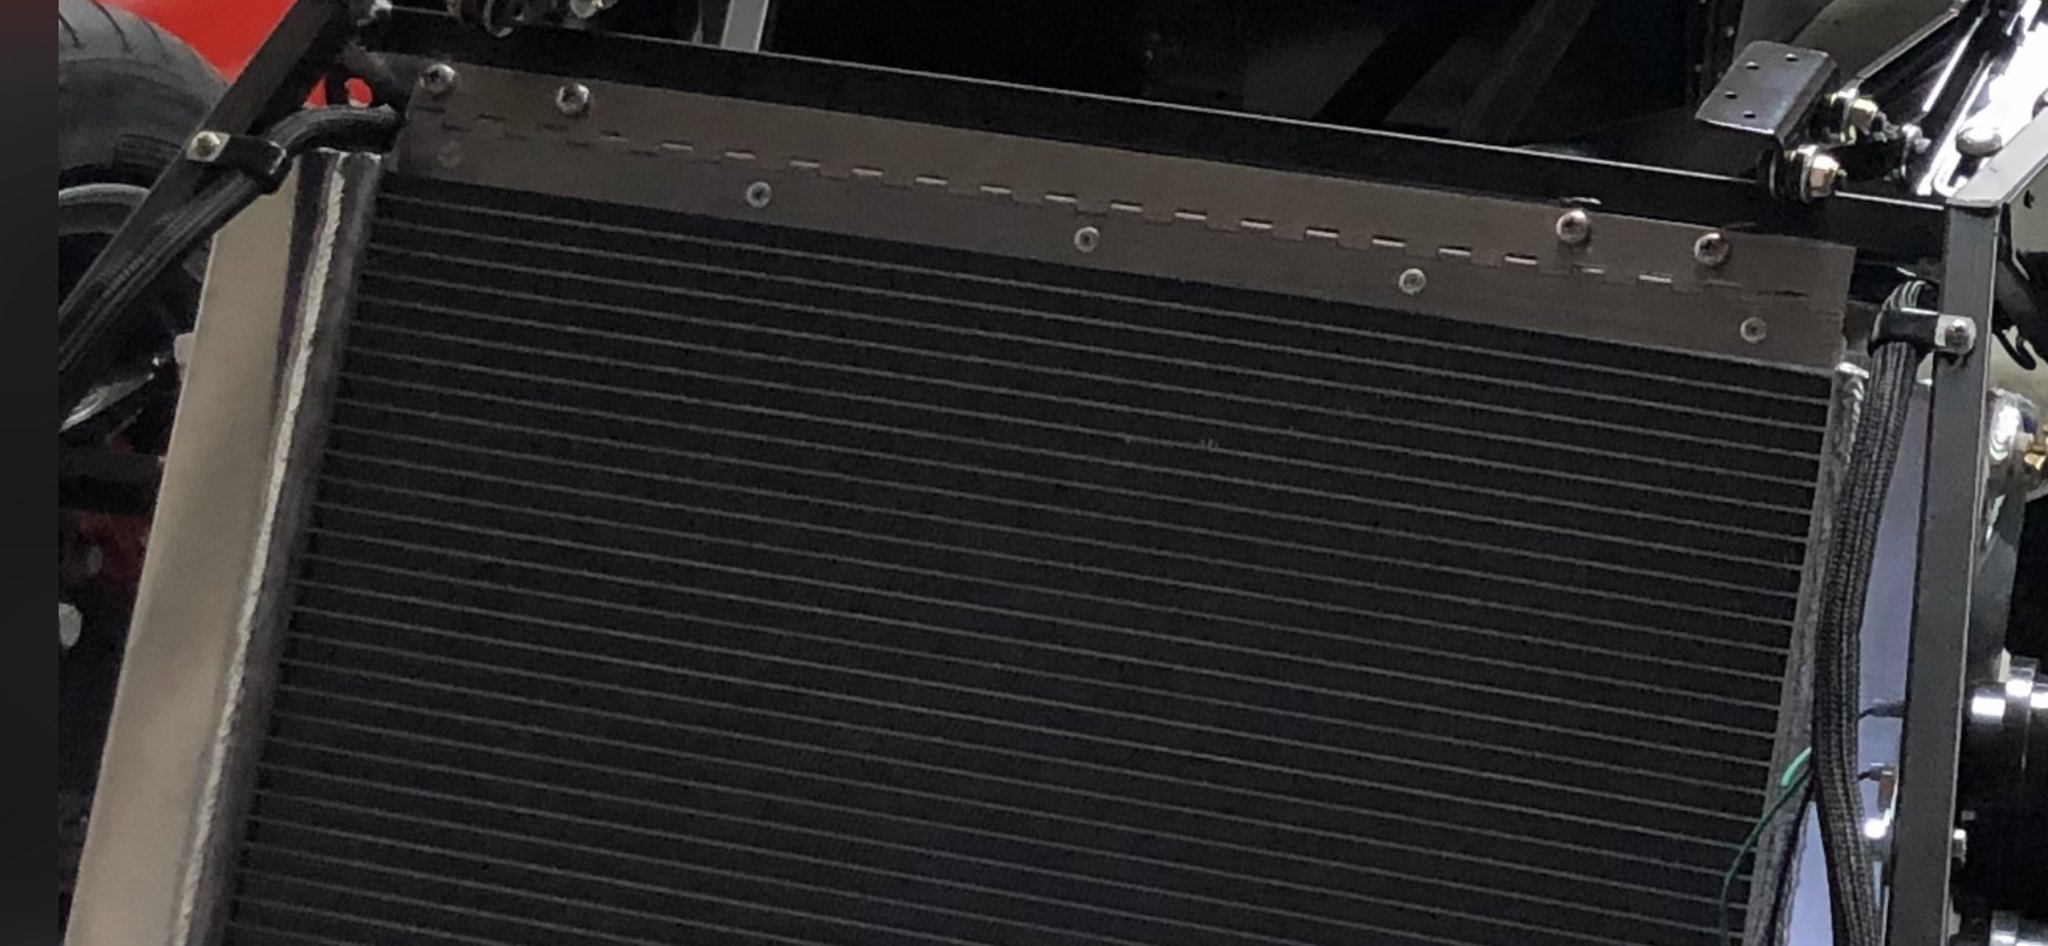
Don't worry about level. None of them are that far off that you have to worry about it. Heres what I do. Rivet a 22 inch long piano hinge to the top flange of the radiator using 3/16 rivets.
I then bolt the hinge to the 2 3/4 block with either 10-32 or 1/4-20 bolt and Nutserts. Perfectly secure and a clean install. If you ever need to remove the radiator this method will allow you to do it with a single tool.
Mike
-
Senior Member
Again Mike, thanks for the picture. As I said on the other site, it appears that the bolts go through the small pice of 3/4 tube that's welded under the main 3/4 tube. And if that's the case, would you level the unit by adjusting where you drill for the nutserts to make sure the radiator is not too far out of level? It will make this install a lot easier. Thanks.
Rick
-
OK, now I'm confused. I had the same question as Rick but hadn't quite gotten to that point in my build so hadn't posted a question. However, if I understand the Breeze install instructions correctly, they say to cut off the small sections of 3/4" tube that are welded to the 3/4" top tube, and then attach the hinge to the top tube directly. Do I not need to do this, and I can instead attach the Breeze hinged upper mount to the two small sections of 3/4" tube?
-John
MkIV Roadster build: Gen 2 Coyote, IRS, TKO600. Ordered 10/24/18. Delivered 1/29/19. Engine installed 8/8/21. First start 9/12/21. First go-kart 9/17/21. Off to paint 4/11/22. Back from paint 12/30/22.
Build thread here.
-
Actually yes you do if using the Breeze lower support. The adjuster brackets wont reach if you don't cut them off. I just made longer adjusters. I leave them in place so I can run the front wiring through the area you see in my picture.
Mike
-
Senior Member

John D. - Minneapolis 'Burbs
1965 El Camino - LT-1, 4L60e, 4wh discs, SC&C susp.
2013 F-150 Platinum - Twin Turbo 3.5
2018 Mk4 Roadster w/ Coyote - #9365 - Build Thread Delivery 7/3/18, 1st Start 1/4/19, 1st Road Mile 5/5/19, Legal 6/18/19, In Paint 2/25/21, Done (?) 4/2021
-
Post Thanks / Like - 0 Thanks, 1 Likes
-
Perfect. Thanks, everyone.
MkIV Roadster build: Gen 2 Coyote, IRS, TKO600. Ordered 10/24/18. Delivered 1/29/19. Engine installed 8/8/21. First start 9/12/21. First go-kart 9/17/21. Off to paint 4/11/22. Back from paint 12/30/22.
Build thread here.


 Thanks:
  Likes:


 Reply With Quote

