-
01-28-2020, 12:30 PM
#281
-
01-28-2020, 01:08 PM
#282

Originally Posted by
MSumners

The header gasket is flat on one side and has this small raised ridge on the other. Does the flat side face the header ?

The side with the ridge goes against the header.
MK IV Build #9659, 3 link, 17's, Forte 347, Sniper EFI, power steering, built for a freak sized person with 17" Kirkey Vintage seats, RT drop trunk, RT turn signal, lots of stuff from Breeze Automotive, Wilwood brakes, paint by Jeff Miller
-
01-28-2020, 01:54 PM
#283
Senior Member

-
02-02-2020, 07:46 PM
#284
Senior Member
-
02-02-2020, 08:03 PM
#285
Mike,
I'm really impressed with your build and enthusiasm. Looks great.
Jim - Ada
-
02-03-2020, 10:13 PM
#286
Senior Member
Thanks Jim I appreciate it,
This build process has been even more fun than I anticipated.
One of these days we will have to meet up, hopefully in the summer when this thing is rolling.
-
02-26-2020, 11:08 PM
#287
Senior Member
Back from vacation and back to the build.
Working on creating brackets for the overflow reservoir. Will it cause interference if the top lid extends above the rail here by about 1/4”?

-
02-26-2020, 11:39 PM
#288
That might be a problem. I have the top just under the top of that frame rail. You can mount it on the F-Panel itself. Lots of room there.
MK IV Build #9659, 3 link, 17's, Forte 347, Sniper EFI, power steering, built for a freak sized person with 17" Kirkey Vintage seats, RT drop trunk, RT turn signal, lots of stuff from Breeze Automotive, Wilwood brakes, paint by Jeff Miller
-
Post Thanks / Like - 1 Thanks, 0 Likes
-
02-27-2020, 11:16 AM
#289
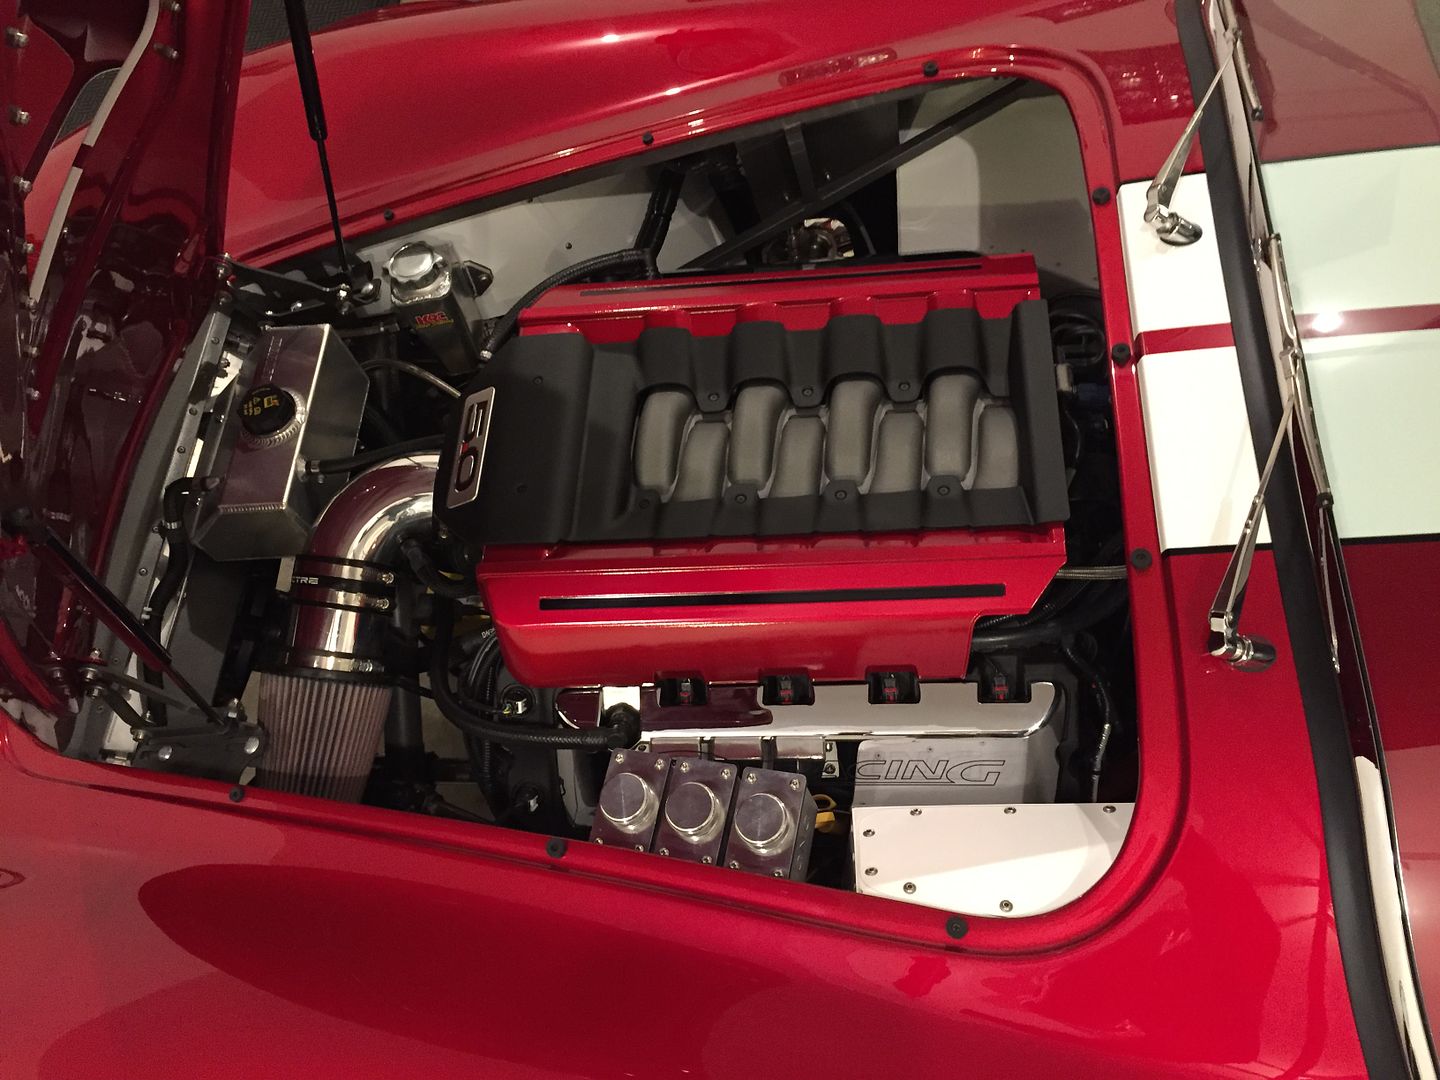
When I got home from work after a 16 hr day last night (I'm ready for the weekend), I took a look at where I have my catch can. Here is a pic I took before the body was on.

The hood bulges down to just about even with the lower part of that frame rail. So, I'd recommend making the catch can cap just under the height of that frame rail. You can also see where I have it on the F panel. Also, that back edge of the F panel is not 90 degrees vertical. So don't use that line to place your can. I used a bubble level to ensure that the catch can was 90 degrees.
Last edited by TMartinLVNV; 02-27-2020 at 11:18 AM.
MK IV Build #9659, 3 link, 17's, Forte 347, Sniper EFI, power steering, built for a freak sized person with 17" Kirkey Vintage seats, RT drop trunk, RT turn signal, lots of stuff from Breeze Automotive, Wilwood brakes, paint by Jeff Miller
-
02-27-2020, 04:40 PM
#290
Senior Member

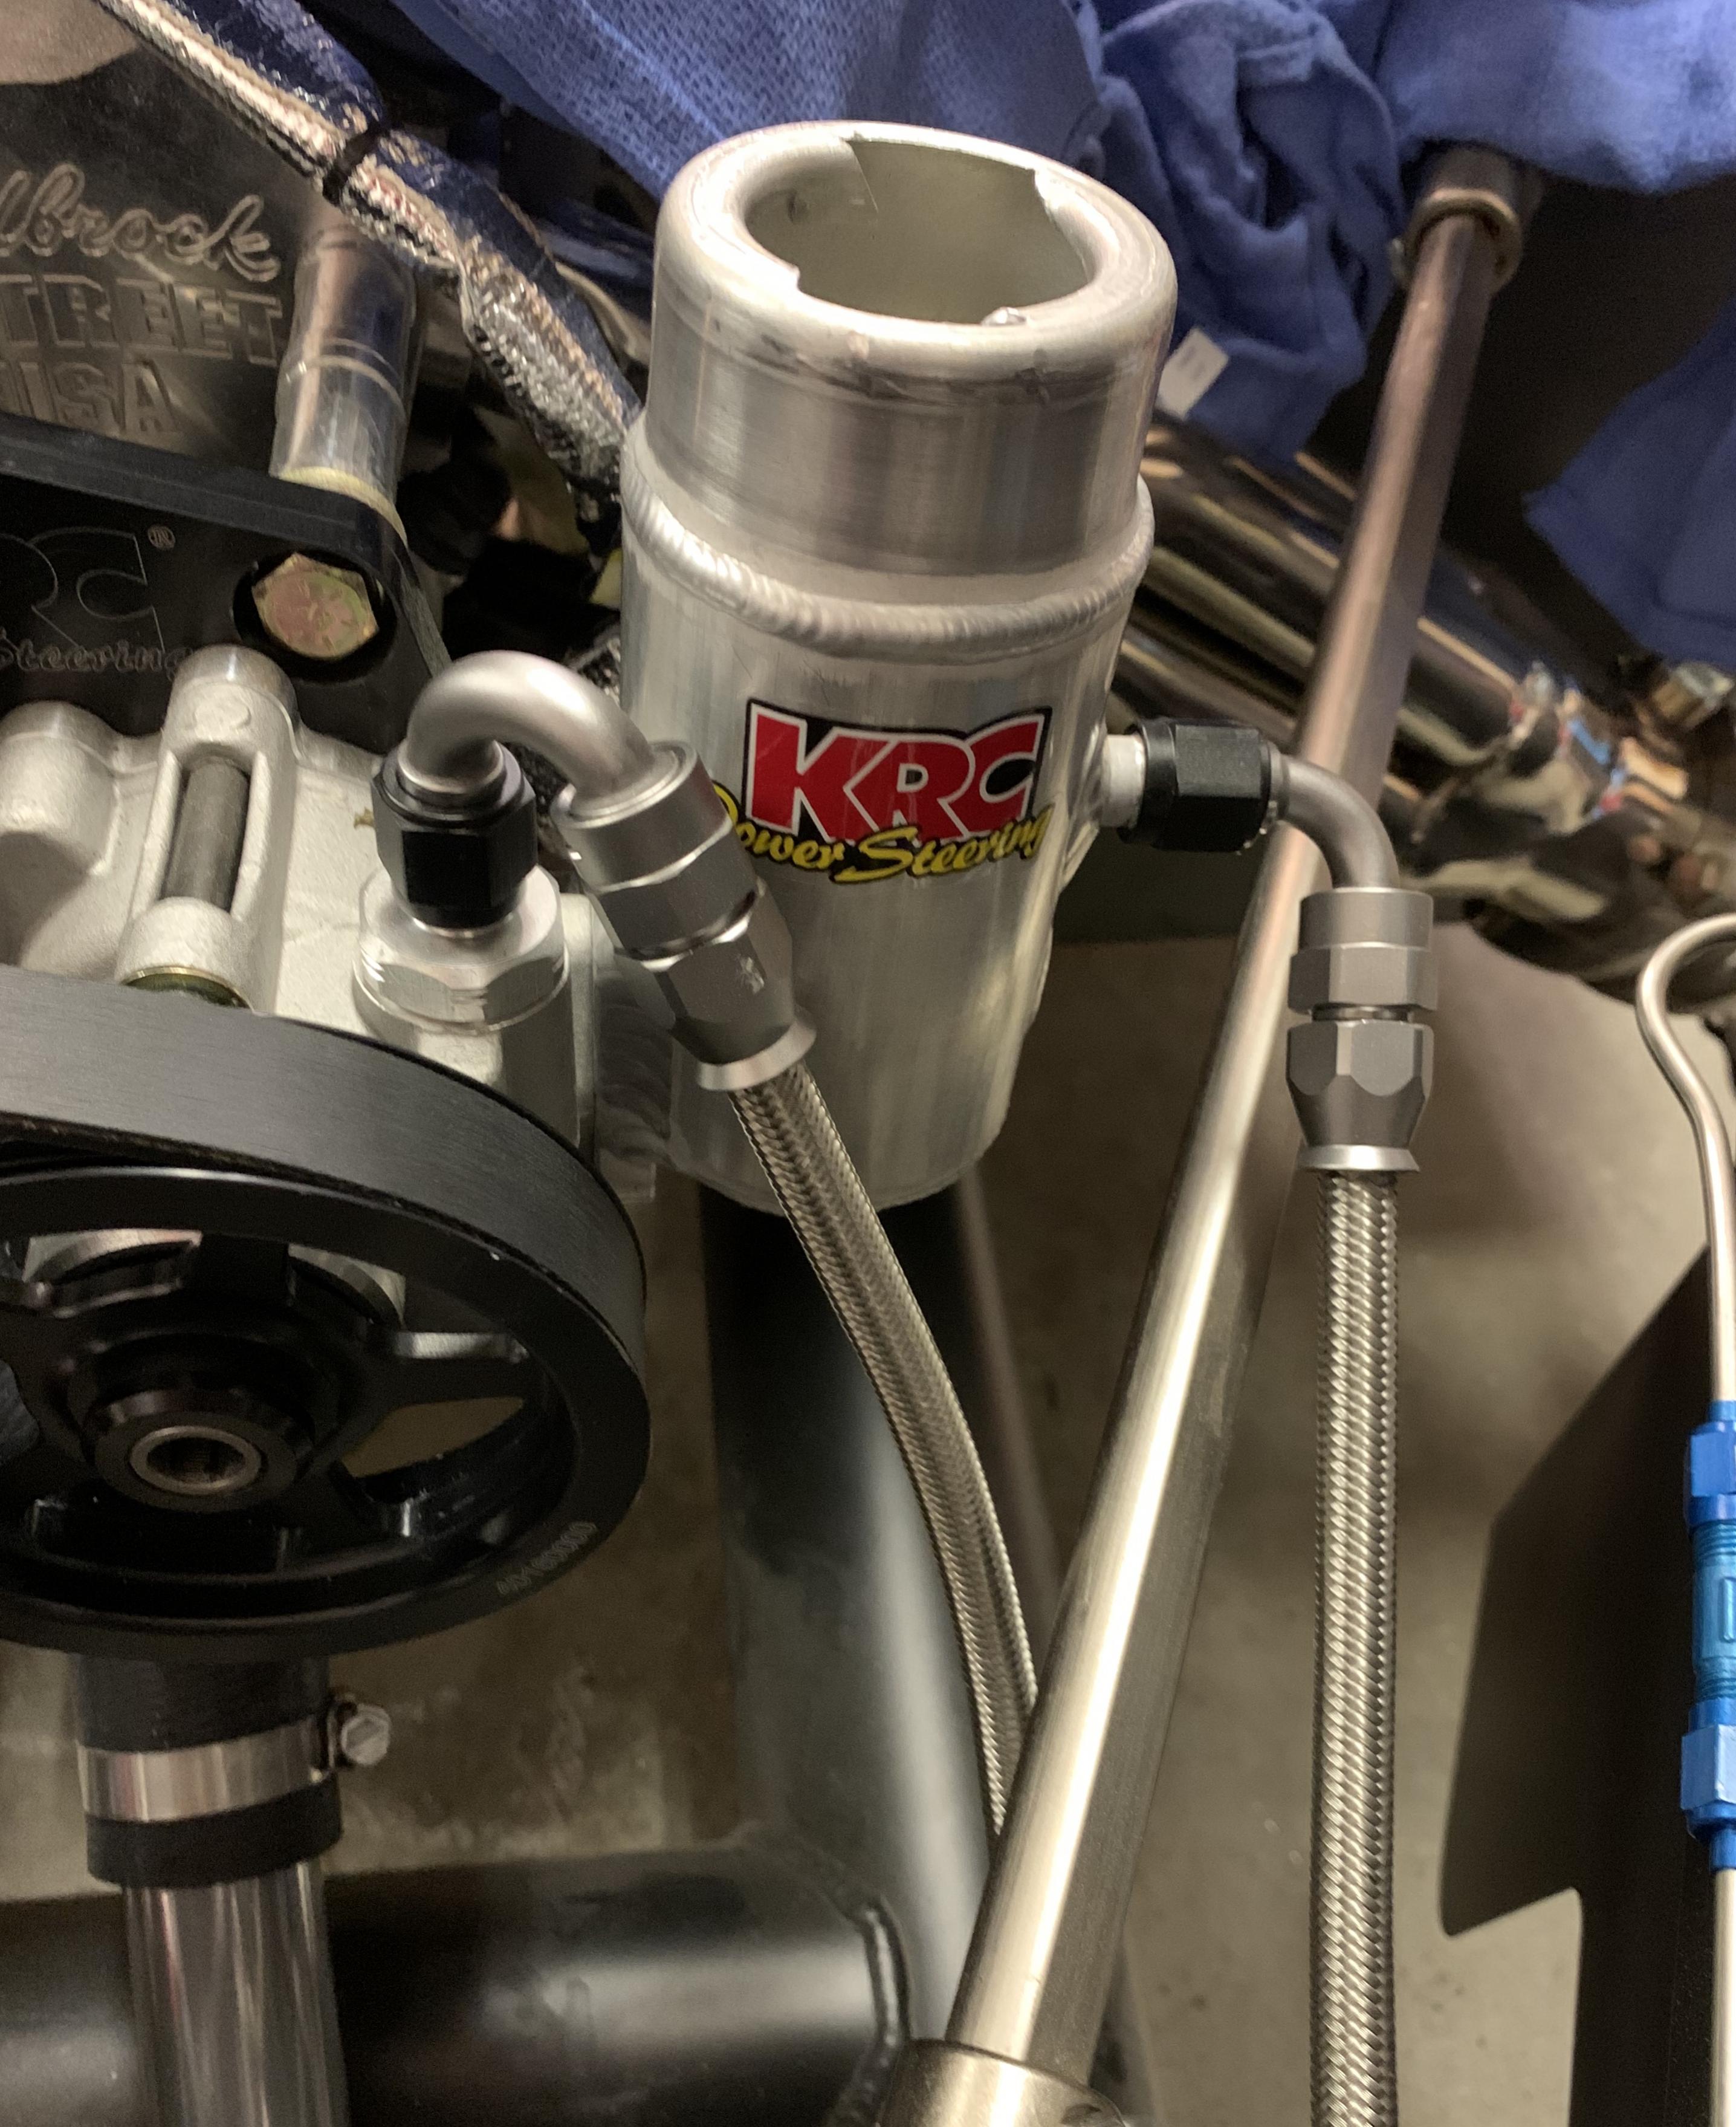
Suggest you guys take a look at where the hood gas strut drops down in that area. Not just the hood to be concerned with. This picture shows my #8674 20th Anniversary build. The tank in this case is the PS reservoir. But would be the same with your radiator tank. With the cap below the 3/4-inch tube, clears the gas strut. There would be interference if it were much higher, including at the top of the 3/4-inch tube.
Build 1: Mk3 Roadster #5125. Sold 11/08/2014.
Build 2: Mk4 Roadster #7750. Sold 04/10/2017.
Build Thread
Build 3: Mk4 Roadster 20th Anniversary #8674. Sold 09/07/2020.
Build Thread and
Video.
Build 4: Gen 3 Type 65 Coupe #59. Gen 3 Coyote. Legal 03/04/2020.
Build Thread and
Video
Build 5: 35 Hot Rod Truck #138. LS3 and 4L65E auto. Rcvd 01/05/2021. Legal 04/20/2023.
Build Thread. Sold 11/9/2023.
-
Post Thanks / Like - 1 Thanks, 1 Likes
-
02-27-2020, 09:40 PM
#291
Senior Member
Perfect, thanks. Looked through some pictures but couldn't quite tell exactly from the angles. I ended up buying a larger reservoir as it seems is commonly recommended and trying to find the right position. Time to make some new supports.
-
02-29-2020, 08:36 PM
#292
Senior Member
Decided to try my hand at powder coating and picked up the simple Eastwood system and after a recommendation from Mark Eaton powders from Prismatic.
Actually very easy to use and the first run turned out great. I figured black would be hard to screw up so started here on the Gasn pipe hangers.

-
Post Thanks / Like - 0 Thanks, 2 Likes
-
03-01-2020, 03:20 PM
#293
Senior Member
Finally got the overflow mounted. I’m using a larger version similar to the one provided by FF. I’ve read some concerns about it being too small and just figured I would rather make the exchange during the build rather than later. I needed just a bit of extra clearance from the F panel so I cut some mounting plates from aluminum scrap I had, powder coated and mounted up.

-
Post Thanks / Like - 0 Thanks, 1 Likes
-
03-01-2020, 11:39 PM
#294
-
Post Thanks / Like - 0 Thanks, 1 Likes
-
03-03-2020, 08:51 PM
#295
Originally Posted by
MSumners
Brake lines finished. Just a short checklist and Ill be filling the system/bleeding them.

The screws clamps, are they attached with rivnuts or tapped?
-
03-03-2020, 11:40 PM
#296
Senior Member
Those are tapped for the 10-32 button heads.
-
03-04-2020, 01:42 PM
#297
Originally Posted by
MSumners
Finally got the overflow mounted. I’m using a larger version similar to the one provided by FF. I’ve read some concerns about it being too small and just figured I would rather make the exchange during the build rather than later. I needed just a bit of extra clearance from the F panel so I cut some mounting plates from aluminum scrap I had, powder coated and mounted up.
Originally Posted by
MSumners
Those are tapped for the 10-32 button heads.
Thanks, prepping my tool and screw list. Edward says 3/8” is the most common he uses.
-
03-06-2020, 09:09 PM
#298
Senior Member
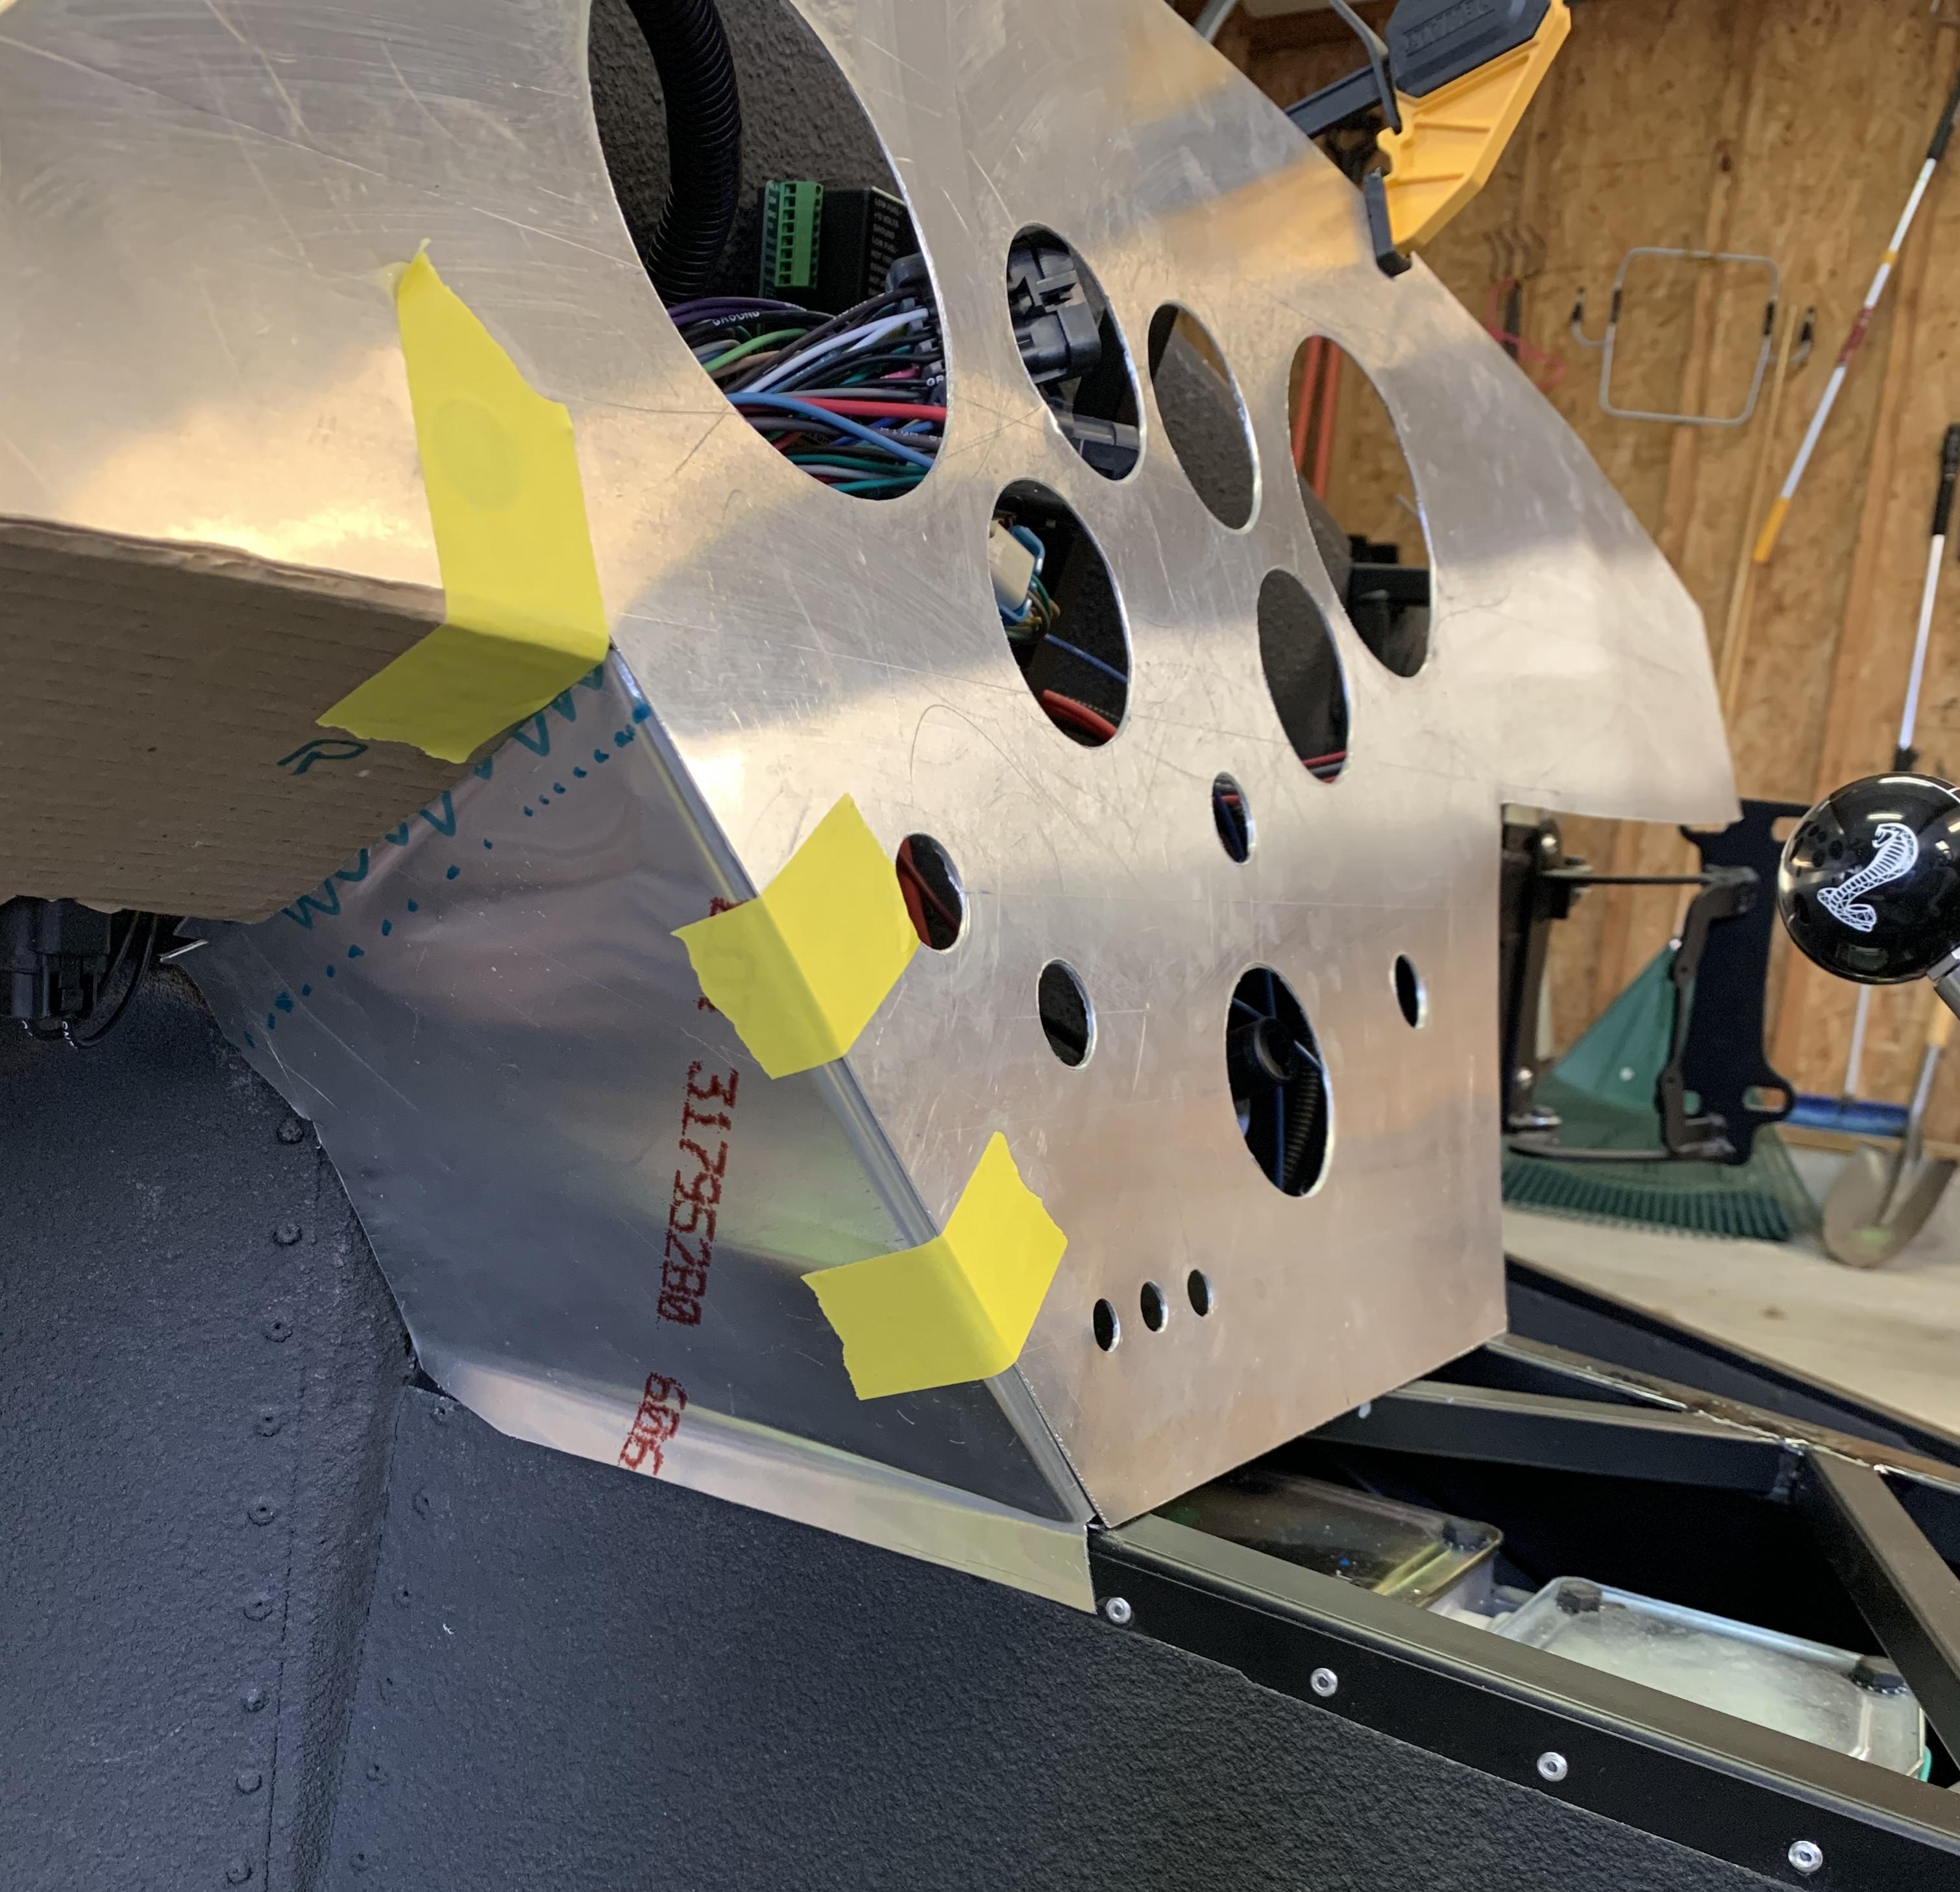
Dash question for the experienced
I am creating a custom dash and roughly using the provided blank sheet from factory five as the initial template. My question is in regards to how to shape the upper part of the dash that will be against the hoop. I know it’s recommended to keep the ends of the FF dash 3/16” below the far edges of the hoop because of some variation in hoop curvature. On the provided blank dash and with the RT signal assembly in place, prior to adjustment the edges are both about 1/2” above the bar and the center is lined up exactly at the upper edge of the hoop. Obviously the steering column hole will have to be enlarged to lower my template. That will put the top center of the dash near the lower edge of the hoop at its center.
On my custom cut, can I follow the hoop exactly at its upper margin or should I still maintain the 3/16” gap as you would with the stock provided version.
Thanks again for any guidance or thoughts!
Mike S
Last edited by MSumners; 03-06-2020 at 09:43 PM.
-
03-06-2020, 10:57 PM
#299
Senior Member
Originally Posted by
MSumners
Dash question for the experienced
I am creating a custom dash and roughly using the provided blank sheet from factory five as the initial template. My question is in regards to how to shape the upper part of the dash that will be against the hoop. I know it’s recommended to keep the ends of the FF dash 3/16” below the far edges of the hoop because of some variation in hoop curvature. On the provided blank dash and with the RT signal assembly in place, prior to adjustment the edges are both about 1/2” above the bar and the center is lined up exactly at the upper edge of the hoop. Obviously the steering column hole will have to be enlarged to lower my template. That will put the top center of the dash near the lower edge of the hoop at its center.
On my custom cut, can I follow the hoop exactly at its upper margin or should I still maintain the 3/16” gap as you would with the stock provided version.
Thanks again for any guidance or thoughts!
Mike S
If you're making an all new dash piece, can't think of any reason why exactly following the top of the dash hoop would be a problem. It's all underneath the body lip.
Build 1: Mk3 Roadster #5125. Sold 11/08/2014.
Build 2: Mk4 Roadster #7750. Sold 04/10/2017.
Build Thread
Build 3: Mk4 Roadster 20th Anniversary #8674. Sold 09/07/2020.
Build Thread and
Video.
Build 4: Gen 3 Type 65 Coupe #59. Gen 3 Coyote. Legal 03/04/2020.
Build Thread and
Video
Build 5: 35 Hot Rod Truck #138. LS3 and 4L65E auto. Rcvd 01/05/2021. Legal 04/20/2023.
Build Thread. Sold 11/9/2023.
-
Post Thanks / Like - 1 Thanks, 0 Likes
-
03-14-2020, 08:06 PM
#300
Senior Member
-
Post Thanks / Like - 0 Thanks, 2 Likes
-
03-15-2020, 10:23 AM
#301
Senior Member

Originally Posted by
MSumners
Decided I wanted a parking brake that I could reach from the drivers seat. Looked through build logs and decided to put it through the trans top. I bought a Lokar brake setup and removed the mounting brackets. Drilled out 5/16 mounting holes and 3/8 spacers to distance it from the trans tunnel side. Secured temporarily and works great and rock solid secure. Ill have to replace the mounting bolts with some low-profile heads or grind them down to fit under tte side of the trans top edge.
Nice e-brake setup. Perhaps something like an elevator bolt would work well here. You could drill the outside of the 3/4" tube to the width of the neck, and use a file it to square it up. This would probably be a LOT stronger than a flat head and countersunk hole.
https://www.mcmaster.com/94650a413
Elevator Bolt.png
-
Post Thanks / Like - 1 Thanks, 0 Likes
-
03-16-2020, 09:24 AM
#302
Senior Member
Good idea.
I looked at ultra low profile hex heads from McMaster but they want $19 each for the 2.25”!
I think I can spend a bit of time on the grinder and get a great result on the ones I have. I don’t think a countersink is an option there isn’t enough depth. The FF Metals trans top cover has about a 1/4 gap on each side so I won’t have to clearance the heads too much.
-
03-17-2020, 08:13 PM
#303
Senior Member
-
03-17-2020, 09:00 PM
#304
Senior Member
Dash template one of 31.

-
Post Thanks / Like - 0 Thanks, 1 Likes
-
03-19-2020, 08:25 PM
#305
Senior Member
How much fluid should the KRC power steering take? With priming the system I can only get about 8oz to the level in the reservoir as recommended.
-
03-19-2020, 10:13 PM
#306
I purchased two bottles of this
https://www.amazon.com/Royal-Purple-...-fluids-pcr-20
I don't think I even used the second bottle. Probably did it wrong but I check the level frequently and it hasn't changed from the fill line and the system seems to work fine. I'm up to almost 400 miles.
I like your dash, only 31 templates, LOL?!
-
Post Thanks / Like - 1 Thanks, 0 Likes
-
03-20-2020, 12:38 PM
#307
Senior Member
-
03-21-2020, 10:14 AM
#308
Senior Member
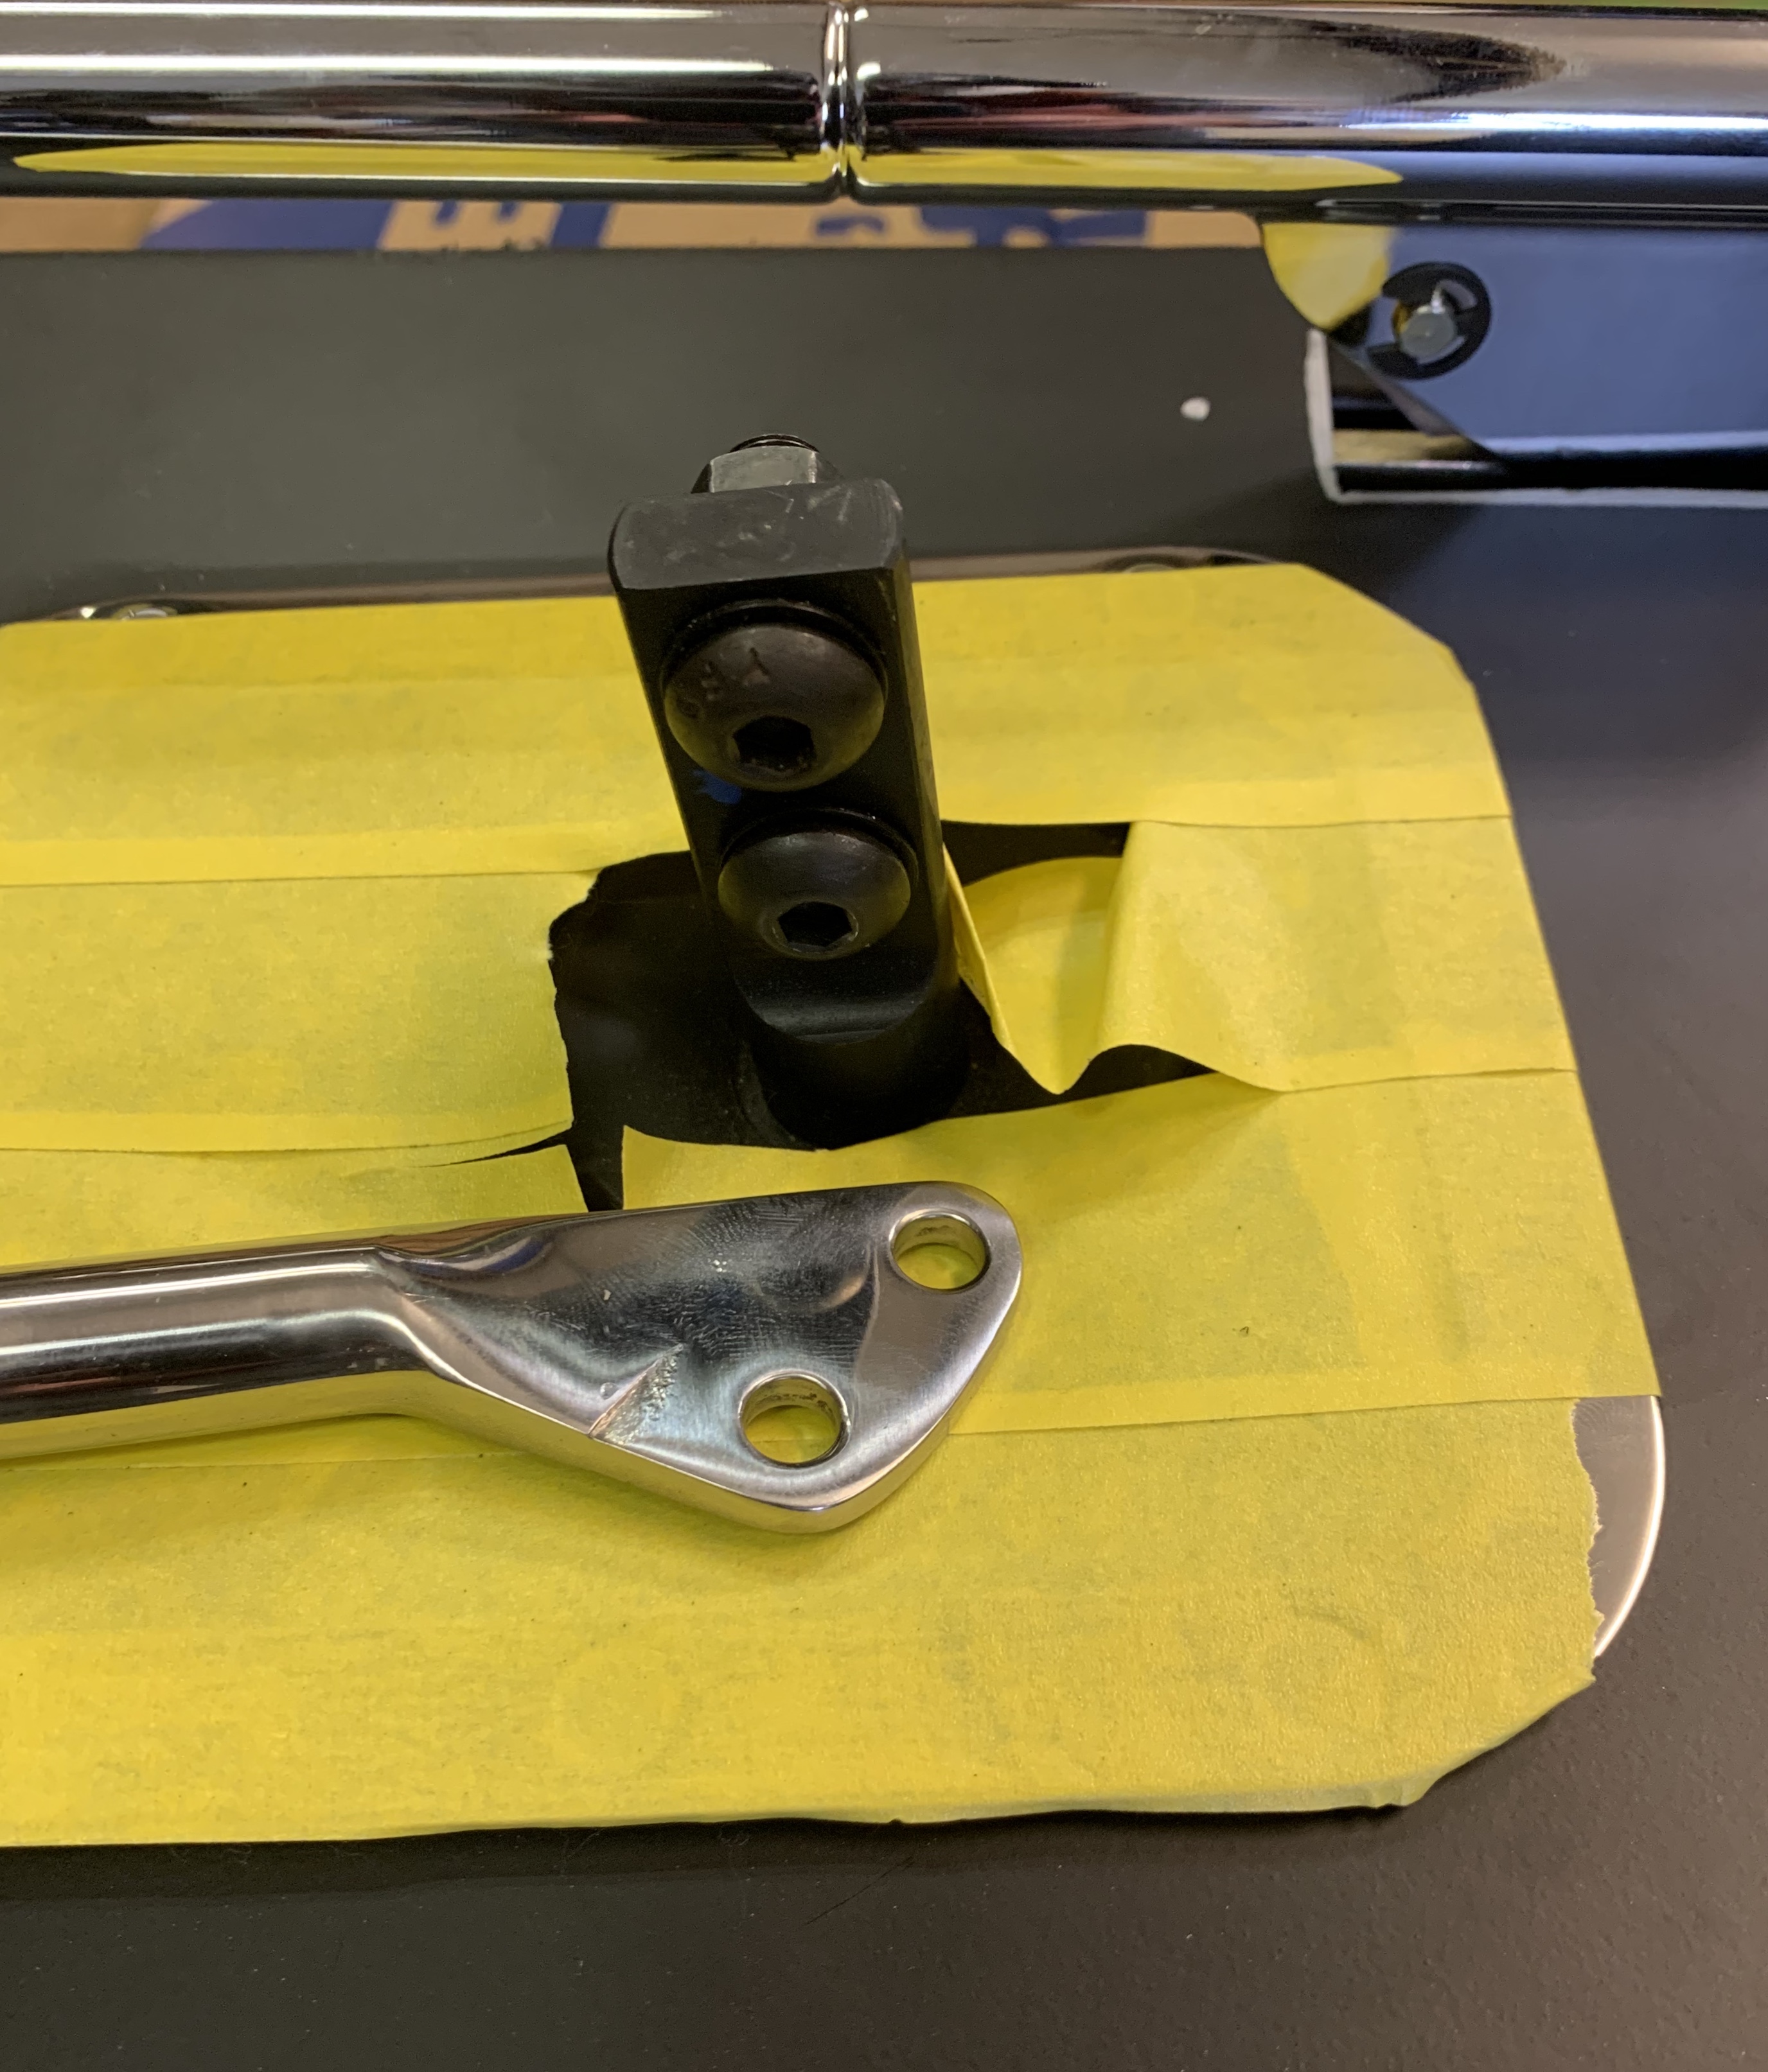
For the supplied FFR shift lever, I assume the mounting holes have to be drilled out to fit the TKO? Seems basic but just asking as I don’t recall seeing this before.
-
03-21-2020, 01:25 PM
#309
Senior Member
Yeah and it's a bit of a pain to drill out. I used it temporarily but ended up using the ********** 427 shifter after go-cart stage.
-
Post Thanks / Like - 1 Thanks, 0 Likes
-
03-21-2020, 01:51 PM
#310
Yep, I had to open up the holes a little. I found that the shifter arm passes through the tranny tunnel hole more centered when mounted on the left side rather than the right side. Basically, reverse the two bolts orientation.
MK IV Build #9659, 3 link, 17's, Forte 347, Sniper EFI, power steering, built for a freak sized person with 17" Kirkey Vintage seats, RT drop trunk, RT turn signal, lots of stuff from Breeze Automotive, Wilwood brakes, paint by Jeff Miller
-
Post Thanks / Like - 1 Thanks, 0 Likes
-
03-21-2020, 04:14 PM
#311
Senior Member
Made an adjustable pedal stop with some aluminum block scrap. Measured out the distance I would need at full throttle open, Drilled out a mounting hole and tapped the adjustable stop for a 3/8-16. The red stop is from McMaster.

-
03-22-2020, 04:57 PM
#312
Senior Member
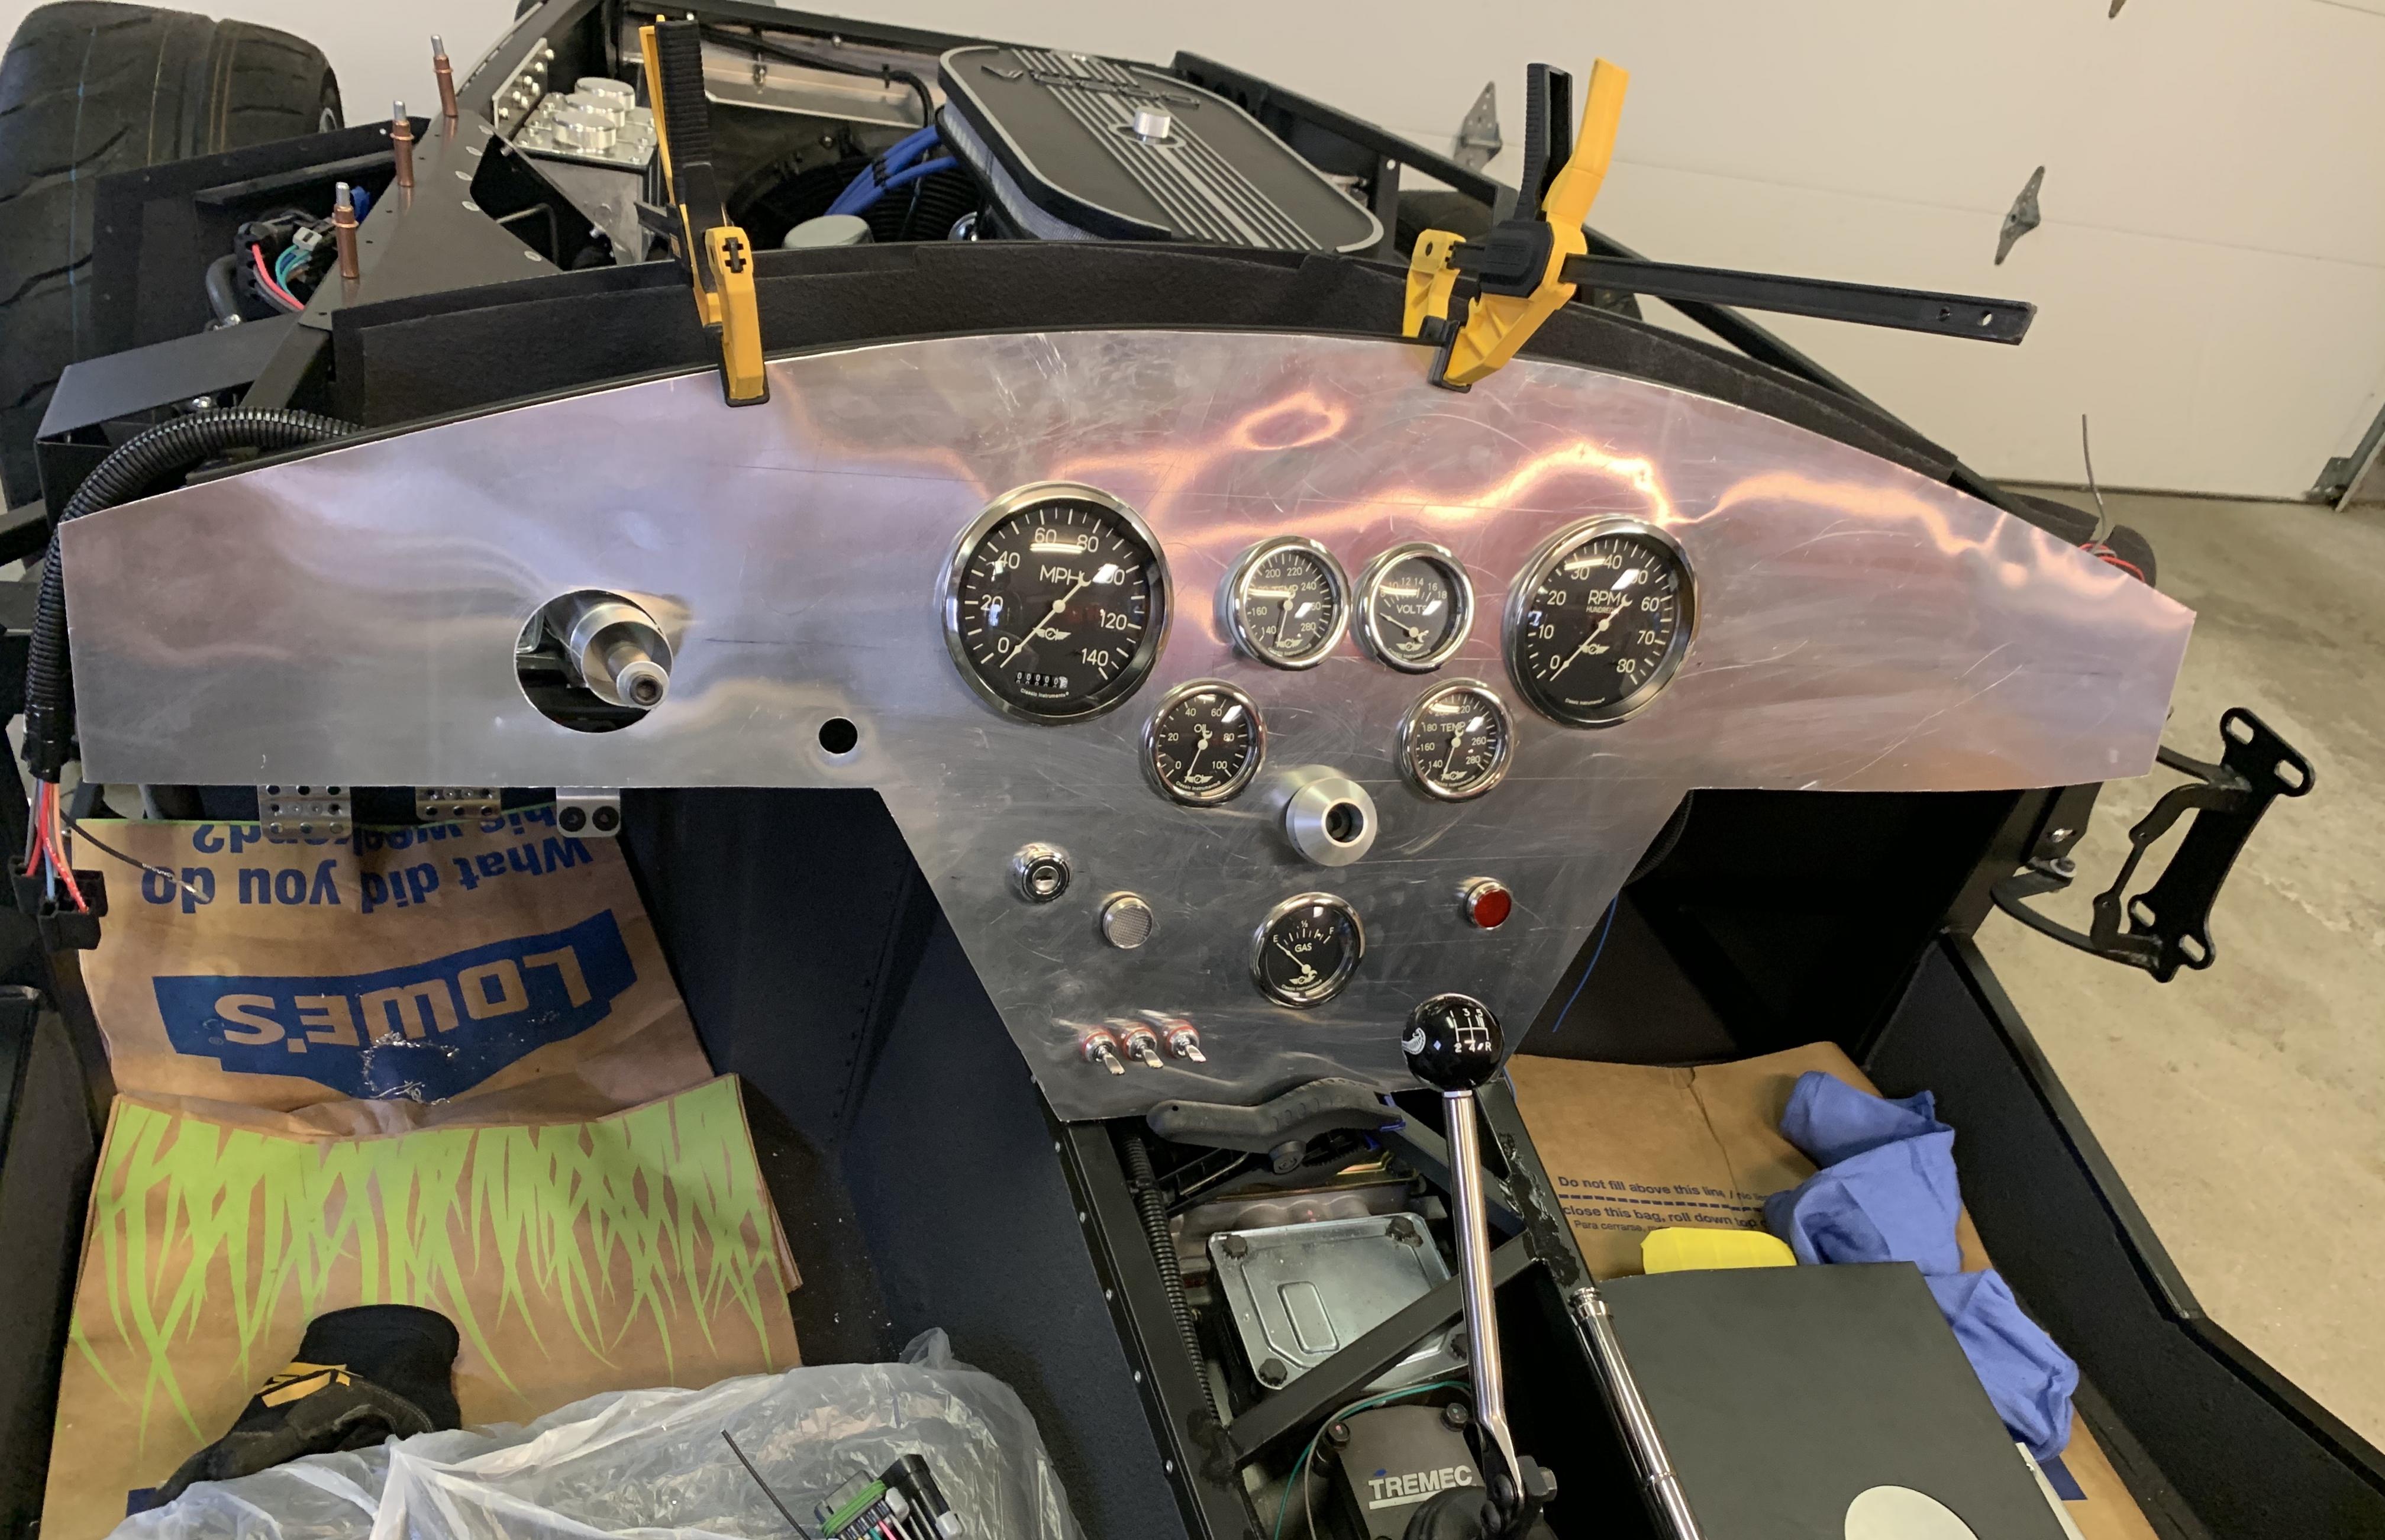
Template 2 of many in process
Nothing is tightened down just loosely set to check overall placement.
Nearly a keeper but still a few things to change and the clock has to go somewhere.
The toggles are too close together and should have spaced them 1.5-2” apart.
Probably will have another couple rounds of trial before cutting into the expensive stuff.

Last edited by MSumners; 03-22-2020 at 08:22 PM.
-
Post Thanks / Like - 1 Thanks, 2 Likes
-
03-22-2020, 09:02 PM
#313
Senior Member
I was planning on working on the breeze roll bars soon. I’ve read some concerns with having them tack-welded while on the car in terms of damaging electronics.
I have most of the wiring in place. The engine is grounded and the EFI is wired. The fuel pump and all senders are wired.
The battery is disconnected and none of the gauges nor switches are hooked up yet.
Is tack welding the roll bars on the car a legitimate concern in this state?
-
03-23-2020, 08:31 PM
#314
Senior Member
As if I needed motivation to buy a new awesome tool. A day of hammering aluminum panels against a metal strip and the workbench and cutting with aviation snips. I’m onto the “it’ll pay for itself” stage of reasoning here.
-
Post Thanks / Like - 0 Thanks, 2 Likes
-
03-24-2020, 05:42 PM
#315
Senior Member
Breeze roll bars fit and welded today. Certainly wasn’t the cleanest weld line I’ve ever seen but a bit of time with the angle grinder taking down the mounds and it looks reasonable. Before they get taken off and finished in the future I’ll clean them up some more. I think I learned the difference between Tig welding and whatever this was today. My fault for not realizing the difference.
They did require minimal adjustment after welding using both the floor jack to spread one and the ratchet strap trick to narrow the other. Now they slide right in and out with no interference.
Next step is to drill the holes for the through bolts.
Are people through-bolting all 3 legs or just the rear and one front leg?

Last edited by MSumners; 03-24-2020 at 05:49 PM.
-
Post Thanks / Like - 1 Thanks, 0 Likes
-
03-25-2020, 07:42 AM
#316
Senior Member
The build one year ago.
Nearly made go-cart in a year as was the initial thought.
Just a few things on the short list and have to look at doing a rough alignment and it’s go-cart time
-
Post Thanks / Like - 0 Thanks, 1 Likes
-
03-25-2020, 02:07 PM
#317
Mike,
Thru-bolting 2 or 3 bars. I'd thru-bolt all three. In the past, with another Cobra brand, I'm aware of the bar pulling off the frame mount in a roll over. It wasn't bolted at the point of separation, the bolted connections stayed together. Doesn't mean that it will or won't happen with the Breeze bars but I don't think there would be a downside. Will you have access to all three bolts on each side?
What hardware are you planning to use as the thru-bolts. I've used shoulder bolts in previous installations as they are solid with threads on the ends and less susceptible to shear.
Jim
-
Post Thanks / Like - 1 Thanks, 0 Likes
-
03-25-2020, 03:07 PM
#318
Senior Member
Thanks Jim, all three it is. They should be no problem to access.
-
03-25-2020, 03:40 PM
#319
Perhaps I missed something, but with the rear leg welded on, how do you install the roll bars once the body is installed?
-
03-25-2020, 04:40 PM
#320
Senior Member
The rear leg isn’t welded, just the top of the hoop. With the breeze bar it comes as separate steel pieces and has to be fit to the car and welded. Then it can be taken off and finished. So right now it is welded and fit but slides on and off easily. There are sleeves that you can see from the rear leg with a 1.75” OD, 1.5” ID that allow the rollbar to slide over the mounts.


 Thanks:
  Likes:


 Reply With Quote


