-
Senior Member

Johns Excellent Oil Pan Adventure
Almost everyone advises new owners to take their car to an autocross to find out how the car behaves. I decided to heed the recommendation, but was unsure if my stock setup could cope with the demands of an event. A couple of respected builders recommended that I change the stock oil pan to one more suited to racing. So I called Gordon Levy and purchased his Road/Race Pan setup.
Gordon provides a Champ oil pan (https://www.champpans.com/products/p/cp302lt-rr/), associated oil pickup, and dipstick/dipstick tube. The drain plugs and dipstick bungs are 1/2”-20. If you don’t have an oil temperature sensor, you’ll need to purchase a 1/2” NPT plug for the pan’s bung. You’ll also need an oil pan gasket; I chose the Fel-Pro OS 34508 R one-piece gasket based on lots of great reviews here and on the other forum.
PRO TIP #1: With the drain plugs in place, fill the pan with water & check for leaks (you’re gonna want that bung; otherwise you end up with a counter full of water!). On mine, the forward plug was fine, but the rear plug leaked at least a drop of water per minute. I switched out the crush washer for a fiber one, and the leak went away. My buddy Scott skipped this test, and he’s got an oil leak, which in light of my test, he thinks is probably at the drain plug.
PRO TIP #2: [EDIT: original text deleted, 'cuz it was bad information] New tip: With the dipstick in place, fill the pan with enough water to just reach the windage tray. Then add two quarts more. [This two quarts represents the oil that's in the upper engine at operating temperature. I chose 2 quarts based on this: http://garage.grumpysperformance.com...ge-tray-do.64/]. Check this level against your dipstick, and adjust accordingly. Neither Scott nor I did this test initially.
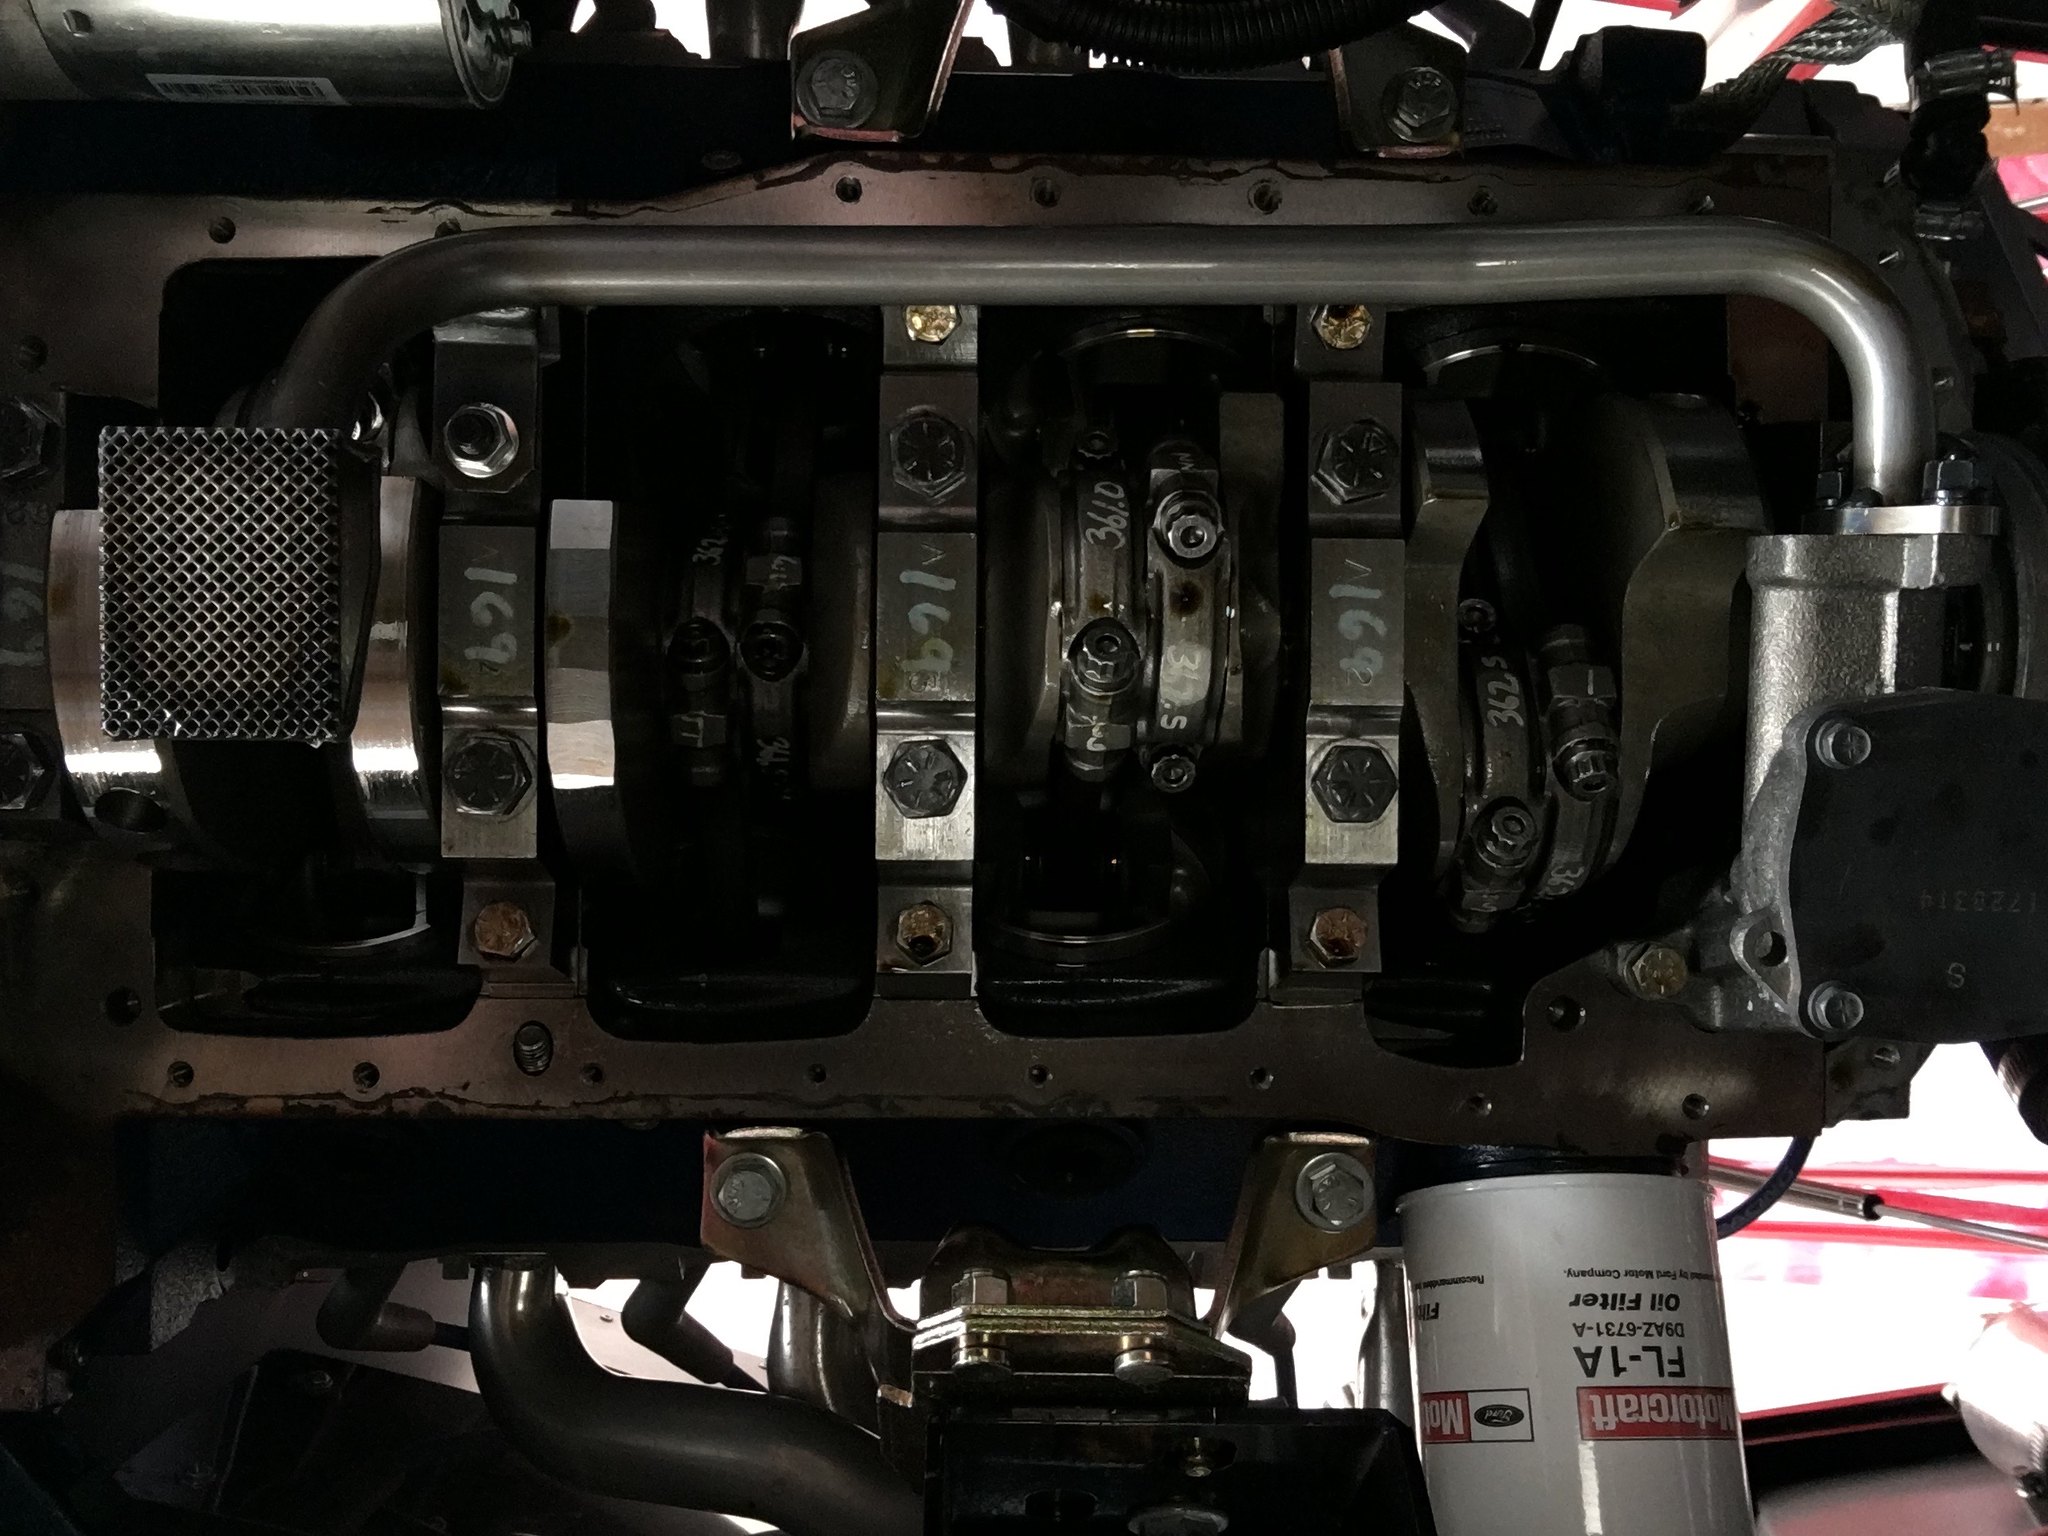
Removing the old pan was a piece of cake. A 3/8” socket for the smaller bolts, a 1/2” socket for the four bolts at the corners, and the pan pretty much drops straight down. I had to tilt the front of my stock pan down first so that the rear of the pan would clear the bump outs on the bell housing block off plate. Once the pan was out of the way, I could see the stock set up:
 IMG_5486 by jhsitton, on Flickr
Removing the stock pick up was easy-peasy. Installing the new pickup proved a little more problematic.
I replaced the pickup bolts with Arp studs. The problem is, I tried to torque the studs into the oil pump, and promptly broke the cheap-a$$ pot metal. So now I had to replace the oil pump. The bolts into the block were secured with red loc-tite (the bolts for the pickup weren’t), so it took a bit of heat to get them loose. I went to Napa and bought a new pump (https://www.napaonline.com/en/p/SEP22441118); I did NOT replace the oil pump drive shaft as it was an Arp and had less than 700 miles on it. I re-used the Grade 6 oil pump bolts (with a light-to-moderate dose of red loc-tite) and torqued them to spec (23-38 foot-pounds; I chose 25).
Once the pump was in place I hand-tightened the studs and tried to fit the pickup onto the studs. No joy. The studs were just a hair too close together. So I drilled the pickup’s mounting holes 1/32” larger in diameter, & finally was able to set the new pickup into place. It was then that I noticed the main cap stud had to be moved.
 IMG_5502 by jhsitton, on Flickr
A panicked call to a couple of friends revealed I “should” be able to swap the stud with the main cap bolt. I confirmed this with Mike Forte (who answered his cell on a Saturday afternoon…you don’t get customer service like this very often; thanks Mike!). So I broke out my breaker bar, swapped the stud & bolt, and torqued each to 65 foot-pounds. After that I was able to install the pickup (torquing the bolts to the oil pump to 25 foot-pounds and the nut on the main cap stud to 30 foot-pounds; I used a drop of red loc-tite on each).
 IMG_5503 by jhsitton, on Flickr
I then dry fit the pan into place. It took some fiddling, but I was able to get the pan into place working around the bump outs on the bell housing block off plate.
PRO TIP #3: You do NOT need to remove the starter. If you do, you’ll figure out there’s no way to get the starter back into place with the oil pan installed. Ask me how I know.
Another test fit or two to verify the space between the bottom of the oil pickup and the oil pan (mine cleared with a little less than 7/16”) and to get my fitting process dialed and I was ready for the real thing.
I smeared a pea-sized drop of Permatex Ultra Black RTV onto the corners of the gasket (both engine side & pan side) and set the gasket into place. I was only able to use three of the Fel-Pro fitting studs due to the bell housing block off plate. For the fourth, I used a long 1/4” bolt with a nut screwed onto it about an inch. I slipped the pan onto the fitting studs & then the metal side supports. Finally I screwed all the bolts into place hand tight and let the RTV cure for an hour per the instructions.
I torqued the bolts to spec (10-12 foot-pounds for the 1/4” bolts, 15 foot pounds for the 3/8”) in three stages, working from the middle of the pan out to the ends & and swapping sides a la the pattern used to torque the intake. Getting to the bolts on the opposite side of the sump was a real pain; you absolutely need a flex drive socket and long extension.
At last the pan was in place.
 IMG_5507 by jhsitton, on Flickr
The final step was to bend the dip stick tube to fit around the engine block. I used a piece of 3” PVC pipe to get the tube to curve smoothly. You’ll want the first curve to start right at the fitting to the oil pan, so either use a tube bender or a vise to hold the tube & PVC in place.
This project turned out to be a TON of work, mostly because I’ve never done it before. If you’re thinking about autocross or track days, I urge you to have your engine provider install a race-ready pan, or at least make the swap before the engine is in the car (& preferably before the bell housing is bolted on).
John
Last edited by phileas_fogg; 04-15-2019 at 06:18 PM.
MK IV Roadster #8631
Ford 302, Holley Terminator EFI, T5z, 3.55 Rear End, IRS, 17 Halibrand Replicas (9 front, 10.5 rear), Nitto 555 G2s (275/40ZR17 front, 315/35ZR17 rear), Fast Freddies Power Steering, F5 Wilwood Brakes, FFMetals Firewall Forward, Fortes Hydraulic Clutch & Throttle Linkage
https://www.ffcars.com/threads/phile.../#post-4776313
-
Post Thanks / Like - 0 Thanks, 1 Likes


 Thanks:
  Likes:


 Reply With Quote
