FormaCars

Visit our community sponsor

Thanks Thanks:  0
Likes Likes:  0
Page 1 of 3 123 LastLast
Results 1 to 40 of 104

Thread: Arrowhead's 33' Hot Rod Build

  1. #1
    EFI Rules and Carbs Drool Arrowhead's Avatar
    Join Date
    Feb 2011
    Location
    Stillwater, NY
    Posts
    599
    Post Thanks / Like

    Arrowhead's 33' Hot Rod Build

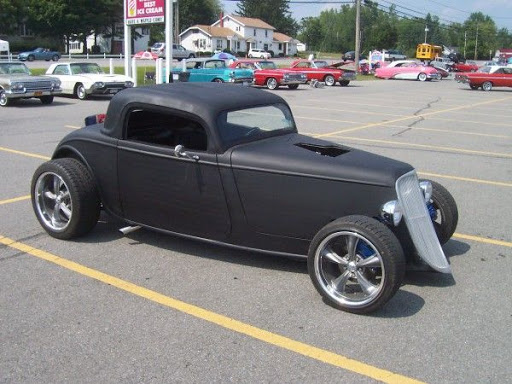
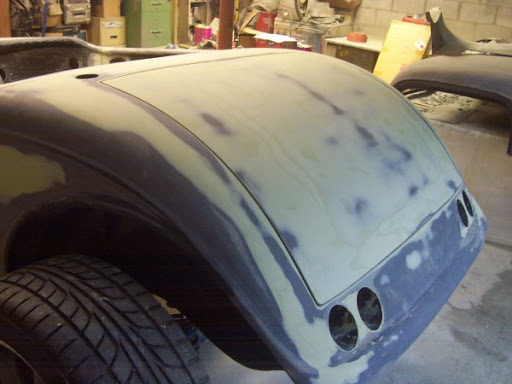
    Thought I'd re-post my build thread from the "other" site. I took the opportunity to fix some things and correct some spelling errors.


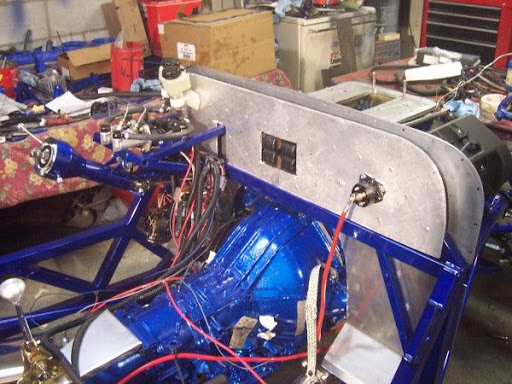
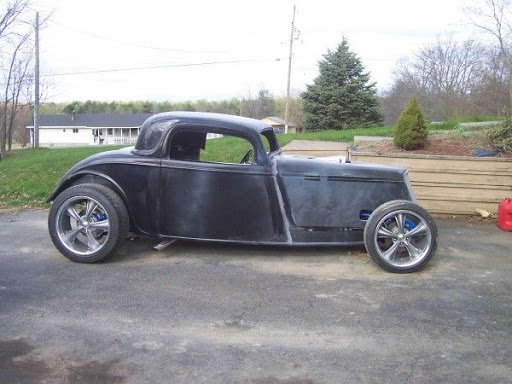
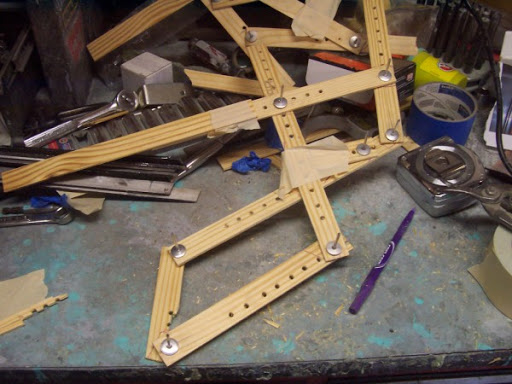
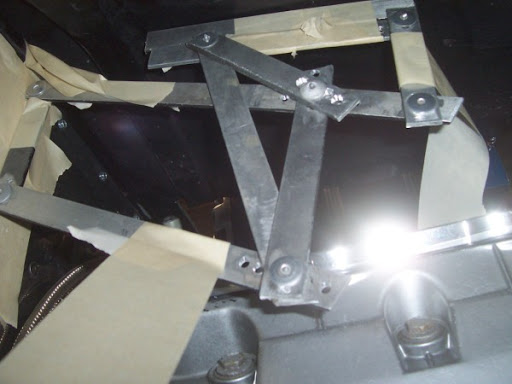
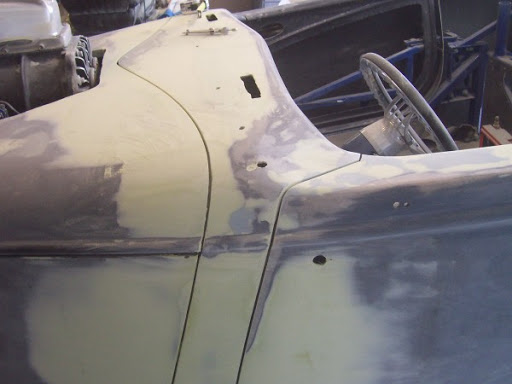
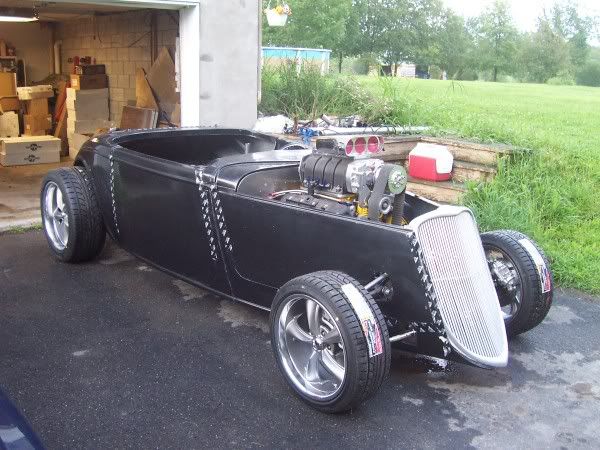
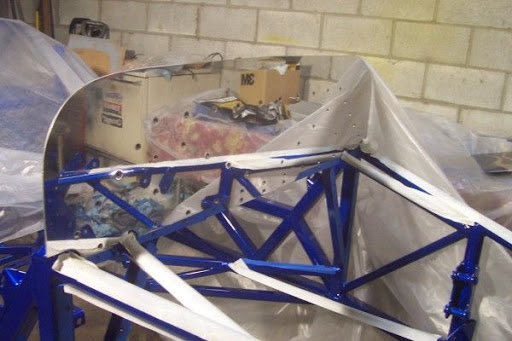
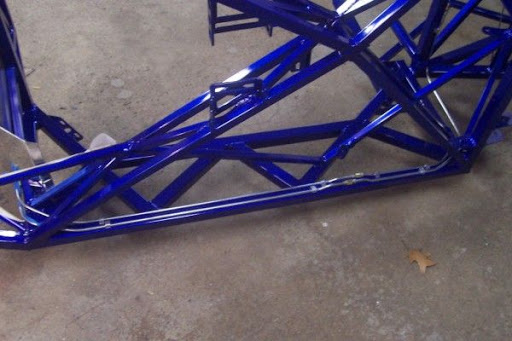
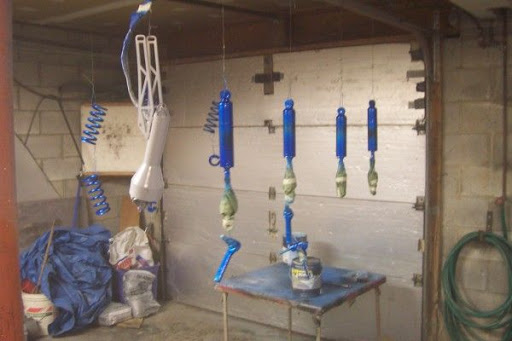
    I figured it was about time to start a build thread of my own. I will be working on the '33 sporadically so I waited till I had something accomplished before posting. I'm kind of going about my build a little differently than the manual. I'm mocking up all the "hard" parts so I can make sure (hopefully) there won't need to be any welding or cutting done after the frame is painted. I'm using a transmission that is not supported by FFR, so modifications will need to be made for that too.

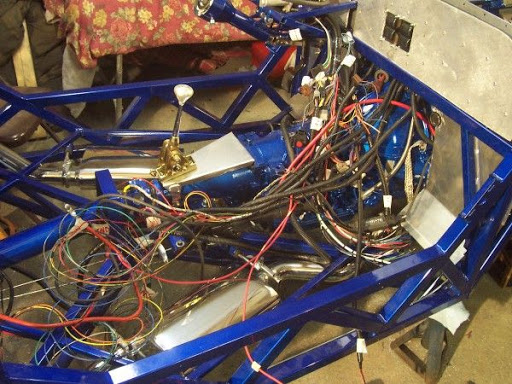
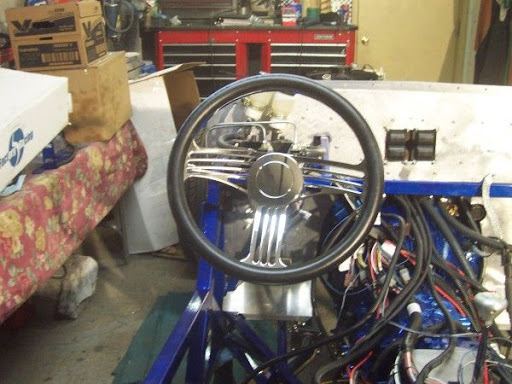
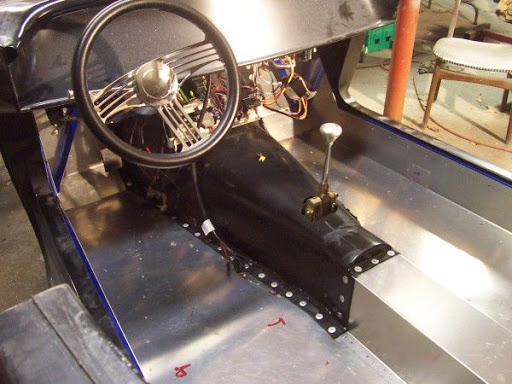
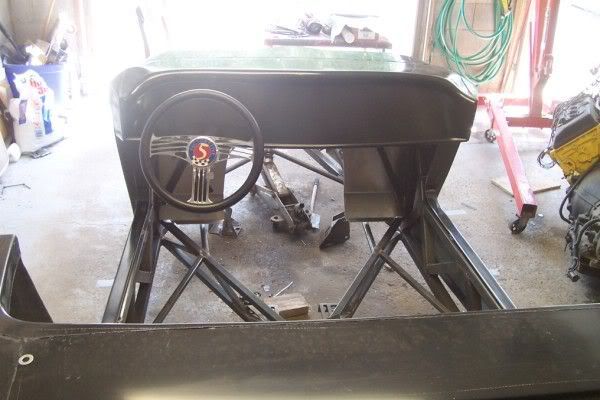
    The assembly has been going pretty well, with the all the minor issues that have been brought up on the board here (grind down the large nut on the steering rack, trim some of the shock spacers, sand down the spindles so the hubs slide on, cut the steering shafts down - more on this later)

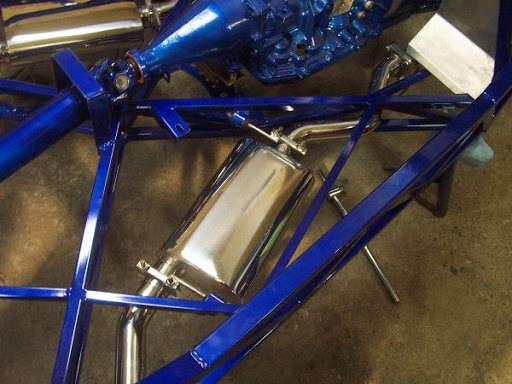
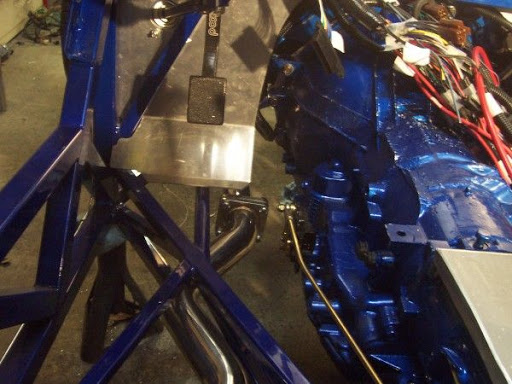
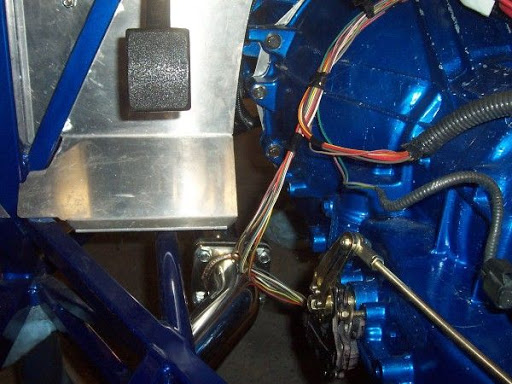
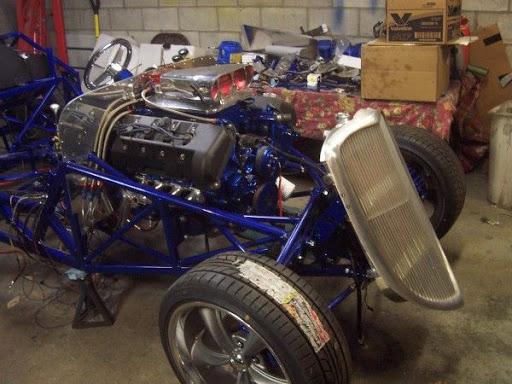
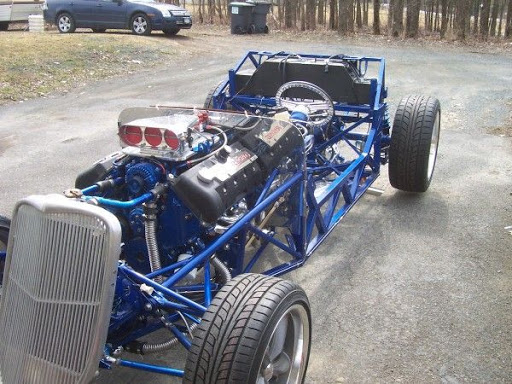
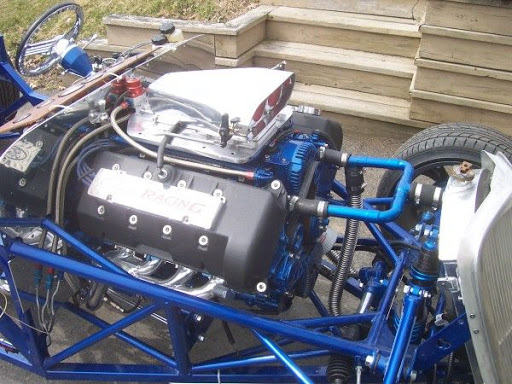
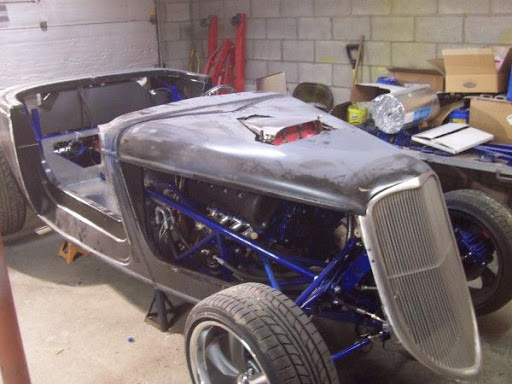
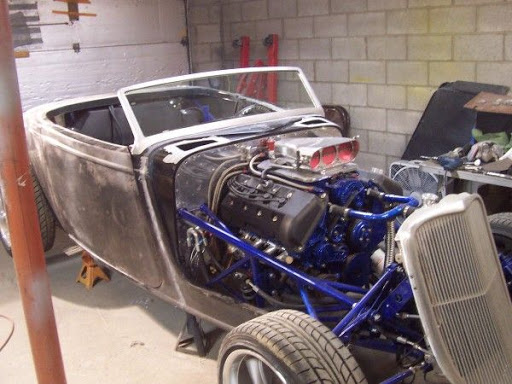
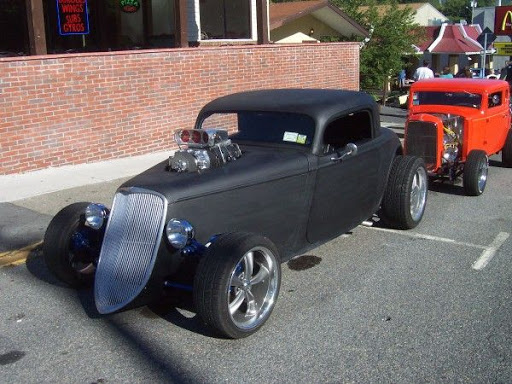
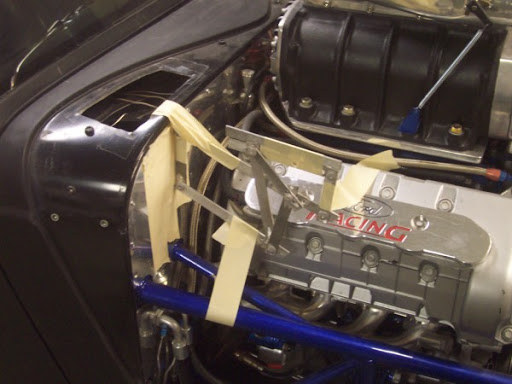
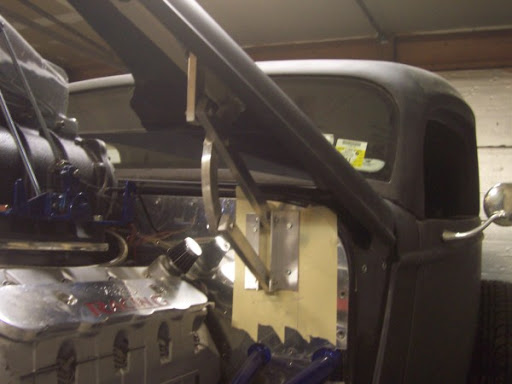
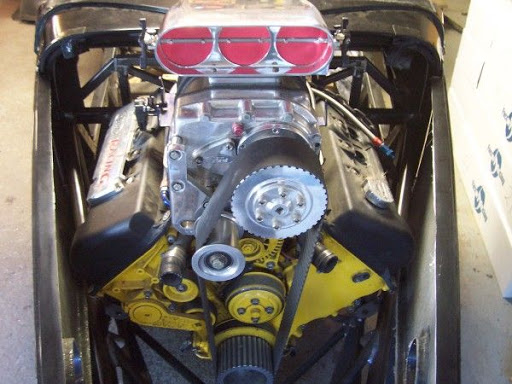
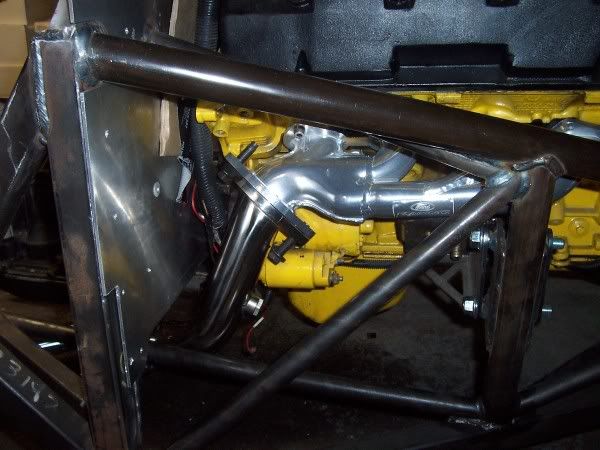
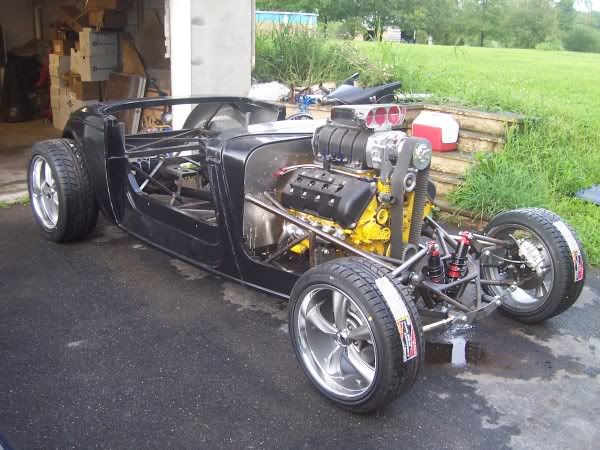
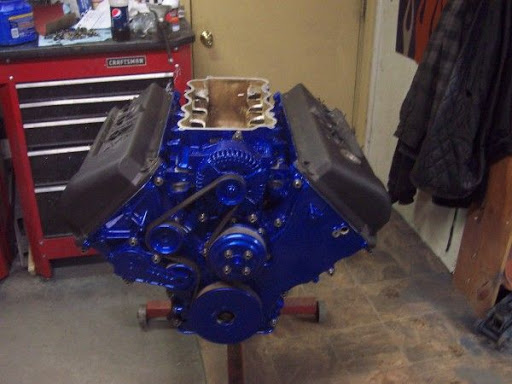
    I first installed the motor to get a feel for what things might not fit:

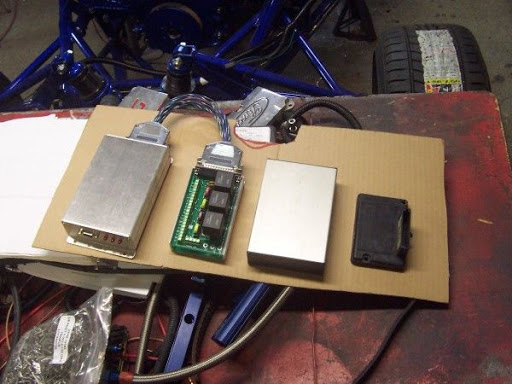
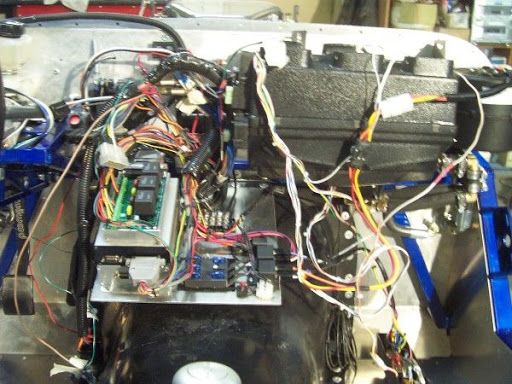
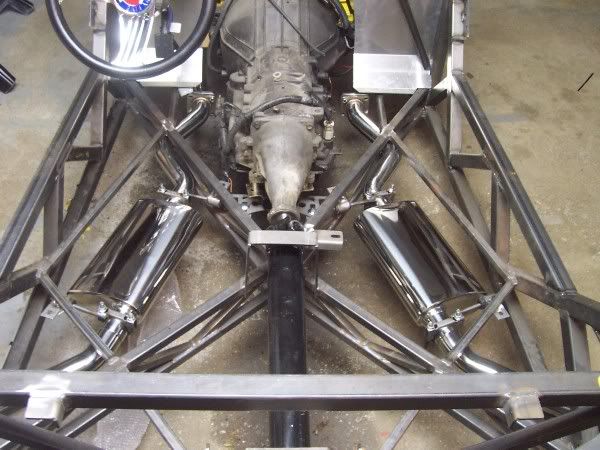
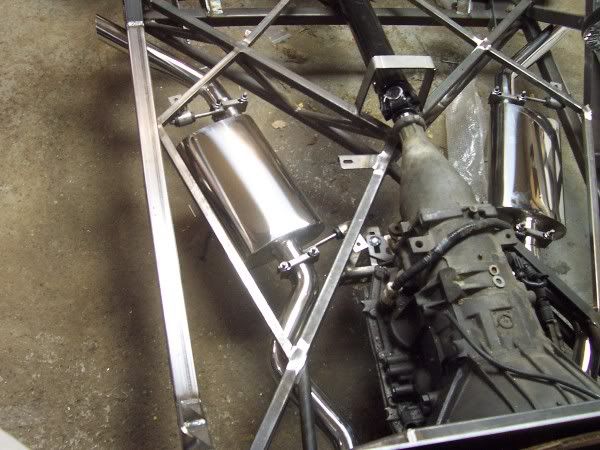
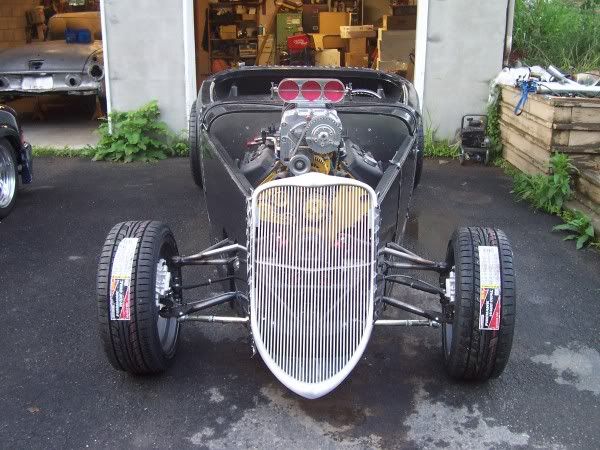
    I'm using a Mark VIII 4.6 DOHC with a custom blower and Megasquirt EFI and ignition system. The transmission is a 4R70W also from a Mark VIII. I'm using a Baumann aftermarket controller for the transmission. I had built this motor a couple years ago and ran it in another car. It's kind of unique so I wanted to use it for this build.


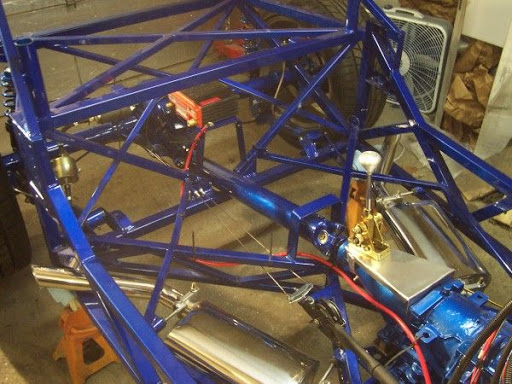
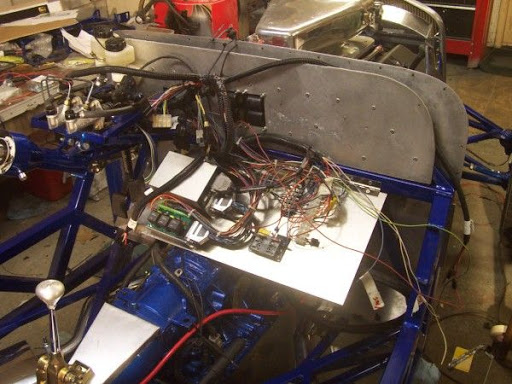
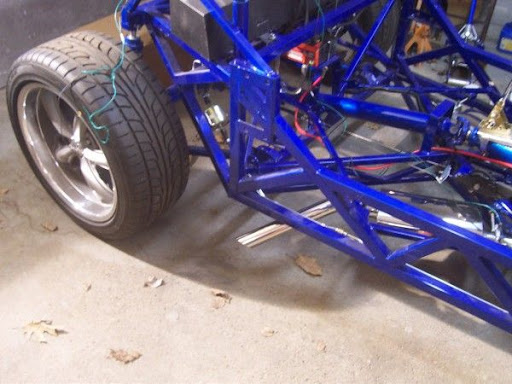
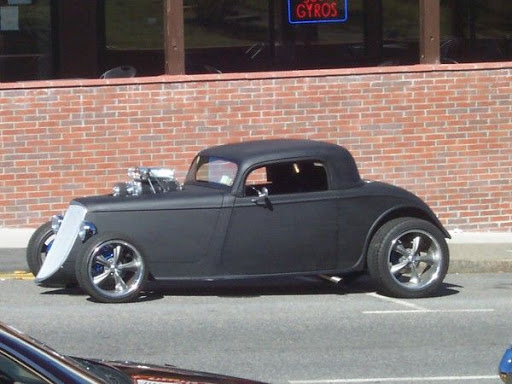
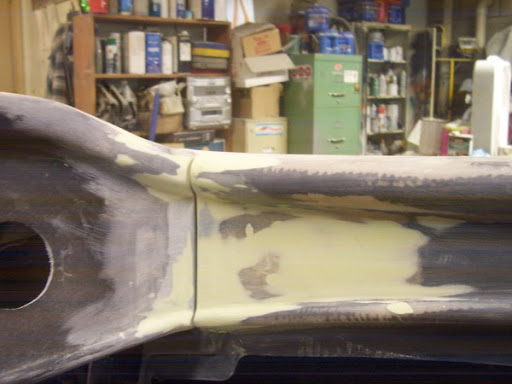
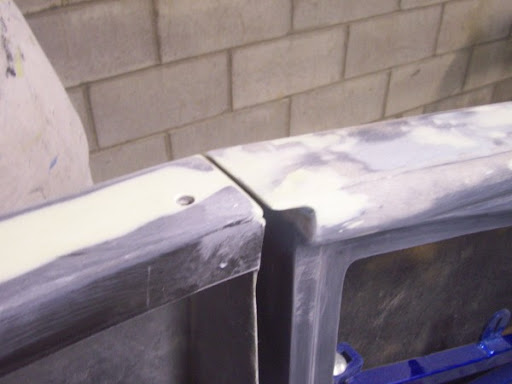
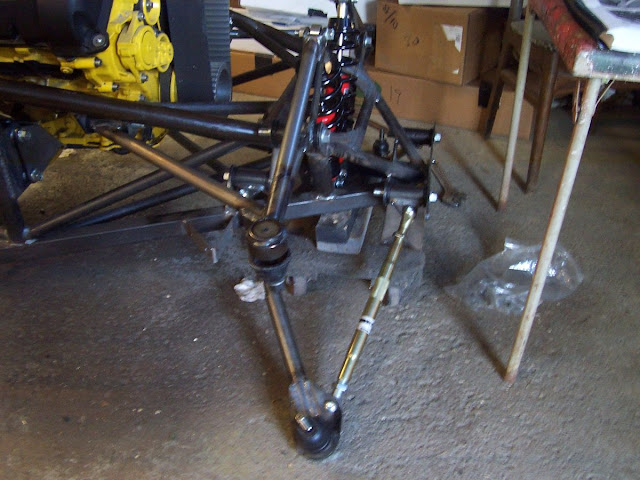
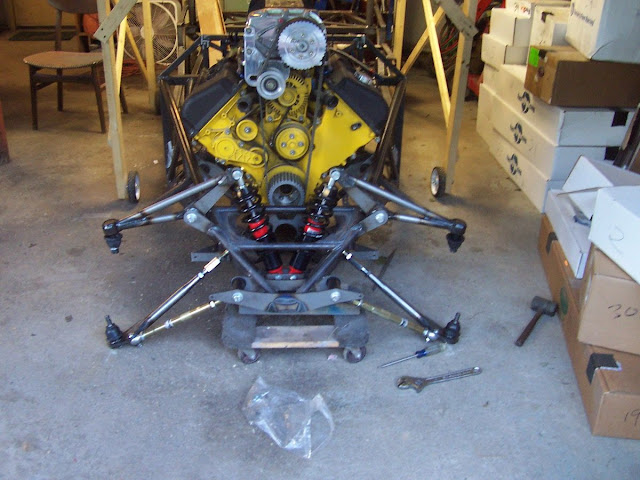
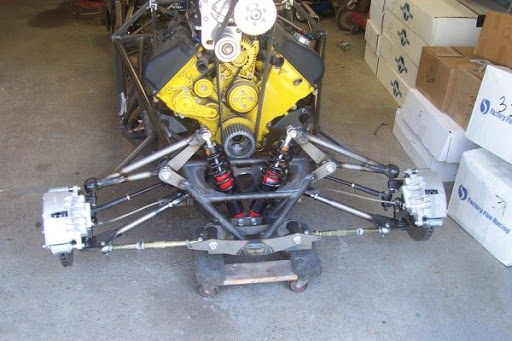
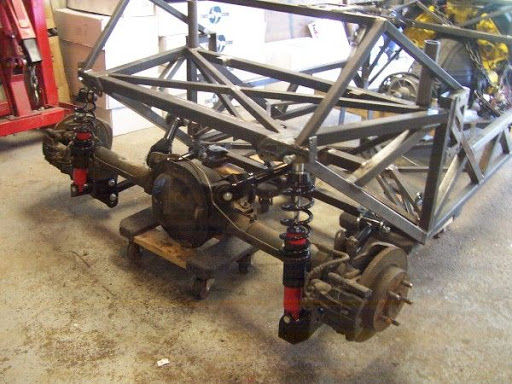
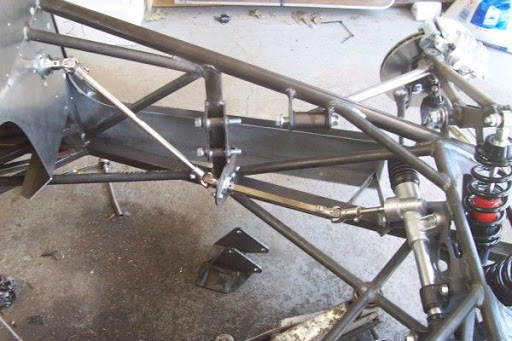
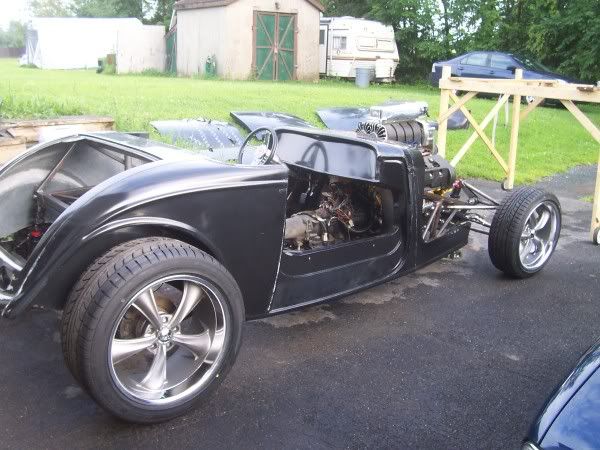
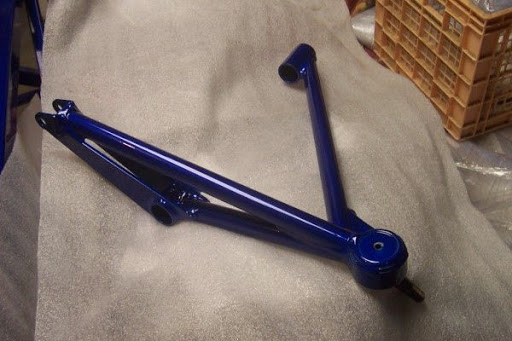
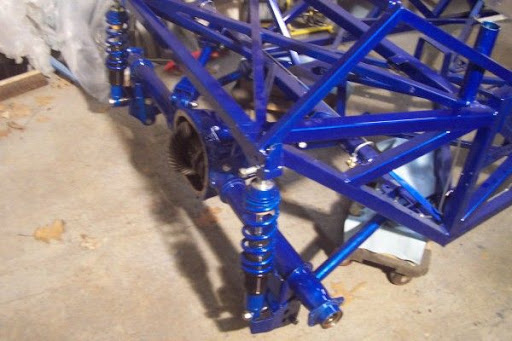
    I got the front suspension mocked up and the brake hardware installed.


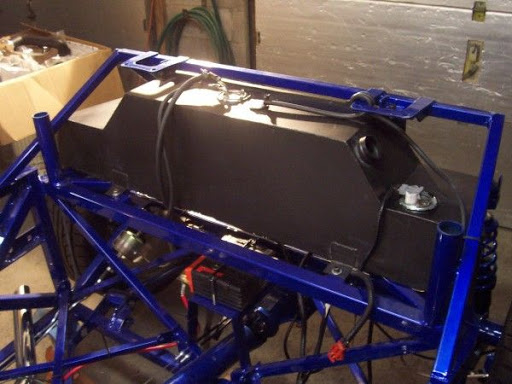
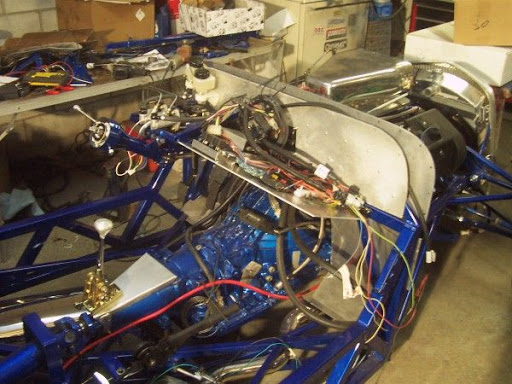
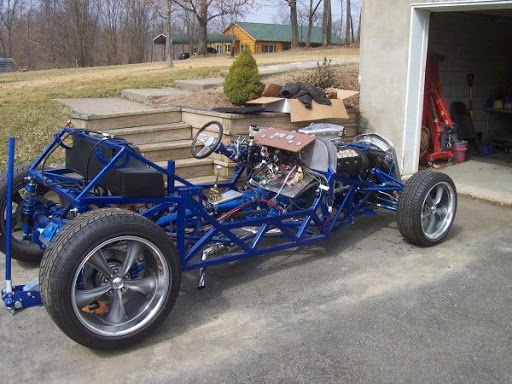
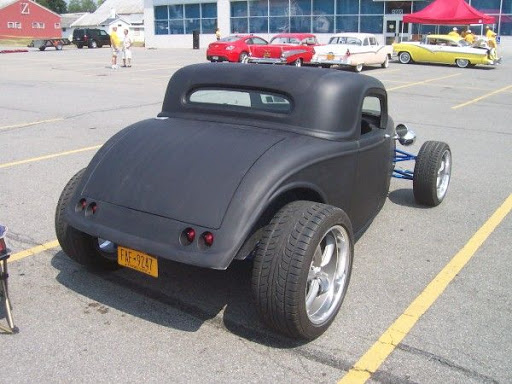
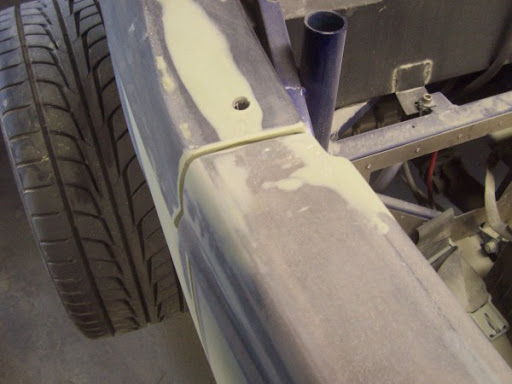
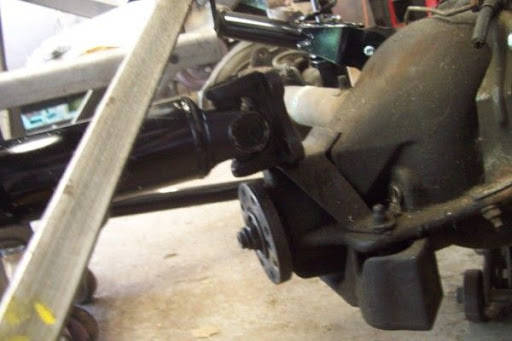
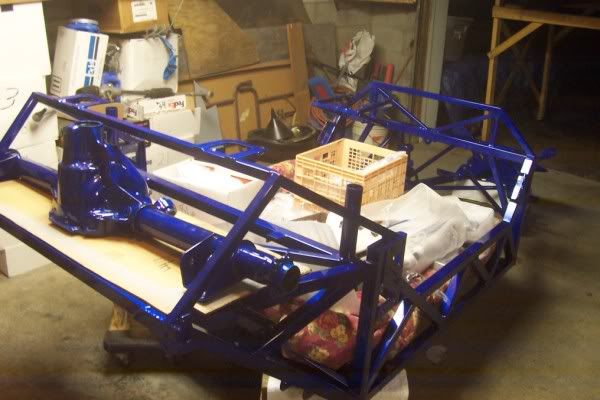
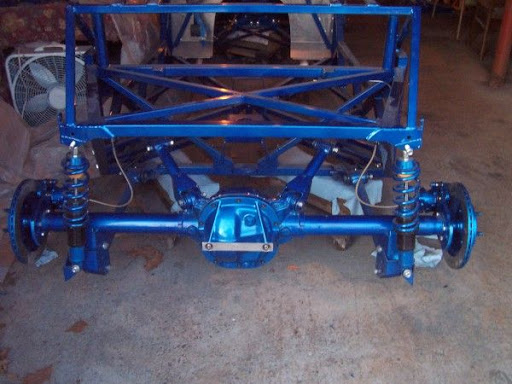
    I got the rear axle hung. It's from a '96 GT so it has the 5 lug axles, limited slip, 3.73 gears and disc brakes. One thing that became obvious after hanging the rear axle was there are a bunch of extra brackets for the optional three link welded to the frame and shock mounts. I think I will be cutting them off and or filling any extra holes just to clean it up a bit.


    Last edited by Arrowhead; 02-14-2011 at 09:50 AM.

  2. #2
    EFI Rules and Carbs Drool Arrowhead's Avatar
    Join Date
    Feb 2011
    Location
    Stillwater, NY
    Posts
    599
    Post Thanks / Like
    Of course to mock up the steering system, I had to install the firewall and foot boxes. I lined up the body and the firewall and trimmed and ground welds down (minimal) as necessary to have a good fit. I drilled all the holes in the aluminum, but only fastened with a few rivets as it will all come apart for paint anyway. But that set my alignment for the steering system.

    I got the steering rack, column, shafts and u joints mounted. The cad drawing in the manual for the steering shafts lists the corrected shaft lengths, but the shafts I got were still the original length. I cut the shafts to the specified length on the revised cad drawing and they lined up perfectly.


    I selected the AOD option for the transmission, but the FFR driveshaft needs to be shortened a bit. I also located an AOD tail shaft housing as the 4R70W in the Mark VIII uses a larger slip yoke.


  3. #3
    EFI Rules and Carbs Drool Arrowhead's Avatar
    Join Date
    Feb 2011
    Location
    Stillwater, NY
    Posts
    599
    Post Thanks / Like
    I've heard a lot of horror stories about fiberglass bodies that warped after being painted and driven a while. Since it's a good idea to post cure the glass body and FFR recommends it, I built a body buck that rolls over the top of the chassis. That way I can roll the body out when I'm working on the chassis and the body can get good exposure to the sun. Plus I can roll it indoors to protect it from any storms that pop up.


    Got the driveshaft shortened and installed. Have the brake lines mostly run. I got my headers the other day (thanks Max!) so I installed the exhaust tonight. I'm welding all my brackets on instead of rivet or screwing them. Just tacking them in for now, I'll go back and finish weld them, trim and smooth later.

    The exhaust is a work of art, very nice pieces. I think I want to run the exhaust out the back. Even though the LK setup is a great value, I think I want to try and do something different.


  4. #4
    EFI Rules and Carbs Drool Arrowhead's Avatar
    Join Date
    Feb 2011
    Location
    Stillwater, NY
    Posts
    599
    Post Thanks / Like
    I finally started my own build website. Never did a website before so it's pretty simple, but it serves the purpose. I will probably only post highlights here from now on, but you can check my build site for more info.

    http://sites.google.com/site/arrowheadshotrodsite/Home

    I picked up wheels at the Syracuse Nationals and I got tires mounted from Firestone. I put them on tonight and rolled it outside for a look.


    I taped the body panels on the get a feel for a completed hot rod.


  5. #5
    EFI Rules and Carbs Drool Arrowhead's Avatar
    Join Date
    Feb 2011
    Location
    Stillwater, NY
    Posts
    599
    Post Thanks / Like
    I was originally going to paint chassis and suspension, so I set off to media blast everything while the weather was nice in October. Well after about 1,000#'s of media and many hours, I can to the conclusion I might go powder coat instead. Partly for the durability, but mostly I needed to concentrate on the T bird project and I had already lost a few weeks working on it ( I need to get it out of my garage for the extra work space). The added time it would take to paint everything, I could be working on the T bird making money. So I dropped it all off at the coaters to get a price first and pick out a color. I went with a candy blue over silver which added a lot of expense, but came out real nice. There were 45 parts including front and rear suspension, rear axle, drive shaft, etc. plus the frame. I got some extra powder so I can do some small parts myself that weren't ready like the rear calipers and some small brackets. Basically, every metal part will be powder coated. (on the fence with the engine and transmission)

    Hopefully in another week or so the Tbird will be "flying south for the winter" and I can kick the 33 into high gear.


    I was very nervous about the upper control arms as they are readily seen and there are the issue with the permanent ball joints. They did a great job.


    I unwrapped all the small parts the other night. They did a really good job on the powder coating. I like to do everything myself, but I have no regrets with having the powder coating done instead of painting it myself. It's candy blue over silver.


  6. #6
    EFI Rules and Carbs Drool Arrowhead's Avatar
    Join Date
    Feb 2011
    Location
    Stillwater, NY
    Posts
    599
    Post Thanks / Like
    Things are moving along now. The T Bird project is out of my garage and I have the week off so I'm hoping to get a lot done.

    I've updated my site with a bunch of new pages, but I’ll post some pic here too.

    Polished and clear coated hardware


    Polished Firewall


    Polished footbox


    Fuel Lines


    Brake Lines


    Front Suspension


    Paint Test panels


  7. #7
    EFI Rules and Carbs Drool Arrowhead's Avatar
    Join Date
    Feb 2011
    Location
    Stillwater, NY
    Posts
    599
    Post Thanks / Like
    Had the last week off so I got to spend a lot of time in the garage. Got a lot done, but thought I would have gotten even further along.

    Painted parts that couldn't be powder coated (shocks, tie rod ends, steering rack)


    Assembled Rear axle


    Hung axle from frame


    Installed brakes w/ powder coated hubs and rotors


    Installed steering rack, shafts and joints


  8. #8
    EFI Rules and Carbs Drool Arrowhead's Avatar
    Join Date
    Feb 2011
    Location
    Stillwater, NY
    Posts
    599
    Post Thanks / Like
    Disassembled engine and inspected


    Got a lot done this month actually. Rear end buttoned up, just needs oil:


    Finished polishing firewall and coated with Everbrite spray on coating, supposed to be good for 5 years.


    The engine had a lot of carbon buildup, so I disassembled the heads for a good cleaning and new valve seals.


  9. #9
    EFI Rules and Carbs Drool Arrowhead's Avatar
    Join Date
    Feb 2011
    Location
    Stillwater, NY
    Posts
    599
    Post Thanks / Like
    The engine was in good shape, but I put in new rings, bearings, oil pump and of course replaced all 50 torque to yield head, main and rod bolts. No, I didn't go w/ ARP studs - that's another discussion. Finished up with epoxy / base coat / clear coat.


    I had intended on rebuilding the 4R70W from the Mark VIII, but all the information I was finding indicated that there are a lot of weak points in these transmissions that were corrected by later years. So I searched around and happened upon a smokin deal on a low mileage 4R from an '02 Mustang GT. So I snapped it up, threw a coat of paint on it and it should be good to go.


    Started dressing out the engine. not sure about the valve covers. I love the wrinkle powder coat, but it's kind of dark with the blue.


  10. #10
    EFI Rules and Carbs Drool Arrowhead's Avatar
    Join Date
    Feb 2011
    Location
    Stillwater, NY
    Posts
    599
    Post Thanks / Like
    Been playing around with colors for the body. I had an orange picked out, but it was a candy over silver that might be real difficult to spray. My body supply guy tried mixing up a base coat to match and it was way off. BUT, I think I like it better anyway.


    VERY rough rendering:


  11. #11
    EFI Rules and Carbs Drool Arrowhead's Avatar
    Join Date
    Feb 2011
    Location
    Stillwater, NY
    Posts
    599
    Post Thanks / Like
    Here is the Lokar shifter replacement selector shaft on the 4R70W transmission. It's a nice piece and allows lots of adjustment.


    "Bench" bleeding the brakes


    Engine/trans ready to go in


  12. #12
    EFI Rules and Carbs Drool Arrowhead's Avatar
    Join Date
    Feb 2011
    Location
    Stillwater, NY
    Posts
    599
    Post Thanks / Like
    Had some of the local FFR Cobra guys interested in seeing the '33 in progress. so I setup a "garage night" and bunch came over. Figured with all the hands, we could set the drive train in place.

    Thanks to everyone for lending a hand.


    Just had to throw the wheels on and take a look.


  13. #13
    EFI Rules and Carbs Drool Arrowhead's Avatar
    Join Date
    Feb 2011
    Location
    Stillwater, NY
    Posts
    599
    Post Thanks / Like
    Got the exhaust installed last night. Man, it's a pretty tight fit. I'm surprised there have been no complaints of the pipes hitting the frame, I mean the engine is going to twist a little in the mounts under aggressive driving conditions - guess I'll find out.

    Wasn't sure what to do about the hangers and ubolts. I just powder coated them silver except the threads and nuts.

    I'm planning on running the exhaust out the back, but I’m running out the side for now for testing purposes. (Unless I get lazy and it might just stay that way )


    I took a couple days at the kitchen table assembling the Megasquirt computer. Got everything put together including the relay panel and harness. It was actually easier to setup the laptop with the manual right there instead of printing the pages. This is about halfway point.


    Now the trick is to fit everything.


  14. #14
    EFI Rules and Carbs Drool Arrowhead's Avatar
    Join Date
    Feb 2011
    Location
    Stillwater, NY
    Posts
    599
    Post Thanks / Like
    I got the emergency brake cables and lever installed. Also made up a mount for the shifter and installed it.


    I had mounted the ignition coils on the back of the firewall thinking I had plenty of room. But the more I thought about it, I really want to have room for a heat and A/C unit. Plus the wires were just to bulky to run though the tunnel. I have been playing with this for the last couple days and since found a better solution. I mounted them to the front of the fire wall, but recessed so there would be enough room.


    I relocated the coils to the front of the firewall, but recessed them so I had more room in the engine compartment. Still a tight fit, I'll probably upgrade to coil on plug at some point, but this will get me going.


    The Lokar shifter comes with a new shift shaft and an ajustable lever. The problem is it goes on the outside of the selector switch and has to be mounted in the up position. This takes away from leg room quite a bit.


    I didn't like how far it stuck out so I flipped the Selector switch upside down and modified the mounting holes a bit for the bolts. Then I was able to bend the selector lever over quite a bit which opens up my leg room a lot.


    Engine harness roughed in.


  15. #15
    EFI Rules and Carbs Drool Arrowhead's Avatar
    Join Date
    Feb 2011
    Location
    Stillwater, NY
    Posts
    599
    Post Thanks / Like
    Fuel lines run


    Fuel tank final installed (except filler, which I think I'm going to put on the outside of the body)


    New horn button


    Radiator/grille installed temporarily, it will have to come apart for the a/c condenser to be installed. Scoop is just sitting there, I have to do some modifications before I can bolt it down. Going to remote locate the TPS to keep the engine compartment clean.


    I spent some late nights this week working on the wiring. I mounted a flip down panel for the computers and junction blocks. This will fold up even with the dash (There’s nothing I hate more than working on wiring under a dash) I still have some "loose ends" ha ha because I'm waiting for the heat & A/C unit to show up in case I have to move something.

    Everything dry tested good, the engine and transmission computers are communicating with the laptop and all the sensors are operating as they should.


  16. #16
    EFI Rules and Carbs Drool Arrowhead's Avatar
    Join Date
    Feb 2011
    Location
    Stillwater, NY
    Posts
    599
    Post Thanks / Like
    I rerouted my exhaust under the frame and out the side just to see how it looks. I think this is a viable alternative until I fabricate a rear exit exhaust, plus there are no holes in the body to deal with.

    As a side note, I took the pipes off last week and flattened them down a little where they go through the frame. I just put them in a vise with a towel wrapped around them and they compressed pretty easy.


    I fabricated a bell crank for my throttle linkage today. Nothing is final, but it's hooked up and works good.


    Had another nice day today so I rolled the chassis outside to run it a while and check everything out.


  17. #17
    EFI Rules and Carbs Drool Arrowhead's Avatar
    Join Date
    Feb 2011
    Location
    Stillwater, NY
    Posts
    599
    Post Thanks / Like
    Here's a little better video of it running:

    <object style="height: 344px; width: 425px"><param name="movie" value="http://www.youtube.com/v/yxZSSwFJxxI"><param name="allowFullScreen" value="true"><param name="allowScriptAccess" value="always"><embed src="http://www.youtube.com/v/yxZSSwFJxxI" type="application/x-shockwave-flash" allowfullscreen="true" allowScriptAccess="always" width="425" height="344"></object>


    I know I posted my test drive on another thread, but i'll repost it here to keep my build thread up to date:

    <object width="480" height="385"><param name="movie" value="http://www.youtube.com/v/_cm3Vsbtbcg&hl=en_US&fs=1&"></param><param name="allowFullScreen" value="true"></param><param name="allowscriptaccess" value="always"></param><embed src="http://www.youtube.com/v/_cm3Vsbtbcg&hl=en_US&fs=1&" type="application/x-shockwave-flash" allowscriptaccess="always" allowfullscreen="true" width="480" height="385"></embed></object>

  18. #18
    EFI Rules and Carbs Drool Arrowhead's Avatar
    Join Date
    Feb 2011
    Location
    Stillwater, NY
    Posts
    599
    Post Thanks / Like
    I got the floors and tunnel installed. My kids lent a hand drilling and riviting the floors.


    I had to make some modifications to the tunnel. Since I'm using a 4R70W, it's a little bigger than what the transmission tunnel was designed for. I just kept trimming the tunnel till it fit good and then fiber glassed in some bump outs where there were parts sticking out like the shifter. I also dished in the area by the throttle get more foot room.


  19. #19
    EFI Rules and Carbs Drool Arrowhead's Avatar
    Join Date
    Feb 2011
    Location
    Stillwater, NY
    Posts
    599
    Post Thanks / Like
    I thought I had it figured out, but after I got the A/C unit and installed it, the fold down electrical panel wouldn't fold up, it was hitting. i cut the panel to fit and rewired the harness.


    The condenser mounting was pretty tricky. I have to put 1/2" spacers to move grille away from the radiator to have enough room for the condenser.


  20. #20
    EFI Rules and Carbs Drool Arrowhead's Avatar
    Join Date
    Feb 2011
    Location
    Stillwater, NY
    Posts
    599
    Post Thanks / Like
    Installed the body to start aligning the panels


    Got the passenger door installed so I rolled it out side take a look. This is first time I've seen it with the hardtop on with the body on the chassis.


    Fitted the roadster windshield.


    I decided to install the gas fill on the rear deck instead of inside the trunk. It looks cleaner with it hidden away in the trunk, but there have been problems with the tanks slow filling that way unless you do major modifications to the tank. This way I don't have to worry about water getting in the trunk if it's raining and it should fill pretty quick because it's not going uphill.


  21. #21
    EFI Rules and Carbs Drool Arrowhead's Avatar
    Join Date
    Feb 2011
    Location
    Stillwater, NY
    Posts
    599
    Post Thanks / Like
    Installed the gauges and A/C vents in the dash.


    I got everything mounted for my DMV pictures (bumpers, wiper, mirrors, backup light, visors, license plate light, etc.) Had to add a couple of front directional as FFR couldn't provide me with any SAE numbers for the built in ones.


    Well after a 3 month detour, I have actually gotten back to having fun working on the hot rod. I don't want to clog this build thread down with the saga, but here are the threads recounting the travesty of loosing the engine to DMV:

    http://ffcars.com/forums/showthread.php?t=249351

    http://ffcars.com/forums/showthread.php?t=250888

    http://ffcars.com/forums/showthread.php?t=252748

  22. #22
    EFI Rules and Carbs Drool Arrowhead's Avatar
    Join Date
    Feb 2011
    Location
    Stillwater, NY
    Posts
    599
    Post Thanks / Like
    One of the things I was on the fence about was the truck lid, the curvature just wasn't right. It didn't meet the bottom of the bottom of the opening correctly and the latch attachment was weak.


    I took the trunk lid and made some cuts to the inner shell so it would flex better. I used some tie downs to hold the curvature in place and adjust it to where I wanted it and then fiber glassed the cuts. Now the lid fits perfect and will need minimal filler work. I also fiber glassed in a length of 3/8" square tubing to the back side of the lower trunk. This helps stiffens where the latch attaches and was also able to pull that area in a bit so it meets the trunk lid better.


    Make sure you have the trunk seal installed before you do anything, it makes a huge difference how it lines up.


  23. #23
    EFI Rules and Carbs Drool Arrowhead's Avatar
    Join Date
    Feb 2011
    Location
    Stillwater, NY
    Posts
    599
    Post Thanks / Like
    I'm using early Corvette tail lights, so I cut away the old recesses, glassed over the holes and made recesses for the new lights with paint cans.


    Old light sockets cut out and backed up with cardboard and wax paper


    First of three fiberglass layers


    Holes cut for paint cans and bonded in place front and back


    Excess cut away and lenses mocked up


    Got the bodywork around the tail lights in fair shape and spayed some rattle can flat just to cover the filler work. Finished off with the LED lights.


  24. #24
    EFI Rules and Carbs Drool Arrowhead's Avatar
    Join Date
    Feb 2011
    Location
    Stillwater, NY
    Posts
    599
    Post Thanks / Like
    Got to do some cruisin in the hot rod. Took it to a big cruise last Monday night, over 1,000 cars show up every month. Had a great time and had a lot of interest in the car. Maybe have the blower on it for next month????


    I lost a bunch of custom parts with the DMV fiasco for the blower setup, so I've had to reacquire and custom make the parts again. I have just about everything I need now. It's not ready yet, probably another week or so, but here's a sneak peek of the drivers view with hard top on. It actually doesn't stick up as high as I thought it would.


    I've had the blower on for a couple weeks and got some of the bugs worked out. Still have a lot of work to finish the car, but it's drivable and I have about 500 miles on it. It's to the point where I can jump in and go.


    I drove it Fri & Sat about 45 miles each way to the Adirondack Nationals in Lake George NY. Beautiful setting and lots of cars and people. I'm probably not going to do much more to it for a while. I have another car to work on until I can get back to work on the '33. Body work and paint and lots of little detail stuff left to do. Hopefully it will be really done by next summer so I can enjoy it.


  25. #25
    Moderator
    Join Date
    Feb 2011
    Location
    Milton,DE
    Posts
    656
    Post Thanks / Like
    Great job in posting your build.

    Olli

  26. #26
    33 Hot Rod Builder geoffav's Avatar
    Join Date
    Feb 2011
    Location
    Enterprise, AL
    Posts
    458
    Post Thanks / Like
    Haha, I remember the temp bumper posts. That was sad and funny at once.

    Good start George. What's the story behind "Arrowhead"???

  27. #27
    Cobra Driver UpstateCobraGuy's Avatar
    Join Date
    Feb 2011
    Location
    East Greenbush, NY
    Posts
    212
    Post Thanks / Like
    Quote Originally Posted by geoffav View Post
    Haha, I remember the temp bumper posts. That was sad and funny at once.

    Good start George. What's the story behind "Arrowhead"???
    He's a HUGE Kansas City Chief's Fan!!!
    Mark III 4630RD Explorer 302, Holley SA570, FRPP B-cam, 4 to 4's, 3 Link, Bullitt wheels, Baer Brakes, 3.73 gears, HD T-5, I2 wiring, Koni Coilovers, Classic Gauges. Jaguar Racing Green w/ Silver stripes

    PM me if you live in Upstate New York. Get added to the "Upstate Cobras" email list. 60+ members!

  28. #28
    EFI Rules and Carbs Drool Arrowhead's Avatar
    Join Date
    Feb 2011
    Location
    Stillwater, NY
    Posts
    599
    Post Thanks / Like
    Quote Originally Posted by geoffav View Post
    Haha, I remember the temp bumper posts. That was sad and funny at once.

    Good start George. What's the story behind "Arrowhead"???
    Actually I've had a lot of hobbies over the years like ATV's, snowmobiles, archery and I had different handles for each. I got Arrowhead on the archery forum and decided I'd let it stick no matter what forum I was on. Unless your on an archery forum, not many people use Arrowhead

  29. #29
    EFI Rules and Carbs Drool Arrowhead's Avatar
    Join Date
    Feb 2011
    Location
    Stillwater, NY
    Posts
    599
    Post Thanks / Like
    Quote Originally Posted by UpstateCobraGuy View Post
    He's a HUGE Kansas City Chief's Fan!!!
    Ugh! I thought you new I was a sport illiterate?

  30. #30
    33 Hot Rod Builder geoffav's Avatar
    Join Date
    Feb 2011
    Location
    Enterprise, AL
    Posts
    458
    Post Thanks / Like
    Quote Originally Posted by Arrowhead View Post
    Actually I've had a lot of hobbies over the years like ATV's, snowmobiles, archery and I had different handles for each. I got Arrowhead on the archery forum and decided I'd let it stick no matter what forum I was on. Unless your on an archery forum, not many people use Arrowhead
    I'm glad it won't something embarrassing.

  31. #31
    Cobra Driver UpstateCobraGuy's Avatar
    Join Date
    Feb 2011
    Location
    East Greenbush, NY
    Posts
    212
    Post Thanks / Like
    Quote Originally Posted by Arrowhead View Post
    Ugh! I thought you new I was a sport illiterate?
    I kid because I care!!!
    Mark III 4630RD Explorer 302, Holley SA570, FRPP B-cam, 4 to 4's, 3 Link, Bullitt wheels, Baer Brakes, 3.73 gears, HD T-5, I2 wiring, Koni Coilovers, Classic Gauges. Jaguar Racing Green w/ Silver stripes

    PM me if you live in Upstate New York. Get added to the "Upstate Cobras" email list. 60+ members!

  32. #32
    33 Hot Rod Builder geoffav's Avatar
    Join Date
    Feb 2011
    Location
    Enterprise, AL
    Posts
    458
    Post Thanks / Like
    Quote Originally Posted by UpstateCobraGuy View Post
    I kid because I care!!!
    Well actually if it had been something embarrassing that would have been funnier. I care too.

  33. #33
    EFI Rules and Carbs Drool Arrowhead's Avatar
    Join Date
    Feb 2011
    Location
    Stillwater, NY
    Posts
    599
    Post Thanks / Like
    Well I finally finished up the Thunderbird I was working on for my friend. It took a bit longer than I thought, but it turned out really good and we were both very happy with it. So now the hot rod is back in the garage and I've started to do some body work. It's already the end of April so there's not much time to get every thing done I wanted to. It would be nice to have it painted by summer though but it's not looking good.


    One of the issues I have is the Factory Five hood hinge design wouldn't work with the super charger sticking through the hood. The hood slides forward several inches and then flips forward. Theres not enough room under the cowl area to do a regular type hinge setup, so I have been thinking of a hinge that would attach to the firewall. I came up with an articulating hinge setup that allows it to swing up and away. It works pretty good, but it was a lot of work to get the hood reinforced to handle the stress - especially with the giant hole in it. I origianlly started w/ strips of cardboard and stick pins on the kitchen table just to see how a hinge like this would work. Then I made a mockup out of paint stir sticks with lots of holes in them and used rivets as hinge pins. That allowed me to switch the pivot points around until I got the hinge action I needed.


    Then I made prototype out of some scrap aluminum just to verify the pivot points before I made the final product.


    Last edited by Arrowhead; 06-02-2011 at 10:09 PM.

  34. #34
    EFI Rules and Carbs Drool Arrowhead's Avatar
    Join Date
    Feb 2011
    Location
    Stillwater, NY
    Posts
    599
    Post Thanks / Like
    I got aluminum bar stock, angle, shoulder bolts and spacers. The curved piece I hogged out of a chunk of 1/2" aluminum I had laying around.


    I added mounts to the frame to anchor the struts. It works pretty good but it took a lot work.

    <object style="height: 390px; width: 640px"><param name="movie" value="http://www.youtube.com/v/1HftniNR3JM?version=3"><param name="allowFullScreen" value="true"><param name="allowScriptAccess" value="always"><embed src="http://www.youtube.com/v/1HftniNR3JM?version=3" type="application/x-shockwave-flash" allowfullscreen="true" allowScriptAccess="always" width="640" height="390"></object>

  35. #35
    EFI Rules and Carbs Drool Arrowhead's Avatar
    Join Date
    Feb 2011
    Location
    Stillwater, NY
    Posts
    599
    Post Thanks / Like
    When I had bolted on the roadster windshield and then hardtop, I noticed the cowl was being warped becuase the bottom of the hard top and the roadster windshield frame weren't the same curvature as the cowl. This could lead to cracking of the fiberglass as there would be stress on the fiberglass where the bolts were. Also, you could see the top of the cowl was "dished" between the bolts because of the stress. I had to do some reshaping anyway beciuse of the hood modifications, so I built up the area w/ duraglass. I didn't want it super thick, so I spent a lot of time shaping the hardtop so it fit as tight as possible before adding filler. It was pretty tricky as the shape of the hardtop and the aluminum windshield frame are a little different. If I got the hard top to fit good, the roadster frame was off and vice versa. I finally got it narrowed down to where they both fit very good and here will be no distortion when I bolt either of them on. This how they sit in thier natural state without tightening the nuts on the studs.


  36. #36
    EFI Rules and Carbs Drool Arrowhead's Avatar
    Join Date
    Feb 2011
    Location
    Stillwater, NY
    Posts
    599
    Post Thanks / Like
    Been working a lot on the bodywork, big push to hopefully get the bodywork and paint done before summer is over.

    Even though the exterior bodyline lines up perfectly, the area where the door and cowl meet need some work - on both doors.


    I had solved my grille/sidepanel/hood alignment problems a little different than most. I pie sliced the leg of the body and brought it up to where the other panels were sitting. A little fiberglass and it saved me a lot of fooling around w/ the side panels and nose cone.


    I've spent some time getting the gaps around the grille as consistent as possible.


    Last year I was kind of hasty in getting everything put together as I had lost 3 months because of the DMV hassle. So I needed to go back and tighten up some of the panel gaps.


  37. #37
    EFI Rules and Carbs Drool Arrowhead's Avatar
    Join Date
    Feb 2011
    Location
    Stillwater, NY
    Posts
    599
    Post Thanks / Like
    Better now


    I thought the panels were pretty good until I really started to feel them and I was noticing a lot of highs and lows. The doors in particular are not curved very smoothly from top to bottom around middle.


    I've tried to make the transitions from the door to the body nice and smooth. I had to feather the transitions quite a ways to make them flow. The curvature of the doors and the body don't always match either so that helps. The area around the wheel wells was pretty lumpy also


    The trunk also needed a lot of smoothing


  38. #38
    EFI Rules and Carbs Drool Arrowhead's Avatar
    Join Date
    Feb 2011
    Location
    Stillwater, NY
    Posts
    599
    Post Thanks / Like
    I reconfigured the transition from the doors to the cowl so they line up better. It was a lot of work because there are no straight edges and it's hard to block sand. I also filled in the holes I had made for the inside door handles since they didn't work very good and I have a different idea for the interior door handles.


    I also finished off the rear of the doors a little different so there is a smoother thansition from the door to the jamb.


    Since the top of the doors and the cowl didn't line up very well, I had to reform that area too.


  39. #39
    EFI Rules and Carbs Drool Arrowhead's Avatar
    Join Date
    Feb 2011
    Location
    Stillwater, NY
    Posts
    599
    Post Thanks / Like
    Finally got the body off the chassis. My son helped me out and reconfigured the cart so it would hold the body up in the air without anything sticking out on the sides.


    This is the first time I've ssen the completed chassis with the blower on the engine. It's pretty dusty but it will clean up fine with the pressure washer.


    I finally got to a point where I could shoot some primer. I didn't have all the panels ready, but I needed a break from doing filler work.


  40. #40
    EFI Rules and Carbs Drool Arrowhead's Avatar
    Join Date
    Feb 2011
    Location
    Stillwater, NY
    Posts
    599
    Post Thanks / Like
    I've spent a lot of time on the hood reinforcing it and making it work with the firewall mounted hinges. The unerside took a bit of smoothing because of that.


Page 1 of 3 123 LastLast

Posting Permissions

  • You may not post new threads
  • You may not post replies
  • You may not post attachments
  • You may not edit your posts
  •  

Replica Parts

Visit our community sponsor