BluePrint Engines

Visit our community sponsor

Thanks Thanks:  0
Likes Likes:  0
Page 2 of 3 FirstFirst 123 LastLast
Results 41 to 80 of 104

Thread: Arrowhead's 33' Hot Rod Build

  1. #41
    EFI Rules and Carbs Drool Arrowhead's Avatar
    Join Date
    Feb 2011
    Location
    Stillwater, NY
    Posts
    599
    Post Thanks / Like
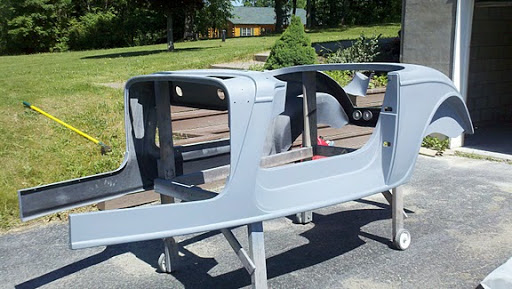
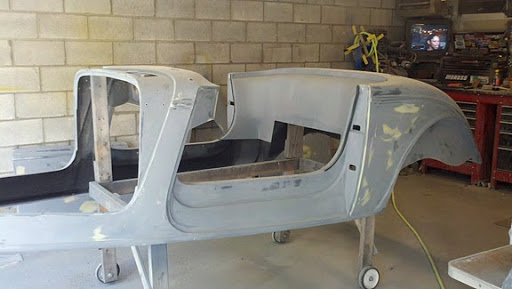
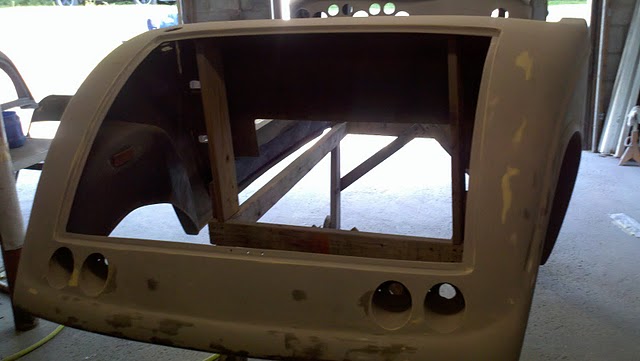
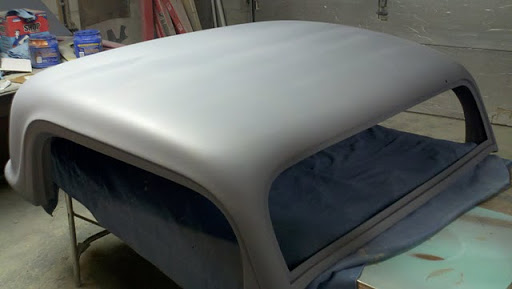
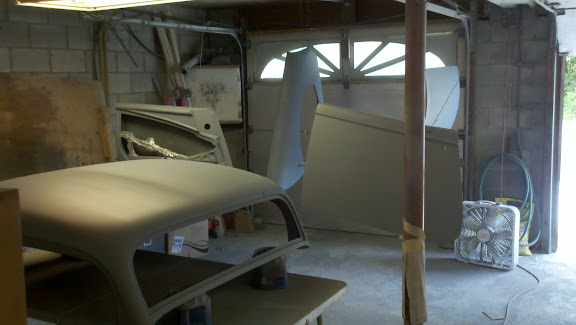
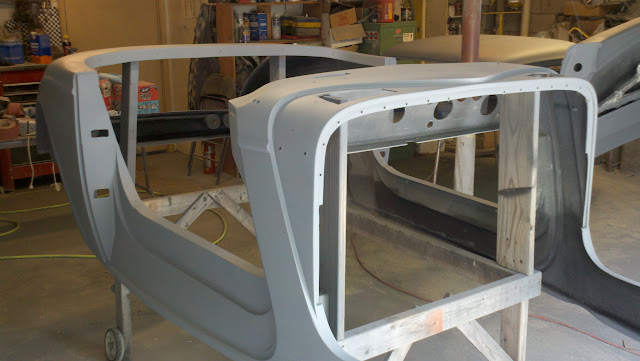
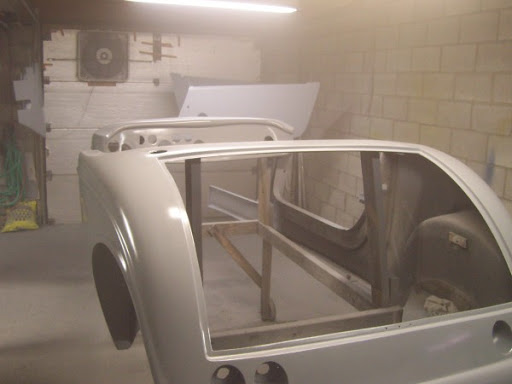
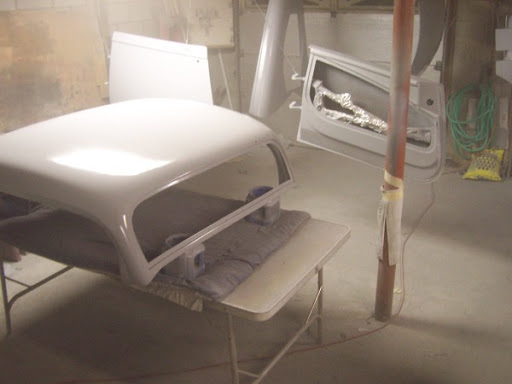
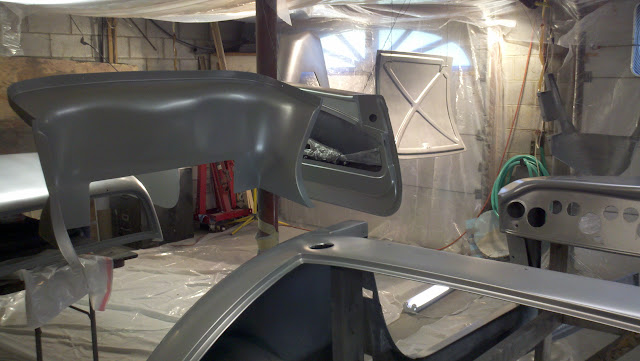
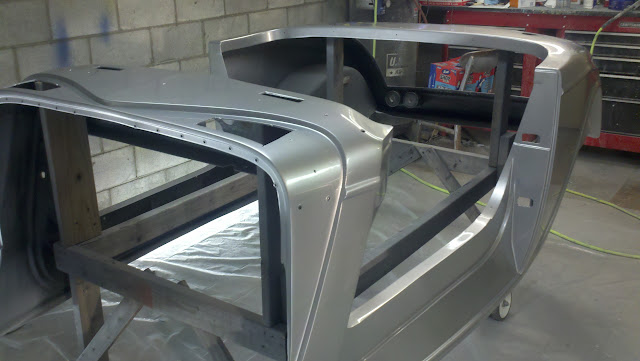
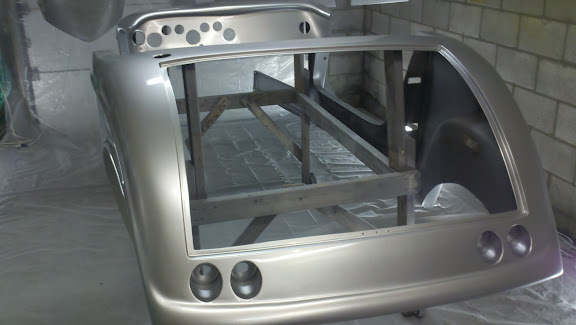
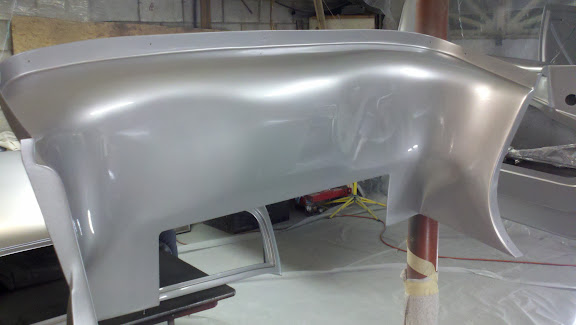
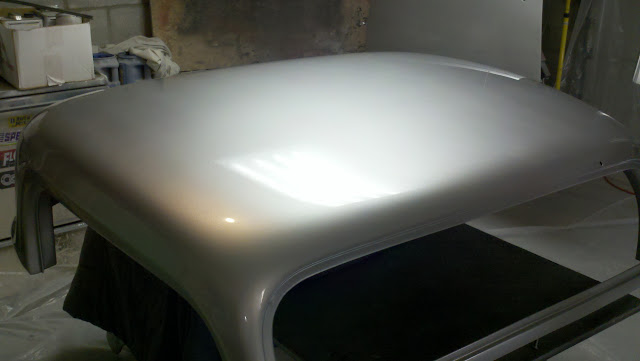
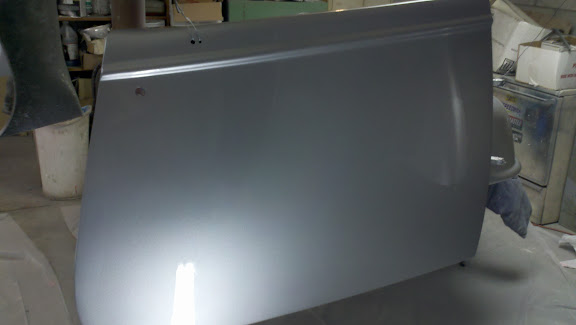
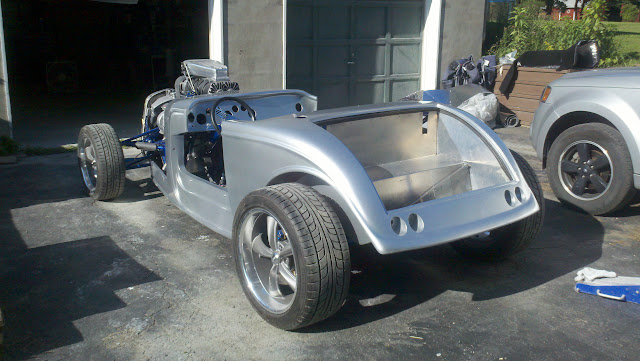
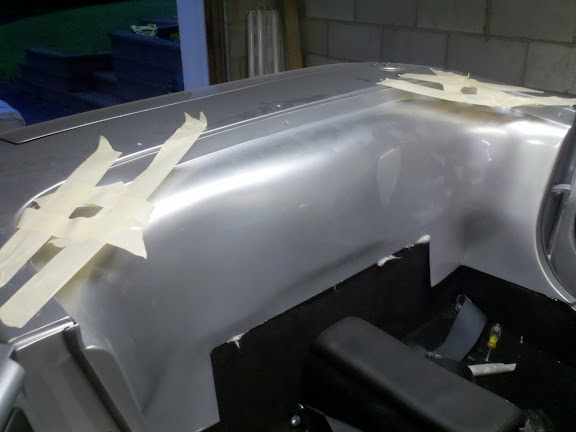
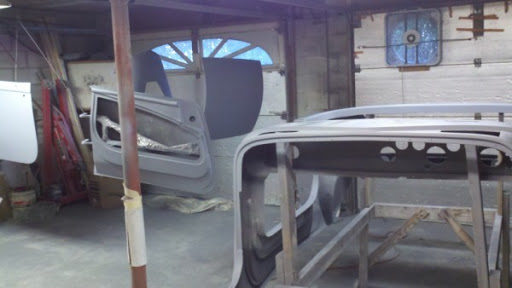
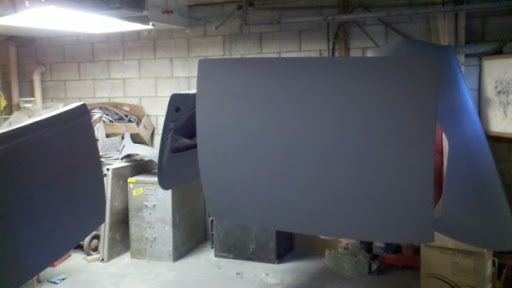
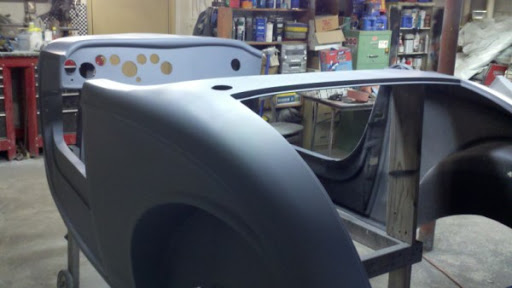
    I spent a lot of tim getting the filler work blocked pretty smooth so hopefully the primer blocking will go well. I put on three good coats of high build primer so there should be enough on there to get it nice and smooth.


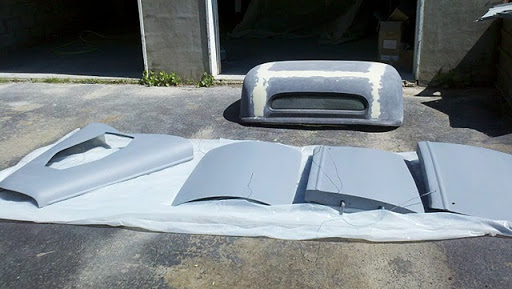
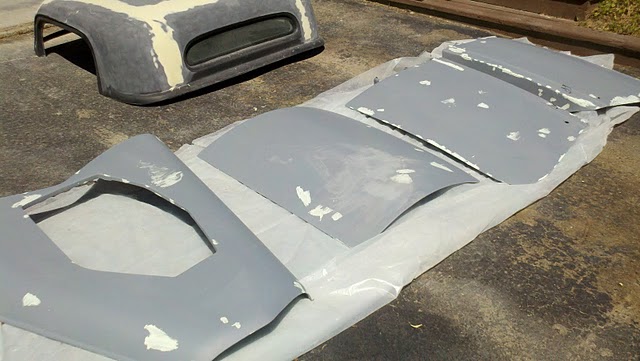
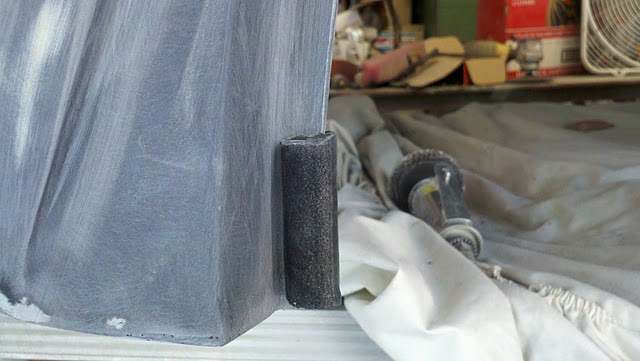
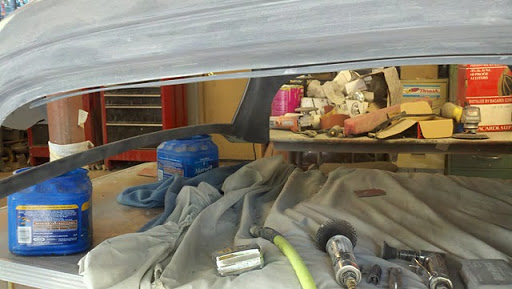
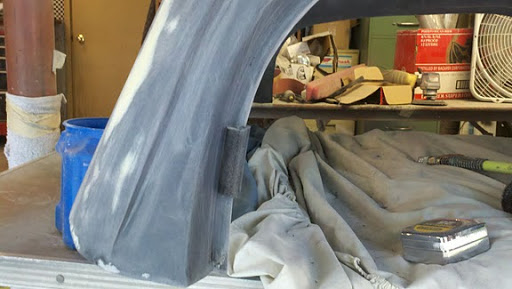
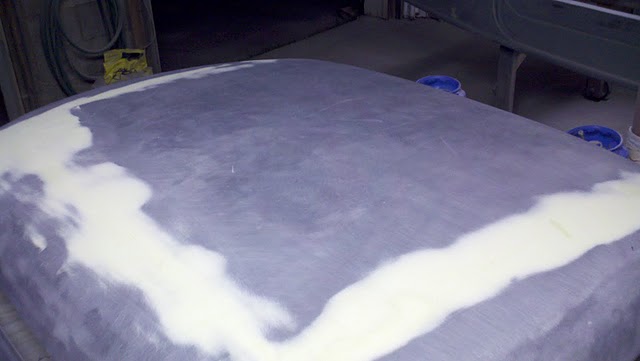
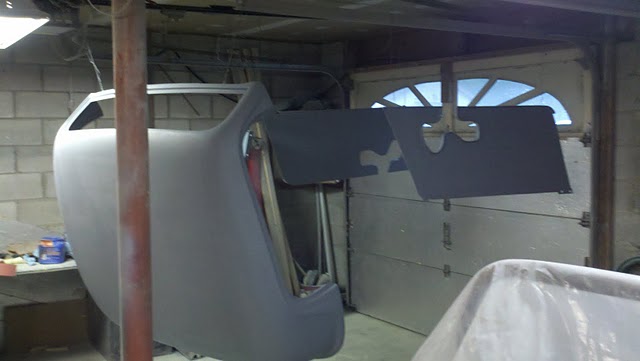
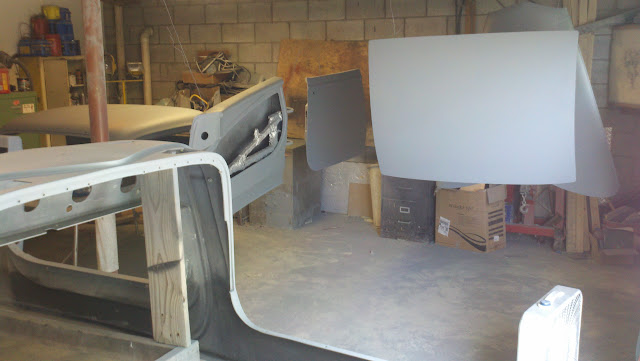
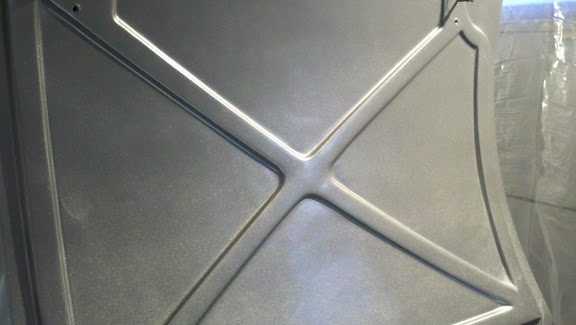
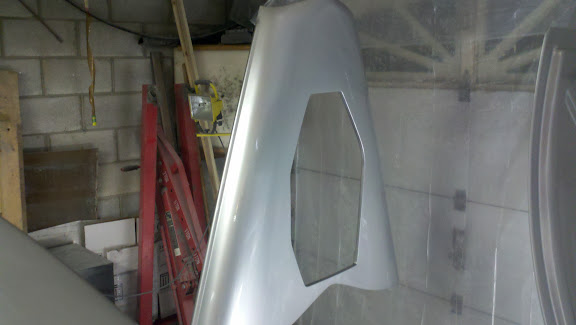
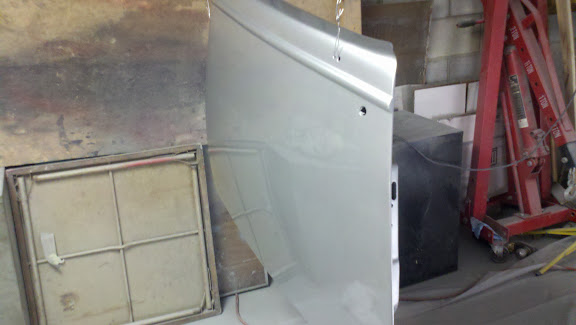
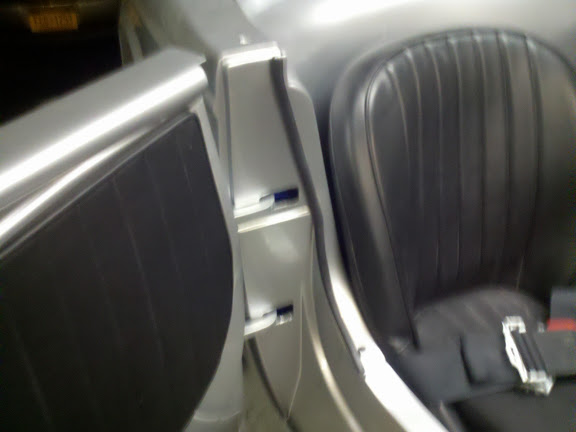
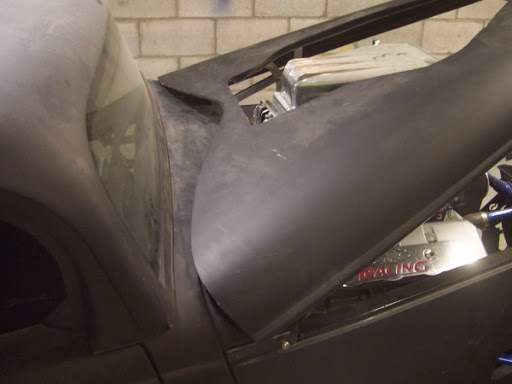
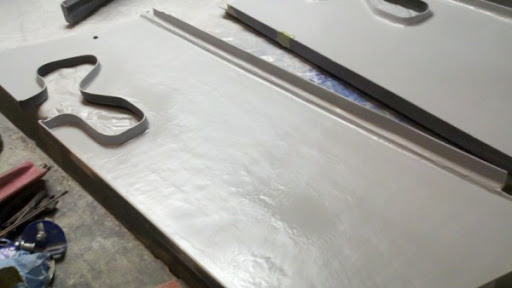
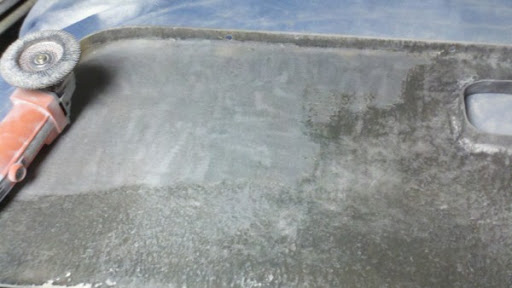
    One thing that disturbs me is the rough finish on the inside of the side panels. I know no one will see it, but I just don't like rough finish of the backside of the fiberglass. So I thought I'd try an experiment. I ground down the surface w/ a flap wheel. Not too much, just to knock off the high spots and the fiberglass pattern. Then I sprayed a few heavy coats of slick sand. I let that cure and see how it sands and if it's comes out smooth enough, I'll paint the backsides bodycolor.


  2. #42
    Moderator
    Join Date
    Feb 2011
    Location
    Milton,DE
    Posts
    656
    Post Thanks / Like
    You can spray some 3M rocker guard to cover the fiberglass texture. Then spray your color/clear. Trust me, it looks good on the visble back sides of the panels.

    Olli

  3. #43
    EFI Rules and Carbs Drool Arrowhead's Avatar
    Join Date
    Feb 2011
    Location
    Stillwater, NY
    Posts
    599
    Post Thanks / Like
    Thanks Olli, I have done that before and didn;t think to use it here. I think I'll try it.

  4. #44
    EFI Rules and Carbs Drool Arrowhead's Avatar
    Join Date
    Feb 2011
    Location
    Stillwater, NY
    Posts
    599
    Post Thanks / Like
    I set the body and panels out in th sun to get a good look and found lots of pinholes. Some from the filler, but a lot were in the fiberglass where the gel coat had been sanded through. I spent almost a whole day filling the pin holes and sanding smooth again.


    Got the body and the panels block sanded, need to do the hard top, hood sides and nose cone yet.


  5. #45
    EFI Rules and Carbs Drool Arrowhead's Avatar
    Join Date
    Feb 2011
    Location
    Stillwater, NY
    Posts
    599
    Post Thanks / Like


    The bottom edge of the hardtop had a lot of large voids that had to be filled.


    One thing I didn't like was how large the flange was around the edge of the door opening. It wasn't cut straight anyway so I took the opportunity to cut the edge down so the gasket would sit up close to the body.


    I had already started smoothing over the seams on the hard top. I finally got serious and tried blocking with the long sanding boards. The more I added filler and sanded, the worse it got. It was very decieving as the top panel seemed smooth, but it was almost cupped down the center. It didn't have any curvature, it was mostly flat if not too low. So I had to skim coat the whole top and work the panel to build up the center so it had a nice curvature from side to side.


  6. #46
    EFI Rules and Carbs Drool Arrowhead's Avatar
    Join Date
    Feb 2011
    Location
    Stillwater, NY
    Posts
    599
    Post Thanks / Like
    After finally getting the shape I wanted and filling a lot of little imperfections, it was ready for primer. I was able to prime the hood sides and nose cone too. Even then, there are a lot of pinholes to fix.


  7. #47
    EFI Rules and Carbs Drool Arrowhead's Avatar
    Join Date
    Feb 2011
    Location
    Stillwater, NY
    Posts
    599
    Post Thanks / Like
    Pulled the body off again for another round of primer and blocking. Everything was in real good shape, but with that many sand throughs, it needed another couple of coats. Oddly enough, with the removable hard top, there are quite a few panels to paint and it's tricky to get everything setup up so there is room to move around,and that's with no fenders.


  8. #48
    EFI Rules and Carbs Drool Arrowhead's Avatar
    Join Date
    Feb 2011
    Location
    Stillwater, NY
    Posts
    599
    Post Thanks / Like
    I block sanded again and I just sprayed two coats of reduced epoxy on as a sealer. Since I'm using a metallic base, I'll wet sand the epoxy w/ 600. Maybe get some color on this weekend????


  9. #49
    EFI Rules and Carbs Drool Arrowhead's Avatar
    Join Date
    Feb 2011
    Location
    Stillwater, NY
    Posts
    599
    Post Thanks / Like
    Wet sanding the epoxy was a drag, took a lot of elbow grease. But I got it all sanded, cleaned the garage, put plastic up and seal up around the doors. Got 4 coats of color on, the silver was slow to cover, need to clear coat tonight.


    This is the first coat so it's a little blotchy, but after four coats it's pretty even. You can't tell from the picture, but it's really bright mettalic silver.


  10. #50
    EFI Rules and Carbs Drool Arrowhead's Avatar
    Join Date
    Feb 2011
    Location
    Stillwater, NY
    Posts
    599
    Post Thanks / Like
    Got everything clear coated last night. Came out pretty good but had a few runs, no big deal. Very little orange peel so I'm happy.


  11. #51
    EFI Rules and Carbs Drool Arrowhead's Avatar
    Join Date
    Feb 2011
    Location
    Stillwater, NY
    Posts
    599
    Post Thanks / Like


  12. #52
    Jeff Collins's Avatar
    Join Date
    Feb 2011
    Location
    Greensboro, NC
    Posts
    458
    Post Thanks / Like
    Looking good, almost there, sand, buff, sand buff. Nice job!
    Thanks
    Jeff

  13. #53
    EFI Rules and Carbs Drool Arrowhead's Avatar
    Join Date
    Feb 2011
    Location
    Stillwater, NY
    Posts
    599
    Post Thanks / Like
    Thanks, luckily I upgaded to a DA w/ 1500 and 3000 sanding discs so that will take some of the pain out of it.

  14. #54
    Senior Member Scott Meyer's Avatar
    Join Date
    Feb 2011
    Location
    Palm Harbor, FL
    Posts
    203
    Post Thanks / Like
    Great results! Metallic Silver is a tough color to get even (I used a Honda Metallic Silver on my roadster).
    818 "S"pyder delivered 11/27/20, using 2007 Impreza 2.5l NA donor. Work mostly being done by my son Liam...body work and paint being done by dad (that's me)
    MK3.1 #6583RD, built from 2008-2019, sold 11/2011

  15. #55
    Moderator
    Join Date
    Feb 2011
    Location
    Milton,DE
    Posts
    656
    Post Thanks / Like
    That looks great!

    Olli

  16. #56
    Senior Member ClemsonS197's Avatar
    Join Date
    Feb 2011
    Location
    Marietta, GA
    Posts
    346
    Post Thanks / Like
    Looks great. Can't wait to see it in the sunlight.
    MK3.1 #7076 - Under Construction....
    Coyote 5.0/Solid 8.8/Tremec 3650
    How to:
    Coyote Power Steering
    05-09 T3650 in a Roadster

  17. #57
    33 Hot Rod Builder geoffav's Avatar
    Join Date
    Feb 2011
    Location
    Enterprise, AL
    Posts
    458
    Post Thanks / Like
    Great job. I liked it in primer so this is going to be over the top when done.

  18. #58
    certified gear head 5speed's Avatar
    Join Date
    May 2011
    Location
    Atlantic Canada
    Posts
    24
    Post Thanks / Like
    looking great.

  19. #59
    Senior Member riptide motorsport's Avatar
    Join Date
    Feb 2011
    Location
    Fort Lauderdale Fl.
    Posts
    3,296
    Post Thanks / Like
    Very nice, I feel all warm inside!!!!!!!!!!!!!!!!!!!! Sweet color.
    FFR Daytona Type 65 Coupe
    67 427 Cobra
    57' Belair
    72 Pinto Wagon ,306" 1/4 miler
    34 5 window coupe Ford
    2003 Mustang GT
    99' ZX9
    85 Goldwing

    All toys still in the Scuderia!


    Every Saint has a past..................every sinner a future

    Don't take yourself so seriously........no one else does.

    You never see a motorcycle parked outside a Psychiatrists office.

  20. #60
    EFI Rules and Carbs Drool Arrowhead's Avatar
    Join Date
    Feb 2011
    Location
    Stillwater, NY
    Posts
    599
    Post Thanks / Like
    Got the loose ends finished up on the chassis and most of the body parts sanded and buffed so it was time to put the body shell on.


    I broke the front suspension down to install the new suspension bolts and to cut he rear lower control arm so I could get less caster.


    I took a different approach with the insulation and used the foil faced bubble wrap type insulation - I have my reasons and it's not all about price.


  21. #61
    EFI Rules and Carbs Drool Arrowhead's Avatar
    Join Date
    Feb 2011
    Location
    Stillwater, NY
    Posts
    599
    Post Thanks / Like
    One cool thing I figured out was the A/C vents unscrew so you can attach the tubing to the vent and then stick it though the hole in the dash from he back and then screw the face plate on. Makes it a lot easier than trying to push the duct on with the vent already installed.


    Installed the carpet and boots.


  22. #62
    EFI Rules and Carbs Drool Arrowhead's Avatar
    Join Date
    Feb 2011
    Location
    Stillwater, NY
    Posts
    599
    Post Thanks / Like
    Installed the door panels and used "Neat Knobs" from Watson Street works for the interior latch. After messing with the cable setup, I came up with a rod setup that connects the exterior handle directly to the latch. It work pretty slick and is fully adjustable. The only issue now is I have to push down really hard on the interior knob to release the latch. I'm also not sure if the rod setup will clear the windows when I install them so I might have to change it around again.


    My solution for the poor fitting water fall was to just cut it off and trim it with windlace.

    Last edited by Arrowhead; 07-13-2011 at 01:52 PM.

  23. #63
    EFI Rules and Carbs Drool Arrowhead's Avatar
    Join Date
    Feb 2011
    Location
    Stillwater, NY
    Posts
    599
    Post Thanks / Like
    I wanted to install the roll bar but wasn't sure how to go about drilling the holes. I think towman posted something about taping around the outline of the rollbar and then using the hole in the tape as a template to locate the holes in the waterfall. I put the rollbar in place and taped around the holes. I removed the roll bar and then carefully slid the waterfall into place without disturbing the tape. Then I could sight down inside the tape and draw the hole locations on the water fall and cut them out. Worked pretty good.


    I remeber reading or hearing that you should paint the flange black where the glass sits or the body color will show through so I taped it off and did that.


    I also made a headliner out of regular auto headliner material and 1/4" poster board. I used velcro to hold it up and I think it came out pretty good. I make a pattern out of paper and then transferred it to the posterboard. Then I used 1/4" tape to make the outline smaller so there would be room for the headliner material to wrap around the board.


    Last edited by Arrowhead; 07-13-2011 at 01:53 PM.

  24. #64
    EFI Rules and Carbs Drool Arrowhead's Avatar
    Join Date
    Feb 2011
    Location
    Stillwater, NY
    Posts
    599
    Post Thanks / Like
    Redneck powder coating.

    I had not sent the rollbar out for powder coating when I had the chassis done, can't remember why now. But now I had to either powder coat it, paint it or cover it with some thing. I tried covering it with the extra black vinyl that came with the kit, but that turned out horrible. I could have painted it, but that would be process of sanding, priming, blue base, blue candy and clear - it's a formula I had worked out that matches the powder coat color.

    It was too big to fit in my oven so power coat at home was out - or was it? I know from powder coating a bunch of small parts that the powder actaully will melt at a pretty low temperature. So I had a redneck moment and got out my torches. Now the powdr is flamable so you can't have an open flame around - but if I can preheat the part, shut off the flame, than I can spray the powder.

    So I took about 15 minutes with my torch and heated up the bar evenly to about 200 degrees. I shut the torch off and quick grabbed my powder gun loaded with silver, dusted it on and sure enough it melted right down. I then swapped the blue in quick and dusted that on and it melted just fine too. It didn't flow out nice and smooth, it has more orange peel texture than if it was in an oven, but it looks fine and I'm happy with it.


  25. #65
    EFI Rules and Carbs Drool Arrowhead's Avatar
    Join Date
    Feb 2011
    Location
    Stillwater, NY
    Posts
    599
    Post Thanks / Like
    I got the hood and side panels mounted so I roleld it outside and stuck the roadster windshield on for a couple of pictures. I think the hard top will be let on most of the time so I figured I see what it looks like with out it.


    Still had to sand and buff the hardtop, that was a lot of work.


  26. #66
    EFI Rules and Carbs Drool Arrowhead's Avatar
    Join Date
    Feb 2011
    Location
    Stillwater, NY
    Posts
    599
    Post Thanks / Like
    Got it done just in time to make a big local cruise in. Still have a few loose ends t owrap up. Need to install the side windows, final connect the A/C hose and charge and run the exhaust out the rear. Have a few paint blemishes to touch up also. I had a pretty elaborate flame job planned but now I'm not so sure.


  27. #67
    Member
    Racer 28's Avatar
    Join Date
    Feb 2011
    Location
    Ocala Fl.
    Posts
    163
    Post Thanks / Like
    Looks Great love the blower!! Drive it and fix things as you see them or when they come up!!!

  28. #68
    Member timdks's Avatar
    Join Date
    Feb 2011
    Location
    Prairie Village, KS
    Posts
    74
    Post Thanks / Like
    Awesome.
    Tim
    HR #209
    Delivered 11 May 2010
    http:/tims33.com

  29. #69
    DaveBoyd's Avatar
    Join Date
    Mar 2011
    Location
    Ocala, Fl
    Posts
    50
    Post Thanks / Like
    That thing turned out SWEET!!! Good Job!

  30. #70
    Junior Member
    Join Date
    Jul 2011
    Location
    Central IL
    Posts
    5
    Post Thanks / Like
    looks great, love the blue frame

  31. #71
    EFI Rules and Carbs Drool Arrowhead's Avatar
    Join Date
    Feb 2011
    Location
    Stillwater, NY
    Posts
    599
    Post Thanks / Like
    Thanks, I'm pretty happy with how it turned out. Have a few loose ends to finish up though.

    A couple weeks before I was done, I heard Factory Five was looking for a customers car for the Good Guys Columbus show. I contacted them and told them I would not be done in time, but I was planning being at the Syracuse Nationals if they needed a car for that show. They contacted me a week later and said they would like to have it at thier booth so we made the arrangements and I drove it the 3 hrs to Syracuse and it was on display for the whole show. They were a great bunch and I had an awesome time.


  32. #72
    EFI Rules and Carbs Drool Arrowhead's Avatar
    Join Date
    Feb 2011
    Location
    Stillwater, NY
    Posts
    599
    Post Thanks / Like
    Wow, been almost a year since I updated this thread - and a lot has happened. Even though the build is "done", I still have a bunch of things to finish up. I had every intention of tearing it down over the winter, but it kind of made a detour.

    After the Syracuse show last summer, FFR seemed to take a liking to how I built the car and wanted to take it to another show - the SEMA show in Las Vegas!!!!!!!!! There were some things I really wanted to do to spruce it up, so I spent the month of October getting it ready.

    The engine compartment was looking a little sad, so I pulled it apart and got new polished pullies and painted the engine.


  33. #73
    EFI Rules and Carbs Drool Arrowhead's Avatar
    Join Date
    Feb 2011
    Location
    Stillwater, NY
    Posts
    599
    Post Thanks / Like
    The hood hinges I made worked out great, but I never had time to finish them. They were just kind of raw aluminum and I wanted to clean them up. I drilled them out to add a little detail and then polished them.


    I also added the polished CNC resivoirs on the firewall.

  34. #74
    EFI Rules and Carbs Drool Arrowhead's Avatar
    Join Date
    Feb 2011
    Location
    Stillwater, NY
    Posts
    599
    Post Thanks / Like
    All polished up and ready to go.


    Here it is at the FFR showroom ready to go to SEMA.


    It was in this spot in the Ford racing area for the whole week. The show was awesome and got to meet a bunch of fellow FFR builders.


    On the way back from Vegas, they stopped off in the Nevada desert for a photo shoot. Pretty cool.


  35. #75
    EFI Rules and Carbs Drool Arrowhead's Avatar
    Join Date
    Feb 2011
    Location
    Stillwater, NY
    Posts
    599
    Post Thanks / Like
    If that wasn't awesome enough, they called me when I got back home and aksed "would you be ok with us sending it on tour with World of Wheels?" Well yaa!

    It went to ten shows from November to March.

    Houston


    Cincinati


    New Orleans


    Kansas City


    Dallas


  36. #76
    EFI Rules and Carbs Drool Arrowhead's Avatar
    Join Date
    Feb 2011
    Location
    Stillwater, NY
    Posts
    599
    Post Thanks / Like
    Even went to the Detroit Autorama


    Salt Lake City


    Winnipeg


    Omaha


    Boston


  37. #77
    EFI Rules and Carbs Drool Arrowhead's Avatar
    Join Date
    Feb 2011
    Location
    Stillwater, NY
    Posts
    599
    Post Thanks / Like
    Well the hot rod came back last week, almost three years to the day of when I first placed the order for the kit.

    I aquired a full fender set over the winter and I wanted to try them on. I didn't think they would fit with the over sized tires and they didn't fit at all. It looks cool, but you could never turn the front wheels and there's no room for suspension travel. I like the look of the fenders in general, but I think it looks better with no fenders the way mine is setup anyway.


  38. #78
    Member timdks's Avatar
    Join Date
    Feb 2011
    Location
    Prairie Village, KS
    Posts
    74
    Post Thanks / Like
    Very outstanding. Quite a well deserved recognition of your talents. Saw your car in KC in all its glory. Looks better in person, even though you've got some great glamor pics.
    Tim
    HR #209
    Delivered 11 May 2010
    http:/tims33.com

  39. #79
    Senior Member ehansen007's Avatar
    Join Date
    Mar 2011
    Location
    Aliso Viejo, CA
    Posts
    1,625
    Post Thanks / Like
    Quote Originally Posted by Arrowhead View Post
    I got aluminum bar stock, angle, shoulder bolts and spacers. The curved piece I hogged out of a chunk of 1/2" aluminum I had laying around.


    I added mounts to the frame to anchor the struts. It works pretty good but it took a lot work.

    <object style="height: 390px; width: 640px"><param name="movie" value="http://www.youtube.com/v/1HftniNR3JM?version=3"><param name="allowFullScreen" value="true"><param name="allowScriptAccess" value="always"><embed src="http://www.youtube.com/v/1HftniNR3JM?version=3" type="application/x-shockwave-flash" allowfullscreen="true" allowScriptAccess="always" width="640" height="390"></object>
    This has to be one of the best examples of ingenuity that I've seen on this forum. Exceptional work George.

  40. #80
    EFI Rules and Carbs Drool Arrowhead's Avatar
    Join Date
    Feb 2011
    Location
    Stillwater, NY
    Posts
    599
    Post Thanks / Like
    Quote Originally Posted by timdks View Post
    Very outstanding. Quite a well deserved recognition of your talents. Saw your car in KC in all its glory. Looks better in person, even though you've got some great glamor pics.
    Thanks Tim, wish I could have gone to more of the shows.

    Quote Originally Posted by ehansen007 View Post
    This has to be one of the best examples of ingenuity that I've seen on this forum. Exceptional work George.
    Thanks Erik, it took quite a bit of trial and error to figure out how to make them work.


    I pulled the body off becuase I have a bunch of upgrades I want to do and some wouldn't be possible with the body on. I replaced the rear master cylinder with a 5/8" bore. That seems to be good candidate for getting a better pedal feel - we'll see. I also added a line lock - probabaly never use it, but it's there when I want it

    I also needed to reduce the heat comming in. Between inadequate insulation and air gaps, it was very uncomfortable if the outside temperature was above 80 degress.

    I first started by pulling the inner panel and insulating the firewall better. All I had before was the insulation under the carpet. Now the entire firewall is backed by 1/2" foam. Even so, the heat can transmit from the firewall to the meatal frame. So I covered the frame rails with foam tape where the inner panel attaches. This will help provide a thermal barrier. Before, the entire firewall and inner panel were just a giant radiator.


    Last edited by Arrowhead; 05-21-2012 at 09:32 AM.

Page 2 of 3 FirstFirst 123 LastLast

Posting Permissions

  • You may not post new threads
  • You may not post replies
  • You may not post attachments
  • You may not edit your posts
  •  

Stewart Transport

Visit our community sponsor