-
Congratulations on the first start -- it's a memorable milestone for your build. You'll love the Boig Cool Tubes.
Last edited by Papa; 04-16-2020 at 07:34 PM.
-
Senior Member

Congrats on the first start. Pretty sure "clear prop" is for a different mode of transportation.  But all good. Sounds great. Smile says it all. Those corrugated hoses can be challenging to stay on. Combined with that chromed water neck which also have a reputation for being hard to grip.
Build 1: Mk3 Roadster #5125. Sold 11/08/2014.
Build 2: Mk4 Roadster #7750. Sold 04/10/2017.
Build Thread
Build 3: Mk4 Roadster 20th Anniversary #8674. Sold 09/07/2020.
Build Thread and
Video.
Build 4: Gen 3 Type 65 Coupe #59. Gen 3 Coyote. Legal 03/04/2020.
Build Thread and
Video
Build 5: 35 Hot Rod Truck #138. LS3 and 4L65E auto. Rcvd 01/05/2021. Legal 04/20/2023.
Build Thread. Sold 11/9/2023.
-
Senior Member


Originally Posted by
edwardb

Congrats on the first start. Pretty sure "clear prop" is for a different mode of transportation.
But all good. Sounds great. Smile says it all. Those corrugated hoses can be challenging to stay on. Combined with that chromed water neck which also have a reputation for being hard to grip.
Yep, kinda brought back my aviation days. I've got to clean up the wiring harness and button everything back up, Also need to trouble shoot a few issues, but for the most part no show stoppers. It's really been a lot of fun. Thanks for motivating me with your build and insight. I can't say enough of how much I appreciate all the knowledge on this forum. Good stuff!
Cheers!
Mk IV Roadster #9749, Kit received Jan 2, 2020, Blueprint SBF 347 TKO600 Holley Sniper EFI, Dual roll bars, IRS, 17" Halibrand, Nitto 555 G2 245, 315 Road legal Oct 20, 2020
-
Senior Member

Congrats! That is a big milestone, nice engine.
Kyle
Complete Kit pickup 09/05/2015, 351w, QF680, 3.55, 3-Link, 15" Halibrands with MT's, Painted Viking blue with Wimbledon white stripes on 03/15/2017. Sold in 08/2018 and totally regret it.
-
You are going to need to scuff up that water neck, where the hose blew off. I take a piece of sand paper in hand and twist back and forth a few times. Good looking work you do there!
Last edited by Railroad; 04-17-2020 at 09:20 AM.
20th Anniversary Mk IV, A50XS Coyote, TKO 600, Trunk Drop Box, Trunk Battery Box, Cubby Hole, Seat Heaters, Radiator hanger and shroud.
-
Senior Member

I could never get the chrome water necks to work right. I replaced them with a cast aluminum unit
stack
FFR MKI Roadster FFR2202K Built in 2000 sold
FFR Hot Rod #39 under construction
-
Senior Member
Originally Posted by
Railroad
You are going to need to scuff up that water neck, where the hose blew off. I take a piece of sand paper in hand and twist back and forth a few times. Good looking work you do there!
Thanks! Yeah, I kinda missed that point when I connected them up. They were hard enough to get on so I thought no way these were going to come off. My initial plan was just to do a quick start and then shut it down, but my excitement got ahead of me. Hearing that engine come to life was so cool!.
I have Boig cooltubes on order and I'll definitely be looking very closely at the water neck.
Cheers!
Mk IV Roadster #9749, Kit received Jan 2, 2020, Blueprint SBF 347 TKO600 Holley Sniper EFI, Dual roll bars, IRS, 17" Halibrand, Nitto 555 G2 245, 315 Road legal Oct 20, 2020
-
Senior Member

Congrats, Frank! Looks and sounds great.
MKIV Complete Kit #9494 l Delivered 1/5/19 l First Start
11/28/20 l First Go-kart
4/11/21 l Carb'd 347 l Mid-shift TKO600 l 3.55 IRS l P/S l Forte Mechanical Throttle Linkage l RT Turn Signal, Drop Trunk l Breeze Upper/Lower Radiator Support, Fan Shroud l Boig Upper/Lower Cool Tubes & Quiet Pipes l 18" FFR Gasser Wheels l
Build Thread
-
Glad you didnt get burned... that coulda been serious. Get out the paper towels...
-
Senior Member
My new Boig Cool Tubes showed up today so I wasted no time getting them installed. This time I scuffed up the upper water neck with some emory cloth, cleaned everything up and then double clamped all the hoses where I could. No way I wanted those hoses blowing off again!
Upper hose

Lower hose with breeze support clamp

This time I tested the cooling system in steps. I started the engine up and looked for movement of the H2O temp. I then shut her down and checked for leaks and tightness of hose clamps. I then started her up and let it warm up to ~60*C. Shutdown and check for leaks again. I then restarted and let it run until the fan came on ~85*C, shutdown and checked for leaks again. All good! I then restarted and let her run until the fan cycled on and off. Life is good! I'll keep an eye on it and cycle it a few more times while she is on jack stands.
All the gauges are working and I started to button up the wiring behind the dash.
I now have two teething issues I need to resolve.
1) the tach seems to read about 500 RPM too high. Originally the tach was reading 2x of what it should so I configured the tach per Speedhut instructions for V8 pulses. That seemed to help. The tach also seems to bounce around a bit more than I'm used to seeing. Is this normal? I'll recheck the connections, but just wondering if anybody else has seen this?
2) the power steering has a chatter in it. At first I thought it might be air trapped in the system so I cycled the steering lock to lock about 4 or 5 times, but no joy. Removing the filler cap, the fluid looks darker then when added, but with no bubbles, foam, etc. Does the steering system need to be flushed? Is there still air in the system?
Any insight would be appreciated.
Enjoy the build and be safe!
Mk IV Roadster #9749, Kit received Jan 2, 2020, Blueprint SBF 347 TKO600 Holley Sniper EFI, Dual roll bars, IRS, 17" Halibrand, Nitto 555 G2 245, 315 Road legal Oct 20, 2020
-
Senior Member
Originally Posted by
Boydster
Glad you didnt get burned... that coulda been serious. Get out the paper towels...
Oh yeah me too! BTW DexCool tastes awful! I went through almost a whole roll of the blue paper shop towels.
Mk IV Roadster #9749, Kit received Jan 2, 2020, Blueprint SBF 347 TKO600 Holley Sniper EFI, Dual roll bars, IRS, 17" Halibrand, Nitto 555 G2 245, 315 Road legal Oct 20, 2020
-
Man your build is looking great... FYI, you are not the first to blow that top hose... I did the same... Most likely you had a air pocket of steam... Either way, one thing you can do is to put 3 or 4 self tapping screws into the upper part of the t-stat water neck, this will give the clamps something to clamp under.
As for your tach, no it should not be jumping around, unless your RPM is in fact jumping around. It will be very smooth when working correctly. I can only say that at this point, check all your connections and be sure there isn't a loose one some where. Be sure the "tach" wire is connected to the negative (-) side of your coil. If that is all good, a call to speed hut may help.
Now a question for you, where did you get the 90* hose coming off of your t-stat water neck? The one I have, I don't like... Have a part #?
-
Senior Member
Originally Posted by
BadAsp427
Man your build is looking great... FYI, you are not the first to blow that top hose... I did the same... Most likely you had a air pocket of steam... Either way, one thing you can do is to put 3 or 4 self tapping screws into the upper part of the t-stat water neck, this will give the clamps something to clamp under.
As for your tach, no it should not be jumping around, unless your RPM is in fact jumping around. It will be very smooth when working correctly. I can only say that at this point, check all your connections and be sure there isn't a loose one some where. Be sure the "tach" wire is connected to the negative (-) side of your coil. If that is all good, a call to speed hut may help.
Now a question for you, where did you get the 90* hose coming off of your t-stat water neck? The one I have, I don't like... Have a part #?
I think I'm either getting interference in my tach signal or I've got an intermittent connection somewhere. I'm using the EFI-Tach signal that comes off the Holley wiring harness as per the directions. I called Speed Hut and they suggested that to help trouble shoot the issue, is (like you said) to just connect directly to the negative terminal of the coil and see if that helps. I haven't done that yet but it's on my list of squawks to work on.
I don't have a part number for the hose. Initially, I tried to use the hose that came with the FFR kit but the ID was too large for the Cool Tube barb and it interfered with the t-stat cap. My Holley Sniper kit that came with my BPE engine included about 20 feet of 3/8 fuel line hose. I'm using hard lines and SS flex hose for my fuel lines so it just went into my surplus parts pile. I just cut a length of that and squeezed it onto the hose barb fitting Seems to be working ok so far. I have plenty leftover so it you need any, let me know and I can send some down to you.
Thanks for the review and insight.
Cheers!
Mk IV Roadster #9749, Kit received Jan 2, 2020, Blueprint SBF 347 TKO600 Holley Sniper EFI, Dual roll bars, IRS, 17" Halibrand, Nitto 555 G2 245, 315 Road legal Oct 20, 2020
-
Senior Member
My new QuickTrick alignment tools showed up today so the first thing I had to do was set the ride height.
First I adjusted air pressure all around to ~24 psi, then I added my mass simulator to the drivers side. About 200 lbs of sand bags should do it. :-)

I don't have a ride height measuring tool so I cut a couple of blocks at 4" and 4.5". I'm using an initial setting of 4" in the front and 4.5" in the rear.

I raised the front (or rear) off the ground and adjusted the collars by hand. I made the typical rookie mistake by not having the chassis settle after lowering it onto the ground. Wasted about a half hour on the front end trying to figure out why my adjustments weren't yielding the results I was expecting. Doh! After that I bounced on each corner and rolled the chassis back and forth a bit. It was a lot of raise it up, adjust, lower her down, check for height. It felt like I was doing crunches for about an hour!
After getting smarter and getting up on the learning curve, I started to dial in the height. It's trickier than I imagined. I was amazed at how just a small tweak on the collar affected the height as I got close to my desired height. I still have some parts to install and she's really light on fuel but I'm thinking this will get me in the ball park so I can do an alignment and start go carting.
Enjoy the build!
Mk IV Roadster #9749, Kit received Jan 2, 2020, Blueprint SBF 347 TKO600 Holley Sniper EFI, Dual roll bars, IRS, 17" Halibrand, Nitto 555 G2 245, 315 Road legal Oct 20, 2020
-
Post Thanks / Like - 0 Thanks, 1 Likes
-
Senior Member
While waiting on the side pipes from Gas-N to get shipped I decided to move forward and do the initial alignment before doing my go carting. Based on what EdwardB stated, other build threads and my limited research, I purchased the Quick Trick 4th Gen alignment system. Since they had a sale going on, I also sprang for the turn plates. They all appear to be of high quality and well thought out. I figured this would be an easy way to learn how to do alignments and something I can use in the future on my other cars. Ha!
I naively thought that I would start with the rear IRS since I only need to adjust the camber and toe. Sounds easy enough. The first issue I ran into was a puddle of green shock fluid under the right rear. I emailed and left a VM at FFR to see what's required to get a replacement. Sigh.

Then I realized it's really difficult just to loosen up the jam nuts on the UCA and LCA. So off comes the QT alignment sticks, off comes the wheel, and the jam nuts are backed off. Then back on goes the wheel and QT alignment sticks. The FFR assembly manual calls out the interaction between the camber and toe adjustments so I dove right in on the toe, then camber, lower the car down, bounce on the rear suspension, check it, oops, turned the toe the wrong way, jack back up, adjust again, etc, etc. I lot of back and forth, up and down, lather, rinse, repeat. At one point I had the alignment so wonky it looked pigeon toed! After about 4 hours I finally got the rear alignment in the ball park but I'll definitely need to get it professionally aligned too. Once you get close, small tweaks are all you need. When I got done I felt like I was doing crunches for four hours. A lift would be nice. :-(
The next day I started in on the front suspension. This time it went much easier because the adjustment sleeves and tie rods are so much easier to get access to. The caster and camber dialed right in, but the best I could get on the toe was within 1/4 inch. The spec is 1/16! I'll leave that to the professionals. Another lesson learned is that it would be nice to have two digital levels instead of the one that comes with the kit. I think you can get one for about $40 on line.
I used a laser instead of the string method to get the toe initially set.

Then I used a piece of plywood cut to fit underneath the car and sit flush against the 4" round side tube. Here is the front.

I then moved the board to the rear and adjusted the toe so that the dots would line up vertically.

This did the rough toe alignment, then I moved onto using the measuring tapes that came with the QT kit where I did the final toe adjustment.
Also, here is a picture of the front upper control arm. When I initially assembled these, I trimmed the rear sleeves as per many other builds on the forum in order to get the 7* of caster . Turns out I have plenty of room for adjustment even without trimming them. I've read where some people don't need to trim, others do. I have a newer kit (S/N 9749) so maybe something has changed since earlier kits. IDK

Enjoy the build!
Last edited by Caddy Dad; 05-05-2020 at 09:13 AM.
Mk IV Roadster #9749, Kit received Jan 2, 2020, Blueprint SBF 347 TKO600 Holley Sniper EFI, Dual roll bars, IRS, 17" Halibrand, Nitto 555 G2 245, 315 Road legal Oct 20, 2020
-
Post Thanks / Like - 0 Thanks, 1 Likes
-
Senior Member
That sounds way too familiar. The IRS is really hard to reach when it's on the ground. And is easy to turn things the wrong way and get things all messed up. My brain took a vacation when I was doing the Coupe a couple months ago. I was chasing the camber and toe on the IRS and just when I though it was getting close decided it looked really weird. Sure enough, I had been adjusting the camber to positive instead of negative. Had to basically start over because the settings interact so much. I ended up making these notes for myself when doing alignments.
Rear (IRS):
Left side: Moving toe arm adjuster DOWN (from front) moves toe OUT. Moving camber adjuster DOWN (from front) moves camber POSITIVE.
Right side: Moving toe arm adjuster DOWN (from front) moves toe IN. Moving camber adjuster DOWN (from front) moves camber NEGATIVE.
Front:
Left side: Moving inner tie rod DOWN (from front) moves toe IN. Moving UCA adjustment sleeves DOWN (from back) move both OUT.
Right side: Moving inner tie rod DOWN (from front) moves toe OUT. Moving UCA adjustment sleeves DOWN (from back) move both IN.
Build 1: Mk3 Roadster #5125. Sold 11/08/2014.
Build 2: Mk4 Roadster #7750. Sold 04/10/2017.
Build Thread
Build 3: Mk4 Roadster 20th Anniversary #8674. Sold 09/07/2020.
Build Thread and
Video.
Build 4: Gen 3 Type 65 Coupe #59. Gen 3 Coyote. Legal 03/04/2020.
Build Thread and
Video
Build 5: 35 Hot Rod Truck #138. LS3 and 4L65E auto. Rcvd 01/05/2021. Legal 04/20/2023.
Build Thread. Sold 11/9/2023.
-
Post Thanks / Like - 3 Thanks, 1 Likes
-
Senior Member
Originally Posted by
edwardb
That sounds way too familiar. The IRS is really hard to reach when it's on the ground. And is easy to turn things the wrong way and get things all messed up. My brain took a vacation when I was doing the Coupe a couple months ago. I was chasing the camber and toe on the IRS and just when I though it was getting close decided it looked really weird. Sure enough, I had been adjusting the camber to positive instead of negative. Had to basically start over because the settings interact so much. I ended up making these notes for myself when doing alignments.
Rear (IRS):
Left side: Moving toe arm adjuster DOWN (from front) moves toe OUT. Moving camber adjuster DOWN (from front) moves camber POSITIVE.
Right side: Moving toe arm adjuster DOWN (from front) moves toe IN. Moving camber adjuster DOWN (from front) moves camber NEGATIVE.
Front:
Left side: Moving inner tie rod DOWN (from front) moves toe IN. Moving UCA adjustment sleeves DOWN (from back) move both OUT.
Right side: Moving inner tie rod DOWN (from front) moves toe OUT. Moving UCA adjustment sleeves DOWN (from back) move both IN.
Now you tell me? LOL! Yep, I had to start over a couple of times. Just like you said, you turn the left and right side adjusters different directions to go in or out/positive or negative. I'd bend over or get down on the floor to adjust it and then get confused which way to turn it. Took me a while to figure that out but I'm writing it down and posting it on my workshop wall. Don't want to repeat that episode again! Oh well, at least I've got a good story to tell.
Thanks!
Mk IV Roadster #9749, Kit received Jan 2, 2020, Blueprint SBF 347 TKO600 Holley Sniper EFI, Dual roll bars, IRS, 17" Halibrand, Nitto 555 G2 245, 315 Road legal Oct 20, 2020
-
Senior Member
My near term goal is to start go carting around my neighborhood and shake out any issues. I'll need to bolt down the seats and get the side pipes mounted, but to do that correctly, I'll need to install the body and get everything fitted as close as I can to their final position. I want to make sure there are no clearance issues between the seats, doors, seat belts, etc. With the help of my teenage daughter, I temporarily installed the body today and more or less got everything into position. I put the drivers seat in and sat in it for alignment. Good thing I did this because I had to move the drivers seat as far inboard and rearward as I could so as my left shoulder wouldn't rub against the door! I'm not that big of a guy (6'2") and no one ever mentioned that I have broad shoulders that I can remember. :-( I've sat in a few MK IVs prior to this and I don't remember having any fitment issues. Regardless I think I've got it figured out and I now have comfortable pedal position and sight lines.
Almost looks like a car!


I had to sand down the door edges a bit to get them to open and close without rubbing. 80 grit sand paper and an orbital sander works really well. I was amazed at how quickly it took off the smidge of fiberglass I needed to eliminate the rub. I was careful not to take too much off as the body is not fully installed yet and still flexes a bit in the rear. It brought back memories of the build school where we installed the body and doors. Everything looked good and then one of the instructors showed us where the body wasn't fitted correctly and then bang! everything went out of alignment again. So tricky to get it right and frustrating too. I watched the FFR body work videos and it seems to me that my wheel openings look different and need little to no trimming at all.
I'm still waiting on Gas-N pipes so it might be a while longer before they show up (due to the pandemic lockdown) so I'll keep working on small tasks to keep making progress.
Enjoy the build!
PS. FFR replaced my defective Koni shock no questions asked. I just had to send them a picture of the leak and return the old shock.
Last edited by Caddy Dad; 05-13-2020 at 08:04 PM.
Mk IV Roadster #9749, Kit received Jan 2, 2020, Blueprint SBF 347 TKO600 Holley Sniper EFI, Dual roll bars, IRS, 17" Halibrand, Nitto 555 G2 245, 315 Road legal Oct 20, 2020
-
Senior Member
Progress has been slow due to the pandemic jamming up some vendors I'm waiting on. Georgie at Gas-N is doing his best to get the side pipes to me in a timely manner and I really appreciate his email updates. I'm sitting tight and keeping everything in perspective. I fully understand that waiting on parts is the least of my worries with a global pandemic and civil unrest going on.
In the meantime I've been keeping busy with little tasks to keep making some sort of progress.
I mounted a backup light wired into the reverse switch on the TKO600 transmission. I also installed the roll bars so I can drill the holes for the mounting bolts. I chickened out on trying to drill them freehand so I ordered a drill jig from Trick Tools. Hopefully that will be shipped soon too.

I then POR-15 coated the Breeze seat mounts and temporarily mounted them in the cockpit. I also installed the seat heaters and added the wiring. I was really dreading tearing apart the upholstery to install the heaters but it was really simple and turned into a non-event.

I then took my untreated leather check straps and seat belts to my local leather shop to get them dyed black. Yeah, I could've done it myself but with businesses just opening back up I figured this guy could use my money too. Turns out he knew exactly what I had and asked if I was building a FFR! This place has been in business a long time. Turns out that Willie "the shoe" Shoemaker used to get his riding boots custom made here. So cool!
I think they turned out nice.
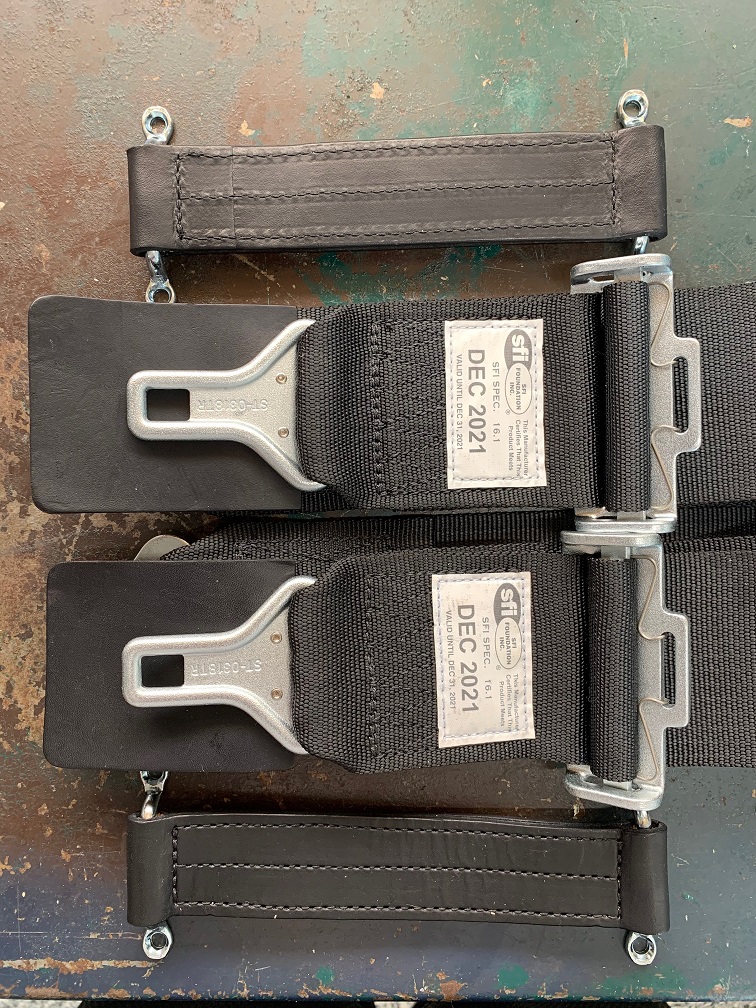
One thing I'm missing on the seat belts is the small pull tab thingys that you use for tightening and loosening the straps. Are these supposed to be included in the kit or ordered separately from Simpson?
Thanks and enjoy the build!
Last edited by Caddy Dad; 06-04-2020 at 12:10 PM.
Mk IV Roadster #9749, Kit received Jan 2, 2020, Blueprint SBF 347 TKO600 Holley Sniper EFI, Dual roll bars, IRS, 17" Halibrand, Nitto 555 G2 245, 315 Road legal Oct 20, 2020
-
06-04-2020, 07:11 PM
#100
Senior Member

Looking great! I can imagine the anticipation you're feeling waiting for the final parts so you can get it on the road.
-
06-04-2020, 08:30 PM
#101


Originally Posted by
Caddy Dad
Progress has been slow due to the pandemic jamming up some vendors I'm waiting on. Georgie at Gas-N is doing his best to get the side pipes to me in a timely manner and I really appreciate his email updates. I'm sitting tight and keeping everything in perspective. I fully understand that waiting on parts is the least of my worries with a global pandemic and civil unrest going on.
In the meantime I've been keeping busy with little tasks to keep making some sort of progress.
I mounted a backup light wired into the reverse switch on the TKO600 transmission. I also installed the roll bars so I can drill the holes for the mounting bolts. I chickened out on trying to drill them freehand so I ordered a drill jig from Trick Tools. Hopefully that will be shipped soon too.
I then POR-15 coated the Breeze seat mounts and temporarily mounted them in the cockpit. I also installed the seat heaters and added the wiring. I was really dreading tearing apart the upholstery to install the heaters but it was really simple and turned into a non-event.
I then took my untreated leather check straps and seat belts to my local leather shop to get them dyed black. Yeah, I could've done it myself but with businesses just opening back up I figured this guy could use my money too. Turns out he knew exactly what I had and asked if I was building a FFR! This place has been in business a long time. Turns out that Willie "the shoe" Shoemaker used to get his riding boots custom made here. So cool!
I think they turned out nice.
One thing I'm missing on the seat belts is the small pull tab thingys that you use for tightening and loosening the straps. Are these supposed to be included in the kit or ordered separately from Simpson?
Thanks and enjoy the build!
That looks really good. I didn't even think about doing to part on the seat belts.
MK IV Build #9659, 3 link, 17's, Forte 347, Sniper EFI, power steering, built for a freak sized person with 17" Kirkey Vintage seats, RT drop trunk, RT turn signal, lots of stuff from Breeze Automotive, Wilwood brakes, paint by Jeff Miller
-
08-03-2020, 01:54 PM
#102
Senior Member
It's been a while since my last update but I was totally jammed up with bad timing on ordering parts at the outbreak of COVID pandemic. But today was a good day as I was finally pick up my Gas-N pipes at UPS. My local UPS distribution center is totally overloaded with packages and has some severe staff shortages. My pipes came off the truck and then sat for 10 days while UPS was finally able to get them to me. Regardless, I picked up my pipes and rushed home to unpack and get them mounted for my first go cart. As I unpacked my passenger side pipe and I was stopped dead in my tracks. The tip was bent! The box and pipes were double and triple wrapped and there didn't appear to be any exterior visible damage to the box. A quick email to Georgie and he said he would send a new one out. I have to give a big shout out to Georgie at Gas-N. He has been super responsive on all my emails and a pleasure to work with. Thanks Georgie!
Here are a few pictures of the tip.


Pipes mounted and I'm off to do my first go cart. Here is a link to the YouTube video. All systems appear to be working just fine. Check out my backup light as I come out of the garage at 1:18.
https://www.youtube.com/watch?v=DvkjPXn-w6M
I'm running a 347 and Holley Sniper EFI from Blueprint engines. My issue now is that whenever I increase the RPM past 2K, the engines sputters, pops, coughs and runs rough. At idle its fine The Sniper widget screen says I'm still in learn mode. Is this normal? How long does learn mode last?
Thanks!
Mk IV Roadster #9749, Kit received Jan 2, 2020, Blueprint SBF 347 TKO600 Holley Sniper EFI, Dual roll bars, IRS, 17" Halibrand, Nitto 555 G2 245, 315 Road legal Oct 20, 2020
-
Post Thanks / Like - 0 Thanks, 1 Likes
-
08-03-2020, 04:45 PM
#103
Senior Member
Looks and sounds great. Congrats! Too bad about the pipe. But you're right. Georgie is great to work with.
Build 1: Mk3 Roadster #5125. Sold 11/08/2014.
Build 2: Mk4 Roadster #7750. Sold 04/10/2017.
Build Thread
Build 3: Mk4 Roadster 20th Anniversary #8674. Sold 09/07/2020.
Build Thread and
Video.
Build 4: Gen 3 Type 65 Coupe #59. Gen 3 Coyote. Legal 03/04/2020.
Build Thread and
Video
Build 5: 35 Hot Rod Truck #138. LS3 and 4L65E auto. Rcvd 01/05/2021. Legal 04/20/2023.
Build Thread. Sold 11/9/2023.
-
08-03-2020, 05:14 PM
#104
That chrome thermostat housing is going to be an issue. If you want to keep it, scuff the hose connecting area with some sand paper. Most people sand it like they are turning a door knob. This will leave grooves that help keep the hose from sliding off. Great looking ride and super detail.
20th Anniversary Mk IV, A50XS Coyote, TKO 600, Trunk Drop Box, Trunk Battery Box, Cubby Hole, Seat Heaters, Radiator hanger and shroud.
-
08-03-2020, 05:19 PM
#105
Fantastic
Originally Posted by
Caddy Dad
The first big box showed up today from BPE. 347 stroker, TKO 600 and hydraulic release bearing, 423 HP, 429 Ft lbs.
https://thefactoryfiveforum.com/atta...7&d=1577736458
https://thefactoryfiveforum.com/atta...8&d=1577736476
BPE even removed the mounting boss on the transmission for me. Thanks Johnny! I was really impressed with the shipping crate and packaging that Blueprint did. Lots of wiring, hoses and miscellaneous parts in the fuel accessories box. Not exactly sure where all those go yet, but I've got some time to figure it out.
The next big delivery should be this week.
Just started my build 2 weeks ago. Also went with a Blueprint motor and trans. Have fun. Will be keeping an eye out for your posts.
FFR MKIV Complete Kit - Blueprint 427 TKO 600 - IRS 3.55 Center section and Spindles.
-
08-03-2020, 05:40 PM
#106
<I'm running a 347 and Holley Sniper EFI from Blueprint engines. My issue now is that whenever I increase the RPM past 2K, the engines sputters, pops, coughs and runs rough. At idle its fine The Sniper widget screen says I'm still in learn mode. Is this normal? How long does learn mode last?>
This is interesting. Usually, it is at idle that problems arise and they clear up with higher RPMs. When it happens, is the engine under load or in neutral? Have you tried it without the air cleaner on (just for a short time to diagnose)?
With your scan tool, you can also check the IAC setting and air/fuel ratio.
I'm learning all of the Sniper stuff right now too. I had a problem with IAC setting that caused the motor to stall when pressing the clutch in coming to a stop sign but got everything sorted out.
MK IV Build #9659, 3 link, 17's, Forte 347, Sniper EFI, power steering, built for a freak sized person with 17" Kirkey Vintage seats, RT drop trunk, RT turn signal, lots of stuff from Breeze Automotive, Wilwood brakes, paint by Jeff Miller
-
08-03-2020, 09:24 PM
#107
Originally Posted by
Caddy Dad
I'm running a 347 and Holley Sniper EFI from Blueprint engines. My issue now is that whenever I increase the RPM past 2K, the engines sputters, pops, coughs and runs rough. At idle its fine The Sniper widget screen says I'm still in learn mode. Is this normal? How long does learn mode last?
Thanks!
Can you describe your fuel system? What type and flow rate pump? What filter(s)? Fuel line sizes of supply and return? Have you checked your plugs to see if they are clean or fouled? What ignition setup are you using? The learning will continue until you turn it off, which is not a bad thing. It takes a bit of tuning to get the system dialed in. I dabbled a bit with mine with the help of weendoggy and bobl as well as a couple of folks on the Holley Sniper forum.
Dave
-
08-04-2020, 08:42 AM
#108
Senior Member
Originally Posted by
edwardb
Looks and sounds great. Congrats! Too bad about the pipe. But you're right. Georgie is great to work with.
Thanks! I also have to give a big shout out of thanks and appreciation to you too. My visit and our conversation convinced me that I could build this project. Your build threads, craftsmanship and attention to detail motivated me to get to this point in the build. I can see my finish line from here and I'm looking forward to paying it back to other builders as well. I'm now wondering how long after I graduate my build will it be before I get bored and feel the desire to start my next project?
Thanks for all you do!
Mk IV Roadster #9749, Kit received Jan 2, 2020, Blueprint SBF 347 TKO600 Holley Sniper EFI, Dual roll bars, IRS, 17" Halibrand, Nitto 555 G2 245, 315 Road legal Oct 20, 2020
-
Post Thanks / Like - 1 Thanks, 0 Likes
-
08-04-2020, 11:48 AM
#109
Senior Member
Originally Posted by
Papa
Can you describe your fuel system? What type and flow rate pump? What filter(s)? Fuel line sizes of supply and return? Have you checked your plugs to see if they are clean or fouled? What ignition setup are you using? The learning will continue until you turn it off, which is not a bad thing. It takes a bit of tuning to get the system dialed in. I dabbled a bit with mine with the help of weendoggy and bobl as well as a couple of folks on the Holley Sniper forum.
Dave
Hi Dave,
I'm using the Pro-M 255 lph fuel pump 3/8 feed and return. Red horse high flow fuel filter. I've got 6AN hoses and 3/8 niCopp hard lines running down the passenger side. I'm also indicating 65 psi fuel pressure at the Sniper EFI and it dips a bit (5 psi?) as I goose the throttle but then quickly returns to 65 psi. I checked the timing and at idle I've got 12 degrees. I can't check it at 3500 as the engine won't rev up that high. I've tried it with the air cleaner removed as well. Same result. The AFR is 13.5% and the IAC is at 9 and decreases to 0 as it warms up. Idle is set to 800 RPM.
I haven't checked the plugs yet and not sure what a fouled plug would look like, but I have a spare set of plugs I'm going to install later today. I'm hoping that I've somehow managed to foul up the plugs with my haste to hear the engine run and didn't let it warm up all the way. Fingers crossed!
More to follow!
Thanks!
Mk IV Roadster #9749, Kit received Jan 2, 2020, Blueprint SBF 347 TKO600 Holley Sniper EFI, Dual roll bars, IRS, 17" Halibrand, Nitto 555 G2 245, 315 Road legal Oct 20, 2020
-
08-04-2020, 11:54 AM
#110

Originally Posted by
Caddy Dad
Hi Dave,
I'm using the Pro-M 255 lph fuel pump 3/8 feed and return. Red horse high flow fuel filter. I've got 6AN hoses and 3/8 niCopp hard lines running down the passenger side. I'm also indicating 65 psi fuel pressure at the Sniper EFI and it dips a bit (5 psi?) as I goose the throttle but then quickly returns to 65 psi. I checked the timing and at idle I've got 12 degrees. I can't check it at 3500 as the engine won't rev up that high. I've tried it with the air cleaner removed as well. Same result. The AFR is 13.5% and the IAC is at 9 and decreases to 0 as it warms up. Idle is set to 800 RPM.
I haven't checked the plugs yet and not sure what a fouled plug would look like, but I have a spare set of plugs I'm going to install later today. I'm hoping that I've somehow managed to foul up the plugs with my haste to hear the engine run and didn't let it warm up all the way. Fingers crossed!
More to follow!
Thanks!
Check your BPE documentation, but I think your timing is a bit retarded at 12 degrees. I think mine is at 16. Have you tried to do any data logging? That will help show what's happening as you encounter the stumble you're describing. If you haven't already, take a look at my thread on learning to tune the Sniper:
https://thefactoryfiveforum.com/show...-Holley-Sniper
Dave
-
08-04-2020, 02:22 PM
#111
Senior Member
Originally Posted by
Papa
Check your BPE documentation, but I think your timing is a bit retarded at 12 degrees. I think mine is at 16. Have you tried to do any data logging? That will help show what's happening as you encounter the stumble you're describing. If you haven't already, take a look at my thread on learning to tune the Sniper:
https://thefactoryfiveforum.com/show...-Holley-Sniper
Dave
Hi Dave,
I called BPE and was told anything between 10-16 is a good place to start. I replaced the spark plugs and got the same result. Idles ok at 800 RPM but when pushed to 2000+ RPM it runs really rough and shoots loud pops out the exhaust. It also really seems to stink up the garage quite a bit too! I'll take a look at your tuning thread and hopefully put it to good use. If the engine was starving for fuel, would it produce these kind of symptoms? The engine was dyno'd before it was shipped to me so I'm guessing I've got something screwed up with my install. Just breaking new ground for me as I've never had to trouble shoot a problem like this.
Thanks for your help!
Mk IV Roadster #9749, Kit received Jan 2, 2020, Blueprint SBF 347 TKO600 Holley Sniper EFI, Dual roll bars, IRS, 17" Halibrand, Nitto 555 G2 245, 315 Road legal Oct 20, 2020
-
08-04-2020, 02:39 PM
#112
Originally Posted by
Caddy Dad
Hi Dave,
I called BPE and was told anything between 10-16 is a good place to start. I replaced the spark plugs and got the same result. Idles ok at 800 RPM but when pushed to 2000+ RPM it runs really rough and shoots loud pops out the exhaust. It also really seems to stink up the garage quite a bit too! I'll take a look at your tuning thread and hopefully put it to good use. If the engine was starving for fuel, would it produce these kind of symptoms? The engine was dyno'd before it was shipped to me so I'm guessing I've got something screwed up with my install. Just breaking new ground for me as I've never had to trouble shoot a problem like this.
Thanks for your help!
If it's popping, check for exhaust leaks or vacuum leaks. Are all your vacuum ports plugged? It the popping under load or as you let off the throttle?
Last edited by Papa; 08-04-2020 at 02:45 PM.
-
08-04-2020, 03:28 PM
#113
Senior Member
Originally Posted by
Papa
If it's popping, check for exhaust leaks or vacuum leaks. Are all your vacuum ports plugged? It the popping under load or as you let off the throttle?
Hi Dave,
No obvious exhaust leaks that I could detect. I'm pretty sure all vacuum ports are plugged but I'll double check. The popping is under load with the transmission in neutral and as the engine runs rough and struggles to maintain its RPM. Releasing throttle to idle brings peace to the universe! :-) The engine just doesn't want to go above ~2000 RPM.
Thanks!
Mk IV Roadster #9749, Kit received Jan 2, 2020, Blueprint SBF 347 TKO600 Holley Sniper EFI, Dual roll bars, IRS, 17" Halibrand, Nitto 555 G2 245, 315 Road legal Oct 20, 2020
-
08-04-2020, 03:40 PM
#114
Originally Posted by
Caddy Dad
Hi Dave,
No obvious exhaust leaks that I could detect. I'm pretty sure all vacuum ports are plugged but I'll double check. The popping is under load with the transmission in neutral and as the engine runs rough and struggles to maintain its RPM. Releasing throttle to idle brings peace to the universe! :-) The engine just doesn't want to go above ~2000 RPM.
Thanks!
Sounding more like a vacuum leak. I'll see if I can find the thread, but someone else was having a similar issue and it turned out to be a missing plug on the back side of the intake manifold.
-
08-04-2020, 04:41 PM
#115
Do any of your electronics have a rev limiter?
20th Anniversary Mk IV, A50XS Coyote, TKO 600, Trunk Drop Box, Trunk Battery Box, Cubby Hole, Seat Heaters, Radiator hanger and shroud.
-
08-04-2020, 07:07 PM
#116
Senior Member
Originally Posted by
Railroad
Do any of your electronics have a rev limiter?
No rev limiter. It was dyno'd by BPE and got good results. I installed it and obviously have something not quite right. Not sure what. I believe the timing and ignition are good. My only guess now is maybe the fuel system? But I've got good fuel pressure.
Mk IV Roadster #9749, Kit received Jan 2, 2020, Blueprint SBF 347 TKO600 Holley Sniper EFI, Dual roll bars, IRS, 17" Halibrand, Nitto 555 G2 245, 315 Road legal Oct 20, 2020
-
08-04-2020, 09:54 PM
#117
Senior Member
Originally Posted by
Railroad
That chrome thermostat housing is going to be an issue. If you want to keep it, scuff the hose connecting area with some sand paper. Most people sand it like they are turning a door knob. This will leave grooves that help keep the hose from sliding off. Great looking ride and super detail.
Oh yeah. I've already been there. I had the top hose blow off shortly after first start. Made a huge mess. I scuffed up the neck with emory cloth and also scothbrite. I then installed the hoses with double clamps. Don't want that coming off again!
Mk IV Roadster #9749, Kit received Jan 2, 2020, Blueprint SBF 347 TKO600 Holley Sniper EFI, Dual roll bars, IRS, 17" Halibrand, Nitto 555 G2 245, 315 Road legal Oct 20, 2020
-
08-05-2020, 07:29 AM
#118
Is your ign vacuum advance, like BPE sent it? Do not know if manifold vs ported would cause the issue.
How about pulling the dist cap. That antifreeze bath might have moisturized the inside of the cap.
Sorry about the double post on the chrome thermostat housing. I must have opened the thread in the middle, by mistake.
20th Anniversary Mk IV, A50XS Coyote, TKO 600, Trunk Drop Box, Trunk Battery Box, Cubby Hole, Seat Heaters, Radiator hanger and shroud.
-
08-05-2020, 09:30 PM
#119
I know that you said that there is no rev limiter. But the distributor that you received on the engine has a built-in rev limiter that may need to be reset. What you are describing sounds like what a Revlimiter would be doing.
-
08-06-2020, 11:08 AM
#120
Senior Member
Originally Posted by
BadAsp427
I know that you said that there is no rev limiter. But the distributor that you received on the engine has a built-in rev limiter that may need to be reset. What you are describing sounds like what a Revlimiter would be doing.
Interesting. I didn't know that the distributor has a built in rev limiter. How do I reset it?
Thanks!
Mk IV Roadster #9749, Kit received Jan 2, 2020, Blueprint SBF 347 TKO600 Holley Sniper EFI, Dual roll bars, IRS, 17" Halibrand, Nitto 555 G2 245, 315 Road legal Oct 20, 2020


 Thanks:
  Likes:


 Reply With Quote


