-

Tonneau cover, homemade
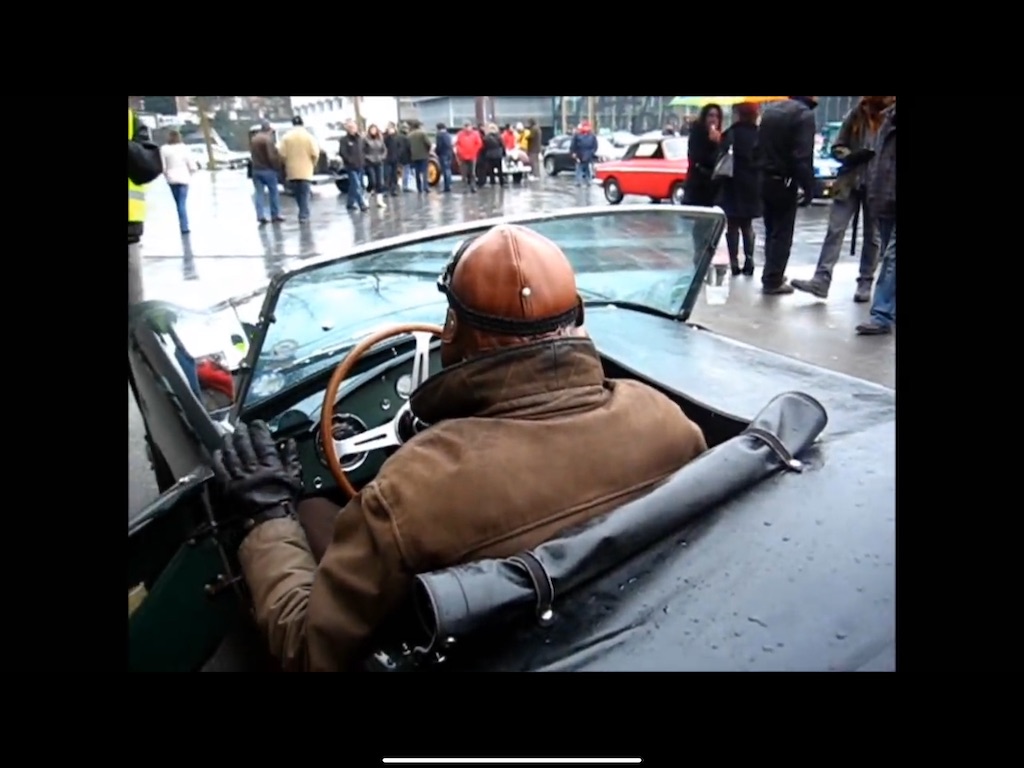
In anticipation of taking the Cobra out on weekend getaways, I made a tonneau cover. A photo of an original AC Bristol that participated in the 1000 mile Mille Miglia in Italy was my inspiration. I'm by no means a seamstress; I just enjoy doing something new and making things. I was hoping I could drive with the cover attached on the passenger side and with the driver side rolled up. However, the passenger side flapped around in the wind a little too much for my liking. It is not bad, I just don't want the flapping cover to ruin my paint job. Anyway, it is a good cover for when I retire for the night at some motel, hotel, air bnb, or wherever the wind takes me. There is no provision for the steering wheel so I have to remove the wheel to completely button up the cockpit. And that's ok too as it is a bit more security.
I already placed the male lift the dot fasteners on the body during construction and after paint. All of the materials and supplies I used, including the sewing machine, thread, tonneau fabric, edge binding, basting tape, fasteners, I mean everything where purchased from sailrite.com. So I first made a template with that clear material and held it in place with double sided basting tape. I cut the template to size, along with a circular hole for the fuel cap. Then I placed the template on the black tonneau cover material and cut it. Then on the outer edges, on the bottom, I sewed an extra 3.5" band around the perimeter for added thickness and strength. Then I attached the 2 front center lift the dot fasteners and the 2 rear center lift the dot fasteners to center the whole cover on the car. Then I marked where the zipper was to be placed and then sewed the zipper on. I used the "bind and slit" method of stitching the zipper. The method is on Sailrite's YouTube channel. Then I attached the remaining fasteners working from the center out. Then I sewed the edge binding on. And finally I used the 1" binding, folded it over and stitched it together to make 4 straps. The straps where also stitched on with velcro. Here are some photos:


build thread:
http://thefactoryfiveforum.com/showt...-USRRC-vspeeds
Build School: July 14-16, 2017
Kit purchased: July 25, 2017
Kit delivered: September 13, 2017
First Start: December 22, 2018
Body painted and kit completed and drivable: July 2019 (but still not done)
CA SB100 Registration: January 2020
Mk4 - 289 USRRC Roadster kit, Roush 427SR with Schneider Racing custom camshaft, Fitech EFI, TKO600 (.64-5th gear), 15" wheels, stock brake calipers, under car exhaust with Spintech 7000 muffler, no roll bar, Russ Thompson turn signal, removable steering wheel, and many other small upgrades and modifications
-
Post Thanks / Like - 2 Thanks, 5 Likes
-
Senior Member

Nice work. I love the look of an old classic car.
Bradley
Build thread - Mk4, Coyote, IRS, Wilwood brakes, old-style soft top and accessories.
The distance between "finished" and finished is literally infinite.
-
Post Thanks / Like - 1 Thanks, 0 Likes
-
Nice work, I've copied your details here and filed it away for another future project for myself. Yes, I used to drive my old sports cars with the passenger side closed with no problems but I have heard that comment from others about the FFR roadster. Possibly add an internal strap to pull the passenger side down to stiffen the material when closed. I think I've seen that on other British cars.
I once had a heavy duty sewing machine and taught myself. I used to dumpster dive at a sail makers dumpster in the Annapolis, MD area and got some really nice pieces of 'throw away' material. Sewed up a bunch of items for my sail boat and made a bunch of Christmas gifts too.
George
-
Post Thanks / Like - 2 Thanks, 0 Likes
-
That looks great. I like the fact that you used the NRG hub and didn't have to account for the wheel sticking up. Most people walking by would never know there's supposed to be a steering wheel sticking up above the dash/cowl. When I order my snapless tonneau, I may have them omit the steering wheel pocket, as I'm installing the same hub as you. I love the ideas that get shared on this forum. As long as money and time allow, I'll incorporate as many as I can into my build.
Scott
Built FFR9457. 351 Windsor, TKO600, 3.73. Fitech EFI. Russ Thompson throttle pedal, turn signal, and trunk pan. Carbon Fiber dash with Speedhut Revolution gauges. Paint by Jeff Kleiner.
-
Post Thanks / Like - 1 Thanks, 0 Likes
-

Originally Posted by
GWL

Nice work, I've copied your details here and filed it away for another future project for myself. Yes, I used to drive my old sports cars with the passenger side closed with no problems but I have heard that comment from others about the FFR roadster. Possibly add an internal strap to pull the passenger side down to stiffen the material when closed. I think I've seen that on other British cars.
I once had a heavy duty sewing machine and taught myself. I used to dumpster dive at a sail makers dumpster in the Annapolis, MD area and got some really nice pieces of 'throw away' material. Sewed up a bunch of items for my sail boat and made a bunch of Christmas gifts too.
George
George
Thanks for the idea for the inside strap. I’ll try that out.
It’s funny; I have a decent paying job but I also dumpster dive. One man’s garbage is another man’s treasure.
build thread:
http://thefactoryfiveforum.com/showt...-USRRC-vspeeds
Build School: July 14-16, 2017
Kit purchased: July 25, 2017
Kit delivered: September 13, 2017
First Start: December 22, 2018
Body painted and kit completed and drivable: July 2019 (but still not done)
CA SB100 Registration: January 2020
Mk4 - 289 USRRC Roadster kit, Roush 427SR with Schneider Racing custom camshaft, Fitech EFI, TKO600 (.64-5th gear), 15" wheels, stock brake calipers, under car exhaust with Spintech 7000 muffler, no roll bar, Russ Thompson turn signal, removable steering wheel, and many other small upgrades and modifications
-
Originally Posted by
Vspeeds
George
Thanks for the idea for the inside strap. I’ll try that out.
It’s funny; I have a decent paying job but I also dumpster dive. One man’s garbage is another man’s treasure.
I laugh ...and being retired I still grab an occasional piece of wood (or two) from the dumpsters at construction sites in our community.
George
-
Senior Member

Small boat sail "stays" (or anything similar) slid into pockets sewed on the underside will help stop the flapping . . . run them front to back for the best effect.
Doc
FFR3712K (MKII) in Lost Wages Nevada.
5.0 w/tubular GT-40 EFI, E303 cam, Custom 4 into 4 headers, T5, 3-Link 3.73 rear. Full F5 tubular suspension. Drop Butt mod, Dash forward mod, custom foot box air vents, custom turn signal system. 13" PBR brakes, Fiero E-Brake mod, Flaming River 18:1 rack w/ F5 bump steer kit on Breeze bushings. 17" Chrome Cobra "R's" w/ 275 fronts and 315 rears. MKIV seats. FORD Royal Blue w/ Arctic White stripes.
-
Post Thanks / Like - 1 Thanks, 1 Likes
-
Thanks Doc
Ill look into those "stays"
build thread:
http://thefactoryfiveforum.com/showt...-USRRC-vspeeds
Build School: July 14-16, 2017
Kit purchased: July 25, 2017
Kit delivered: September 13, 2017
First Start: December 22, 2018
Body painted and kit completed and drivable: July 2019 (but still not done)
CA SB100 Registration: January 2020
Mk4 - 289 USRRC Roadster kit, Roush 427SR with Schneider Racing custom camshaft, Fitech EFI, TKO600 (.64-5th gear), 15" wheels, stock brake calipers, under car exhaust with Spintech 7000 muffler, no roll bar, Russ Thompson turn signal, removable steering wheel, and many other small upgrades and modifications
-
Dave
Mk 3.1 - #6882 - 5.0L 302 - FiTech EFI - 3-Link - 3.08 Ratio - 15" Wheels
Greenhorn and doing the best I can
My photos are at:
My Flickr acct
Videos are at:
YouTube Videos
-
Post Thanks / Like - 1 Thanks, 0 Likes
-
Helicopter Wrench-Bender

What template are folks using to accurately place the Lift-A-Dot studs on the body? - thank you
"Gravity, It's The Law" 
-
Senior Member
Originally Posted by
ChopperJustin
What template are folks using to accurately place the Lift-A-Dot studs on the body? - thank you
I wanted a template too when I put my Whitby tonneau on, as they only showed where the rear posts go for the soft top. For the front I used historical photos, but ended up placing them where they would make the tonneau the most even and taught.
Bradley
Bradley
Build thread - Mk4, Coyote, IRS, Wilwood brakes, old-style soft top and accessories.
The distance between "finished" and finished is literally infinite.
-
Post Thanks / Like - 1 Thanks, 0 Likes
-
Originally Posted by
ChopperJustin
What template are folks using to accurately place the Lift-A-Dot studs on the body? - thank you
I didn’t use a template neither. I did however replicate a 289 slabside from Superformance. I took measurements of their lift the dot locations. I could post/send them if you want.
build thread:
http://thefactoryfiveforum.com/showt...-USRRC-vspeeds
Build School: July 14-16, 2017
Kit purchased: July 25, 2017
Kit delivered: September 13, 2017
First Start: December 22, 2018
Body painted and kit completed and drivable: July 2019 (but still not done)
CA SB100 Registration: January 2020
Mk4 - 289 USRRC Roadster kit, Roush 427SR with Schneider Racing custom camshaft, Fitech EFI, TKO600 (.64-5th gear), 15" wheels, stock brake calipers, under car exhaust with Spintech 7000 muffler, no roll bar, Russ Thompson turn signal, removable steering wheel, and many other small upgrades and modifications
-
Senior Member

If you've got a heater, a tonneau is even better! Keeps the warmth in there REAL NICE!
F5R #7446: MK4, 302, T5 midshift, 3.55 Posi IRS, 17" Halibrands
Delivered 4/4/11, First start 9/29/12, Licensed 4/24/13, off to PAINT 2/15/14!! Wahoo!
-
Originally Posted by
MPTech
If you've got a heater, a tonneau is even better! Keeps the warmth in there REAL NICE!
No heater on this build. But my electric seat heater seems to suffice for California weather. High 50’s F in the winter. I made the cover mainly for covering up the cockpit overnight when traveling.
build thread:
http://thefactoryfiveforum.com/showt...-USRRC-vspeeds
Build School: July 14-16, 2017
Kit purchased: July 25, 2017
Kit delivered: September 13, 2017
First Start: December 22, 2018
Body painted and kit completed and drivable: July 2019 (but still not done)
CA SB100 Registration: January 2020
Mk4 - 289 USRRC Roadster kit, Roush 427SR with Schneider Racing custom camshaft, Fitech EFI, TKO600 (.64-5th gear), 15" wheels, stock brake calipers, under car exhaust with Spintech 7000 muffler, no roll bar, Russ Thompson turn signal, removable steering wheel, and many other small upgrades and modifications
-
Senior Member

Nice job. Looks great. I think I'll get the removable steering wheel hub as well.
Mk4 Complete Kit delivered 5/2019, Gen 2 Coyote, TKO 600, IRS, Wilwood F/R, Power steering, Halibrand 17 X 9 Front 17 X 10.5 Rear, Nitto NT555 G2 F/R
-
Post Thanks / Like - 1 Thanks, 0 Likes


 Thanks:
  Likes:


 Reply With Quote

