-
Beautiful work, I love your attention to detail
-
Senior Member


Originally Posted by
runamuk

Beautiful work, I love your attention to detail
Thanks! More to come soon...
-
Senior Member
1st Drive
The weekend before last I had some friends over and we took the coupe out for it's first road test. First lap around the block my buddy chased me in his super sweet 16' convertible mustang with a seriously awesome whipple installed. He accidentally recorded his face the whole time so I don't have chase video at present, LOL. All I can say is how surprised I am at the fact I had zero issues! No leaks, everything works (that could) and even though it isn't tuned yet it still runs pretty darn good. Can't wait until I can do some proper tuning on it once it's road legal. HP Tuners is a ton of fun and I love pouring over the data logs, but I digress...
Hope you all enjoy the videos!
Cheers,
Patrick
-
Post Thanks / Like - 0 Thanks, 1 Likes
-
Senior Member
Didn't realize you could only post one at a time
-
Post Thanks / Like - 0 Thanks, 2 Likes
-
Funny how the driver front tire stops turning as you're backing into the street!
And, I couldn't get away with go-karting like that, were it me, before I got two blocks down the street there would be three cops ready to write me up!")
-
Post Thanks / Like - 0 Thanks, 1 Likes
-
Senior Member
Engine Assembly Part 2
Had some family visit a few weeks ago and then got distracted with some other things in life, but have time now so let's continue on with the 2nd part of the engine assembly. Not sure how many this will end up being, but probably one more...maybe two 
The short block assembly was straightforward or at least I think it was since this is the first one I've ever done. Seemed to go just like it does on TV. I did a check with plastigage more as a sanity check as I was pretty confident in the Ford bearing numbering system and the plastigage just confirmed that everything looked right. I did use stock main bolts as the price delta in ARP's was pretty high and I don't see going back into the bottom end again unless something goes bad and then I'll be out quite a bit more $$$ in that event. Rod bolts were also stock but mostly because I used stock rods. I don't think the bolts are something you could really upgrade without using different rods. I did accidentally smoke one rod bolt as I followed the wrong torque spec. Had to order new ones to replace as they are TTY and I proved that in one fell swoop of the torque wrench. No harm came to anything other than the bolt and more time for new ones to come in from the local ford dealer. Pretty inexpensive mistake as they are only a few bucks a piece, no complaints there.
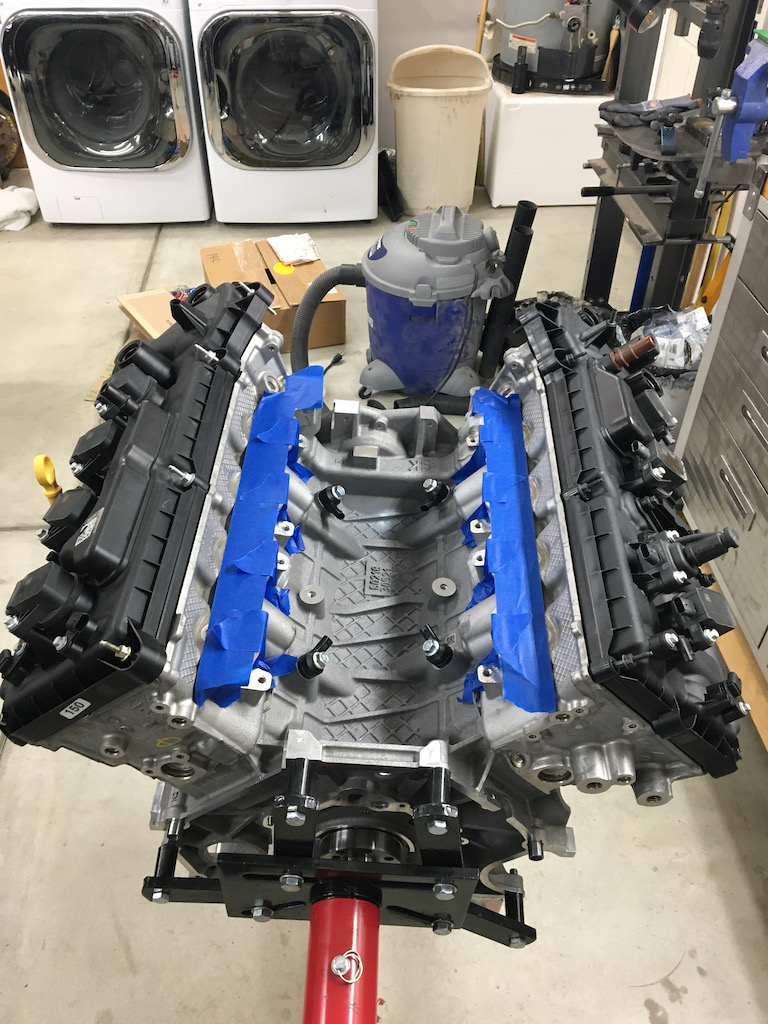
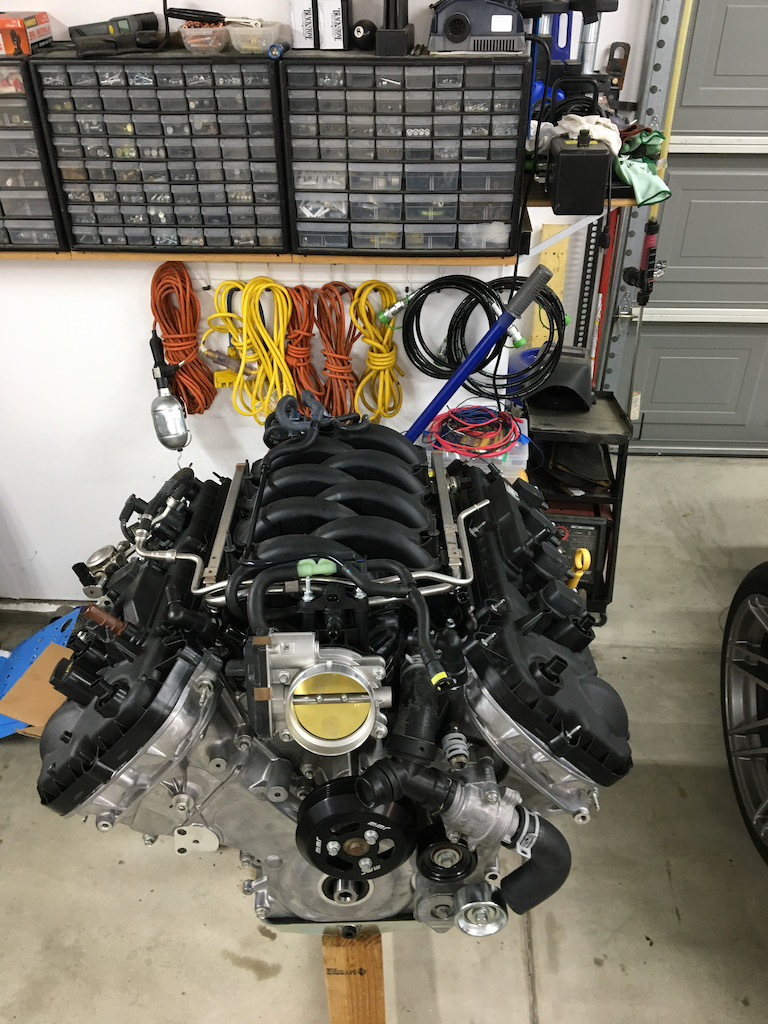
I think I mentioned this before, but I'm the worst at remembering to snap photos of progress so unfortunately I don't have any pictures of assembling the short block, you'll just have to trust me it went well and resulted in this once the heads were on:
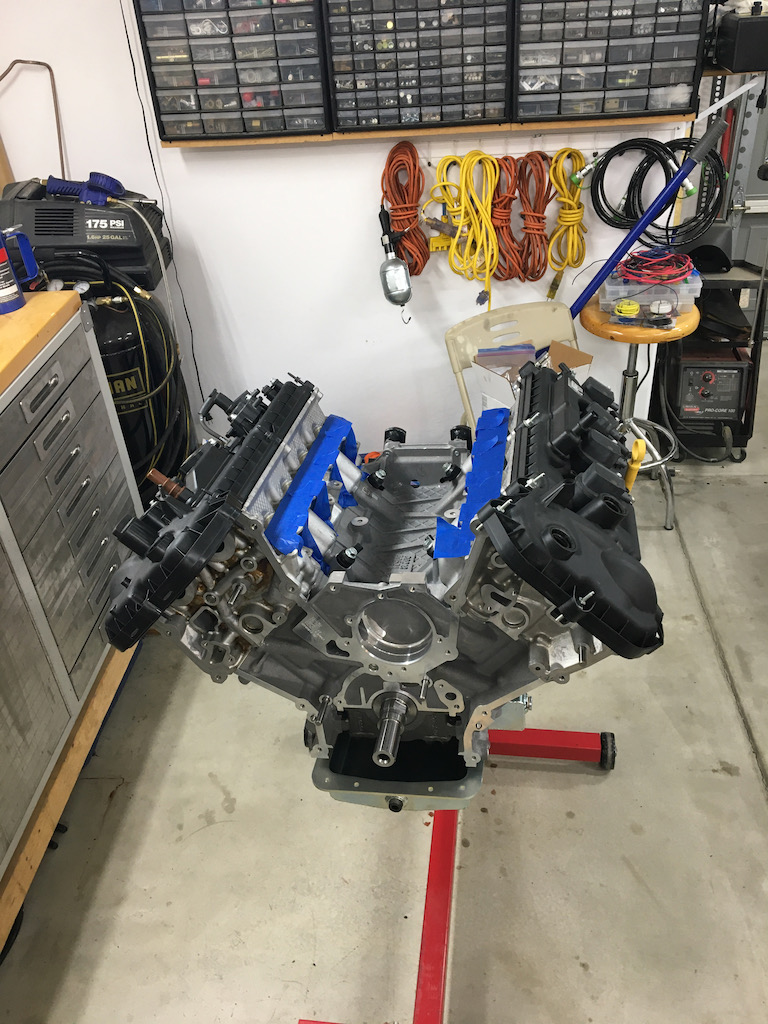
Stuck the valve covers on there to keep debris out. Oil pan was just hung with a few bolts to catch the drips from the assembly lube. Was doing this on weeknights in short sessions.
I also used the factory pistons and crank (did end up with a new one since the junkyard one had some pitting on a main journal, documented in previous posts and in the Coyote thread). I opted for total seal's gapless rings which are clever. There seems to be some controversy out there about them, more of an old school vs new school thing, but talked to total seal about them a handful of times and I guess they are good salesmen, lol. Also, since the Gen3 is a different bore size than previous Coyote I ended up sending them a piston to make sure I got the correct sized rings. Hopefully they used that to update their database (I never looked back to check). Awful nice bunch of guys at total seal. Only the top rings required filing and not much at that. With the rotating assembly installed I checked the rotating torque and I can't remember the exact numbers, but it could be measured with my inch-pound wrench so that was pretty cool.
This will probably sound pretty dumb, but my heart was actually racing when I knocked the first piston in the hole. I've never done that before and I was seriously nervous that I would break a ring right out of the gate. Thankfully no issues whatsoever, they all glided in smooth as glass which I largely attribute to using one the of the bore size specific tapered ring compressors. I felt the $30 was cheap insurance on a task I've never done before.
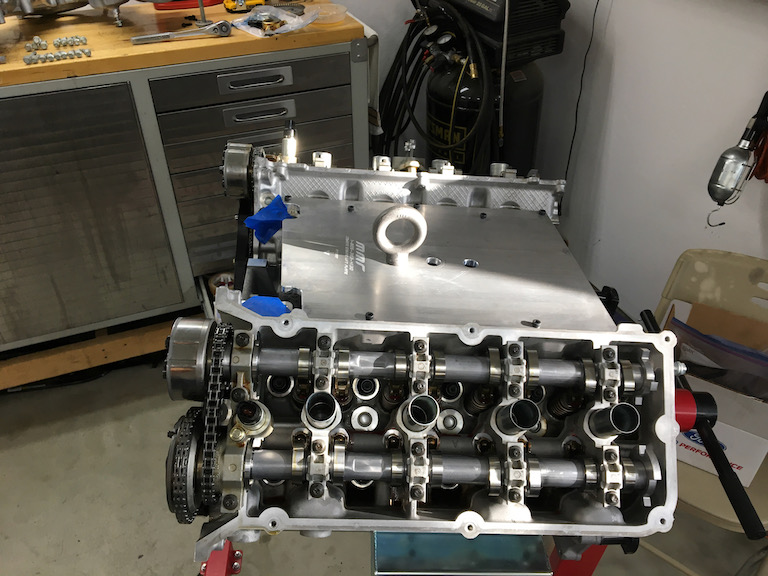
Next up was installing the new Mustang cams and doing the timing. Still seems crazy to me you can get those cams for the cost of a good high performance pushrod engine cam. Happy to capitalize on economy of scale. Timing is really pretty darn easy on these, but I can see where it could be much more challenging with the engine installed...as most things tend to be. Lots of good videos out there on how to do it so I just followed one that referenced the ford service manual. Cleary I got it right from the previous videos

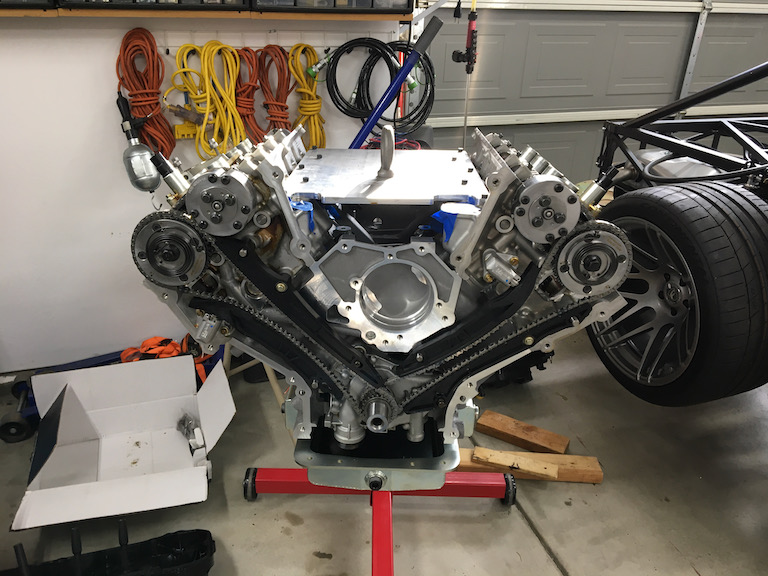
I did use ARP head studs and glad I did. The factory TTY bolts have a ridiculously high torque sequence. I broke two different 15mm sockets getting them out. The ARP's get torqued to 125 lb-ft which it still a lot, but seemed way more manageable than when I was trying to break the factory ones loose.
Last note about the heads. Took them to MMR and they did their CNC porting and valve job. While they were in there I had them check the valve guides, which were good, replace the valve seals and they were kind enough to through in a new set of factory springs they had sitting on the shelf. No charge on the springs which was pretty cool of them. The old ones were so dirty from an engine that clearly did not see frequent oil changes that it was easier to replace than clean them. MMR stated that California is so strict about solvent usage that it's just not worth their time to clean stuff like those springs.
I think that will wrap it up for this post.
Cheers,
Patrick
-
Post Thanks / Like - 1 Thanks, 1 Likes
 WIS89
WIS89 thanked for this post
-
Senior Member
Originally Posted by
Ltngdrvr
Funny how the driver front tire stops turning as you're backing into the street!
And, I couldn't get away with go-karting like that, were it me, before I got two blocks down the street there would be three cops ready to write me up!
Yeah, the driveways where I live are pretty aggressive. I three wheel my daily driver every time, lol. Thankfully the torsen diff handled the three wheeling quite well on the way up the drive.
I'm lucky to live in a quiet neighborhood which is outside of city limits. Even so I didn't want to press my luck and I try to be respectful and not make noise after 8pm. The next time it hits the street will hopefully be during the registration process.
-
Senior Member
Engine Assembly Part 3
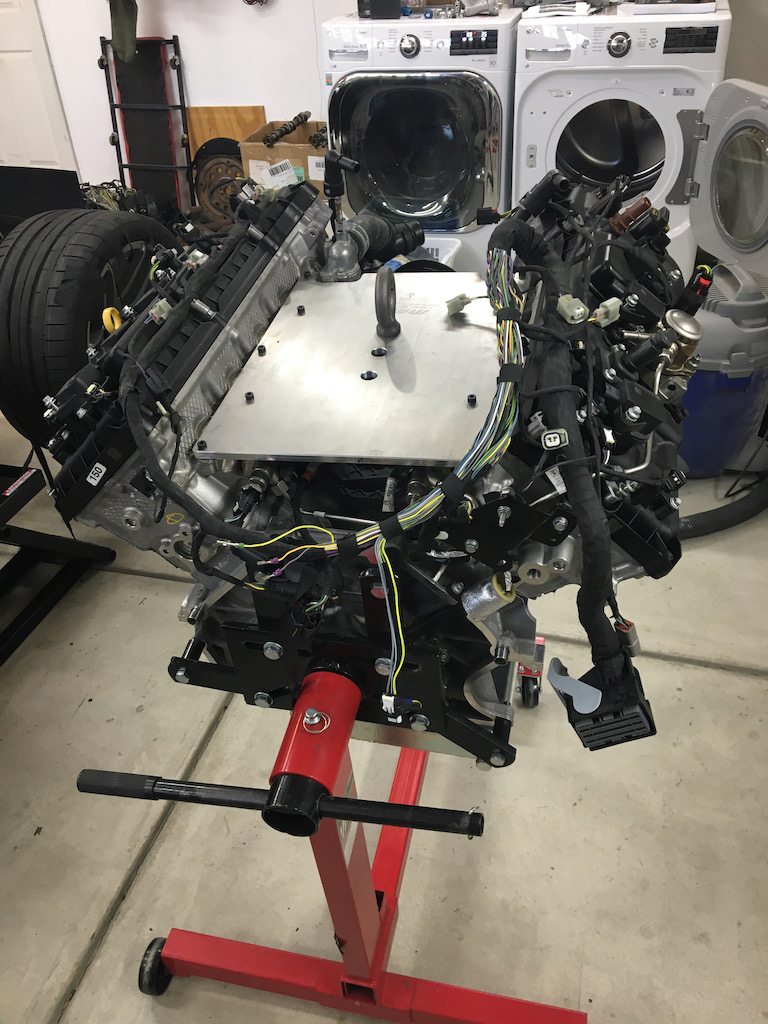
As I've stated before, I'm not brilliant about taking photos when I should. So this is the glam shot of the assembled engine minus the wiring harness, which will be the primary topic for this installment of the engine assembly. Before that just a few notes on the remainder of the assembly. With all of the challenging parts completed the rest was rather straightforward...timing cover, oil pan and valve covers are all very easy to knock out and as long as you take your time and keep surfaces clean, add the few spots of RTV where there are joints in the various covers then leaks shouldn't be a problem. The rear main seal retainer caused me a little grief as the seal didn't come with any kind of sleeve to make it slide over the crank shaft more easily, but I ended up making something out of some card stock which worked OK. In hind sight I should have also put some kind of a slippery tape on the card stock as it kind of dragged on the seal lips when removing it. Thankfully no issues with rear main leaks so I think I'm out of the woods on that one.
Next up it's time for some engine wiring harness surgery...
There were two main things to address here. 1) The computer mounting location dictated that I fold the harness towards the back which requires lengthening the wires to the throttle body and the passenger side intake cam phaser solenoid thingy. 2) Since I decided to use the GT350 intake manifold the CMVC connectors are different (basically Gen 2 vs. Gen 3).
For the 1st item, since I had gotten this from a junkyard F150 I still had the harness for that and the F150 harness is considerably longer than the Mustang so I pilfered those wires and connector from the donor harness which worked out to be just the right length I needed. They are easy to de-pin from the ECU connector so it was straightforward, just with the annoyance of unwrapping and re-wrapping the harness. Thankfully that fabric style tape from the factory is reusable as long as it's not too old and/or dirty. You just have to take your time and be careful with it. In the end it pretty much looks like a factory job. For the cam phaser solenoid I did have to cut and splice one wire that is common to many of the sensors, but since there was an existing splice I just cut that out and replaced the splice with my longer wires. No added splices or other connections...goal achieved.
For the second item, this was a bit more challenging and annoying to say the least. From what I can tell the difference between the Gen 2 and Gen 3 CMCV setup respectively is two vs. one solenoid valves and the position sensors are independent of the vacuum actuators. The solenoid valve was an easy fix with a vacuum "T" fitting to remove the second solenoid...problem solved! Interestingly there are kits to go from a Gen 2 to a Gen 3 manifold setup since the 2018 intake was so good compared to previous ones, but not the other way around. I know the Bullit model had at the GT350 intake on a Gen 3 so I thought I could source something from the dealership, but unfortunately this was one time they were not able to come through for me. In the end I found a gen 2 F-150 harness on eBay and picked that up for a decently cheap price. This time I did have to do some splicing, but it worked out well and things seem to working correctly. Of course the wire colors are also different so there was a bit of deductive guess work involved and it came down to a 50/50 shot of getting two of the three wires in the connectors right. I think I got lucky, but I need to check my data logs in HP tuners to be sure. The third wire was common to both sensors so I was confident in that one.
Gen 3 connector:
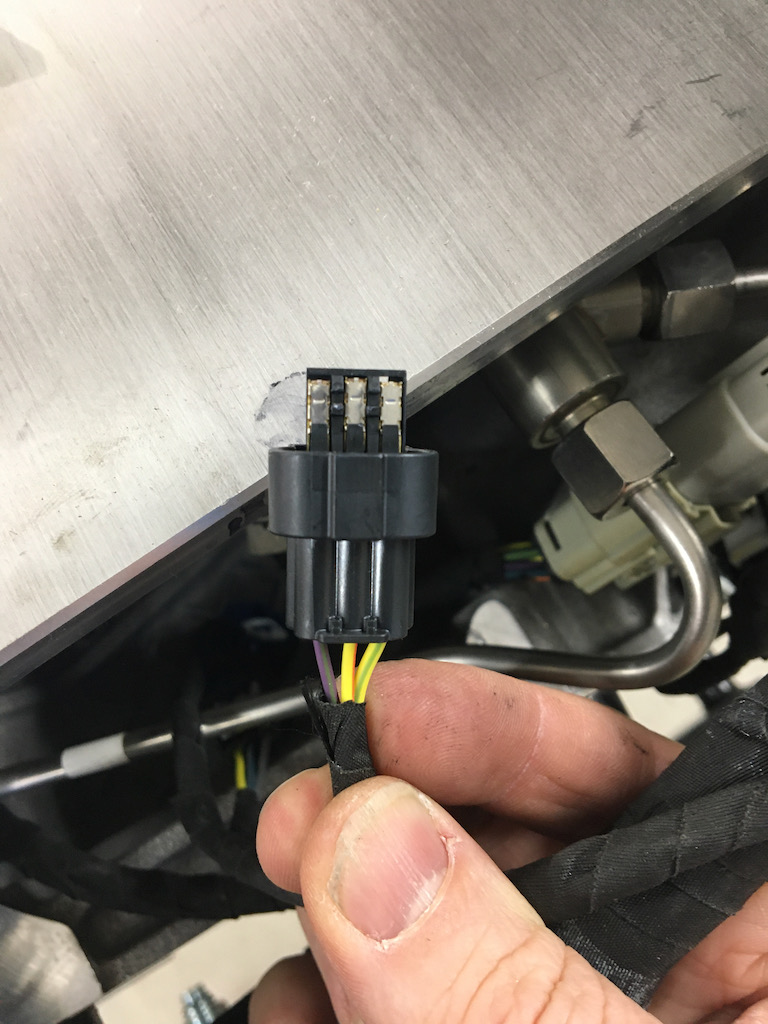
Gen 2 connector:

FWIW, the runners are actuating fine when it runs and there are no codes being thrown. Again, I'll check the data logs to be sure.
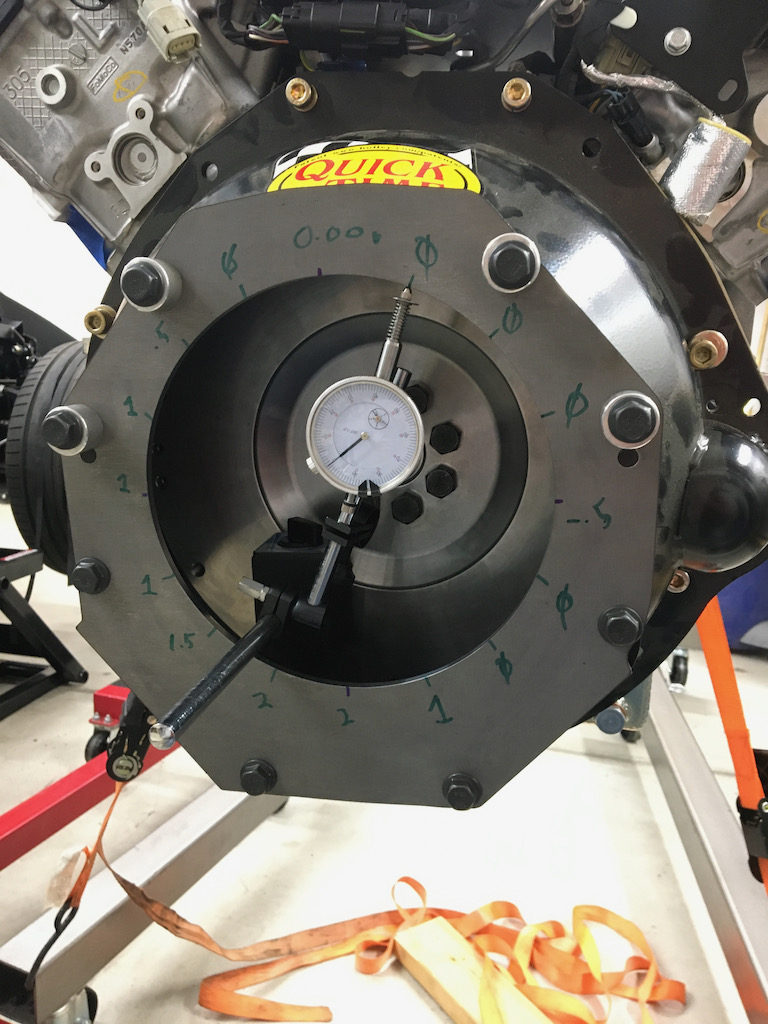
Now that all the wiring surgery was completed it was time to get this thing mated to the T-56. So first up was indexing the bell housing. I opted for the indexing plate from Bowler transmission which made the job a snap. I did have to clean up a couple of the bolt holes on the laser cut plate, but otherwise it went smoothly with good results so no need for offset guide pins, yay!
The clutch install was per the instructions and really not too difficult setting up the hydraulic throwout bearing from tilton. Trans matted smoothly to the engine and all was torqued to spec so I think I can call this a completed power unit.


The clutch was the ford performance part that looks like a re-branded center force and it functions quite well. The flywheel is also the ford performance billet unit that clocks in around 20lbs.
One other part I didn't mention previously, but is barely noticeable in the last picture is the ATI super damper. I picked up the one that has an aluminum hub and aluminum pulleys. It literally weights HALF of the stock part. The only thing quirky about it is you have to warm the aluminum hub up before pressing it onto the crank. ATI recommends boiling it, so that's exactly what I did and it worked out just like the instructions said it would. High quality part and maybe it'll be extra useful in the future if I decide to dry sump this engine. I really like the setup from Dailey Engineering, but future upgrade...finish the car first!
That wraps up the engine assembly and now I'll move on getting the car ready to receive the engine.
Cheers,
Patrick
-
Post Thanks / Like - 0 Thanks, 1 Likes
-
My Type 65 Coupe: Ordered May 27, 2021. Arrived November 19, 2021.
I would like to treat my gas pedal as a binary operator. It would be nice to get the cooperation of everyone in front of me.
-
Senior Member
Preparing the engine bay
Now that I have a completed power unit to install it's time to get the engine bay ready. My main purpose for this car is to make it a grand tourer. So sound deadening is a top priority. After calling second skin audio and discussing at length with them my goals, we came up with a custom package to address sound deadening as a strategy instead of just trying to through some peel and stick at it and hoping for the best. This involved providing area measurements for everywhere that we thought products would be needed so of course I made a spreadsheet! Happy to share it with anyone that is interested, just PM me.
The overall strategy is this:
damplifier (peel and stick) on all footbox sheetmetal
spray-on sound deadener on the rest of the cockpit sheetmetal
Mass Loaded Vinyl (MLV) on top of damplifier and spray-on where possible
damplifier inside doors and a melamine foam on top of that
Melamine foam on the roof before headliner is installed
spray on sound deadener on the backsides of the wheel well sheetmetal
undercoat (UPOL raptor planned) on the exposed side of wheel well sheetmetal
This will come at a weight penalty, but considering the main purpose of the car I'm completely happy to accept that. I'm estimating ~150lbs based on raw material weight.
In order to ease this installation on the footboxes I did all the sound deadening before I installed the panels.
Before the install:


Prepping the individual panel for install. I also installed the carpet at the same time since it was being adhered with contact cement and this just seemed easier to me.

After install:


The trickiest thing about this method of install was not getting the sealant all over the carpet, but took my time and I'm happy with the results. On the topic of sealant I went to the local HD and had sticker shock at how much a tube of silicon sealant cost. I started looking at alternatives they had on the shelf and came across this:
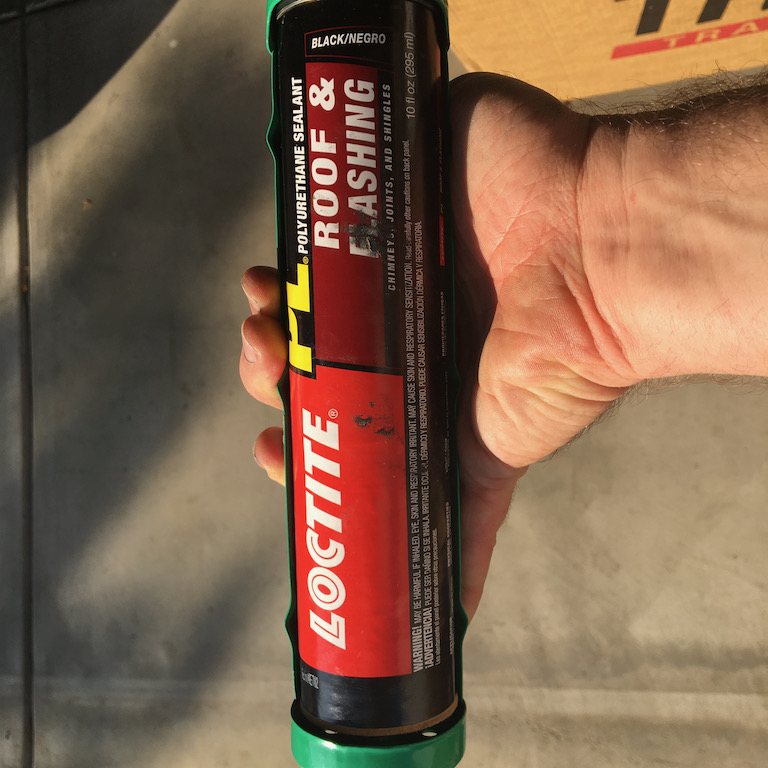
I really like this sealant and at only $7 a tube made me feel better about it. It takes about 7 days to cure so plenty of working time and in the event of a mistake its easy to remove in that time frame. Cleans up quite nicely with lacquer thinner or mineral spirits and is easy to remove (compared to silicon sealants) even after it cures. I did a couple of rounds of sealing up all of the gaps that the sheetmetal inevitably leaves behind.
As far as sound deadening is concerned it seems to be very effective, if you tap on the sheetmetal with a fingernail it sounds about the same as tapping on a concrete floor. Hopefully with as many square inches of coverage as I can achieve it will greatly reduce the sound levels and add to a little bit of comfort. I'm not expecting daily driver levels of sound, but hopefully short trips won't require ear plugs. If the sound is still horrible I will likely upgrade with a race radio style intercom with headsets. For now we'll see how it does.
Lastly, The second skin folks are really awesome! Everyone, and I mean EVERYONE, at the company is required to answer customer calls. If you call during business hours someone will answer. They had everything they carry in stock and shipping was quick. Great american company with outstanding customer service. We went back a forth a few times on the spreadsheet I had created and they were thankful to have that resource to meet my needs. They have also followed up a few times to see how I like the results, unfortunately its too soon to tell how it all worked out until the car is completed.
Cheers,
Patrick
-
Senior Member
-
Senior Member
-
Brake modulation is good just different from most stock cars. You control the brake with pressure not travel since as you noted they feel like there is a brick under the pedal.
David W
Mkll 4874 built in 2004
Gen 3 coupe #16 registered 2018 painted 2019
-
Senior Member

Surprised at the lack of attention this build got, any update on this car? Would love to see the body with these wheels on it.
-
Patrick,
Any regrets on the wheel choice now that you have got some miles on it? Have you had any issues with rubbing?
-
Originally Posted by
burchfieldb
Patrick,
Any regrets on the wheel choice now that you have got some miles on it? Have you had any issues with rubbing?
I'd also be curious to know how you like them as well, I'm getting ready to order wheels and I'm having a hard time deciding between 18's & 19's.
I really love your approach to this car, it looks exceptional.
-
only thing i will say is 18s will be lighter.
-
Originally Posted by
speedfreak440
I'd also be curious to know how you like them as well, I'm getting ready to order wheels and I'm having a hard time deciding between 18's & 19's.
I really love your approach to this car, it looks exceptional.
Ditto to this.
Your combo of 19 inch F14 wheels with the super and ultra deep concave is what I'm thinking for my build. Per Logan's 'Wheel and Tire Repository", you and Shannon Galusha are the only ones with this wheel combo. However, Shannon is listed as race suspension height, so I'm curious how yours have been behaving.
You changed your initial front offset from +6mm to +14mm, per Forgestar recs to better clear the Wilwood brakes. Do you feel that was the right call in hindsight? Any rubbing/notching of frame required?
Last edited by JimStone; 02-29-2024 at 03:24 PM.


 Thanks:
  Likes:


 Reply With Quote

