-
Senior Member


Originally Posted by
kmseddon

Hi Rich - I greatly appreciate the detail you are putting into your thread and the video. Our chases just arrived and we will be following you closely! I notice you show cutting aluminum and it sounds like you were making modifications to the foot boxes. Could you provide a little more detail about what modifications you are making and why? What were you cutting? What color powder costing are you going with? Best of luck!
Hey kmseddon, happy to help! I actually did not make any mods to the footbox. The cuts I made were to the sidewalls of the seat sheet metal. I cut down the edge that sits against the top of the transmission tunnel so it's flush with the frame. There was a little excess that would have pushed up the transmission tunnel cover. Sorry I couldn't be more helpful.
Cheers,
Matt
Matt
FFR Complete Kit, Coyote, Tremec TKX, 3.73 IRS, power steering, 18" Halibrands, Wilwood brakes, Gas-N pipes + header, Viking blue color
Roadster Build Time Tracker
-
Senior Member
A lot of progress today. My buddy Craig came over and helped installing the rear differential and most of the front suspension. We actually started with the rear wheel hubs, which is somewhat of a story in and of itself. I tried to follow the instructions in the manual to put a washer and lug nut on the wheel stud to pull it through. I gave it the old college try and, believe it or not, broke the neck of the impact wrench 3/8 drive adapter. Again, very glad to be erring on the side of safety and wearing eye protection. After this happened, I had EdwardB in my thoughts to slow down and evaluate... thanks again for the great advice Paul. A press is the "right" way to get the studs in so I first researched my local harbor freight and found out that the press I would need would take up too large of a footprint in my small garage. So calling around to a few shops I found one that would be willing to do it for $50. Pep Boys, for the record, quoted $321. I said we must be talking about different things and he wasn't willing to quote it unless he saw the parts. So I took it into the $50 shop and the guy looked at it and said, "Okay, here's what you're going to do..." and told me to use the lug nut approach. Tried it, I said. Then he said hit it with a punch. Tried it, I said. Then he said, "Fine I'll do it in 5 minutes for $20." Deal, I said. Well, in the back I heard the impact going to town. Then I heard the air hammer going to town. And I started getting a little worried. He came back with the two hubs a little sweaty about 30 minutes later and confessed he had to use the press after all. The stud he hit with the air hammer was pretty ugly on the head, but it's hidden behind the hub facing inward anyway.
Surprisingly, after I got home I noticed that at least half of the studs were not fully seated and, as a result, angled slightly. Here is a picture of the hubs with the studs installed:

So Craig and I started the day by hitting the lug nuts with the impact again. Fortunately, with the studs 99% seated, the impact did its job and straightened them out. Here you can see the picture of the stud not fully seated:

Matt
FFR Complete Kit, Coyote, Tremec TKX, 3.73 IRS, power steering, 18" Halibrands, Wilwood brakes, Gas-N pipes + header, Viking blue color
Roadster Build Time Tracker
-
Senior Member
Next we turned our attention to the rear differential. Some people say it goes in quickly without too much trouble, but many others report it to be the hardest part of the build. I am guessing that the mixed reviews is as a result of the variation in the dimensions of the weld. I'm sure it's a big challenge for FFR to hold such tight tolerances across such long distances. So I was glad to have Craig with me and prepared for the worst. Well, I am very happy to report that it went in basically as easy as you can expect. It took about an hour from first looking at the thing and getting it on the floor jack to loctite'd into the chassis. We were both very pleasantly surprised, and wondering if we missed something in the instructions!
Here's the pic, and I'm bummed that I forgot to turn on the time lapse for this part of the build. Would have been a cool one.

Matt
FFR Complete Kit, Coyote, Tremec TKX, 3.73 IRS, power steering, 18" Halibrands, Wilwood brakes, Gas-N pipes + header, Viking blue color
Roadster Build Time Tracker
-
Senior Member
Finally, we installed the front suspension. Thanks to the feedback from the forum on the front panels, I learned that two rivet holes are not accessible on the F panels after the front suspension is put on. I asked the PC shop to give me the F panels ASAP, and they turned it around a couple days later. I also thought I had it well timed with the black rivets from Summit as they were supposed to arrive yesterday. But they didn't show up. No big deal, Craig and I decided to use the FFR rivets for these four and I can touch them up with black paint. So with the F panels in hand we put our first rivets into the car! Craig took the first two and I put the next two in. We liberally applied silicon to the panels and cleco'd the rest of the panel to let the silicon set.
The passenger side (PS) went in without a hitch, which you can see below. Two spacers were required in the gaps of the LCA. As you can see, most of the bolts have only been hand tightened, so please don't hesitate to let me know if anything looks off!
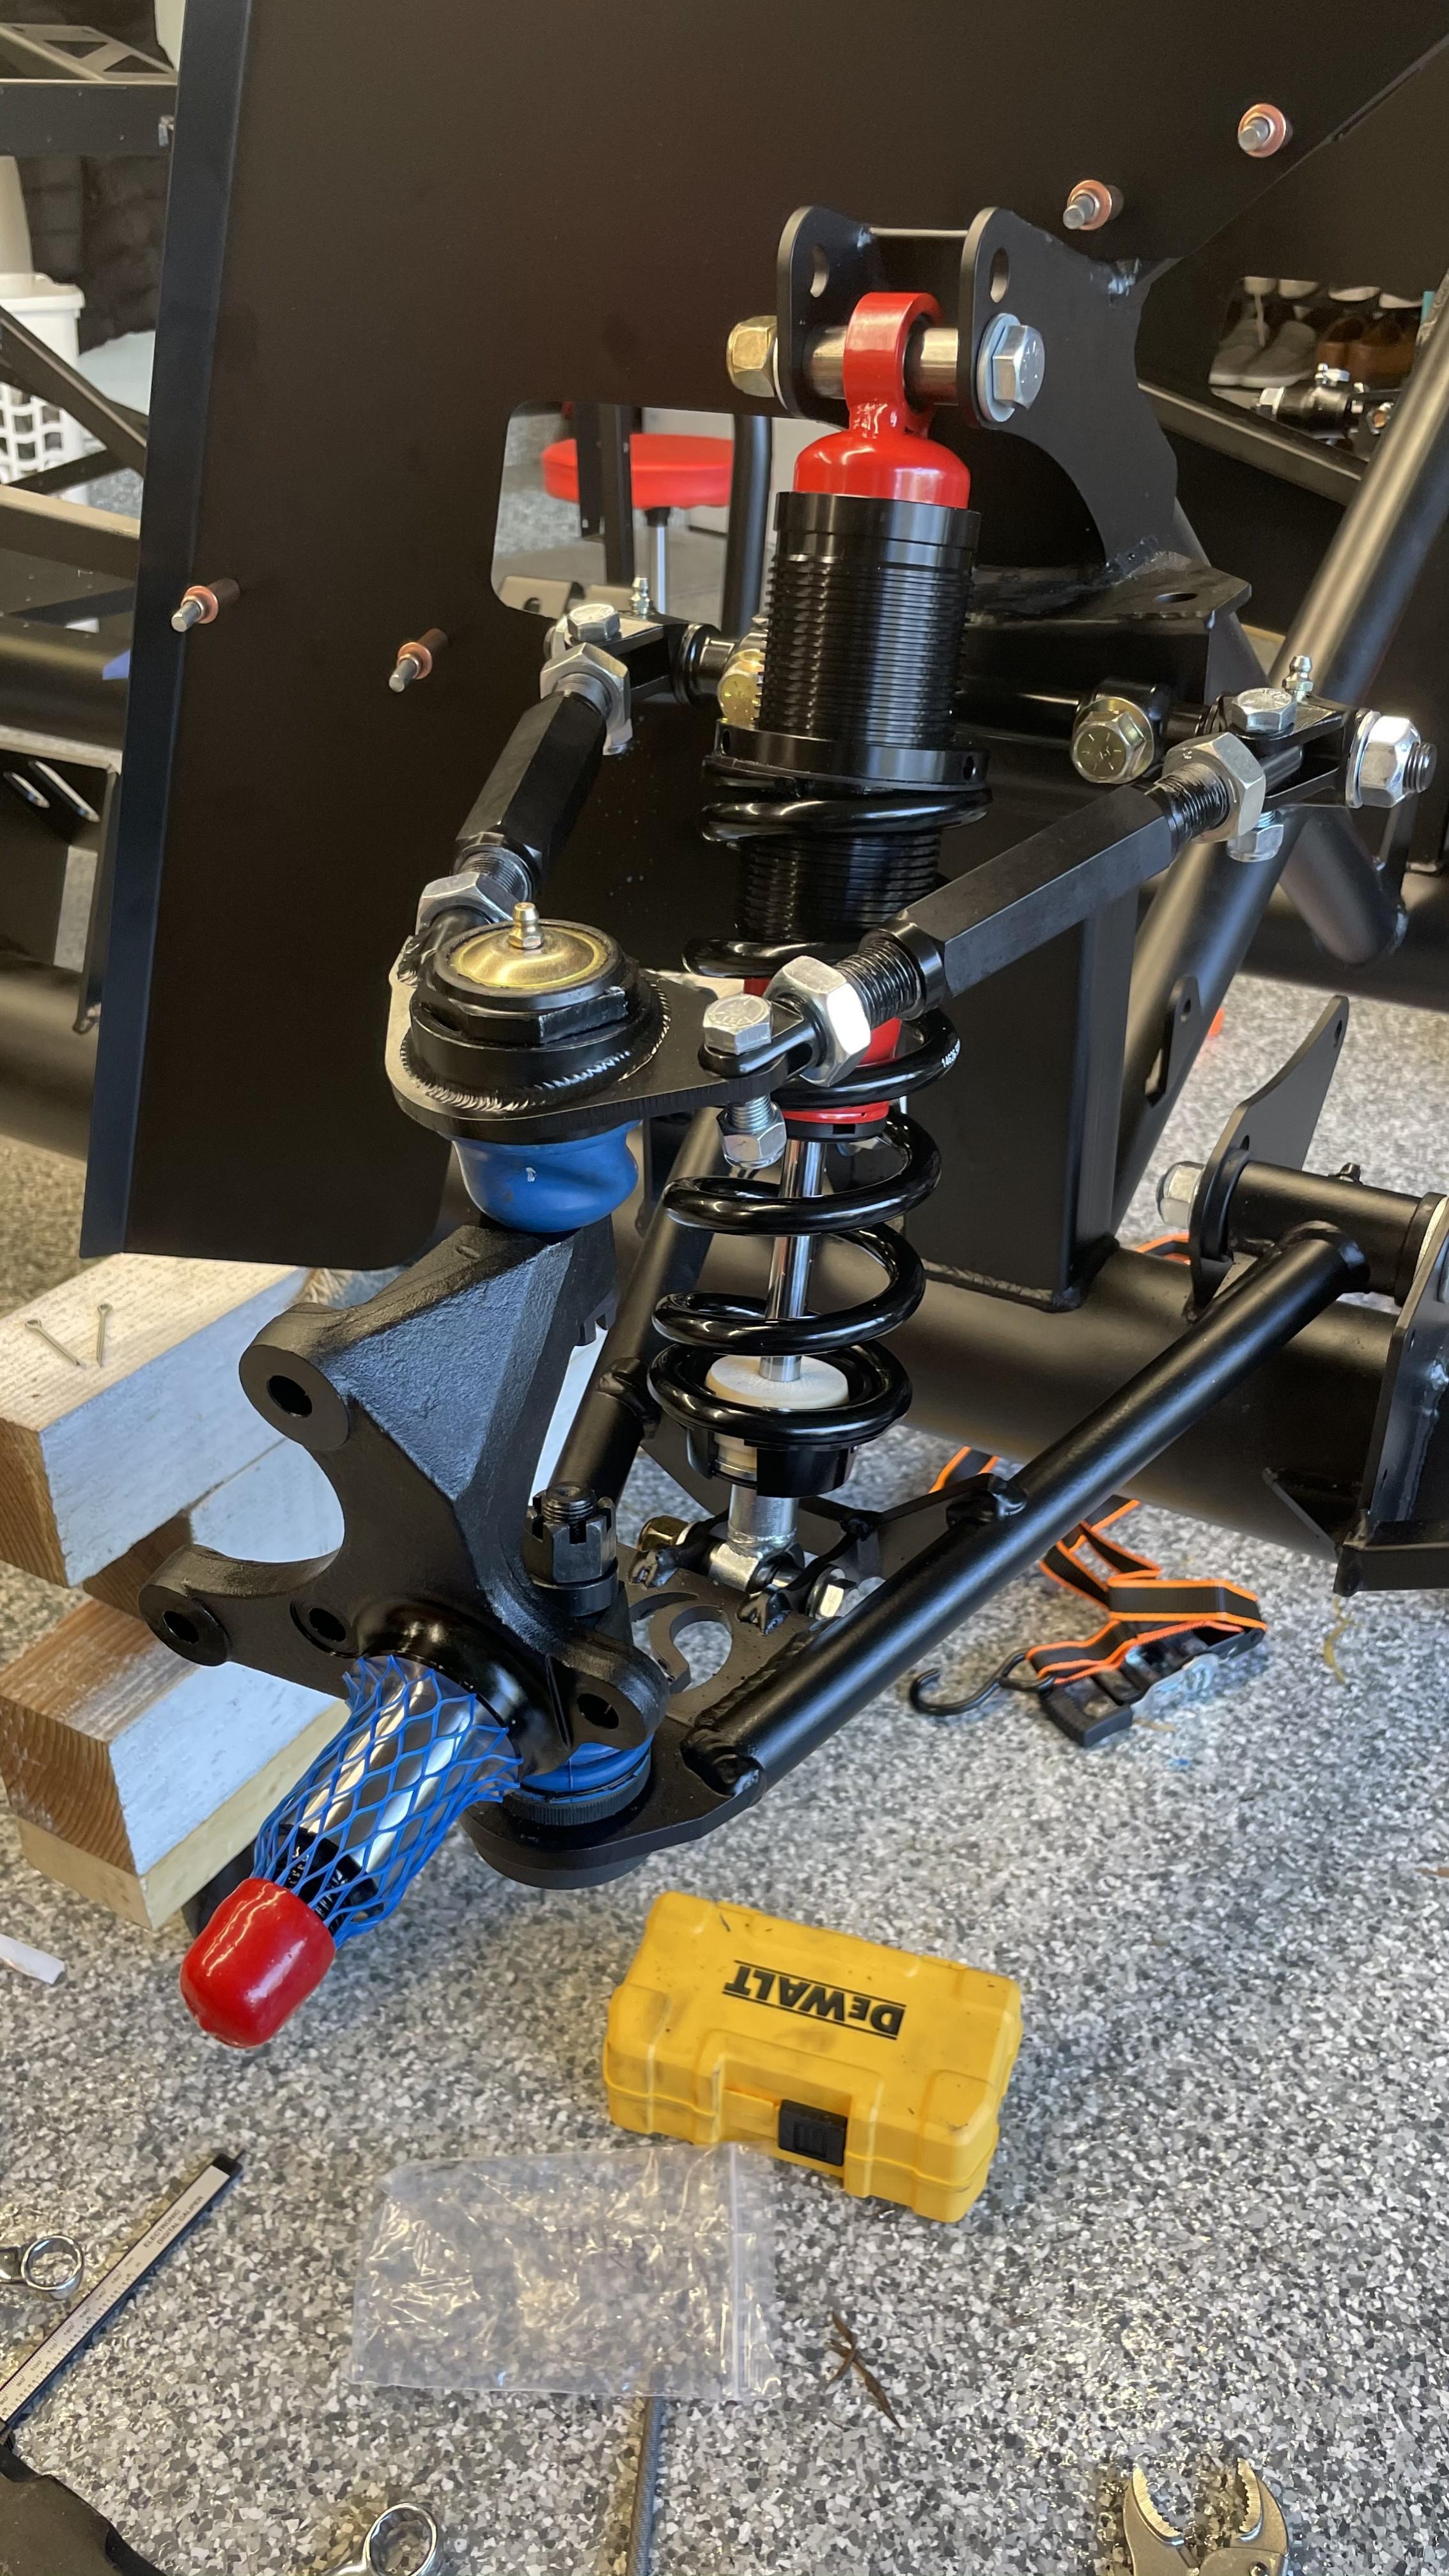
Unfortunately, the the driver side (DS) LCA install was not as smooth. The left side of the LCA was *barely* squeezing in and probably wasn't going to make it so my buddy grabbed a towel and some channel locks to pull it open a few millimeters. That side dropped in with a few love taps from the dead blow mallet. The right side had a big enough gap on both sides that we used both washers on both sides. The left gap was nicely spaced for one of the washers, but the right sight was significantly too tight. We also tried the channel locks and managed to get it in but it looked like it was stressing the mount on the chassis too much. After running through a few ideas, we decided the easiest way to make it fit would be to shave a few millimeters off of the bushing sleeve. So we popped it out and, without a wheel grinder, Craig had the great idea to use my belt sander. This would ensure the sleeve end stays as flat as possible. Here's the belt sander setup:

We shaved it down and with some slight finessing from the channel locks we got the the washer in. Our difficulties weren't totally over though, as it was impossible for us to get everything to align. So we strapped on my ratcheting straps and used that to pull the side of the LCA into place. Here's the strap setup:

Finally, we were able to get the bolt through! Everything came together pretty easily after we sorted that out. Here are a few more pictures:
Passenger side inside view:
Driver's side inside view:
Driver's side outside view:

And here's the time lapse from the day:
Last edited by richtersand; 11-30-2020 at 12:03 AM.
Matt
FFR Complete Kit, Coyote, Tremec TKX, 3.73 IRS, power steering, 18" Halibrands, Wilwood brakes, Gas-N pipes + header, Viking blue color
Roadster Build Time Tracker
-
Senior Member
Originally Posted by
richtersand
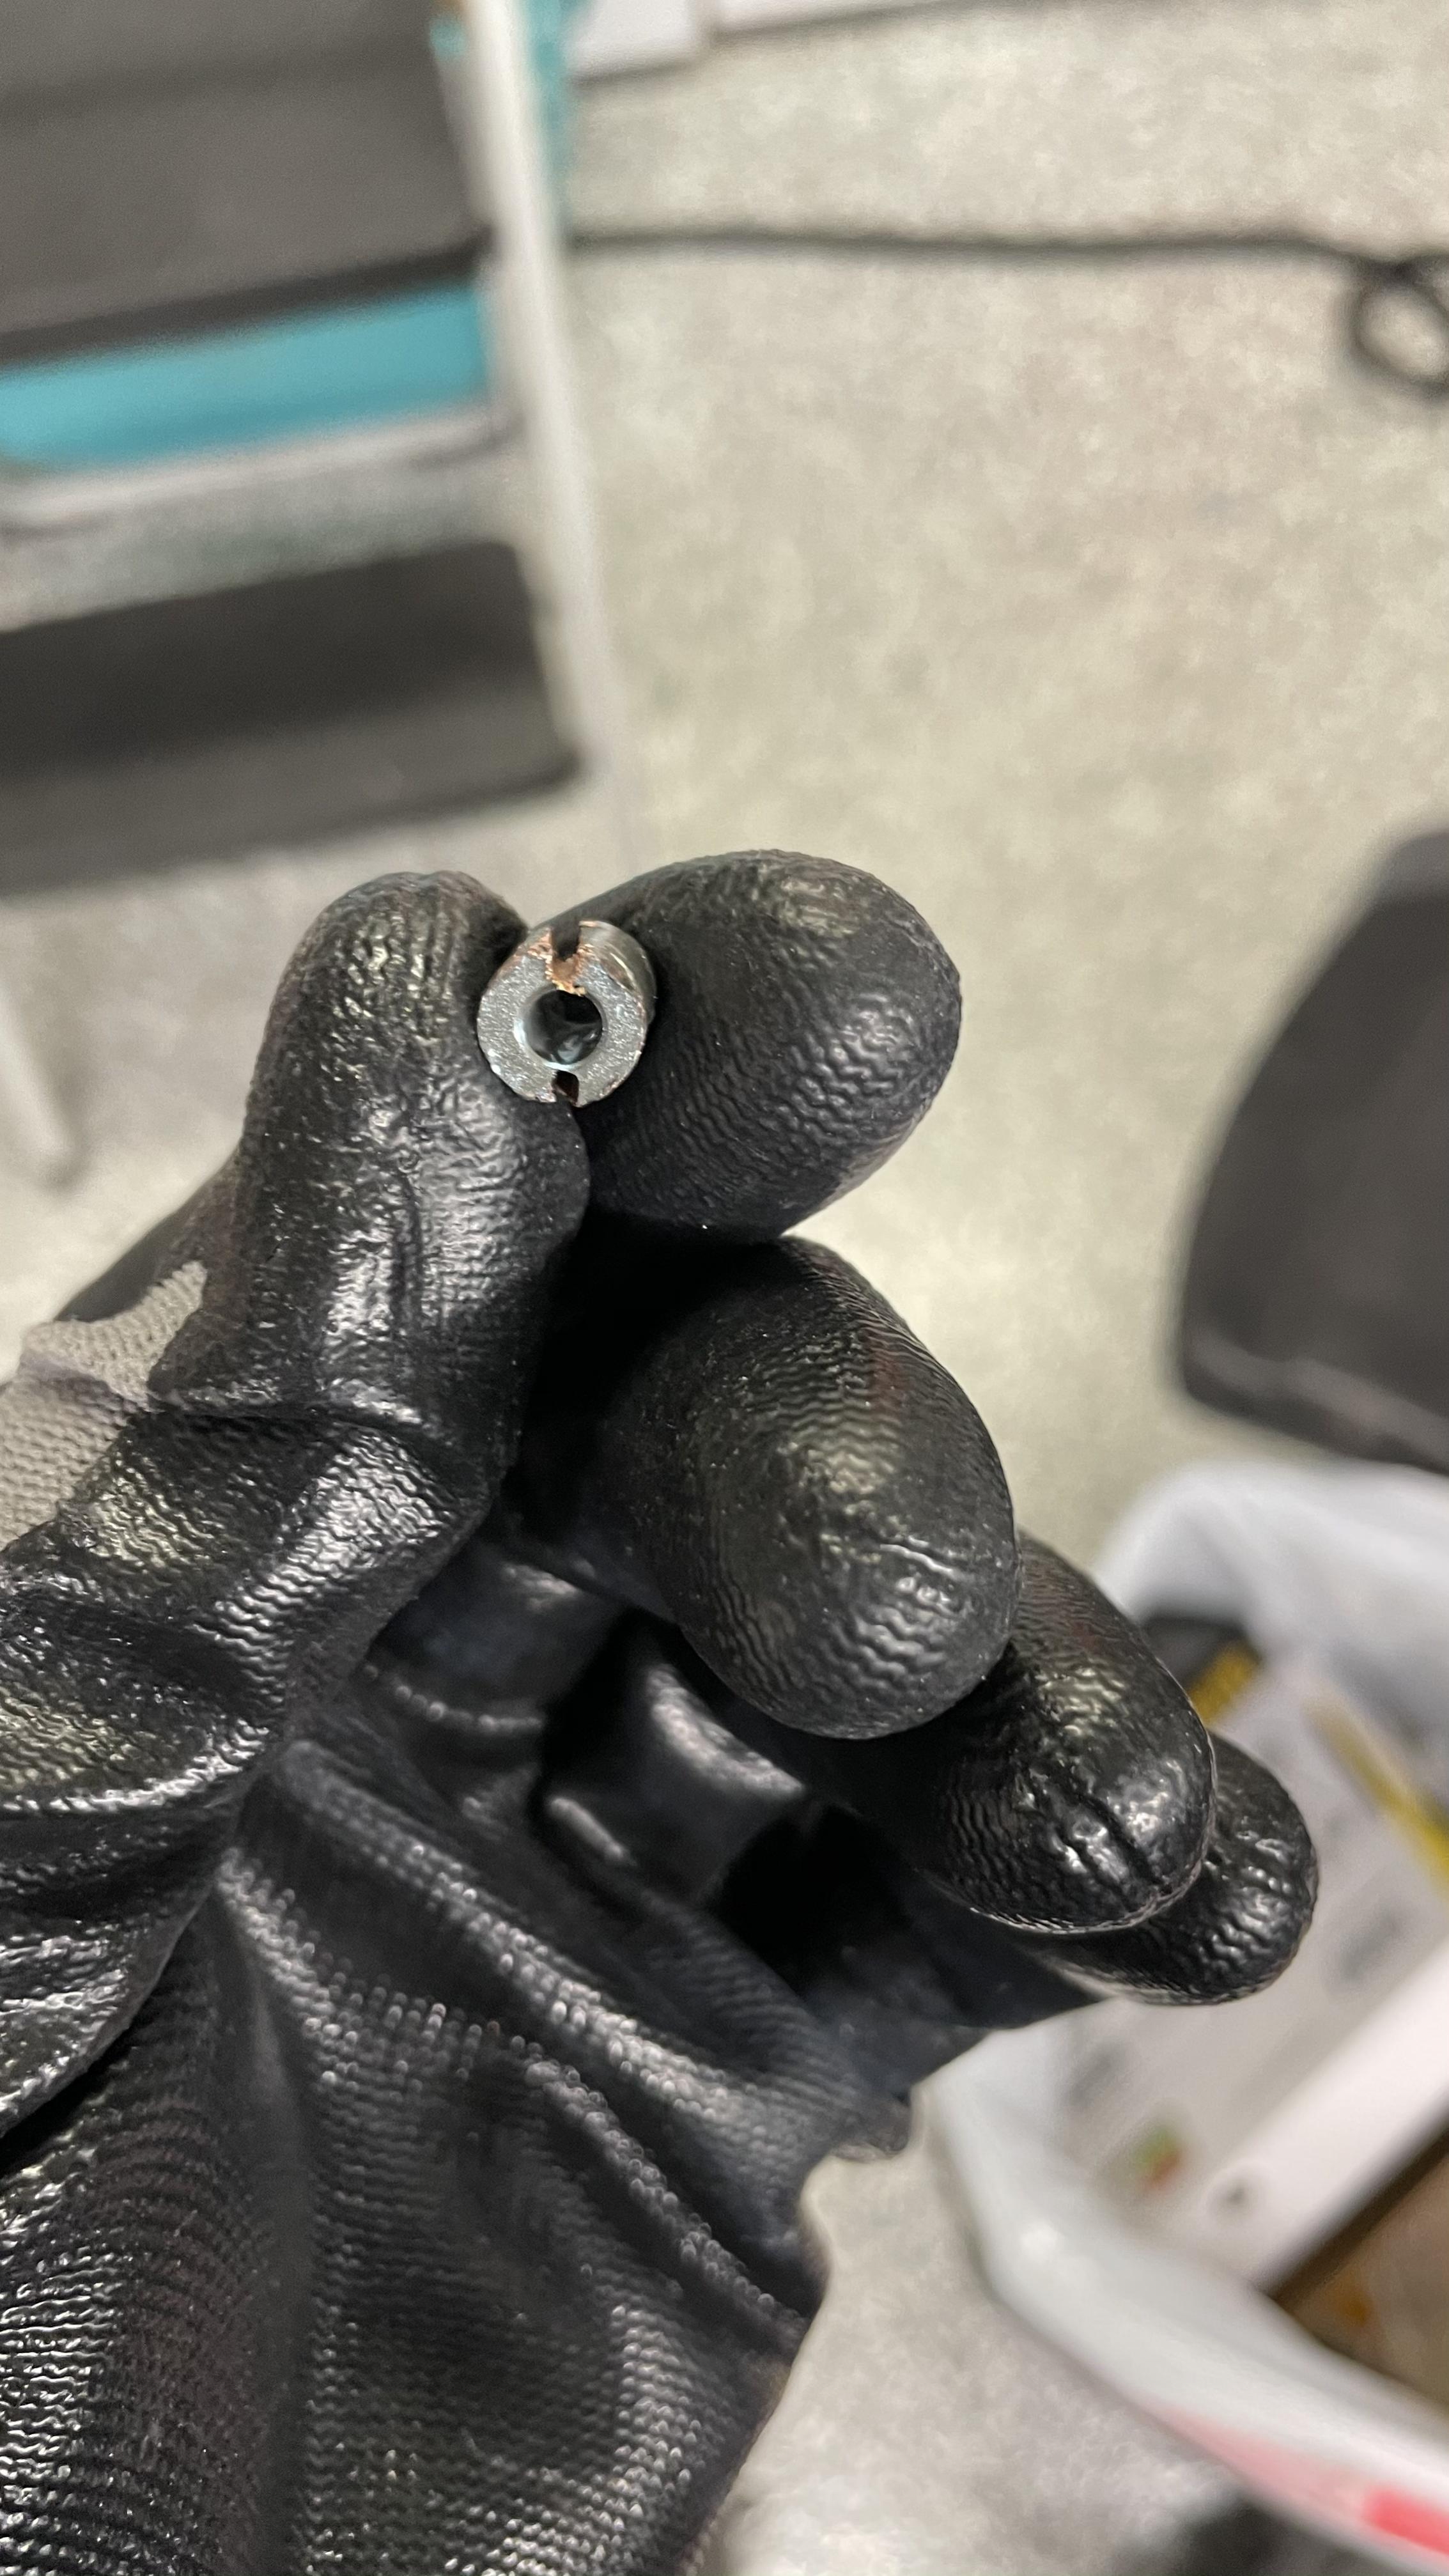
I'm not sure what it would be if it's not powder coat. It clearly hit the threads after they were cut on the piece. A file is an idea so I'll give that a shot and report back. Also emailing FFR to see what thoughts they have on it.
Following up on this. I think my buddy nailed it that it's probably splatter from the welding process. I tried to file and dislodge it but it isn't going anywhere. I'll report back what FFR says. Hopefully it's an easy/quick swap.
Matt
FFR Complete Kit, Coyote, Tremec TKX, 3.73 IRS, power steering, 18" Halibrands, Wilwood brakes, Gas-N pipes + header, Viking blue color
Roadster Build Time Tracker
-
My UCAs received a few months ago also had major thread issues which luckily I was able to fix. One had what looks like a very similar issue with the internal threads, and a couple of the external thread parts had threads that were pretty mangled for being new parts. Seems like a QC issue with their supplier.
-
Senior Member
Originally Posted by
Hoooper
My UCAs received a few months ago also had major thread issues which luckily I was able to fix. One had what looks like a very similar issue with the internal threads, and a couple of the external thread parts had threads that were pretty mangled for being new parts. Seems like a QC issue with their supplier.
That’s too bad. How did you fix the threads?? I have a tap/die set but nothing for anything that big...
Heard from Dave B @ FFR today and they’re going to swap it out for me. Great responsiveness and service from FFR so far!
Matt
FFR Complete Kit, Coyote, Tremec TKX, 3.73 IRS, power steering, 18" Halibrands, Wilwood brakes, Gas-N pipes + header, Viking blue color
Roadster Build Time Tracker
-
Senior Member
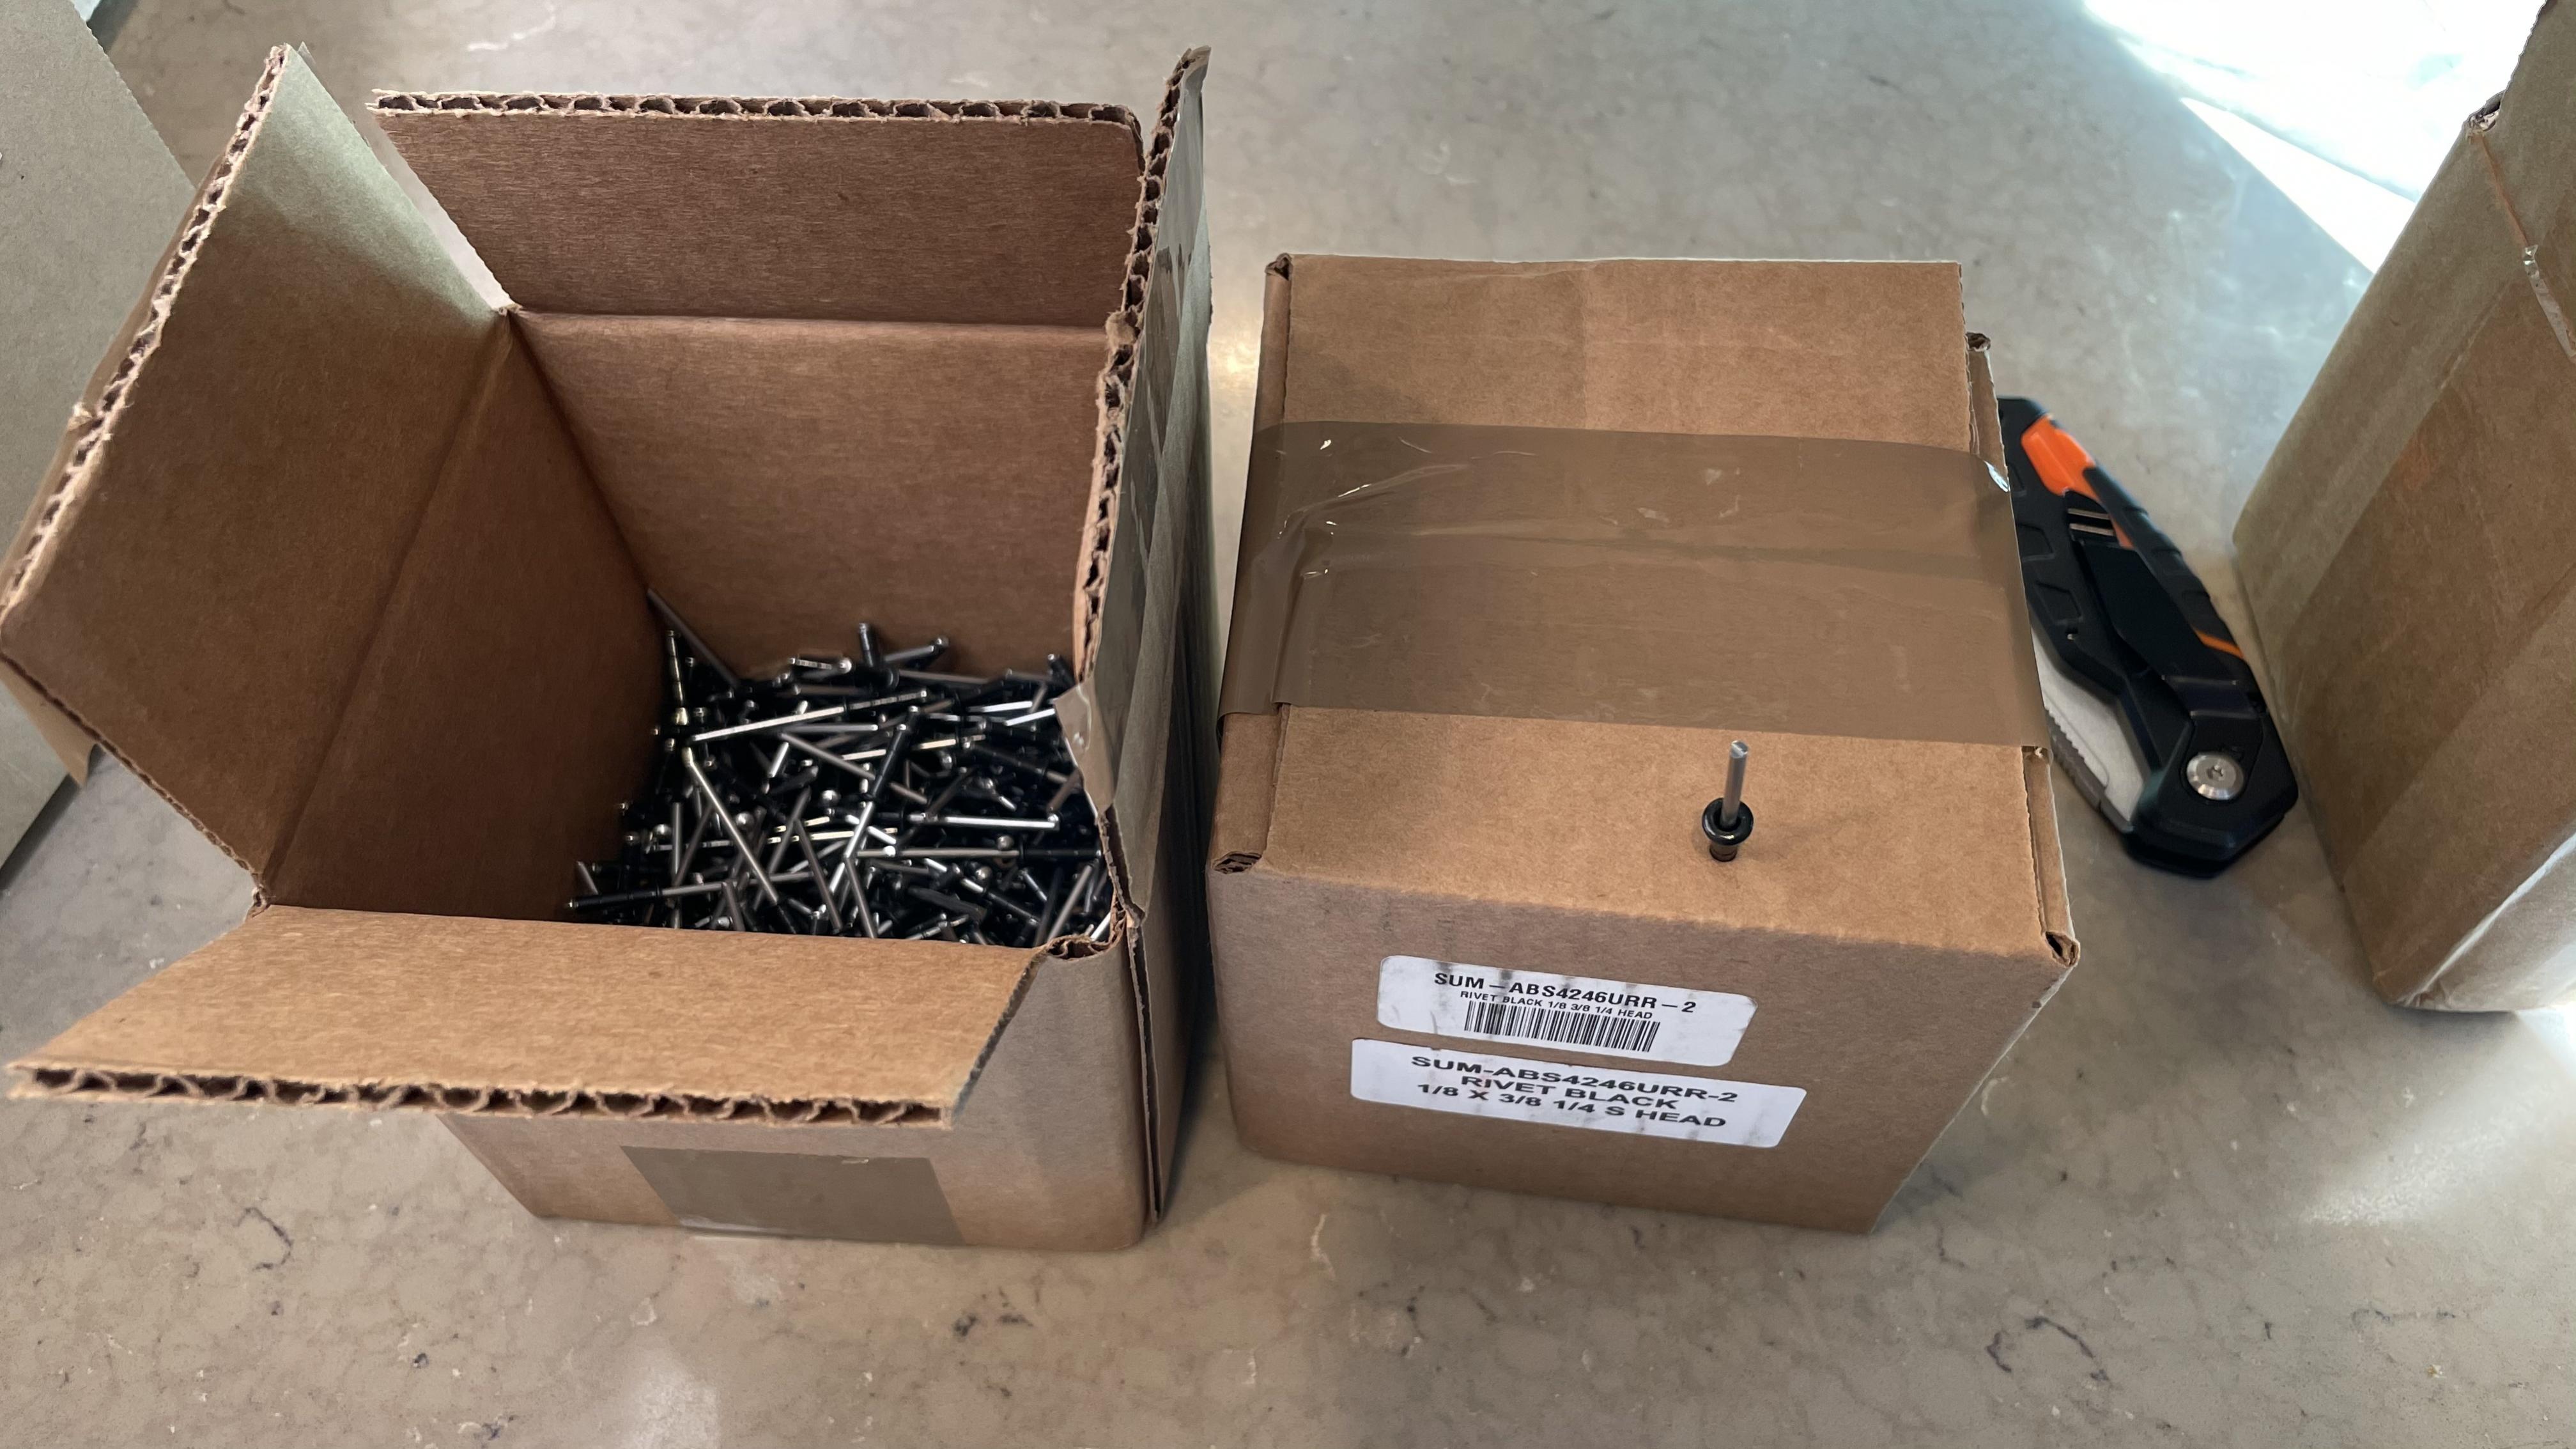
Got the black rivets today. As others have reported, the black scratches off relatively easily. But I think it's still a good $40 investment given it will only need to be touched up if scratched during riveting and the multi-grip can handle different thicknesses in one rivet.
Matt
FFR Complete Kit, Coyote, Tremec TKX, 3.73 IRS, power steering, 18" Halibrands, Wilwood brakes, Gas-N pipes + header, Viking blue color
Roadster Build Time Tracker
-
Senior Member
Got a few hours in tonight. Torqued most of the bolts on the front suspension and cleaned up the knuckles in preparation for assembly of the rear suspension. Cleaning dirty metal for a couple of hours hasn't been my favorite part of the build, but I'm glad I did it in the end. Mostly scotch brite pads with some wire wheel selectively applied...
Here's the before:

And the after. Not perfect, as you can see, but good enough to keep pressing.

Matt
FFR Complete Kit, Coyote, Tremec TKX, 3.73 IRS, power steering, 18" Halibrands, Wilwood brakes, Gas-N pipes + header, Viking blue color
Roadster Build Time Tracker
-
Good job. I would clear coat or paint to keep them looking new.
20th Anniversary Mk IV, A50XS Coyote, TKO 600, Trunk Drop Box, Trunk Battery Box, Cubby Hole, Seat Heaters, Radiator hanger and shroud.
-
Senior Member
I am finding one of my favorite moments in the build are throwing away boxes--it feels like progress!
Spent most of my time over the last few days finishing the front suspension and brakes. Got the two front rotors safety wired and everything is installed now. Definitely a learning curve on safety wiring but I think I've got the hang of it now. Pro tip: use rubber mechanics gloves. It was SO much easier after I put these on to grip the wire and form it. The inner wall of the rotor made it hard to insert it at the 9 o'clock / 3 o'clock positions as recommended, so you can see how I ended up in the end... most of the connections are around 7/8 and 1/2 o'clock positions. But I feel comfortable that it will serve its intended purpose to prevent loosening of the bolts.

On the car:
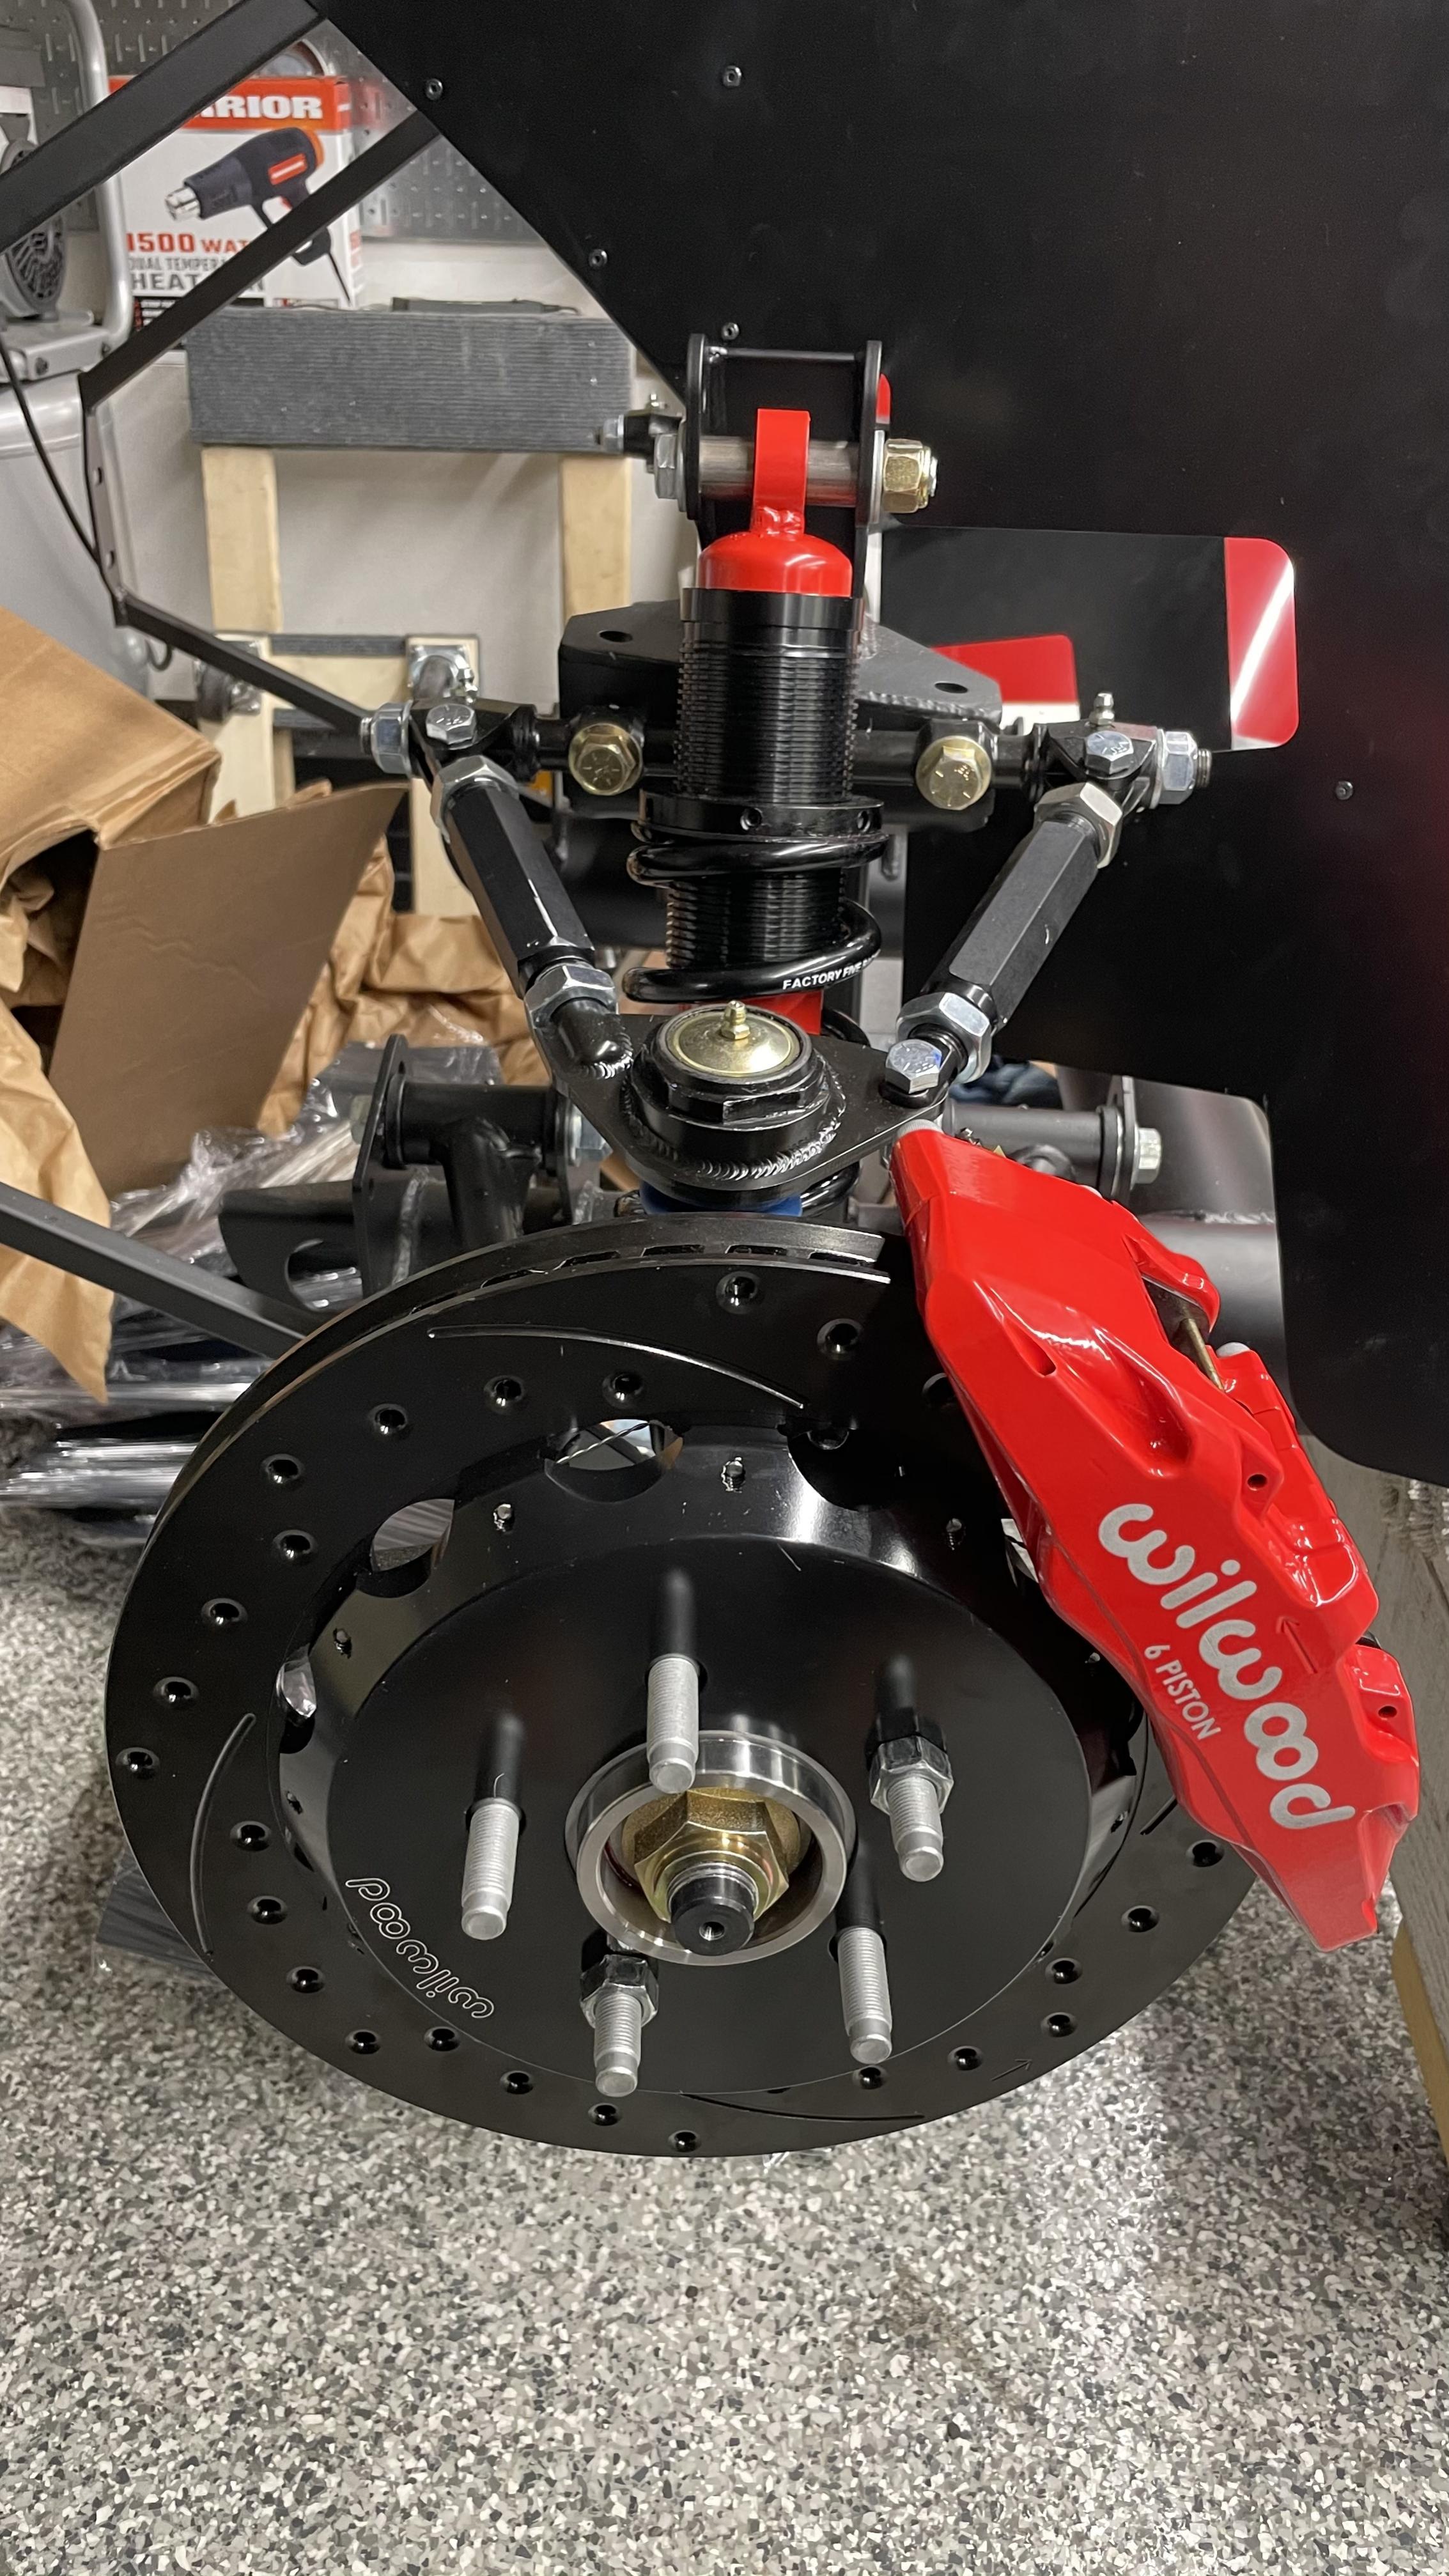
I think I've hit a milestone because people are now asking, "Are you building a car?" instead of "What are you building?"  Below is one good recent investment. Got the idea from another member on the forum:

Here's a mostly worthless timelapse because I'm on the far side of the car. This is work on the first rotor and installing the brake system.
Last edited by richtersand; 12-05-2020 at 01:17 AM.
Matt
FFR Complete Kit, Coyote, Tremec TKX, 3.73 IRS, power steering, 18" Halibrands, Wilwood brakes, Gas-N pipes + header, Viking blue color
Roadster Build Time Tracker
-
Post Thanks / Like - 0 Thanks, 1 Likes
-
Senior Member
Got the rear wilwoods done loctite'd and wired tonight. Pretty quick once you get the hang of the safety wiring. I was rotating the hats on the plastic bag and unfortunately a piece of safety wire got under the hat and scratched it up a bit:

I also got the CV axel on the DS inserted and all is well there. The only thing is the bracket holding one of the joints on the rear knuckle is a few thousandths too narrow. I am guessing it's the powder coated frame narrowing the gap. Unfortunately, since we're talking about the sleeve in the knuckle, my usual trick of shaving the sleeve down won't work. I ordered this set of spreading pliers from Amazon so hopefully that will help open it up enough to get the knuckle posted. Wish I had that for the front suspension! I'll report back how well it works. In the meantime, the CV half shaft is sitting on the floor jack fully raised.
Here's the time lapse from the night. Made it through two rotors and two beers.
Matt
FFR Complete Kit, Coyote, Tremec TKX, 3.73 IRS, power steering, 18" Halibrands, Wilwood brakes, Gas-N pipes + header, Viking blue color
Roadster Build Time Tracker
-
Senior Member

Those scratches won't show with the wheels mounted. But I know how you feel. I hate damaging new and perfectly good parts. For the suspension, it's very common to have to spread open the tabs. As opposed to adjusting the sleeves or whatever. Those pliers looking interesting (maybe) but there's a real simple method that many of us use. A piece of threaded rod, two washers, two nuts. Size isn't critical. 5/16, 3/8, in that range. Put the threaded rod through the hole in one side. Inside the tab, install washer, nut, nut, washer. In that order. Spin the nuts to where the washers are against the inside of the tabs on each side. Now wrench the nuts enough to open the tabs, pressing on each side. Typically doesn't take much. Hope that helps.
Build 1: Mk3 Roadster #5125. Sold 11/08/2014.
Build 2: Mk4 Roadster #7750. Sold 04/10/2017.
Build Thread
Build 3: Mk4 Roadster 20th Anniversary #8674. Sold 09/07/2020.
Build Thread and
Video.
Build 4: Gen 3 Type 65 Coupe #59. Gen 3 Coyote. Legal 03/04/2020.
Build Thread and
Video
Build 5: 35 Hot Rod Truck #138. LS3 and 4L65E auto. Rcvd 01/05/2021. Legal 04/20/2023.
Build Thread. Sold 11/9/2023.
-
Senior Member
Biggest news is I dropped the check in the mail for the Coyote + Transmission from Forte! He said ~6 week lead times so I am guessing 8 weeks before it gets here with delays on the check getting there and the shipping back to the west coast.
Got a really nice note from TXBoiler on my safety wiring. He's an aircraft mechanic and, not surprisingly, had some constructive feedback on my job.
Originally Posted by
txboiler
I wanted to PM you to commend you on safety wire. I am a aviation mechanic by training and that skill is second nature. I did want to highlight that the Two bolts in the top center of the photo (11 to 12 o’clock) Could potentially loosen. You don’t want to have the safety wire make a straight line from one bolt to the next; it should make a “lazy backwards S” from the bolt to bolt. For the bolt on the left, It looks like the twist should start at the opposite side of the bolt where the current twist starts or ends. Don’t mean to be critical but since it is a brake Part and it is safety wire .....otherwise great job. If you find this useful please add to your thread for others.
It was a really nice note and I appreciate it. My response was that I totally agree with the less than ideal entry point on the lower bolt. I really tried to make it work with that angle. But the inner wall of the rotor blocks you and makes it really difficult to get a clean feed into the hole. A couple times I tried to wire it that way and ended up stressing the wire so much that it snapped. So I chose the lesser of the two evils, less stress on the wire and less optimal directionality. The instructions actually say use red loctite and optionally safety wire it. I did both, so I hope it will be sufficient. I will keep a close eye on it.
Originally Posted by
edwardb
Those pliers looking interesting (maybe) but there's a real simple method that many of us use. A piece of threaded rod, two washers, two nuts. Size isn't critical. 5/16, 3/8, in that range. Put the threaded rod through the hole in one side. Inside the tab, install washer, nut, nut, washer. In that order. Spin the nuts to where the washers are against the inside of the tabs on each side. Now wrench the nuts enough to open the tabs, pressing on each side. Typically doesn't take much. Hope that helps.
Brilliant! I figured there had to be a simple way to do it but, after racking my brain, couldn't come up with anything. For $20 including next day shipping I figured the pliers were worth a try. I'm glad to report that they worked like a charm. I did have to pry the bracket so much that you can actually a little bend. Everything bolted up and fits, but I wish I didn't have to stress the weld that much.
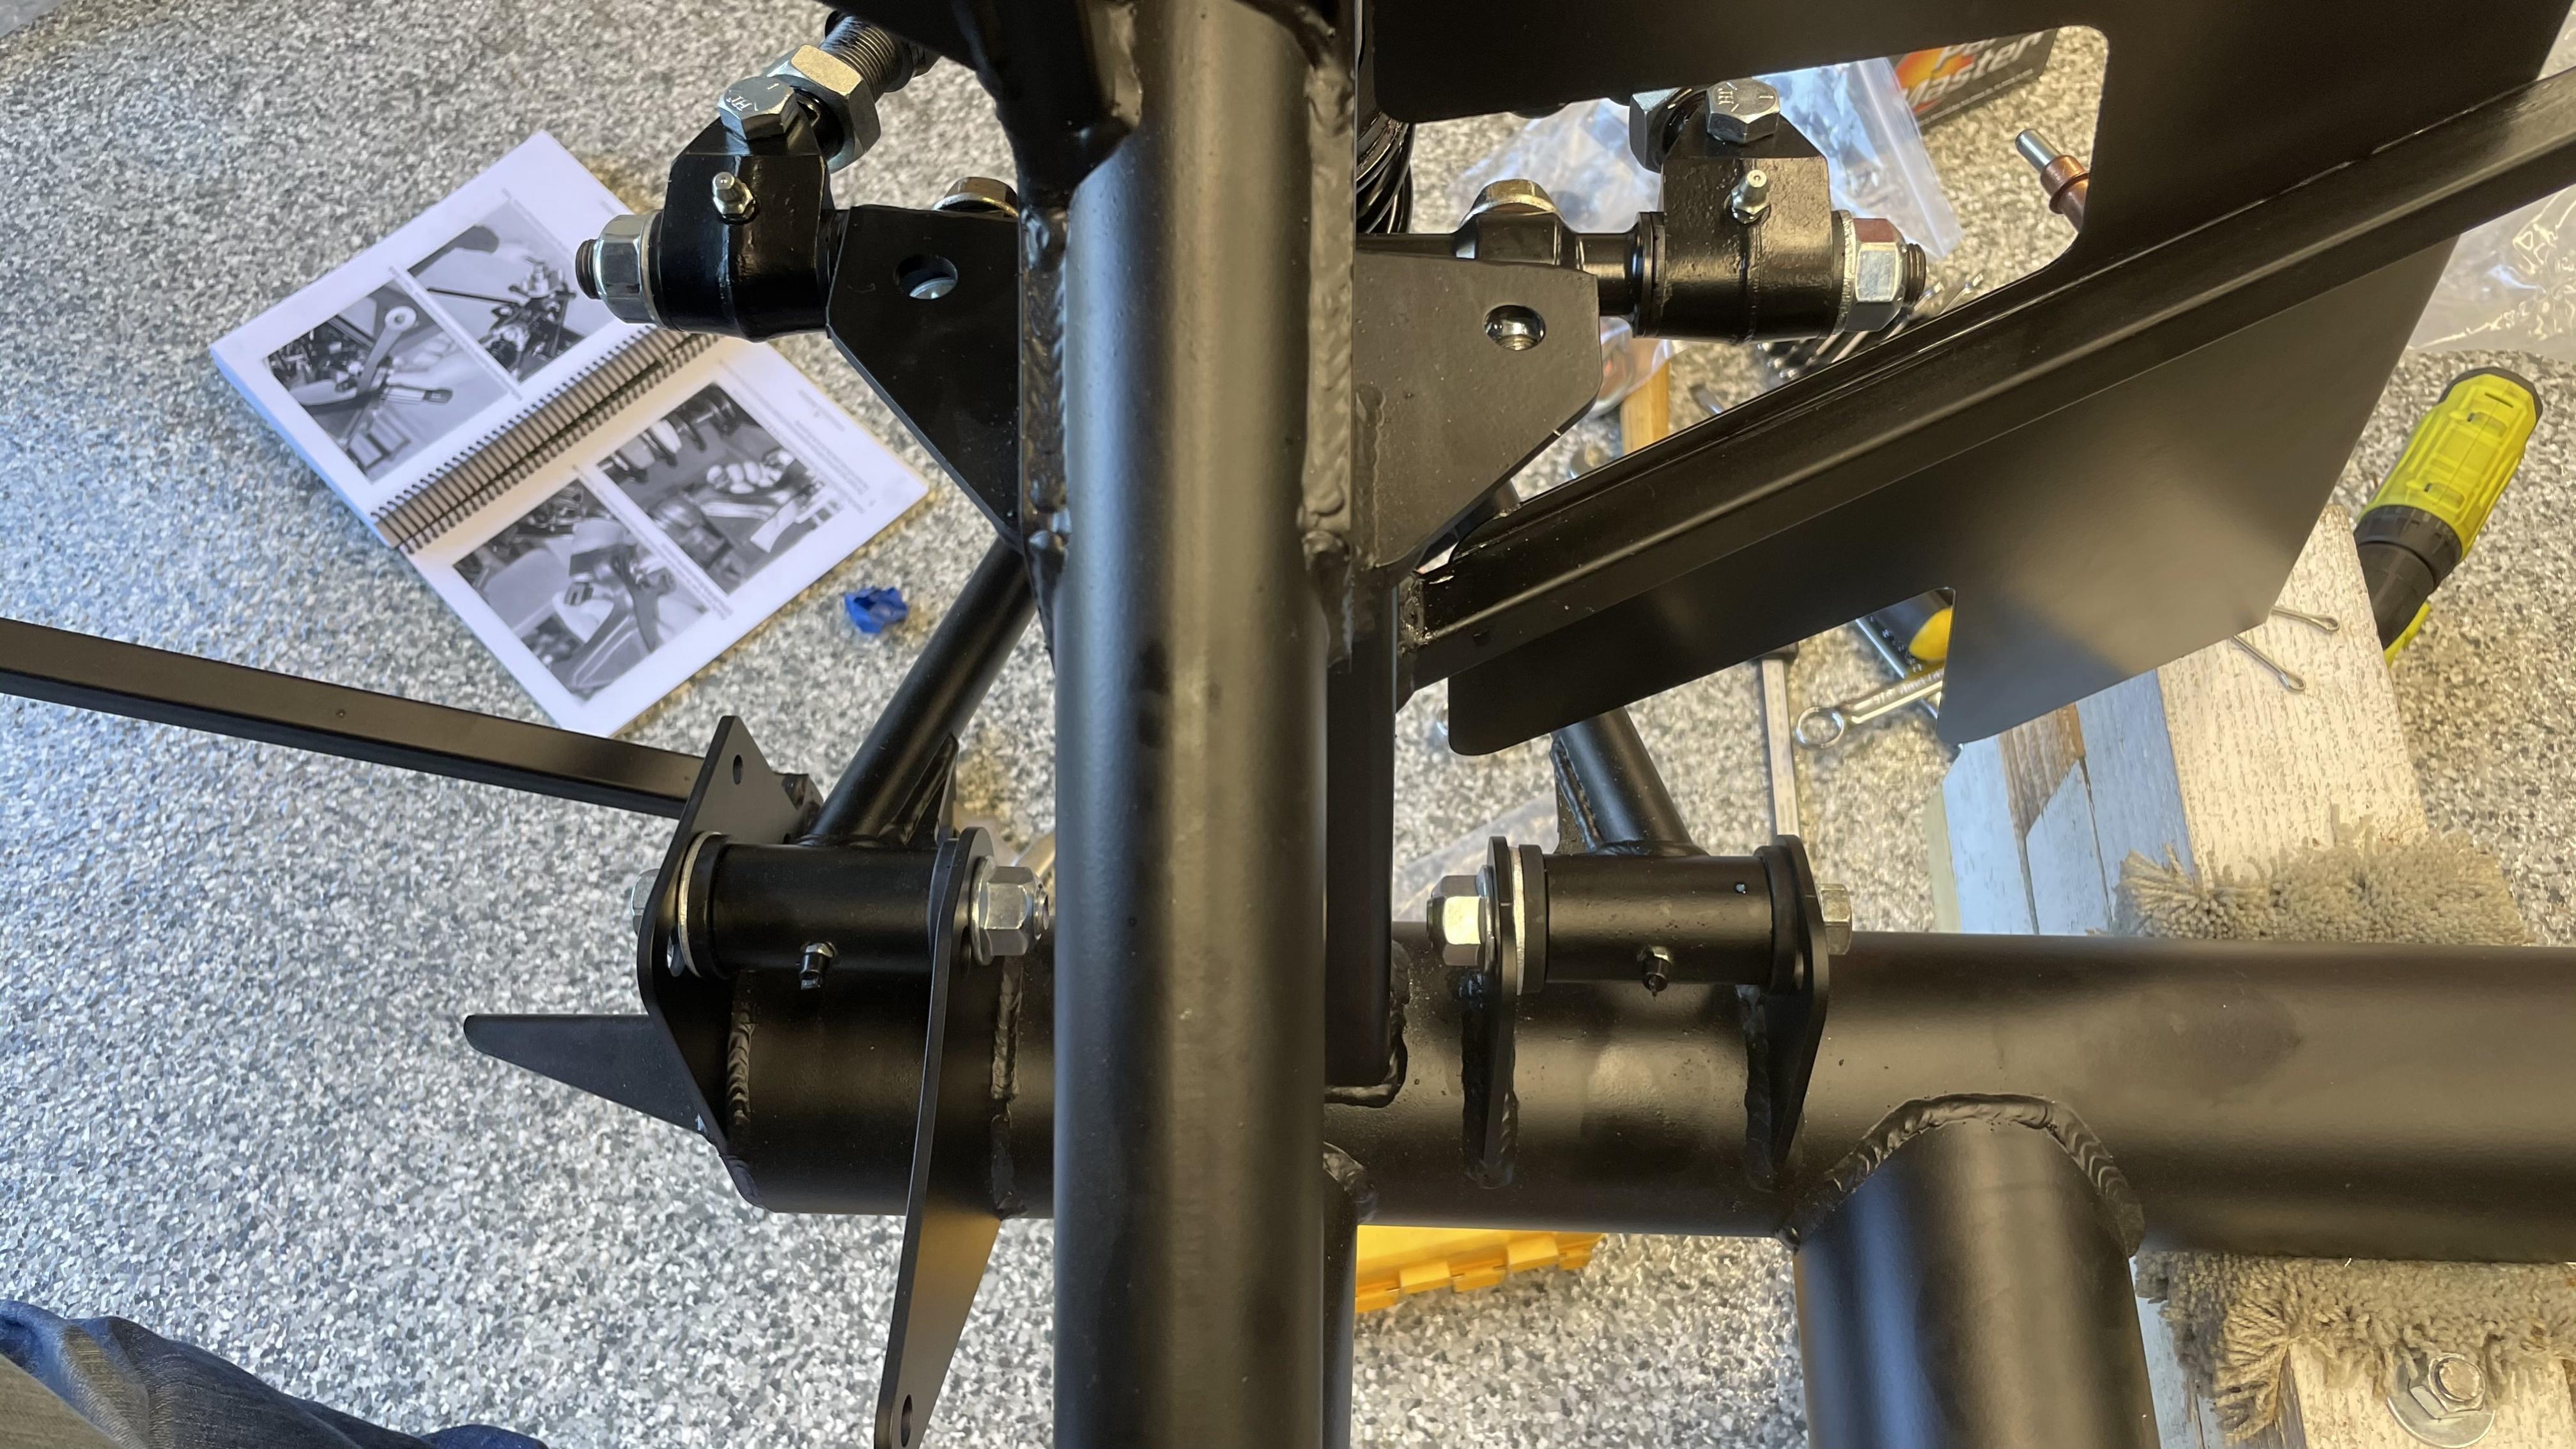
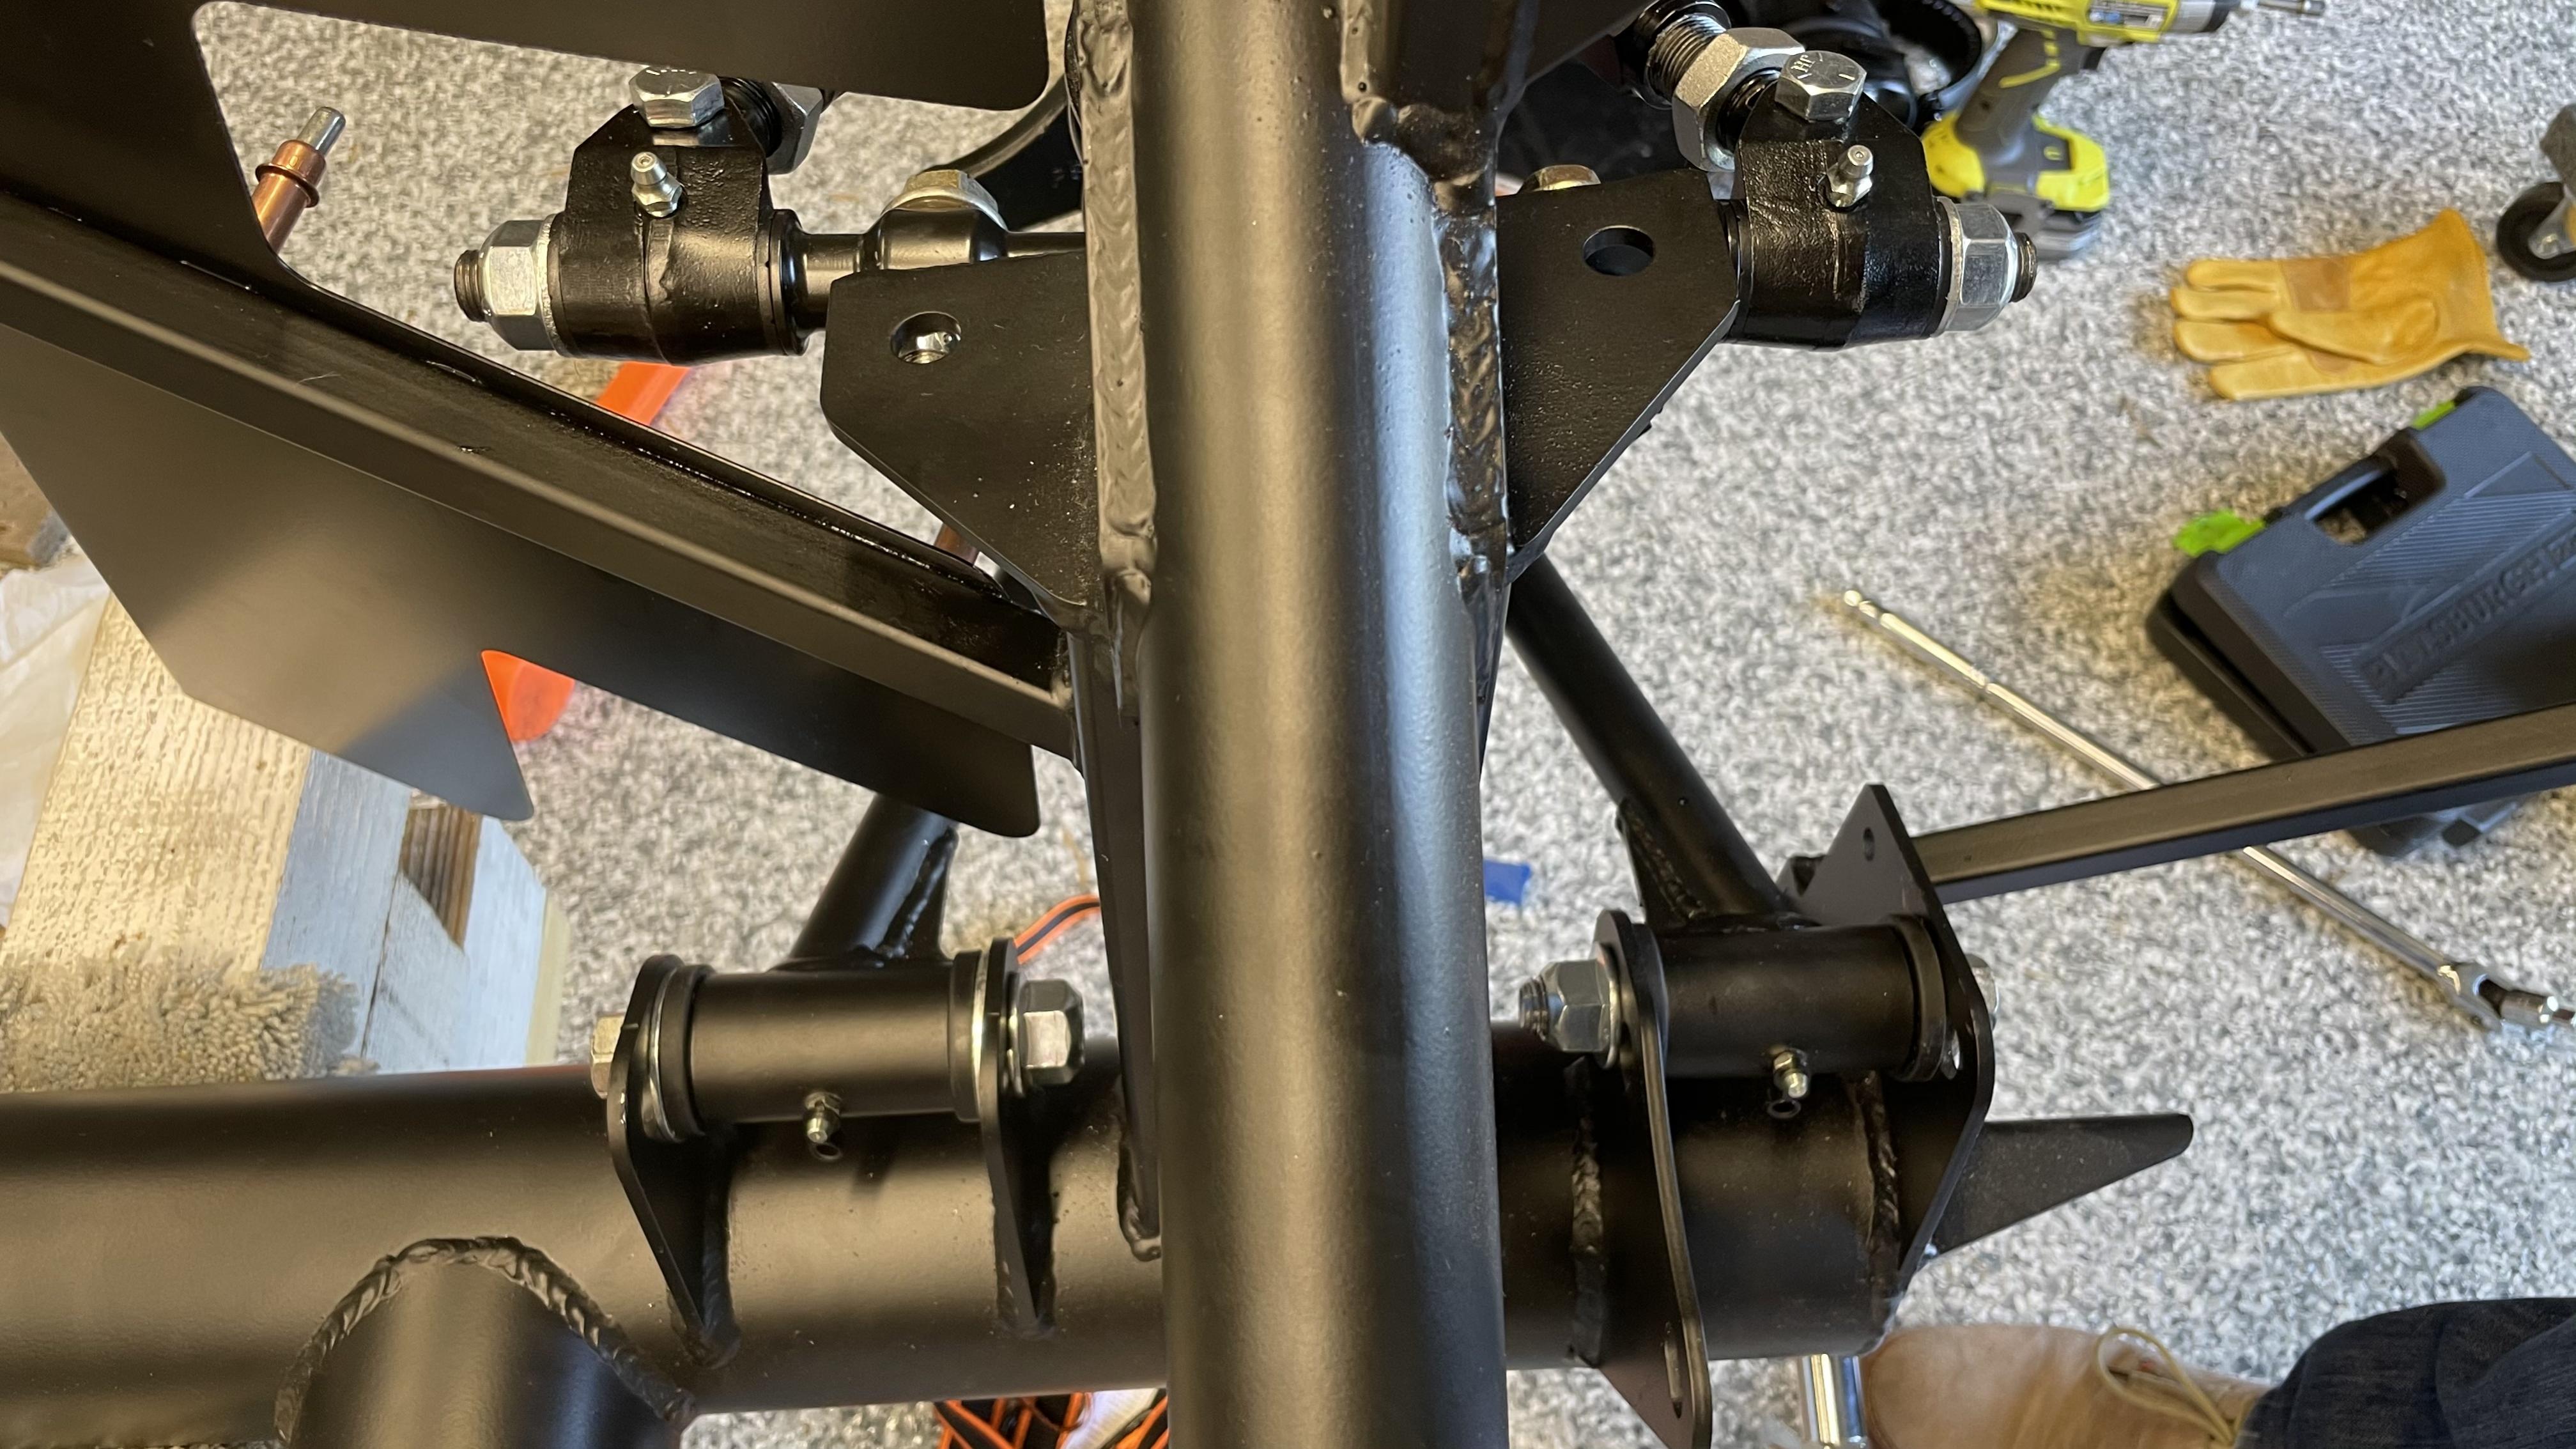
Made progress on the rear suspension over the last couple of days. I guess the pictures tell the story. Next up I plan to install the rear wilwoods and the front sway bar. On the sway bar, I am realizing I should have done this with the front suspension, as I'll need to take apart the lower shock in the front. Not a huge deal, but would have saved a few grunts.


Matt
FFR Complete Kit, Coyote, Tremec TKX, 3.73 IRS, power steering, 18" Halibrands, Wilwood brakes, Gas-N pipes + header, Viking blue color
Roadster Build Time Tracker
-
Senior Member
Got the front sway bar installed. Took 2 hours, much longer than expected. My OCD got the best of me and I changed the washers on the mounting brackets to match the gold color. Was debating powder coating this but I kind of like the contrast so I'll probably keep it as is. I left the lower shock hardware loose to confirm angle/fit of the bar with the wheels on.
There was a little interference with the weld bead on the lower outside bracket attachments, so I trimmed it down with the angle grinder.

The time lapse from tonight:
Last edited by richtersand; 12-09-2020 at 03:13 AM.
Matt
FFR Complete Kit, Coyote, Tremec TKX, 3.73 IRS, power steering, 18" Halibrands, Wilwood brakes, Gas-N pipes + header, Viking blue color
Roadster Build Time Tracker
-
Senior Member
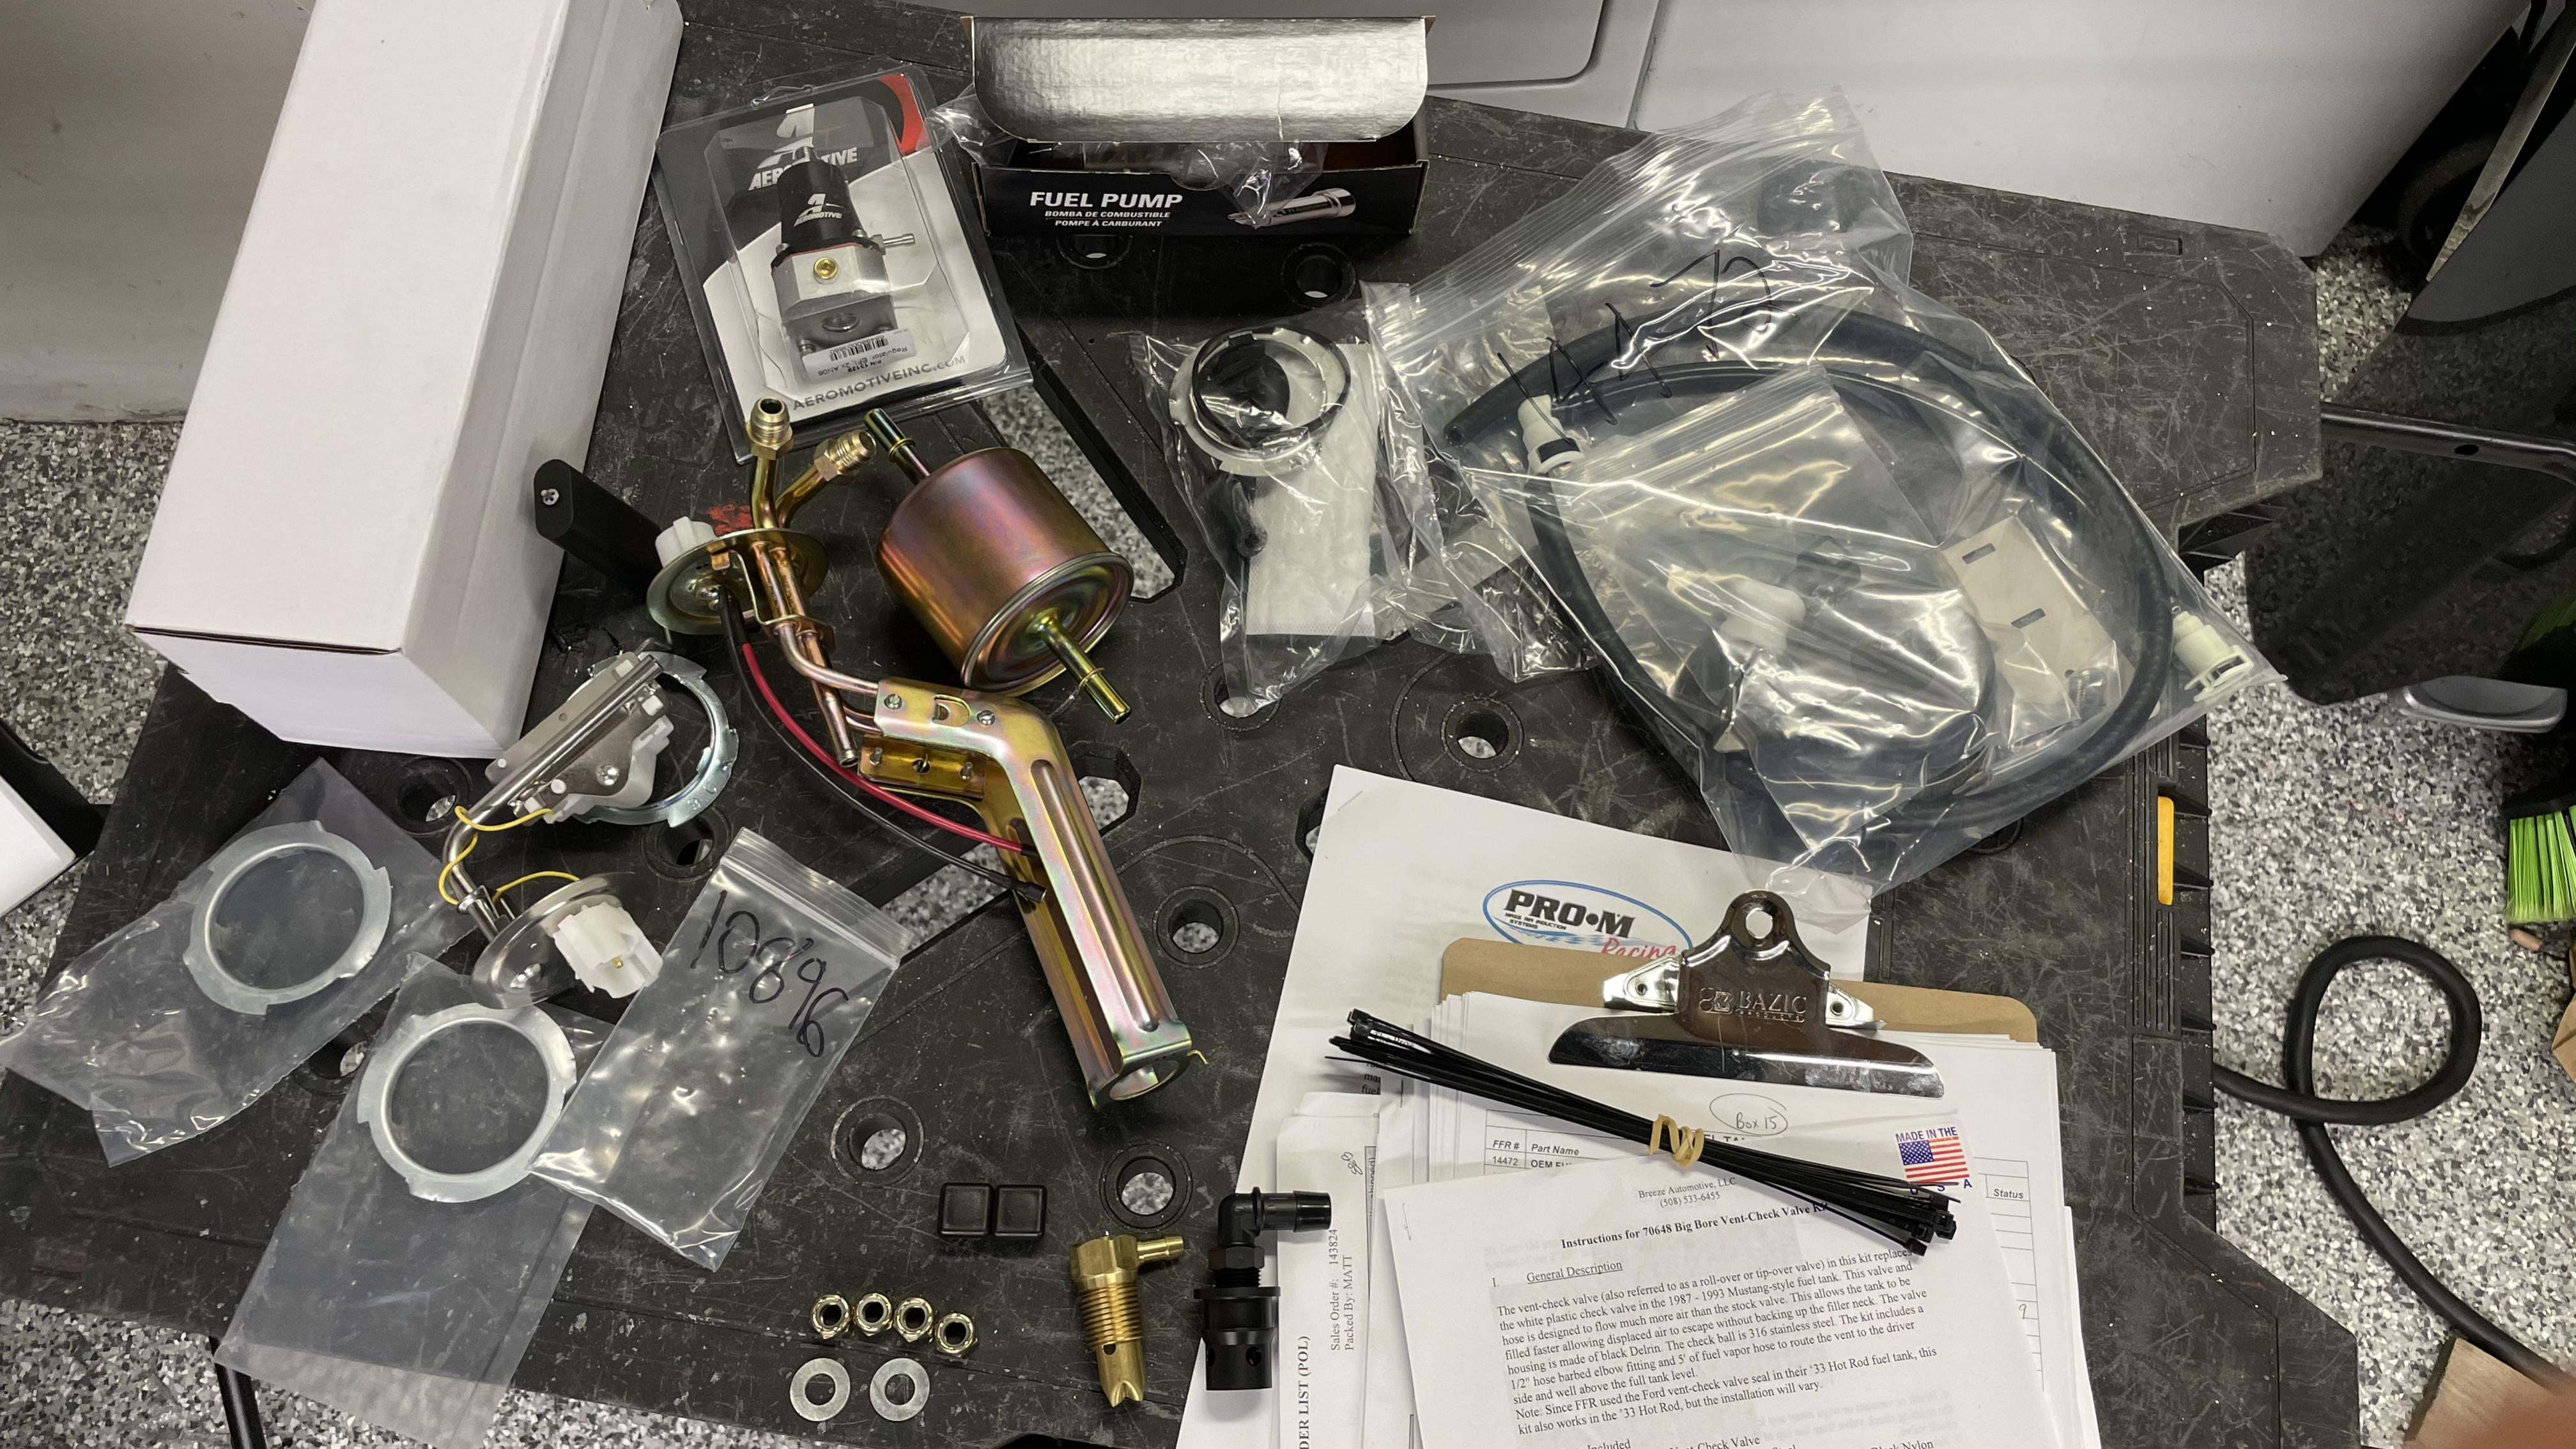
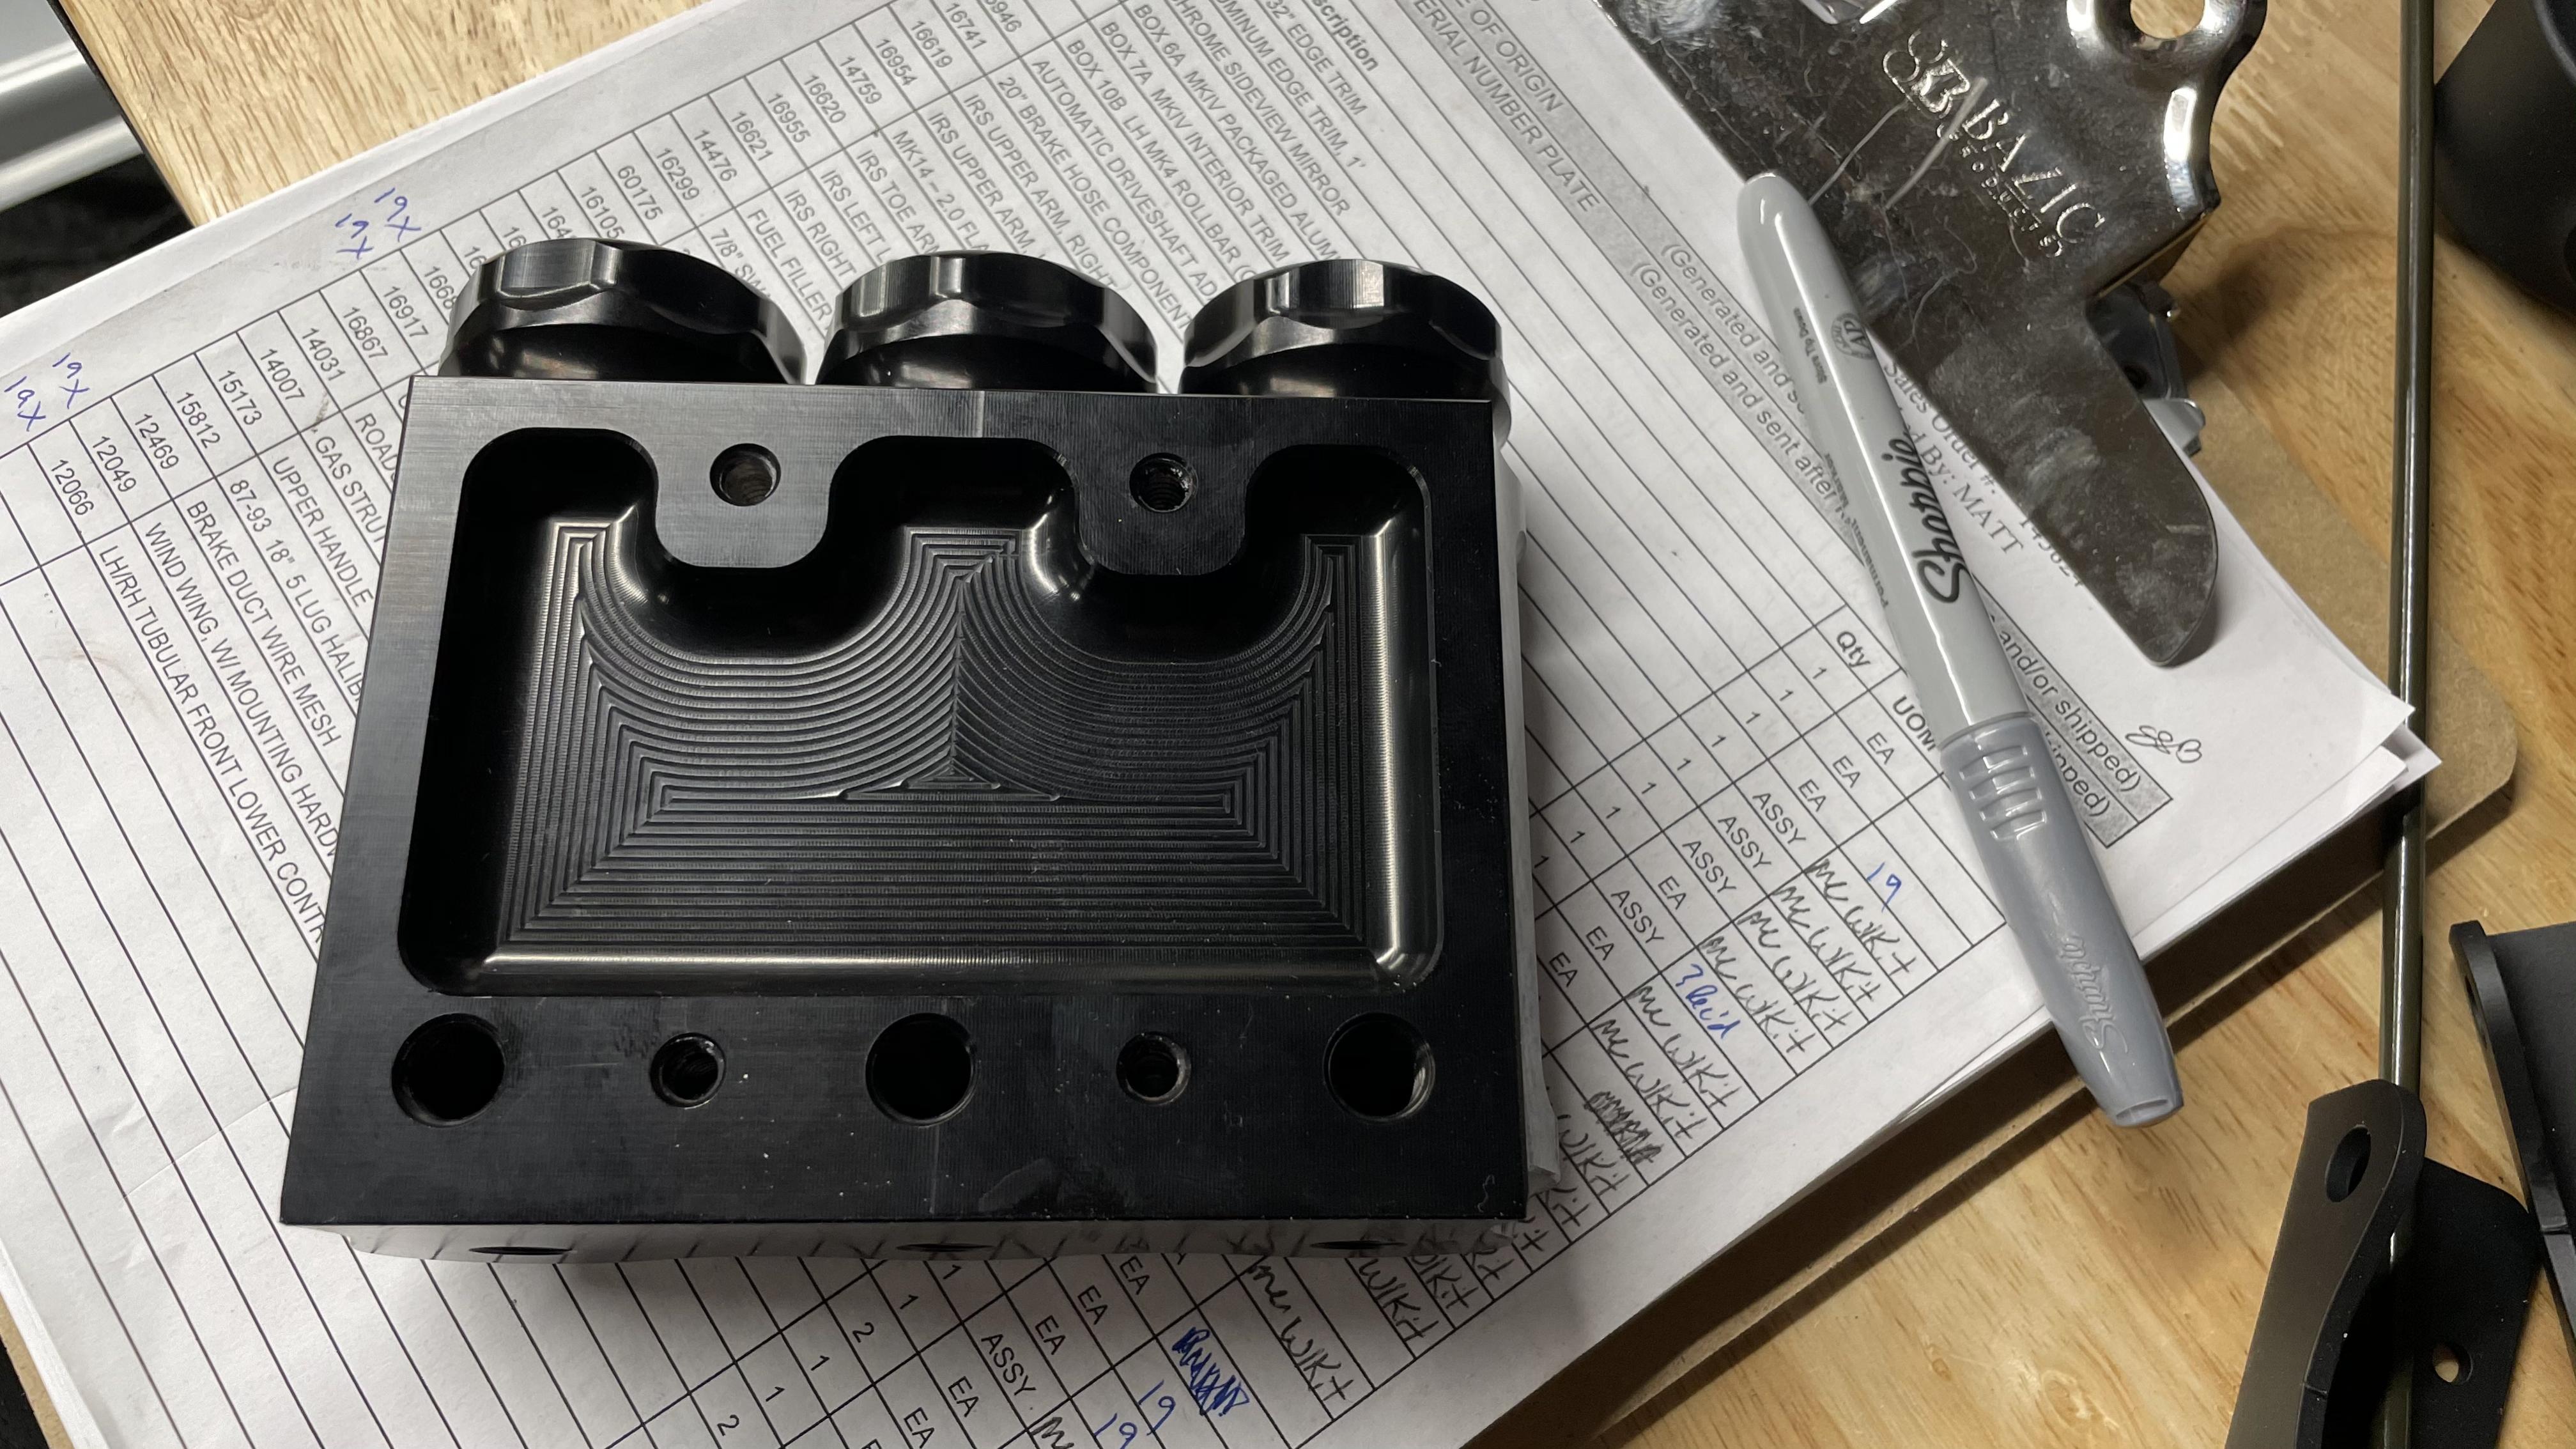
Haven't posted on the build thread lately but I've been steadily plugging away. Got the fuel setup figured out. Going to run 3/8 nicopp all the way around with walbro pump, pro-m hangar, and aeromotive regulator (thanks to edwardb for so much great documentation and discussion on this setup). Most of the fuel stuff comes in this week so I am hoping it will be pretty quick to get the fuel tank mounted and everything hooked up. Planning to install drop trunk once I get all of that mocked up. With that I think I can do another powder coat run to finish the rest of the aluminum and random steel parts.
Also getting my order in with Breeze after a few conversations with Mark. He's been really helpful. I am getting the front battery mount, steering rack offset, lower and upper radiator kits, radiator shroud, dead pedal, dash support brackets, radiator cowl cover, and (importantly) four 3/4" square plugs. I must have a blind spot because two times I have hit my head on these corners and cut my forehead in nearly the exact same spot. It's not a bad cut, but enough to get your attention. I think these plugs will provide some degree of protection.
My biggest blockers from FFR at this point are the steering rack and radiator. Wheels are supposed to ship this week. Forte got my check for the engine/transmission, and I expect that to arrive in 6-7 weeks. So I am now on a countdown to run the lines and get the rest of the setup complete. Not rushed, but it's good to have a deadline to work towards.
Some sheet metal has been riveted in, which you can see in the following time lapses. Also got the footbox started. Missing some of the lock nuts and one 1" bolt for that, but McMaster makes it so easy to order these odds and ends. Still a little messy from the silicon, but easy enough to clean up.
Pro tip: if you are going with black panels, do the BLACK GE Silicon II. I started with clear and it stood out as if it were basically white. Huge eye sore. I got the black and haven't looked back. You have to look hard to see it when it's smoothed in, looks great.
Pro tip 2: I can't tell you how many times I have thanked my pneumatic riveter. I didn't think it would make THAT big of a difference but it's such a great investment.


Matt
FFR Complete Kit, Coyote, Tremec TKX, 3.73 IRS, power steering, 18" Halibrands, Wilwood brakes, Gas-N pipes + header, Viking blue color
Roadster Build Time Tracker
-
Senior Member
Matt
FFR Complete Kit, Coyote, Tremec TKX, 3.73 IRS, power steering, 18" Halibrands, Wilwood brakes, Gas-N pipes + header, Viking blue color
Roadster Build Time Tracker
-
Senior Member

Nice progress. From the photos there is open inlet and outlets on your master cylinders. Just a tip if you havent done already, cover them with tape to prevent ingress of any gunk.
Cheers,
Nigel
Mk.4 FFR supplied Right hand drive
Received 12/2012 completed 12/2019
Gen1 Coyote / TKO600 / IRS
Lots of mods to make compliant for Australian design rules
-
Originally Posted by
Hoooper
I would second the inventory concern. I spent about 3 hours doing inventory on a base kit with enough deletions that the boxes amounted to little more than just front and rear suspension, minimal electrical nonsense, and aluminum panels.
X-3
FFR MKIV ordered 12 July 2019. IRS, Wilwood Brakes, 18" Wheels w/MT tires, power steering, EFI, Heat. 347 Dart w/TKO-600 by Mike Forte, Holley FI, MSD coil and CD box. All new, no donor build.
-
Senior Member
Originally Posted by
Nigel Allen
Nice progress. From the photos there is open inlet and outlets on your master cylinders. Just a tip if you havent done already, cover them with tape to prevent ingress of any gunk.
Cheers,
Nigel
Good point, thanks Nigel!
Matt
FFR Complete Kit, Coyote, Tremec TKX, 3.73 IRS, power steering, 18" Halibrands, Wilwood brakes, Gas-N pipes + header, Viking blue color
Roadster Build Time Tracker
-
Senior Member

Love those time lapse videos. Wish I would have done them.
-
Member

Looking great! I'm considering ordering some of those black rivets now...
I've got a question for you regarding the driver's footbox floor. I've got enough of a gap under the round tube where it doesn't make much sense to try to rivet the panel to it (in the area indicated by the green arrows below). It looks like you've got that same gap. Were you able to place rivets there?

-
Senior Member
Originally Posted by
Rook
Looking great! I'm considering ordering some of those black rivets now...
I've got a question for you regarding the driver's footbox floor. I've got enough of a gap under the round tube where it doesn't make much sense to try to rivet the panel to it (in the area indicated by the green arrows below). It looks like you've got that same gap. Were you able to place rivets there?
Hey Rook, no, did not rivet directly to the chassis there since the gap is too big as you point out. Went sheet metal to sheet metal. I am attaching the bottom panel to that round tube (outside) and it feels rock solid to me with all the other frame attachment points.
Last edited by richtersand; 12-16-2020 at 05:26 PM.
Matt
FFR Complete Kit, Coyote, Tremec TKX, 3.73 IRS, power steering, 18" Halibrands, Wilwood brakes, Gas-N pipes + header, Viking blue color
Roadster Build Time Tracker
-
Post Thanks / Like - 1 Thanks, 0 Likes
 Rook
Rook thanked for this post
-
Senior Member
Got a lot of work on trunk sheet metal last night. Also started work on the drop trunk. ALMOST 100% DONE WITH SHEET METAL!!!!!!!!
Matt
FFR Complete Kit, Coyote, Tremec TKX, 3.73 IRS, power steering, 18" Halibrands, Wilwood brakes, Gas-N pipes + header, Viking blue color
Roadster Build Time Tracker
-
Senior Member
Spent a lot of time over the last two days working on the drop trunk. Painstaking work... spent a lot of time "measuring twice" in an attempt to get everything properly cut and aligned. In the end, despite all of the planning, it could be better. Lines aren't as straight as I would like and there's one area where the overhang, where the trunk flange rivets, is slightly undercut (I'll post pic soon). Not a huge deal, but I wish it was better given how much time I spent on it. But it's done now and will be covered with carpet anyway so let's roll.
Matt
FFR Complete Kit, Coyote, Tremec TKX, 3.73 IRS, power steering, 18" Halibrands, Wilwood brakes, Gas-N pipes + header, Viking blue color
Roadster Build Time Tracker
-
Senior Member
Yesterday was a day of research and organization. I am putting in a fair amount of ongoing time to researching in general and reading build threads. It's not nearly as fun as the build portion, but it's obviously critical to make sure I get it right the first time (hopefully). It also makes me appreciate the hours towards the build that much more.
Got the rear wilwoods installed tonight. With those in, I'm going to tackle the e-brake assembly next.

Matt
FFR Complete Kit, Coyote, Tremec TKX, 3.73 IRS, power steering, 18" Halibrands, Wilwood brakes, Gas-N pipes + header, Viking blue color
Roadster Build Time Tracker
-
Senior Member

good work! love the time lapse videos. I've been using my go pro to capture time lapse on my build. Sometimes I'll record, sometimes I forget, a few times I've forgotten to turn it off. I was going to post the entire build once I was done. I figured it'd be a nice project to remember the process.
-
Senior Member
Originally Posted by
egchewy79
good work! love the time lapse videos. I've been using my go pro to capture time lapse on my build. Sometimes I'll record, sometimes I forget, a few times I've forgotten to turn it off. I was going to post the entire build once I was done. I figured it'd be a nice project to remember the process.
Thanks! Yeah, its fun to see it in time lapse. Crook forward to seeing yours!
Matt
FFR Complete Kit, Coyote, Tremec TKX, 3.73 IRS, power steering, 18" Halibrands, Wilwood brakes, Gas-N pipes + header, Viking blue color
Roadster Build Time Tracker
-
Senior Member
Made some progress setting up fuel system prepped for install tonight. This foldable table is probably one of my best purchases for my small garage.
After a lot of research, I'm finally wrapping my head around the AN fittings setup for my 3/8 line. It's funny how new things like this can feel pretty confusing before you wrap your head around it. Then, once you get it, it seems pretty simple/obvious. But I guess that's part of the learning process. I'm enjoying it.
I have a blocker and a potential issue. The blocker is I'm waiting on Forte to send the pigtail with a safety clip that plugs into the walbro 255lph pump. The potential issue is I noticed a pretty significant dent in the fuel tank when installing my Breeze oversized vent valve. See the picture below. It looks worse than it is in the picture, but it's definitely not insignificant. I emailed Dave B at FFR to see if a replacement is in order. They were awesome with the IRS LCA replacement, so hopefully they will be with this as well.

Matt
FFR Complete Kit, Coyote, Tremec TKX, 3.73 IRS, power steering, 18" Halibrands, Wilwood brakes, Gas-N pipes + header, Viking blue color
Roadster Build Time Tracker
-
Senior Member
Made an upgrade to the time tracker. You can now see totals of the time based on Type. I also added a fancy pie chart.
Link to Time Tracker
Matt
FFR Complete Kit, Coyote, Tremec TKX, 3.73 IRS, power steering, 18" Halibrands, Wilwood brakes, Gas-N pipes + header, Viking blue color
Roadster Build Time Tracker
-
Senior Member
I'm with you on liking to see any damage to parts. But as long as that tank doesn't leak, there's really no reason not to use it. That corner is essentially not visible on the completed build. It's tucked in behind the body and rear splash guards. And only a minimal to nonexistent reduction in capacity.
One other point since it's in the picture -- don't forget you have to flatten those bent flanges on around the edge of the tank. Otherwise it won't sit properly in the frame mounts. It's in the manual, but some miss it.
Build 1: Mk3 Roadster #5125. Sold 11/08/2014.
Build 2: Mk4 Roadster #7750. Sold 04/10/2017.
Build Thread
Build 3: Mk4 Roadster 20th Anniversary #8674. Sold 09/07/2020.
Build Thread and
Video.
Build 4: Gen 3 Type 65 Coupe #59. Gen 3 Coyote. Legal 03/04/2020.
Build Thread and
Video
Build 5: 35 Hot Rod Truck #138. LS3 and 4L65E auto. Rcvd 01/05/2021. Legal 04/20/2023.
Build Thread. Sold 11/9/2023.
-
Senior Member
Originally Posted by
edwardb
I'm with you on liking to see any damage to parts. But as long as that tank doesn't leak, there's really no reason not to use it. That corner is essentially not visible on the completed build. It's tucked in behind the body and rear splash guards. And only a minimal to nonexistent reduction in capacity.
One other point since it's in the picture -- don't forget you have to flatten those bent flanges on around the edge of the tank. Otherwise it won't sit properly in the frame mounts. It's in the manual, but some miss it.
Thanks for the pointer on bending the flanges. Agree it doesn’t seem to be a functional issue. I did also notice a big bend in one of the corner flanges. Would rather have an unbent tank that doesn’t leave me wondering. The good news is Dave B from FFR said they’re going to swap it out for me. I am 10/10 impressed with FFR and their customer service!
Got second round of powder coat back! They charge $8/sq ft for so the little pieces end up costing a couple bucks each. I may have gone a little overboard. Hoping to get the ebrake done this weekend. Running hard lines next week.

Matt
FFR Complete Kit, Coyote, Tremec TKX, 3.73 IRS, power steering, 18" Halibrands, Wilwood brakes, Gas-N pipes + header, Viking blue color
Roadster Build Time Tracker
-
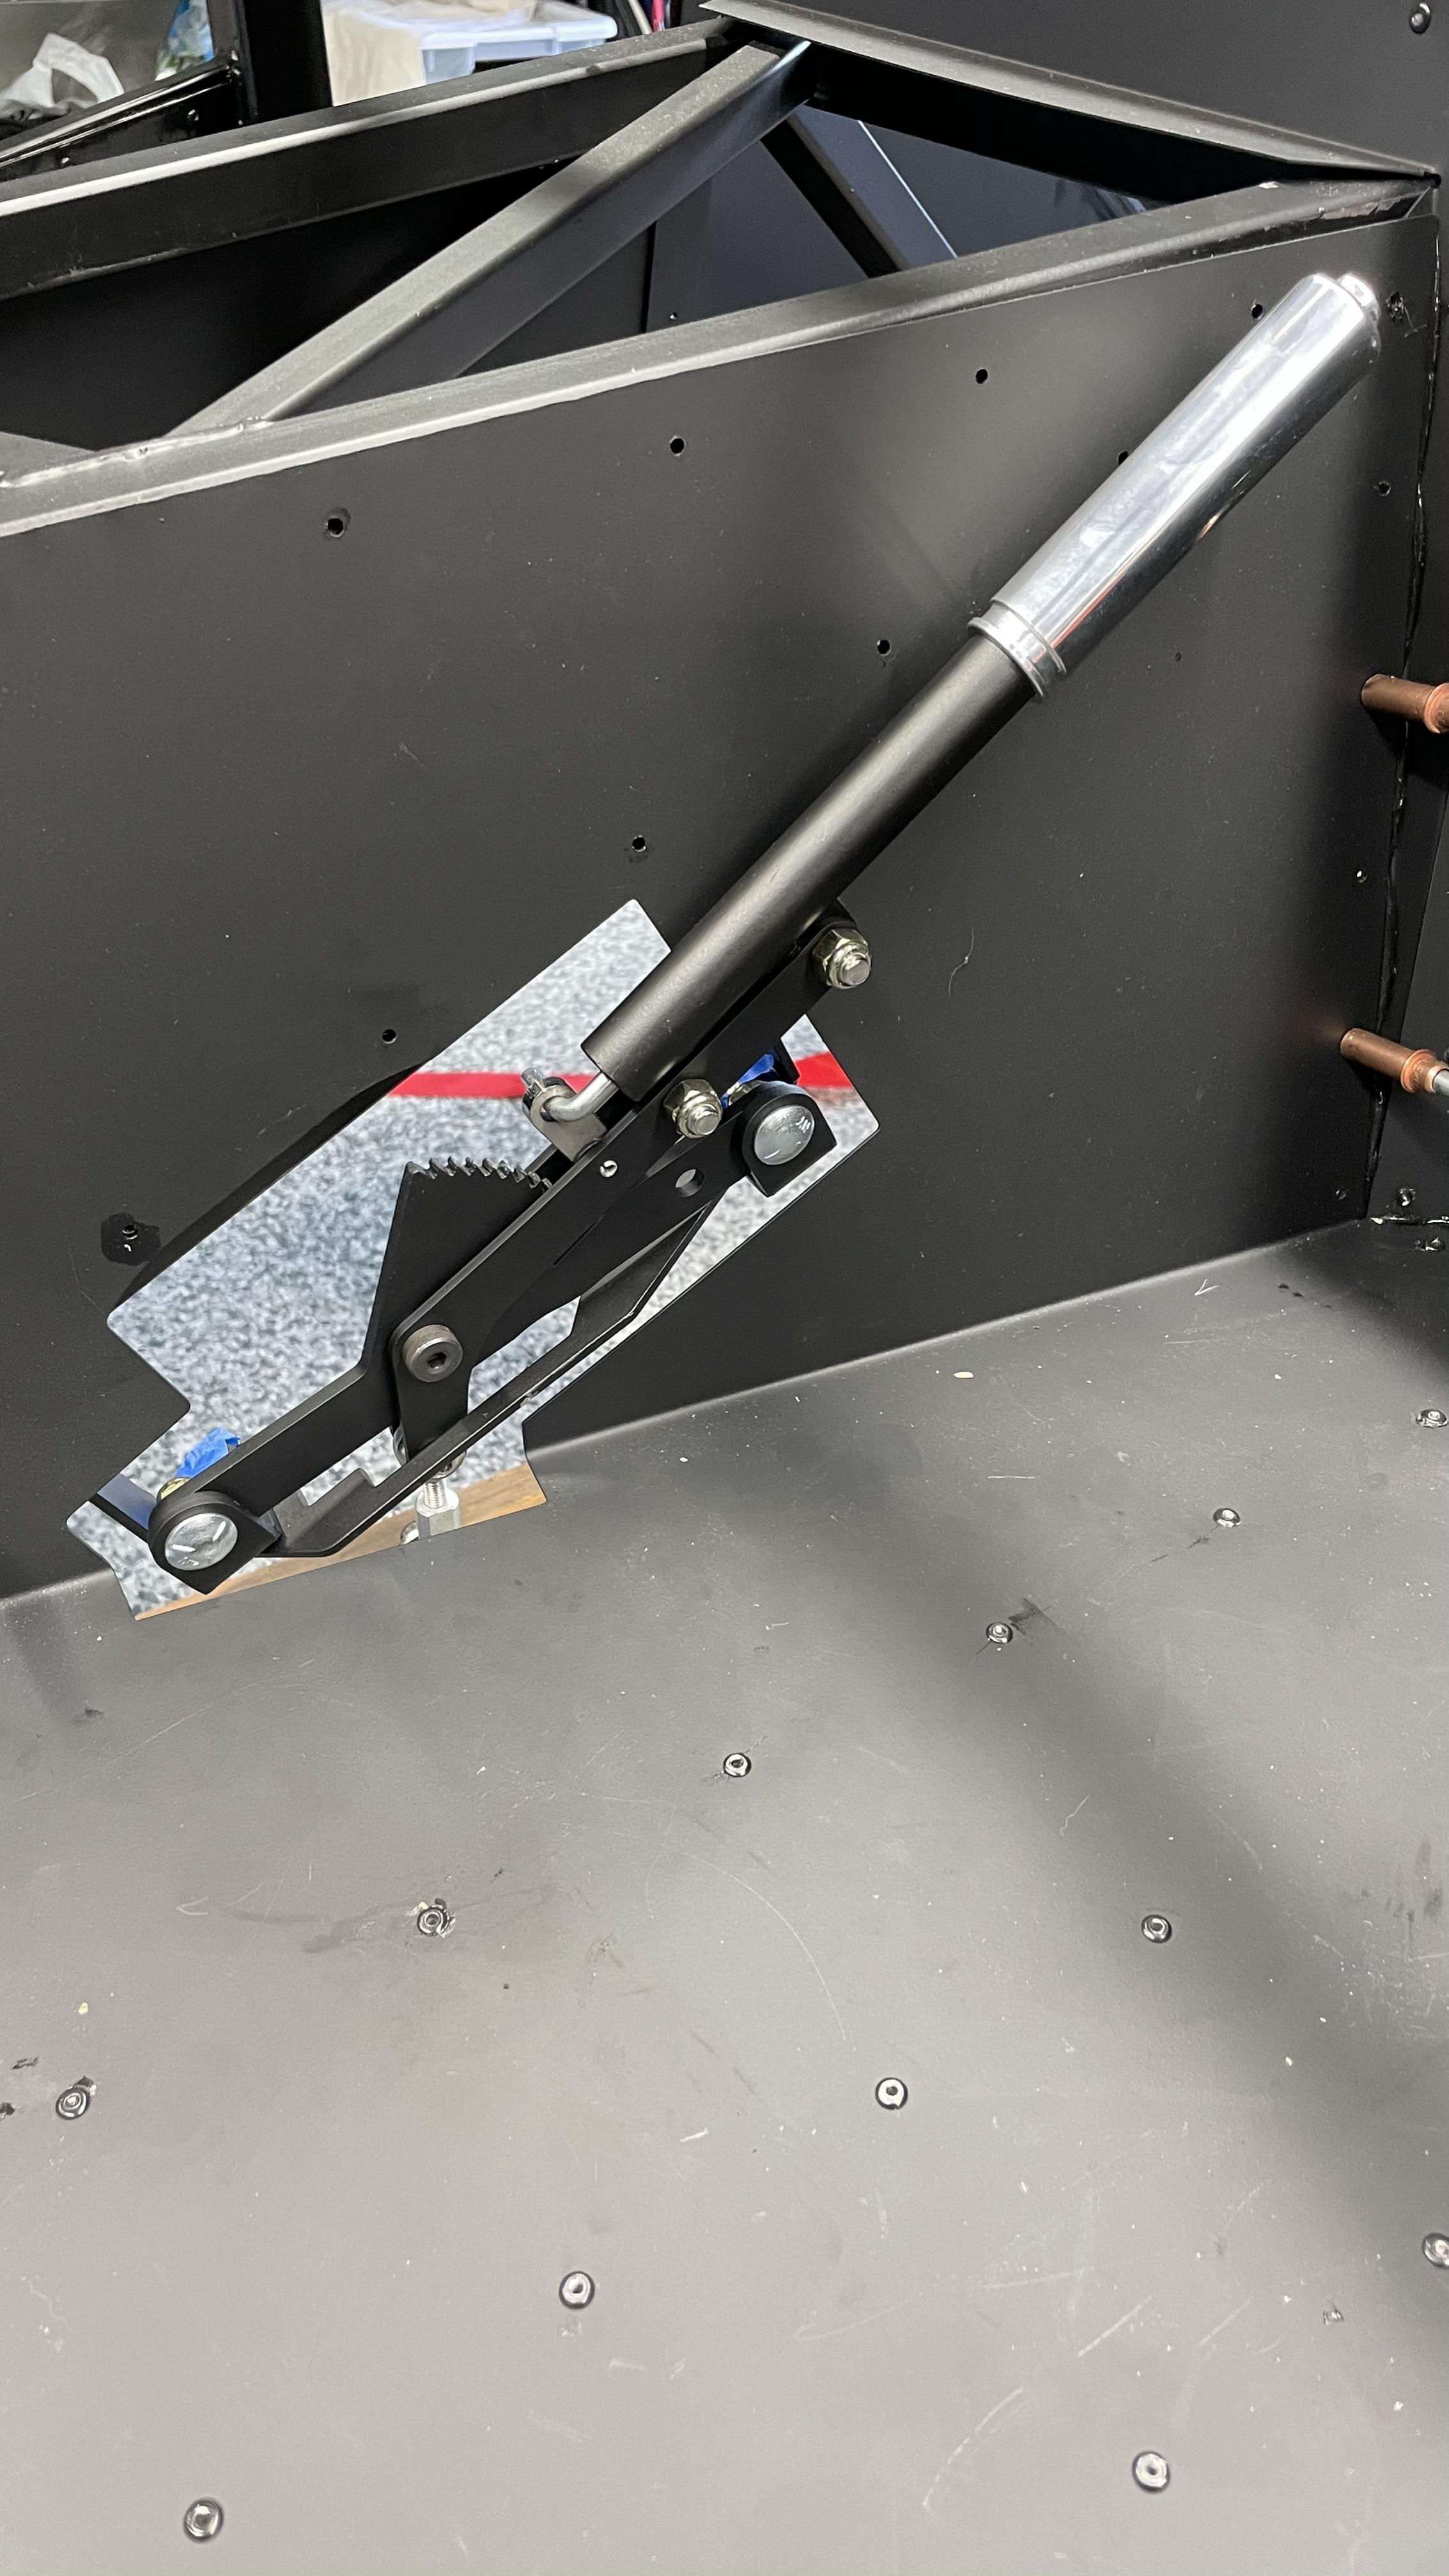
Senior Member
Tonight I assembled the ebrake and ran the flex lines on the front calipers. I am using edwardb's pulley system (thanks Paul!) with slightly smaller pulleys. Instead of using the modified lokar approach, I am going to cut the lines and re-clamp them. Lokar apparently doesn't sell them anymore, and I am not seeing the advantage to doing this over using the FFR designed assembly. I will be paying extra close attention to the strength of the clamps. Assuming I get good swages, I have to think that a clamp on the line will be at least as robust as the set screws in the lokar.
Matt
FFR Complete Kit, Coyote, Tremec TKX, 3.73 IRS, power steering, 18" Halibrands, Wilwood brakes, Gas-N pipes + header, Viking blue color
Roadster Build Time Tracker
-
Senior Member
Originally Posted by
richtersand
Tonight I assembled the ebrake and ran the flex lines on the front calipers. I am using edwardb's pulley system (thanks Paul!) with slightly smaller pulleys. Instead of using the modified lokar approach, I am going to cut the lines and re-clamp them. Lokar apparently doesn't sell them anymore, and I am not seeing the advantage to doing this over using the FFR designed assembly. I will be paying extra close attention to the strength of the clamps. Assuming I get good swages, I have to think that a clamp on the line will be at least as robust as the set screws in the lokar.
Nothing particularly magical about the Lokar piece. Too bad they made it hard to get. Apparently maybe still possible directly from Lokar. But haven't followed it closely. Was an easy way to reattach the cables since the mod requires the ends of the cables to be cut off. They're much too long when not routed under the chassis tube. If you have an acceptable method to clamp or swage the shortened cables another way, that's fine. Smaller pulleys are OK I guess. Nothing magical there either. Although there's plenty of room where they're located. The actual cable movement with that Wilwood rear e-brake is very slight. Basically just taking the slack out of the lines engages the e-brake. The main caution to be aware of with this mod is the reduced angle of the cable attachment at the handle. It's very close and/or drags on the rear mounting bolt of the e-brake handle assembly. Some lengthen the handle piece to clear. I didn't find that necessary with (1) The retaining bolt turned over so the head is down, and (2) I sanded off the top of the bolt head to flatten it a bit. Good luck.
Build 1: Mk3 Roadster #5125. Sold 11/08/2014.
Build 2: Mk4 Roadster #7750. Sold 04/10/2017.
Build Thread
Build 3: Mk4 Roadster 20th Anniversary #8674. Sold 09/07/2020.
Build Thread and
Video.
Build 4: Gen 3 Type 65 Coupe #59. Gen 3 Coyote. Legal 03/04/2020.
Build Thread and
Video
Build 5: 35 Hot Rod Truck #138. LS3 and 4L65E auto. Rcvd 01/05/2021. Legal 04/20/2023.
Build Thread. Sold 11/9/2023.
-
Senior Member
Thanks Paul. I noticed the drag on the ebrake assembly but it's flat metal to metal without any edges to catch (I did have to switch the orientation of the rear carriage bolt 180 degrees so it would be contacting the clevis assembly and not the nut). I don't think it will be a noticeable issue. If it is, I have a few ideas brewing... I will follow up and post the results when I get the cables cut to the proper length.
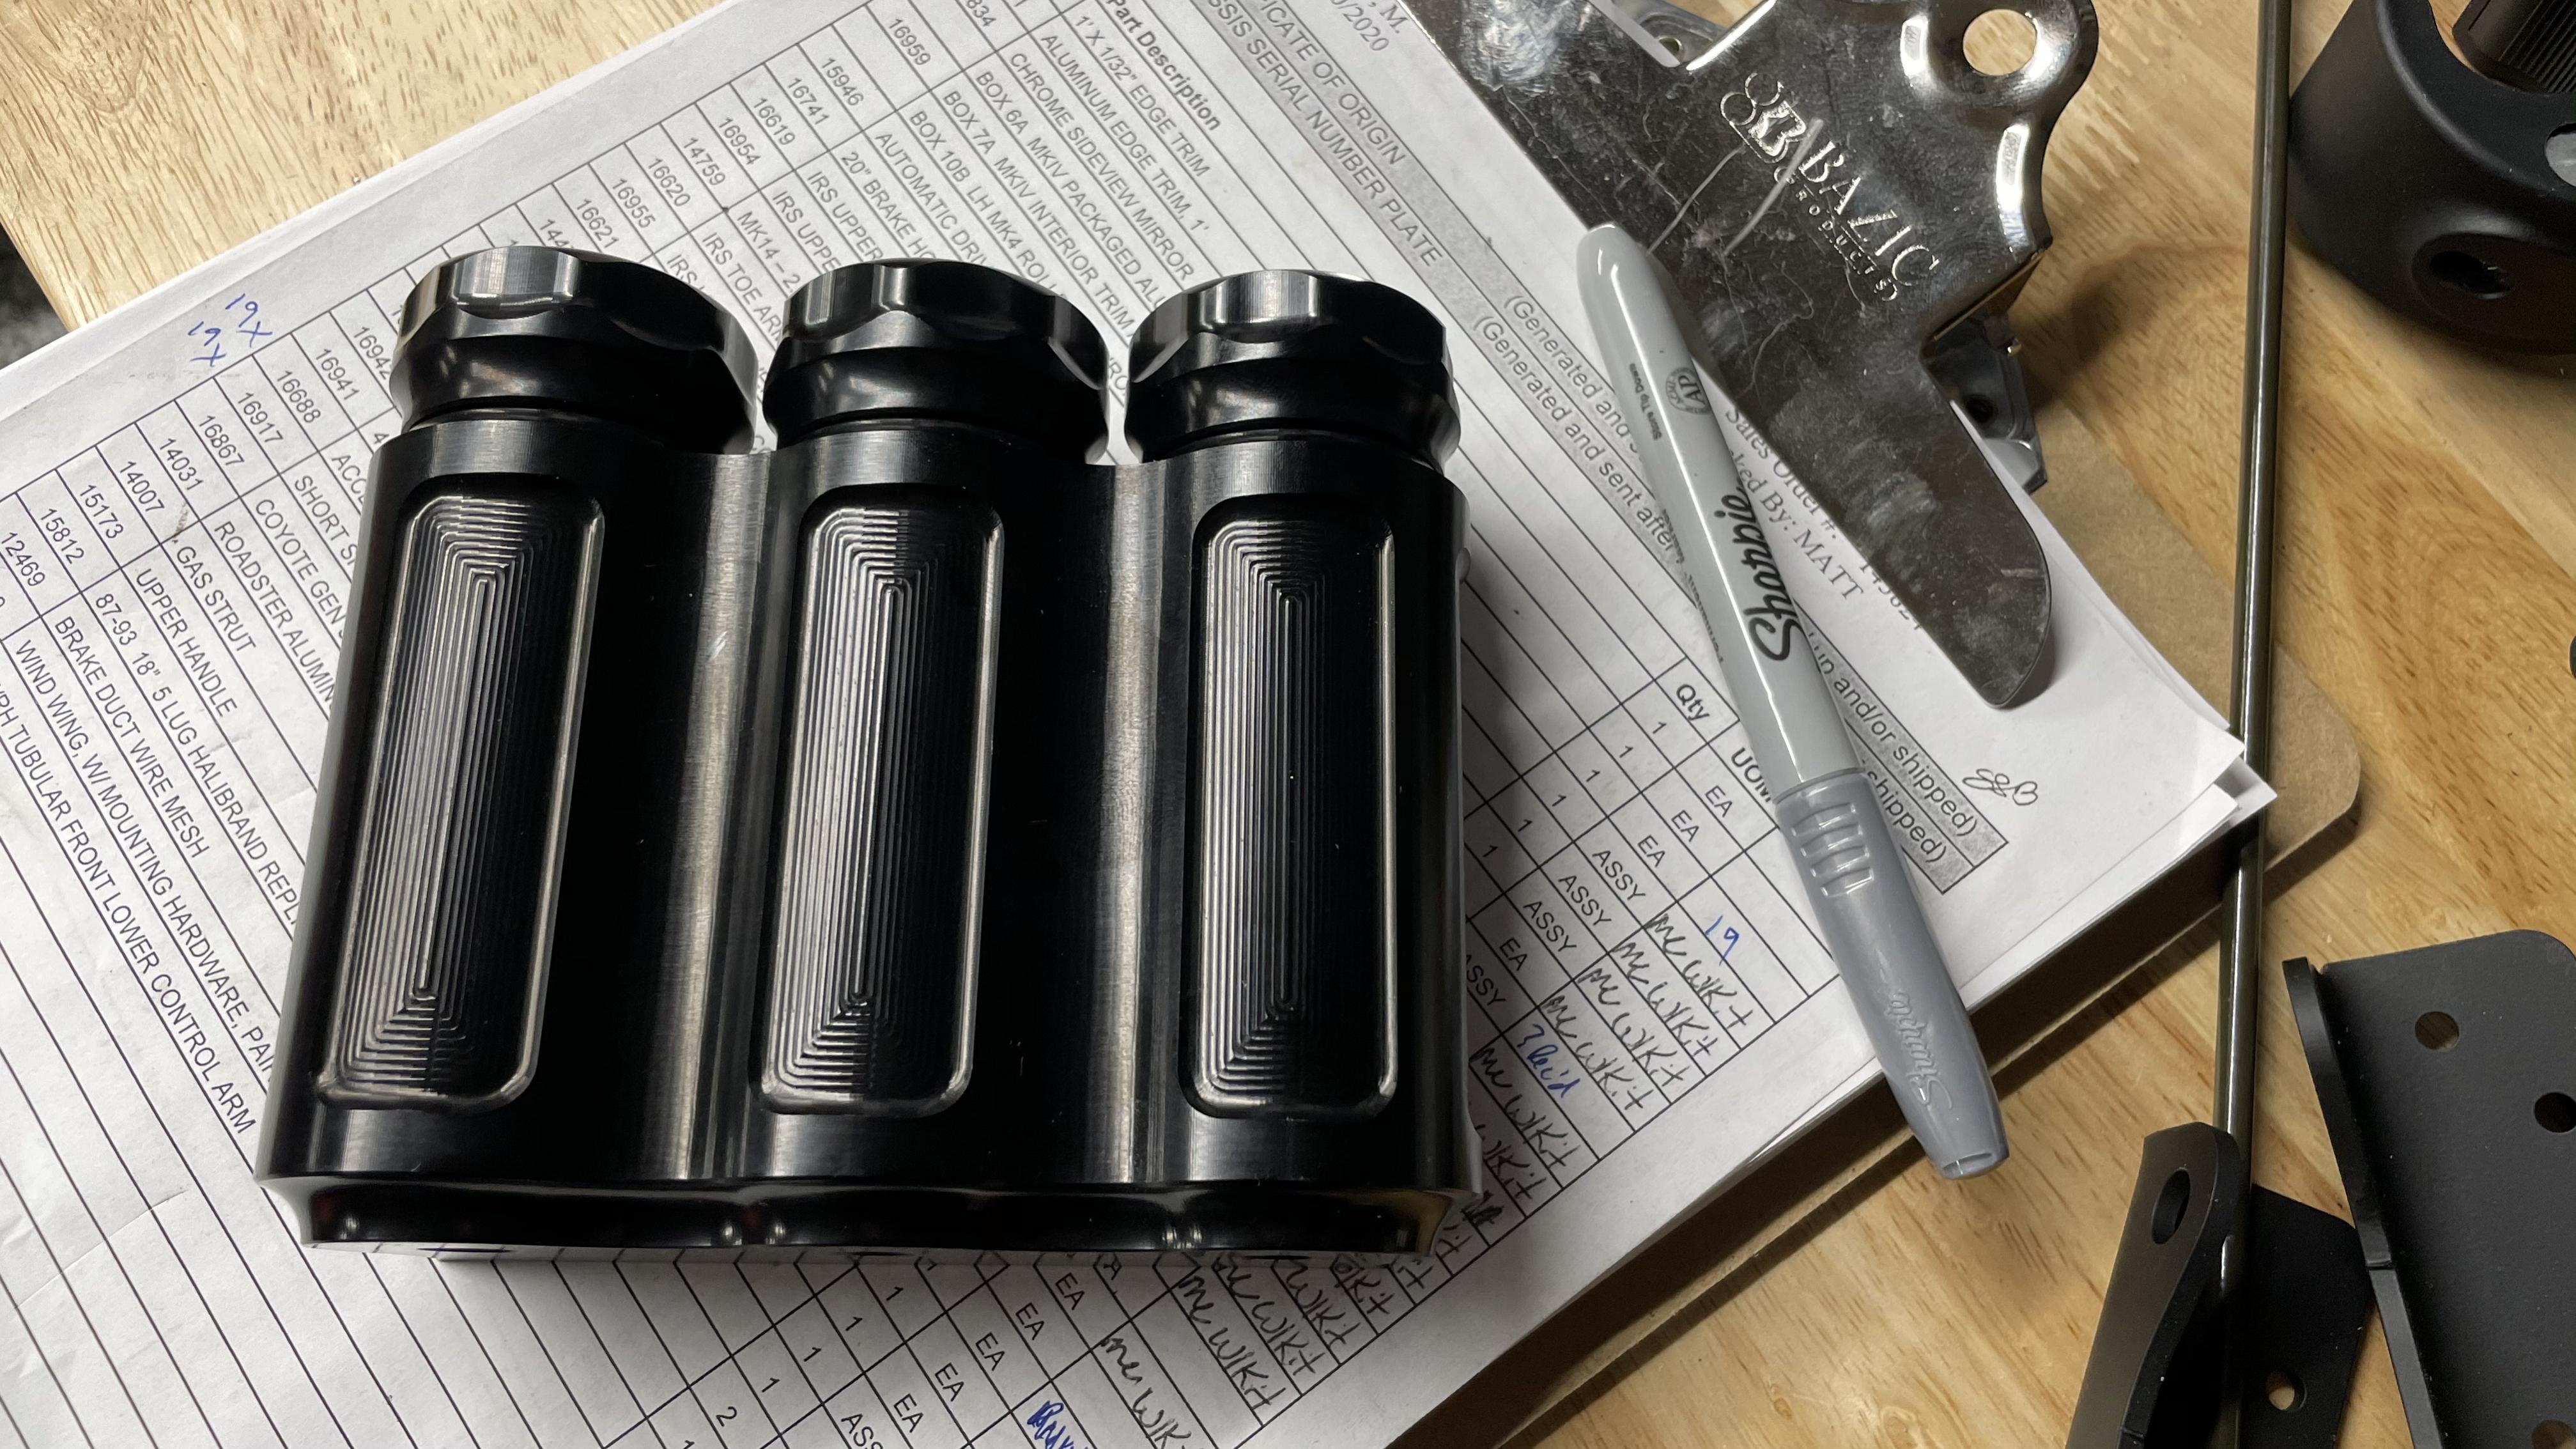
I spent time today prepping the hard line brake work. As a happy coincidence, I also received my triple reservoir today from Scotts Hotrods. Wilwood remote reservoirs are 4oz, so I went with the XL 3 oz option. I got it in black to blend in with the frame and black PC. I am very happy with it. There are four flush mount holes in the back that do not require a wide mount bracket and the depth of the reservoirs is minimal. It is tall, but looking at others build pics it appears that there is plenty of space for height. I hit McMaster for the hardware necessary + a 4x6" 3/16 mild steel plate to make the bracket.
Matt
FFR Complete Kit, Coyote, Tremec TKX, 3.73 IRS, power steering, 18" Halibrands, Wilwood brakes, Gas-N pipes + header, Viking blue color
Roadster Build Time Tracker
-
Post Thanks / Like - 0 Thanks, 1 Likes
-
Senior Member
Made some good progress last night. I got the Breeze front battery box installed. Overall very happy with the quality of the box. My OCD kicked in and I was a little bothered with the three pre-drilled holes for the X member. They are not evenly spaced and they don't line up to the frame very well. I'm not sure why he doesn't leave these undrilled and let the builder take care of it. So I had to choose between using the pre-drilled holes with a slight lean or drilling new holes. The lean is only a few degrees, so I went that direction. I added a couple more rivets in the back for it and tapped the two bottom holes per the instructions. You can see my rivet tool scratched up the PC. I am slowly learning to not press forward while I squeeze the manual rivet tool. I was pressing forward and after it popped the tool pushed into the plate. I guess none of this matters too much because it will all be covered with the battery.

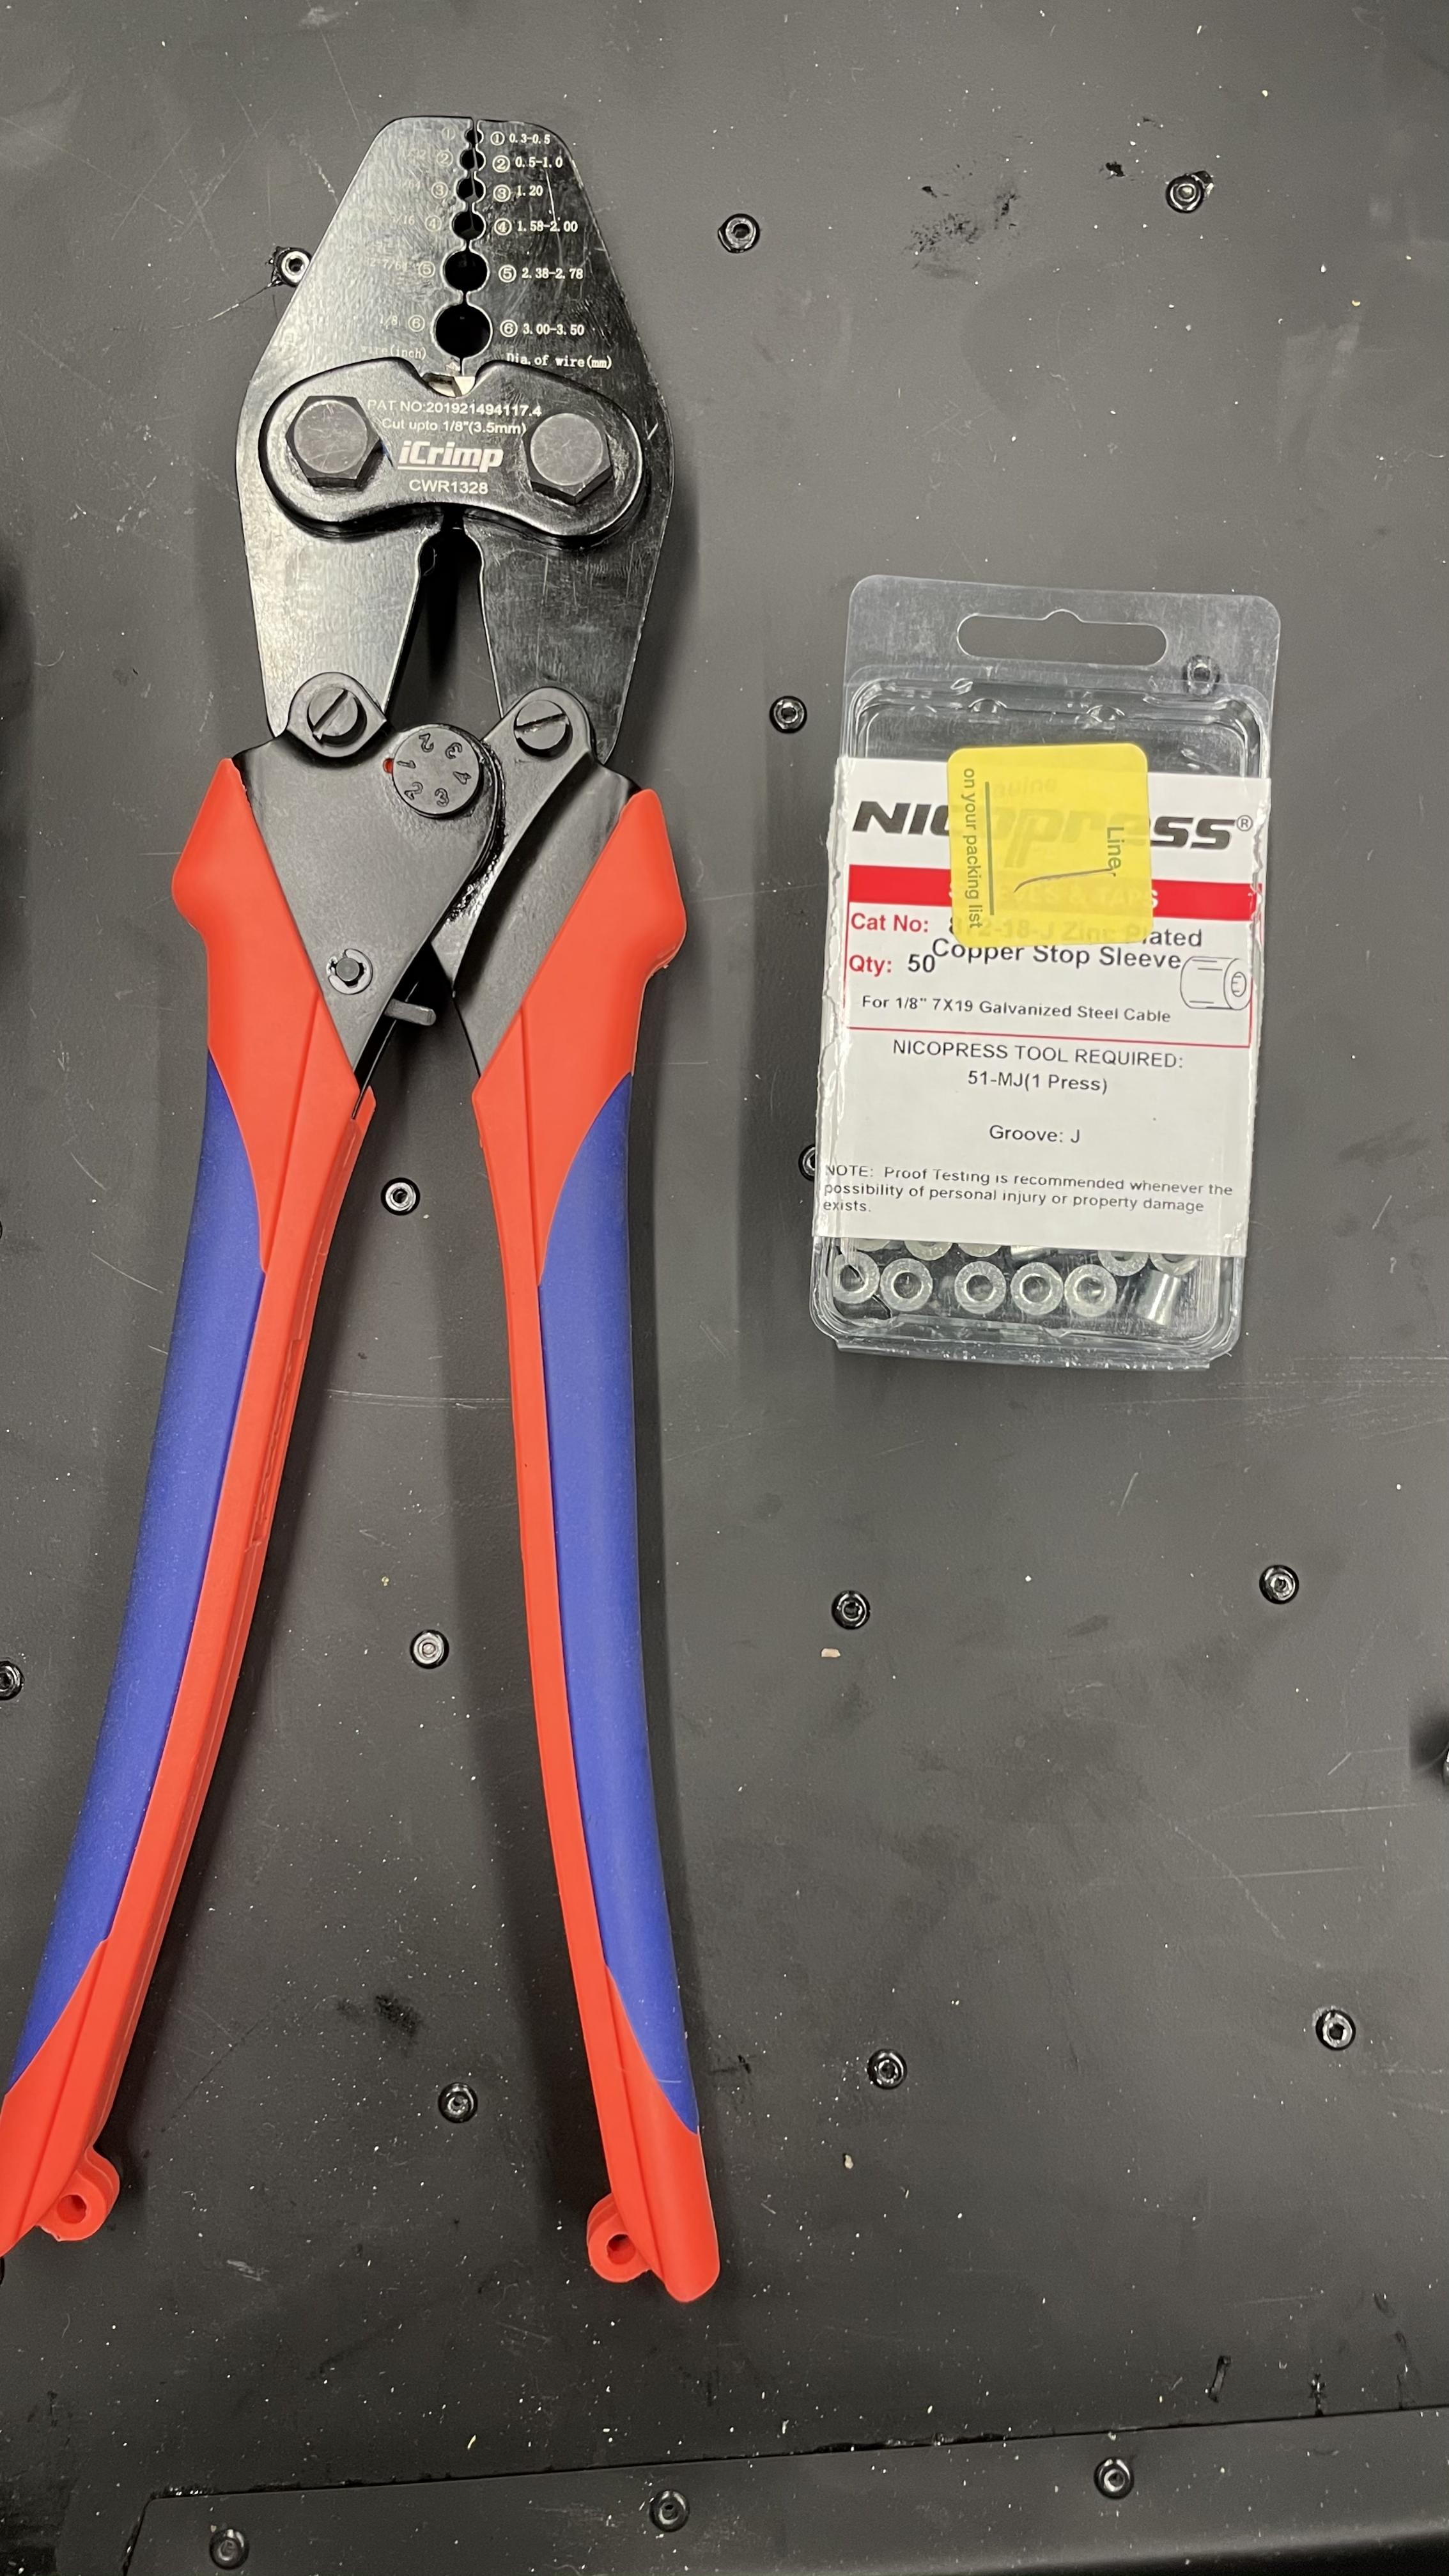
I also got the ebrake fully installed last night. I am happy with how it all turned out. Since the lokar piece isn't in production any more, I ended up cutting the cables and re-crimping new anchors. I got the crimping tool on Amazon and the 1/8" stop sleeves from McMaster. Took a lot of time to measure it out since you only get one cut. Marked it with the silver sharpie, cut the old anchor off, stripped the insulation from the cable, added TWO new anchors (for redundancy), crimped, and finally cut the cable to the top of the second anchor. Pro tip: feed the cable through the clevis before crimping. This way you don't have to feed two large anchors through the clevis. Had I tried to insert after anchoring, I probably would have had to make the clevis cable insert opening significantly larger.


If there was any doubt as to the strength of the anchors, I put my mind at ease when I made a mistake. I did not have one of the anchors fully seated before I *barely* squeezed the crimp tool. It immediately locked in, so much so that I needed to cut it off and start fresh (pic below). Considering I applied at least 100X more force to fully crimp it down, I am pretty darn confident these anchors aren't going anywhere. The officially advertised strength of these anchors is 40% of the strength of the line, and I have TWO per line.
Here is the tool + hardware:
Last edited by richtersand; 12-30-2020 at 02:22 PM.
Matt
FFR Complete Kit, Coyote, Tremec TKX, 3.73 IRS, power steering, 18" Halibrands, Wilwood brakes, Gas-N pipes + header, Viking blue color
Roadster Build Time Tracker
-
Senior Member
-
Not a waxer

No need for a shield with the brake line in that location.
Jeff
-
Senior Member
You'd be doing yourself a big favor by buying a small compressor and rivet gun from a place like Harbor Freight. $150-$200 all in and you can sell it afterwards if you don't have any more use for it. Easy sell. It will save your forearms, give you better access to awkward riveting locations and avoid scratching your powder coated panels.
Edit: Oops...Just saw one in your time lapse video. Sorry!
-
Senior Member
Originally Posted by
cv2065
You'd be doing yourself a big favor by buying a small compressor and rivet gun from a place like Harbor Freight. $150-$200 all in and you can sell it afterwards if you don't have any more use for it. Easy sell. It will save your forearms, give you better access to awkward riveting locations and avoid scratching your powder coated panels.
Edit: Oops...Just saw one in your time lapse video. Sorry!
No worries, I agree that the air riveter is an amazing addition to the shop. I use it when I have a bunch of rivets to do, but if it's only a few rivets here or there I go old school. Good wrist workout 
Matt
FFR Complete Kit, Coyote, Tremec TKX, 3.73 IRS, power steering, 18" Halibrands, Wilwood brakes, Gas-N pipes + header, Viking blue color
Roadster Build Time Tracker


 Thanks:
  Likes:


 Reply With Quote

