Boig Motorsports

Visit our community sponsor

Thanks Thanks:  0
Likes Likes:  0
Page 1 of 3 123 LastLast
Results 1 to 40 of 111

Thread: The start of a new project

  1. #1
    Member
    Join Date
    Sep 2011
    Location
    San Diego, CA
    Posts
    72
    Post Thanks / Like

    The start of a new project

    Hello all! I have finally Joined the club. I'm the owner of a new Type 65 Coupe as of Saturday October 26th. 2011. So far I'm impressed with the whole experience, Bob from Stewart is the man! As well as Jason Lavigne from FFR. I'll be documenting my entire build with pics and all. Any Q's, ask 'em, because I'm sure i'll be asking plenty of my own.

    So far I've got the car in the garage on stands, inventory done, and will be taking the body off this weekend. Then its GO TIME!


  2. #2
    Member
    Join Date
    Sep 2011
    Location
    San Diego, CA
    Posts
    72
    Post Thanks / Like
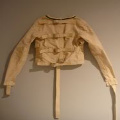
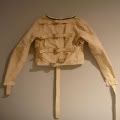
    Oh, and this one is for Bob!


  3. #3
    Trick Tool Maker, Super Moderator Hankl's Avatar
    Join Date
    Feb 2011
    Location
    Northern CA
    Posts
    671
    Post Thanks / Like
    Blog Entries
    1
    Dave,

    Raise your right hand and say after me,

    "I (State your name), do swear/affirm, that upon acceptance of this "Revered Coupe Jacket", will willingly subject myself to all manner of frustration and abrasion that my FFR Type 65 will provide. I further pledge that any and all fellow Coupe builders will have free reign in using the cash available in my wallet as they see fit to improve my build plan. I will not look down upon our fellow Roadster builders, but rather take pity on those not talented enough to build a race car with a roof, So Help Me God!"


    It is my pleasure to present you with the "Revered Coupe Jacket", Here's your sign!!


    Hank
    “If you didn’t have enough time to do it right the first time. How come you always have time to go back and do it again?” FFR1000186CP

    Understeer is when you hit the wall with the front of the car and oversteer is when you hit the wall with the rear of the car.
    Horsepower is how fast you hit the wall and torque is how far you take the wall with you.

  4. #4
    Senior Member bil1024's Avatar
    Join Date
    Feb 2011
    Location
    NY
    Posts
    1,432
    Post Thanks / Like
    Congrats Dave! Did you get the complete or basic kit ? Hoping to order next year

  5. #5
    Member Georgia Coupe's Avatar
    Join Date
    Feb 2011
    Location
    Flowery Branch, GA
    Posts
    74
    Post Thanks / Like
    Congrats on the new Coupe project! What are your build plans?
    Build photos at: http://s1184.photobucket.com/albums/...Daytona_Coupe/
    Coupe #510 ordered 10/28/2010 - Picked up 12/17/10 FIRST of the Generation 2
    Roller 02/22/11
    IRS, All aluminum Forte 408W with Weber stacks

    Mark III, 514, TKO 600, IRS - SOLD

  6. #6
    Senior Member rj35pj's Avatar
    Join Date
    Mar 2011
    Location
    Marion, IN
    Posts
    301
    Post Thanks / Like
    Welcome and have fun!!

  7. #7
    Junior Member
    Join Date
    Feb 2011
    Location
    The Alamo City
    Posts
    14
    Post Thanks / Like
    Might as well hand me your wallet for safe keeping!

  8. #8
    Member
    Join Date
    Sep 2011
    Location
    Houston
    Posts
    33
    Post Thanks / Like
    Your pictures have me all excited. My completion date is tomorrow and my ship date is set for next week.

  9. #9
    Member
    Join Date
    Feb 2011
    Location
    The hills of TN
    Posts
    81
    Post Thanks / Like
    Damn, this make me want to build another one.
    If in doubt......flat out-Colin McRae

    Coupe #485

  10. #10
    Senior Member riptide motorsport's Avatar
    Join Date
    Feb 2011
    Location
    Fort Lauderdale Fl.
    Posts
    3,296
    Post Thanks / Like
    Welcome!
    FFR Daytona Type 65 Coupe
    67 427 Cobra
    57' Belair
    72 Pinto Wagon ,306" 1/4 miler
    34 5 window coupe Ford
    2003 Mustang GT
    99' ZX9
    85 Goldwing

    All toys still in the Scuderia!


    Every Saint has a past..................every sinner a future

    Don't take yourself so seriously........no one else does.

    You never see a motorcycle parked outside a Psychiatrists office.

  11. #11

    Join Date
    May 2011
    Location
    Pittsburgh, PA
    Posts
    730
    Post Thanks / Like
    Dave (and Trichardson),
    Welcome aboard. I hope you find the build to be as creative and engaging as I have.

  12. #12
    Super Moderator

    Join Date
    Feb 2011
    Location
    Richmond, ca.
    Posts
    393
    Post Thanks / Like
    Welcome aboard! These are always great shots, can't beat the grins on everyones faces.

    Have fun, we are here for you!

  13. #13
    Member
    Join Date
    Sep 2011
    Location
    San Diego, CA
    Posts
    72
    Post Thanks / Like
    Hank, I knew the day would come when I would receive the jacket. Thanks for making it happen. ;-)

    Bil, Thanks! I did get the complete kit, with a seat upgrade, carpet kit, and floor mats. I also deleted a few things that I will not be using from the kit. Such as engine mounts, headers and drive shaft.

    GA coupe, I've already got my mind set on where I would like to go with this car. And I'm not so sure everyone else is going to be as happy about it as I am. So I might just hold off on stating the choice of engine until it comes time to throw that bad boy in there. Unless you guys promise not to burst into tears? I went with a 4 link rear, cuz I'm not a huge auto X kind of guy. Although, with the car it might be time to get out and give it a try. I plan to use a 6 spd. manual transmission and a V8. Rear end has 28 spline axles and 2.73's now, but somewhere down the line I'll be beefing it up to a 31 spline unit. And probably something closer to 3.73's or 4.11's

    Everyone else, Thanks for the welcomes! I've built myself several project cars in the past, but I don't think I was anywhere near as excited as I was when I got this thing in my garage. I do 100% of all my own work , minus paint / body. And I also love pictures! So you'll have plenty to look at along the way here.

    Russ, everyone in the pic is grinning, But I'm the one with the biggest smile! Haha

  14. #14
    Member firechicken's Avatar
    Join Date
    Aug 2011
    Posts
    30
    Post Thanks / Like
    So awesome. I cant wait to be the one posting some pics like that.

  15. #15
    Senior Member xlr8or's Avatar
    Join Date
    Feb 2011
    Location
    San Diego CA
    Posts
    316
    Post Thanks / Like
    Where abouts in San Diego are you? I'm the only F5 coupe in town that I know of that is on the road but there are lots of roadsters running around town.
    It's never too early to start beefing up your obituary.

  16. #16
    Member
    Join Date
    Sep 2011
    Location
    San Diego, CA
    Posts
    72
    Post Thanks / Like
    Scott - I'm located in El Cajon, But spend a lot of my time up in Mira mesa / poway area. My girl friend lives up in Rancho Bernardo near you. I've been meaning to give you a call one of these weekends to come check out your car but things have been pretty busy lately. This weekend I'm going to try and get a bunch of work knocked out on the car. I only know of one other car besides yours that is up an running here in SD. Blue with white stripes, and running on an electric motor.

  17. #17
    Super Moderator vnmsss's Avatar
    Join Date
    Feb 2011
    Location
    California
    Posts
    649
    Post Thanks / Like
    Blog Entries
    13
    Welcome Dave!!! Sounds like you've got all the skills, and as far as the driveline, individual choices are one of the greatest things about these cars...Build it you own way! You may get some of the "Wanna B's" out there tossing a few volleys here and there, but I've never seen a lot of criticism come from any of the real builders....As for the rest, I hope someday they have the courage to do what you're doing.....Go for it!! Can't wait to follow your build

    Karen
    #28 FFR Challenge Series
    #28 FFR Type-65 Coupe
    2011 Western Endurance Racing Championship
    2010 West Coast Champion
    Drive it.....Like you stole it!

  18. #18
    Superannuated Member
    Join Date
    Feb 2011
    Location
    Virginia
    Posts
    99
    Post Thanks / Like
    Ditto -- build it your way; sounds like you have the drive train nailed down already. I'm envious of your back glass, though. Mine did not show up with the coupe and still hasn't appeared yet. And do your inventory carefully. What the paperwork says is there and what got packed (or not) are not always the same.

    Most of all, have fun!

  19. #19
    Senior Member John Dol's Avatar
    Join Date
    Feb 2011
    Location
    Gorham, ME
    Posts
    1,522
    Post Thanks / Like
    Welcome aboard, just tell us already we don't bite (hard).

    John
    Finished the "My Coupe, my way" project.

    http://s956.photobucket.com/albums/ae46/jdcoupe1969/
    Coupe #386,17" Team III 245 FR 315 RR, 3-link, T5, 4 wheel disk, power brakes/steering. Sniper EFI
    First start Sept. 18 2013 First go kart Sept 19 2013

  20. #20
    Member
    Join Date
    Sep 2011
    Location
    San Diego, CA
    Posts
    72
    Post Thanks / Like
    Spent a little bit more time on the car this weekend, Got the glass off the body, and the body off of the frame. The sound of twisting / popping / crackling fiber glass is never something I would want to get use to. It was extremely nerve racking! Also got a bunch of the suspension and steering components installed in the front.


    I've actually found a couple items that were said to be in the box's, but are not turning up anywhere. I'm sure FFR will take care of the problem. Not too worried about it.
    So I have never really been too much of a ford guy. My last project car was a Datsun 240Z with an LS1. After that I've grown pretty fond of the LSX motors and also put one in a Volvo 740. AND swapped a 5.3 from an avalanche into my 1971 Chevy C20. So I ended up selling the Datsun project, and the Volvo 740 in order to fund the Factory Five project. Left over from my Datsun is a 2004 Chevy Avalanche 5.3 long block that is going to make its way into my coupe. I had originally purchased it as a spare for the 240Z, but ended up never needing it.

  21. #21
    Senior Member xlr8or's Avatar
    Join Date
    Feb 2011
    Location
    San Diego CA
    Posts
    316
    Post Thanks / Like
    I know what it is....

    It's never too early to start beefing up your obituary.

  22. #22
    Member
    Join Date
    Sep 2011
    Location
    San Diego, CA
    Posts
    72
    Post Thanks / Like
    Hey Scott, it was nice meeting you the other day! Thanks for stopping by and letting me check out the car. I'm sure I'll have to take a peak at it again for future reference.

  23. #23
    Senior Member xlr8or's Avatar
    Join Date
    Feb 2011
    Location
    San Diego CA
    Posts
    316
    Post Thanks / Like
    Anytime. Just let me know. I'll use any excuse to go for a drive.
    It's never too early to start beefing up your obituary.

  24. #24
    Senior Member CJBergquist's Avatar
    Join Date
    Feb 2011
    Location
    Palo Alto, CA
    Posts
    230
    Post Thanks / Like
    Welcome aboard. I sure wish I had the glass back hatch like yours...I may have to give FFR a call...
    Chris
    If it's too LOUD....you're too OLD!!

    Build Site >> http://www.flickr.com/photos/51103049@N00/collections/

    FFR#0441CP Complete Coupe kit, IRS, T-5, 392ci 351W, Webers, Delivered 4/29/09

  25. #25
    Senior Member rj35pj's Avatar
    Join Date
    Mar 2011
    Location
    Marion, IN
    Posts
    301
    Post Thanks / Like
    Quote Originally Posted by CJBergquist View Post
    Welcome aboard. I sure wish I had the glass back hatch like yours...I may have to give FFR a call...
    I have seen the back glass (don't have mine yet). If you can swing it, it is really nice and adds to the overal quality of the car in my opinion.

  26. #26
    Senior Member John Dol's Avatar
    Join Date
    Feb 2011
    Location
    Gorham, ME
    Posts
    1,522
    Post Thanks / Like
    There is one other Coupe with I believe an LS1. You'll have to search for it on the other forum. Might be a time saver as far as figuring things out.
    If you keep up this pace you'll have her done by the end of the month.

    John
    Finished the "My Coupe, my way" project.

    http://s956.photobucket.com/albums/ae46/jdcoupe1969/
    Coupe #386,17" Team III 245 FR 315 RR, 3-link, T5, 4 wheel disk, power brakes/steering. Sniper EFI
    First start Sept. 18 2013 First go kart Sept 19 2013

  27. #27
    Senior Member xlr8or's Avatar
    Join Date
    Feb 2011
    Location
    San Diego CA
    Posts
    316
    Post Thanks / Like
    Didn't Badger use an LS1 in his SPF coupe?
    It's never too early to start beefing up your obituary.

  28. #28
    Senior Member jkrueger's Avatar
    Join Date
    Feb 2011
    Location
    DFW, TX
    Posts
    432
    Post Thanks / Like
    LDave

    keep us posted on the LS specifics of your build. I plan on doing the same thing when I get mine (as soon as I sell my roadster, which is posted in the for sale section).

    JC

  29. #29
    Member
    Join Date
    Sep 2011
    Location
    San Diego, CA
    Posts
    72
    Post Thanks / Like
    I've heard of another guy putting an LS1 / T56 in a Roadster and it looked pretty straight forward. So far I've got a 2005 LM7, Iron block 5.3 Litre with stock 706 casted heads.Pulled from a Chevy Avalanche. I have a Comp cam installed, will be swapping out the valve springs with some Comp Beehive springs, and with be using an LS1 intake manifold. Also going to be using the stock 5.3L exhaust manifolds. Going to be using the stock PCM for now, but later down the road I plan to use a MegaSquirt standalone fuel computer, and an MSD unit for the ignition. Don't worry, I'm taking pics of everything I do so you'll see how it goes.

    The other night I was able to get all the front brake parts installed, as well as get all the aluminum panels marked and ready for removal. I'm REALLY dissappointed that I have to work this weekend. :-( Other wise I would be in the garage taking care of business. I'm still waiting on some back ordered master cylinders so I won't be able to finish up the brake stuff in its entirety just yet. Pics to come!

  30. #30
    Coupe Modifier RonSchofield's Avatar
    Join Date
    Feb 2011
    Location
    Halifax, Nova Scotia, Canada
    Posts
    253
    Post Thanks / Like
    Blog Entries
    10
    Dave,

    Since you are putting in a LS1, I suspect you will have to be making clearance in the hood for the engine. It would be a shame to cut into that nice red body. But look who's talking.. I think the top of the hood and roof are the only areas that I didn't cut on my build. I only have about 75 percent original fiberglass in my build.

    Welcome to the insanity..

    Ron
    Type 65 Coupe Builder / Coupe Parts Vendor

    Websites:
    myCoupe Build
    F5Registry

  31. #31
    Senior Member xlr8or's Avatar
    Join Date
    Feb 2011
    Location
    San Diego CA
    Posts
    316
    Post Thanks / Like
    Do not look at Ron's website. It will put your brain in overdrive with new ideas for your car and destroy your budget.
    It's never too early to start beefing up your obituary.

  32. #32
    Coupe Modifier RonSchofield's Avatar
    Join Date
    Feb 2011
    Location
    Halifax, Nova Scotia, Canada
    Posts
    253
    Post Thanks / Like
    Blog Entries
    10
    Quote Originally Posted by xlr8or View Post
    Do not look at Ron's website. It will put your brain in overdrive with new ideas for your car and destroy your budget.
    Except to look at the hood lock brackets.

    BTW: Sharon and I will be down in your area in Feb. I will keep you updated. Maybe a group meet.

    Ron
    Type 65 Coupe Builder / Coupe Parts Vendor

    Websites:
    myCoupe Build
    F5Registry

  33. #33
    Member
    Join Date
    Sep 2011
    Location
    San Diego, CA
    Posts
    72
    Post Thanks / Like
    I'm not too sure if I'm going to have clearance issues or not, I guess I will cross that bridge once I get there. Luckily the intakes on the LS1's are pretty low profile and out the inlet pointing straight forward. The LS1's that I've seen in Roadsters have at least a few inch's of hood clearance on top.


  34. #34
    Member
    Join Date
    Sep 2011
    Location
    San Diego, CA
    Posts
    72
    Post Thanks / Like
    Last weekend I was able to get a little bit more progress done to the car. Managed to get the rear end, and rear suspension installed. And when the book says that you need two people and to be careful to avoid hurting yourself, I know what they mean. ;-) I was solo and still managed to get everything installed. (I only smashed one finger)

    So here is what i'm starting out with. Its just a plain 'ol 8.8 with 2.73 gears. Poly bushings and a nice coat of black paint. I've installed a set of upgraded stock 28 spline axles with 5 lugs on them. I also installed a set of 95 mustang rear disc brakes.


  35. #35
    Member
    Join Date
    Sep 2011
    Location
    San Diego, CA
    Posts
    72
    Post Thanks / Like


    I was also able to get the steering shaft on and start on a little bit of the aluminum paneling. Its so much fun putting this thing together, I just wish I had more time to work on it. I'm in for a 3 day weekend this week but unfortunately I'll have to spend it in Las Vegas on a little vacation. :-( Oh well... There's always next weekend!


    So I guess technically the car would be considered a roller, wahoo!

  36. #36
    Senior Member bil1024's Avatar
    Join Date
    Feb 2011
    Location
    NY
    Posts
    1,432
    Post Thanks / Like
    Looking good!

  37. #37
    Senior Member xlr8or's Avatar
    Join Date
    Feb 2011
    Location
    San Diego CA
    Posts
    316
    Post Thanks / Like
    Lookin good so far. Remember to stock up on drill bits before you begin the aluminum panels.
    It's never too early to start beefing up your obituary.

  38. #38
    First Time Builder DARKPT's Avatar
    Join Date
    Feb 2011
    Location
    West Alabama
    Posts
    256
    Post Thanks / Like
    Look at all those shiny new parts! Congrats on the new kit!
    Coupe #497 delivered 7/29/10. Engine in on 10/1/10. Pushcart on 10/4/10. First start on 12/01/10. First go-cart on 12/31/10. Finished and on the road as of February 2012.
    Coupe Body Buck Plans - My Spray Booth - Painting Lessons Learned
    Build site: www.bamacoupe.blogspot.com
    Lots of build photos and some observations: http://www.flickr.com/photos/53614858@N05/

  39. #39
    Member
    Join Date
    Sep 2011
    Location
    San Diego, CA
    Posts
    72
    Post Thanks / Like
    Things have been slow the last couple weeks and I haven't gotten to spend much time in the garage. But today I started getting the engine buttoned up. And also worked on the pedal box, or at least TRIED to work on the pedal box. I ran into a snag, and wonder if you guys could give me some advice. Here's what I've got:

    The kit came with the wilwood pedals, and the two steel pieces that are cut to mount the pedals into the car. first piece mounts to the front of the drivers foot area like so...


    Next, I'm assuming that the pedals bolt to the top of this piece like so:


    THEN, once you got the pedals mounted down, the second piece connects to the front like this.


    Does this look good so far? With everything in place like this, Where the second metal piece would mount to the frame, Its both too high and not centered over the square tube, Like this:


    Now I know that where there is a welder, there is a way. But Maybe I'm doing something wrong here? I would like to fix it the correct way, before I resort to the Dave way.

    Also. what is the purpose of the two drilled holes in the front left area of the 1st steel bracket? I wish I could just read all about it in the installation manual, but there is pretty much no information about installing the wilwood pedal book in there. Did anyone else have this kind of problem when installing their stuff? Thanks in advance for any kind of input you guys could give me.

  40. #40

    Join Date
    May 2011
    Location
    Pittsburgh, PA
    Posts
    730
    Post Thanks / Like
    Dave,
    I am not sure if the pedal box goes on the top or the bottom of the horizontal mount, but it looks like putting it on the bottom would get you closer to where you need to be, at least with respect to height. Hopefully someone who actually knows will weigh in on that.

    Assuming the pedal box goes on the top, I would first consider re-drilling the holes in the "horizontal" bracket, which as I mention below, may solve both problems in one step. If that doesn't seem like a viable fix, you could try taking the "horizontal" bracket off of the frame, put it in a vise, and bend it downward (where it bends at the front of the footbox) until the "vertical" bracket hits the 3/4" tubes. The bracket looks like 1/8" cold rolled steel, which is some tough stuff, but with a pipe wrench or something similar for leverage it should bend without heat. Maybe use a piece of hardwood or some scrap metal between the vise jaws/pipe wrench jaws and the bracket to avoid gouging it, if you care. Doing so will also help to keep the bend uniform and not distort the metal where you aren't tring to bend it. You could try to bend the bracket with it still on the frame, but you might kink the forward-facing part of the bracket, rathern than bend it at the angle. You may end up with the pedals in crooked. On that point, I'd take a carpenter's square and check how everything lines up vis-a-vis the 2"x2" bulkhead at the bottom of the front loop. Maybe check out some of my latest photos on my thread re: frame mods to the Coupe, where I made a litany of changes to make my pedals fit with my frame mods.

    As for making the horizontal mount line up with the 3/4" tubes, from the photos it doesn't look like the distance between the bracket's bolt holes is the same as the distance between the center lines of the 3/4" tubes. If they are pretty close, you could just correct the whole problem by redrilling the horizontal bracket so that the vertical bracket lines up with the 3/4" tubes, as mentioned above. But if, as the photos suggest, they are not drilled consistent with the centerlines of the 3/4" tubes, you could weld some additional steel tabs onto the vertical mount, plug weld the old bolt holes and drill new bolt holes. I would do that before I welded something onto the 3/4" tubes, which are fairly thin and not the easiest to weld to, especially using thicker metal. Also, no need to disturb the powder coating if you don't need to. The vertical bracket will be much easier to modify, regardless of your welding skills.

    I would be cautious about how much you elongate any of the holes. You don't want that pedal box to shift around any more than it otherwise would. I'd also add that the pedals run fairly close to the 1"x1" square tube out to the front suspension towers, the steering shaft, and the 3/4" square tube. I taped paint sticks to the latter two while fitting the pedals to ensure adequate clearance. Also, it looks like you are using a hydraulic clutch, so you have some leeway to move the pedal box around. If you are using a cable, I'd guess, from looking at others' photos, that you need to take into consideration the clutch cable's travel when moving the pedal box around, and would be much more constrained in locating the pedals.

    Bottom line: I'd try re-drilling the horizontal mount holes and correcting both problems in one fell swoop, and it that doesn't seem viable, move on to the other options. I will be by a phone all day if you want to touch base about any of this - just send me a PM.
    Last edited by Jacob McCrea; 11-20-2011 at 05:20 PM. Reason: A few more thoughts.

Page 1 of 3 123 LastLast

Posting Permissions

  • You may not post new threads
  • You may not post replies
  • You may not post attachments
  • You may not edit your posts
  •  

Replica Parts

Visit our community sponsor