-

Originally Posted by
JeffP

I have the same pump from mike and did exactly this.. installed a weatherpack. the website has conflicting data - 10amp and 16amp @60psi. either way should be fine and given the gauge of wire on the pigtail it ships with is pretty small it must not be a huge draw.
Perfect! This is exactly what I'm going to do. I was thinking the same. I also saw conflicting information, but yes, the pigtail is the same gauge as Ron Francis wiring harness so I think a WeatherPack would be fine. I'm feeling more confident about this now.
MKIV Complete Kit, IRS, received 11/18/21
Aim to Misbehave
-
Post Thanks / Like - 0 Thanks, 1 Likes
-
Continuation...
Installed the Fuel Inertia Switch. This called for self-tapping screws, but we have rivnuts and I'm not about to pass up an opportunity to use them.
Started wiring up the dash. I'm not entirely happy with how it's all wired up - it's just messy. I'm probably going to buy a WeatherPack set to clean this up. For now, it's coming along fine.
Installed the horn. You can see I used Rivnuts for this, too! Overall I'm pretty happy with how this wired up. I spent way too much time on this part, but it looks good. You'll notice I used 2 Rivnuts side by side to keep the horns in position (so they don't shift).
I purchased the Breeze Installation Kit for the Classic Seats and so far I'm very happy with this decision, too! We mounted the bases to the seats, but we'll permanently mount it in the car later. I've also ordered the Cobra Seat Heaters from Mike Forte, and we'll get those installed once they arrive. The Breeze installation kit slightly reclines the seats and makes them adjustable (move the chair forward if needed depending on the driver). Since I'm 6' 1", I think the Breeze kit will make the vehicle just a bit more comfortable.
https://www.breezeautomotive.com/sho...classic-seats/
https://fortesparts.com/product/cobr...rproof-regular
Installed the drive shaft adapter. Factory Five includes hex bolts to install the drive shaft adapter (with red Loctite), but I opted to purchase 12 point bolts from Mike Forte, too! It is easier to torque 12 point bolts vs. hex, and if I ever needed to remove these, I'll be glad I used the 12 point bolts. Factory Five says to torque these down to 41 ft lbs., but Mike Forte suggested 60-64 ft lbs, so we torqued them to 62 (with red Loctite). I included a picture of this if anyone wants to see it. I used the emergency brake to hold the drive shaft adapter in place while I torqued it down, and it didn't budge. I'm feeling more confident in my emergency brake, too!
Kadence Eastman started the sound proofing in the trunk area. Love having my kids helping me with this! Making so many memories and everyone is pitching in.
Installed the rear wiring harness and secured it in place. Hopefully I won't regret this later. I had a difficult time seeing how other people ran/ secured the rear harness. I played with it - slept on it - made some adjustments - and riveted it in place today. Once this is done, I think I can start permanently riveting the aluminum panels in the trunk/ rear of the car.
Semi-prepared the Transmission Mount. I purchased the spacers from Mike Forte for this, too. Does it look like I did this right? I'm sure it will be more clear once the engine/ transmission arrive, but I was just trying to prepare for the upcoming installation.
Likewise, if anyone has any suggestions, please let me know!
John Mark
PXL_20220419_000554507.jpg
PXL_20220420_041010872.jpg
PXL_20220423_235606439.jpg
PXL_20220423_232639843.jpg
PXL_20220430_005646493.jpg
PXL_20220430_012314979.jpg
PXL_20220430_013418096.jpg
PXL_20220430_013403039.jpg
PXL_20220501_013526294.jpg
MKIV Complete Kit, IRS, received 11/18/21
Aim to Misbehave
-
Post Thanks / Like - 0 Thanks, 2 Likes
-
Glove Box, Trailer Converter, Seat Heaters
I've also created a private/ closed Facebook group documenting this build and it has a lot more pictures and additional information. It is a small group that includes a few other builders that I've met along the way, too! If anyone is interested, in following on Facebook, you can join here: https://fb.me/g/p_fuEJVzTR3Tq9RiAc/02htwdmG (link is only good for 48 hours, but if you PM me I'll resend it to you). I'm planning to keep this updated, too!
---
All of the kids helped with various parts this weekend but Reagan has been spending a lot of time in the garage with me and that's been really fun! Love spending time with her.
Glove Box:
We installed the Glove Box. The Glove Box includes an aluminum plate that sandwiches the door hinges against the cover. We used an epoxy glue to hold this together. To ensure correct alignment, we clamped a piece of wood against the other side of the dash & Glove Box door to make sure it is flush with the dash once glued. Reagan ran over to Lowes with me to pick up the glue & clamps for this. I did have clamps, but these ones are better than what I had and Im sure I'll use them again before this project is finished. The actual alignment of the hinges was off and no matter how I tried to bend things, it didn't work. I ended up using 4 washers on one side to improve alignment, and then I added one more support screw in the middle. Perfect!
Engine Lift -
One of my neighbors had an engine lift that he had purchased to unload a cast iron table saw from his truck a few years ago and brought it over for me to use. It had some surface rust from sitting on the side of his house for the last few years, but once cleaned up it works great!
Seat Heaters -
I opted not to install AC/ Heat, BUT I did decide to install seat heaters for those cool nights in Southern California 😊. The installation was pretty straightforward and they came together pretty easily. Ive decided that Im going to mount the controls on the side of the Breeze seat mount. Some people mount the controls on the side of the transmission tunnel or the top, but this involves additional wiring inside the transmission tunnel, and Id prefer to have the controls concealed. We used 3M Super 77 Spray Adhesive to re-attach the seat base/ foam back together and this worked great!
Trailer Converter
Since the rear lights are LED, and require 4 wires instead of 5 that are in the harness, we need to splice in a 5 wire to 4 wire trailer light converter to make them work properly (correct brake logic). The manual calls for splicing this in behind the dash, but some people splice it in near the rear of the harness by the fuel tank. This can occasionally fail, and if it is behind the dash, it will be difficult to replace without removing the fiberglass body. After taking apart the rear harness, I ultimately decided to splice this in near the drivers side tire tucked up against the frame. This provided me an opportunity to use a 5-5 Weatherpack for one side and a 4-4 Weatherpack for the other side. Perfect now it can be easily replaced if needed. Why did I take apart the rear harness you might ask? Well, in one of the pictures of wires, youll see 3 pink wires, and I was looking for 2. 2 of those wires for the rear lights and 1 of them is the power for my fuel pump. After identifying which one was for the fuel pump, I put everything back together and I think it came out pretty well!
Fuel Pump
Installed a Weatherpack on the fuel pump connection.
Rear Brakes
When I had assembled the rear brakes, I had the sliding clips (for the pads) but didnt see where they went, so I set them aside, knowing I would need to revisit this later. In reading other build threads, I saw someone else mention this and then I knew exactly where they went. They are now installed, but that was a real bother
.super tight tolerance, but Kadence Eastman helped me with this!
Seats & Breeze Mounts
Painted up the Breeze Seat Brackets as they are made of steel, and I would like to avoid rust if possible. Lowe's is running low on spray paint paint and didn't have ANY Rustoleum Flat Black, so we bought a hammered spray paint (no one will see these anyways, and it actually looks good). The Breeze seat mounts include a piece of wood that is screwed under the seat pad to provide additional support for longer drives. This is an MDF wood, and it can break if you press down on the end of it too hard. Ive ordered an aluminum plate (1/8) which I secure over the wood for added reinforcement (or might replace the wood with the aluminum plate, we'll see). Rather than using self-tapping screws for installing the wood, I decided to use rivets. Since the electrical for the seat heaters will be under this, Id like to make this accessible for service later. We counter sunk the drill holes in the MDF so it will late flat over the rivnuts and then we sealed the MDF with a waterproof sealant.
Fuel Filter
Ive spent the last few weeks looking at this and really struggled with placement. I wanted to make this accessible to service later, but also secure. I didnt like where the manual suggested to mount this, and unfortunately my rear brake lines would have been ever slightly in the way. I attached this to the frame near the fuel pump using 2 rivnuts for added security with 2 button head hex bolts. This is now easy to remove/ service using access for the fuel pump.
Rear Shocks -
I had been waiting since November for Rear Shocks. They had always been out of stock when I inquired, but I finally received them. It turns out the shipping department at Factory Five lost my paperwork and the Sales Department needed to re-print the pick ticket and ask the shipping team to send those out. We now have a roller - if I had my wheels 😎. Hopefully we'll get the wheels in June.
Family visiting -
My in-laws are visiting, so took some time off the build and replaced the thermostat on their truck. They are visiting from Tennessee and unfortunately their truck over-heated on their drive to see us. Since this is the original thermostat and the truck has 200k miles, this seemed the most likely. About 1 year ago, their mechanic suggested installing a stop leak additive since they seemed to be losing coolant. Apparently, this resolved the coolant leak, but I think this may have created a new issue as the thermostat and inside of the engine was coated with this gelatinous substance which Im assuming was the stop leak additive. It also made it difficult to drain the coolant from the radiator. We did test the old thermostat and unfortunately it opened right at 180F. Hoping that installing a new thermostat (all clean) will resolve the issue.
PXL_20220501_222354477.jpg
PXL_20220502_154723474.jpg
PXL_20220507_165818774.jpg
PXL_20220507_192929669.jpg
PXL_20220507_223703912.jpg
PXL_20220508_013555117.jpg
PXL_20220508_012232154.jpg
PXL_20220508_032949119.jpg
PXL_20220508_033001263.jpg
PXL_20220508_185700091.jpg
MKIV Complete Kit, IRS, received 11/18/21
Aim to Misbehave
-
Post Thanks / Like - 0 Thanks, 1 Likes
-
Panels, Electrical, Seat Heaters
This was another working weekend, so we only had limited time to work on the car, but we made some progress!
---
As noted in my previous post, I have a closed/ private facebook page which includes a lot more images if anyone wants to follow along there, too! This is limited to 10 pictures, which is generally ok, but I end up taking quite a few pictures so I can reference them later. Here is the link if you'd like to follow-along on Facebook. It is only valid for 48 hours, but you can PM me and I can send it to you. https://fb.me/g/p_sQot6M4iLdfvsiFd/Q8lgfbEr
---
Aluminum Panels:
Installed and riveted the rear panel, trunk drop box, inside trunk panels, and outside rear trunk panels.
Secured Rear Right/ Left Electrical:
We riveted the electrical to the chassis.
Electrical for Seat Heaters:
I ran 2 hot wires and 2 ground wires from the firewall in the existing rear wire harness to the rear of the seat boxes. The wire harness/ fusebox has extra hot/ ground wires that I wasn't planning on using. Example, since I'm not installing a heater, I'm going to use the hot lead for this which has a 20amp fuse for the seat heaters. According to the instructions, the seat heaters each require a maximum of 10 amps. People smarter than me have tested the amp draw with both seat heaters on HIGH, and indicate that the combined draw is 15 amps, so we'll be just fine. The seat heaters include their own 10amp fuses that I could wire in-line, but I'm opting to NOT use them since this will have a 20amp fuse for BOTH seat heaters. If anyone feels differently, about this please let me know. I attached pictures so you could see how I ran the electrical for this.
Rear Springs:
Rear Springs installed. This week Reagan helped me torque them down to specs and mark the bolts indicating they have been properly torqued. We now officially have a roller - just no wheels yet. Hopefully we'll get these in June.
Seats:
As mentioned in one of my earlier posts, one of the weak spots with the Breeze Installation Kit for the Classic Seats is the included MDF panels. The MDF panels are designed to provide additional support to the seats. I had planned to use the aluminum to reinforce the MDF, but decided to just replace the MDF with the 1/8" aluminum panels. They are plenty strong! We only needed to trim them width wise as the length was perfect! I also used stainless steel button head screws and stainless steel rivnuts to secure the aluminum panels to the frame of the chair. I also used split wire loom and a grommet to pull the electrical through the aluminum panel. Lastly, we installed the switch for the seat heaters into the frame of the Breeze Seat Brackets. I might come to regret this later, but we'll see. I don't see any reason this won't work. We did need to trim one of the securing bolts that interfered with our switch location, but Carter took care of this. Kadence, Reagan, and Carter all helped get the seats ready. Seats are DONE and ready to install. I'll need to fit the body before we find the permanent spot for the seats, but for now they're OK. An added benefit is that all electrical is easily accessibly from right under the Breeze Mount.
Supplies used:
12"x18"x1/8" Aluminum Panels for the seats:
https://www.amazon.com/gp/product/B08GCRN3Z6
1/4-20 x 3/4" Button Head Screws:
https://www.amazon.com/gp/product/B07TJN6L2J/
1/4-20 Rivnuts:
https://www.amazon.com/gp/product/B077GQLQZ8/
PXL_20220509_043357562.jpg
PXL_20220513_045905755.jpg
PXL_20220513_045958754.jpg
PXL_20220513_050658498.jpg
PXL_20220514_031218211.jpg
PXL_20220514_053355327.jpg
PXL_20220515_034620606.jpg
PXL_20220515_044447664.jpg
PXL_20220515_181959812.jpg
PXL_20220515_182300677.jpg
MKIV Complete Kit, IRS, received 11/18/21
Aim to Misbehave
-
Post Thanks / Like - 0 Thanks, 1 Likes
-
Dash Electrical (Headlights, Blinkers, Running Lights, etc.)
I also have a private/ closed Facebook Group documenting this build with a group of other builders, too! I generally include more images/ photos in the Facebook Group. Anyone is welcome to follow along on FB (https://fb.me/g/p_yxpkejsurnXBPeW2/3JHhi07W) or here. I always welcome any critical feedback.
---
Here is an update for this past week -
Dash Electrical -
Electrical doesn't come naturally to me, so I spent a few nights reading the wiring diagrams and taking the wire harness apart to make sense of it. Since I bought a pretty large Weatherpack set, we used Weatherpacks for all connections. In order to make the flashers work properly, I needed 2 diodes, so I put those together and wired everything up. I bought the IDIDIT Headlight Dimmer Module so I could wire up the "flash to pass" feature on the Russ Thompson Turn Signal. It's called flash to pass, but it really just switches between hi-beams & low-beams. Ron Francis makes something similar (https://www.ronfrancis.com/product/142) called the RP-3. The different between the RP-3 and the IDIDIT, is that the IDIDIT requires it's own power supply whereas the RP-3 uses the power form the headlight switch. This means that if I wanted to use the "flash to pass" feature, then I would need to turn the headlights on first before my hi-beams would activate. With the IDIDIT, I can activate my hi-beams anytime the ignition switch is on, which is a nice feature. Was this necessary? No, of course not, but then again, neither is the car. If I'm building a vehicle with the feature, I'd like it to work.
After we wired up the blinkers (left/ right/ front/ rear), brake lights, running lights, headlights (low beam/ high beam), and hazard lights, we decided to test everything before moving forward. The front wiring harness has a battery feed (to the fuse box) and an ignition switch/ accessory lead and BOTH are wired to the starter along with the power from the battery. Since I don't have the engine/ starter yet (coming soon), I hooked up these 2 leads directly to a battery that I have laying around. I also have a 15amp fuse wired inline in case I run into trouble. I also wired up my battery cut-off switch so I could kill the power if I ran into trouble. I threw the switch, and no smoke or blown fuses. I then turned the ignition switch. EVERYTHING WORKS - PERFECTLY! Almost couldn't believe it. This was a real confidence booster and a landmark objective for me. I made a short video, but I neglected to show the brake lights + blinker switch working at the same time, but we tested thoroughly and everything works! My wiring isn't as neat/ organized as some other builders, but I'm OK with this. My Weatherpacks are solid. I did clean things up and used split loom wire tubing to tidy things up. I included pictures of the electrical diagrams that were most helpful for me.
I also added a ground bus bar which is visible in one of the pictures beneath the IDIDIT box. This just makes it easier for me to add another ground box for the wire harness, accessories, etc....
Aluminum Panels -
With the dash electrical now working, we can mount the rear aluminum panels and start applying sound/ heat resistance material to the panels. We also put in the little panel that goes around the fuel tank strap.
Vinagaroon -
Vinagaroon is just steel wool + vinegar. This creates a chemical reaction with leather turning it black, but it isn't a dye so the black can't rub off. I've seen a number of other builders doing this, so we're going to do it, too! I attached a picture of a mason jar beginning to ripen ��. You need to put a hole in the lid to let the hydrogen gas bleed off. The gas bubbles are quite explosive - don't ask how we know...lol... Once you dip your leather into the Vinagaroon, it needs to be neutralized in a baking soda solution, too. My solution wasn't quite ripe enough, so we'll do this next week. We'll be using this on the door check straps. Here are the instructions for this: https://www.instructables.com/Vinega...k-Leather-Dye/
I believe we've also settled on the final color, too! More information coming on this, but it'll be awhile before we move to painting.
Here is a video showing the blinkers, headlights, running lights, flash to pass, etc...:
https://photos.app.goo.gl/RRpuFrSgvjSUY9Ng6
PXL_20220517_051322315.jpg
PXL_20220518_023615478.jpg
PXL_20220518_034026602.jpg
MKIV Complete Kit, IRS, received 11/18/21
Aim to Misbehave
-
Post Thanks / Like - 0 Thanks, 2 Likes
-
Senior Member

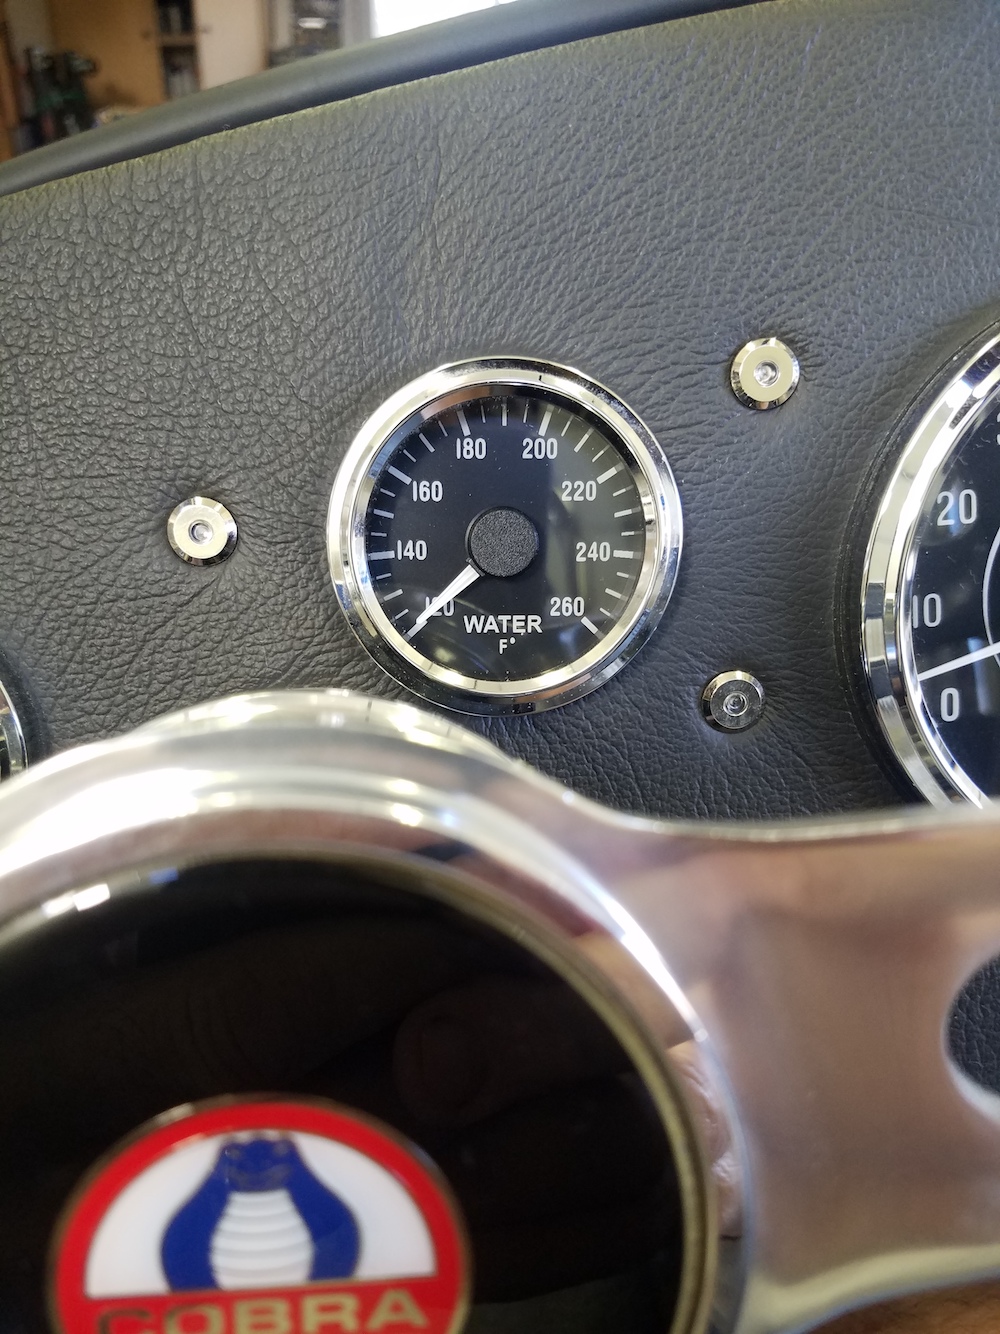
Nice work! While you have good access to electrical I would consider adding a buzzer/indicator lights to let you know your turn signal is on. The FFR indicator lights in the speedo are almost impossible to see in daylight. Watson street works sells a nice beeper that is not over annoying loud but lets you know your signal is turned on and also have really nice LED indicator lights. The clock IMO is also useless, it never really kept the time correctly. I ended up going with oil temp gauge from Speedhut but there are also other gauges you could install that would be helpful to monitor engine. Just something to consider, really enjoying watching your progress and very cool your kids are part of the build.
https://watsons-streetworks.com/prod...ed-indicators/
https://watsons-streetworks.com/prod...minder-buzzer/
Last edited by Fman; 05-30-2022 at 09:13 AM.
-
Post Thanks / Like - 0 Thanks, 1 Likes
-
Originally Posted by
Fman
Nice work! While you have good access to electrical I would consider adding a buzzer/indicator lights to let you know your turn signal is on. The FFR indicator lights in the speedo are almost impossible to see in daylight. Watson street works sells a nice beeper that is not over annoying loud but lets you know your signal is turned on and also have really nice LED indicator lights. The clock IMO is also useless, it never really kept the time correctly. I ended up going with oil temp gauge from Speedhut but there are also other gauges you could install that would be helpful to monitor engine. Just something to consider, really enjoying watching your progress and very cool your kids are part of the build.
https://watsons-streetworks.com/prod...ed-indicators/
https://watsons-streetworks.com/prod...minder-buzzer/
Thank you! I'm giving this some thought. I really like the dash as clean as it is. If I lived in any state other than California, I'd likely add the buzzer/ indicator lights, but in California we don't use blinkers. It's really a safety issue. As soon as you turn your blinker on, any vehicles next to you slam the gas to close the gap. So, why did I install the Russ Thompson blinker switch you might ask? Well, I do like everything to be functional and clean. The Russ Thompson switch certainly makes the vehicle more usable and there are times I might use a blinker, which is why I'm rethinking this..... I really appreciate you including the links. Thank you!
MKIV Complete Kit, IRS, received 11/18/21
Aim to Misbehave
-
Senior Member
Originally Posted by
Serenity
Thank you! I'm giving this some thought. I really like the dash as clean as it is. If I lived in any state other than California, I'd likely add the buzzer/ indicator lights, but in California we don't use blinkers. It's really a safety issue. As soon as you turn your blinker on, any vehicles next to you slam the gas to close the gap. So, why did I install the Russ Thompson blinker switch you might ask? Well, I do like everything to be functional and clean. The Russ Thompson switch certainly makes the vehicle more usable and there are times I might use a blinker, which is why I'm rethinking this..... I really appreciate you including the links. Thank you!
I also live in CA (northern), not sure how much time you have in one.... I will say these cars are not like driving a regular vehicle. They are very low to the ground, people don't see you easily and turn signals IMO are a must use with them. These cars are not safe at all to begin with and using a turn signal gives you some more visibility. Leaving your signal ON and not realizing it is blinking is also another issue in itself. Just my .02 after 3500 miles of driving in one... but you gotta do you, so hopefully you find a solution that works for you. Those Watson components are all top of the line and very good quality.
-
Post Thanks / Like - 0 Thanks, 1 Likes
-
I appreciate the feedback. Would you have a picture of your dash showing where you mounted them? You're probably right and this is a good time to do it. Thank you!
MKIV Complete Kit, IRS, received 11/18/21
Aim to Misbehave
-
Originally Posted by
Serenity
I appreciate the feedback. Would you have a picture of your dash showing where you mounted them? You're probably right and this is a good time to do it. Thank you!
Like you, I appreciate the clean look and how I went with my dash. I didn't add any additional indicators and opted for using the ones in the speedometer. I haven't had any issues seeing the indicator in full sun, granted its not exactly a strobe light to catch my attention. The RT turn signals are very effective at cancelling so I haven't found myself driving around with the blinker on yet.. only 115mi on it so far.
When I laid out my dash I went back and forth quite a bit on where to place the speed/tach. I really wanted what seems to be the more traditional with the tach on right like yours, but knowing it was a daily driver and not a track car - I knew I'd be much more interested in speed over RPM so I put my speedometer on the right. So far I don't regret that decision at all because its virtually impossible to see my tach on the left and thats with the FFR leather steering wheel. I'm not sure if the wood wheel would give more visibility but just wanted to pass that along for thought.
MK4 Complete Kit #10315 / Coyote G3 / TKX / 427 HardTop
Build Thread Production Date: 2/26/22, Registered 5/19/22, Graduated 3/1/2023
-
Post Thanks / Like - 0 Thanks, 1 Likes
-
Thank you, Jeff! That makes me feel a little better. I'm also glad you suggested swapping the position of the speed/ tach. Someone else had suggested that to me awhile ago, but I was pre-occupied with something at the time so I'm glad you brought this up again. I'm planning to get this done soon. Yes, this will be a daily driver for me too, and not a track car.
MKIV Complete Kit, IRS, received 11/18/21
Aim to Misbehave
-
Test Body Fitment
I'm looking for some guidance on this, so I welcome all feedback.
I was test fitting the body over the weekend and ran into a couple issues -
1. If the outside edges of the dash are flush with the square tube, the top center of the dash barely makes contact with the square tube as seen in the picture below. PXL_20220528_005526061.jpg
2. In theory I could move the dash up slightly, but look how close the tachometer gauge is to the body here.
PXL_20220528_002052439.jpg
3. With the body on, it 100% covers the top of the dash. You can see more pictures with measurements here:
PXL_20220530_230308936.PORTRAIT.jpg
PXL_20220530_230239499.PORTRAIT.jpg
PXL_20220530_230203163.jpg
4. I did trim the back of the dash on the edges where it makes contact so it lays completely flat. The body pushes up 100% against the dash, and the original screw that attach the body to the chassis are mis-aligned by the same thickness as the dash.
PXL_20220530_220601754.jpg
5. With the body on, the doors do open, but the clearance with the hinges is VERY close as noted below:
PXL_20220530_224425151.jpg
All this to say, I'm assuming I should leave my dash in the current position and is it ok to secure this in place now?
Thank you!
MKIV Complete Kit, IRS, received 11/18/21
Aim to Misbehave
-
Post Thanks / Like - 0 Thanks, 1 Likes
-
Weekly Update 6.5.22
Here is the progress since my update last week!
Vinagaroon
This stuff is really pretty cool! Vinegar and steel wool turns leather black within a few seconds, and the black spreads through the entire leather! Afterwards we soaked it in a baking soda/ water solution to neutralize the acid.
PXL_20220527_043204776.jpg
original_f960bb48-1c86-494c-8c20-6c48bc9b92c8_PXL_20220527_045134706.jpg
Panels
Cater drilled and mounted the last little side panel on the far right of the firewall.
PXL_20220527_214237913.jpg
Blinker Grounds
Since I do everything totally overkill, we redid front wiring harness ground and connected the blinker ground wires permanently. Not going to have any ground issues here. I already have another redundant ground for the wiring harness, too!
PXL_20220530_021744185.jpg
Battery Cut-Off Switch
Mounted above the transmission tunnel. I debated whether to use this or not, but it will be a nice safety feature if ever needed. I did not use the cheaper one with a removable key. This is pretty hefty/ solid, and honestly I could make the red handle removable easy enough.
PXL_20220530_021855373.jpg
Sound Deadening/ Heat Resistance
Installed most of the sound proofing/ heat resistance material. This is all Fatmat + Dynamat Aluminum Seam Tape.
PXL_20220529_033936121.jpg
PXL_20220530_021907753.jpg
Body Mounting - We test fitted the body to take some measurements for the seats.. I'm using the classic seats, and as long as they are centered between the seatbelt mounts, they don't come close to interfering with the body/ doors, so no worry there. I wasn't able to make the body fit perfectly on the drivers side, so we'll be revisiting that soon. The dash has a little lip on it, maybe 1/4". It looks like if I sand that down, then the body can shift just a little and then everything will align. I'm still researching this, You can see how low my dash sits on the hoop, and if I leave my dash exactly as-is, the top is 100% covered up by the body. I'm going to cover the dash with blue masking tape and refit the body again, using a sharpie to mark on the blue masking tape so I can see much the body covers the dash.
PXL_20220528_004852184.jpg
Replica Parts- http://www.replicaparts.com/
Michael Everson is a professional builder and also sells some components! He's created a lot of aftermarket add-ons that complement the vehicle. I specifically wanted to use his Under Dash Filler Panel, but since he's located on the East Coast, I might as well order anything else I might from him at the same time. Here are the components that I've ordered from him
Rear Quick Jack Plates
Under Dash Filler Panel
Front License Plate Bracket
Seat Belt Trim Plates
Roll Bar Trim Rings
Windshield Post Trim Plates
Russ Thompson Turn Signal Bezel
Weather Stripping Package
Engine - The engine & transmission arrive early next week, so stay tuned!
I have a lot of work events/ traveling coming up for most of June, so progress will be slowed... We'll I'm just hoping the kids don't finish this without me 😂. Love having them in the garage with me and this has been an incredible journey so far.
MKIV Complete Kit, IRS, received 11/18/21
Aim to Misbehave
-
Post Thanks / Like - 0 Thanks, 2 Likes
-
Senior Member
Originally Posted by
Serenity
I appreciate the feedback. Would you have a picture of your dash showing where you mounted them? You're probably right and this is a good time to do it. Thank you!
Here is how I mounted the Watson LED lights but you can definitely mount them in many different places. I also wired one light for a high temp warning light that comes on at 215 degrees. I originally was going to use it as the high beam indicator. These Watson lights are far superior to the lights in the speedo. I am surprised Jeff can see them as well as he was describing, maybe my aging eyes are the problem 
-
Due to personal reasons, I've made the decision to suspend this build thread and will not have any further updates. I continue to post updates on my private/ closed Facebook page, and if anyone is interested in following along there, let me know and I can send you an invite.
MKIV Complete Kit, IRS, received 11/18/21
Aim to Misbehave
-
Senior Member
Please send me a PM, I would like to continue following your progress.
-
Hi Fman - I PM'd you the link to follow along and it's listed here for anyone else that would like to follow, too: https://fb.me/g/p_2V7p8AHhiwRUv8gG/OsPuzLAV
This link is only good for 48 hours, but I'll send it to anyone else interested in following.
Best,
John Mark
MKIV Complete Kit, IRS, received 11/18/21
Aim to Misbehave
-
Post Thanks / Like - 0 Thanks, 1 Likes
 Fman
Fman liked this post


 Thanks:
  Likes:


 Reply With Quote