-
Trans tunnel stuff
With some of the added electronic goodies I have, I'll have a lot of wiring going back and forth through the trans tunnel. So I test fit the trans A frame, the trans mount, and the drive shaft safety loop just to help reference the amount of free space I'll have. Since I was there I put the drive shaft adapter in as well. I couldn't find any of the spacer hardware with the trans mount... but I'll be more worried about that when I actually have a drivetrain on hand and fitting. Want to get wiring mostly complete and some panels finally finished before that happens. It's hard to see in this picture but I built a couple of Z channels out of galvanized steel for each side of the tunnel to help hold the wire looms out of the way. The loom on the north side of the picture holds all the audio cables... low voltage rca cables to the amp, one rca for the back up camera, and two normal two wire speaker cables. You'll see how I'm thinking I'll route the extra 4g cable from the front battery to power the rear supplemental fuse panel and amp. It's going through some rubber grommets installed in the bracketry normally used for the parking brake cables. I'll add loom later when I'm sure it's what I want to do. On the south side of the picture I have the rear wire harness from the Ron Francis kit.
Trans Tunnel:
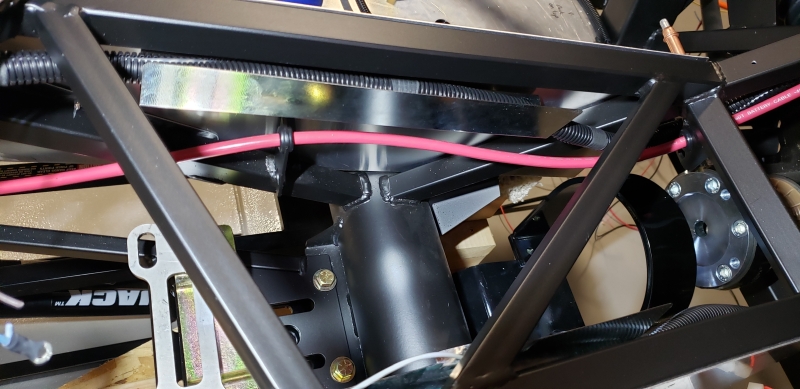
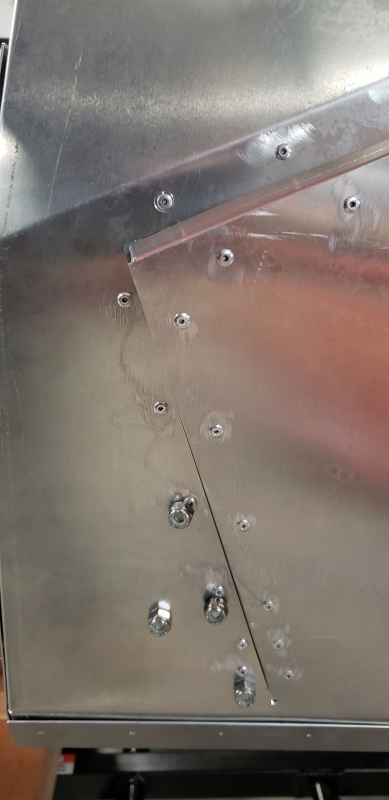
I plugged the ebrake cutout as most do when they aren't using the stock location or go with an electronic version. You can see some of the planned rivet locations for the z channel. They are the ones running horizontally up the middle here.
I figure I would likely like to get the tunnel top off for serviceability but that's a challenge with the way the dash overlaps the center console . I could redo the console so it would go up under the dash but I doubt I'd like the finished product there. So for now I'm submitting to the fact that I'll have to take the dash off in order to get behind the console. Better get that wiring done right! With that in mind I chopped the front of the tunnel off to allow it to stay in place while opening the rest of it. You can see the harness carrying the audio stuff poking through the passenger side grommet here. Also look at that wiring mess... sometimes I feel I would have been better off starting from scratch on that harness. I've pretty much taken the whole thing apart.
I added a rear panel to the console to mount the cross overs for the front speakers. I also de-pinned all the wires from the stereo harnesses I wasn't using to allow for less clutter once installed. I think I ended up taking about half of them out... even with less clutter it's going to be a challenge to get things hooked up in their final locations here. Again... better get the wiring done right the first time! Lots of testing.
Last edited by topherchrisb; 02-11-2024 at 03:45 PM.
MK4 #10255 project: "Mako"
Coyote Gen 3, TKX, IRS, Wilwood brakes, power steering
Order date: 6/24/21, Received date: 1/12/22, First Gocart date: TBD, Registration date: TBD
Build thread
-
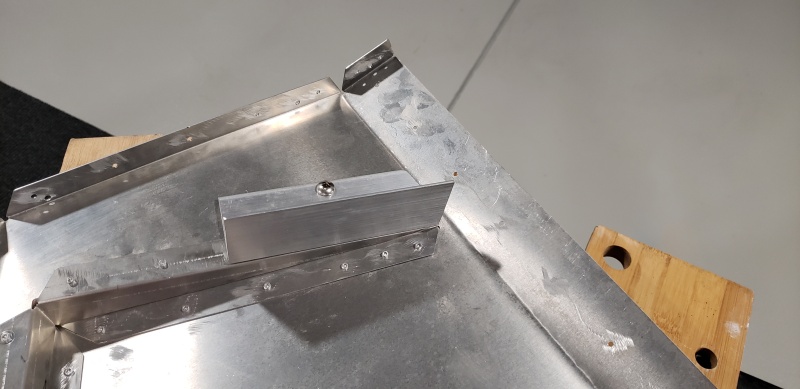
Dead Pedal Fitting
Another thing I used as a break from all the wiring is the dead pedal fitment. I debated back and forth on actually doing a dead pedal at all. I have enough spacing between the clutch and the outside panel and my foot is skinny enough I could easily get my foot behind the clutch and into a nice cruising rest position. Probably a few cringe faces out there reading that statement with safety concerns. That's something I don't think I would be doing outside of long straight interstate travel but it's an option. I also bought the Breeze dead pedal kit to try out as another option. It's a simple kit with some angled aluminum and mounting hardware. The size of the pedal allows for the perfect fitment between the foot box chassis tubes when sitting flush with the kick out panel ledge. That also allows the ledge to increase the foot placement surface area somewhat. I won't really get to test it completely till I can get some seat positions finalized and make vroom noises.
I did have to drill some recesses into the pedal to allow for rivets to countersink and sit more flush:
Fitting:

From the outside:
MK4 #10255 project: "Mako"
Coyote Gen 3, TKX, IRS, Wilwood brakes, power steering
Order date: 6/24/21, Received date: 1/12/22, First Gocart date: TBD, Registration date: TBD
Build thread
-
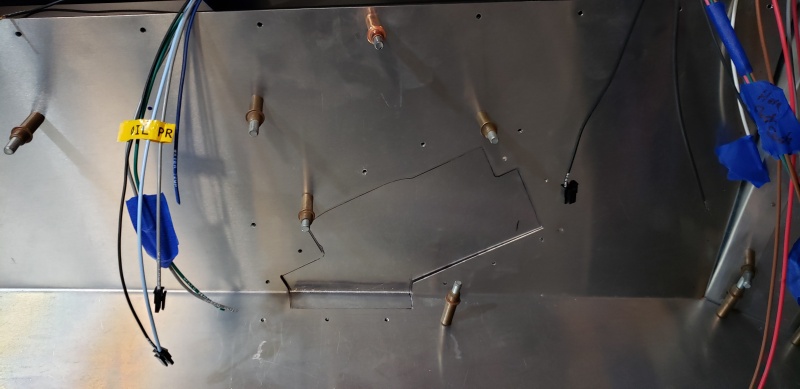
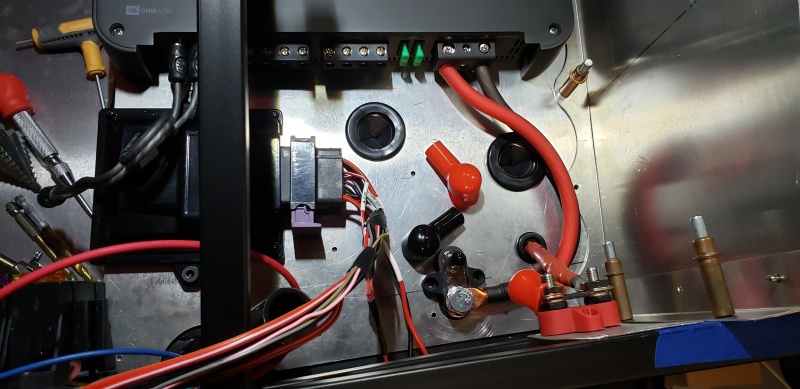
Rear wiring start
I have made a lot of progress on the behind the dash wiring but have also started the rear power distribution as well. The rear components that exist so far are a couple of two post distribution terminals, a four channel amp, the aux fuse panel seen previously, and the wilwood ebrake controller. Probably the most interesting thing I've done here is I drilled through the ground distro block, welded a flanged nut to the square tube frame and ran a bolt through the distro block into the welded nut. I've added similar grounding points in a few other places that'll pop up in future posts.
Top view:
Grounding post:
From the rear:

MK4 #10255 project: "Mako"
Coyote Gen 3, TKX, IRS, Wilwood brakes, power steering
Order date: 6/24/21, Received date: 1/12/22, First Gocart date: TBD, Registration date: TBD
Build thread
-
Post Thanks / Like - 0 Thanks, 1 Likes
-

Originally Posted by
Mike.Bray

Installing bulkhead fittings in rubber grommets for the transition from hard lines to flex lines makes me all kinds of nervous. The flex line is in constant motion when driving and when the grommet fails the stress from flexing will be transferred directly to the hard line. In time the hard line will probably see a fatigue failure. If I was a safety inspector I would fail the car based on those connections.
Get some aluminum angle and make a bracket to fit the bulkhead fitting proper so you have a good ridgid connection.
Mike
Hey Mike. I wasn't ignoring your advice here... I wanted to do some testing before I responded. I will go with your advice. The grommets I used are really robust and the way the bulkhead fits into them is surprisingly form fitting like they were meant for it. During my testing I saw something I wasn't expecting but should have in hindsight. The connection felt solid every time I tried to flex it. But your words "constant motion" made me change my testing behavior where I simulated flexing the line over and over as though the suspension was active over a period of time. Now I didn't have anything torqued to spec as the fittings are just temporary. What I found was it was easier for the fitting to twist in the grommet which started to introduce loosening of the hard line to the bulkhead connection and also the retaining nut itself. Likely torquing the hard to hard surface (flared surface) wouldn't allow that. But I can't really get reliable torque spec (especially over time) when mating metal to rubber. That is definitely concerning and not worth the worry. I won't get to fixing it just yet but it's on my list and will when I get some material.
MK4 #10255 project: "Mako"
Coyote Gen 3, TKX, IRS, Wilwood brakes, power steering
Order date: 6/24/21, Received date: 1/12/22, First Gocart date: TBD, Registration date: TBD
Build thread
-
Post Thanks / Like - 0 Thanks, 1 Likes
-
Impressive work. I would radius the corners of your dead pedal. Probably never know the difference, but something might get caught on the corners.
20th Anniversary Mk IV, A50XS Coyote, TKO 600, Trunk Drop Box, Trunk Battery Box, Cubby Hole, Seat Heaters, Radiator hanger and shroud.
-
Originally Posted by
Railroad
Impressive work. I would radius the corners of your dead pedal. Probably never know the difference, but something might get caught on the corners.
Thank you... I did think about trying to put some finishes on the dead pedal that make it look more cohesive with the wilwood pedals, but haven't executed yet. So rounding and a pattern of holes or something.
Last edited by topherchrisb; 03-05-2024 at 11:54 AM.
MK4 #10255 project: "Mako"
Coyote Gen 3, TKX, IRS, Wilwood brakes, power steering
Order date: 6/24/21, Received date: 1/12/22, First Gocart date: TBD, Registration date: TBD
Build thread
-
Post Thanks / Like - 0 Thanks, 1 Likes
-
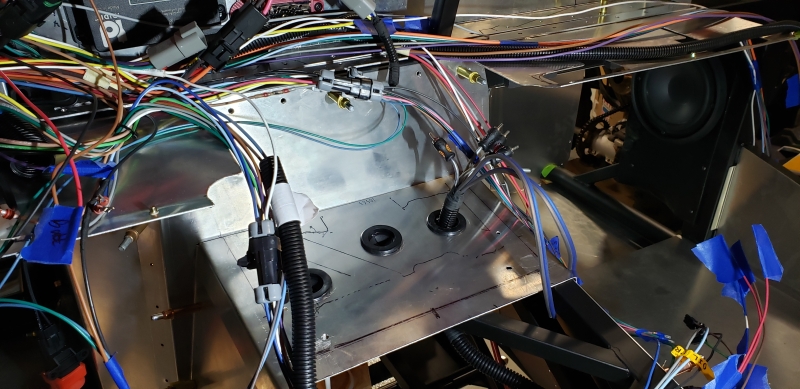
More Wiring
Well... I've made some decent progress. Still a long ways to go but getting it done one wiring at a time, and sometimes redoing one wire at a time, and possibly redoing a wire a third time. Everyone knows the drill. I decided I really want to be able to go cart early summer so I need to get my butt in gear. I should probably call Forte and see what his leave time is on coyote/tkx packages are soon. I'm assuming they aren't that long these days, but you know how assuming goes. With the new sense of urgency I started getting up much earlier than I have in a long time, going straight to the shop and getting a couple hours of build time in before the house is active. Definitely have some momentum right now but soccer, spring break and yard work just around the corner. 
There are sooo many wires in this build due to all the tech goodies I'm adding. A few things that may be out of the ordinary but mostly done in some fashion before... keyless ignition, brights relay system, stereo/nav, warning speaker, supplemental rear fuse panel, possible AC, and a few others that I think are really unique I'm not ready to divulge yet.
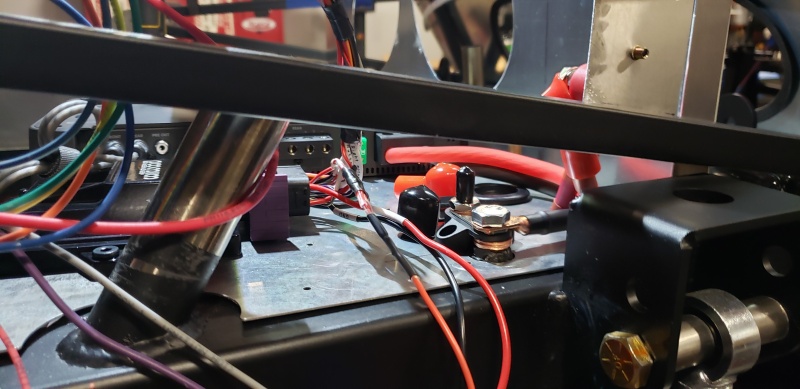
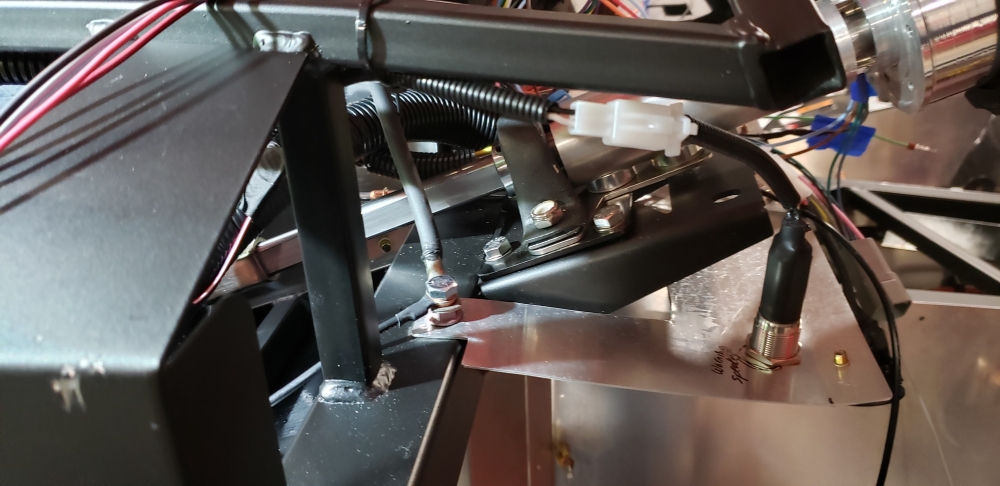
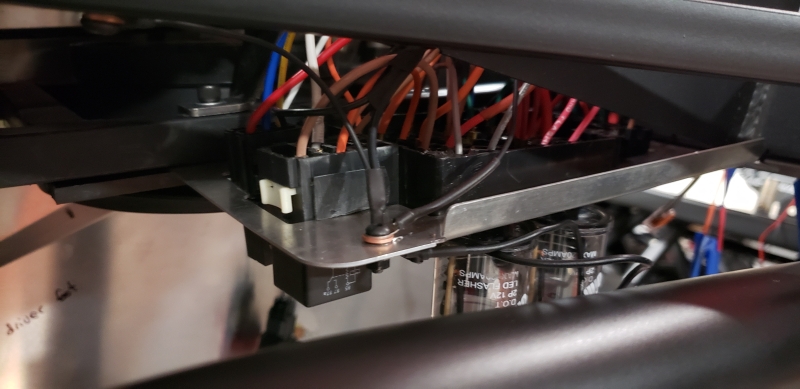
I did get a headlight warning speaker from watson's street works. It's got a good mid tone triple beep sound pattern to it. It also has a read light ring for a visual queue as well. I wanted to be stealthy with it and wasn't really worried about the light so I mounted it into the dash under panel, just left of the steering column bracket. I didn't use the relay that had come with it though. The provided relay is only a four wire with a normally closed circuit. I got a hair brained idea and also wanted to wire the fuel pump inertia switch into it as well. So I needed a normally open circuit added for when the ground breaks on that switch. So now when a combo of no ign/headlight on or no inertia ground/ign on the warning is active. I had read a couple instances where people didn't realize their inertia switch was open and it caused a large waste of time on the road, so this will sort me out in a hurry if that occurs. The load for the speaker is small so I went with a medium size relay you can barely see behind the fuel pump inertia relay in the second picture. Another thing you'll see here are additional grounds. The large one forward of the warning speaker that goes up to a ground distribution block, and a bolt through the fuse panel mount to supplement my additions and the flashers.
MK4 #10255 project: "Mako"
Coyote Gen 3, TKX, IRS, Wilwood brakes, power steering
Order date: 6/24/21, Received date: 1/12/22, First Gocart date: TBD, Registration date: TBD
Build thread
-
Wires... they're everywhere
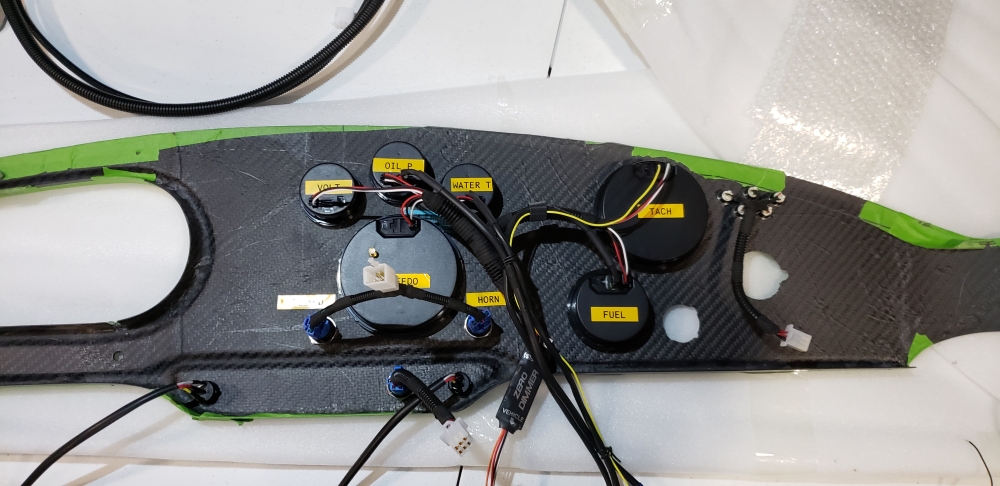
Here are a number of pictures displaying the progress on the tidiness of the wires. Still doing tons of testing so will have to re-loom most things... but I was able to get the gauge/switch wiring cleaned up. Just five 6-pin molex style connectors and an extra run for sending units(and I don't even have AC controls picked out yet).
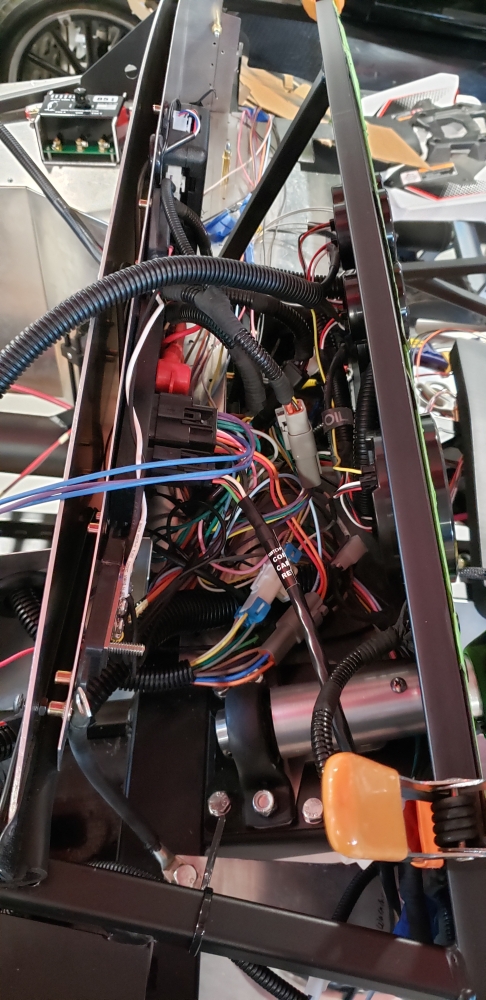
Behind the dash with it in place. Still not re-loomed
Some wires for the wipers and AC if I end up going that route. Plenty of room still too.
The rear is still even more of a disaster while testing. I did get extra wires ran for the cubby lighting, rear fuse ign trigger, rear view camera, etc...
MK4 #10255 project: "Mako"
Coyote Gen 3, TKX, IRS, Wilwood brakes, power steering
Order date: 6/24/21, Received date: 1/12/22, First Gocart date: TBD, Registration date: TBD
Build thread
-
Testing the wire mess.
I am constantly testing things as I add runs and connect them. I am making everything so I can get it apart once the body is on... but it's not going to be fun. So double and triple check everything!
IGN, headlights, turn signals, brights, pilot lights, stereo power, fuel gauge, switch panel... check! The switch panel won't go in place till I get the transmission in and can properly space everything on the tunnel. You can see I still have one blank in there that I don't have a use for yet. I took the picture with the hazards on right when they flashed so I could get the pilots in an active state in the picture. I also did check the turn signals individually to make sure my diodes were wired properly with the single output hazard switch. I do have the speed hut dimmer that can cycle through six different gauge brightness levels. The button is mounted to the back side of the square framing behind the starter button. It also has the button for the manual override of the ignition system. Both of those tested with success as well. I also calibrated the fuel gauge and moved the float manually to verify it's in working condition. You can see the low fuel warning light active there.
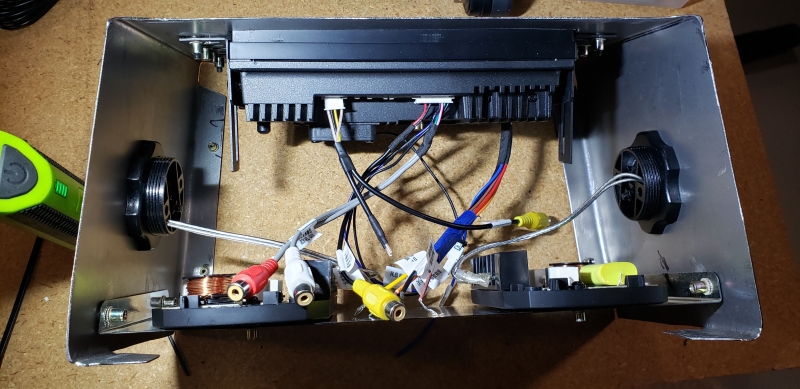
Speaker amp, stereo sound... check! I got these JBL GTO939s due to them being recommended for open air environments. Still it's an open air environment that'll hopefully get a more full sound with the body on and the trunk shut. I had to tune the EQ on the stereo quite a bit to get the low end depth I was looking for. I think I might add an all in one 8" sub enclosure to get the bass drum punches I like. I still have to finish the runs for the front speakers. Only have up to the cross overs wired there so far.

One of the reasons I went with the stereo I did go with. I don't have the antenna positioned or the sensors installed in the wheels yet... so nothing to display at the moment. I did do a bench test with everything connected and a tire pressure warning pop up appeared on the screen while in navigation mode. So pretty confident it'll work as intended.

Last edited by topherchrisb; 03-05-2024 at 12:46 PM.
MK4 #10255 project: "Mako"
Coyote Gen 3, TKX, IRS, Wilwood brakes, power steering
Order date: 6/24/21, Received date: 1/12/22, First Gocart date: TBD, Registration date: TBD
Build thread
-
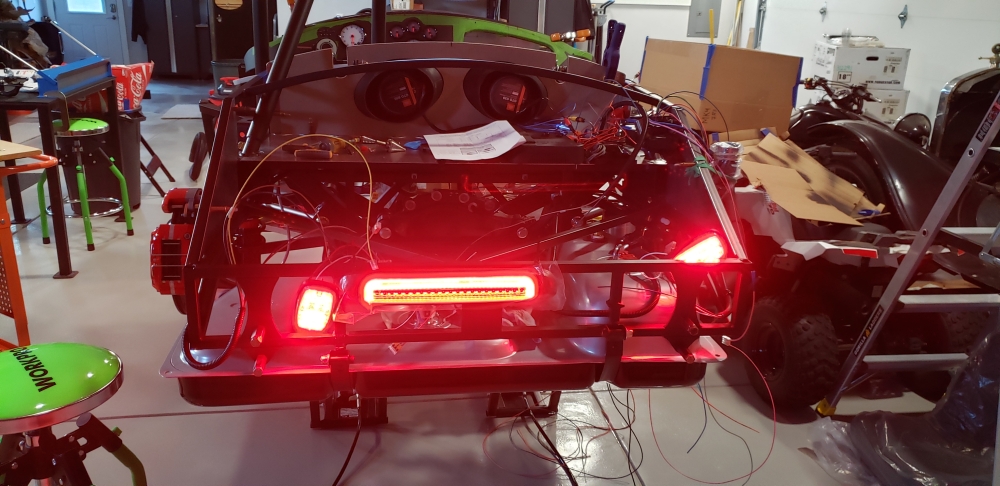
Brake/Reverse testing
One thing I wanted the capability of doing but still on the fence is a reverse view camera. With that I wanted the stereo to show the camera view automatically when in reverse. I don't need the speed sensor wiring in the RF harness with a coyote/gps gauge setup so I repurposed those wires for a reverse switch I'll put in the transmission when I get to that point. I used the gray wire as an IGN feed and continued that feed to the rear fuse panel for it's IGN trigger source. Then I used the green wire for a reverse trigger to the stereo and ran an extra feed to the back feeding a reverse light through the drivers side rear harness. I put a clamp on my button so I could take the picture. I tried to capture the rear view mode on the stereo but it's too far away to tell it's working. I just temporarily set the camera on the top trunk shelf behind the pliers. It's hard to see as well.
I'm still testing and on the fence about the third brake light as well. I re-added the purple brake light feed into the harness before the trailer light conversion in order to allow it to feed that possible third light. Here is my temp setup for that test.
MK4 #10255 project: "Mako"
Coyote Gen 3, TKX, IRS, Wilwood brakes, power steering
Order date: 6/24/21, Received date: 1/12/22, First Gocart date: TBD, Registration date: TBD
Build thread
-
Senior Member

Originally Posted by
topherchrisb
Another thing I used as a break from all the wiring is the dead pedal fitment. I debated back and forth on actually doing a dead pedal at all. I have enough spacing between the clutch and the outside panel and my foot is skinny enough I could easily get my foot behind the clutch and into a nice cruising rest position. Probably a few cringe faces out there reading that statement with safety concerns. That's something I don't think I would be doing outside of long straight interstate travel but it's an option. I also bought the Breeze dead pedal kit to try out as another option. It's a simple kit with some angled aluminum and mounting hardware. The size of the pedal allows for the perfect fitment between the foot box chassis tubes when sitting flush with the kick out panel ledge. That also allows the ledge to increase the foot placement surface area somewhat. I won't really get to test it completely till I can get some seat positions finalized and make vroom noises.
You have better foresight than I did. I put my dead pedal in almost the exact position you did. And I do use it. But for this six footer with narrow feet, while the dead pedal is plenty comfortable and still allows plenty of room on the pedals as well, my favorite cruising position is with my left foot stretched out under the clutch. Something I never anticipated and not great for safety but sure is comfortable.
MK4 #7838: IRS 3.55 TrueTrac T5z Dart 347
The drawing is from ~7th grade, mid-1970s
Meandering, leisurely build thread is
here


 Thanks:
  Likes:


 Reply With Quote
