-
Member

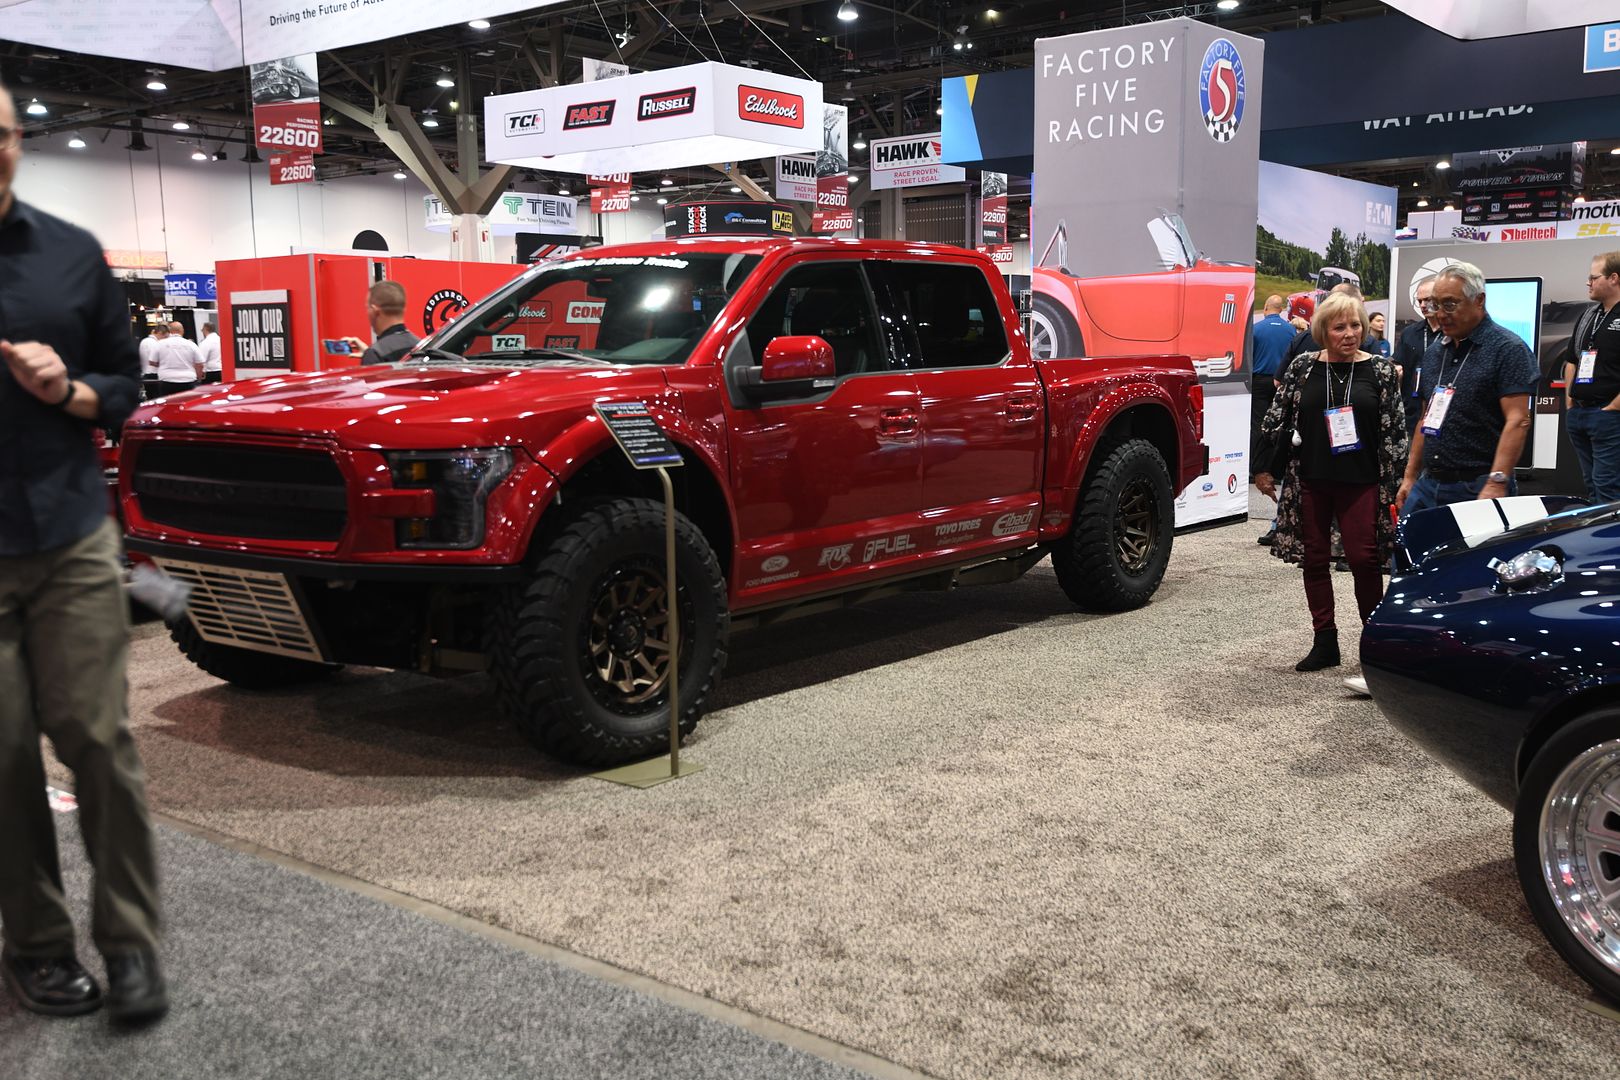
2021 Ford F150 -> XTF pre runner build log
I'm in!
When I saw the factory five XTF at SEMA I knew it was in my future.
My experience building the GTM into a super unlimited race car that I documented here https://thefactoryfiveforum.com/show...+modifications
gave me a huge respect for Factory Five engineering. In the GTM kit, I was delivered an incredibly capable platform that I and others were able to build into a winning race car AND an insane street car. It was my first ever car build, my first ever race car build, and many more first ever things. The fact that I was successful was all about the foundation I started with and the community here that encouraged me and helped me along.
I have been waiting for years for a V8 raptor like the Raptor R. For me, a V8 is mandatory.
I wanted a truck that was more about the well-rounded experience vs just the bragging rights stat sheet. TRX… its cool and fast, but it’s not what I want.
I wanted a truck with all the nice infotainment features that come in a new vehicle AND next level capability on and off road. For me , cars and trucks are just as much about the total user experience as the numbers on the spec sheet. The user experience is especially important as a daily driver. Ford has invested millions and millions of dollars making the F150 into the best selling truck in America so it’s a great place to start.
Considering what I want , what are my choices? Pay a stupid premium for a raptor R. Wait and hope the Raptor R some day sells at its 109k sticker price which is still kinda high considering what you can buy for $109,000 dollars … or build exactly what I want using the Factory Five XTF… and here we are.
This will be a daily driver toy not just a weekend toy.
Its gotta jump high.
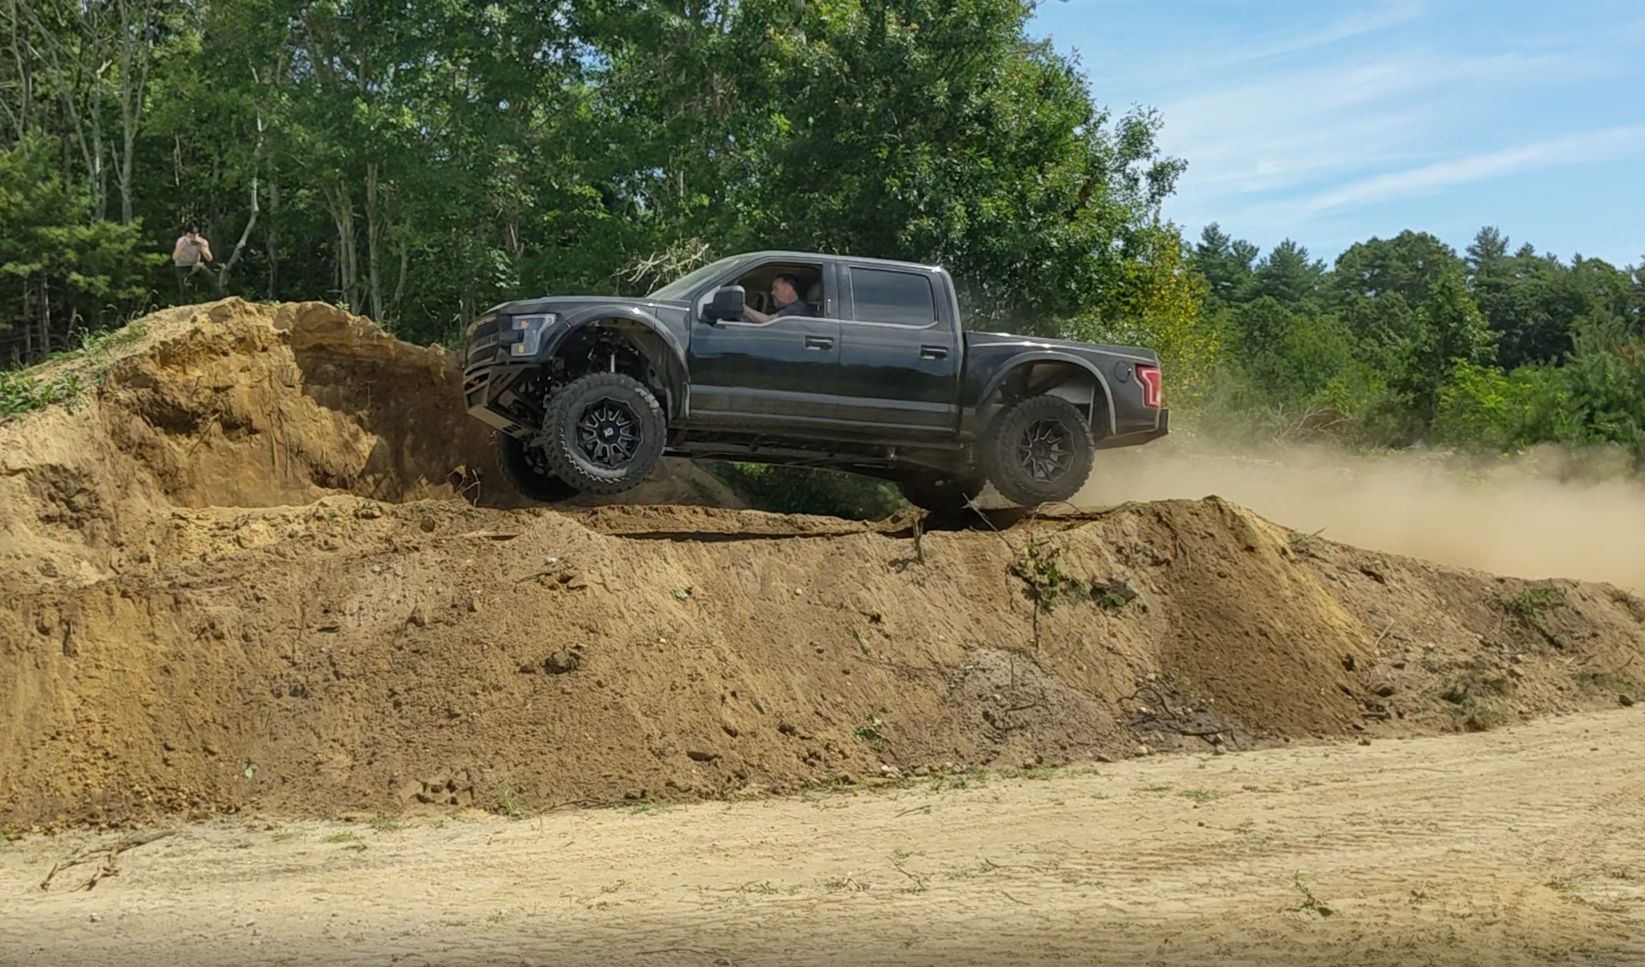
Jumping things is really fun, and having a full size pickup that can fly is unique.
Power needs to be respectable but its not going to be a drag truck. 37 inch tires really ruin your strip times so ill focus on optimizing performance as a pre runner.
Although I'm really far from the desert, the desert is one of my favorite places. Ill move west soon enough so I might as well build the truck ill want when I get there.
Step 1
Find a good F150 to base my build on. Unfortunately Ford does not make it easy to know exactly what you get on a truck, but after doing lots of research I landed on the below.
Requirements
V8- even a stock motor can be boosted to very impressive levels and sounds great
Lariat trim- I think this is the sweet spot for features that will carry over to the XTF
FX4- drive modes and drive train that are helpful in an off road truck
9.75 inch rear end 3.73 gear ratio
Max Tow package – so I get bigger rear brakes, more cooling capacity in the engine and transmission and the heavy duty 9.75 axle
360 camara- this tech is so cool and actually not common on new cars. Ford has a great system.
Sync 4 – I like the giant screen
Pro Power onboard – its handy to have a decent generator built into the truck
I was looking for a low mile truck and something that is corrosion free. I want this thing to fly apart without any difficult rusted nuts and bolts.
I cast a wide net 250 miles around my house and found 5 trucks.
I landed on this one.
10,000 miles on the clock. Got an oil change every 3000 miles according to CarFAX.
It had the panorama roof and nice sound system as a plus.
it has the tow package , but the hitch is pristine... It never towed anything.
It barely had anything in the bed
And the body is absolutely perfect.
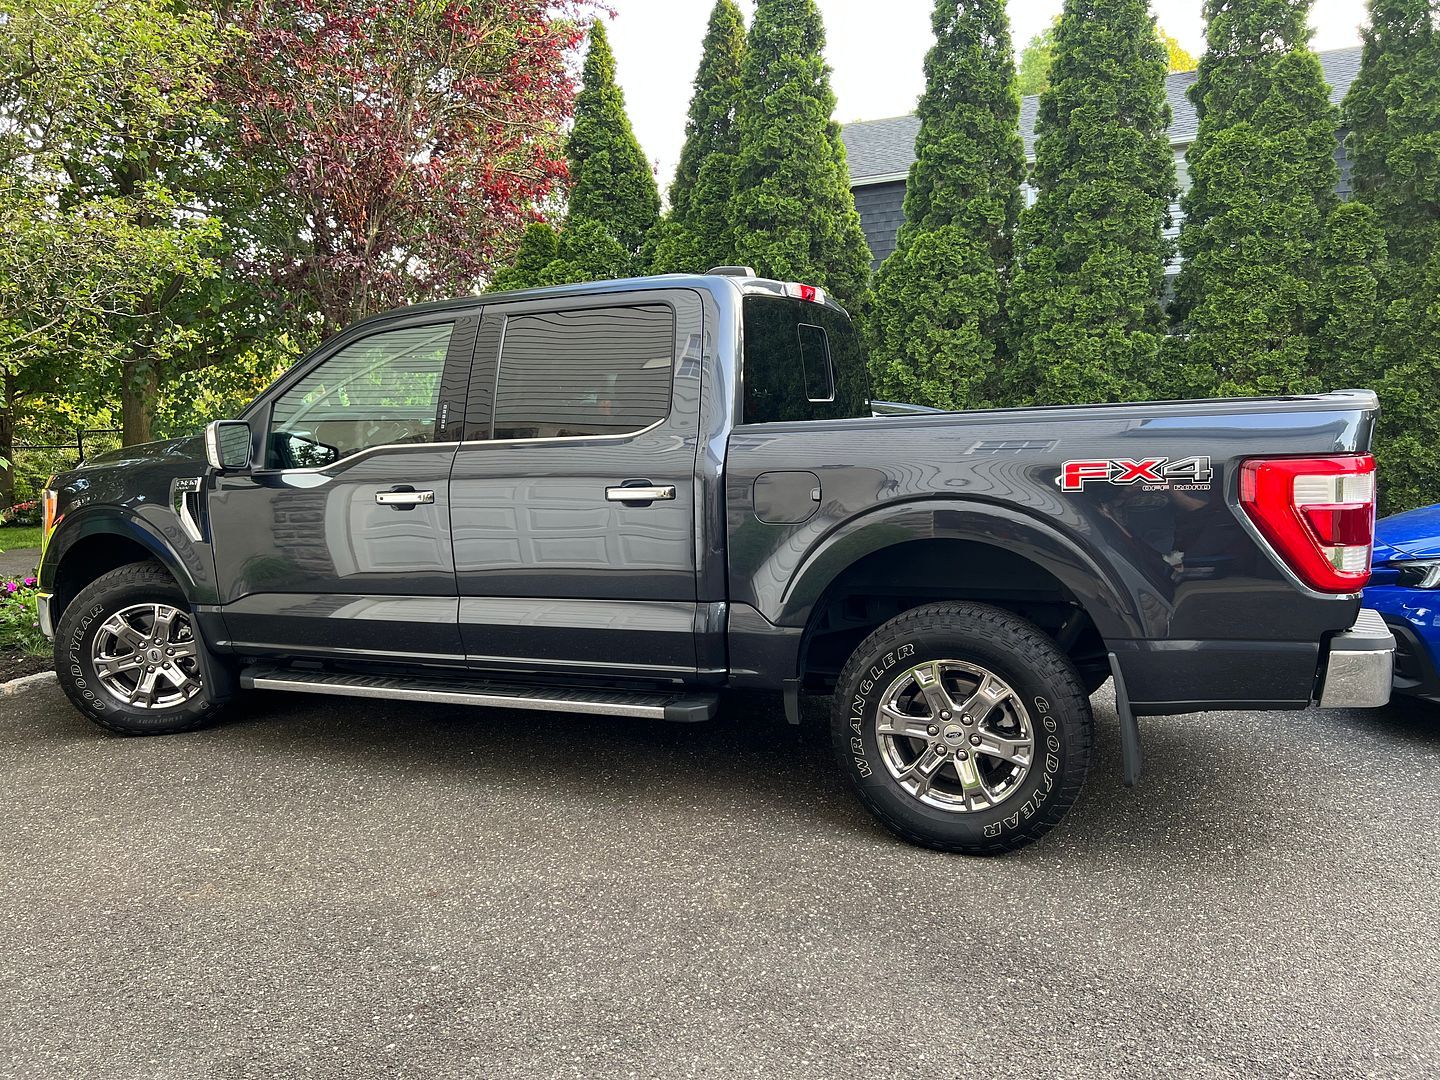
I drove it home. 22.6 MPG on the 120 mile drive home. pretty good!
Last edited by kabacj; 07-28-2023 at 04:59 AM.
Reason: Typo
XTF #2
build start date June 19 2023
GTM # 344
Build Start December 2010
First track day April 2013
-
Post Thanks / Like - 0 Thanks, 5 Likes
-
Member
Now that I found a foundation for my build it was time to collect the parts needed for the kit.
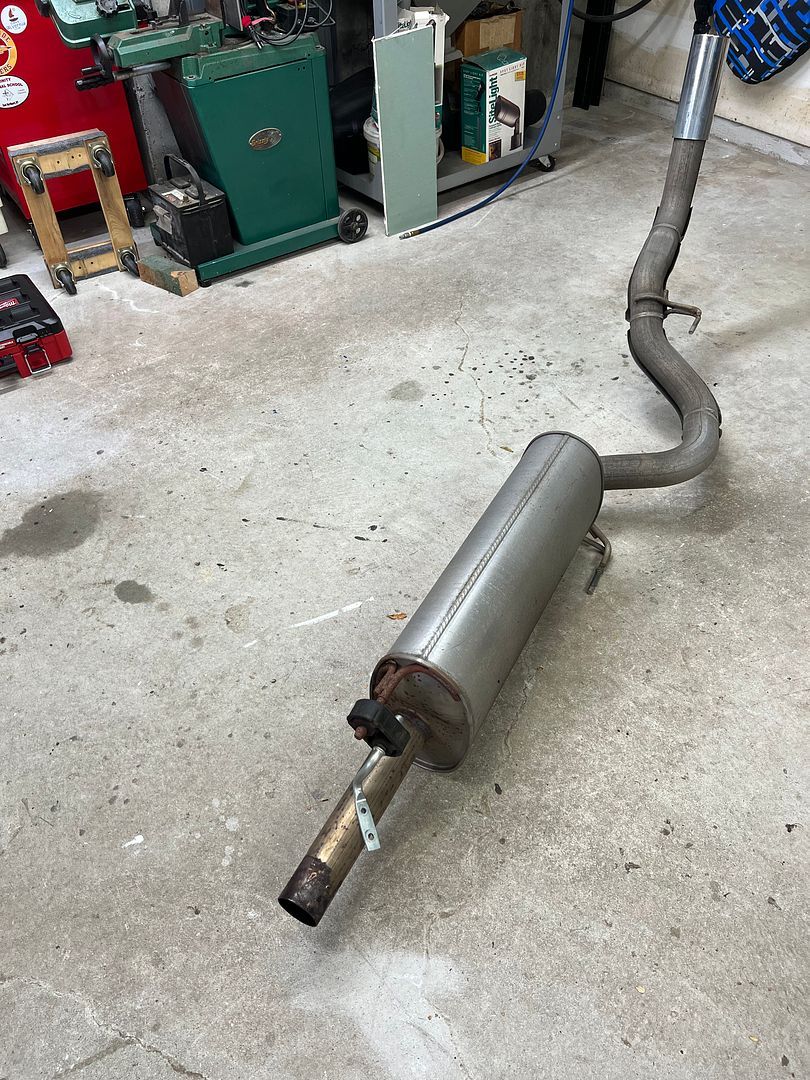
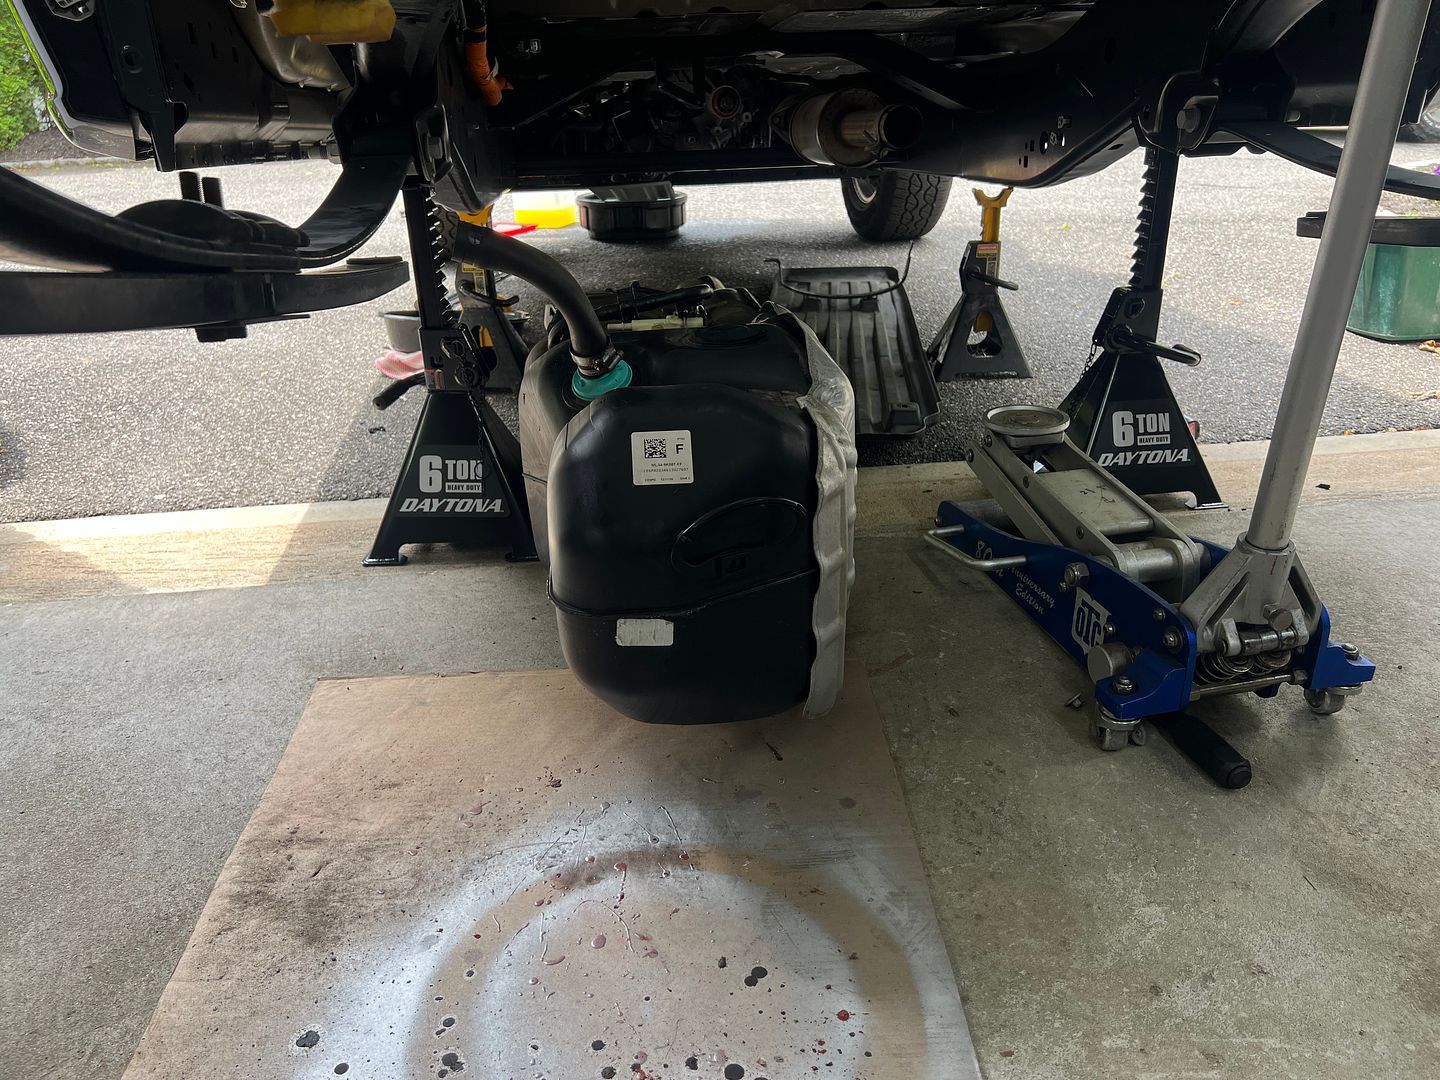
When Ford builds an F150 with the Max tow package where you get bigger rear brakes, enhanced engine and transmission cooling and a heavy duty 9.75 rear axle you also typically get the 36 gallon fuel tank.
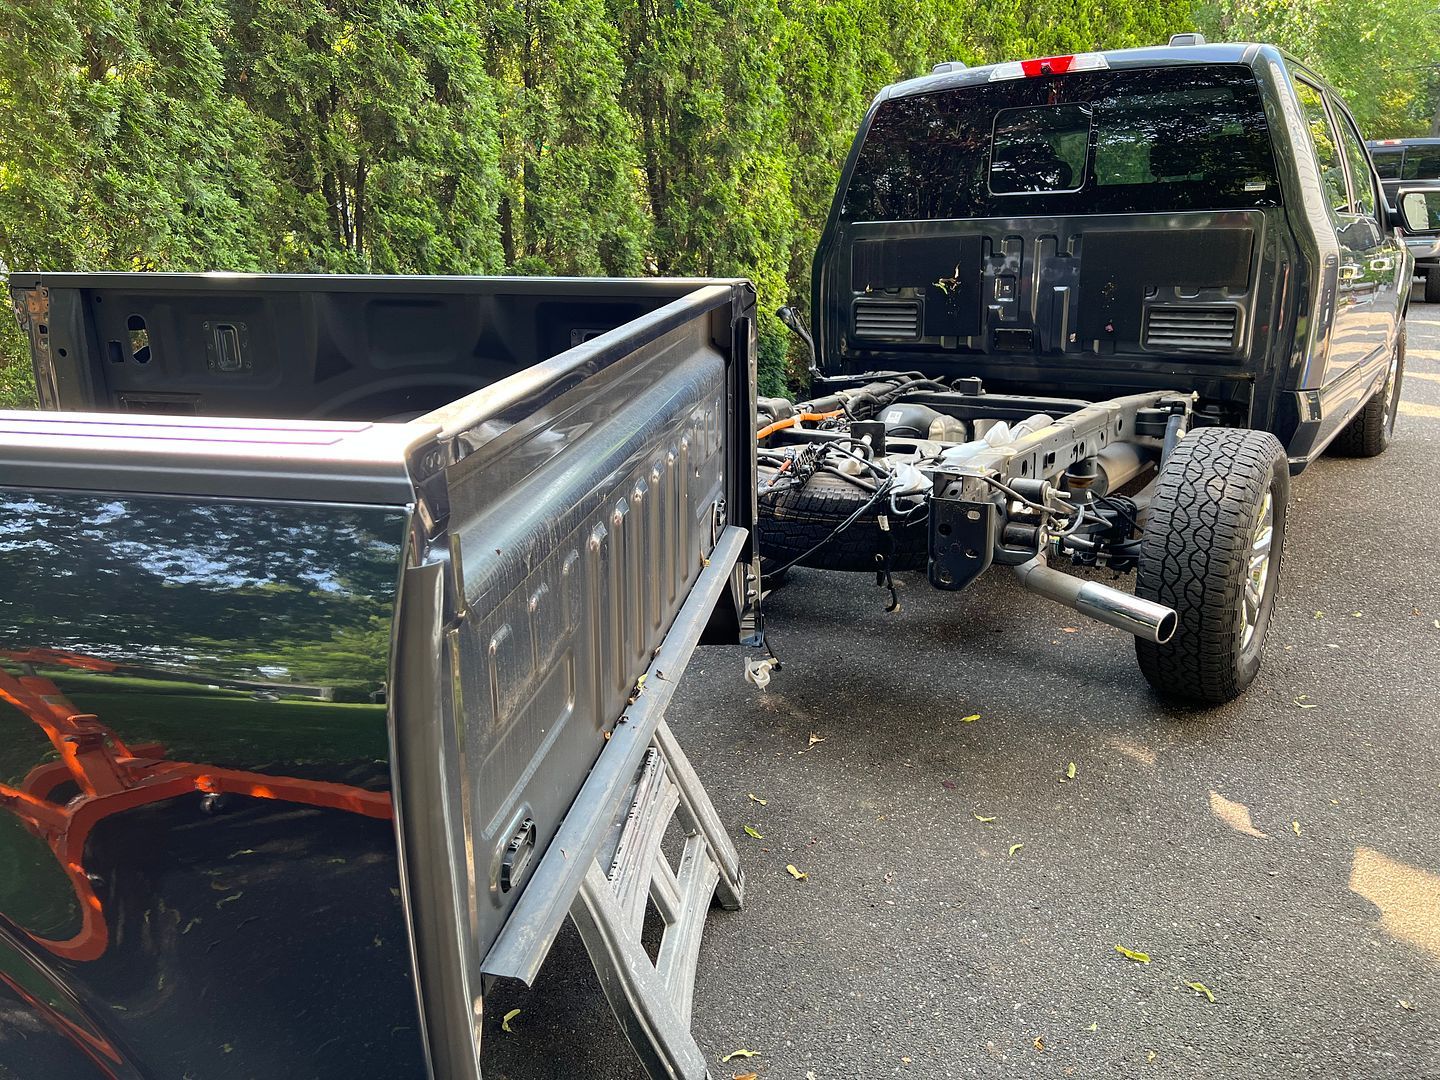
The bigger tank is definitely useful when you are pulling a load and getting poor gas milage, however the 36 gallon does not fit in the XT1. In the kit the fuel tank is relocated toward the rear of the truck and mounted perpendicular to the center line of the truck . The 36 gallon is too long to fit across the frame.
Here are the tanks side by side.
[IMG]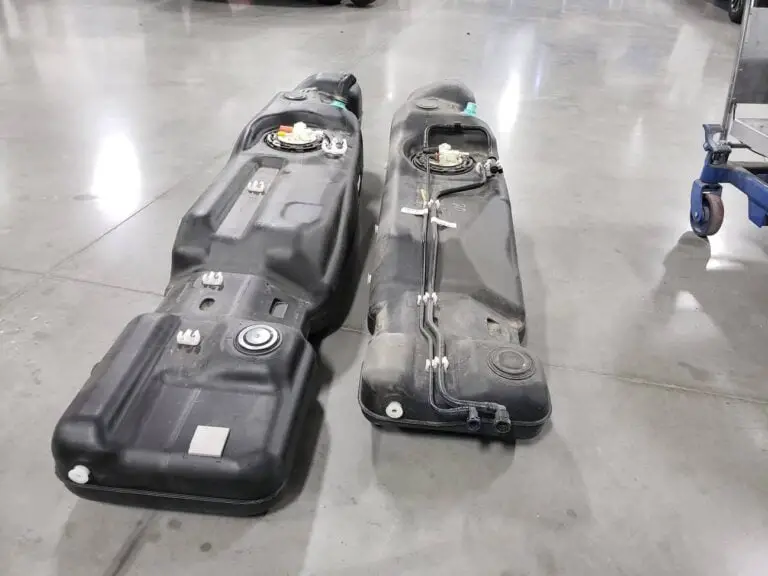 [/IMG]
In addition to swapping the 26 gallon tank from a 2015 to 2023 F150 I also needed to order a 26 gallon fuel pump from Ford. Changing the fuel pump will allow the computer to calculate the distance to empty and the sending unit is calibrated to the fuel level of the 26 gallon tank.
Ill cover the tank swap when we get to that point.
XTF #2
build start date June 19 2023
GTM # 344
Build Start December 2010
First track day April 2013
-
Member
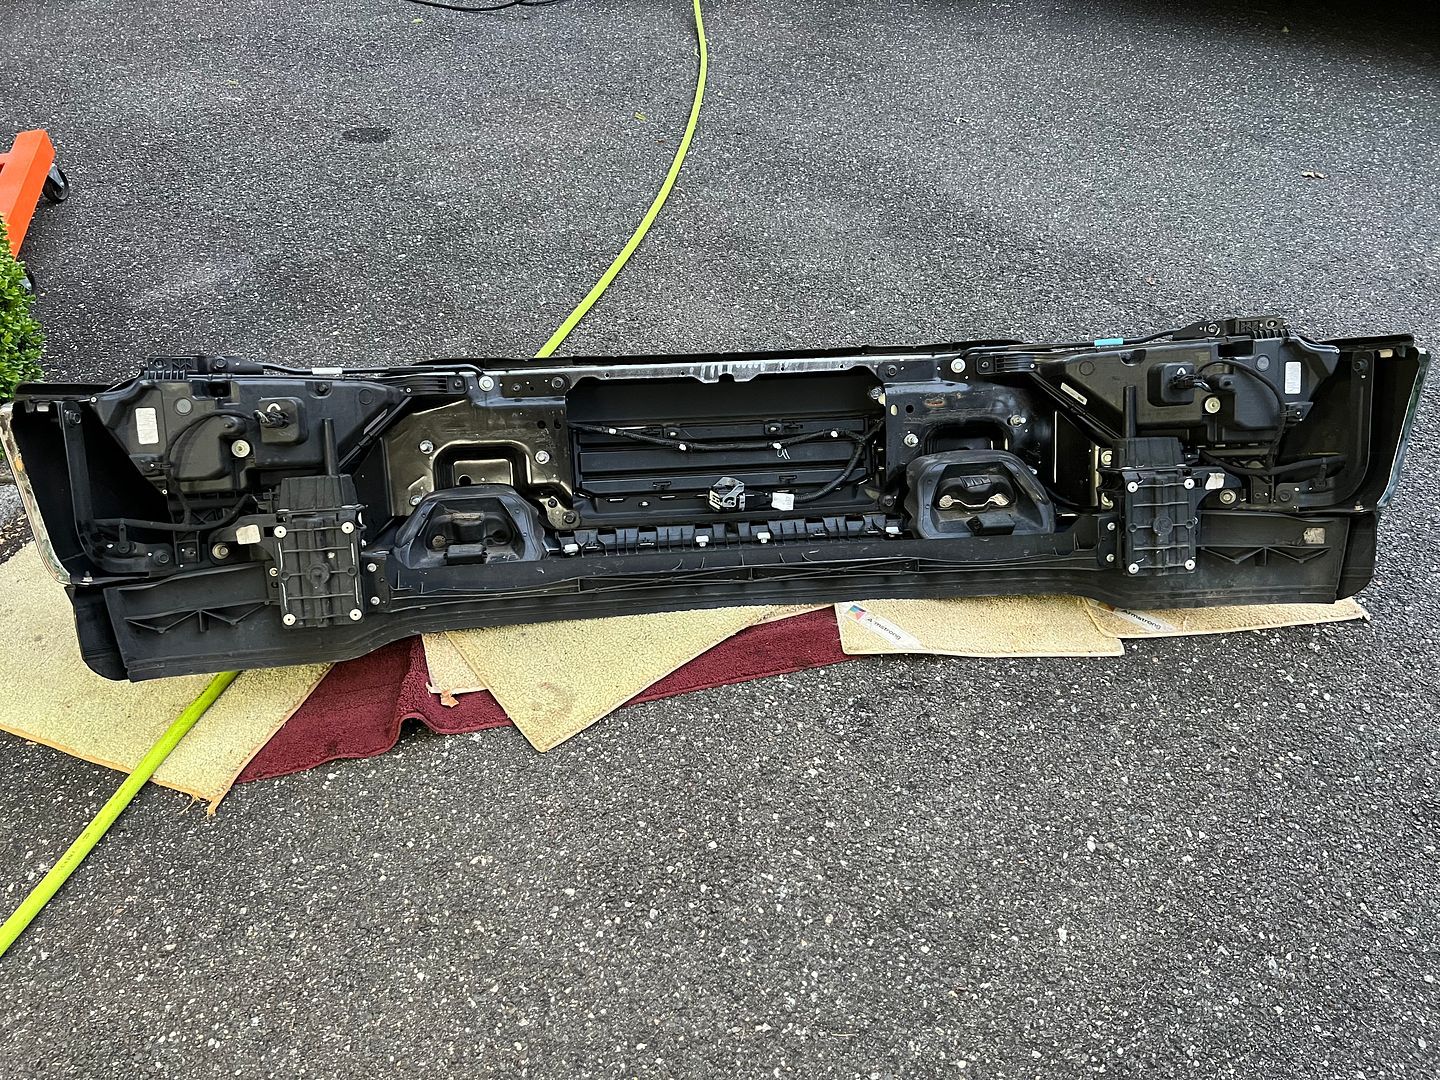
I like the idea of having a generator along with me at all times so I looked for an F150 with the pro power option. Pro power gives you two outlets with 20 amp service in the bed.
In order to get the bed off these accessories as well as the LED bed lights need to be removed.
[IMG]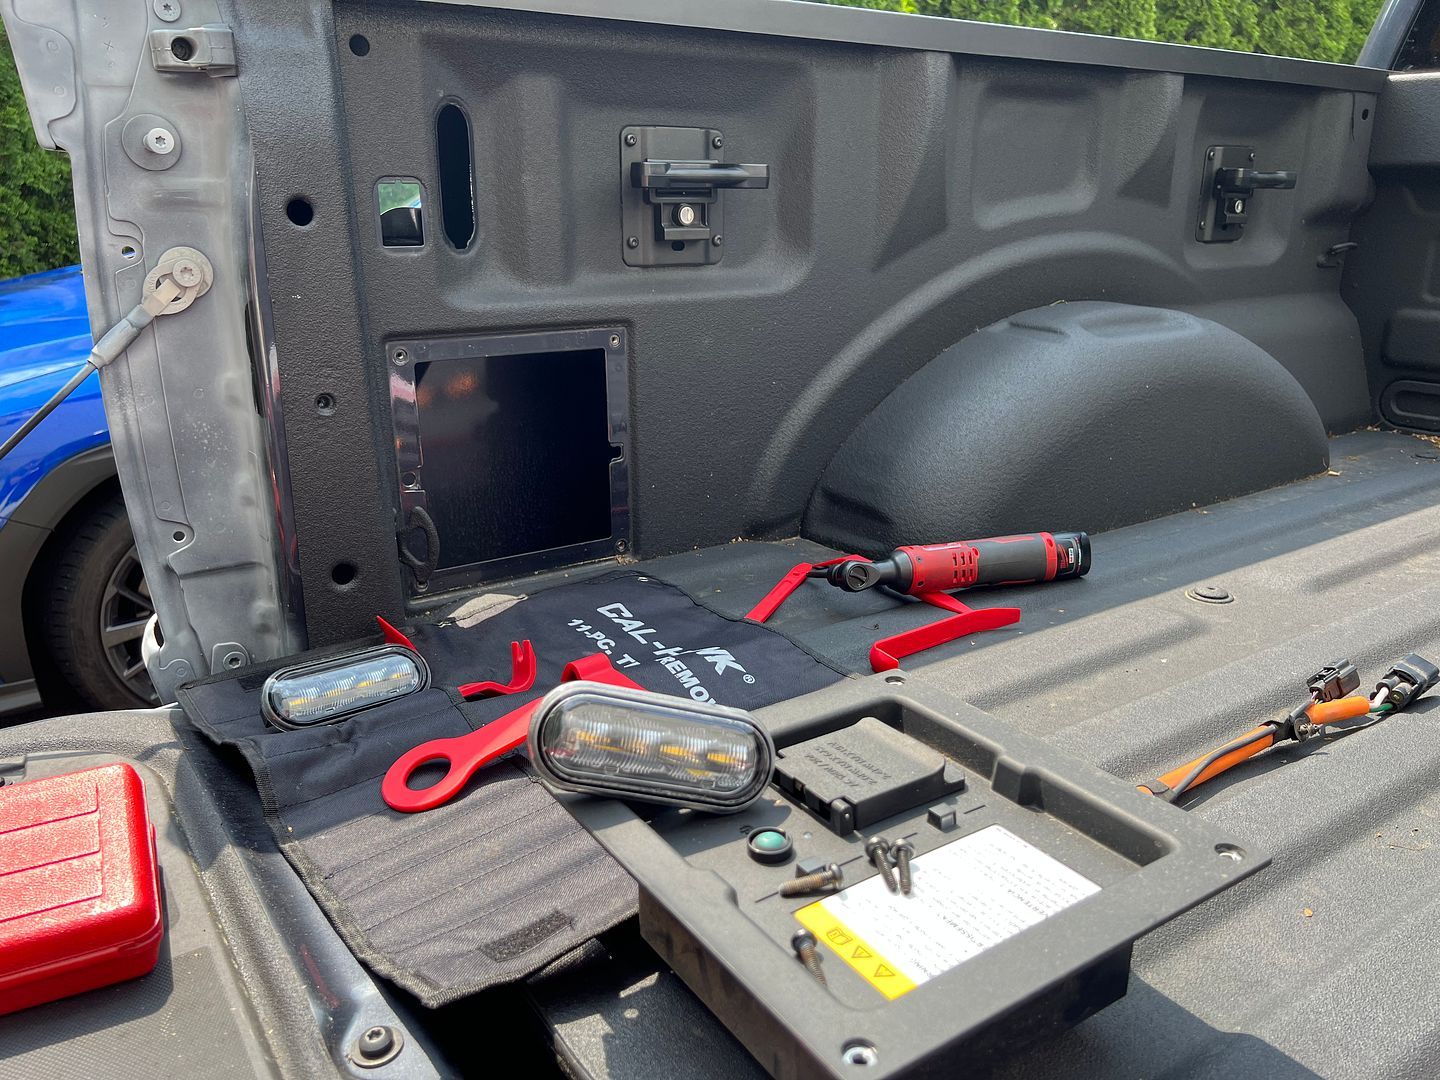 [/IMG]
The thing about any of the accessories and gizmos on this truck is everyone of them needs to be moved over to the XT-1 build or the truck complains either on the dash info screen or via the Ford Pass app or both.
[IMG]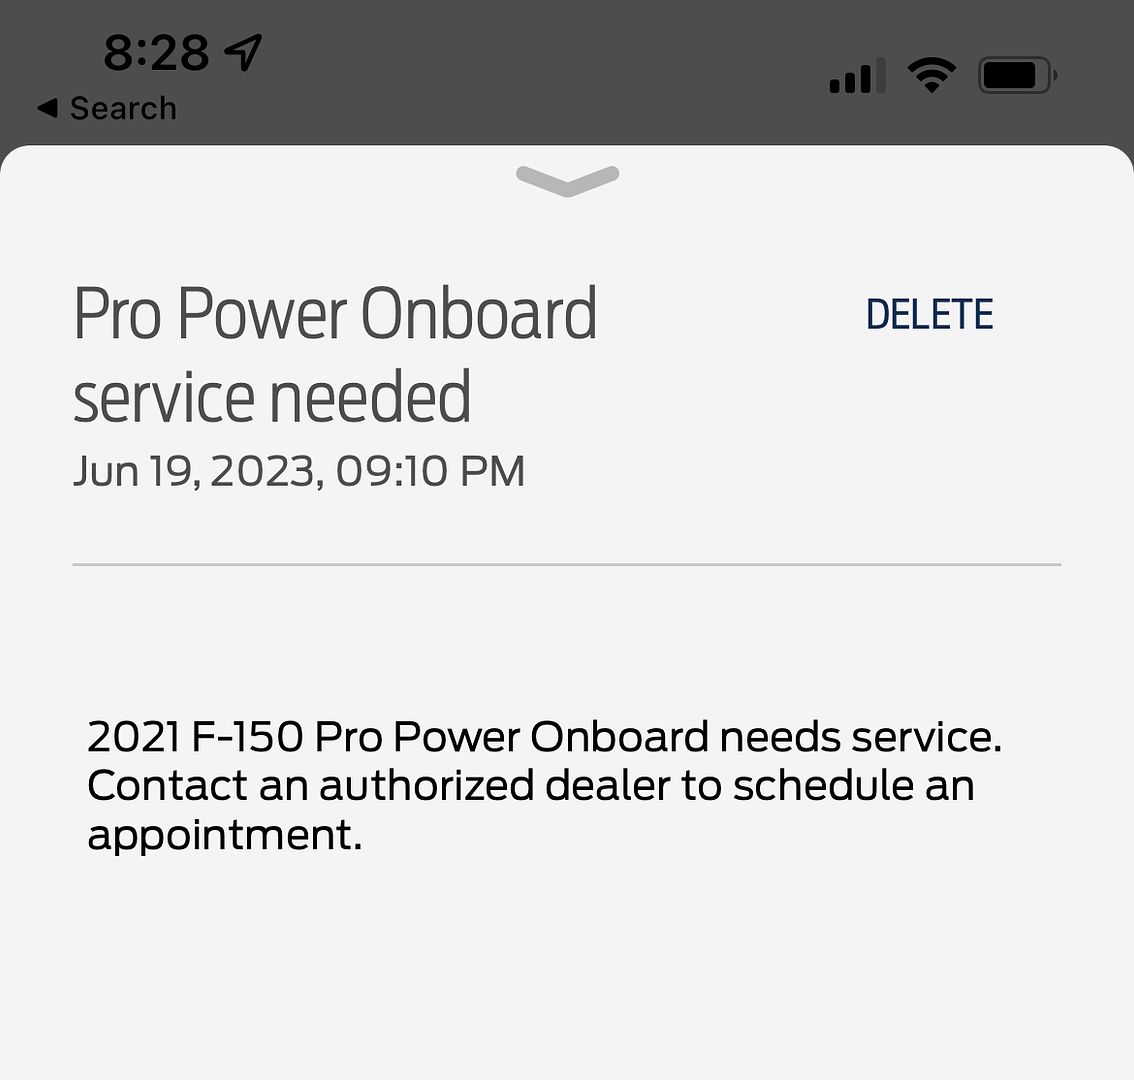 [/IMG]
XTF #2
build start date June 19 2023
GTM # 344
Build Start December 2010
First track day April 2013
-
Member
-
Post Thanks / Like - 0 Thanks, 1 Likes
-
Member
-
Post Thanks / Like - 0 Thanks, 1 Likes
-
Member
Looks like Road and Track came out with an article on the XT1 yesterday
http://https://www.caranddriver.com/news/a44298958/ford-f-150-factory-five-xt1-kit/
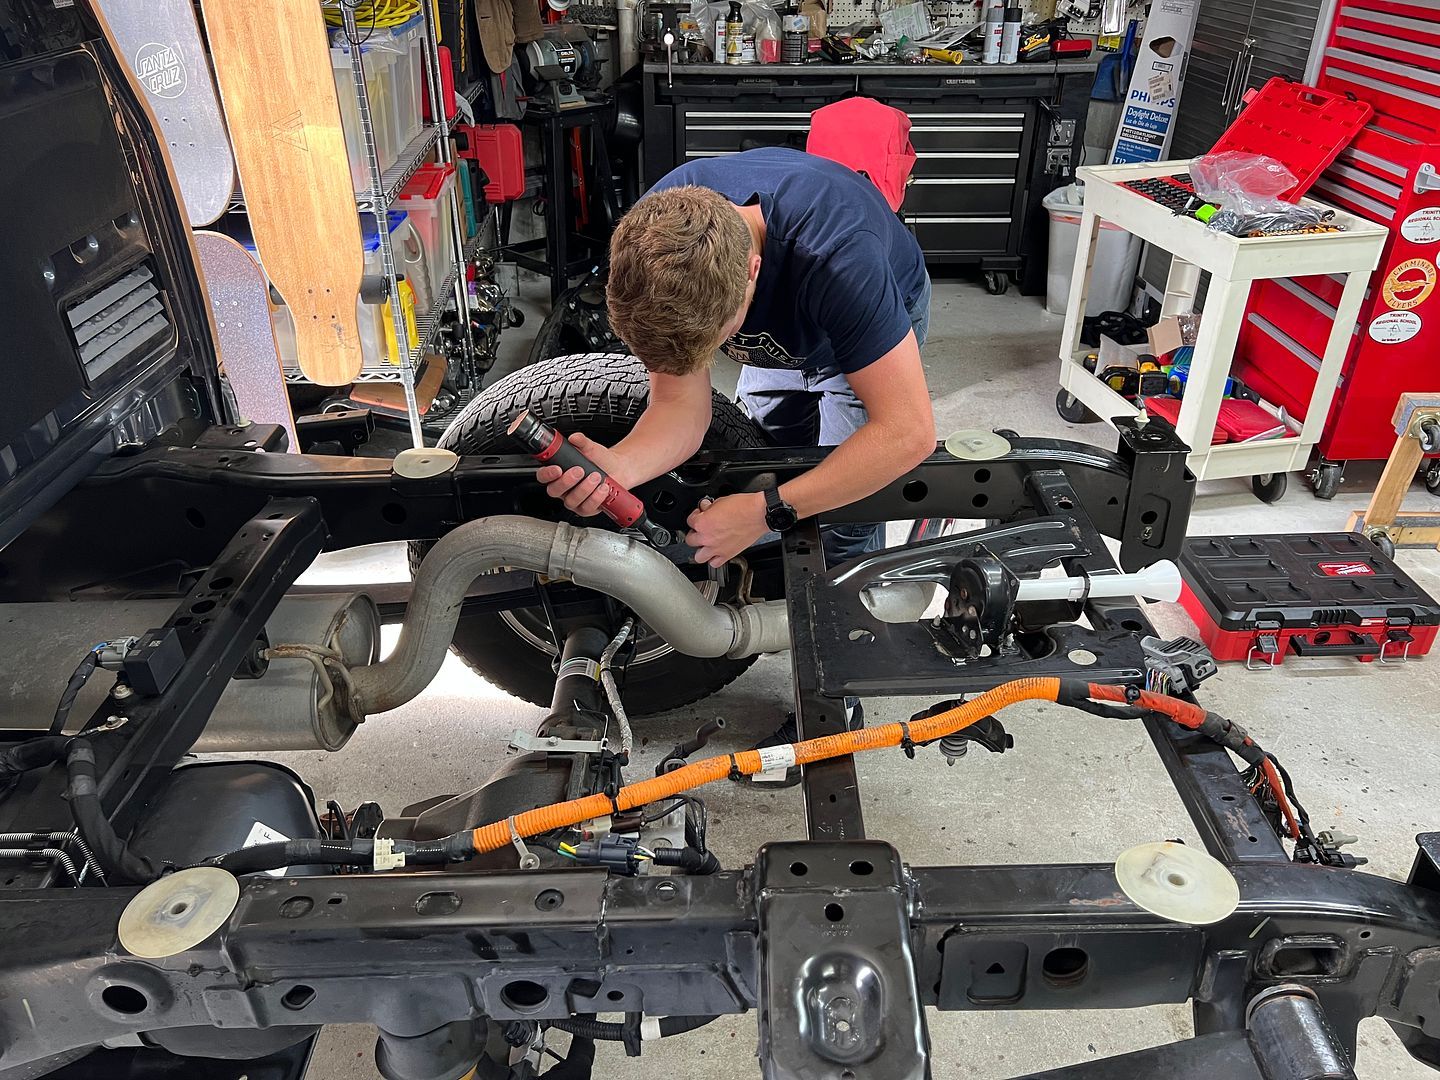
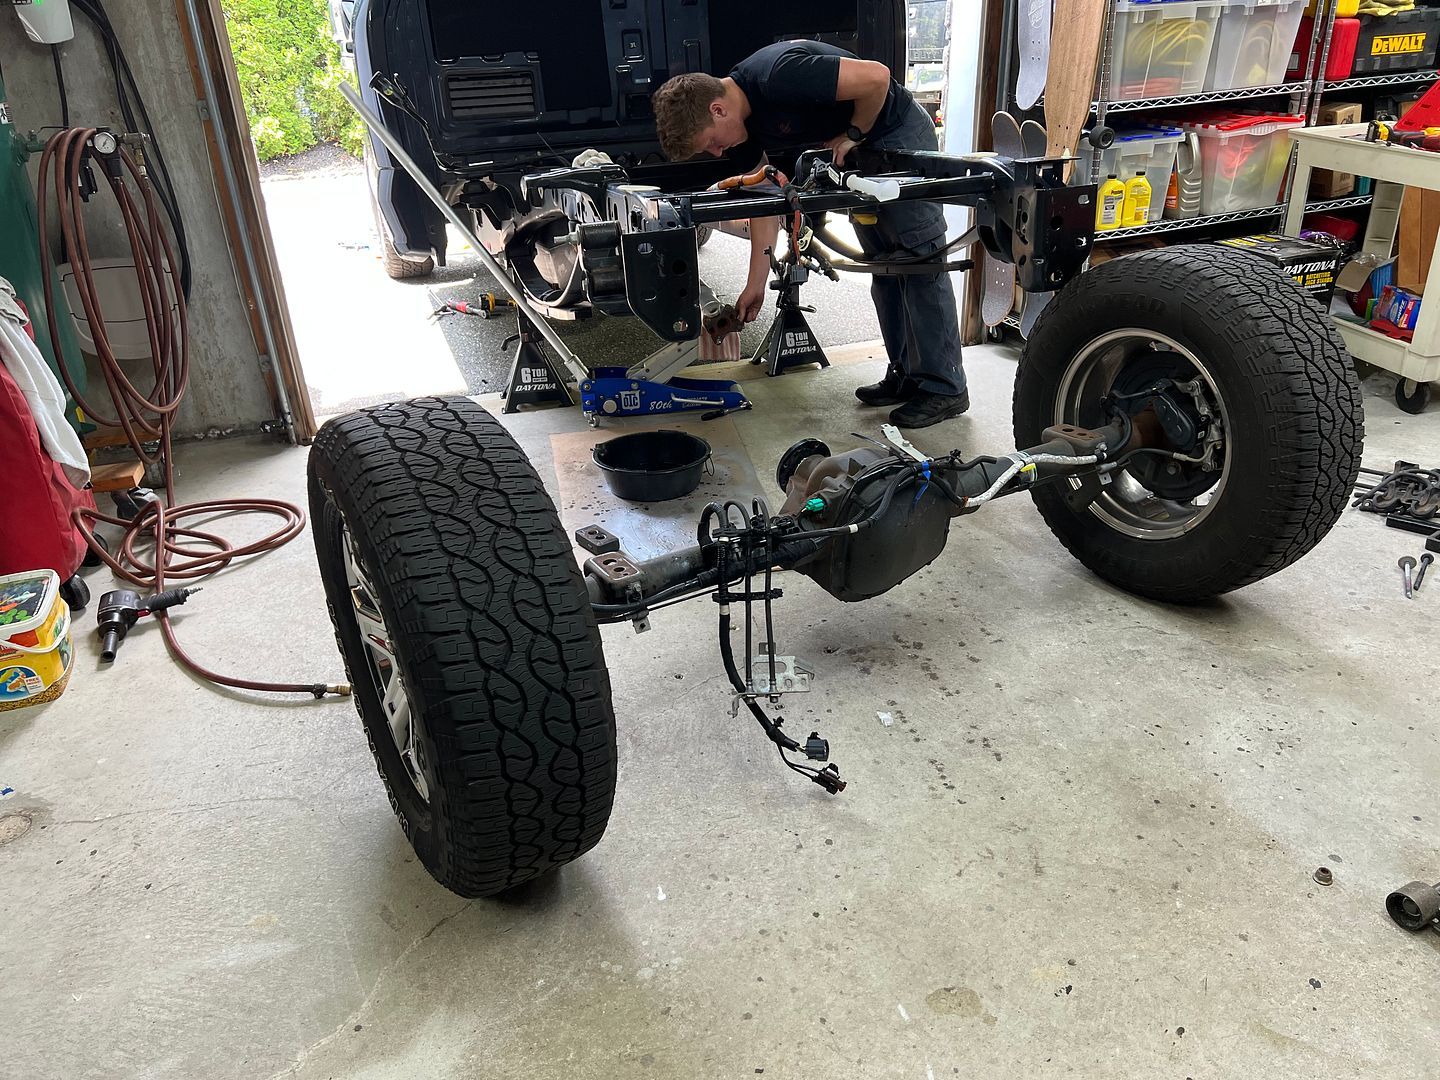
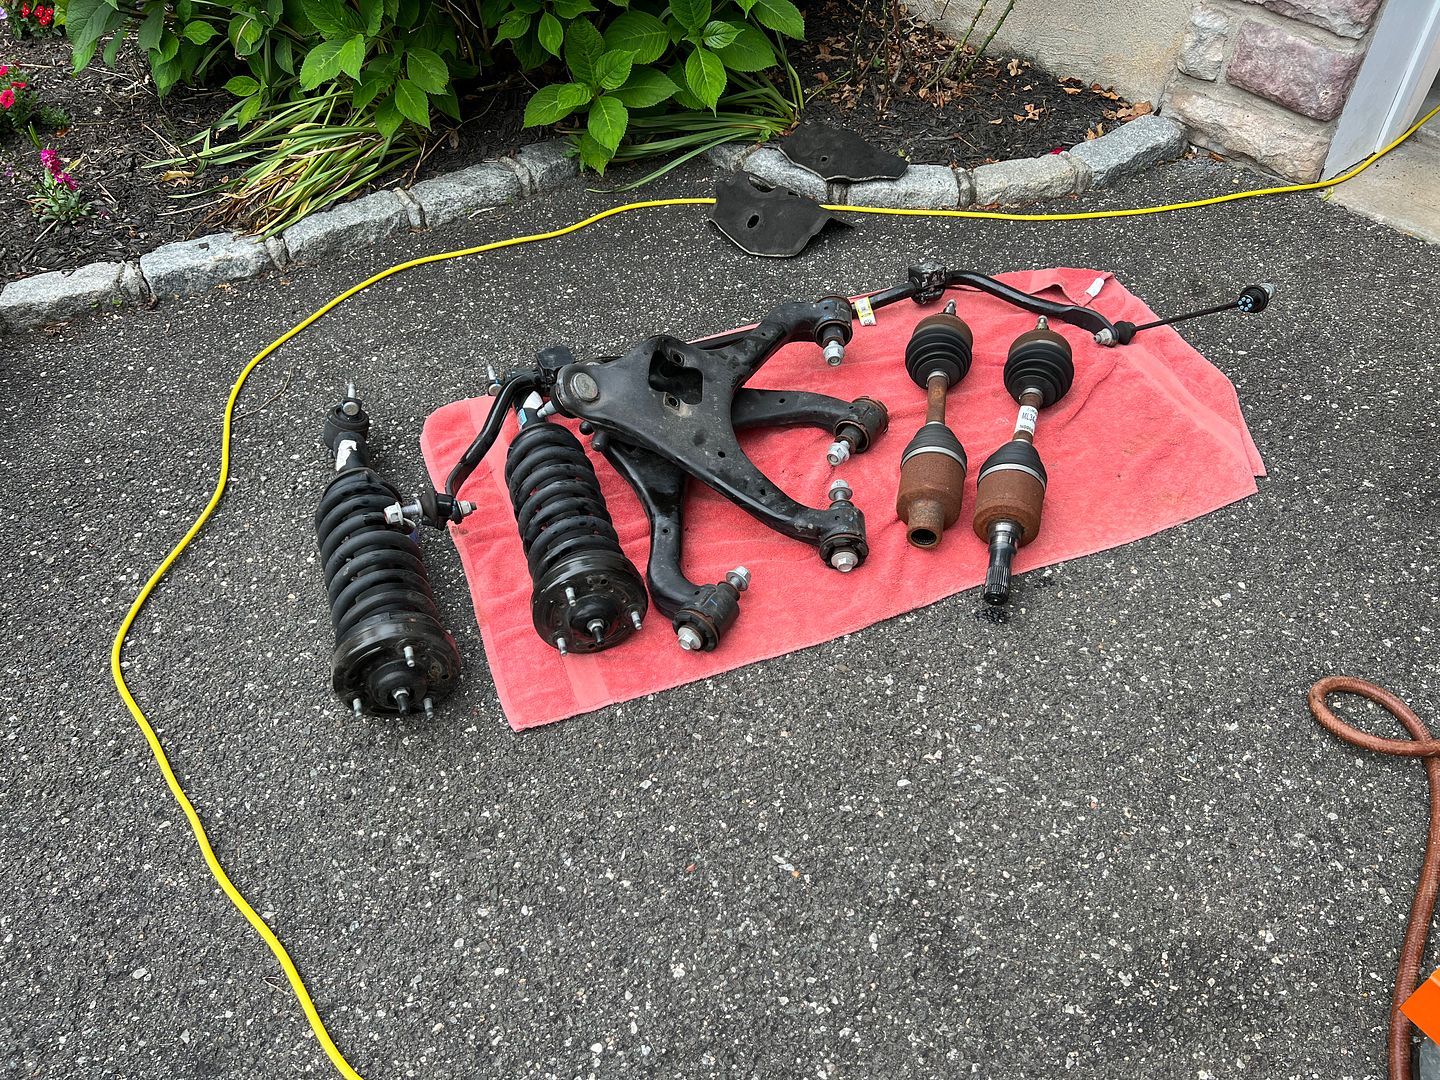
The next AM was a work day for me so my son was responsible for completing the front end tear down.
In no time at all I got a text with these pictures.
[IMG]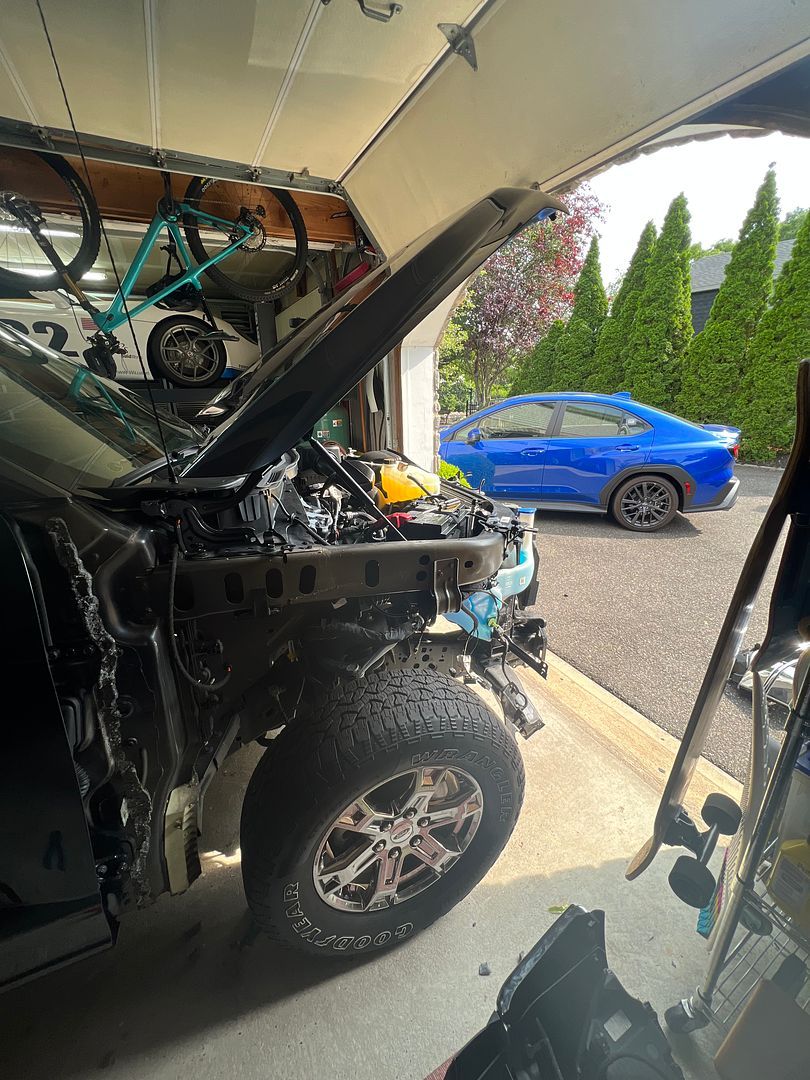 [/IMG]
[IMG]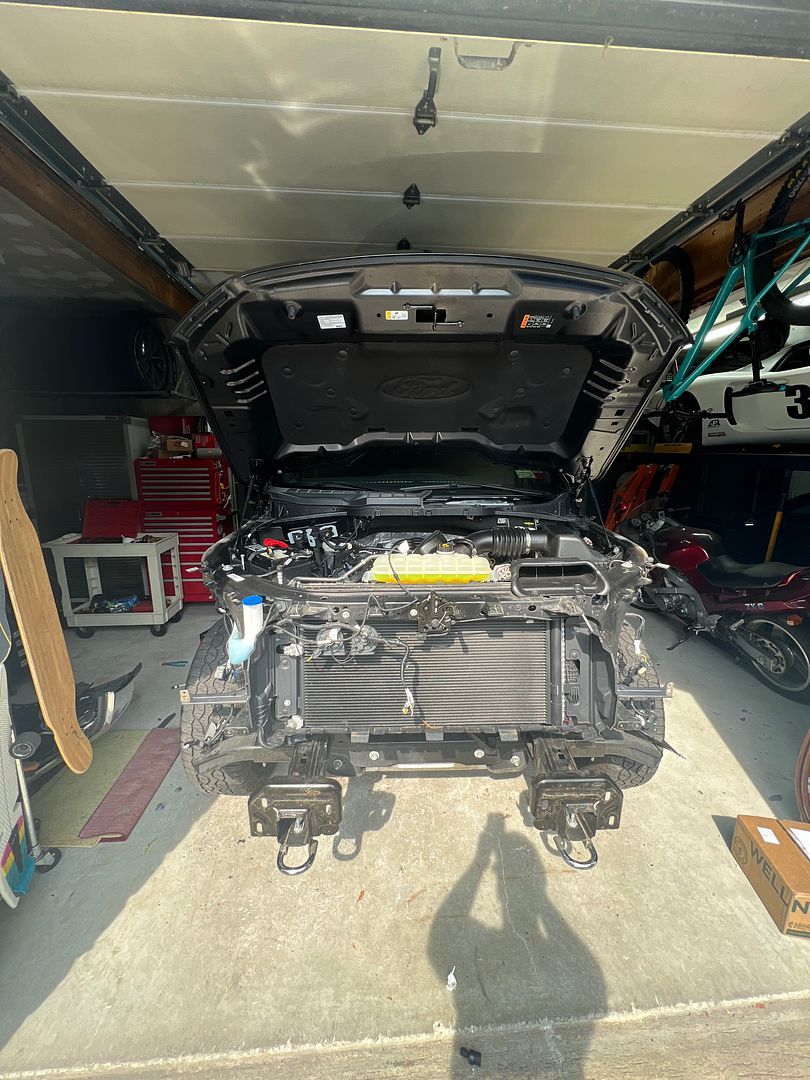 [/IMG]
[IMG]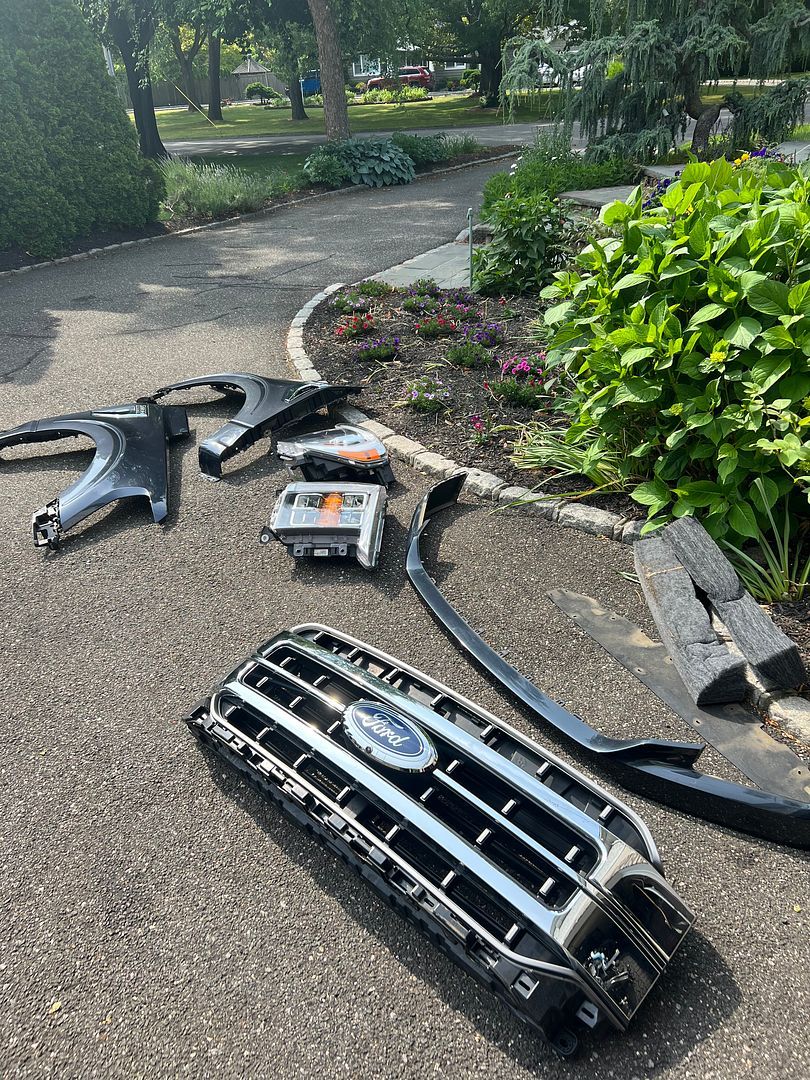 [/IMG]
XTF #2
build start date June 19 2023
GTM # 344
Build Start December 2010
First track day April 2013
-
Member
After pulling out the grill you need to remove and save the grill shutter motor for re attachment later.
I forgot to take a picture with it installed, but this is where it sits in the shutter mechanism
[IMG]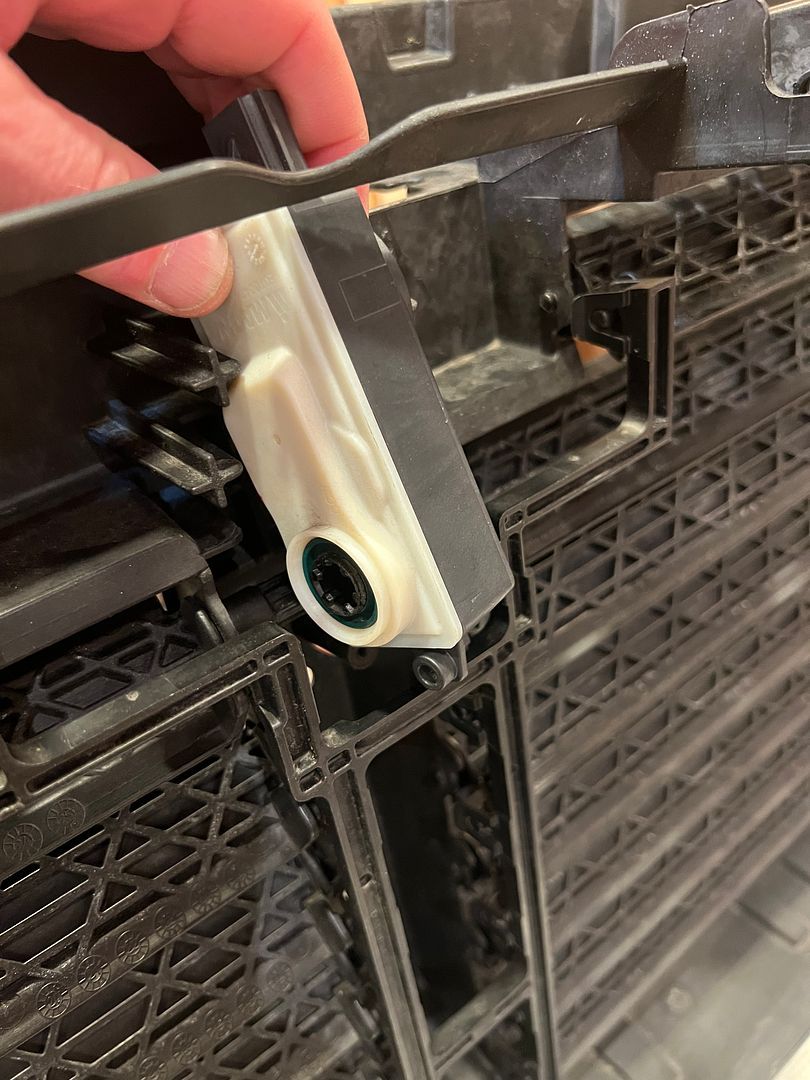 [/IMG]
the splines in the motor fit into the drive axles that move one left and one right shutter. All shutters are connected by a pretty elegant mechanism that snaps on and off easily
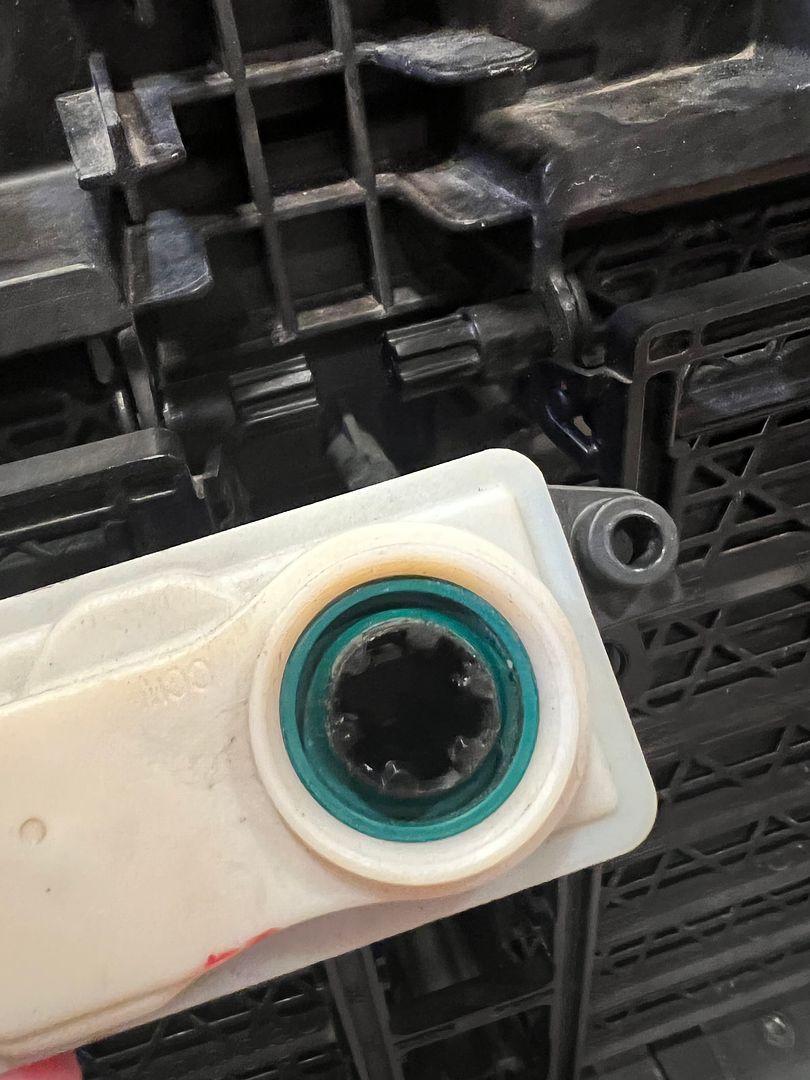
Because i have been traumatized by plastic parts that break when you try to disassemble them I was a little scared to do this , but I tell you, ford has come a long way with their plastic materials science. The shutters are just pliable enough that you can bend the shutter vain in the middle by pulling on it and prying at the edge and it just pops out without breaking!! What a concept!
pry here and bend the shutter from the middle and it pops right out.
_IMG_9990.png?width=1920&height=1080&fit=bounds)
XTF #2
build start date June 19 2023
GTM # 344
Build Start December 2010
First track day April 2013
-
Post Thanks / Like - 0 Thanks, 1 Likes
-
Member
First question for the group.
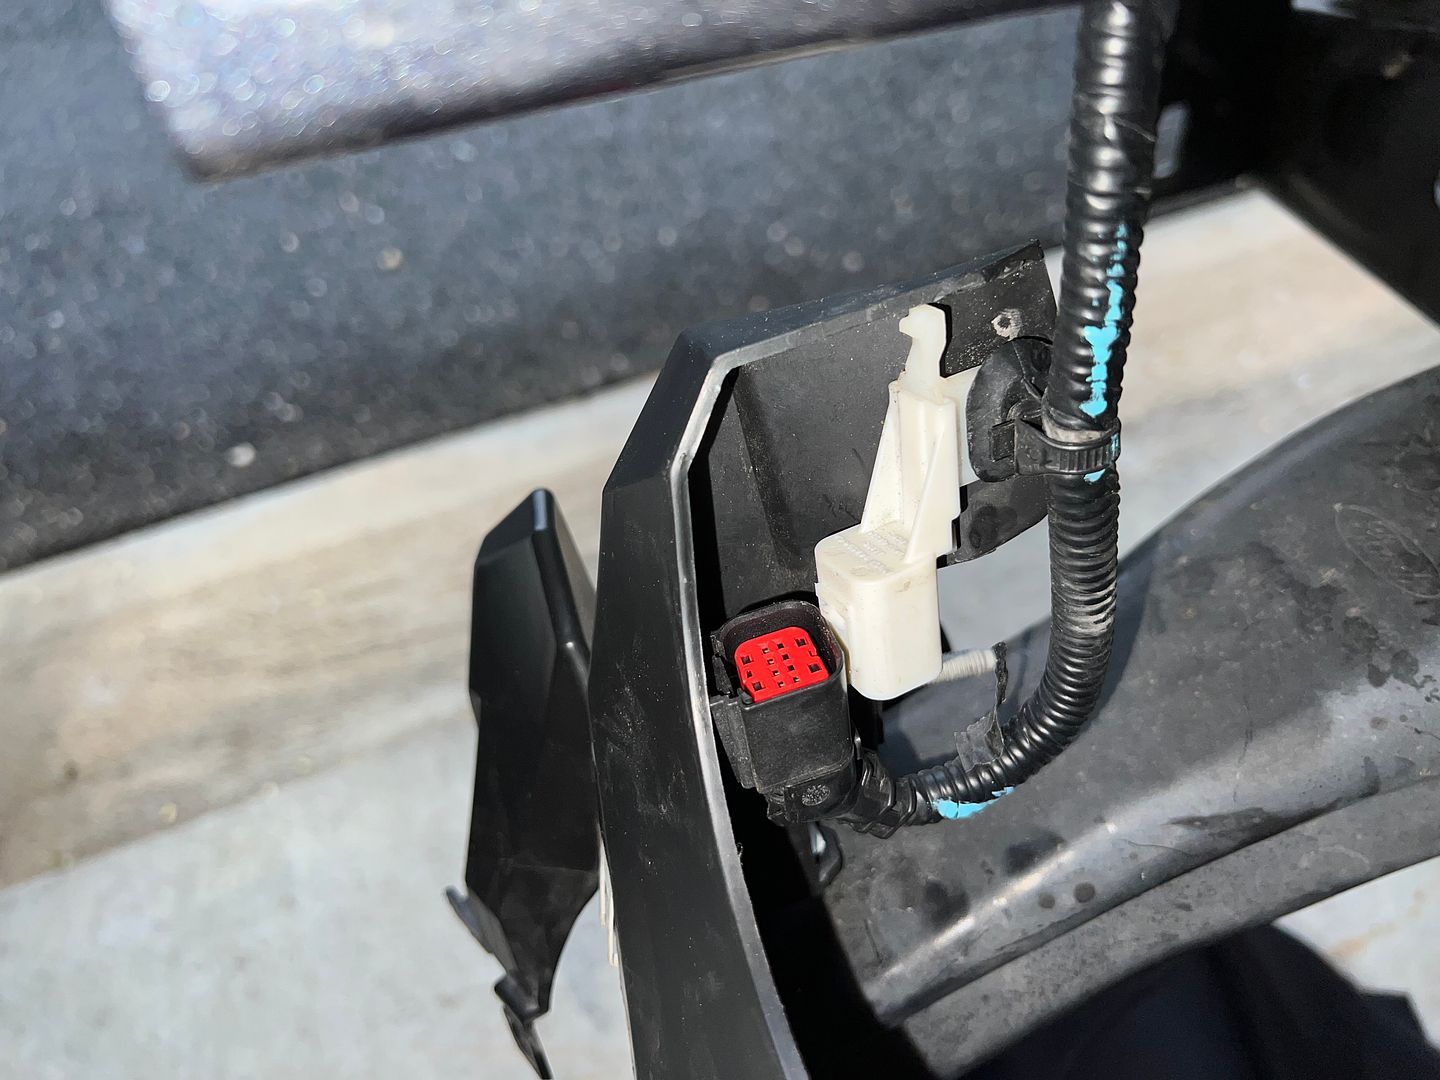
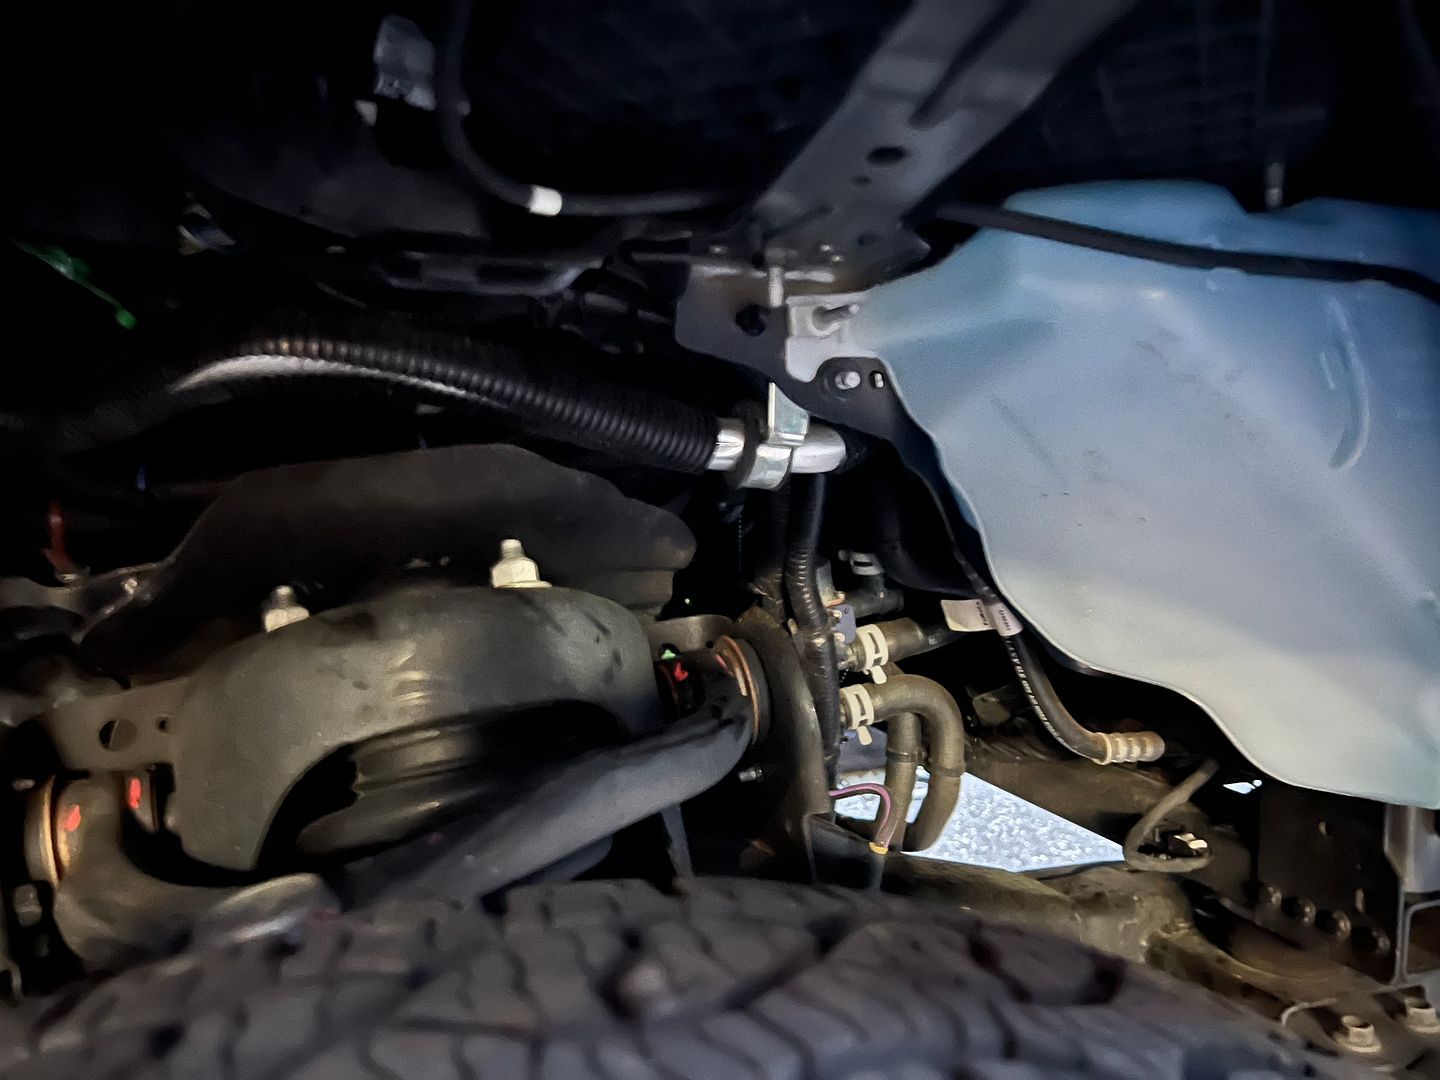
I am being very careful to make sure to keep track of anything that is plugged in because the trucks computer seems like it does an inventory of every item that it expects to be connected at startup. I also notice that it does a verification that sensors are in range. That's a reasonable thing to do..
one of my tasks today is to plug everything back in and check the truck with a scanner and verify that the truck thinks everything is OK. After that the motor and trans come out and the cab comes off.
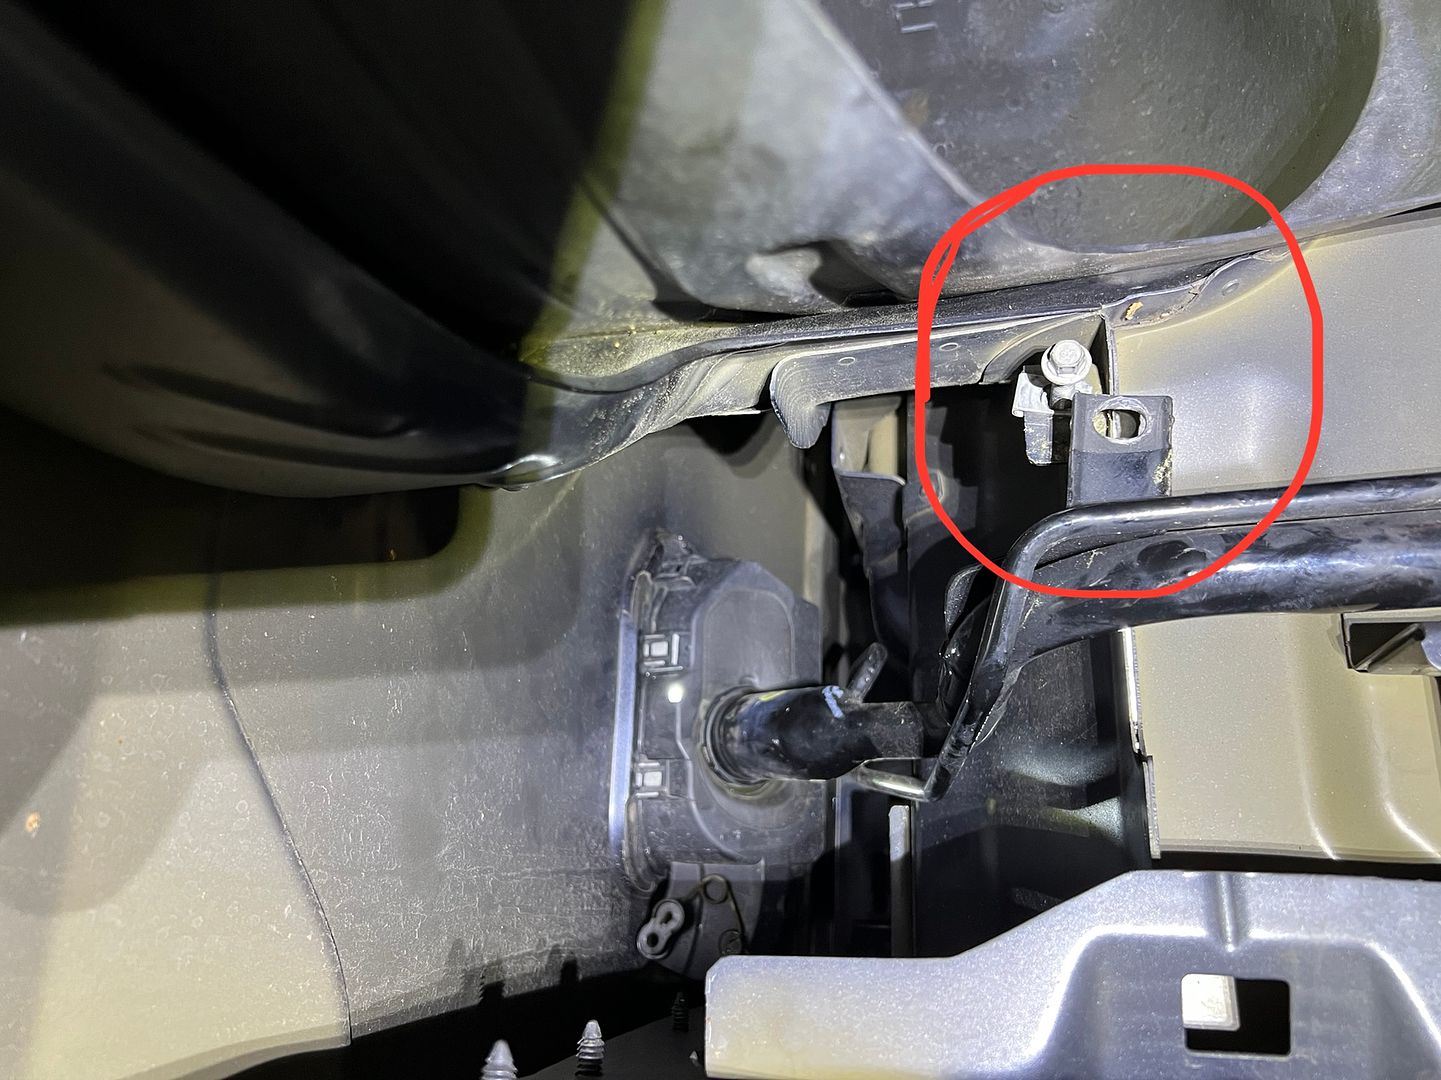
oddly i found this one plug that does not go to anything. The plug actually goes to the white block off which is attached to this bracket. The plug is right in the area of the headlight and if it did plug in somewhere it seems like that's where it would reach.
anyone familiar with what it is? unless you took the truck apart you probably would never see it. My google searches come up dry.
Last edited by kabacj; 06-24-2023 at 07:27 AM.
XTF #2
build start date June 19 2023
GTM # 344
Build Start December 2010
First track day April 2013
-
I cant even imagine taking such a beautiful truck apart. I would guess you can recuperate some of the cost by selling off everything you don't need?
Mike
-
Post Thanks / Like - 0 Thanks, 1 Likes
-
Member

Originally Posted by
michael everson

I cant even imagine taking such a beautiful truck apart. I would guess you can recuperate some of the cost by selling off everything you don't need?
Mike
Hey Mike,
Yeah I think I can sell off the bumpers, bed, fenders stuff like that because those are the parts you most often damaged in a fender bender. All the parts are pristine condition so they should make someone happy when they swap out a damaged part.
I'm not going to lie saying It doesn't hurt me a bit to take apart such a nice truck . The truck is wonderful , but it really needs something... a little spice.
I think this project is really going to solve that problem. Haha
Last edited by kabacj; 06-24-2023 at 06:47 PM.
XTF #2
build start date June 19 2023
GTM # 344
Build Start December 2010
First track day April 2013
-
Post Thanks / Like - 0 Thanks, 1 Likes
-
Member
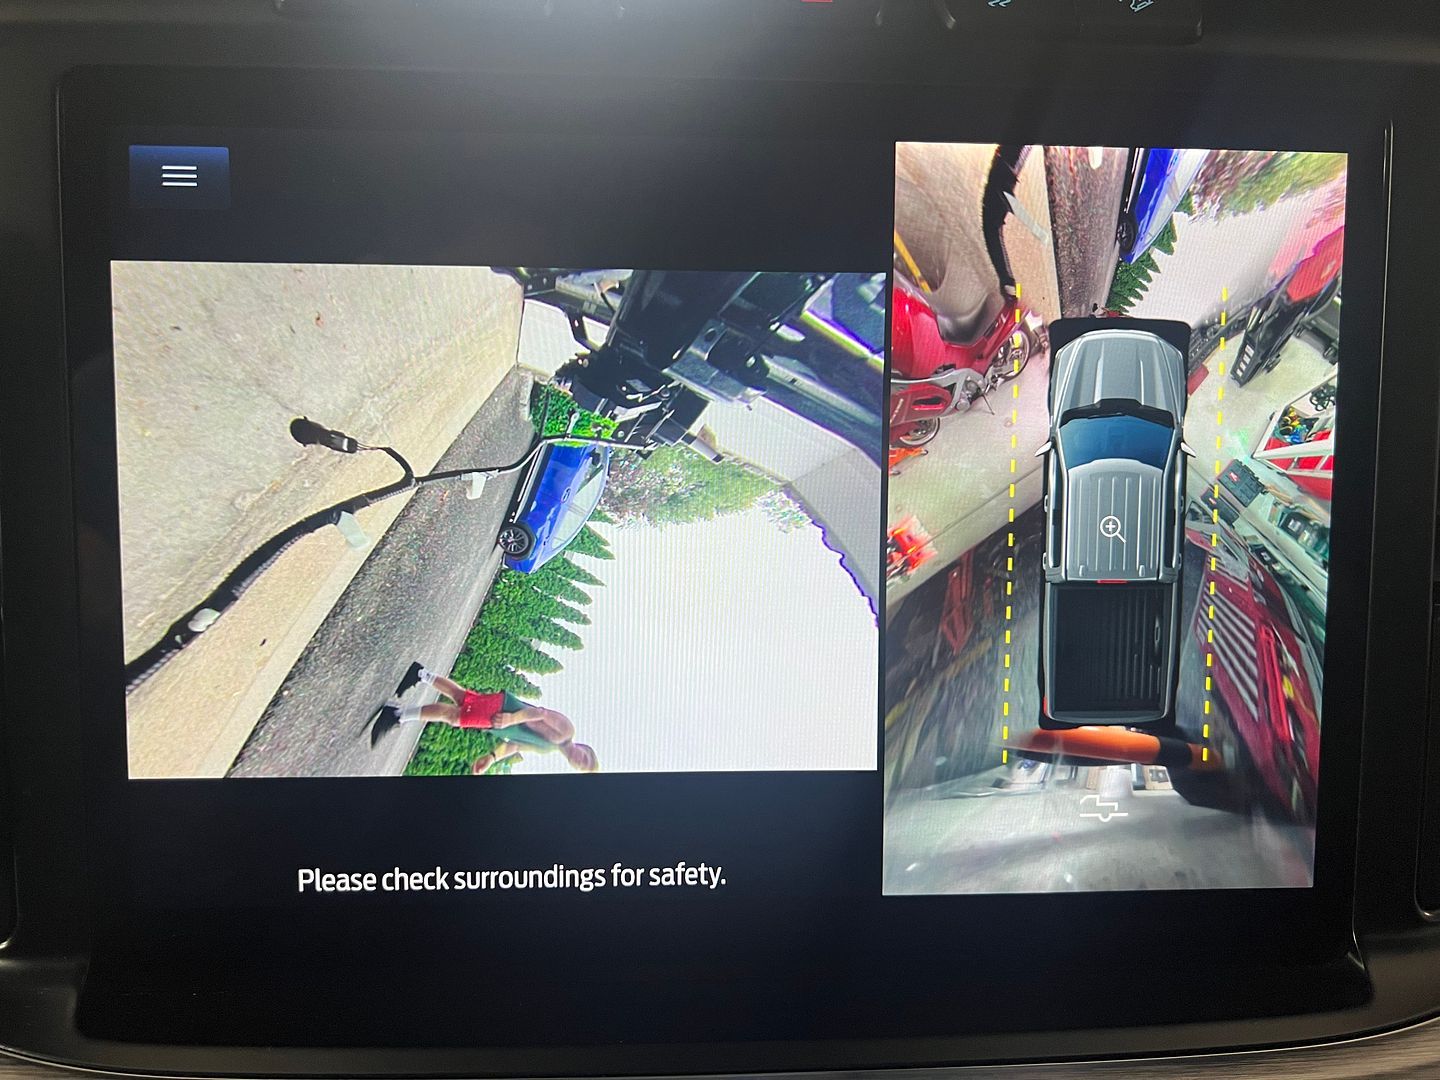
Because i am paranoid that somehow I messed up the electronics. The truck complains a lot when moving it around without all the sensors attached. For example, it will not go into drive when the hood open sensor is disconnected.
I plugged everything back in for a test.
_IMG_0016.png?width=1920&height=1080&fit=bounds)
Success!
I also got an accessory backup camera like you would use on the back of a trailer or camper shell. This will allow me to retain the 360 camera with the tailgate on or off.
XTF #2
build start date June 19 2023
GTM # 344
Build Start December 2010
First track day April 2013
-
Member
-
Post Thanks / Like - 0 Thanks, 1 Likes
-
Member
-
Post Thanks / Like - 0 Thanks, 1 Likes
-
Senior Member

Definitly sketchy! But I'll give you points for ingenuity! You have my attention!
Higgy
MK4 #11012 picked up 04/16/24
351W, 3 link, single roll bar
MK4 #10616 picked up 4/10/23
302w, 4 link, 17's, dual roll bar SOLD
MK4 #9759 picked up on 4/3/19
351C, 3 link, 17's, dual roll bars SOLD
-
Member
Originally Posted by
Higgybulin
Definitly sketchy! But I'll give you points for ingenuity! You have my attention!
Higgy
Haha. Higgy
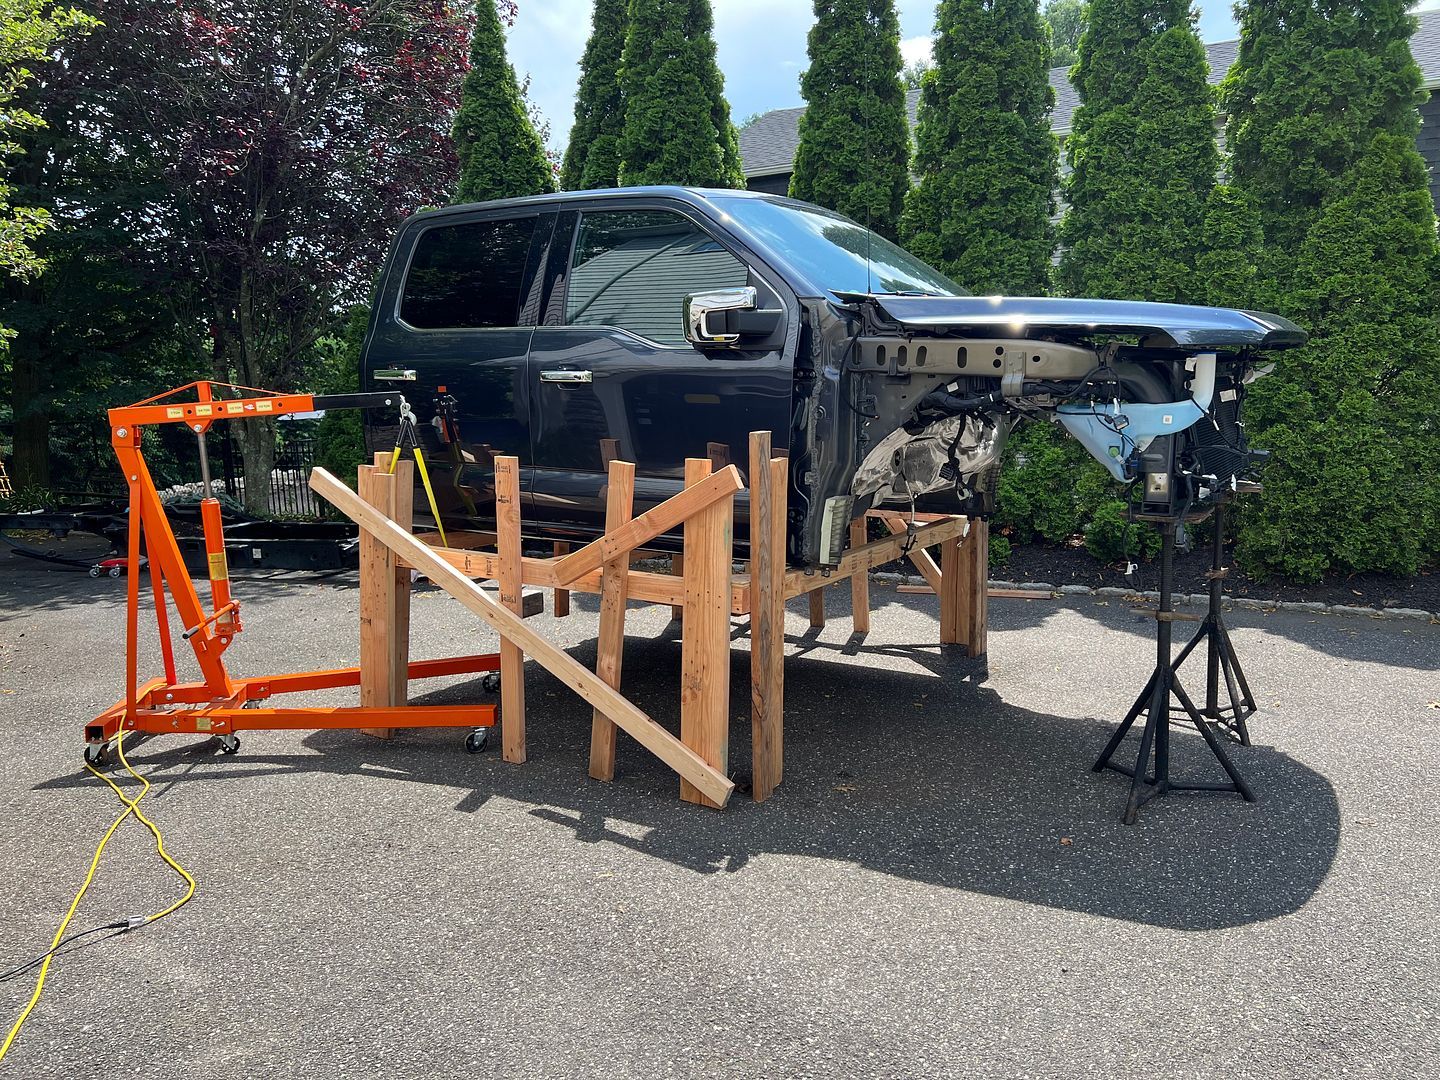
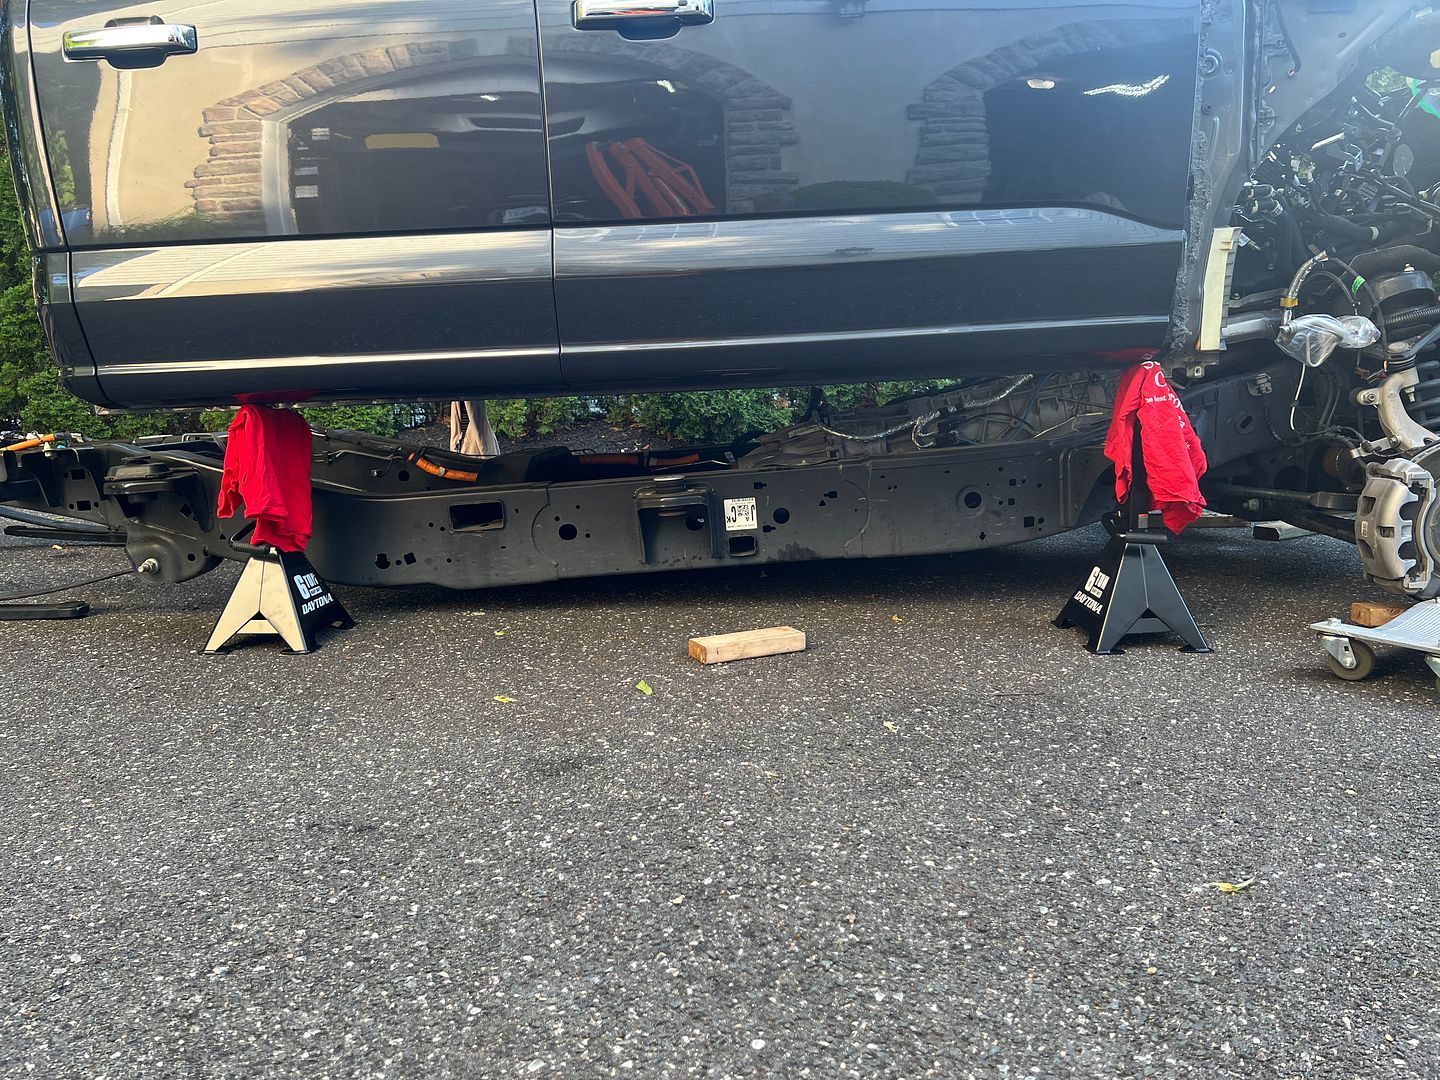
Both my son and I had nightmares on Sunday night that we would wake up to the truck on the pavement on Monday AM.
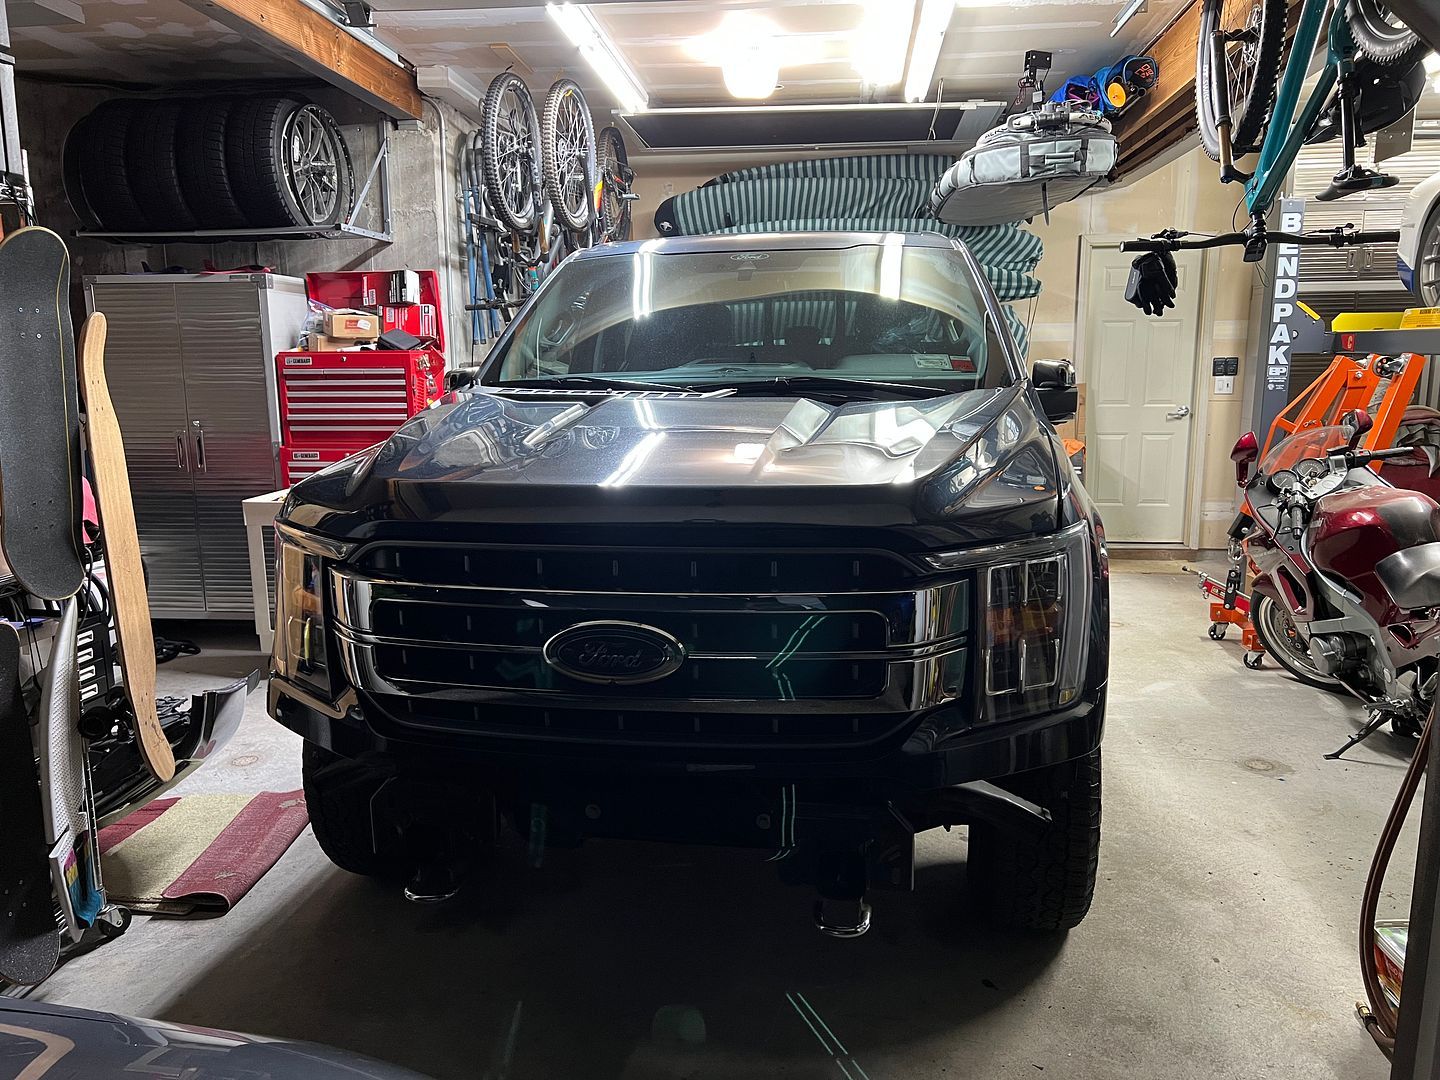
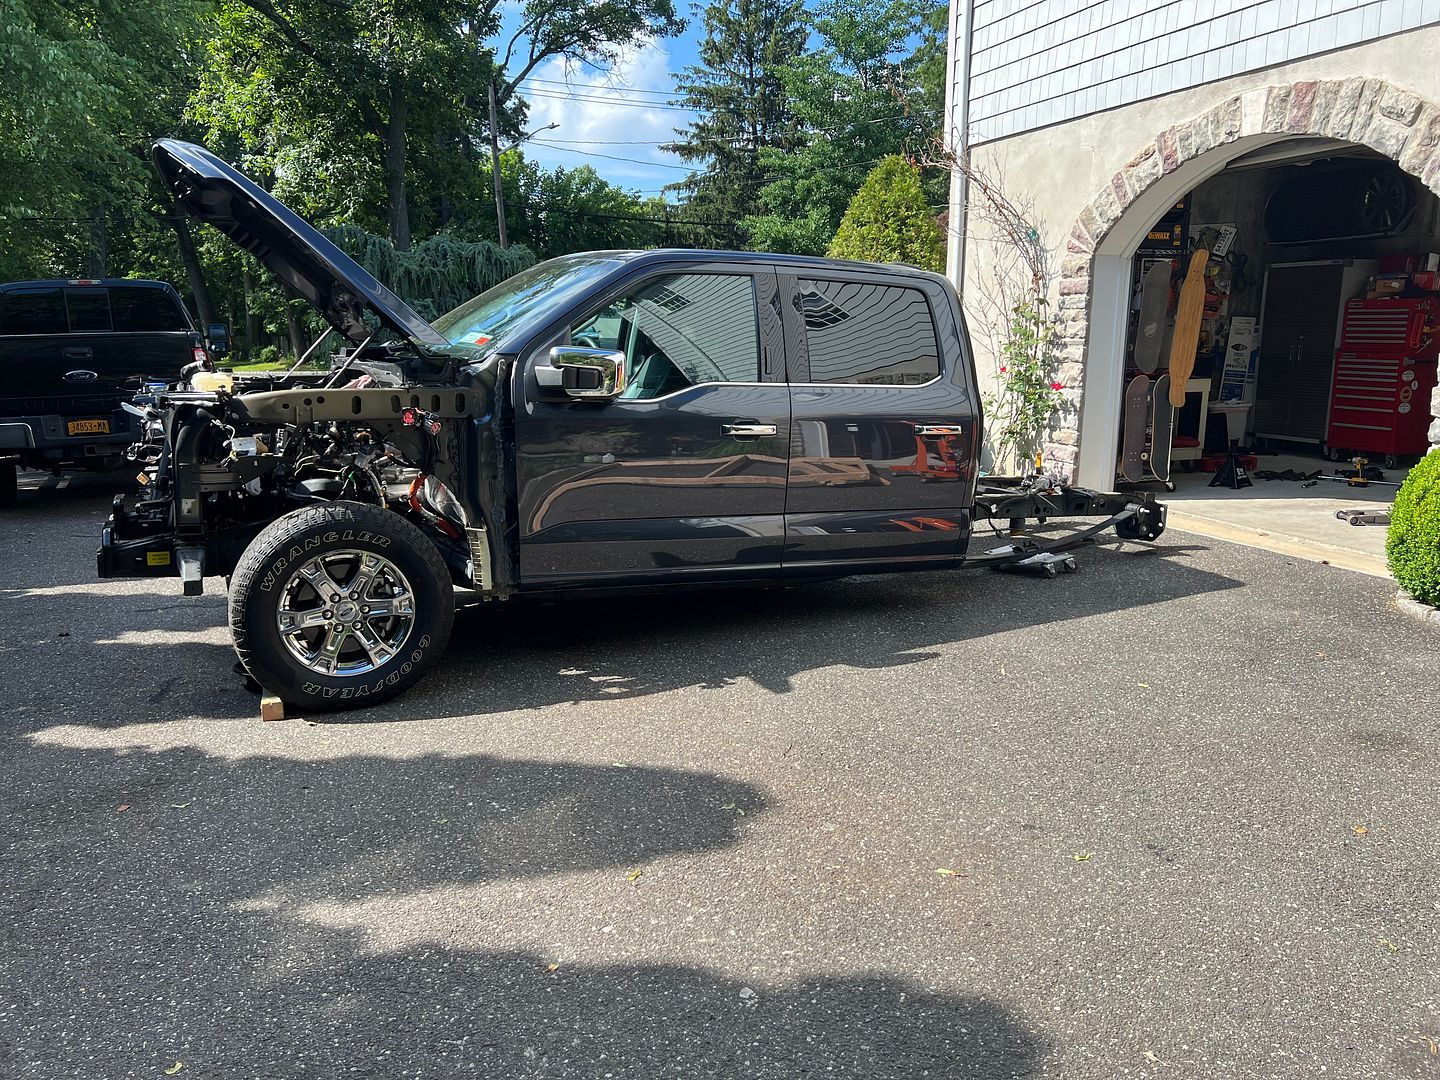
But to be honest now that the monument to the F150 greets me every AM on my way to work and when I get home I'm getting used to the idea of having the truck body up there.
Its actually very very stable.

If this giant boat is ok why isnt a tiny truck body ok?
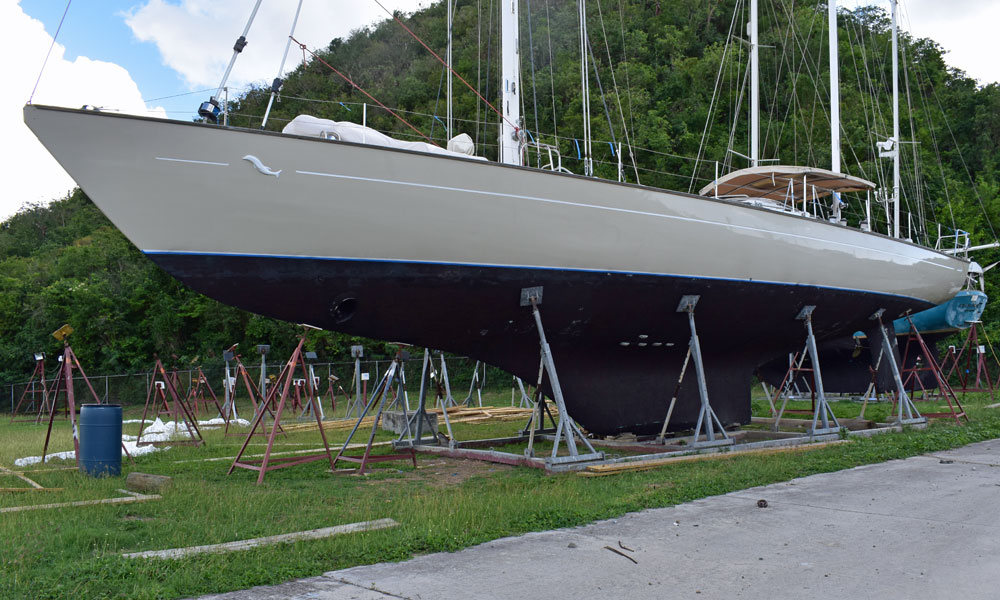
Just think of the wood platform as a giant jack stand
seems kinda normal now
maybe?
This is how I convince myself stuff like this is OK. Ha
XTF #2
build start date June 19 2023
GTM # 344
Build Start December 2010
First track day April 2013
-
Post Thanks / Like - 0 Thanks, 1 Likes
-
Not a waxer

-
Post Thanks / Like - 0 Thanks, 5 Likes
-
Originally Posted by
kabacj
If this giant boat is ok why isn’t a tiny truck body ok?
Is that your boat? Now you've got my attention! She's a beauty!
MkIV Roadster build: Gen 2 Coyote, IRS, TKO600. Ordered 10/24/18. Delivered 1/29/19. Engine installed 8/8/21. First start 9/12/21. First go-kart 9/17/21. Off to paint 4/11/22. Back from paint 12/30/22.
Build thread here.
-
Member
Originally Posted by
Jeff Kleiner
Hey John...just sayin'


Jeff
Haha. You got me Jeff for sure. I originally planned on taking the truck down off the stand I had casters and plywood pads built into the lifting frame but. It kinda looks good to me in the driveway.
Nobody has mentioned anything to me about it, but Saturday Im sure they all will come by to see whats going on this time.
XTF #2
build start date June 19 2023
GTM # 344
Build Start December 2010
First track day April 2013
-
Member
Originally Posted by
JohnK
Is that your boat? Now you've got my attention! She's a beauty!
Hey John
No I wish that was my boat. I have a Catalina 22 with a swing keel. I lifted that boat 4 feet in the air to drop the keel and repair it. Thats why I was pretty sure I could lift an aluminum shell a few feet up. The boat still floats so hopefully the truck lands safely too.
XTF #2
build start date June 19 2023
GTM # 344
Build Start December 2010
First track day April 2013
-
Post Thanks / Like - 0 Thanks, 1 Likes
-
Member
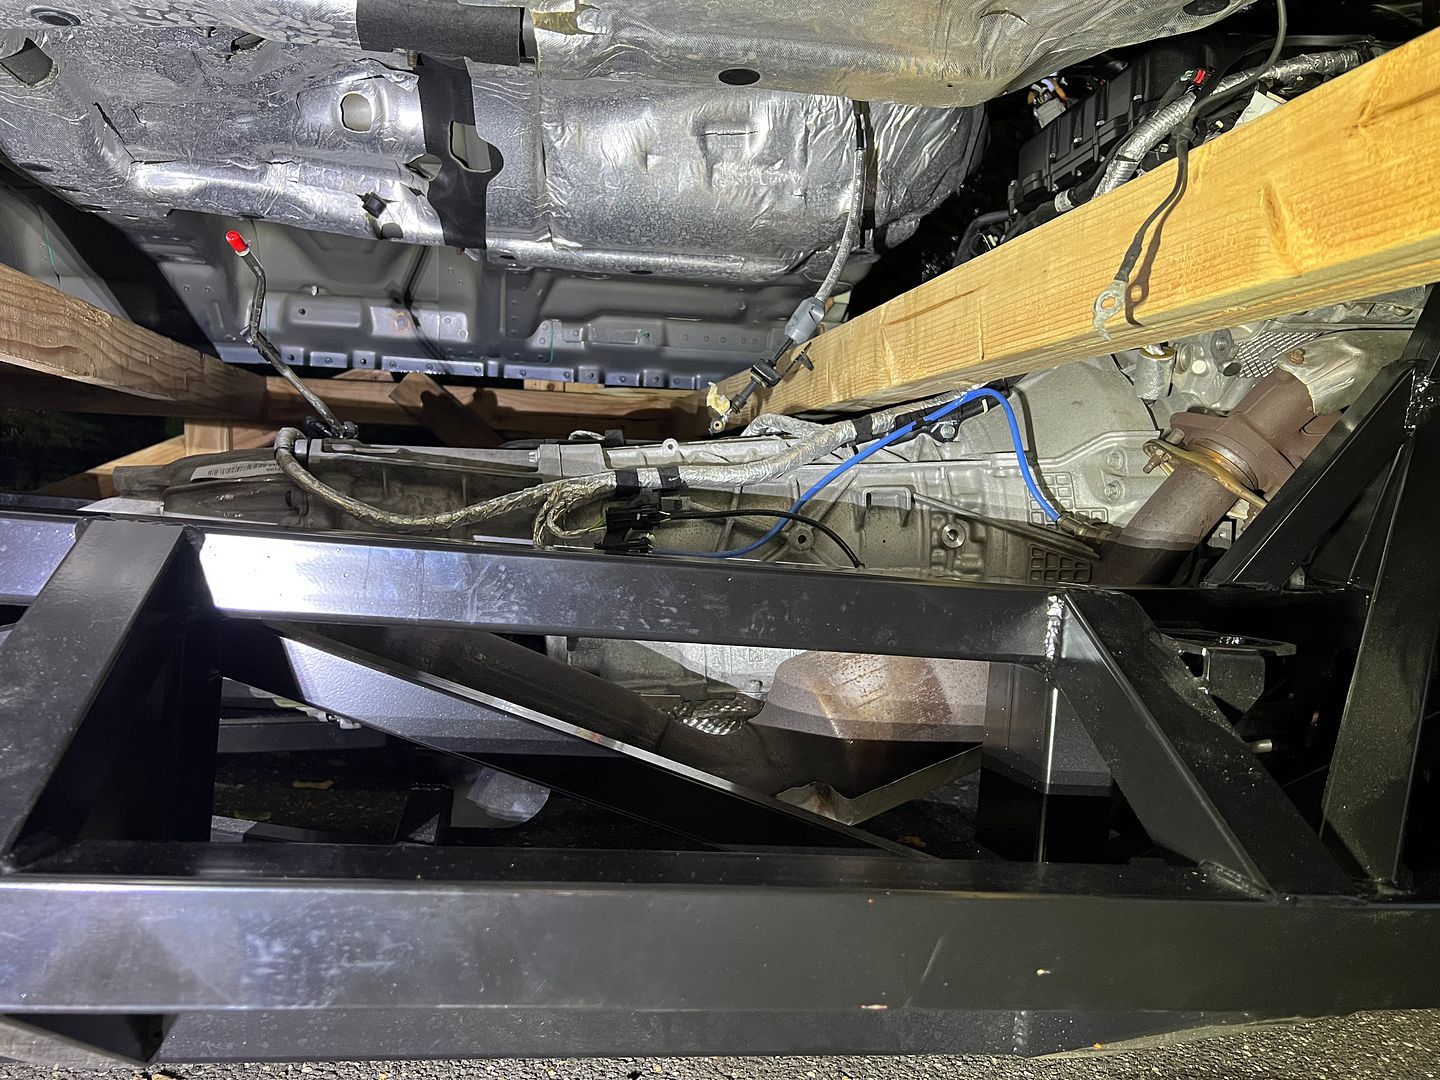
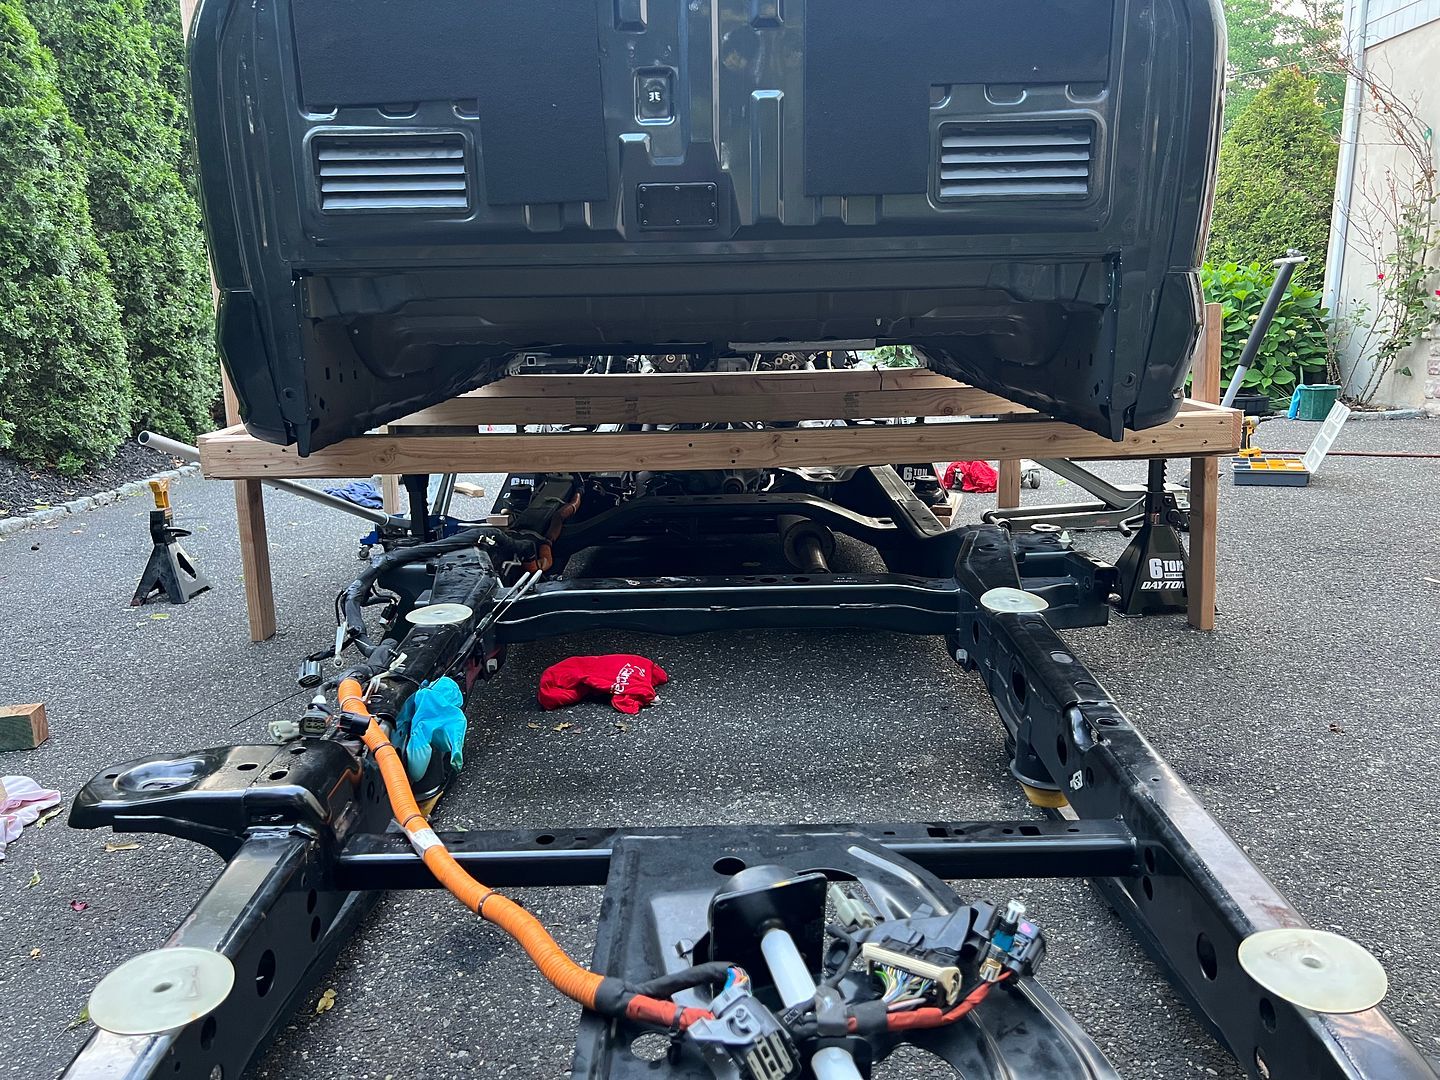
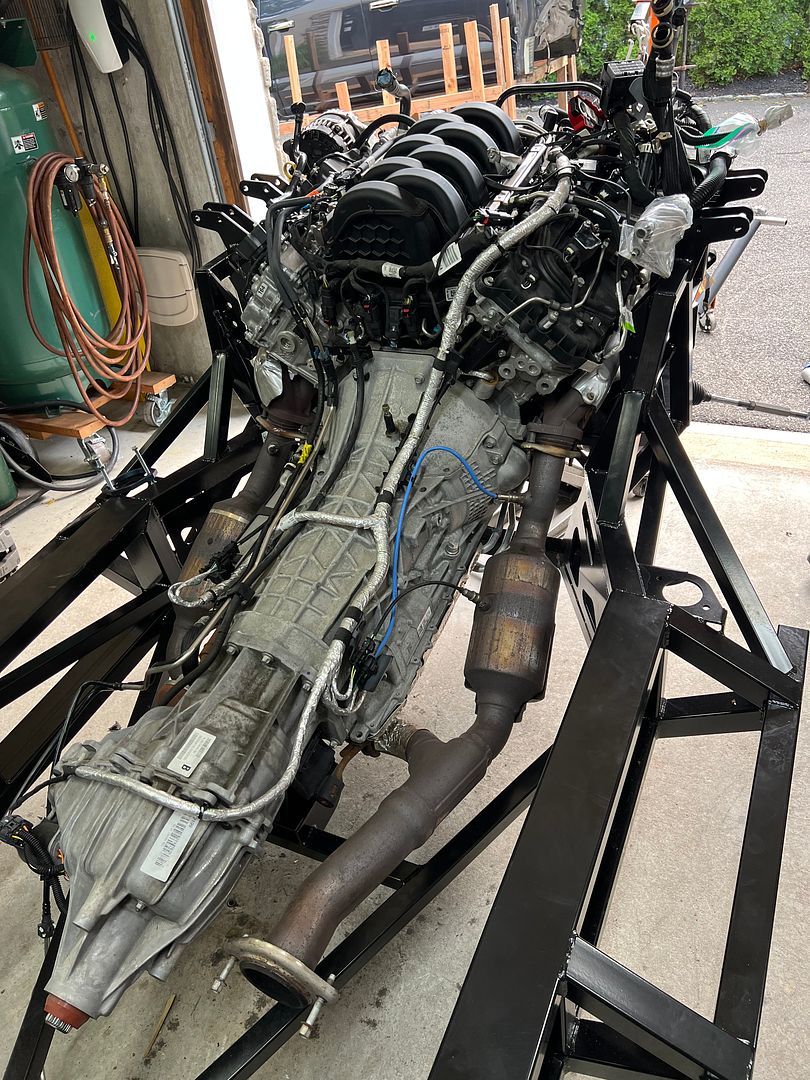
So its 10.00 at night on Sunday and we got the motor and frame out from under the body. I under gunned the lifting frame. Making a 6.5 by 8 foot rectangle using only one 2/4 allowed too much flex for my comfort, so I ended up laminating another 2x4 inside the original frame to make everything much stiffer mid lift. That and figuring out how to get the frame / motor as low as possible and how to move it all around took some time.
But we got it done.
It was too late to drop the body down on to the casters like I had planned so its going to stay there for a week.
The next step is to free the motor/ transmission and front differential from the frame.
I plan to lift the whole assembly up and drop it into the factory five frame that should arrive on Friday.
XTF #2
build start date June 19 2023
GTM # 344
Build Start December 2010
First track day April 2013
-
Post Thanks / Like - 0 Thanks, 1 Likes
-
Member
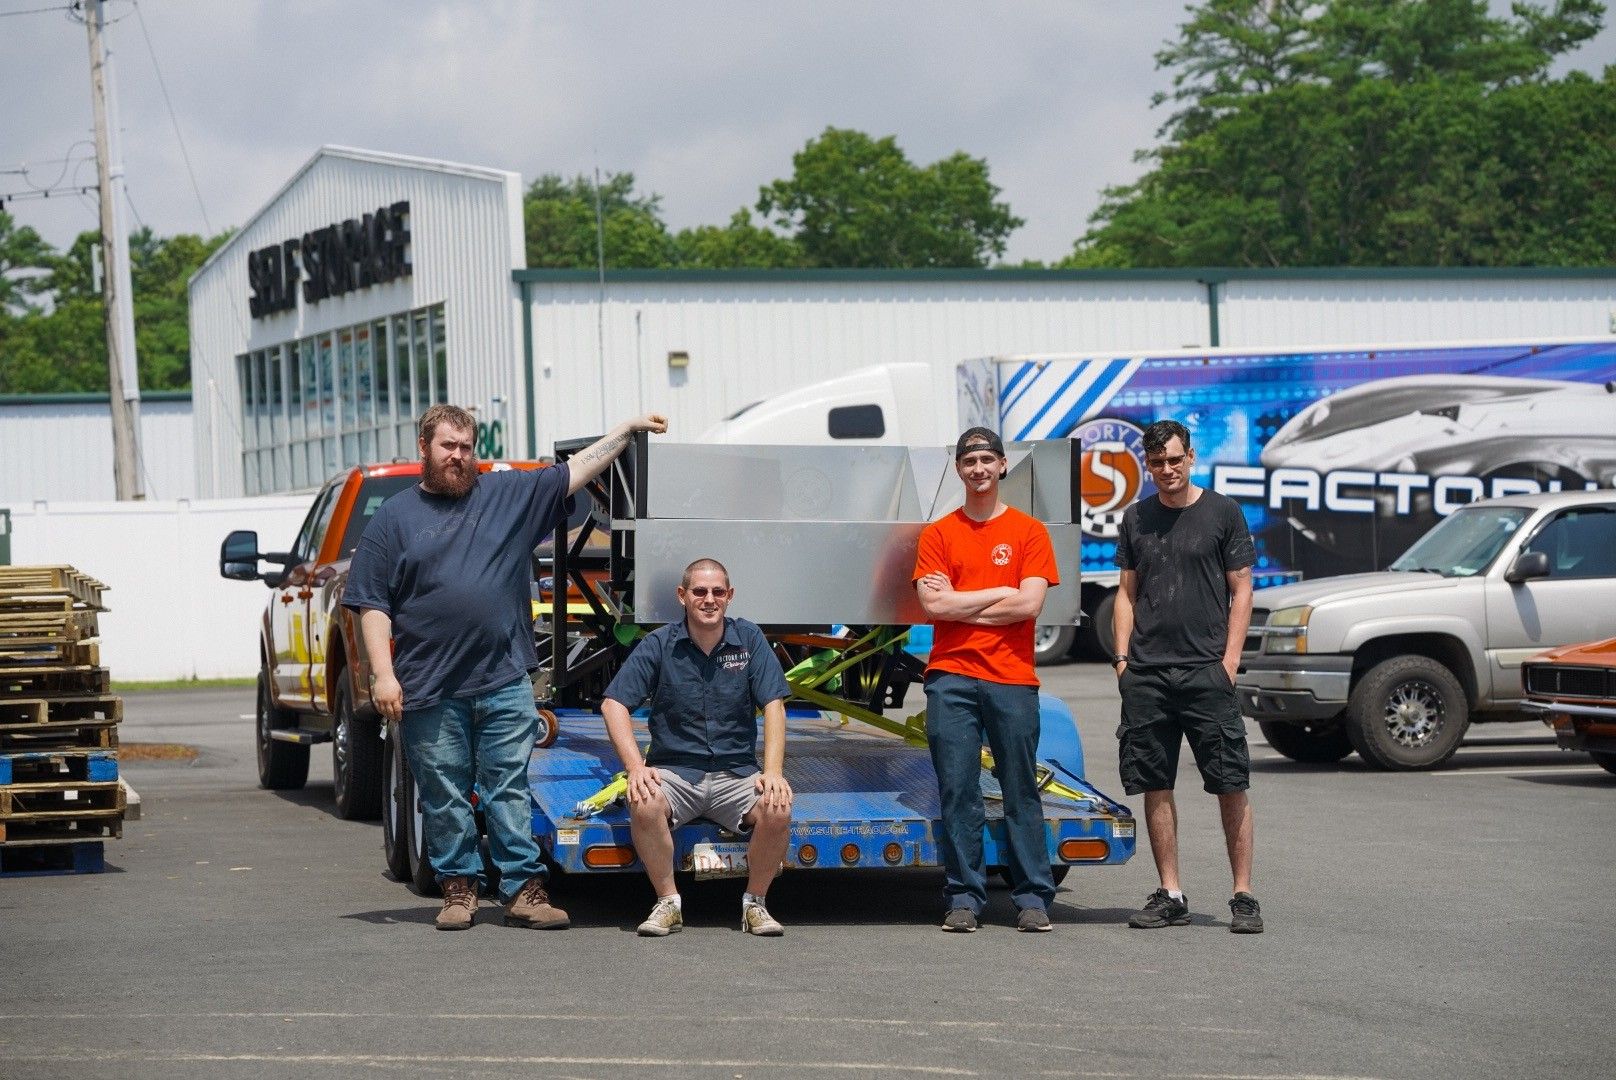
Today is the day!
Customer frame number two is on its way from Factory Five right now! The crew left at O dark 30 to beat the holiday traffic. I can’t wait!
Last edited by kabacj; 06-30-2023 at 06:57 AM.
Reason: Typo
XTF #2
build start date June 19 2023
GTM # 344
Build Start December 2010
First track day April 2013
-
Post Thanks / Like - 0 Thanks, 2 Likes
-
Member
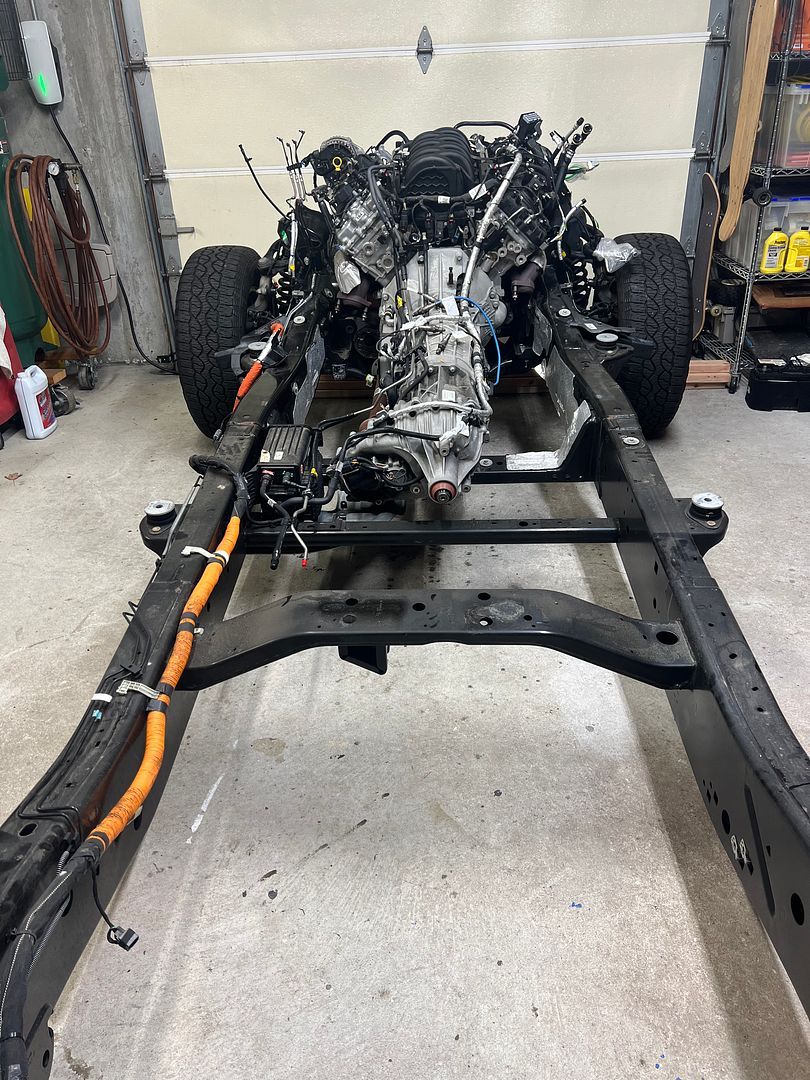
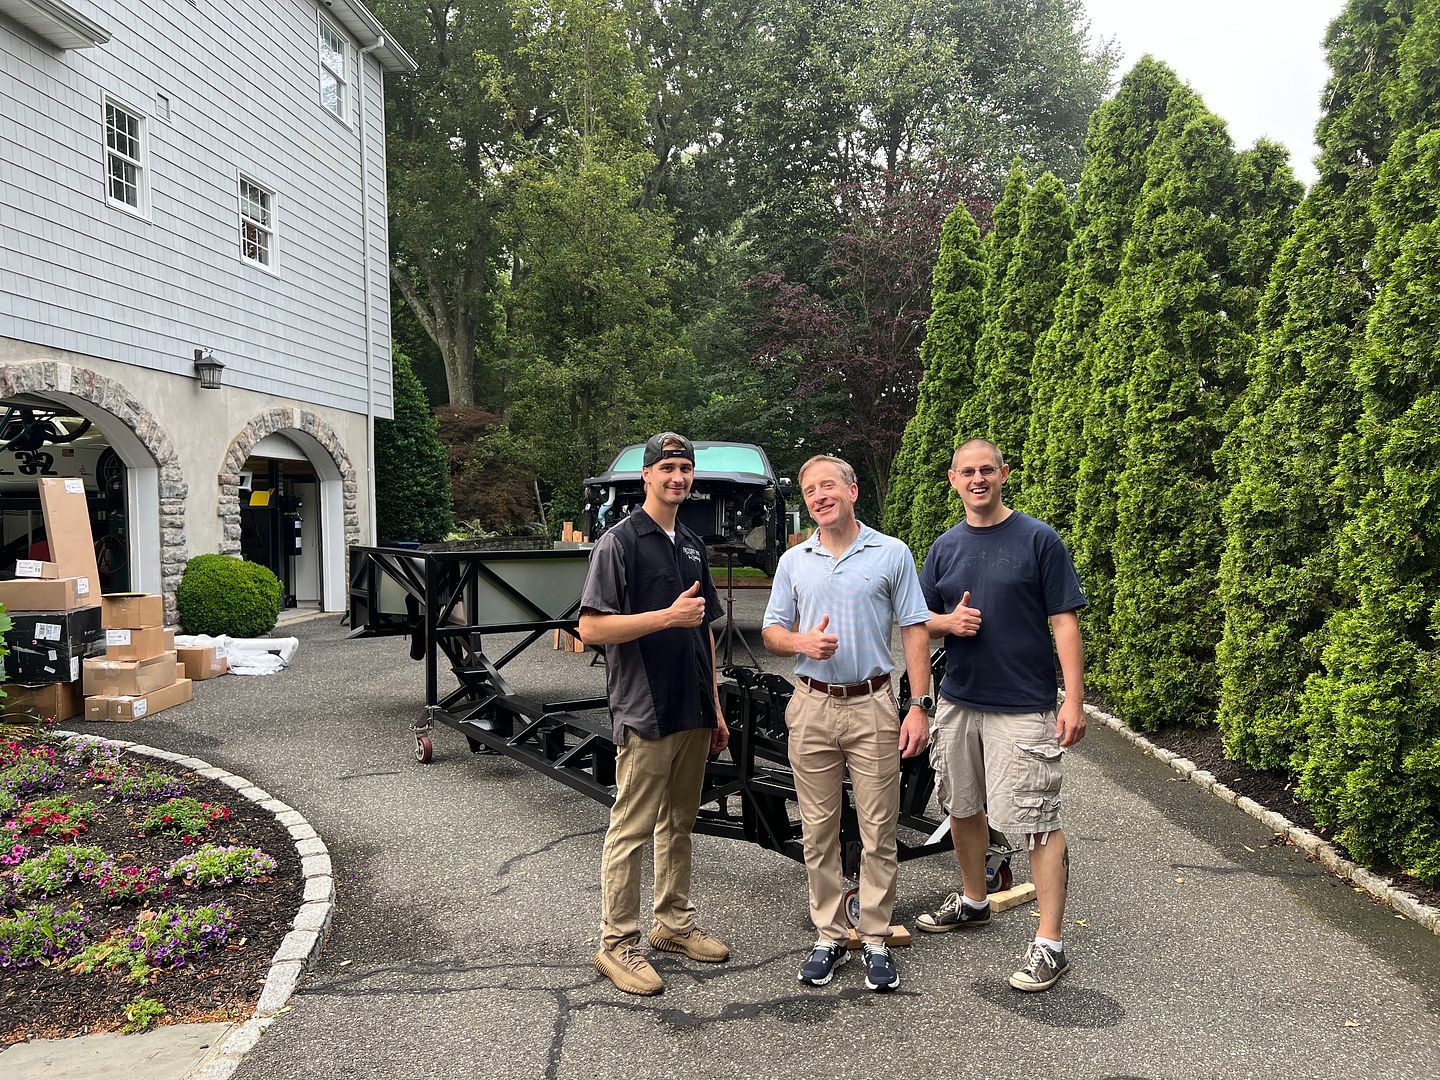
Delivery Day!! Woo hoo!
The guys rolled in bright and early which was excellent. Some quick teamwork and we had all of the boxes unloaded.
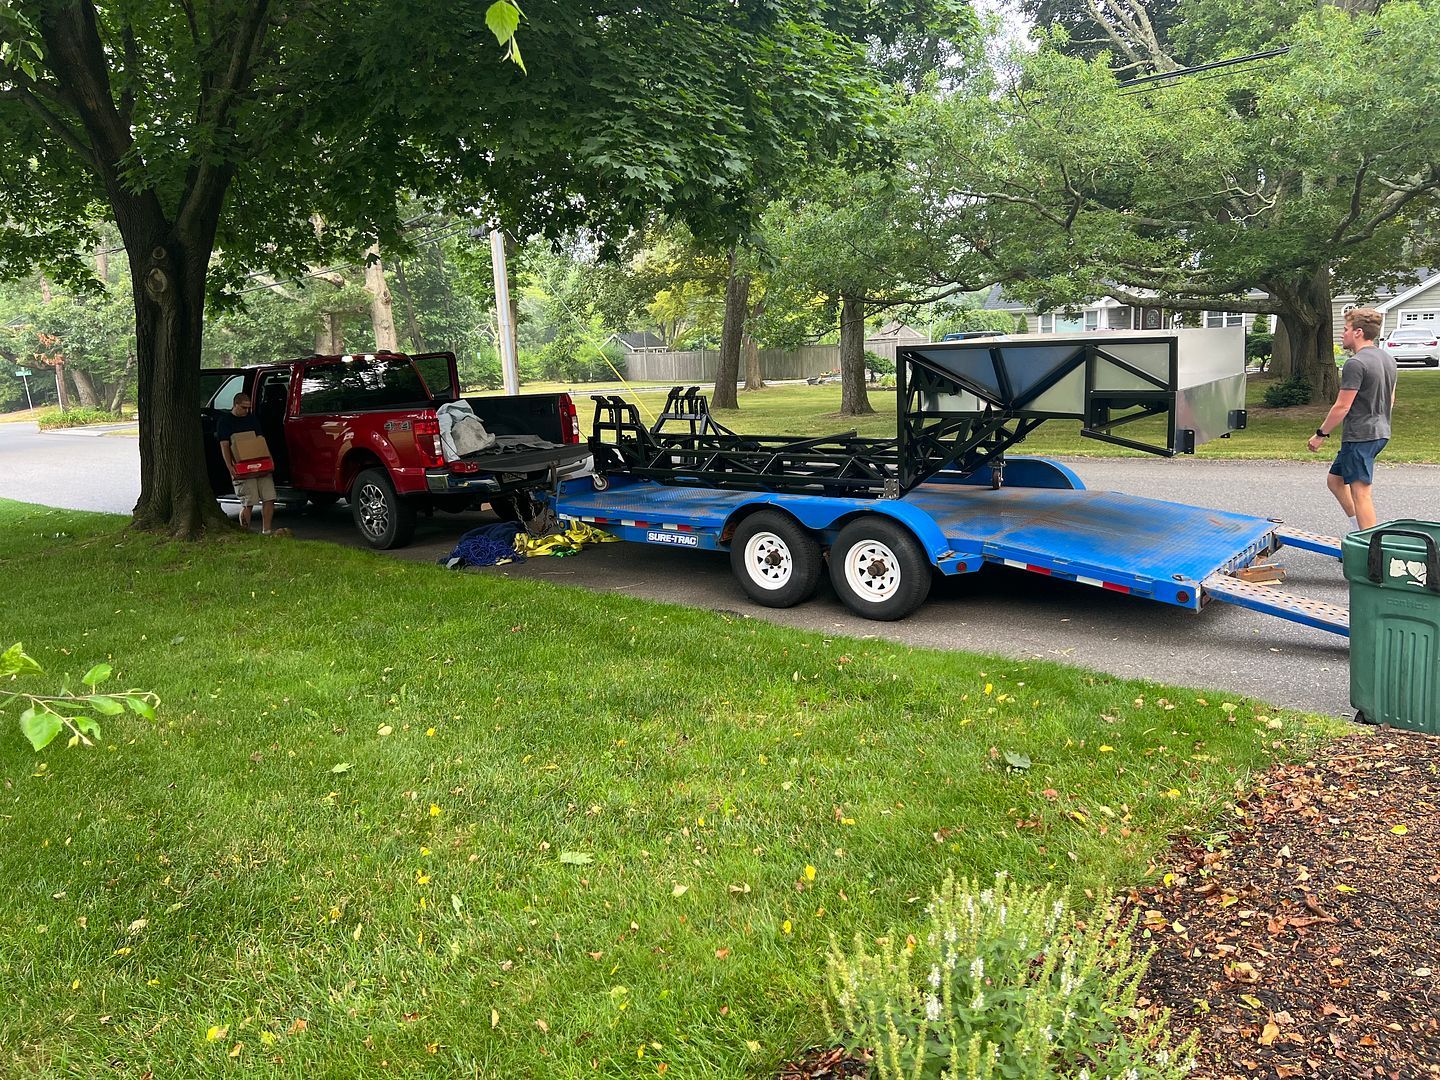
Next we rolled the frame off the flatbed adjusting the loading ramps to account for the offset of the casters.
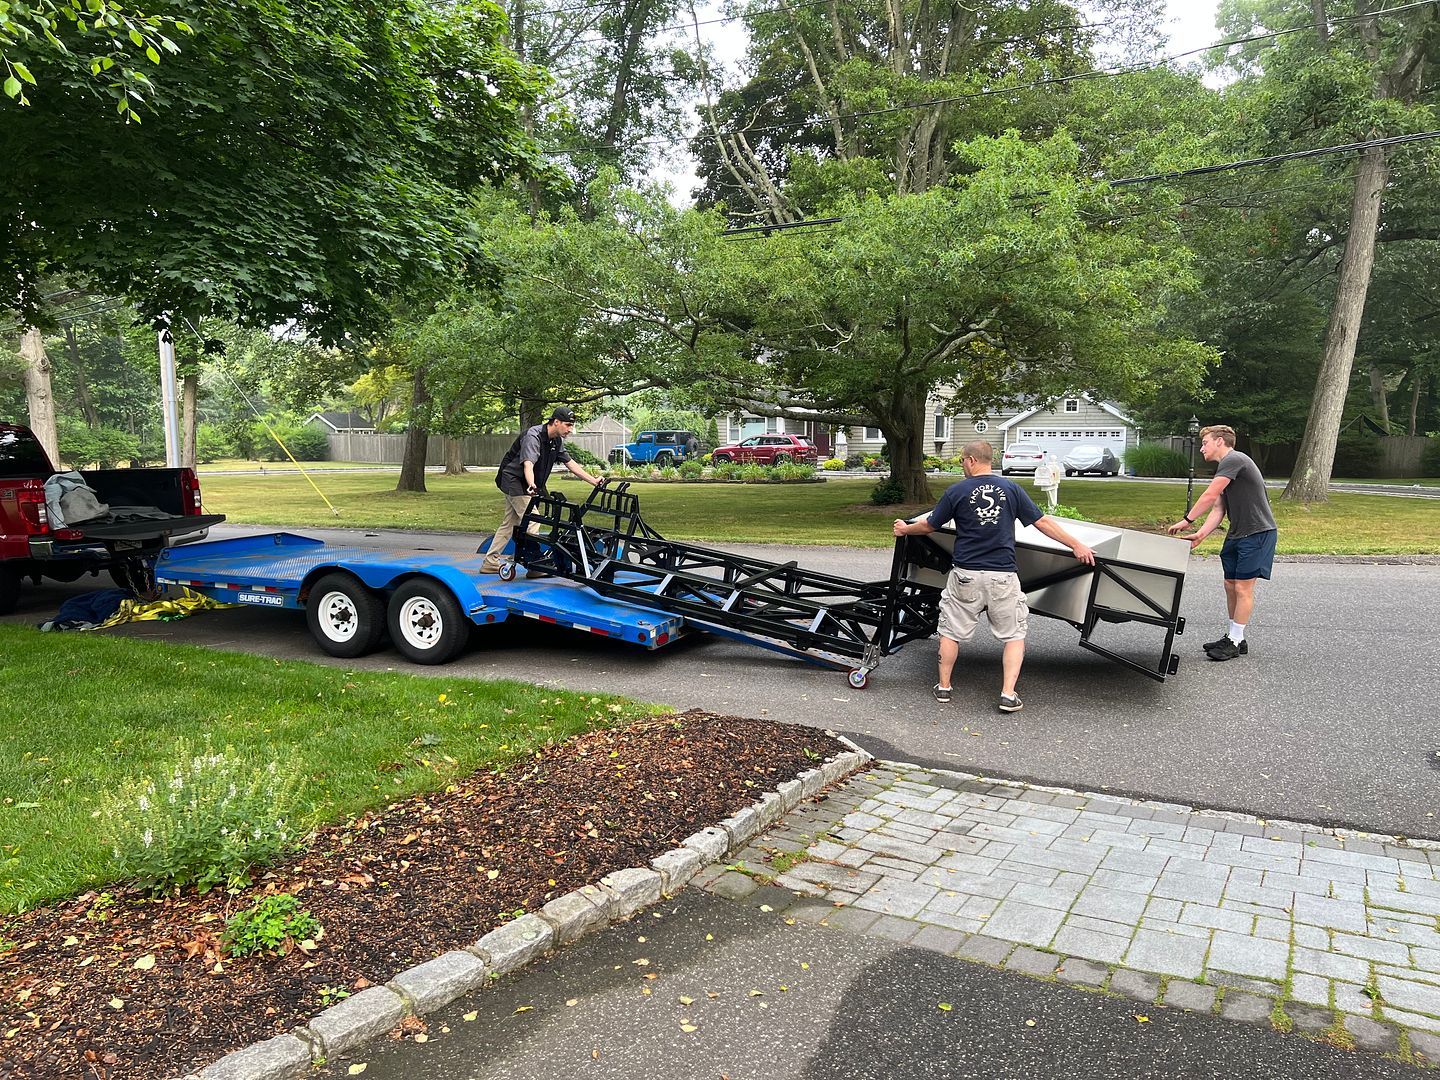
In no time we were unloaded. Time to get building!!!
oh after I go to work. I really need to adjust my priorities.
XTF #2
build start date June 19 2023
GTM # 344
Build Start December 2010
First track day April 2013
-
Post Thanks / Like - 0 Thanks, 2 Likes
-
Member
-
Post Thanks / Like - 0 Thanks, 1 Likes
-
Member
-
Post Thanks / Like - 0 Thanks, 3 Likes
-
Member
-
Post Thanks / Like - 0 Thanks, 2 Likes
-
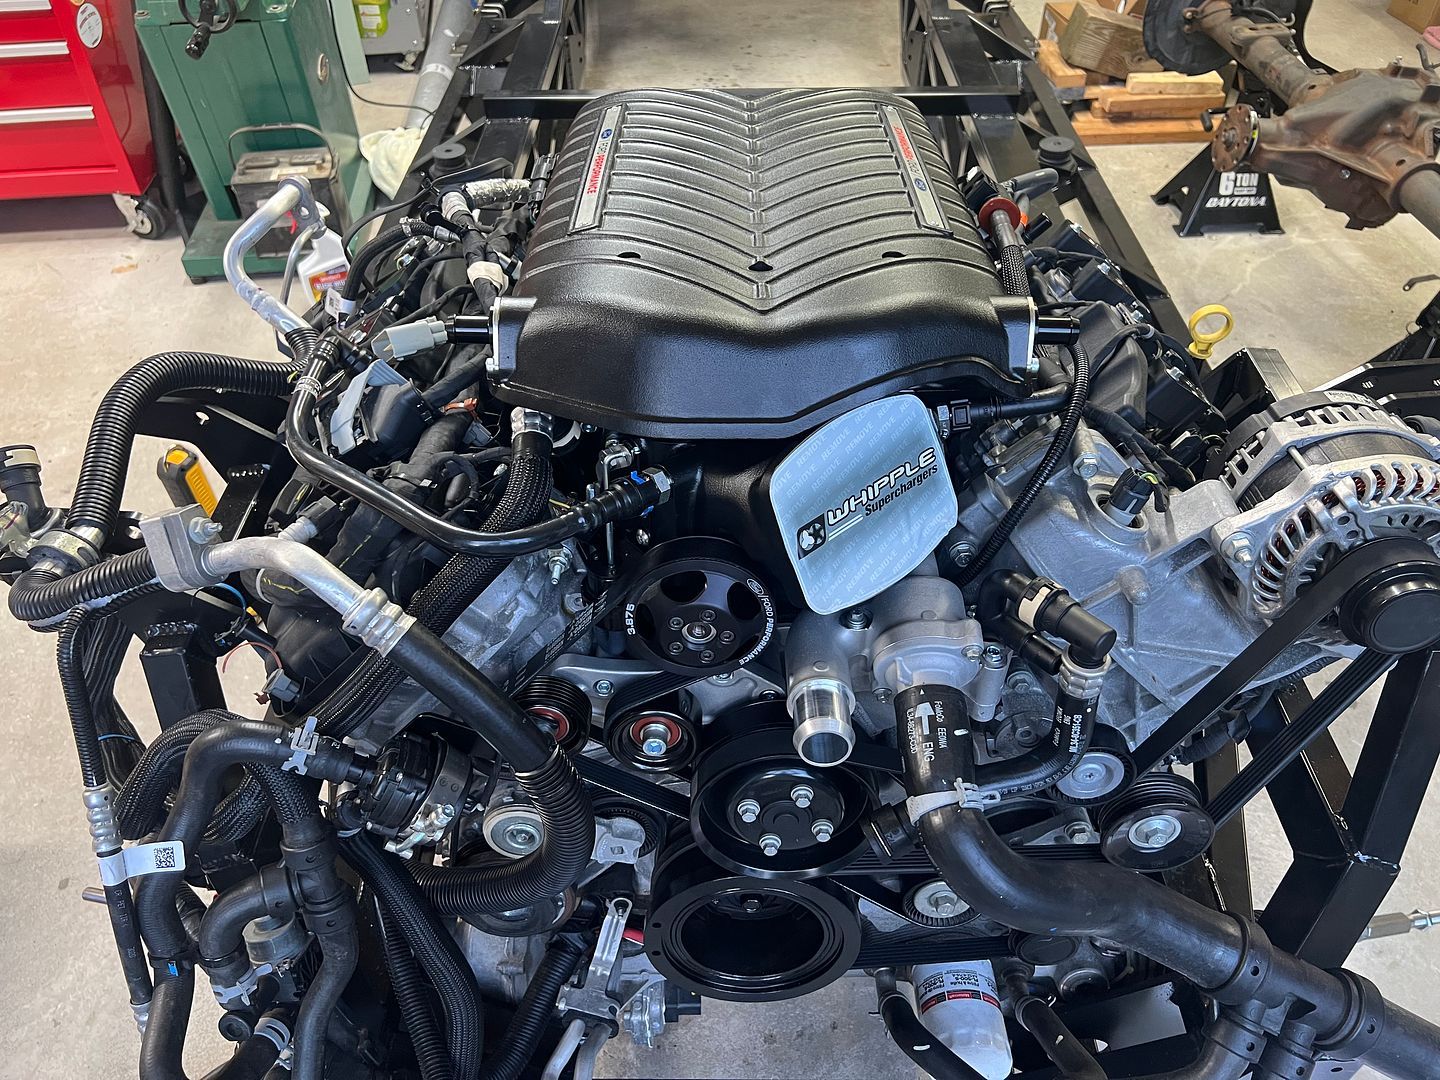
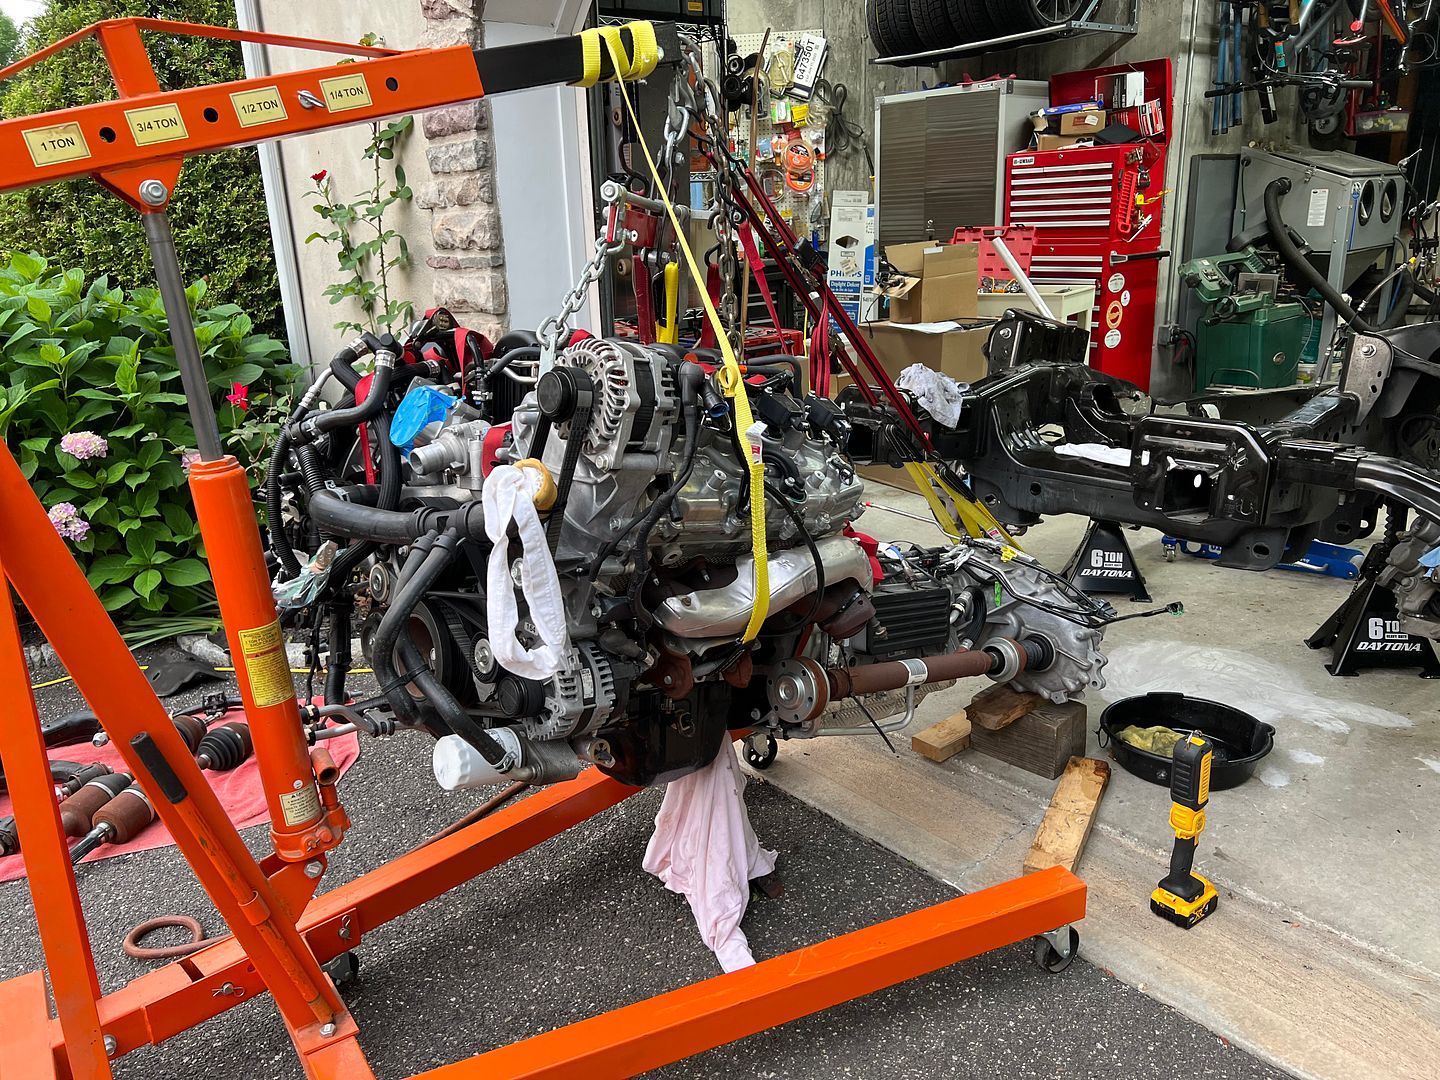
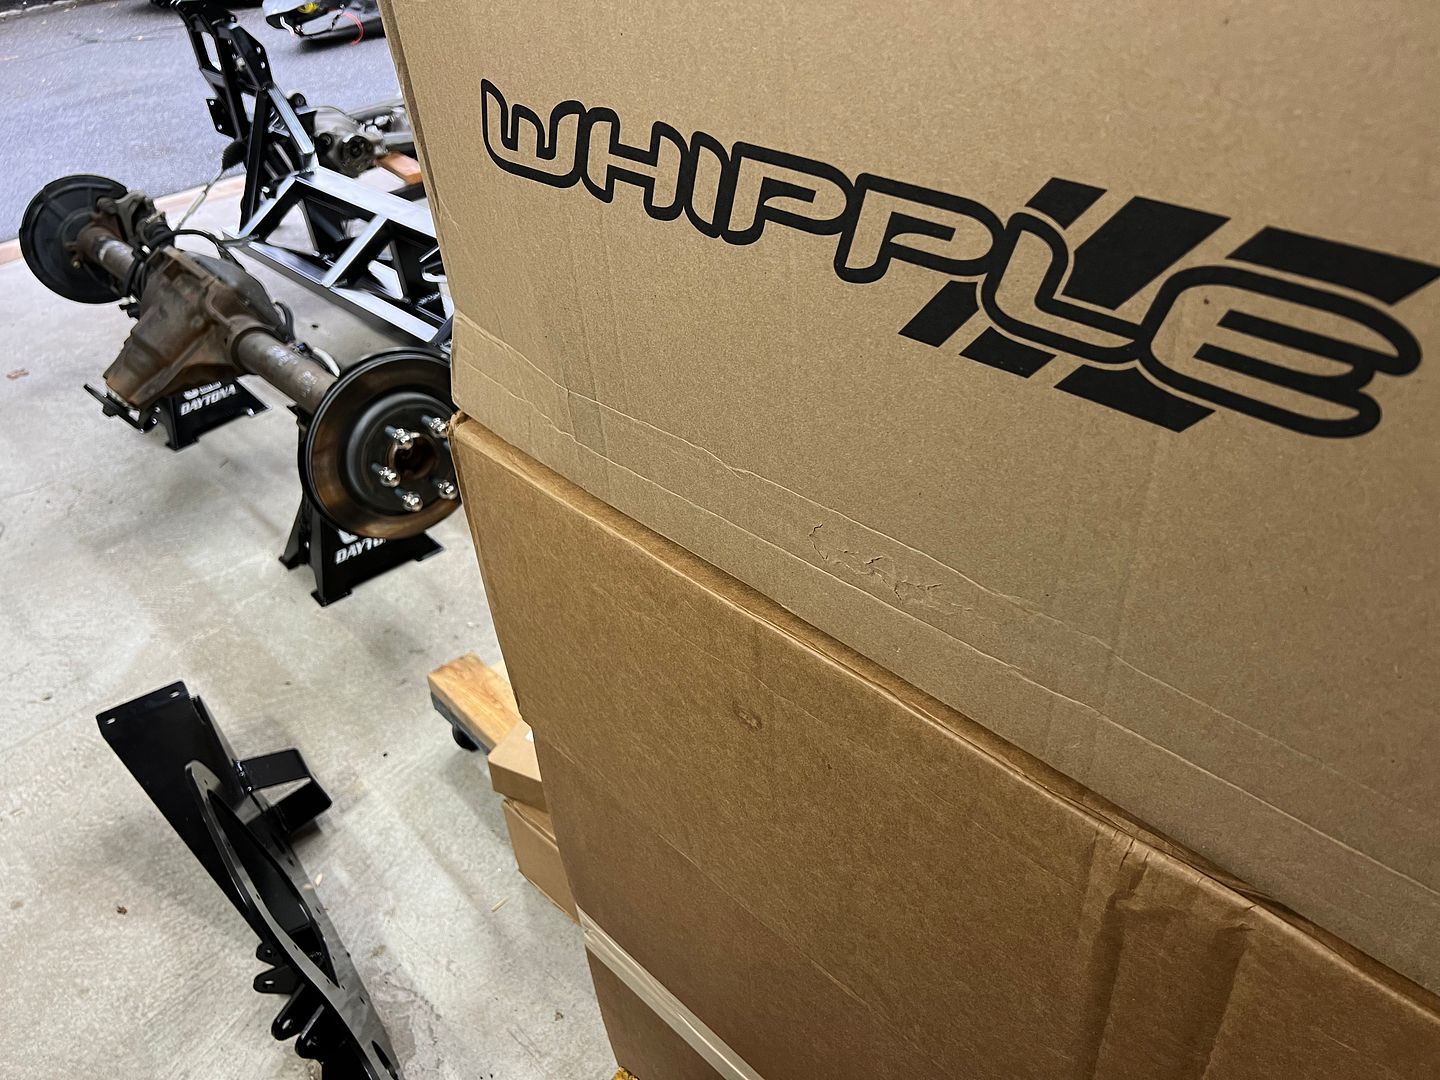
East Coast Speed Machines

you will love that whipple - I had one on my last truck and had over 45,000+ miles on it and it just kept going!
FFR 1879, Blown DSS 306,REDLINE management, VeryCoolParts Tuned 460RWHP
FFR 818S, The Flash, Chassis #5, 2.0L, LSD, Electromotive TEC-S, VCP Tuned, 278RWHP 265 RWTQ
FFR 6651, Green Lantern, 408W Crate, Hellion 66mm Turbo, JGS Waste gate / Blowoff valve, Tec-GT management, VCP Tuned, 575 RWHP, 690 RWTQ
FFR 8335, Black Mamba, 289 FIA CSX 2001 tribute car, 347, 48 IDA webers, VCP Tuned, 311 RWHP 386 RWTQ, 3-link, Trigo's
FFR 0004, Gen 3 , Hawk Coupe, Coyote twin turbo, 683 RWHP 559 RWTQ, IRS, VCP Tuned. "not too shabby"
US ARMY Maintenance Test Pilot (CW4 Retired)
-
Senior Member

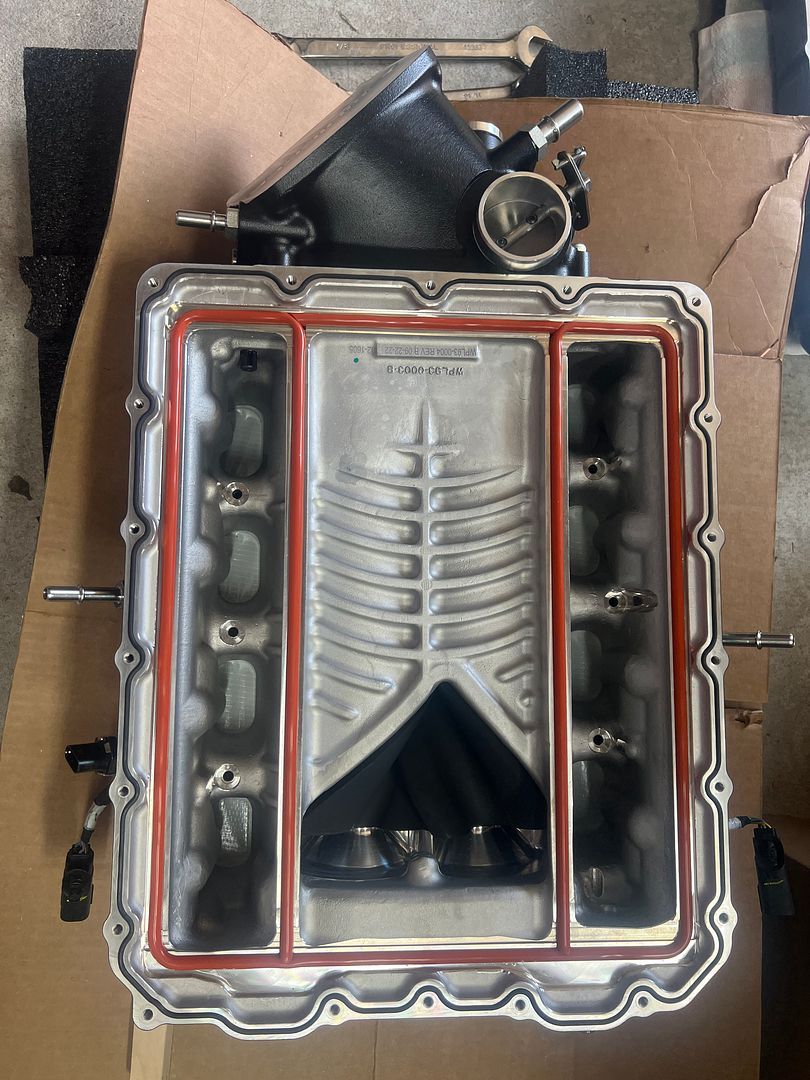
I am surprised that Ford does not call out a cam shaft appropriate for boost. That is leaving some performance on the table. How much boost does this deliver? Compression is not reduced?
My son has supercharged two Lexus V8s for a Supra; the first with an earlier Ford blower. DIY is a challenge. The second engine is (Whipple) blown hard enough that it required a stronger bottom end and reduced compression.
jim
-
East Coast Speed Machines
The stock bottom ends on the these will go up to 800-1000hp all day long. My gen2 made 650hp at 12 psi - burnouts with the trailer attached... The coyotes are missing a bit of torque - but they love forced induction -
FFR 1879, Blown DSS 306,REDLINE management, VeryCoolParts Tuned 460RWHP
FFR 818S, The Flash, Chassis #5, 2.0L, LSD, Electromotive TEC-S, VCP Tuned, 278RWHP 265 RWTQ
FFR 6651, Green Lantern, 408W Crate, Hellion 66mm Turbo, JGS Waste gate / Blowoff valve, Tec-GT management, VCP Tuned, 575 RWHP, 690 RWTQ
FFR 8335, Black Mamba, 289 FIA CSX 2001 tribute car, 347, 48 IDA webers, VCP Tuned, 311 RWHP 386 RWTQ, 3-link, Trigo's
FFR 0004, Gen 3 , Hawk Coupe, Coyote twin turbo, 683 RWHP 559 RWTQ, IRS, VCP Tuned. "not too shabby"
US ARMY Maintenance Test Pilot (CW4 Retired)
-
Post Thanks / Like - 0 Thanks, 1 Likes
-
Member
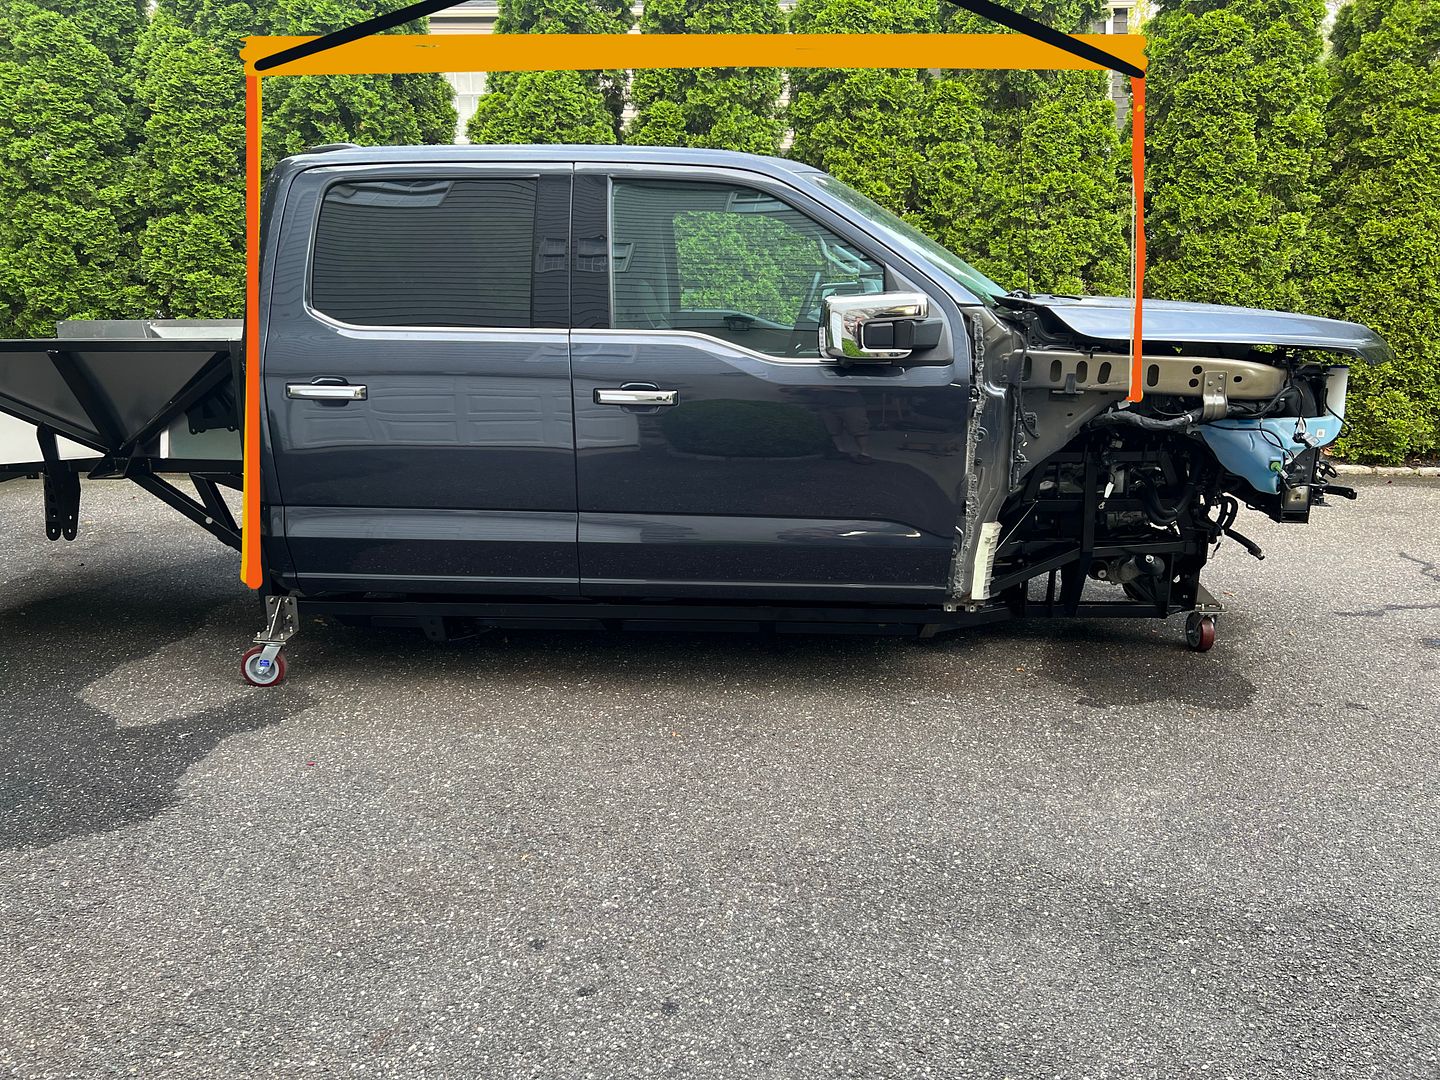
two post lift? how about 2x4 lift
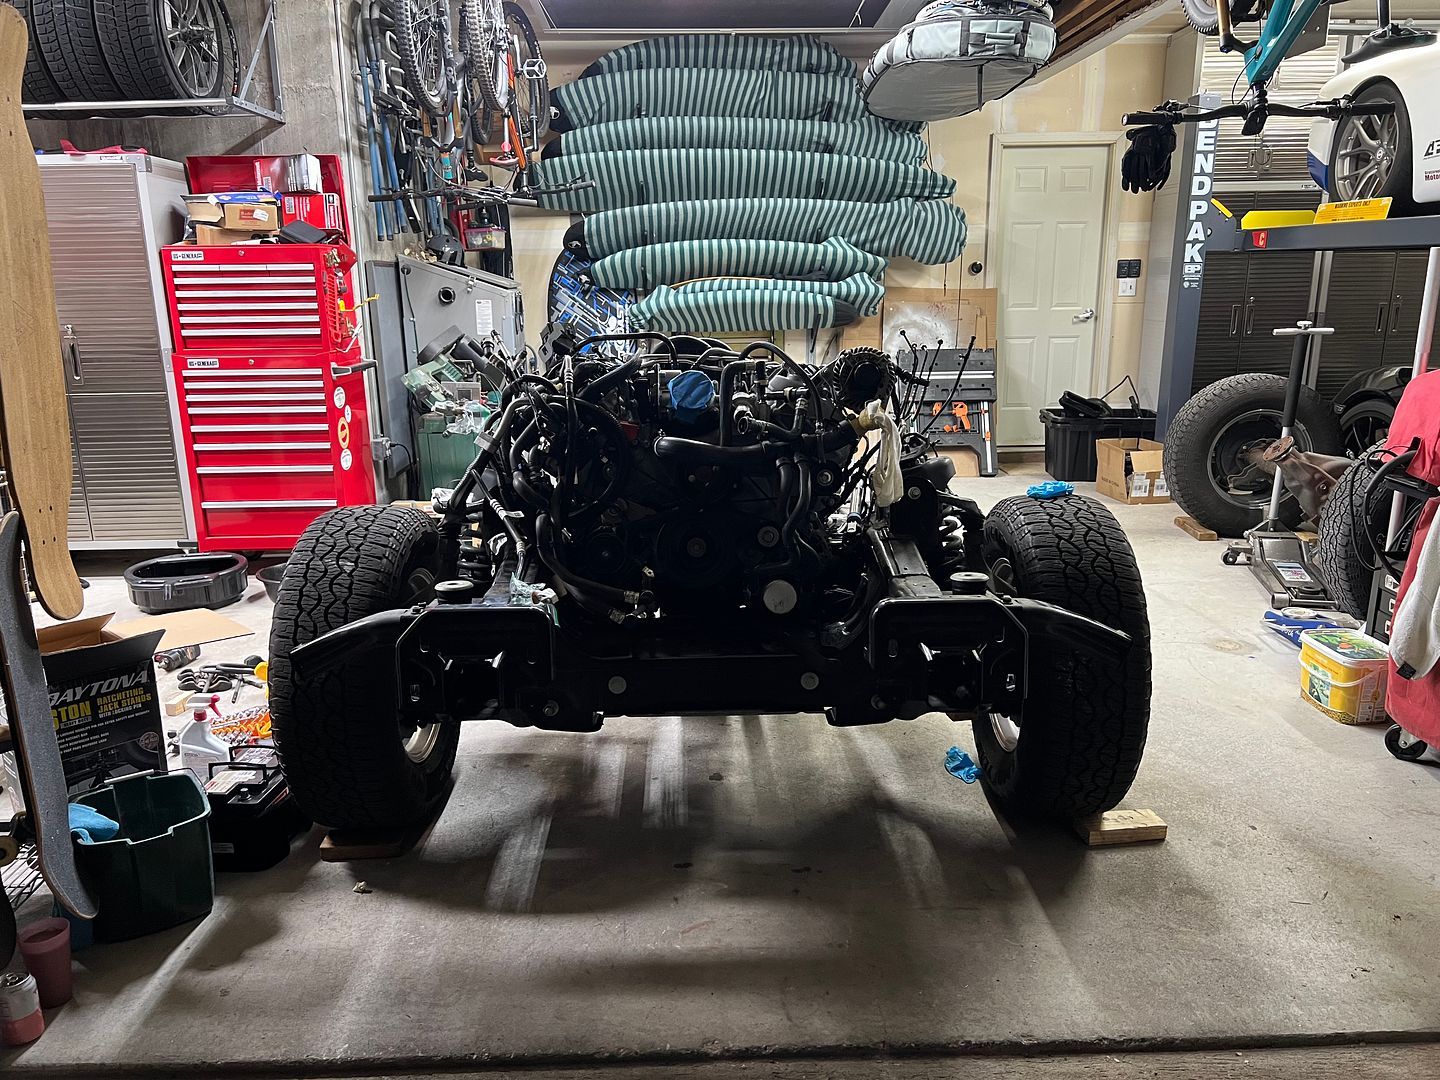
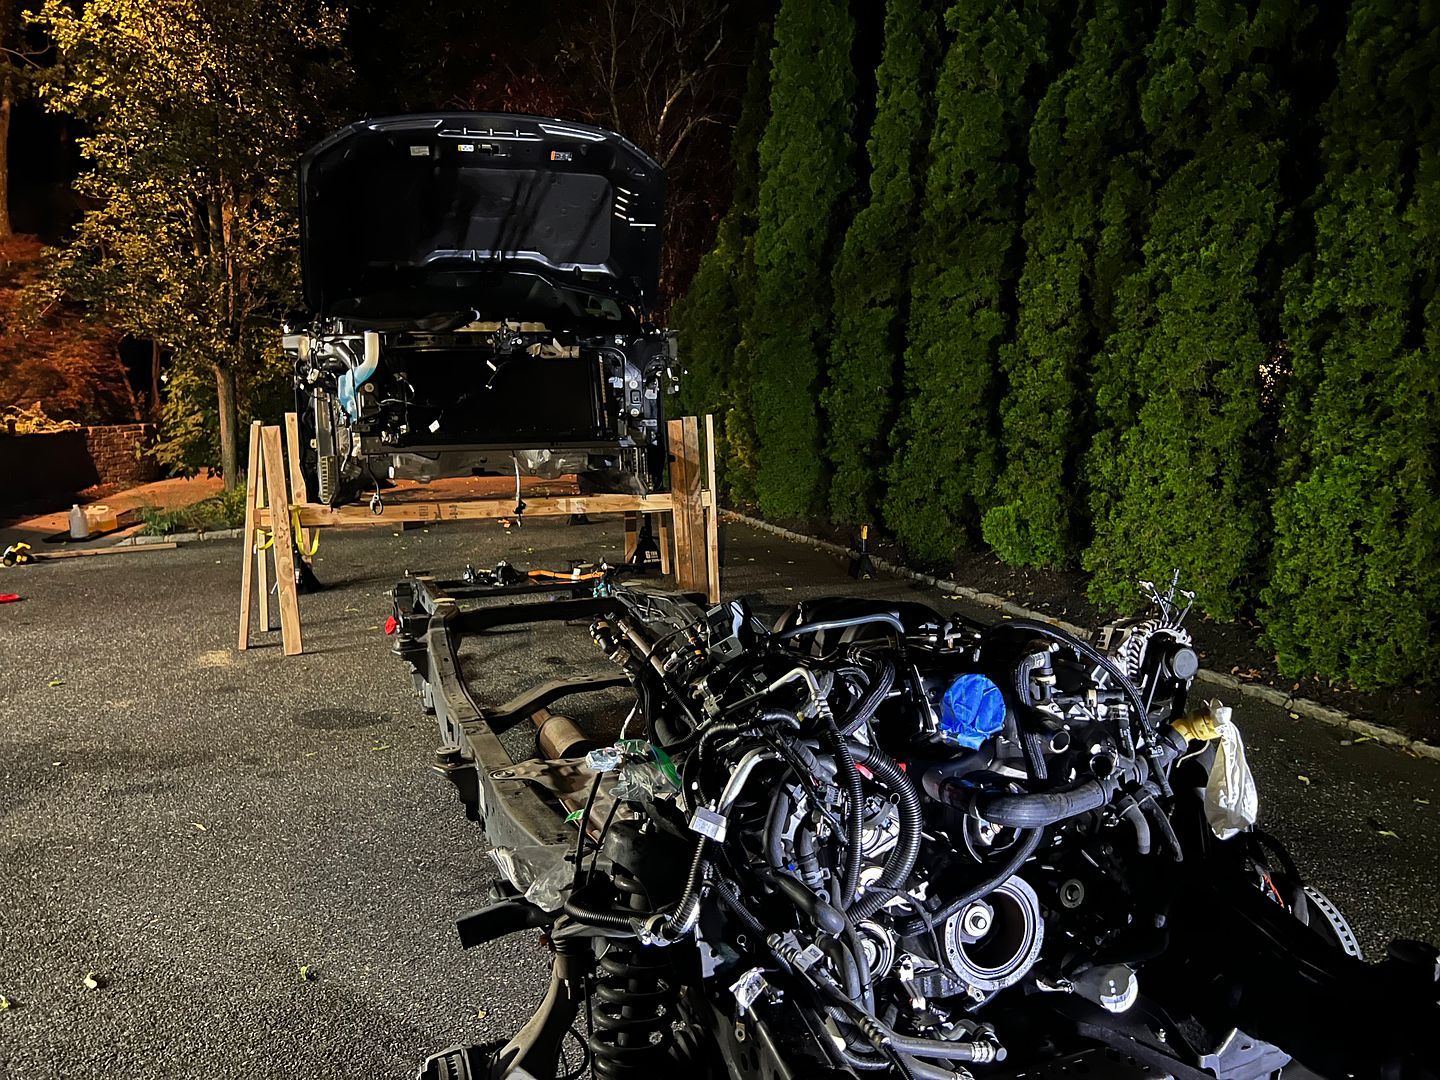
Now that the motor is complete its time to put the cab on the frame. The fourth of July was on and off thunder showers here in the northeast so we were delayed a bit getting started. The sun came out and we got to lifting
its funny how having the body 30 or so inches up is really no big deal now.. at least it does not feel like a big deal. A few lbs of 3 inch deck screws and this platform is rock solid. The boat jacks really help in the front as well as additional support points although they are time consuming to adjust as we lift. One side I was lifting with a high lift jack and the other was the engine crane lifting the back then the front. Slowly stepping up 6 inches at a time.
We kept resetting the legs downward every 6 or 8 inches of lift to ensure that if something failed the body does not have too far to fall. My 18 volt dewalt impact got a workout.
And like a glove! we are 43 inches up and the motor/ chassis rolls right under with loads of clearance. haha. That was easy... well not that easy, but its possible.
_IMG_0205.png?width=1920&height=1080&fit=bounds)
After lowering back down to 25 inches or so I need to re configure the platform to clear the transmission which is quite a bit higher than the chassis.
thankfully there weren't any fireworks with the lift, but now it was time to call it quits an go see some Fireworks.
XTF #2
build start date June 19 2023
GTM # 344
Build Start December 2010
First track day April 2013
-
Post Thanks / Like - 0 Thanks, 1 Likes
-
Given the amount of labor and the amount of lumber, I'm wondering if it wouldn't be worthwhile for builders to rent a telehandler or similar equipment to simply lift the cab assembly off the Ford chassis and onto the XT1 chassis. Around here you can rent a 6,000lb telehandler for about $250/day. I've even thought about whether it would be possible to use the forks on my Deere tractor, but I'm not sure my model could handle the weight of a fully outfitted cab.
Cheers, John
-
Member
Originally Posted by
dukegrad98
Given the amount of labor and the amount of lumber, I'm wondering if it wouldn't be worthwhile for builders to rent a telehandler or similar equipment to simply lift the cab assembly off the Ford chassis and onto the XT1 chassis. Around here you can rent a 6,000lb telehandler for about $250/day. I've even thought about whether it would be possible to use the forks on my Deere tractor, but I'm not sure my model could handle the weight of a fully outfitted cab.
Cheers, John
I agree with you John. A forklift of some sort is a much faster and safer option.
This exercise was more about testing an idea, than getting it done the easiest or best way. I can borrow a fork lift for free from a friend.
The cab is front heavy, but its not especially heavy. I bet a garden tractor could lift it. Lets find out.
Ill pull out my racing scales and get corner weights and total weight.
XTF #2
build start date June 19 2023
GTM # 344
Build Start December 2010
First track day April 2013
-
Post Thanks / Like - 1 Thanks, 1 Likes
-
Member
Well this cab is not a feather weight! You will need a reasonable size tractor to lift it. Its definitely above what a mini tractor is rated to lift to full height. Since the tractors are not rated for what they can lift to half height, we might need more testing 
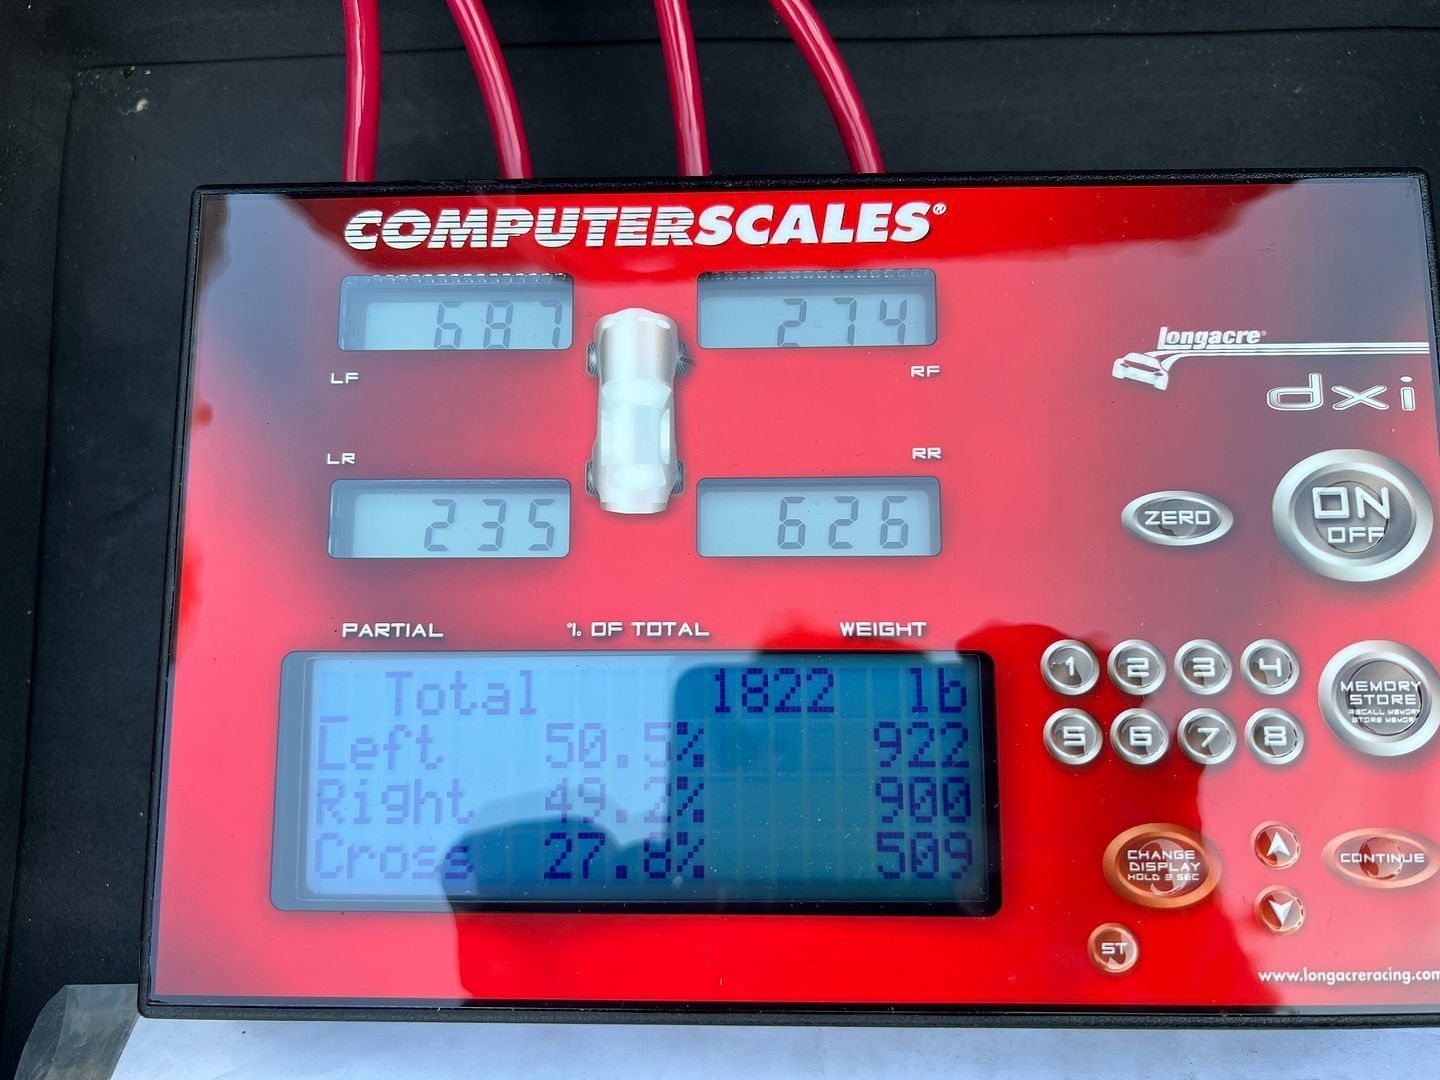
Note that this weight includes the 2x4 platform so lets subtract 250 lbs . 1,572 lbs. Thats pretty heavy!
The other thing to consider is the distance between the cab and the bed structure and the cab and the motor is less than one inch when the cab is on its mounts. The final fitting requires decently fine positioning. A fork lift has fine adjustment on all axes. Thats a plus.
You also cant put the cab down fully as the bottom of the cab is concave. When supported on forks the cab is still 8 or 10 inches from home. The final drop will need to happen off jack stands using floor jacks.
Interesting results .
XTF #2
build start date June 19 2023
GTM # 344
Build Start December 2010
First track day April 2013
-
Post Thanks / Like - 1 Thanks, 3 Likes
-
Thanks for that awesome post! I had wondered about the total weight of the cab, and now I've got a real good idea -- really appreciate that. And you're right, that's just beyond what I'd be comfortable doing with my tractor that has a loader/forks. (Unfortunately my larger tractor that could easily handle that weight lacks a loader setup.)
As far as the shape of the cab and the clearance of forks, etc... Just thinking out loud, but if you were using a telehandler, I wonder about rigging it from above? Of course that requires all its own precautions, but it lets you avoid those issues underneath when you're trying to set it down.
Thanks again for a great post and letting us follow along on your early build.
Cheers, John
-
Member
XTF #2
build start date June 19 2023
GTM # 344
Build Start December 2010
First track day April 2013
-
Member
-
Member
-
Post Thanks / Like - 1 Thanks, 0 Likes
-
Senior Member
Careful with bolts. The shank length/diameter is engineered for stretch at torque.
Bolt strength is in part the result of surface hardening.
jim
-
Post Thanks / Like - 1 Thanks, 1 Likes
-

Moderator

A tip I use - put a blue dot on the bolts that are torqued. So later you can quickly see the ones you haven't.. like these "temp" ones you'll forget to replace 
James
FFR33 #997 (Gen1 chassis, Gen2 body), license plate DRIVE IT says it all!
build thread
My build: 350SBC, TKO600, hardtop, no fenders/hood, 32 grill, 3 link, sway bars, 355/30r19
Previous cars: GTD40, Cobra, tubeframe 55 Chevy, 66 Nova, 56 F100
-
Post Thanks / Like - 1 Thanks, 1 Likes
-


Originally Posted by
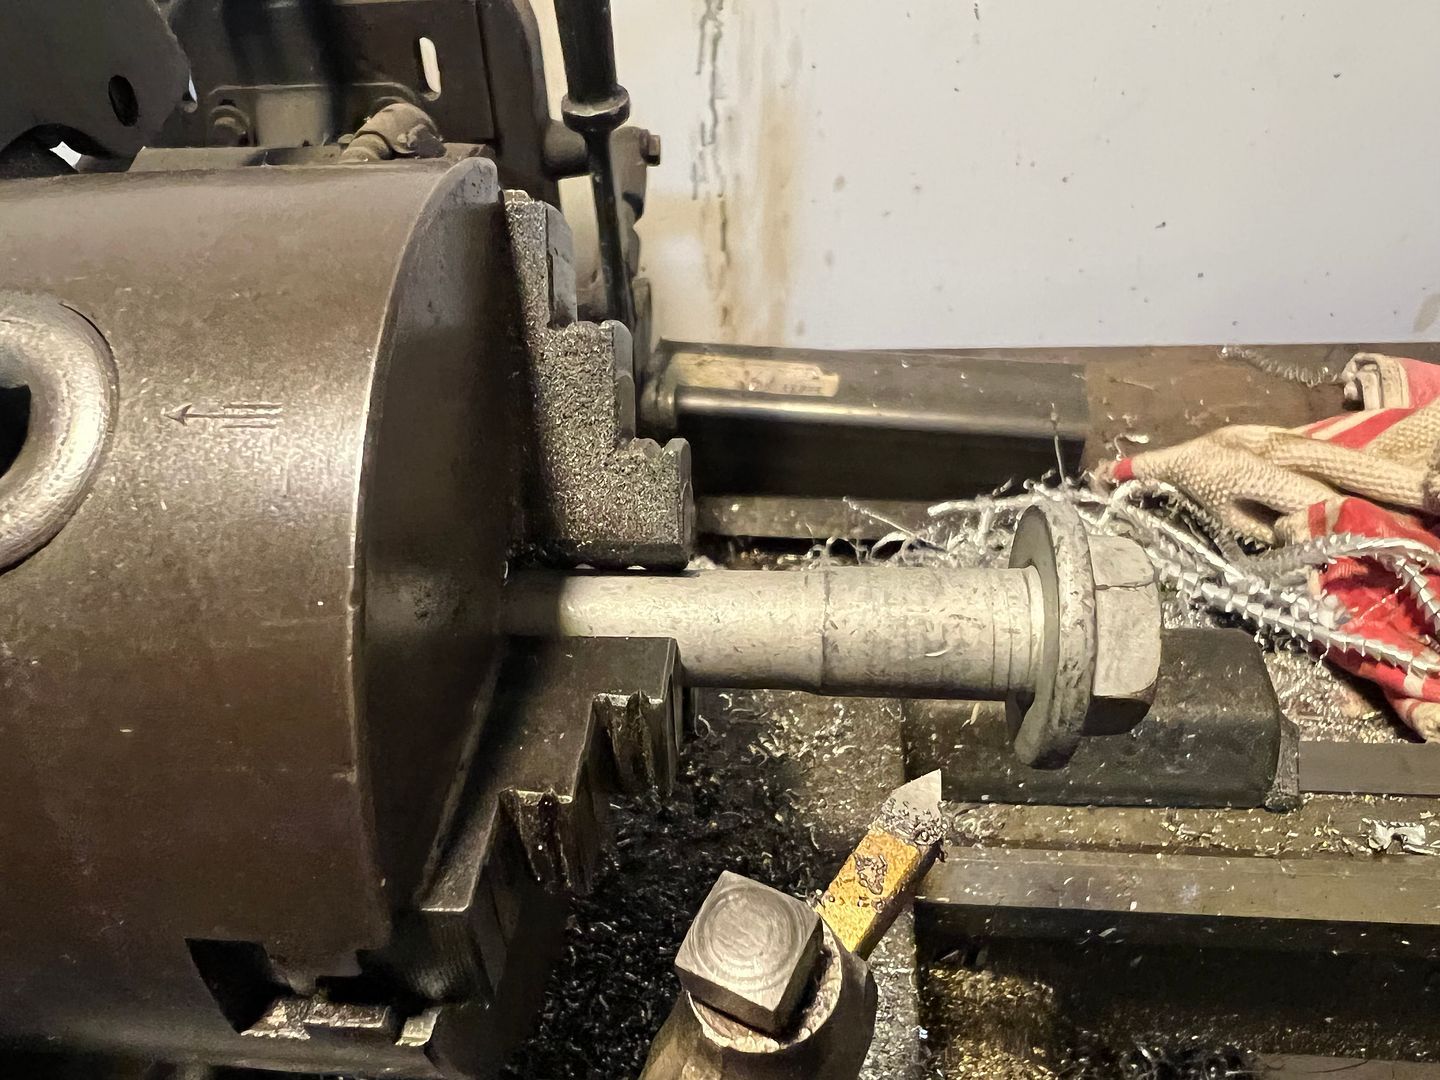
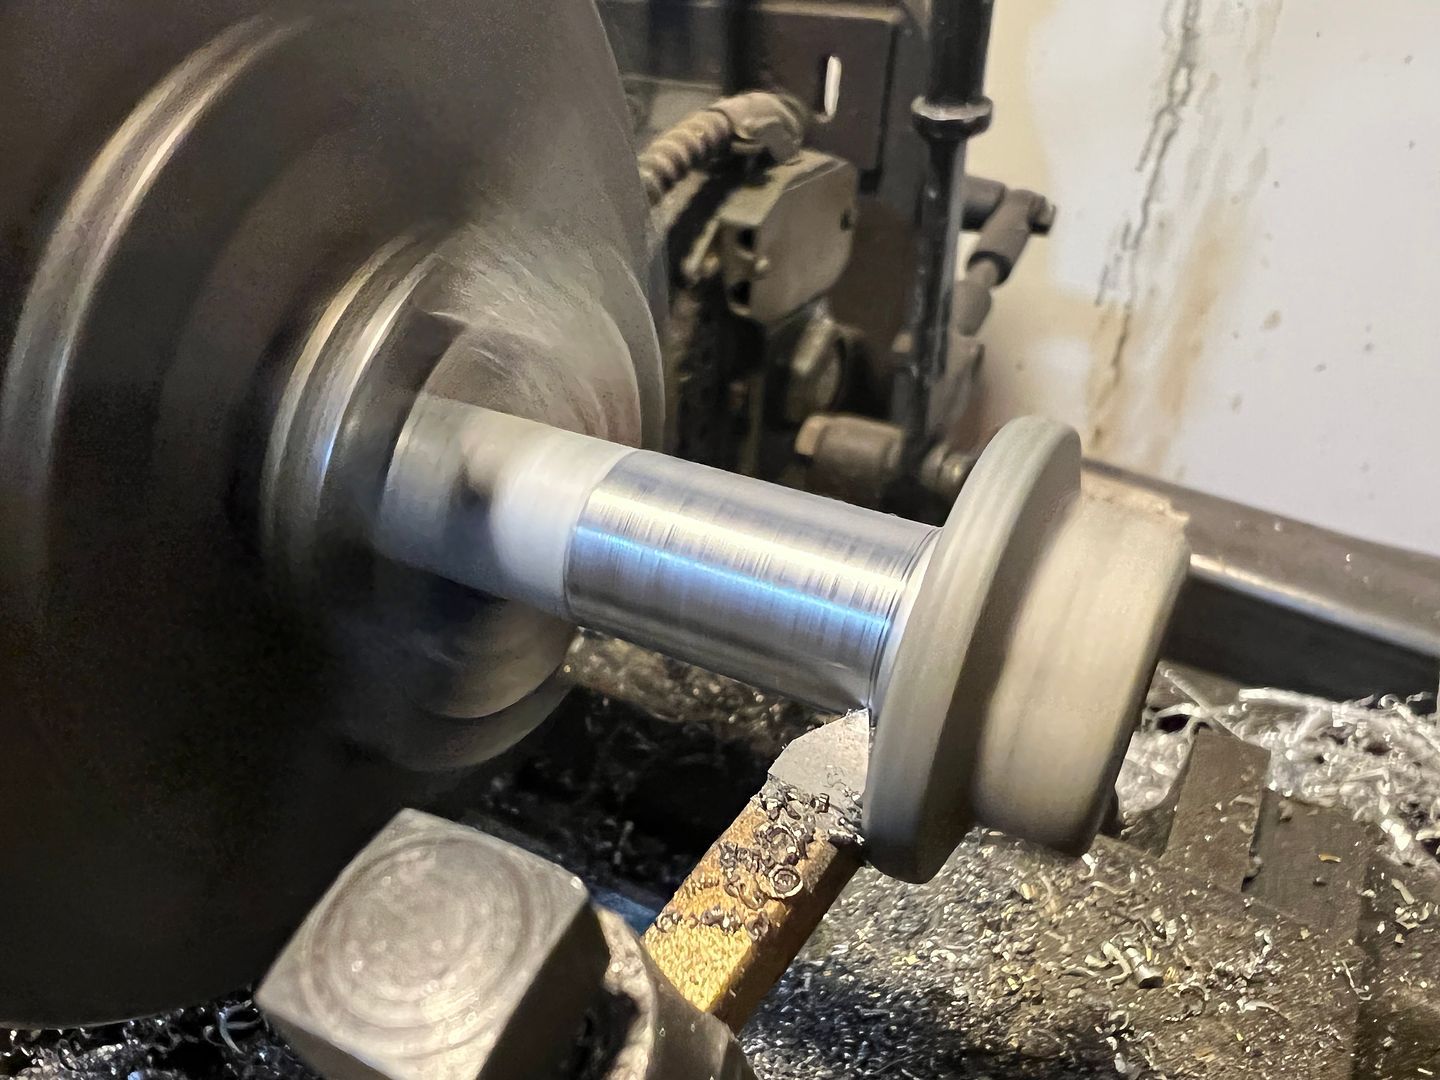
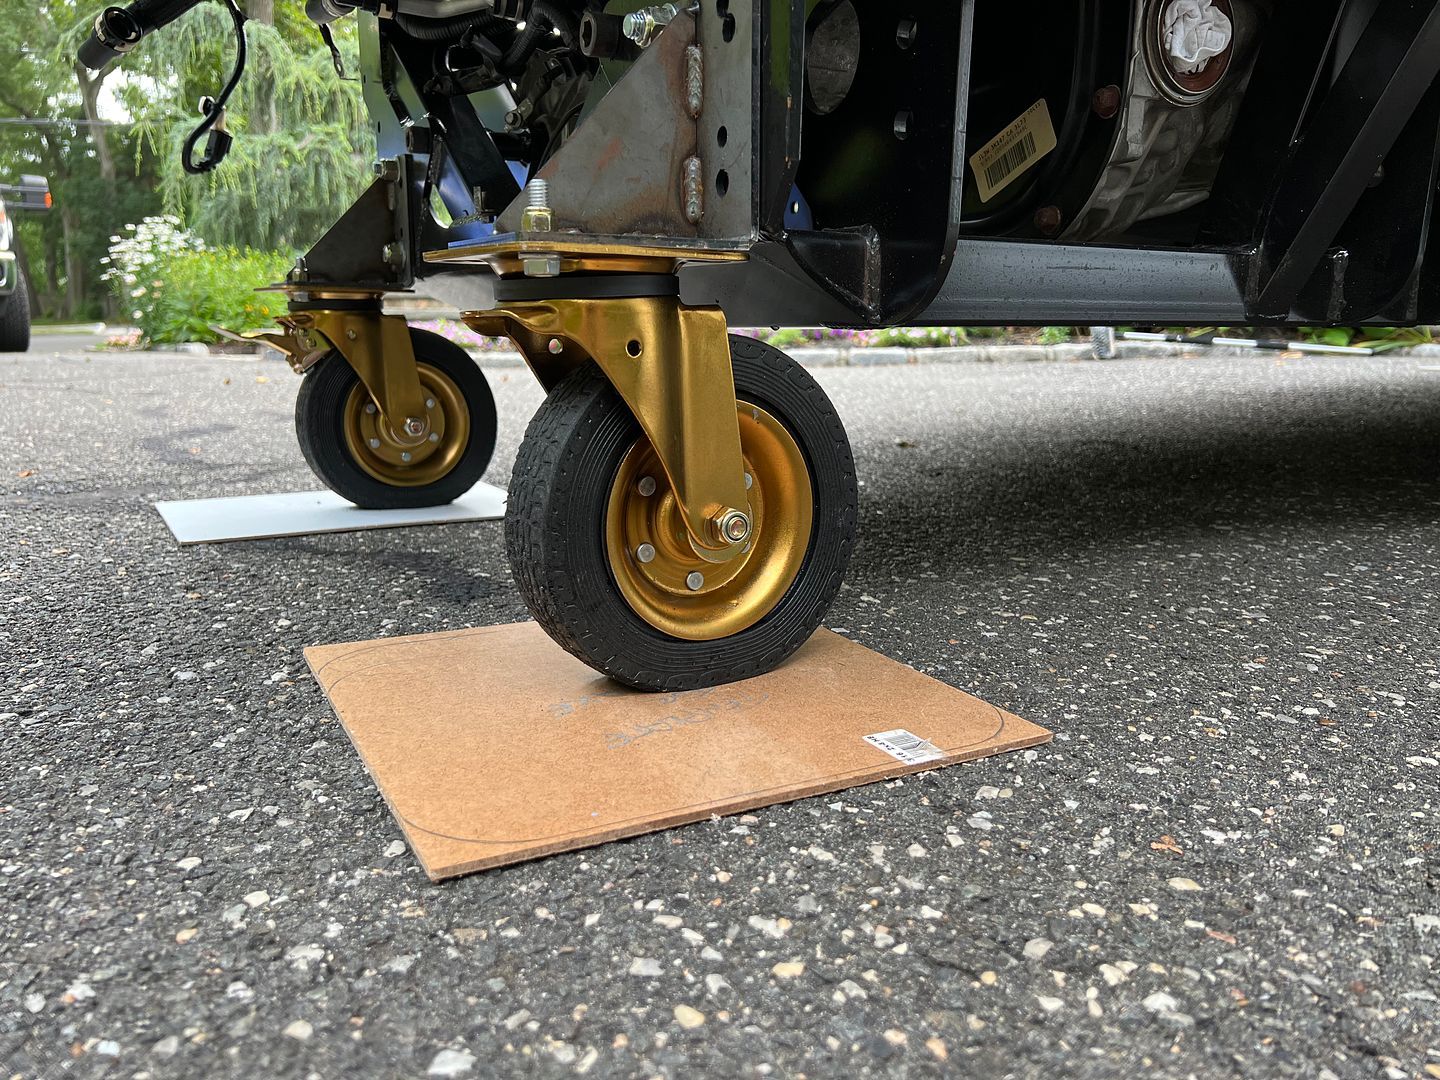
kabacj
Now the truck is getting heavy. The frame motor and cab are getting to be a bit much for the casters. The factory five provided casters worked great with the frame and motor, but the cab was the straw that broke the camels back. Rolling the cab became much more difficult.
I tried another set of casters I have, also not rated for 1,500 lbs each. The rubber tires rolled a little bit better on the pavement .
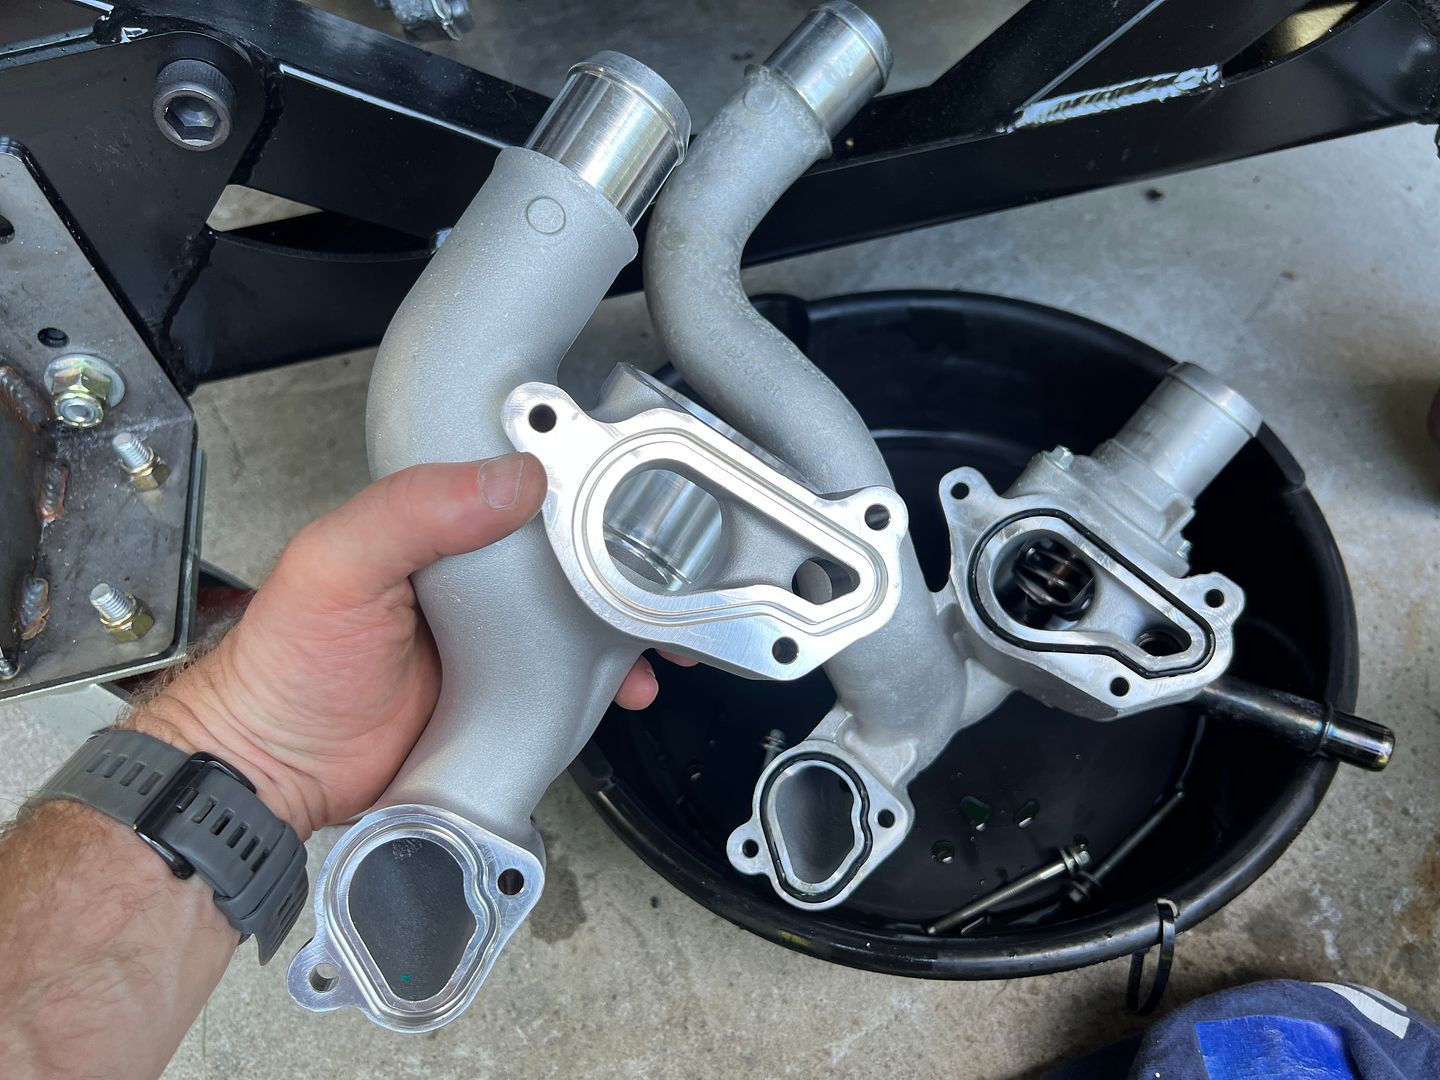
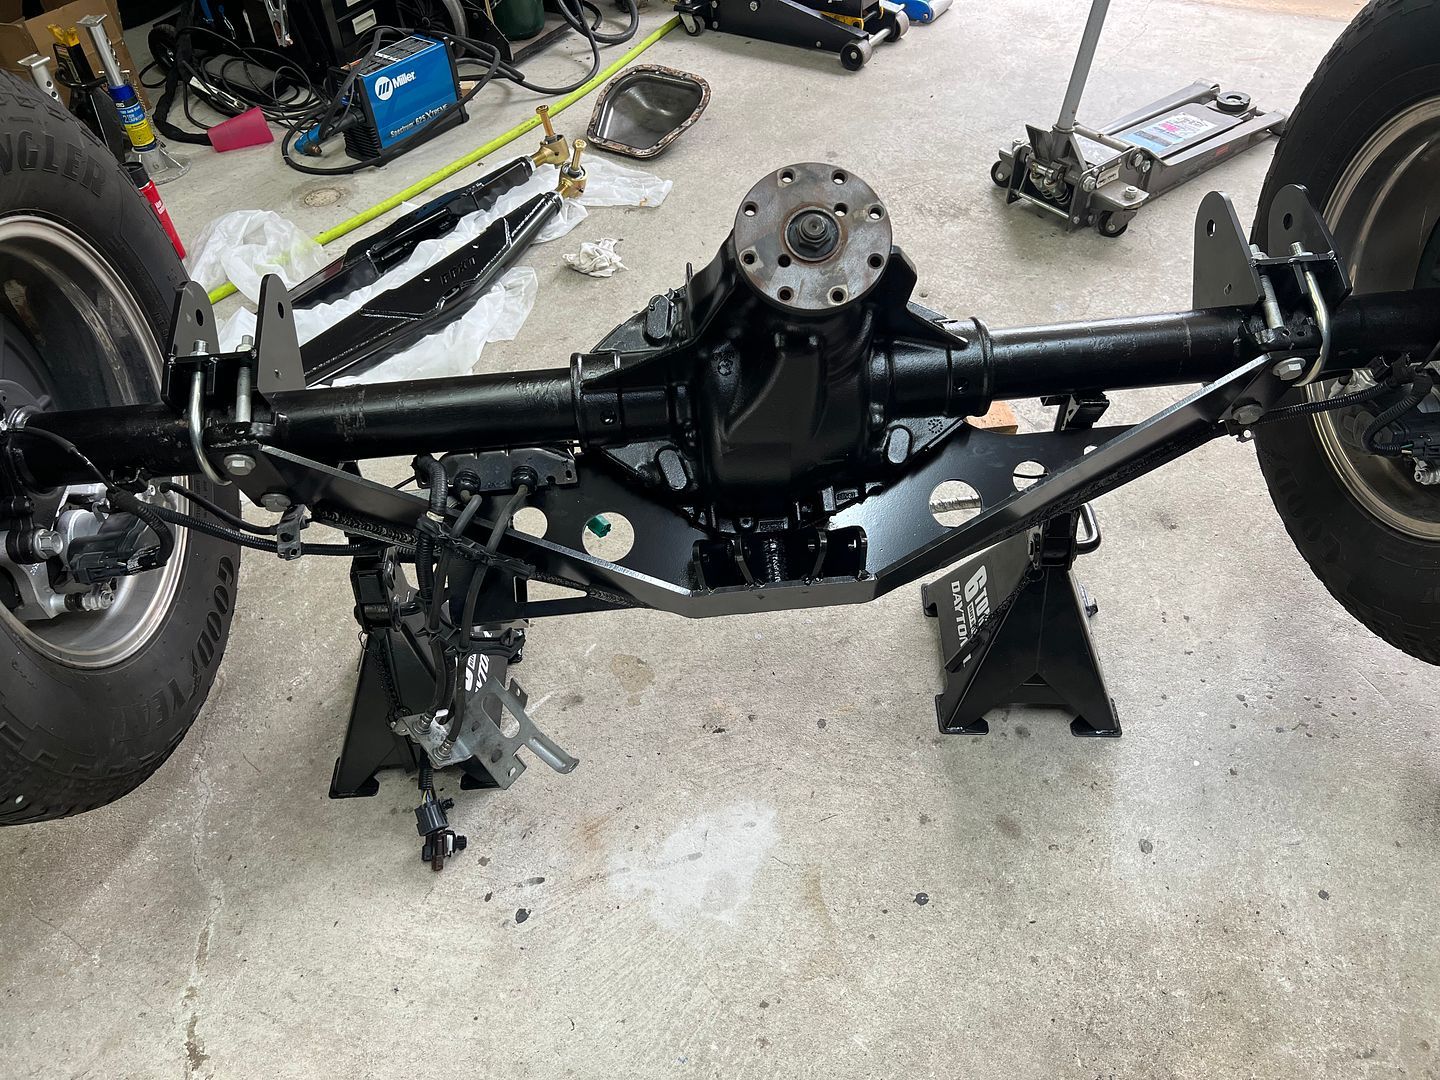
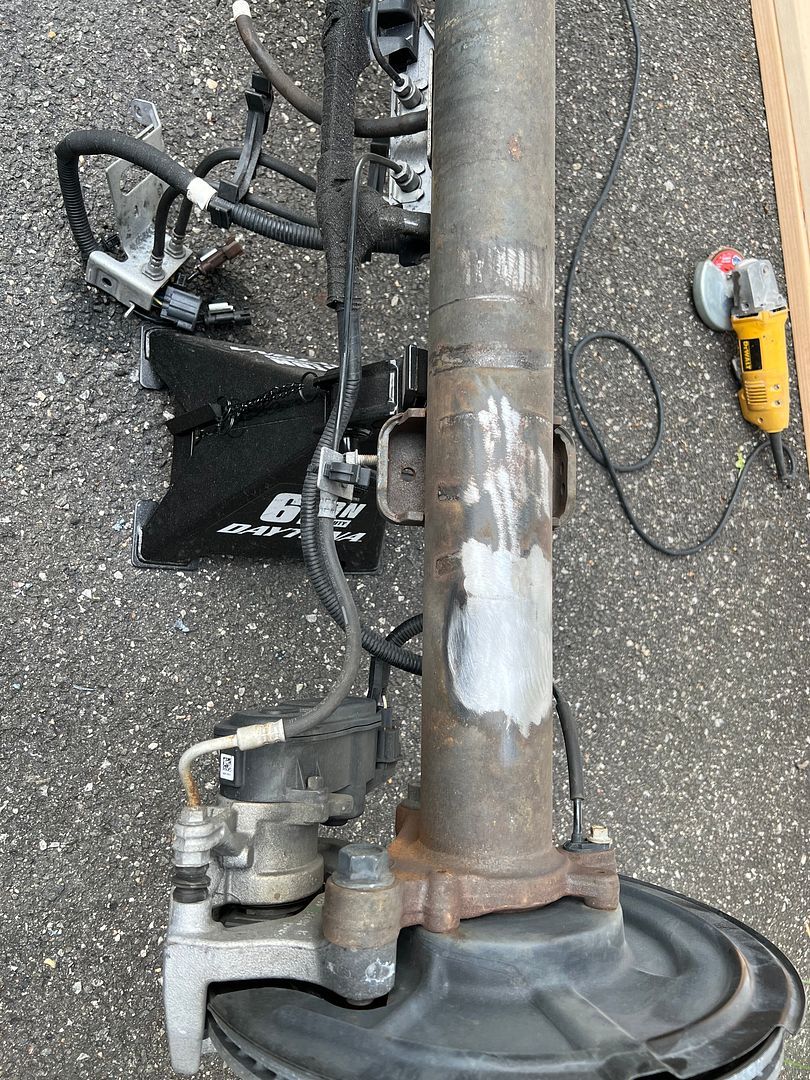
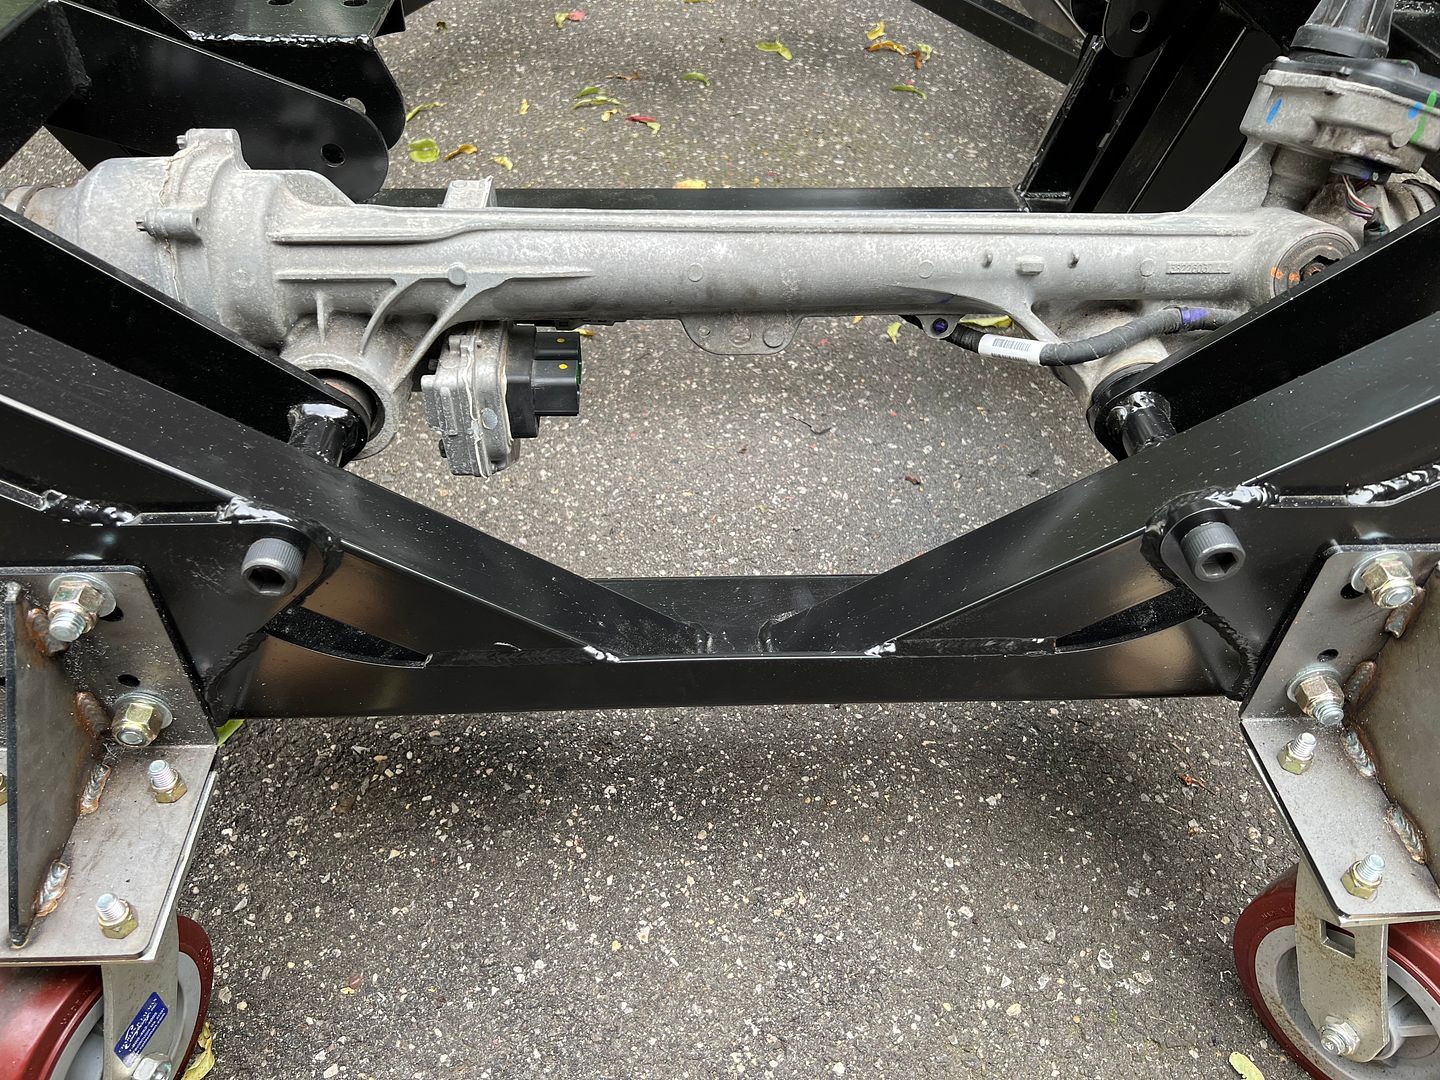
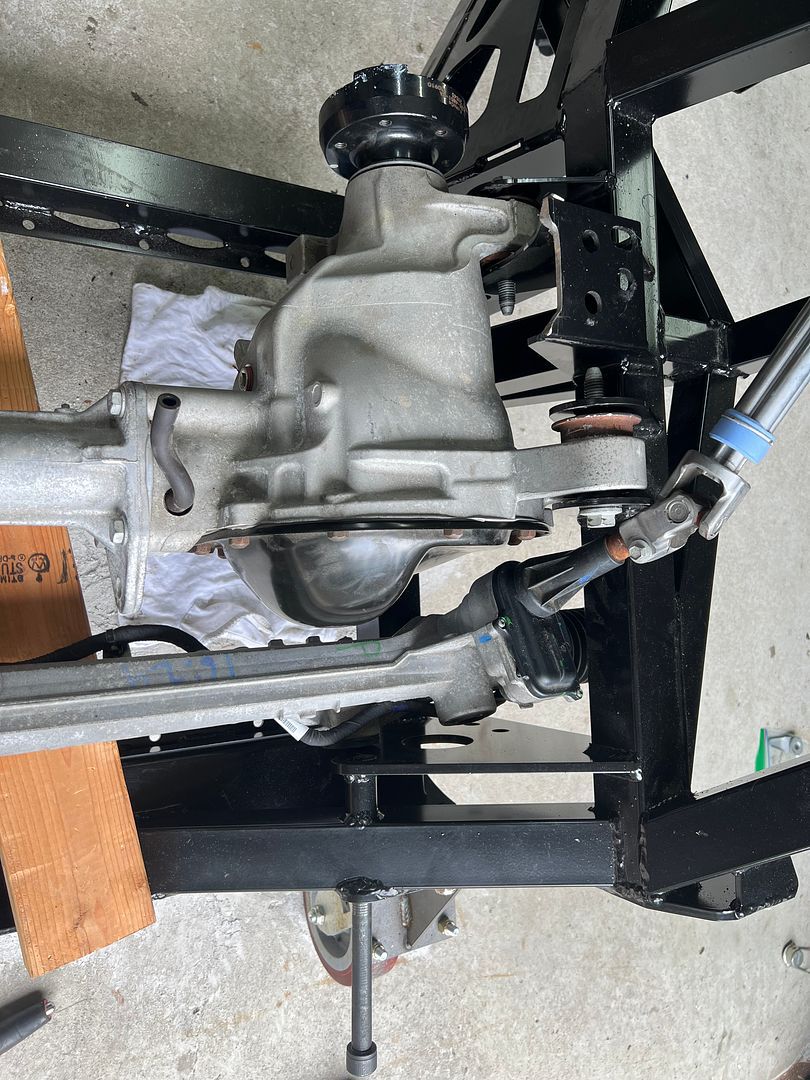
It’s time to put the wheels back on. I’ll start with the rear axle. After clipping off the shock supports that will not be used.

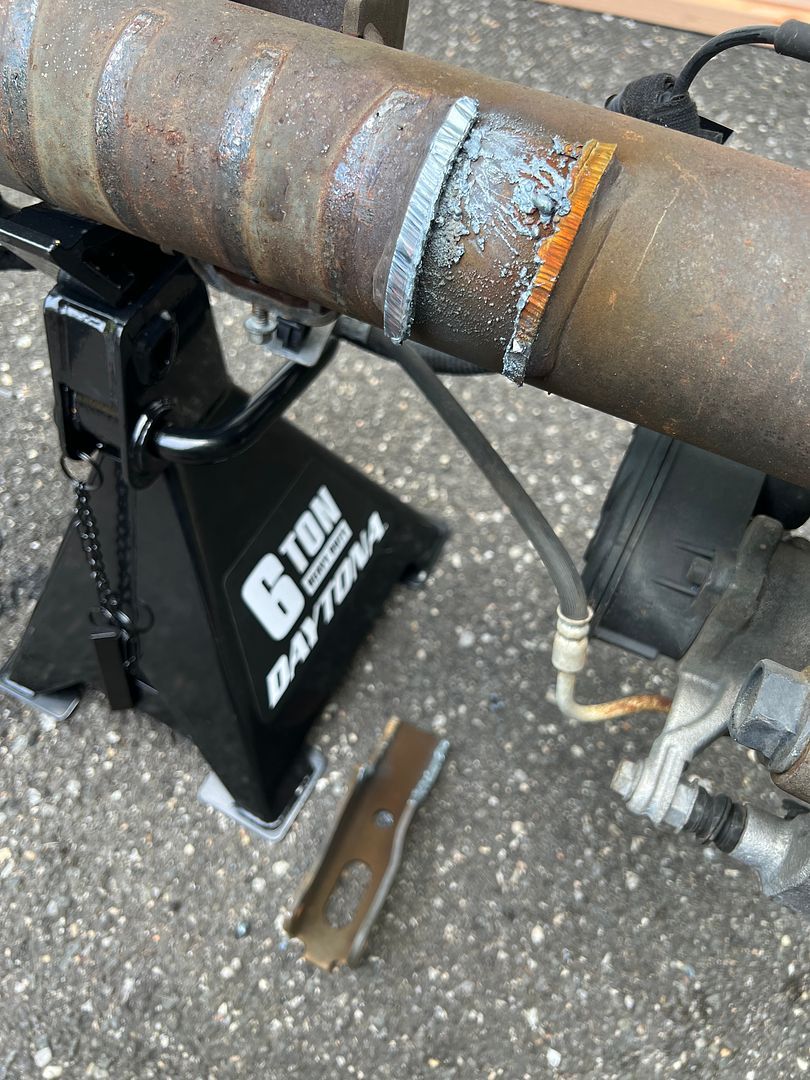
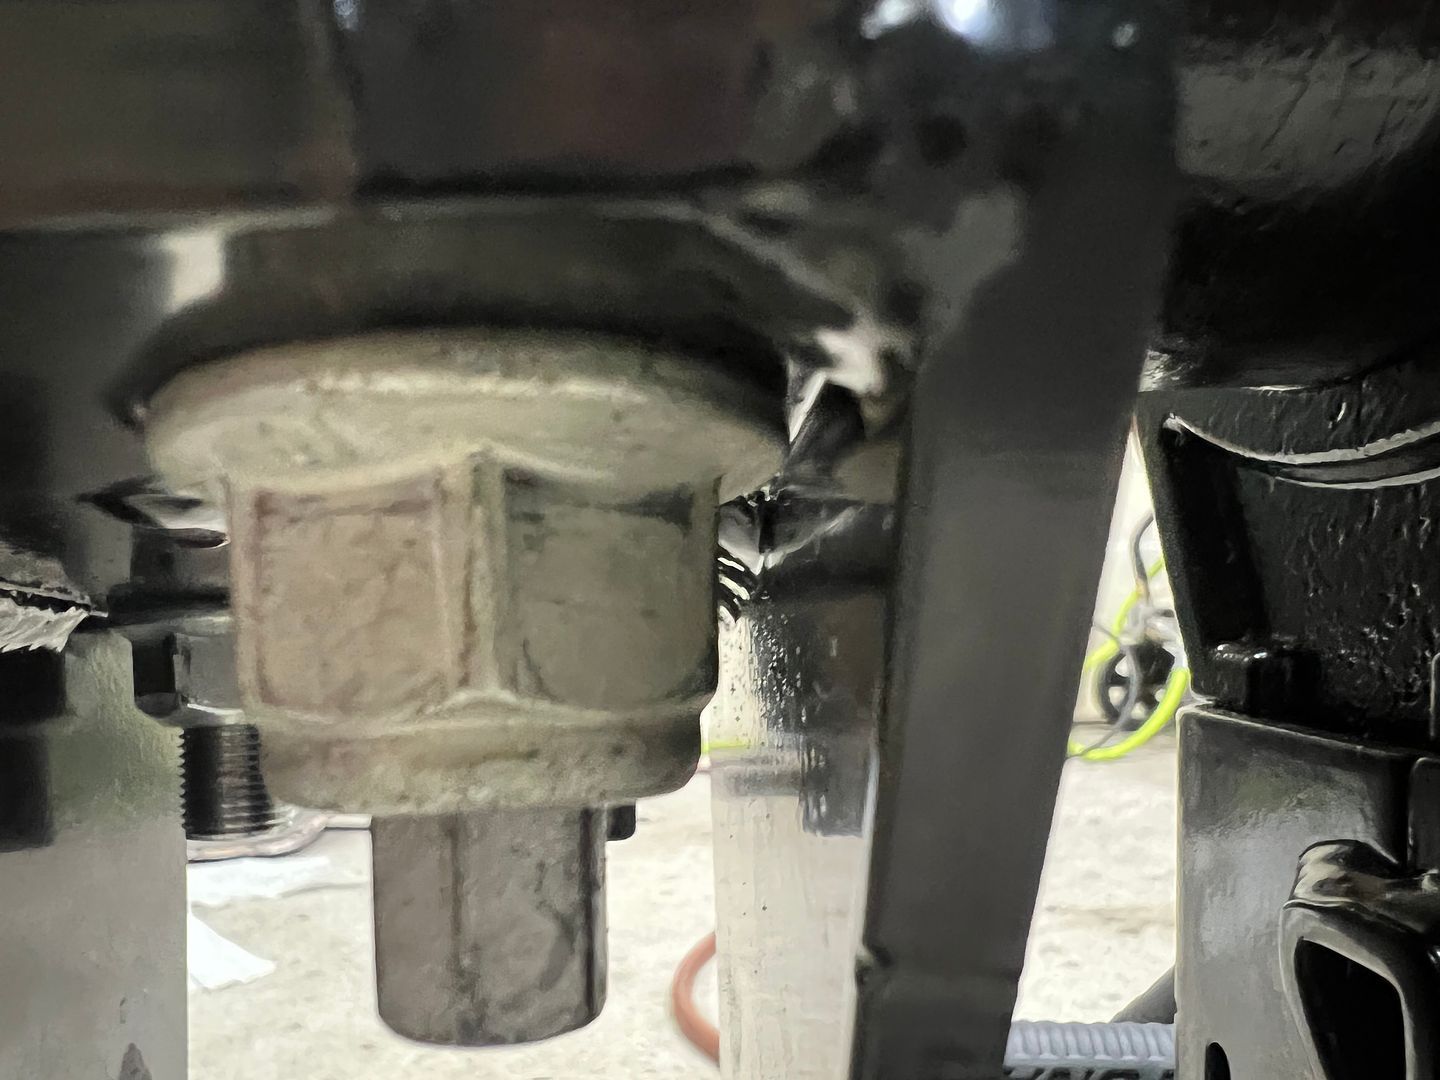
Next the rear cover comes off and the axle brace is installed and cover replaced. Ford uses M9-1 bolts on the housing. These bolts are nearly impossible to find! Factory five sourced them , however they are not ready. I figured rather than waiting id just get some from McMaster Car. They dont even stock them! Oh well I’ll just use the Ford bolts. They are too short, but I can still catch 4 or 5 threads. Enough to compress the RTV sealant
Big gears in this 9.75 rear.
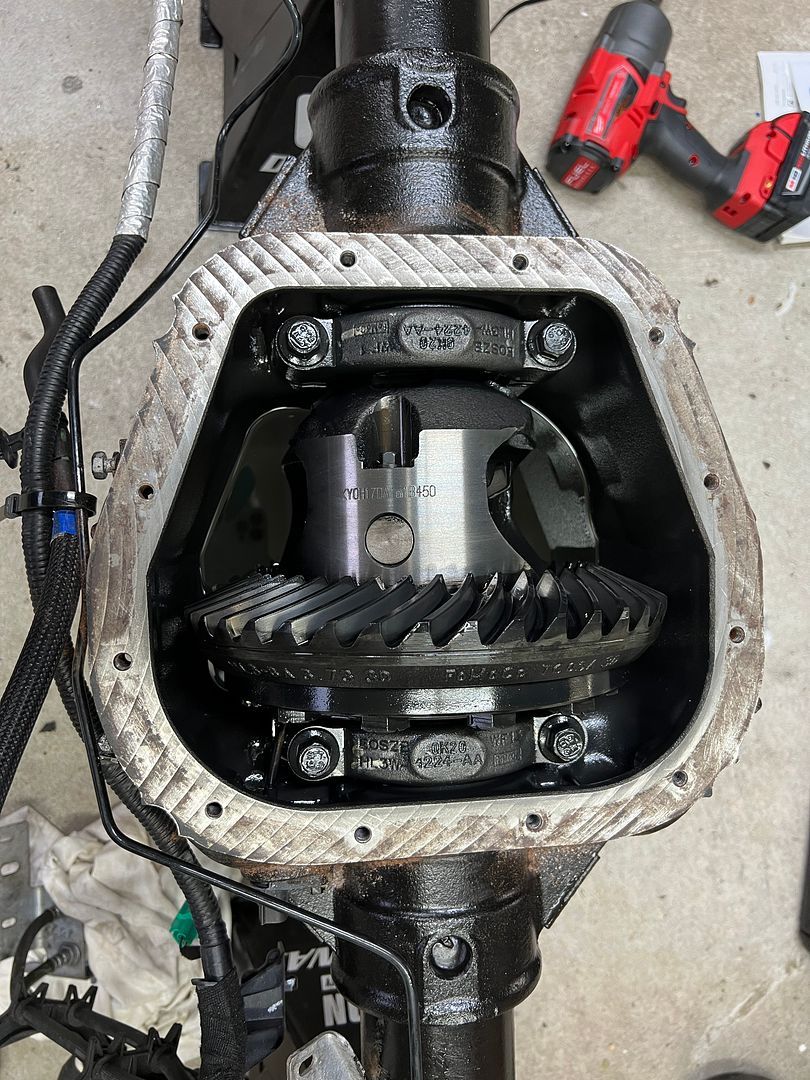
I got the 3.73 electronic locking rear differential as part of the FX 4 package.
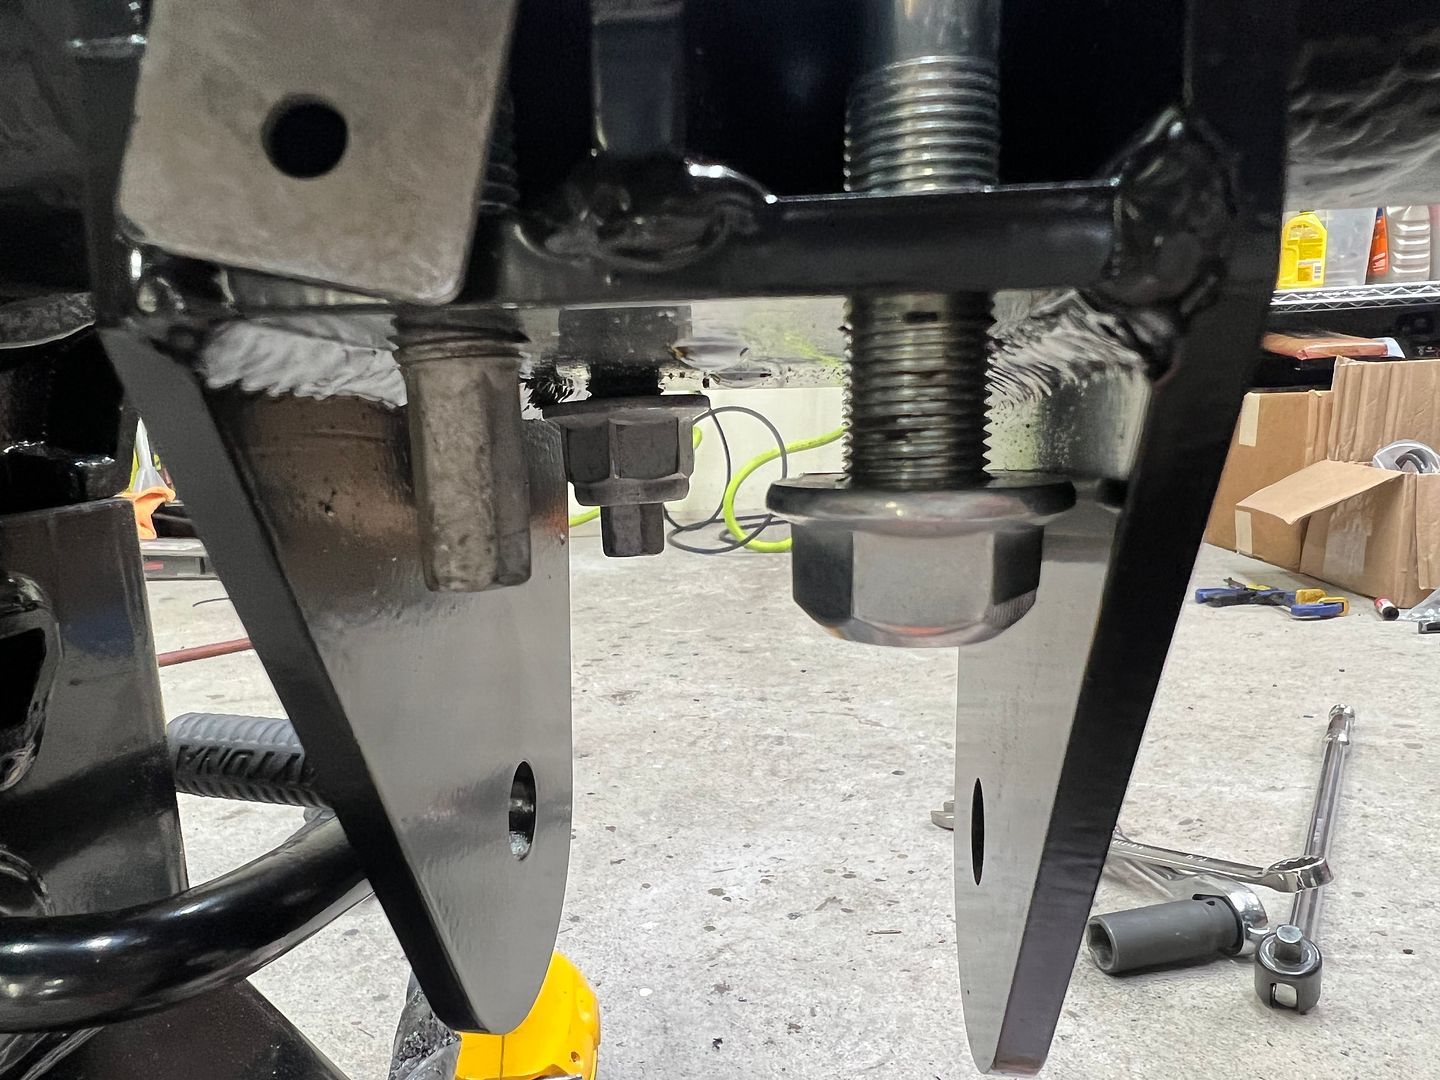
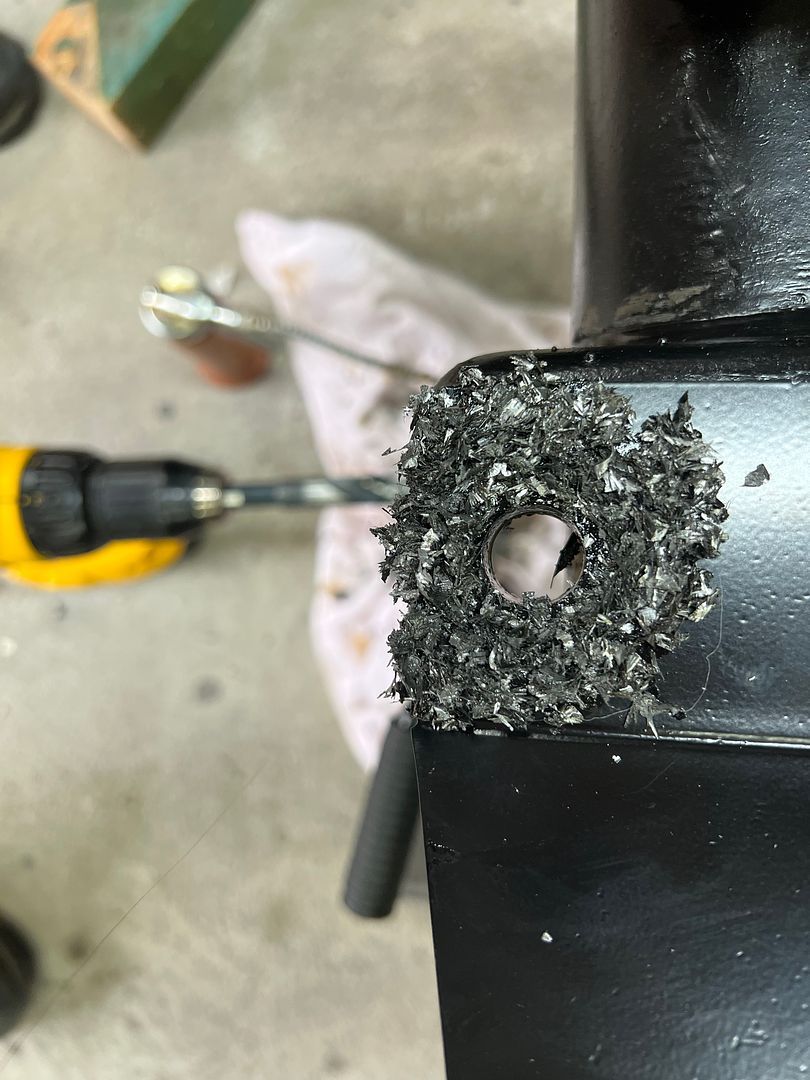
After the housing bolts are installed next you need to drill out the spring pads to accept the mounting bolts for the axle brace.
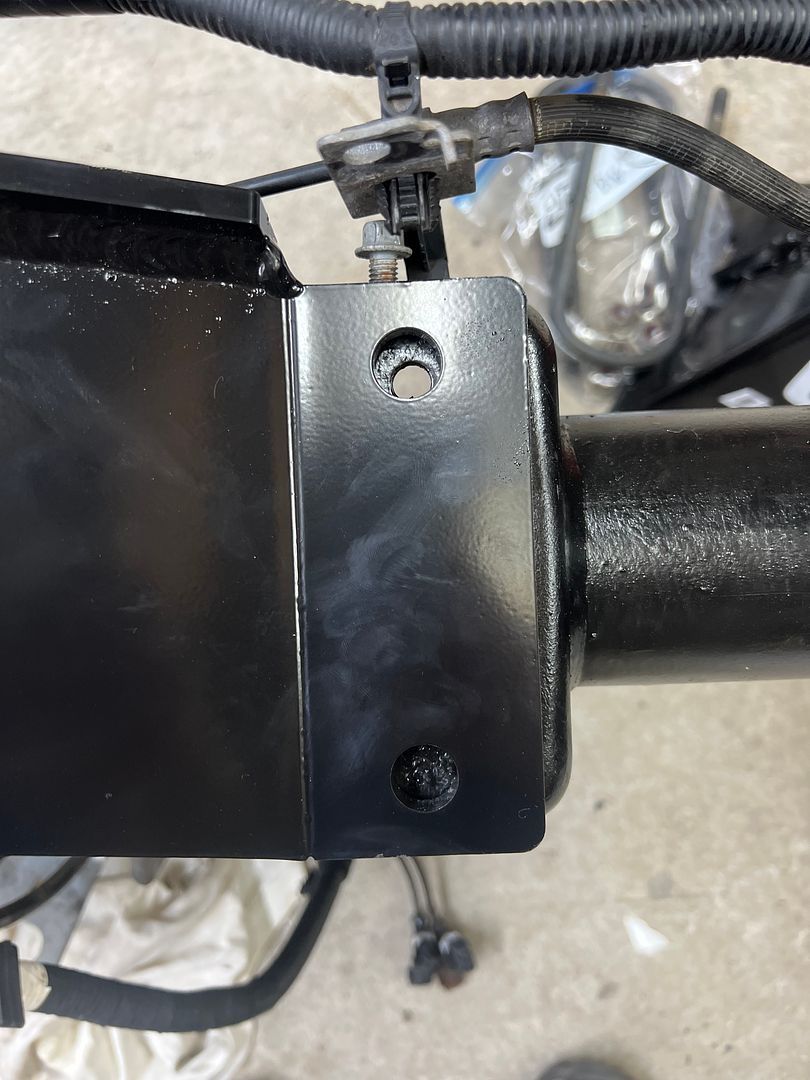
Slow drill speed and cutting oil and it’s not a terrible job. Just takes some time.
I found some expensive M9-1 bolts that are 30mm long here:
2pcs M9 x 1 x 30 mm Titanium Ti Screw Fine Thread Bolt Allen Hex Socket Cap Head/Aerospace Grade https://a.co/d/fk9tauv
-
Post Thanks / Like - 1 Thanks, 0 Likes
-
Member
Originally Posted by
RoadRacer
A tip I use - put a blue dot on the bolts that are torqued. So later you can quickly see the ones you haven't.. like these "temp" ones you'll forget to replace
Great advice James.
Originally Posted by
J R Jones
Careful with bolts. The shank length/diameter is engineered for stretch at torque.
Bolt strength is in part the result of surface hardening.
jim
You are right Jim. Who knows what the specifications for the bolt were before I modified it and now that it’s been trimmed down. I’m not a materials engineer, however the suspension of a 6,000lb truck that will be airborne is probably not the place to experiment with bolt strength.
Originally Posted by
Papa
I found some expensive M9-1 bolts that are 30mm long here:
2pcs M9 x 1 x 30 mm Titanium Ti Screw Fine Thread Bolt Allen Hex Socket Cap Head/Aerospace Grade
https://a.co/d/fk9tauv
Thanks Papa, Those were the only ones I could find as well, however they are pretty expensive for a temporary solution. I was sure ARP or someone would make a bolt for this application. The Ford Performance cast iron cover is both stiffer and also holds more fluid. In theory the added stiffness will stabilize the differential and the added volume will aid in cooling. It seems Factory Five had to special order the 9M-1 bolts as the size is not common.
Thanks guys for the input.
Last edited by kabacj; 07-12-2023 at 05:48 AM.
XTF #2
build start date June 19 2023
GTM # 344
Build Start December 2010
First track day April 2013


 Thanks:
  Likes:


 Reply With Quote


_IMG_9971.png?width=1920&height=1080&fit=bounds)

_IMG_0052.png?width=1920&height=1080&fit=bounds)


_IMG_0157.png?width=1920&height=1080&fit=bounds)
_IMG_0161.png?width=1920&height=1080&fit=bounds)