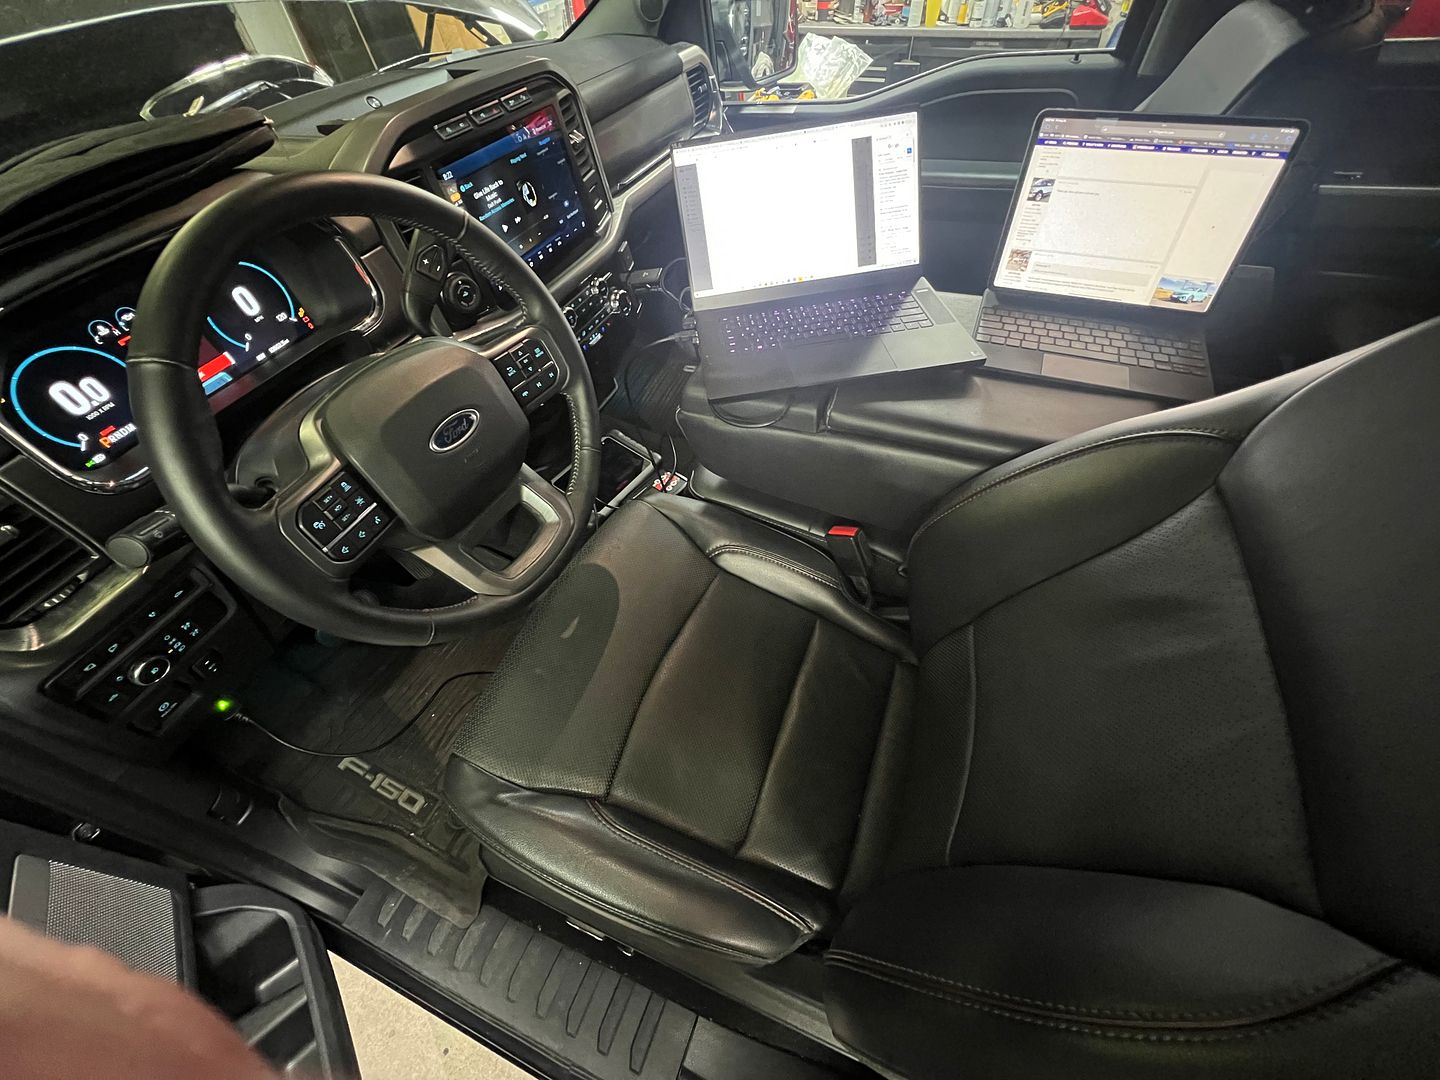
Interestingly a laptop and scan tools are now a required part of my car building tool kit.
One procedure that you will need to perform is changing your fuel tank size as your F150 likely had a 36 gallon.
By changing the fuel tank size, you will update the trucks ability to calculate the distance to empty. Ford leave an extra margin of fuel in the tank so you can drive pretty far even after zero miles to empty, however I plan on testing the accuracy with a 5 gallon jug of fuel In the back.
It's a simple process to update the fuel tank size through a software tool called Forscan. Of course messing around with the modules in your truck requires some understanding of what you are doing and how to backup your work before you make changes. I would suggest fully understanding your goal and the procedure before you dive in.
The other thing I have gained an appreciation for is how sensitive the CAN network is in this truck.
Driving the truck around with lots of things disconnected (even in the driveway) can cause unexpected behavior. Id say that ideally you turn the truck off. do your whole build adding everything back where you found it and turn it back on. Evervthing will be fine.
IF you are like me. You start it up as soon as the engine is back in the truck and powered up. Brake lines are not attached. no lights are attached. no cameras are attached. the grill shutters are not attached the radar and blind spot sensors are not attached. Sure the engine might be fine, but now I might need to re calibrate the 6 cameras on the truck and sort out other phantom DTCs. Not the end of the world, but its just a new experience.
The gen 14 is a rolling computer. I have been reading the Ford documentation prepared for fleet truck builders that modify F 150s for Police service etc. Lots of warnings about messing with bits that are connected to the CAN network. That tells you something. Thankfully we have help.
XTF #2
build start date June 19 2023
GTM # 344
Build Start December 2010
First track day April 2013
You got them to light up, but did you get the computer happy? Perhaps you will have to find a way to hide the 2021 lights somewhere inside the body wired up to keep the computer from throwing codes.
You got them to light up, but did you get the computer happy? Perhaps you will have to find a way to hide the 2021 lights somewhere inside the body wired up to keep the computer from throwing codes.
Yes actually thats my plan. Make the computer think the stock LED lights are still plugged in.
I dont plan on cutting into any of the factory wiring harness or making any FORSCAN changes.. let’s see how that goes haha.
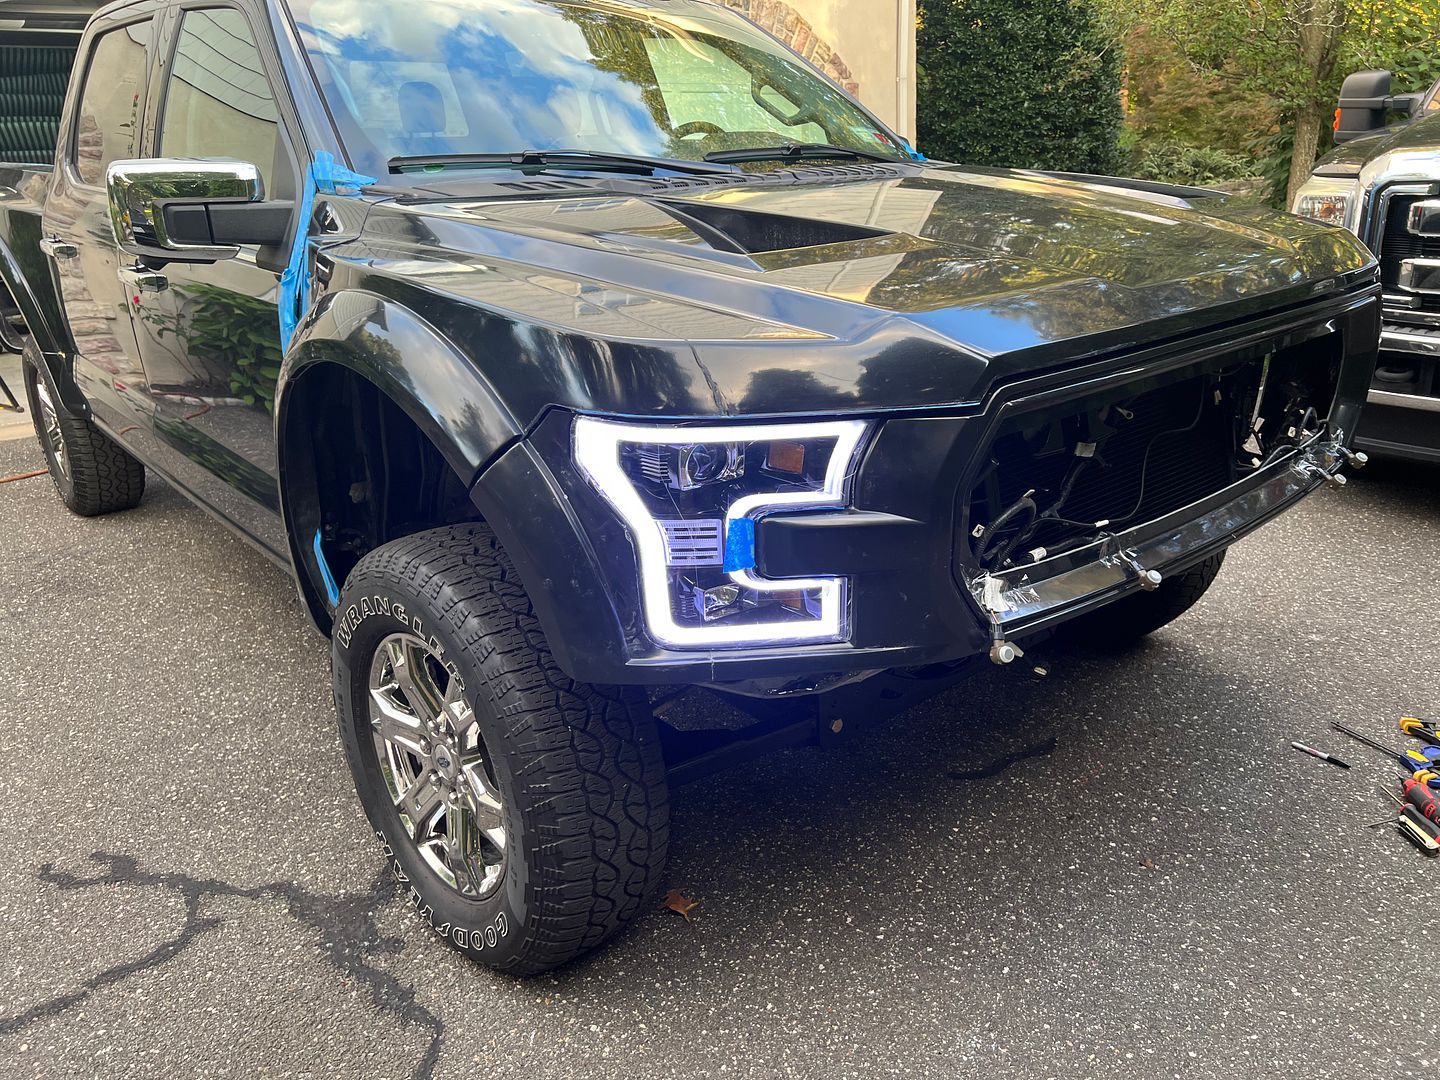
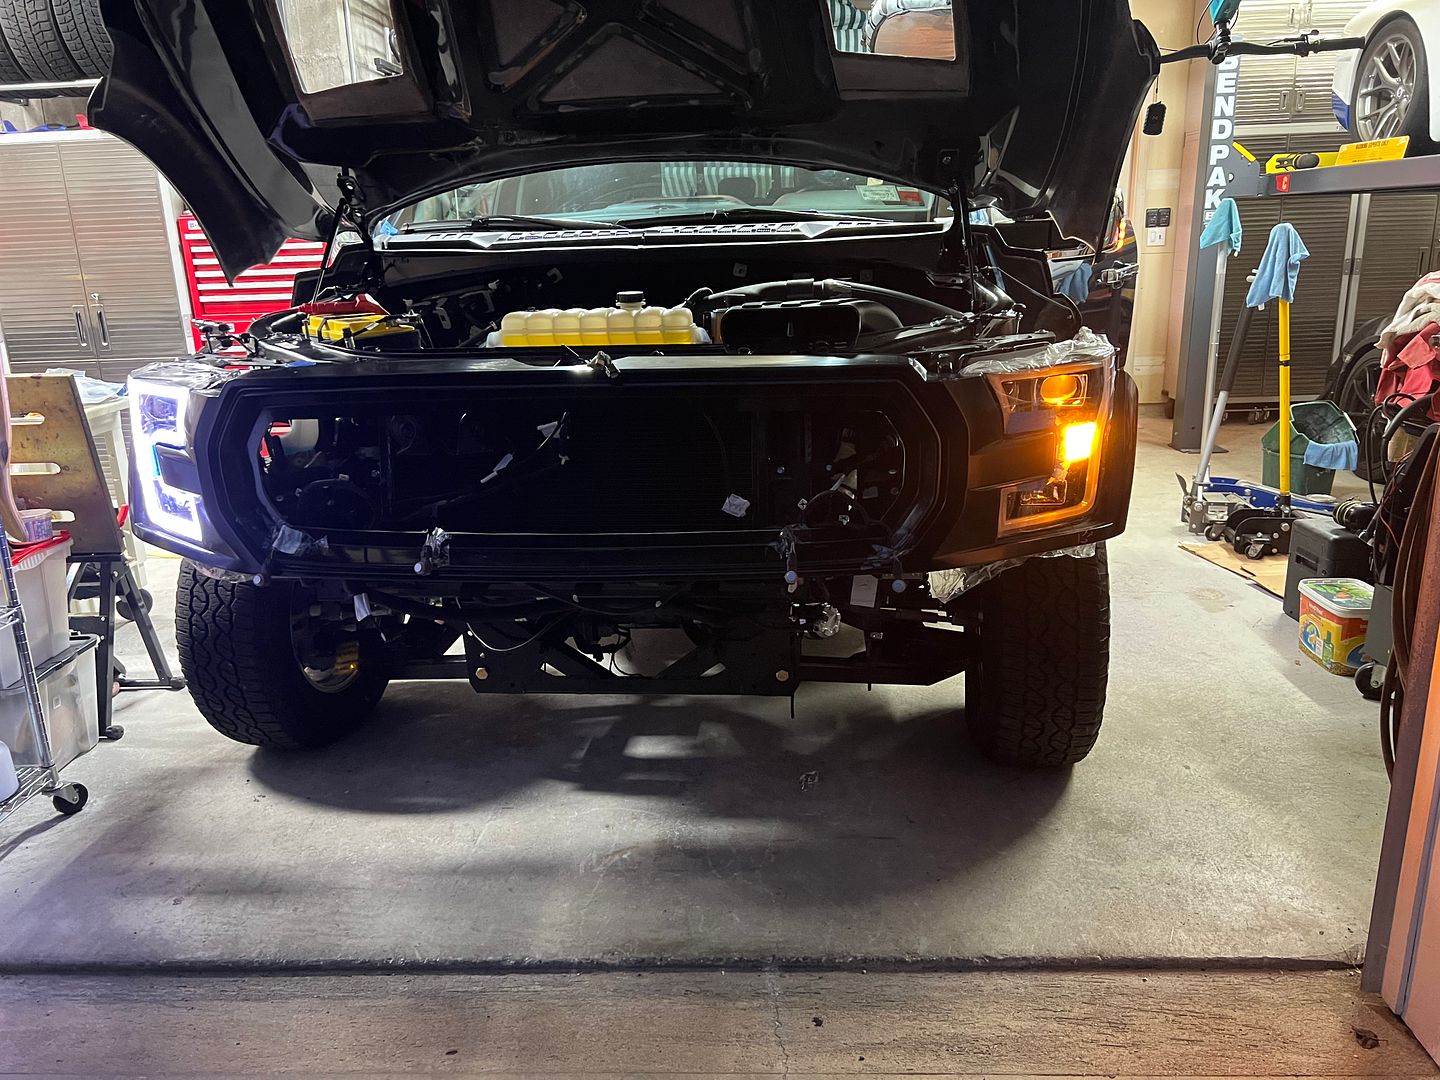
Step one was to buy a replacement light housing for the marker light. I could have just swapped the one from my stock lights, but I wanted to keep the stock lights intact.
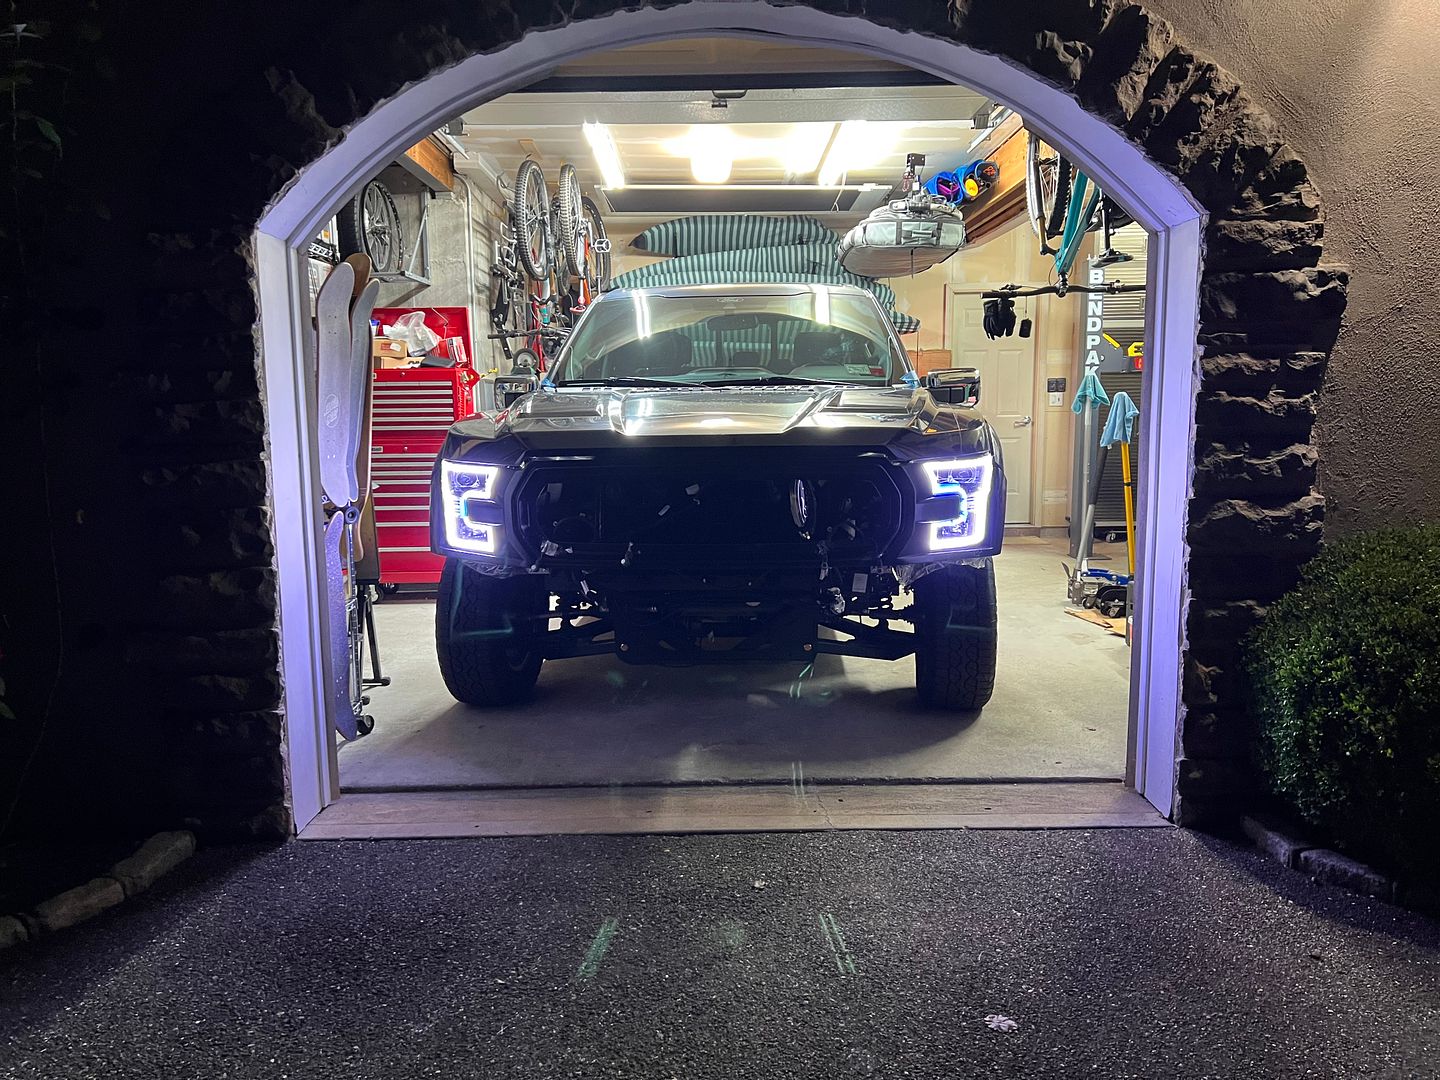
I simply plugged in the stock marker light and I had halo lights.
So far so good.
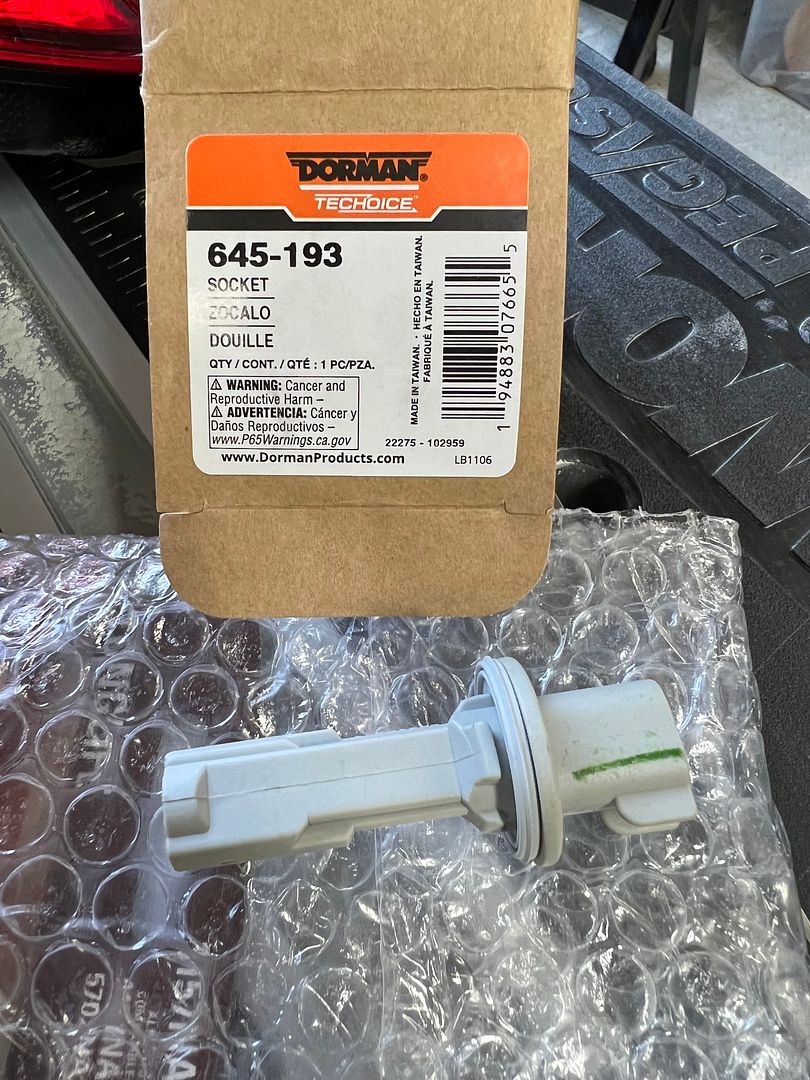
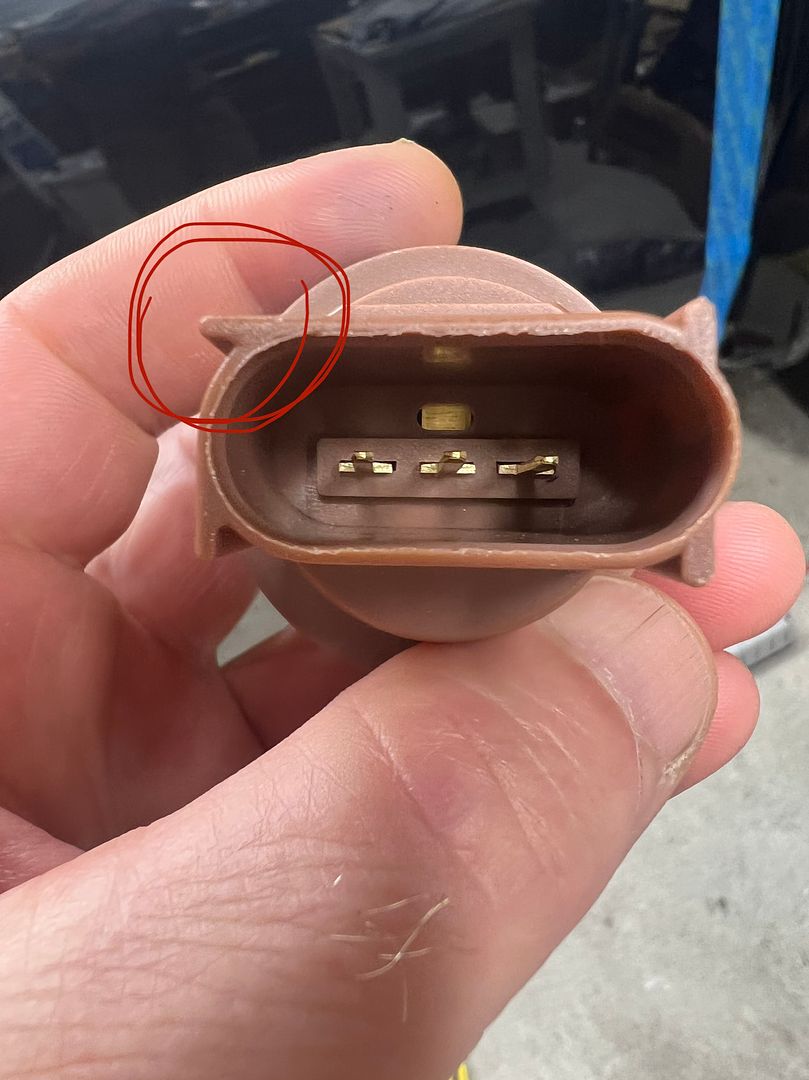
Next was the turn signal. for this I needed to purchase a light housing. The 2021 Lariat does not use a housing to hold the turn signal bulb.
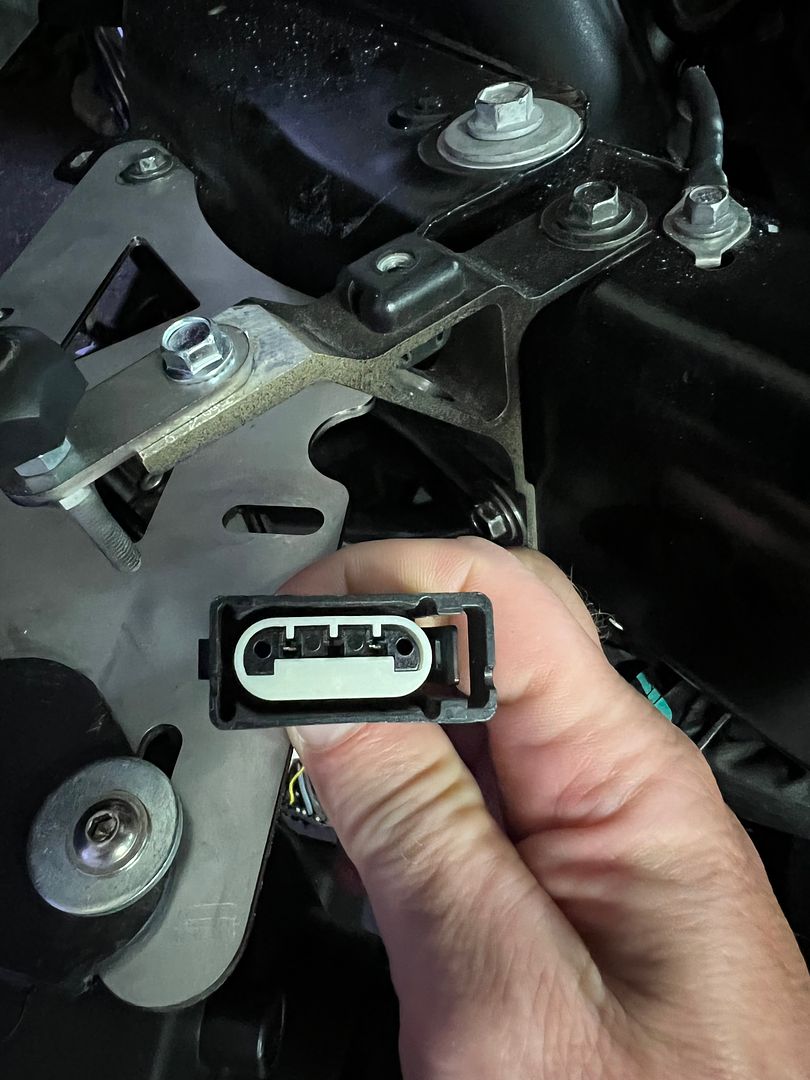
Now I need to connect what you would normally see in a halogen light to the LED harness. Turns out the plugs are very similar.
My LED plug
Simply remove this tab from the halogen plug and we are golden
This flashes at normal rate. Matching the rear lights that are stock 2021 F150. Interestingly the blinker click sound is a bit faster than normal in the cab, but I have a few other bulbs to try to match the stock units.
Next was the headlights. They work fine using the Factory five harness. I didn’t fully test them but they seem good.
The only codes I have are the zone lighting. In the front the fog lights are used to light up the front of the truck with the zone lighting feature. Ill figure that out too.
Finally I need to figure out the projector high beams of the aftermarket headlight but I ran out of time. That is a job for another day.
John
Last edited by kabacj; 09-01-2023 at 06:13 AM.
XTF #2
build start date June 19 2023
GTM # 344
Build Start December 2010
First track day April 2013
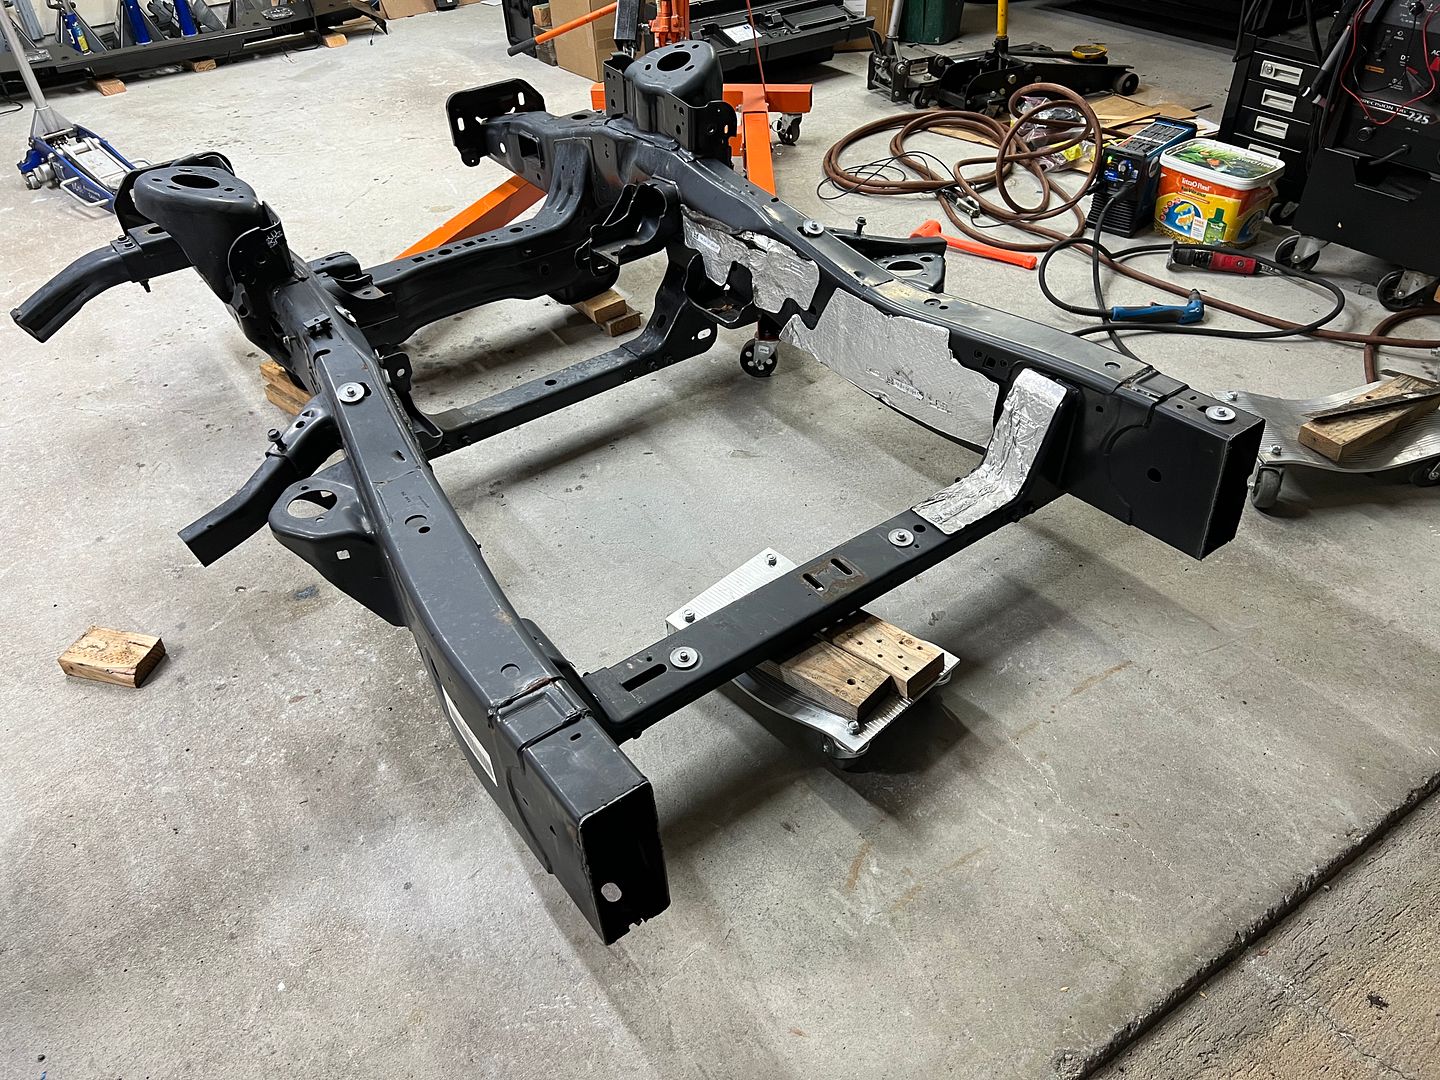
I was holding on to it as a reference while we sorted out the fit of the 2021 cab on the factory five chassis.
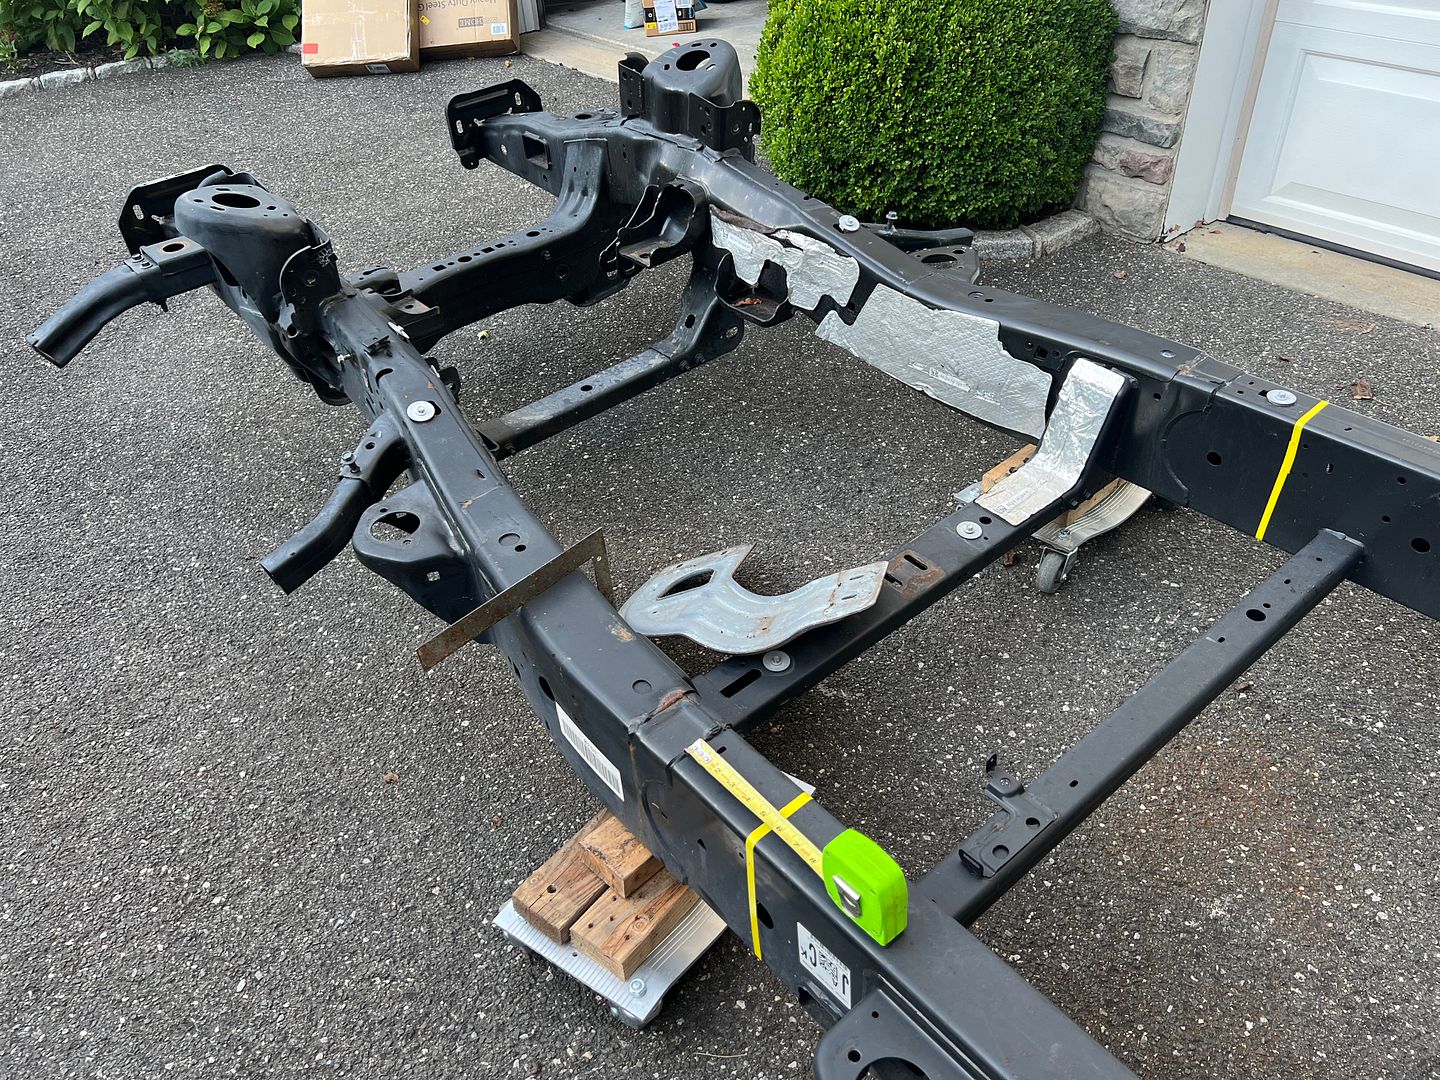
I was anxious to get the frame out of the way and had a plan to move it this weekend when I got a call from a guy who I sold some F150 parts to. He wanted the frame but only the front section.
I told him either you take the whole thing or nothing.
He agreed but he only wanted the front to repair his F150 project. I agreed to cut the frame for him. That was a little scary to be honest.
I sent him several pictures .. you sure you want me to cut this right???!
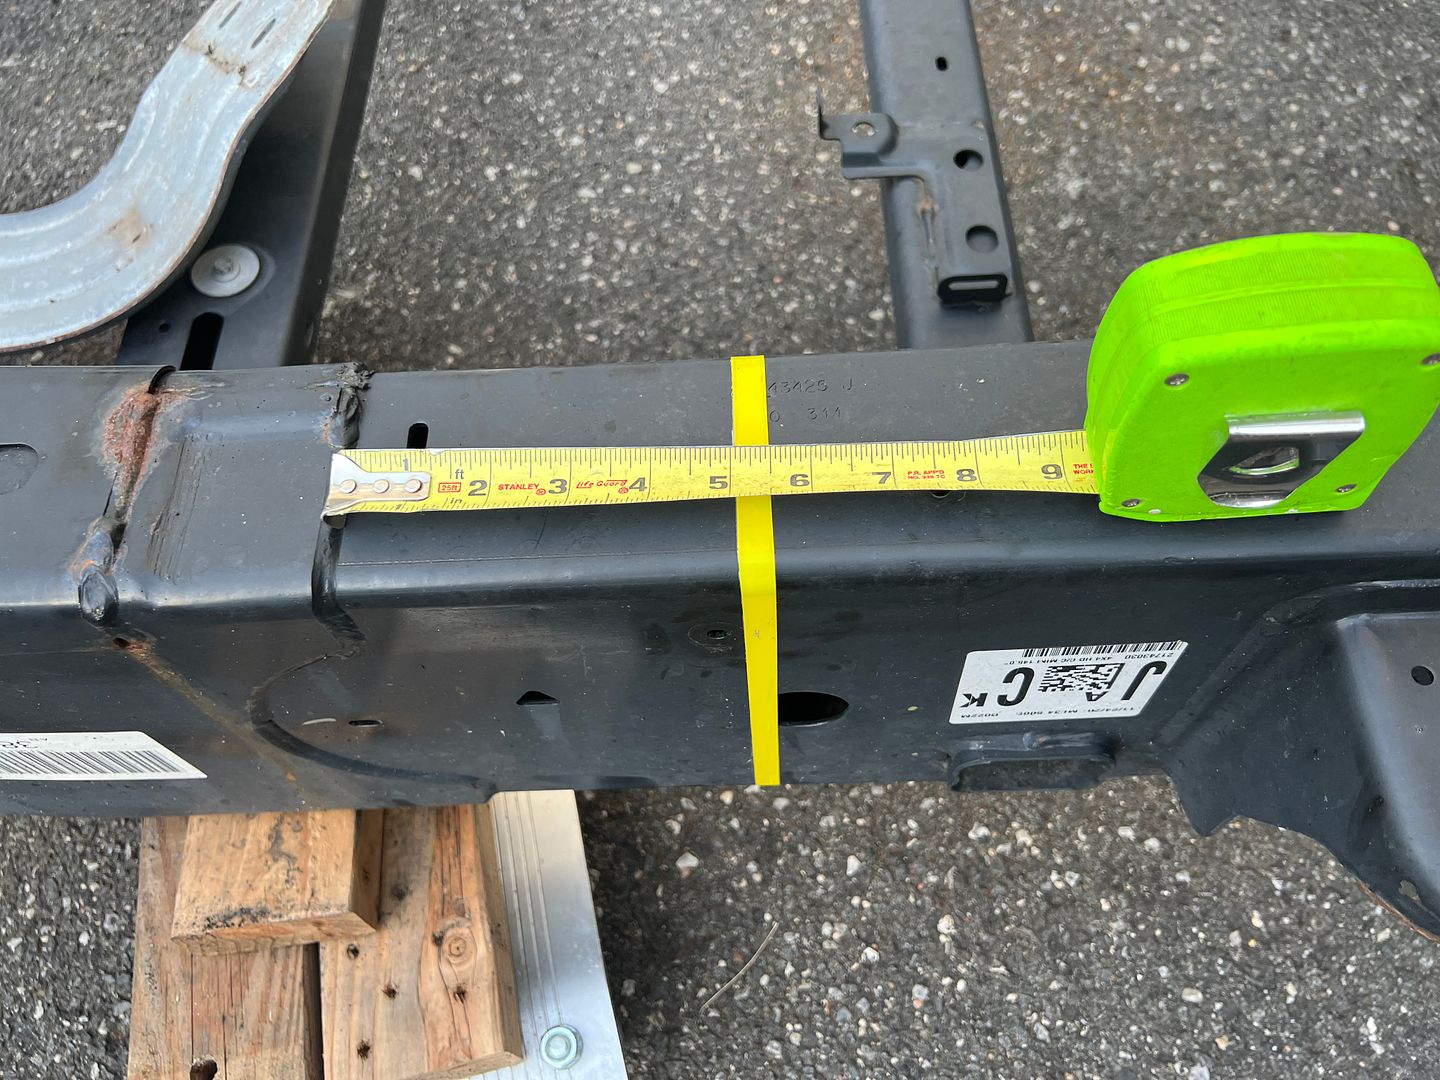
Im going to cut it on the yellow tape lines..
I scanned the internet for the frame sections ford sells and this looked about right.
Of course this guy didnt give me any money yet so i might end up with two pieces of frame if this doesnt work out.
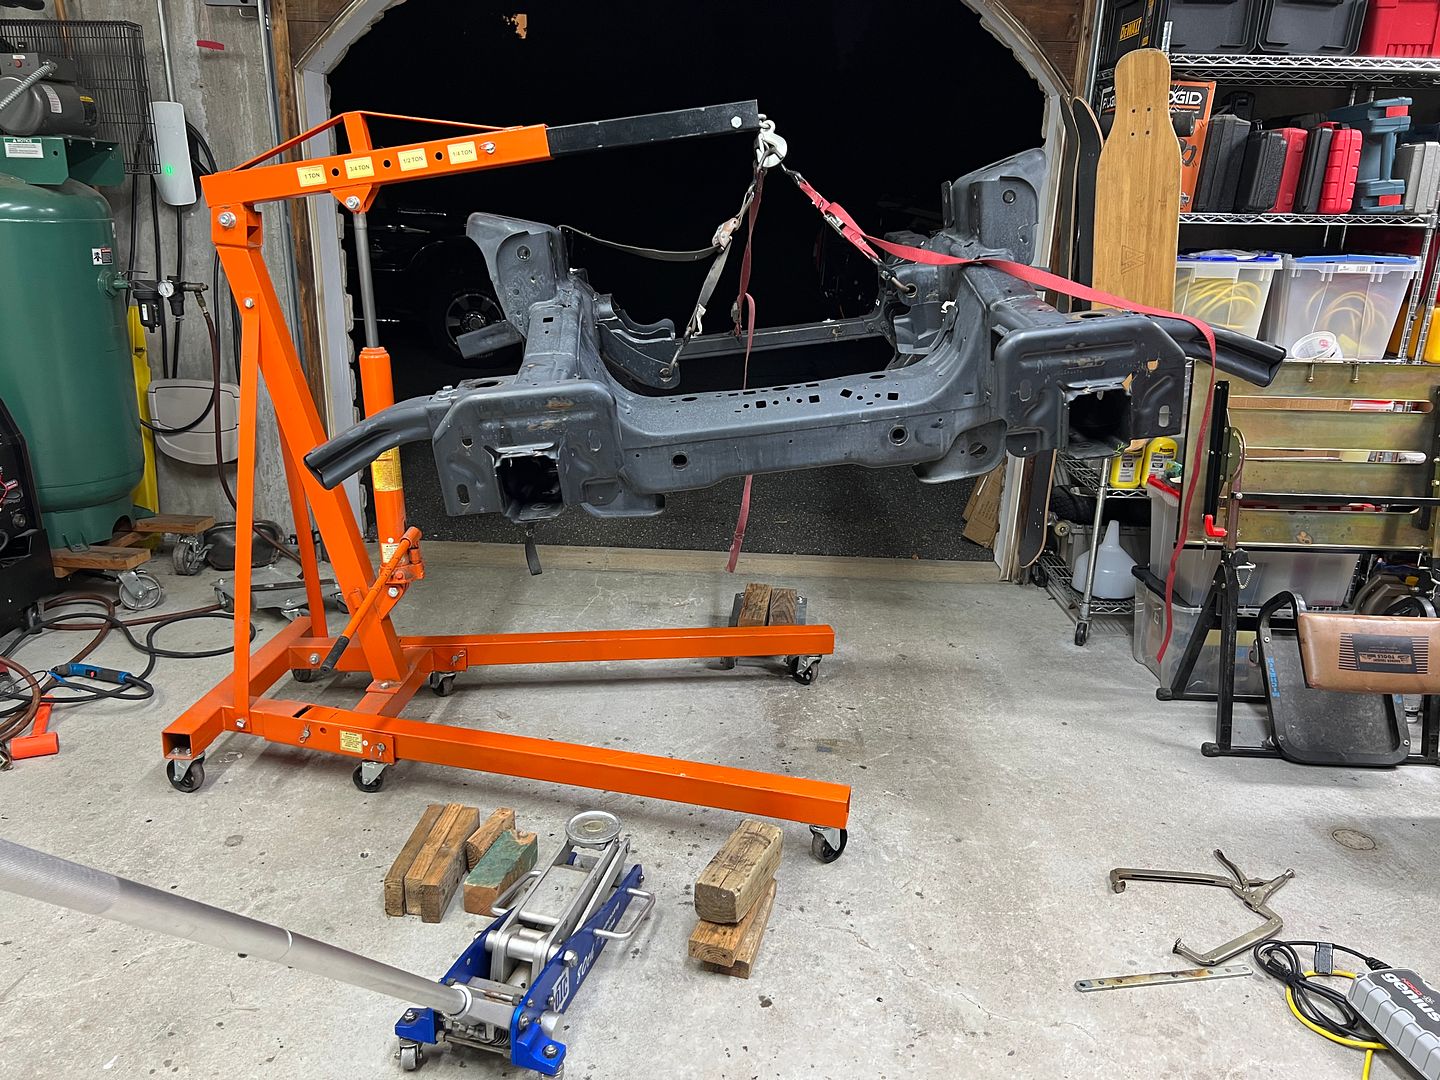
At least the cutting part was easy.
And now i can lift the frame up into his box truck.
Thankfully it worked out.
I gave him a bunch of other stuff that I don't want to bother selling . He is a nice young guy and Everybody wins.
XTF #2
build start date June 19 2023
GTM # 344
Build Start December 2010
First track day April 2013
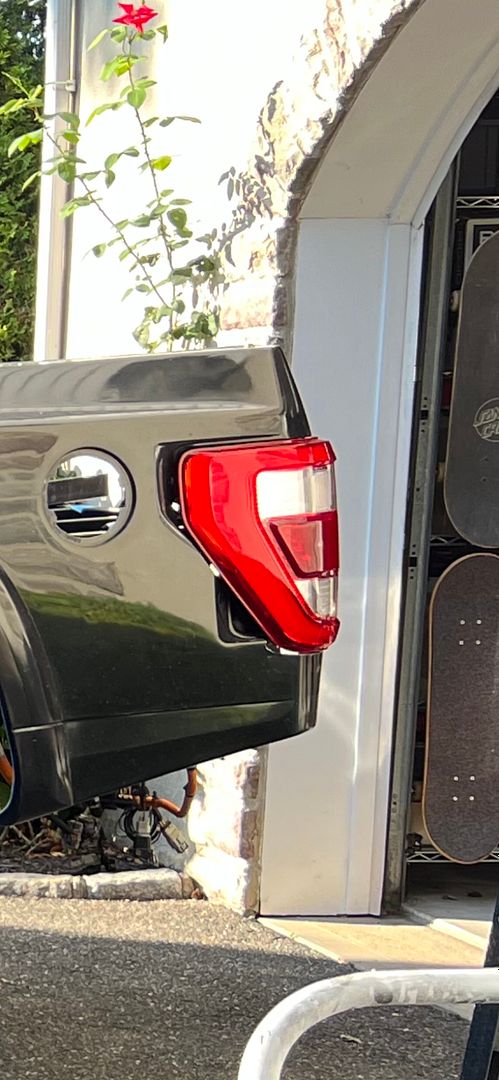
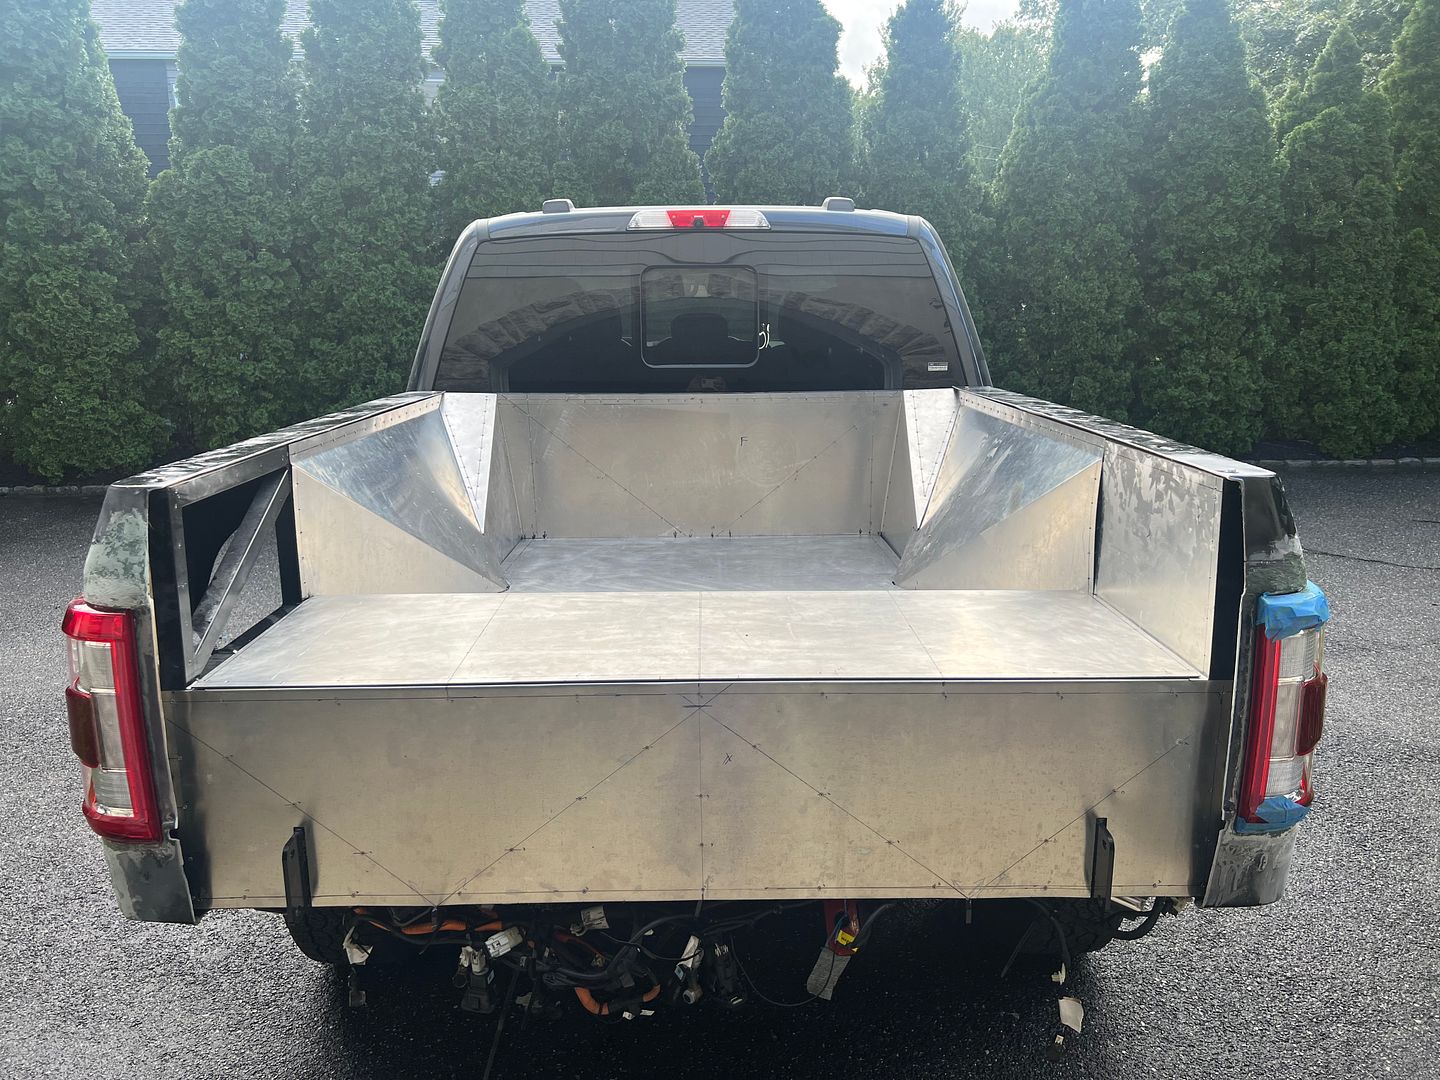
Now that the bodywork is on the frame, i need to address the changes from the gen 13 F150 to the Gen 14 F150.
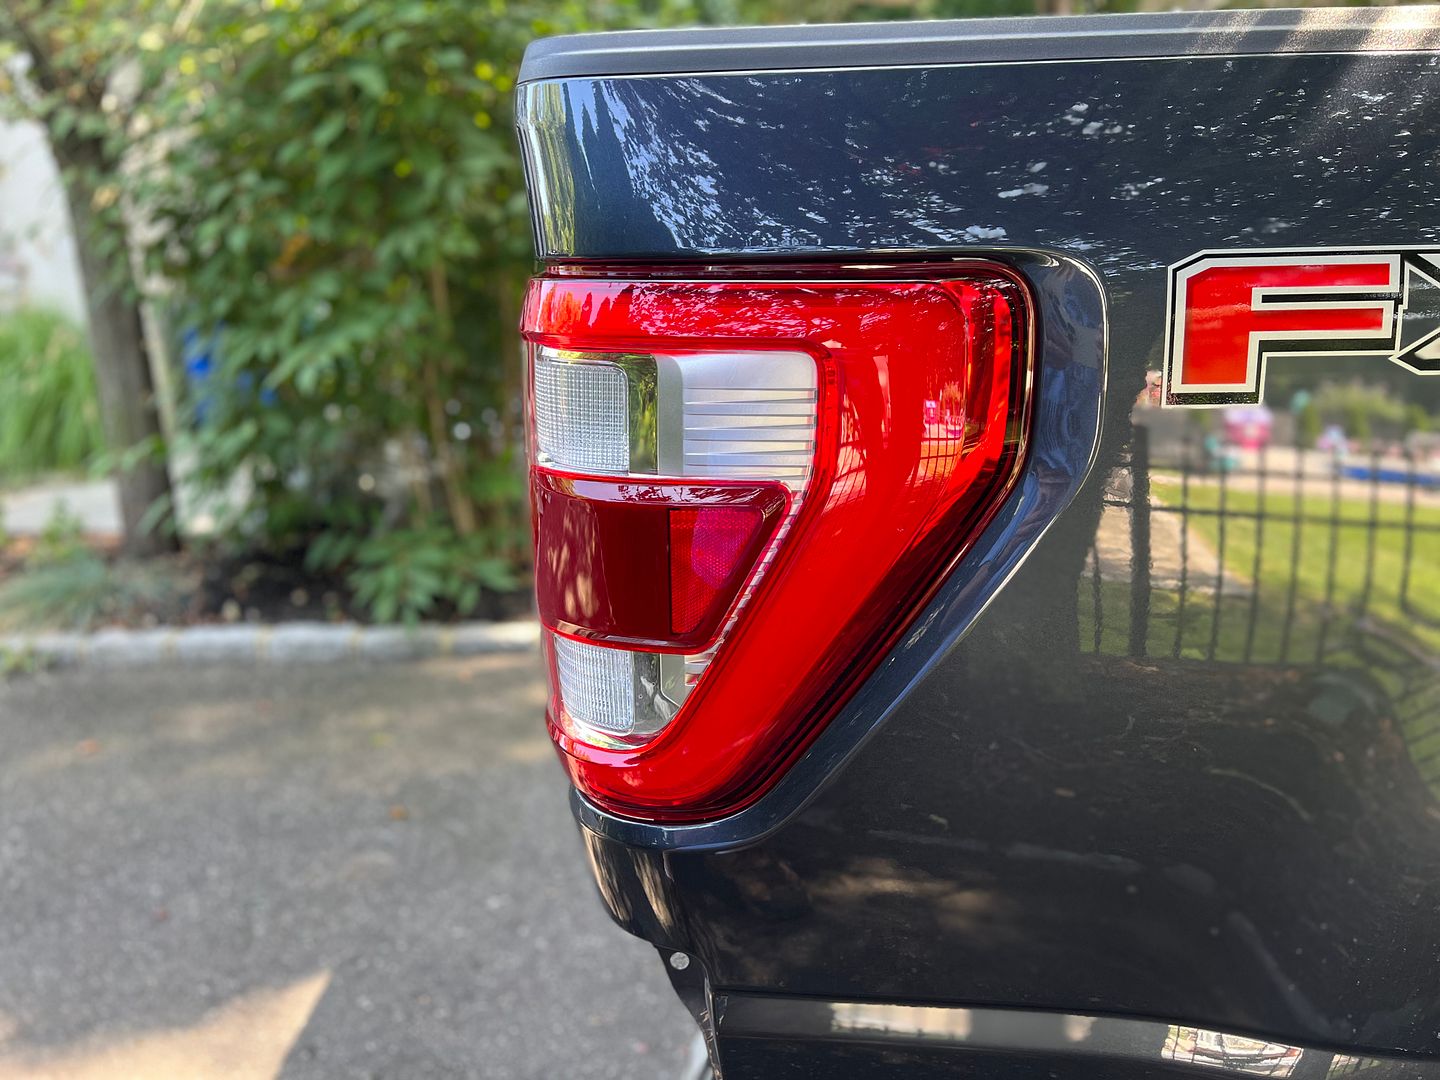
The tail lights are my first task. While using the gen 13 lights would be easier from a bodywork perspective, the wiring changed and the blind spot sensor changed. I would basically need to rewire a gen 13 tail light to simulate a gen 14 and make the Blind spot sensor fit. Anything is possible, but i know I can make the tail light fit in the factory five bodywork so thats the approach I took.
I also like the gen 14 tail light so there is that.
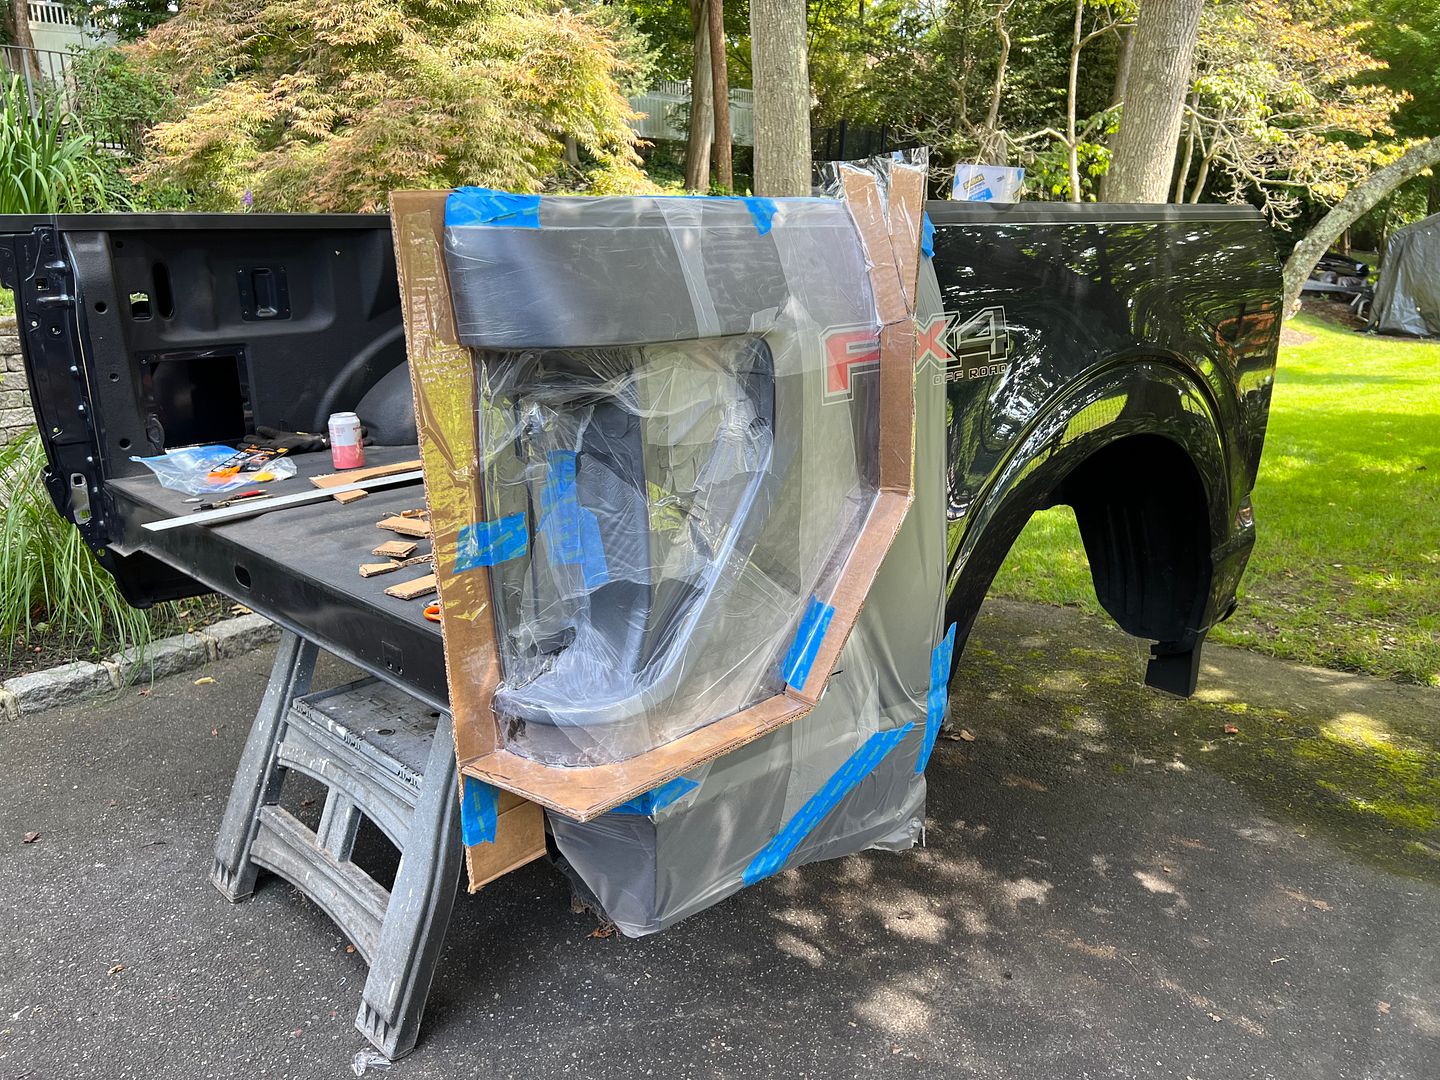
This isnt going to work thats for sure.
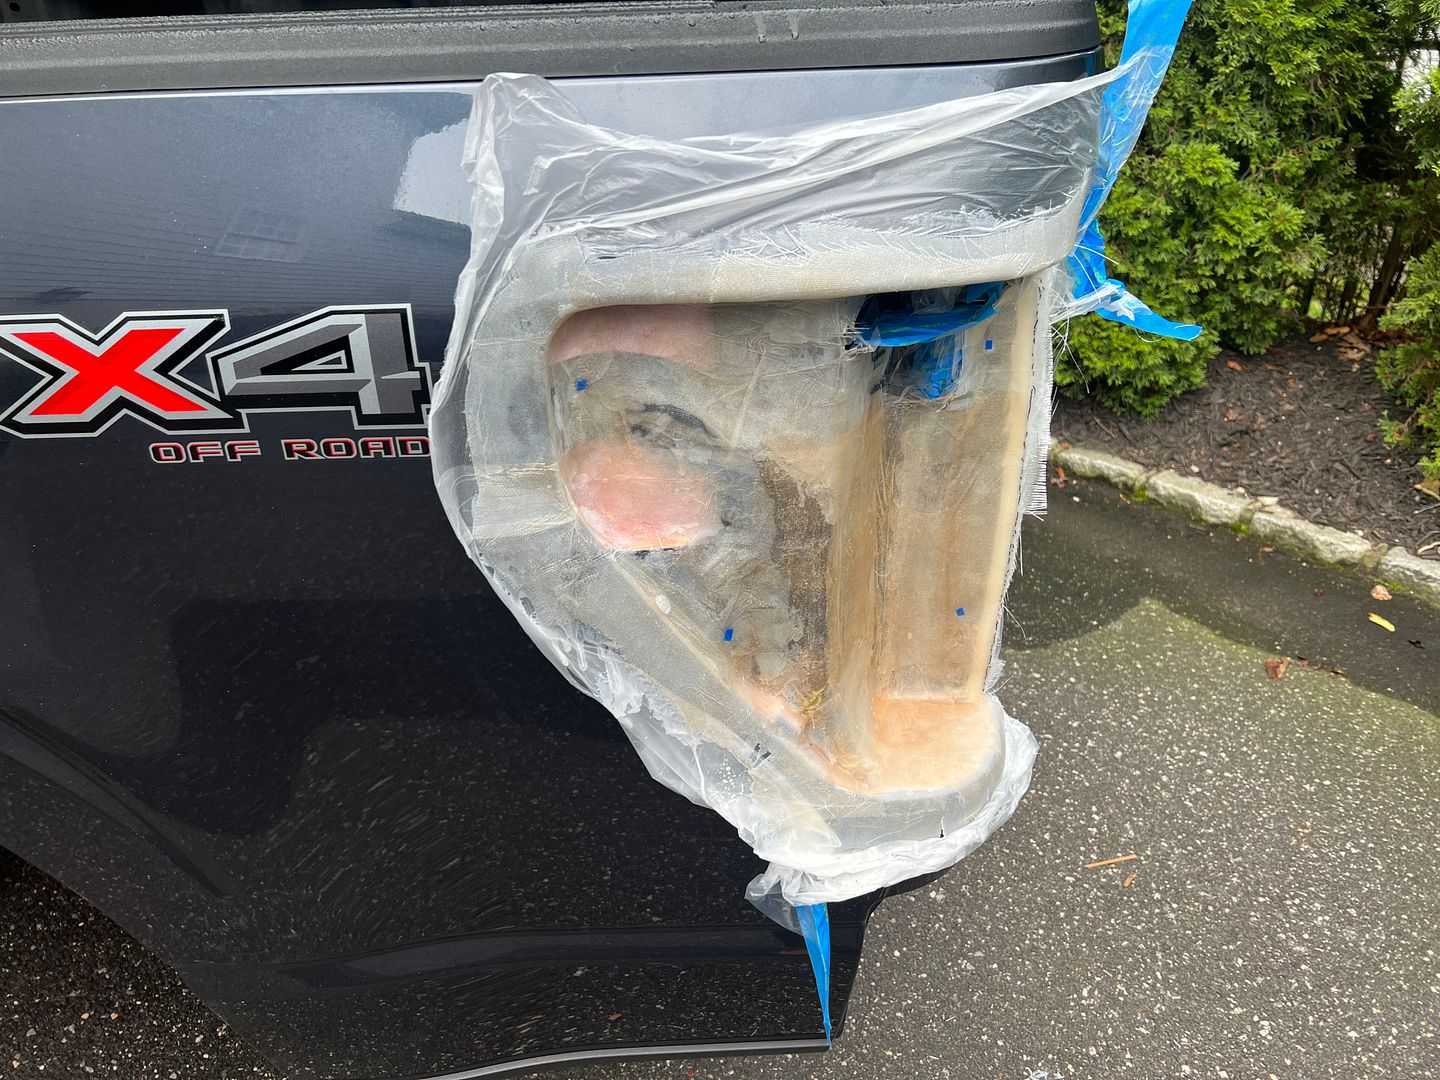
My first idea was to make a mold directly form the bed I kept for this purpose. I will have an exact copy of the tail light housing and surrounding sheet metal and I can just graft that into the factory five parts.
So i covered the area with cling wrap.
Built an enclosure.
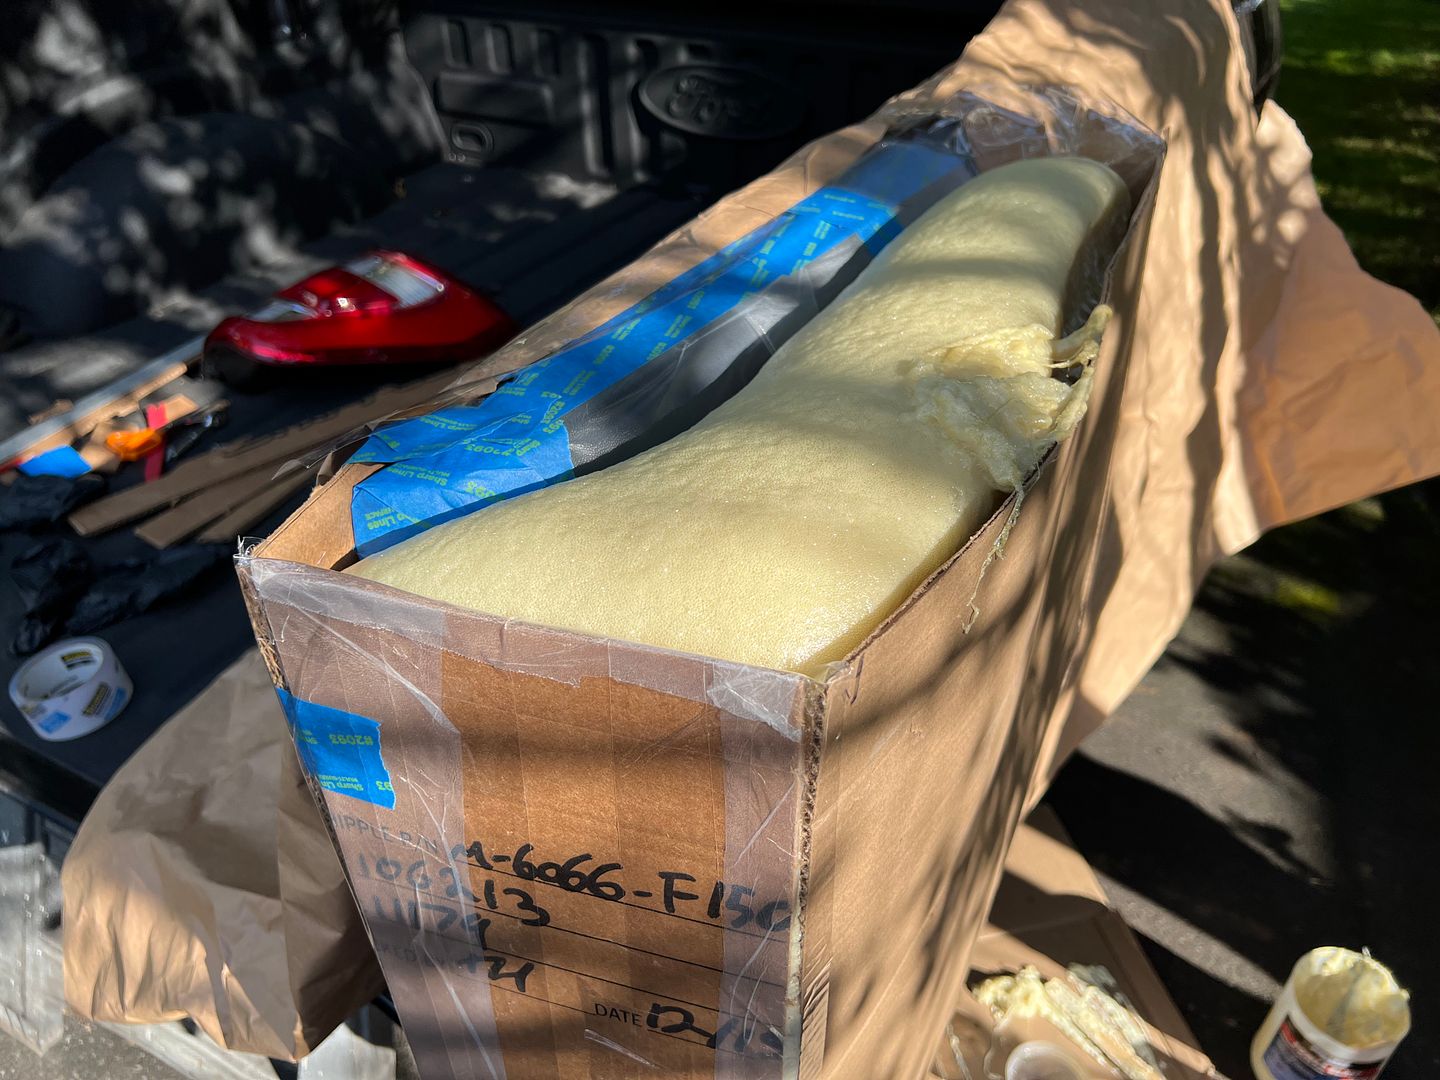
Covered the area in a thin layer of fiberglass and poured in some foam.
That was fun. Ive never done that before.
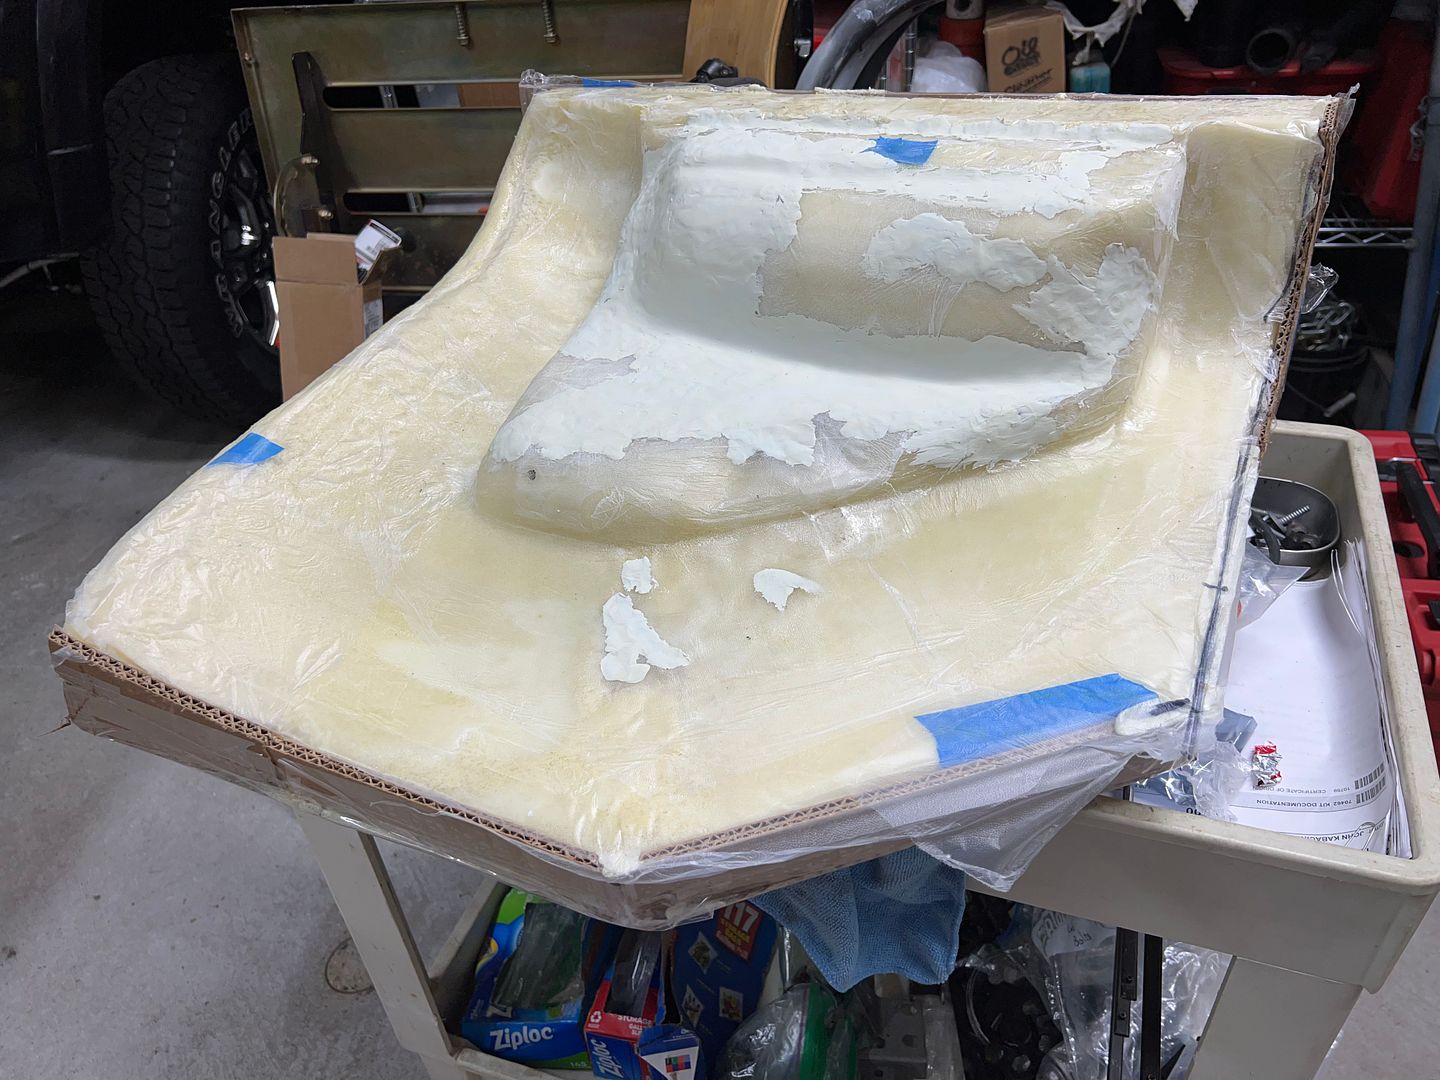
I got this mold where I was able to pull off the part i needed.
I got a bit carried away with the plasticine filling in all the divots in the mold. some of them were for clearing the light housing .. oh well. This works, but the second try will be better.
XTF #2
build start date June 19 2023
GTM # 344
Build Start December 2010
First track day April 2013
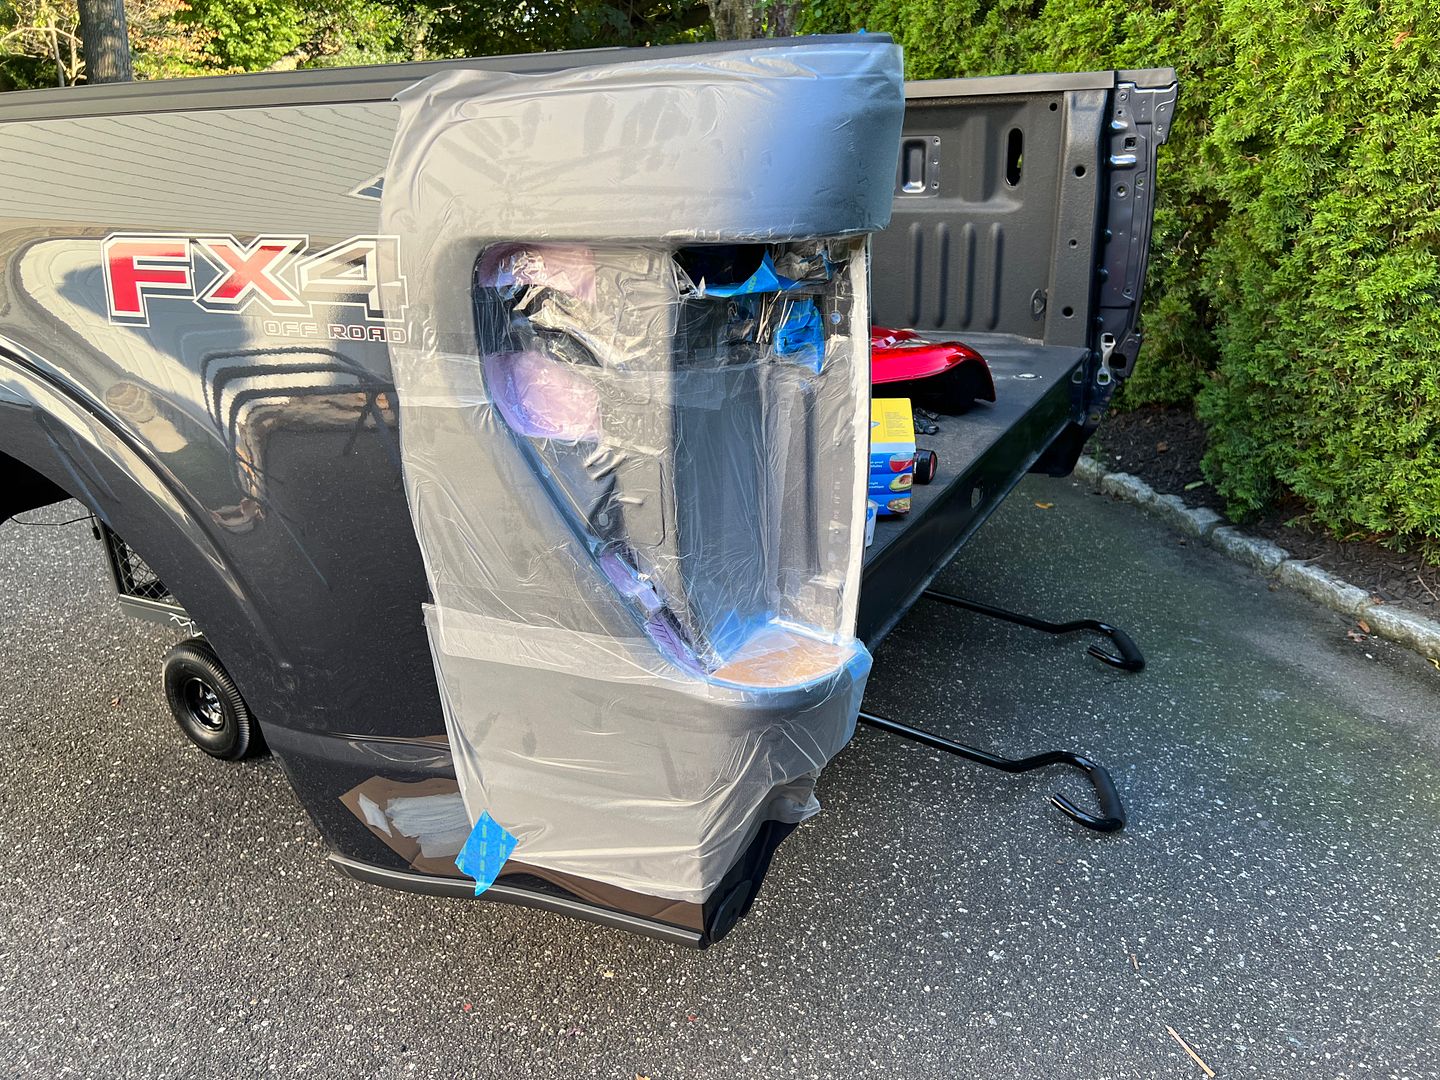
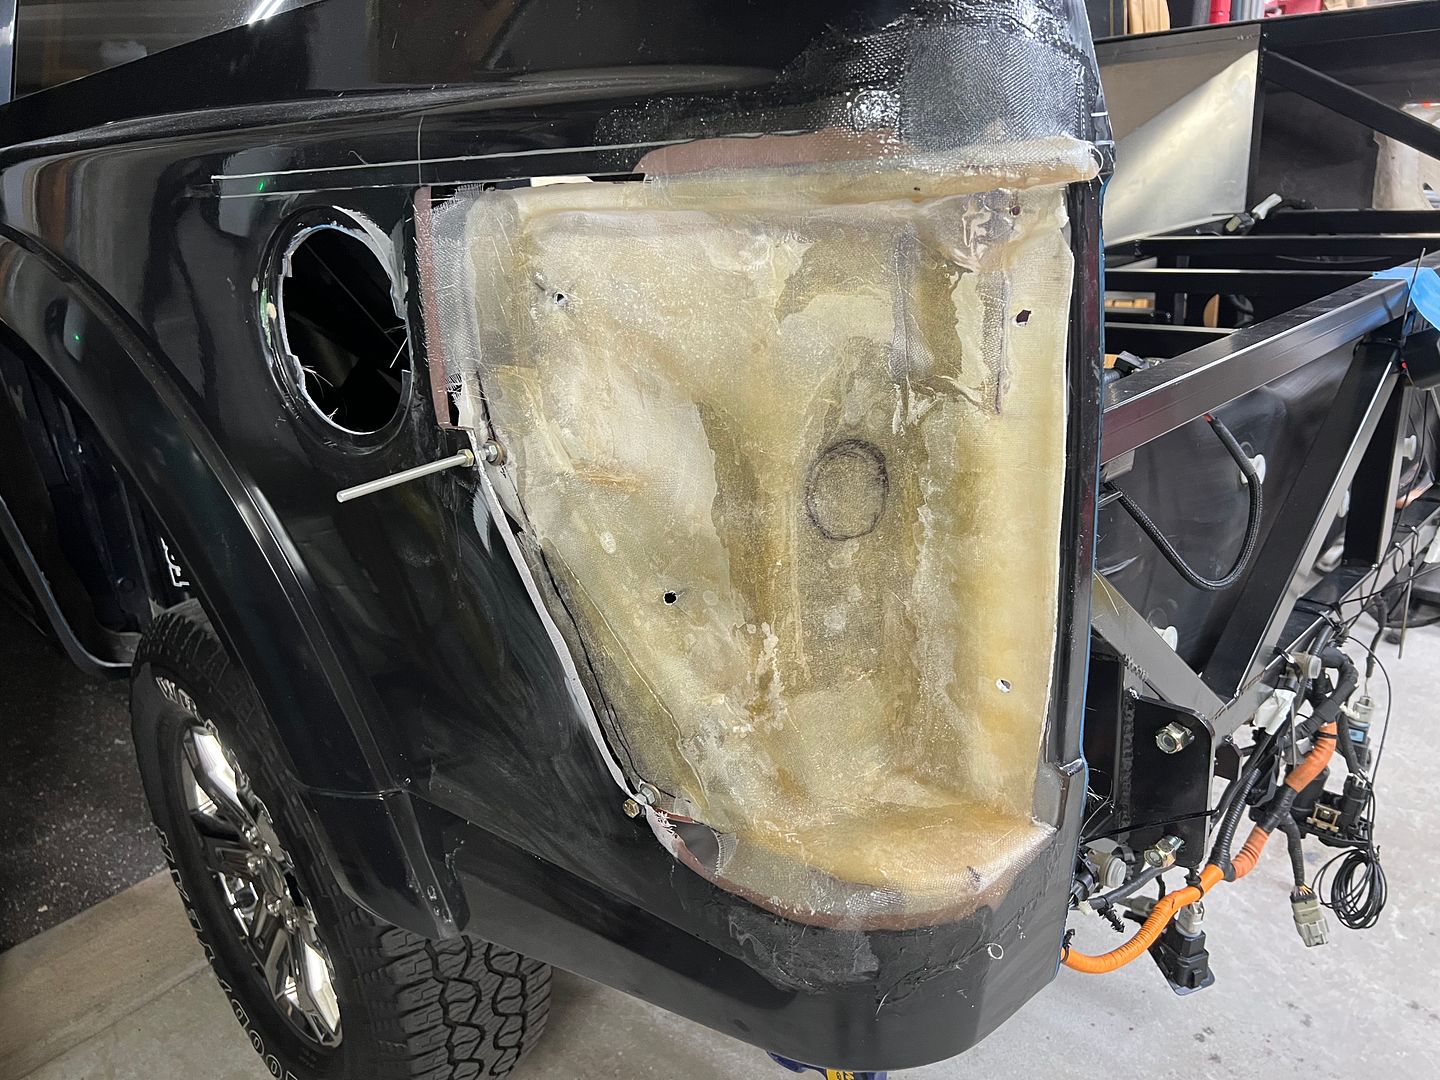
With some experience mounting the first tail light replica, I realized that the sheet metal surrounding the light was not as useful as I hoped. I simply used it to locate the light in the factory five bodywork but it is below surface of the finished panel.
This time my only goal was to pull a replica of the tail light bucket and not worry about the surface finish of the part. No mold needed.
First put down the cling wrap paying attention to where I wanted negative space for the light housing.
Put down a thin layer of fiberglass. Thin fiberglass is also flexible. This helped as this tail light housing does not have the proper draft angle to make a fiberglass part. The part wants to lock itself into the bed like a key.
I avoided the top corner because there is a sheet metal plate that is not needed in my fiberglass part. I will rebuild that area when I build up the back of the mold after its pulled from the truck bed. I also marked the holes for the pins and bolts that mount the light with bits of blue tape. A layer of fiberglass over those will keep them in place.
Finally using some threaded rod and bolts I held the tail light bucket in space while I put a layer of fiberglass on the outside of the bucket to lock the alignment perfectly in space.
I find that parts that need good alignment need to built in place. If I were to take the panel off the truck and glass the part into position the weight of the panel slightly warps the opening. The fiberglass lock this new position in place and I dont get the outcome I expected. Once the new tail light housing is locked in place I will remove the part from the truck and grind off the extra fiberglass from the back side. Ill build up the connection between the two parts making the transition from the factory five part and my tail light housing a smooth transition.
There is probably a better and faster way to do this, but the result was great. The tail lights drop exactly into place and are perfectly aligned just like the factory. Im satisfied with that.
John
XTF #2
build start date June 19 2023
GTM # 344
Build Start December 2010
First track day April 2013
I'm enjoying following along with your build, but I would think that these sorts of fabrication may be beyond the typical builder's ability to pull off. I hope FFR sees this as an opportunity to provide options that support either generation of donor truck.
This route is definitely faster than 3D printing or or CNCing a buck/mold. the down side is you don't have something you can sell on Etsy to other builders.
My experience with round tail light mounting was much easier. Did you consider cutting the original mounts out of the donor box and bonding them in place?
jim
I'm enjoying following along with your build, but I would think that these sorts of fabrication may be beyond the typical builder's ability to pull off. I hope FFR sees this as an opportunity to provide options that support either generation of donor truck.
Hi Papa,
Yes the point of my build is to help factory five evaluate what needs to change in order to have a turn key kit for gen 14 F150s.
When factory five and I discussed building a kit I was originally going to get a gen 13, but after doing research it seemed like the Gen 14 would work, so I took a chance.
I get to be the first beta builder on Gen 14. Factoryfive have only built Gen 13 f150 into XTF prerunners. The kit was not designed for gen 14, but I think it actually works pretty well. Lucky for me haha. I figured how bad could it be?!? Famous last words.
If people ask for a 2021+ kit then factory five know everything that needs to be updated with the kit to make it turn key. Its early days so factory five are simply selling the kit they designed before the gen 14 was even available.
If somebody wants to build the gen 14 into an XTF I can tell them everything they need to do to modify the kit. Factory five also have all that information.
Factory five will offer turnkey kits for the Gen 14 and even the Gen 15 at some point.
Great question.
XTF #2
build start date June 19 2023
GTM # 344
Build Start December 2010
First track day April 2013
This route is definitely faster than 3D printing or or CNCing a buck/mold. the down side is you don't have something you can sell on Etsy to other builders.
Haha very true. The truck needs to be done for SEMA so i don't have time to play around sadly.
The other thing to consider is that Factory five will likely offer a turn key 2021 sooner kit if people ask for it. Else they will offer it as demand increases.
The work I have done is no big deal for factory five to Change in the turn key kit.
If you don't go off the rails building a crazy power plant or try to modify fords Gen 14 design back to a gen 13 design the build would likely take 1 month.
Now getting a truck ready for SEMA. I am sweating !!
This truck needs to be shaken down an ready for the desert in 6 weeks
XTF #2
build start date June 19 2023
GTM # 344
Build Start December 2010
First track day April 2013
My experience with round tail light mounting was much easier. Did you consider cutting the original mounts out of the donor box and bonding them in place?
jim
Actually Jim cutting out the tail lights would be a great solution as you quickly get OEM fit.. BUT a very expensive solution .
The aluminum bed of an f150 in pristine condition lists for 4-5 thousand dollars on EBAY. Im not sure if they actually sell for that amount, but even if it sold for $1000 those would be very expensive tail light buckets !!
When Im done with the bed Ill sell it as there are many folks who buy a badly damaged F150 and rebuild it with a nice good as new bed like mine.
XTF #2
build start date June 19 2023
GTM # 344
Build Start December 2010
First track day April 2013
Well its crunch time. Im super busy getting everything ready for SEMA.
Since my last update Ive been wrapping up the loose ends.
I charged the AC system. (Very important for Las Vegas heat) we get condensation here not so much there.
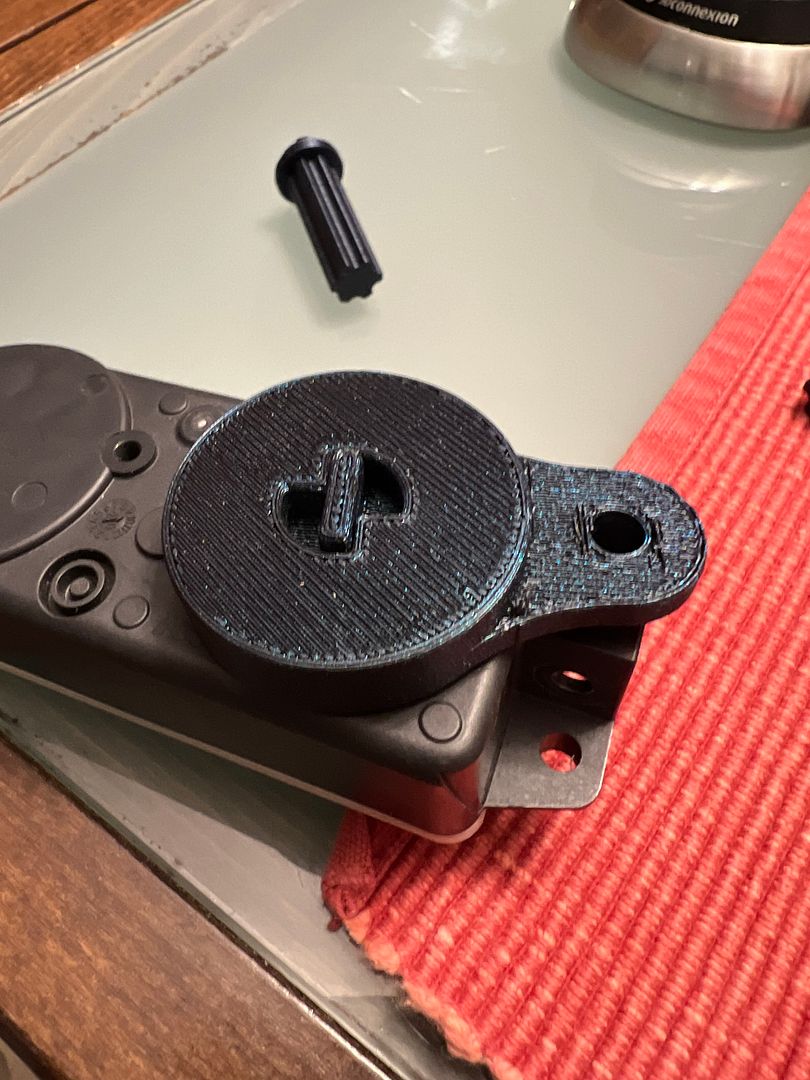
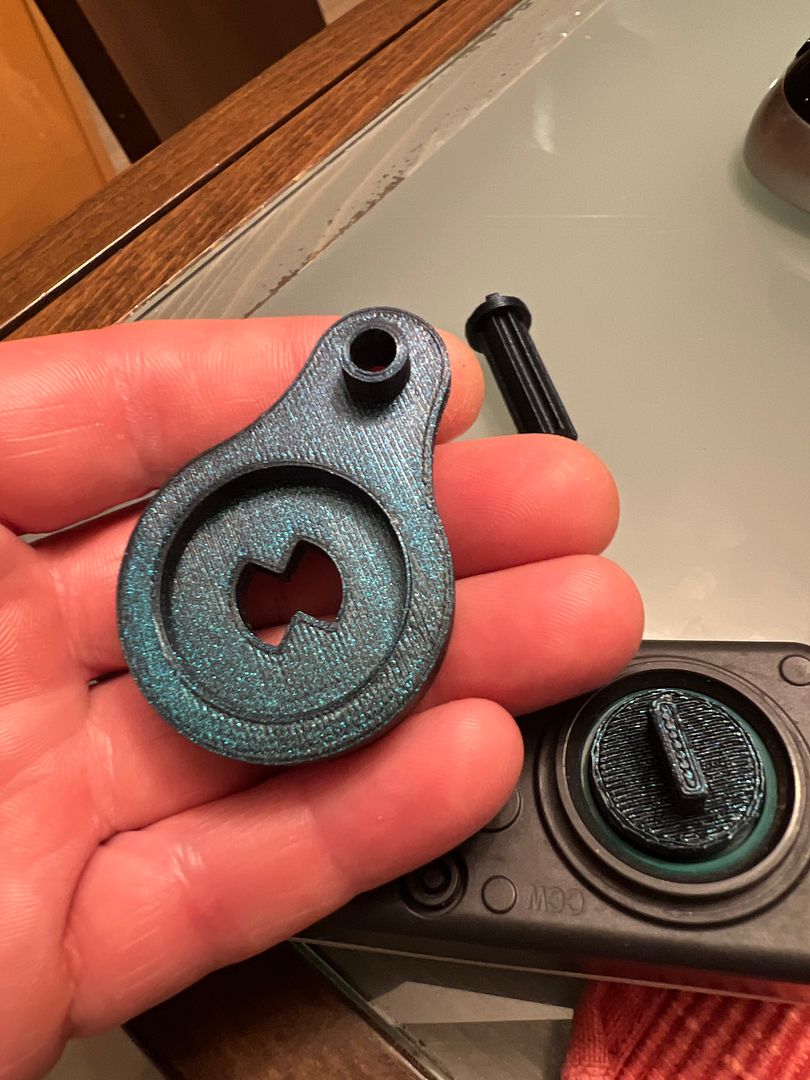
I wanted to delete my grill shutters as they are silly on a truck like this. You cant do it in software, but you can do it with a mechanical grill shutter simulator
XTF #2
build start date June 19 2023
GTM # 344
Build Start December 2010
First track day April 2013
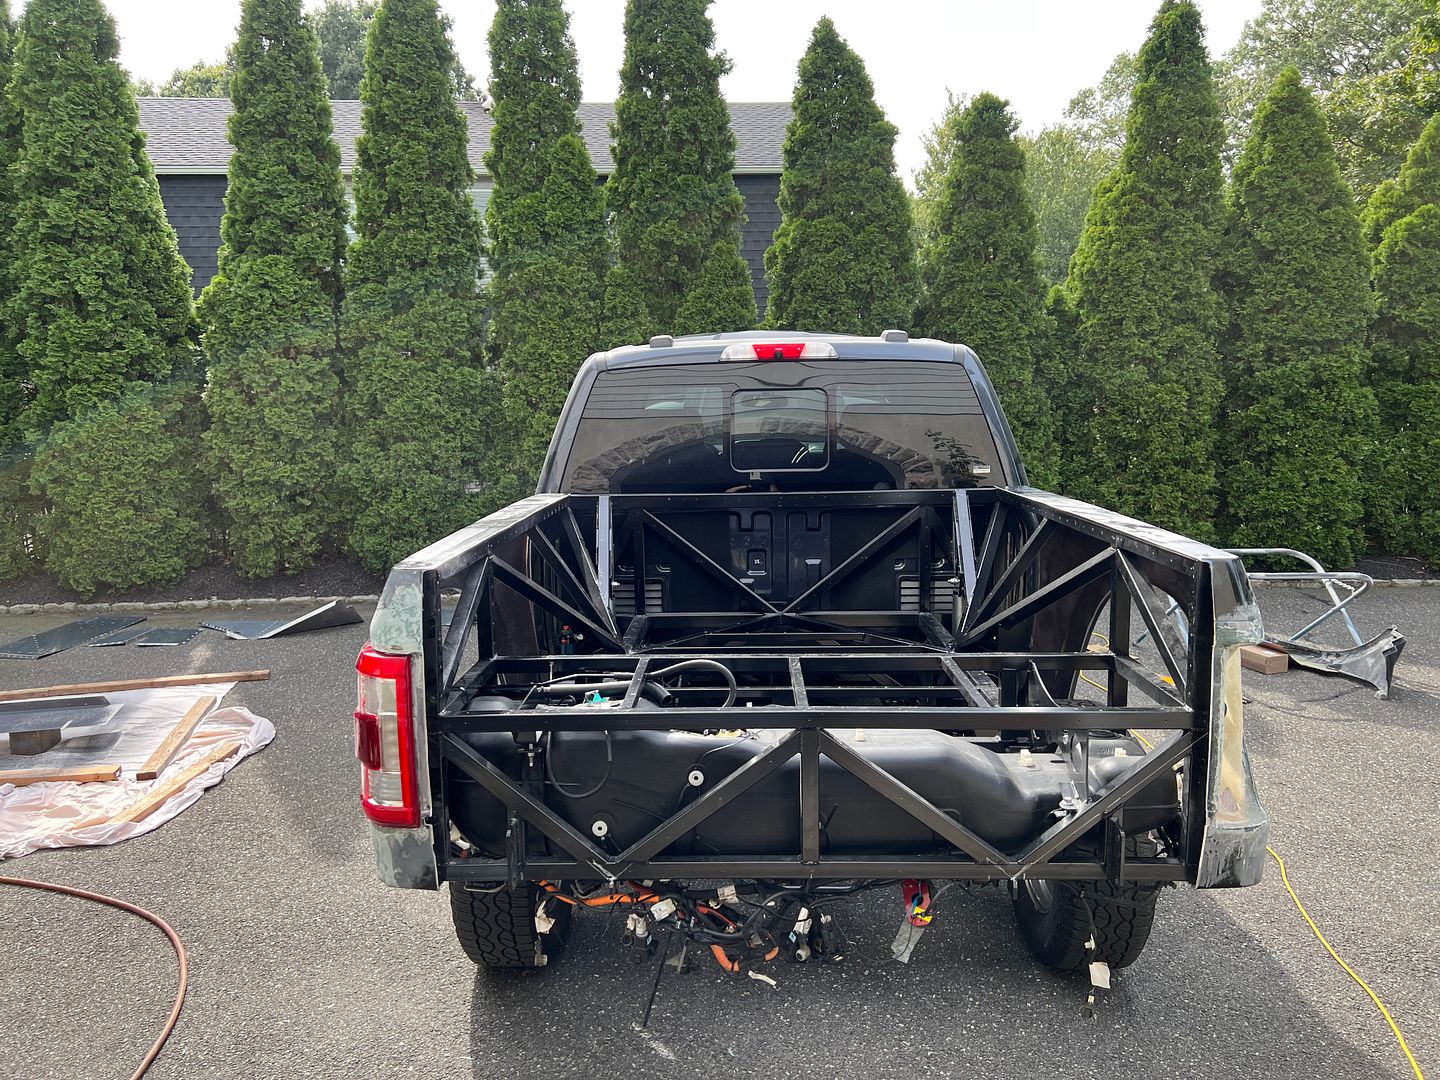
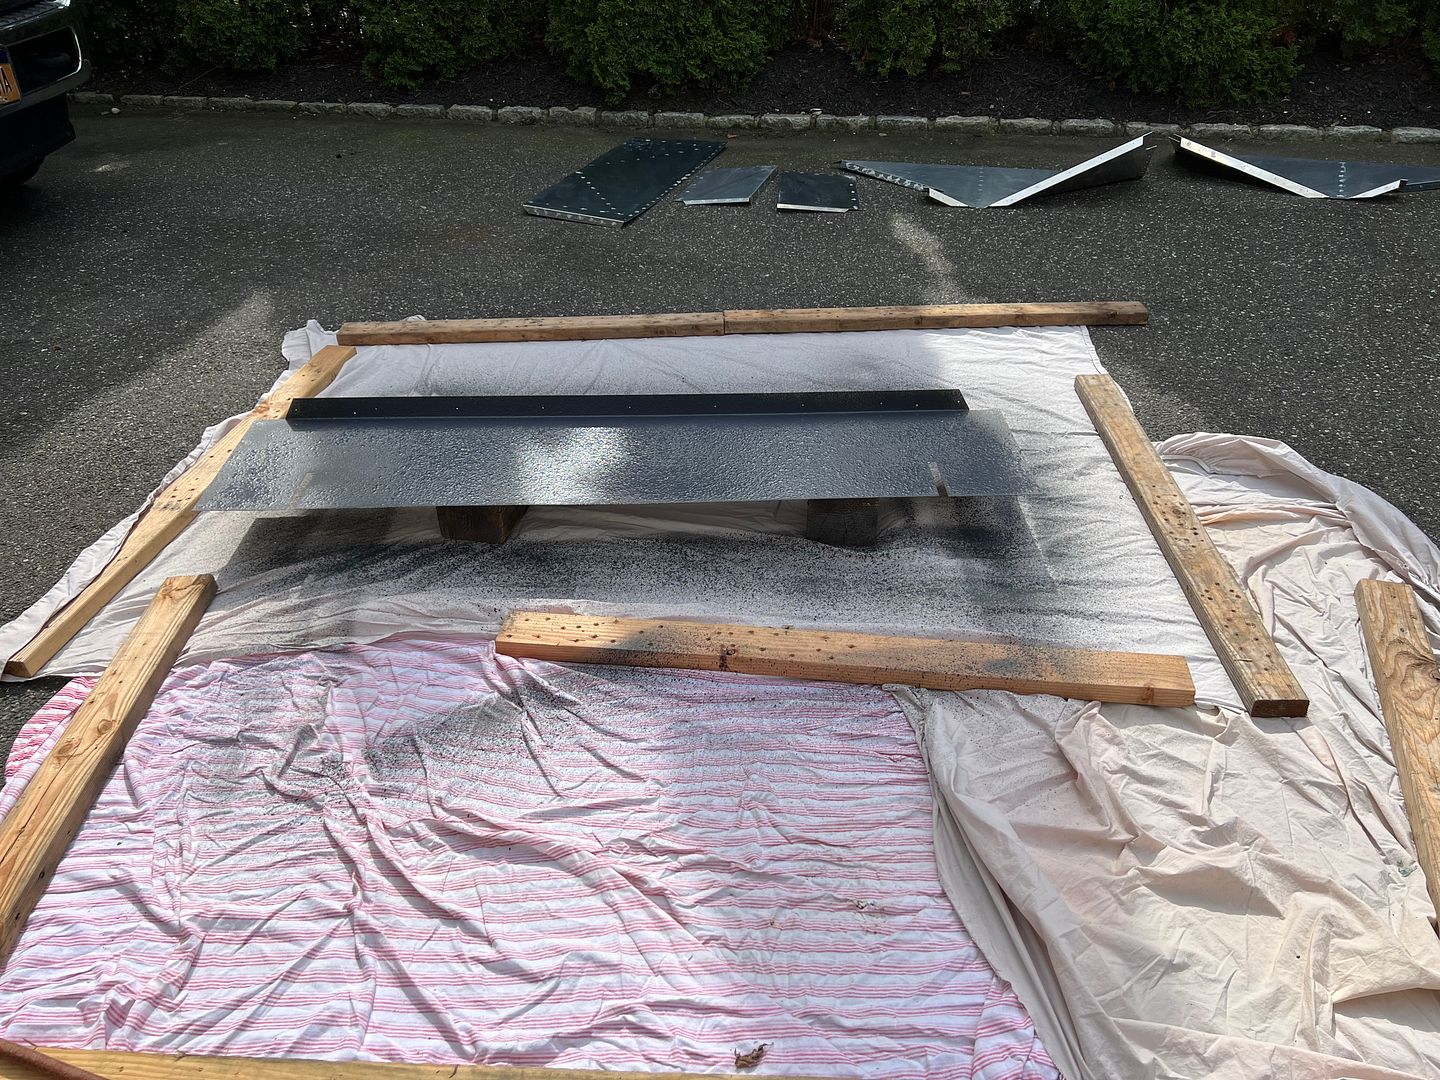
In order to sound deaden the aluminum I gave it a coat of lizard skin sound deadener. All the panels are drilled and ready to rivet so I pulled them all off
Then a coat of lizard skin sound deadener sprayed with an undercoating gun. Just thin it down to the consistency of interior latex paint.
Probably over kill as I am going to add bed liner in too, but this is cheap and easy insurance that I will not have any rattles.
Works like a charm, dries fast and water clean up . This stuff is great.
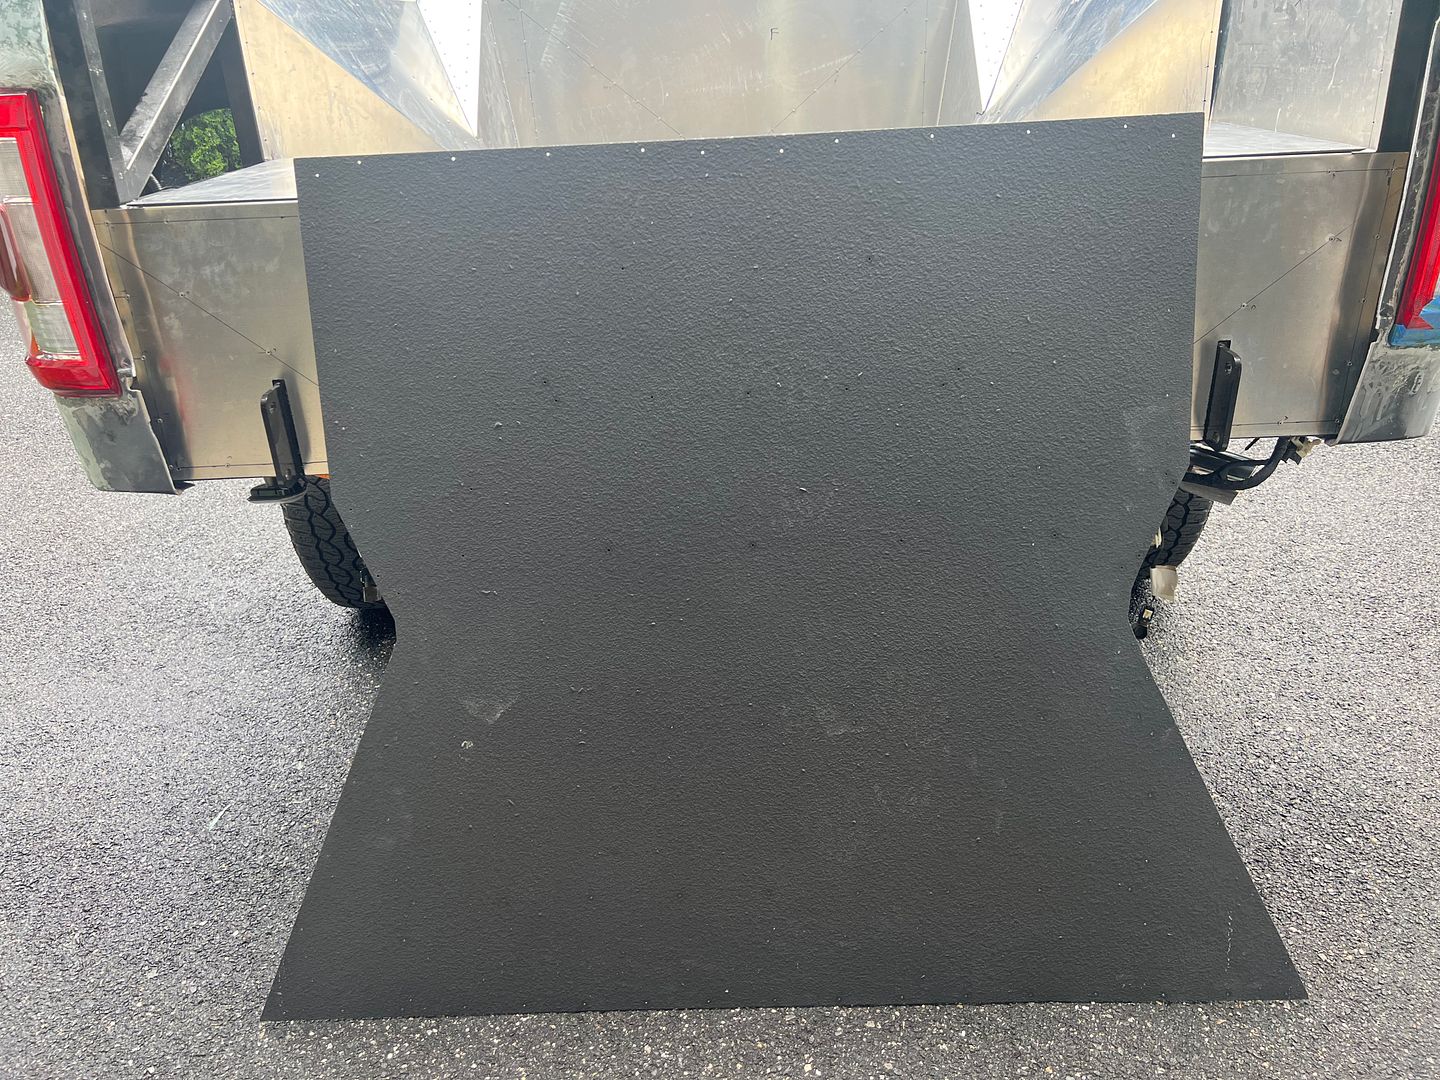
Almost ready for bed liner.
XTF #2
build start date June 19 2023
GTM # 344
Build Start December 2010
First track day April 2013
I am confused. You put Lizard skin on the backside of the panels?
As an experienced pick-up owner I never hear structure noise from the cargo box, maybe they do not exist.
Bed liner will contribute somewhat to averting panel impact damage, but it will not be OEM truck-like. Light duty.
After two long term Tundras, I recently bought a Honda Ridgeline. The cargo box has SMC composite panels in the steel body. The OEM bedliner was not UV resistant and evaporated in spots leaving fiberglass exposed.
I removed all the panels and double coated them with Durabak-18 through Amazon. It comparison tested very well. It comes in colors and my gray matched the leather interior.
jim
Project Farm bedliner review: https://www.google.com/search?q=Proj...RY-Z0ObgY,st:0
Hey John,
I don't know what your bedliner plan is but I highly recommend Raptor. I recommended it to Erik and he used it. I've been using it on the undersides of all the Cobra and Coupe bodies I've done for the past 3 years or so and love it! User friendly and creates a nice texture which you can vary with pressure or number of coats.
I am confused. You put Lizard skin on the backside of the panels?
As an experienced pick-up owner I never hear structure noise from the cargo box, maybe they do not exist.
Project Farm bedliner review: https://www.google.com/search?q=Proj...RY-Z0ObgY,st:0
Yeah the side panels on the XTF are thin flat aluminum. The floor is thick flat aluminum. If you leave them alone they can vibrate. Over time the rivets could loosen and then they could vibrate. Sure maybe they are fine, but with the flat panels and rivet construction, it’s always good to go the extra mile to eliminate any chance of vibration.
Last edited by kabacj; 09-19-2023 at 09:10 PM.
XTF #2
build start date June 19 2023
GTM # 344
Build Start December 2010
First track day April 2013
Hey John,
I don't know what your bedliner plan is but I highly recommend Raptor. I recommended it to Erik and he used it. I've been using it on the undersides of all the Cobra and Coupe bodies I've done for the past 3 years or so and love it! User friendly and creates a nice texture which you can vary with pressure or number of coats.
I have enjoyed following along!
Jeff
Hey Jeff Thanks! Yep I got the Raptor Liner as well. I saw how well Eriks turned out and clearly thats the best solution .
XTF #2
build start date June 19 2023
GTM # 344
Build Start December 2010
First track day April 2013
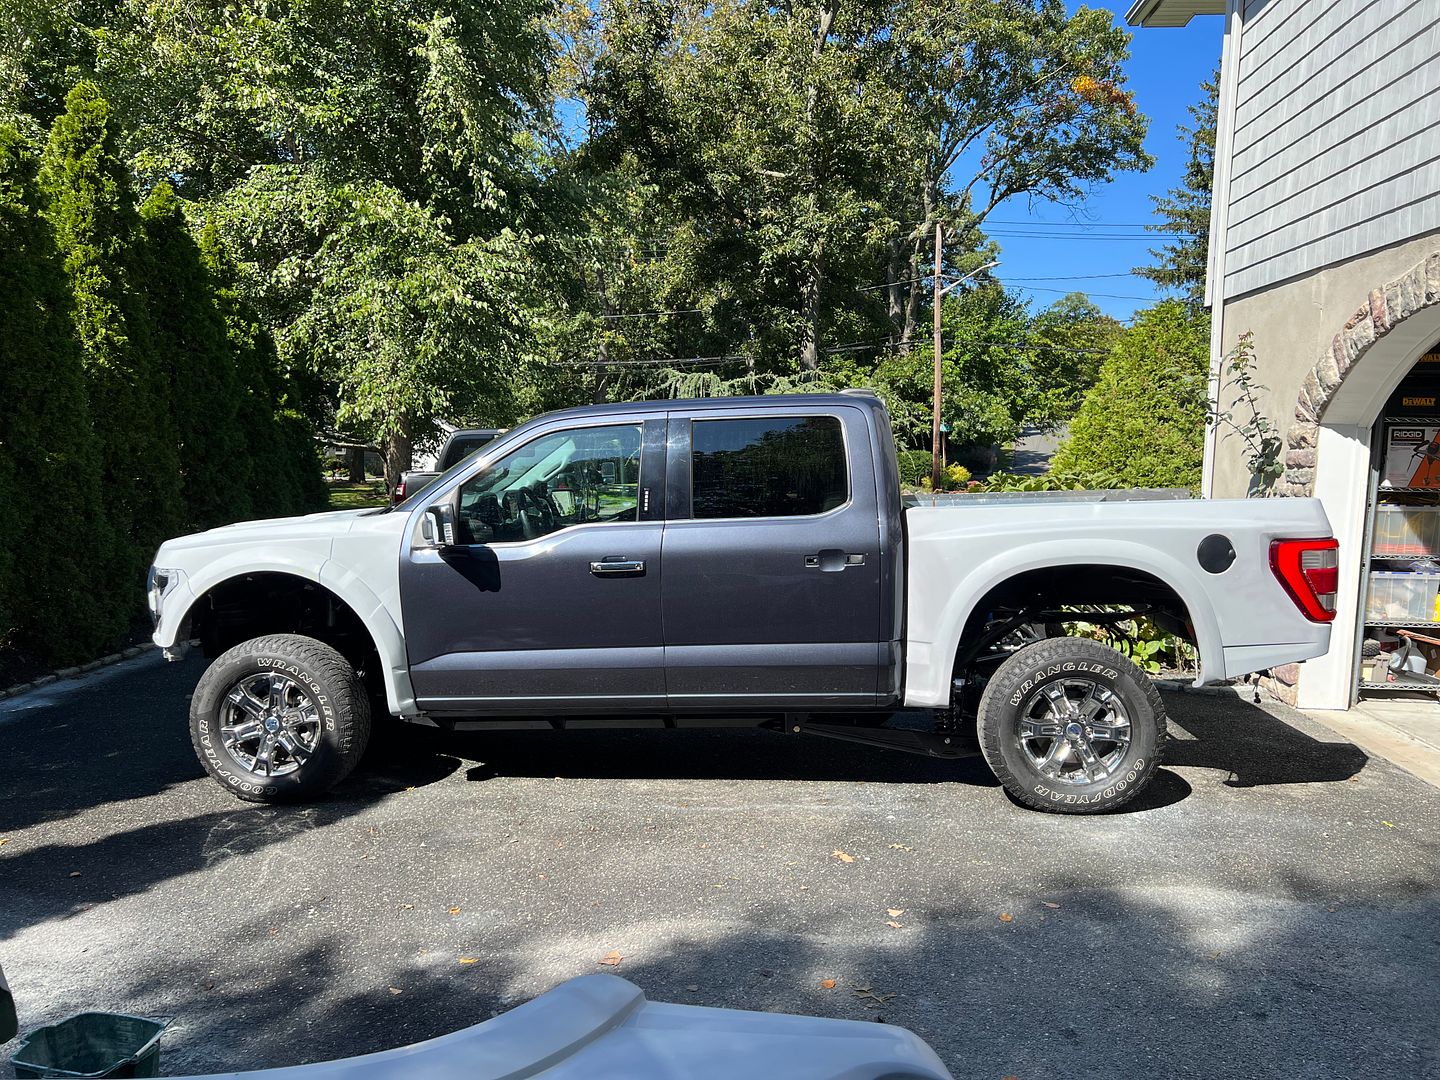
And finally after a spray with feather fill and hours and hours of block sanding then wet sanding she is ready to go out to get wrapped! Door handles, mirrors, tail lights all come off .
Since all the bodywork was done, I took the truck out for a drive. WOW . After installing the front anti roll bar the truck turns better than stock. I have both front and rear anti roll bars. The XTF It has a sporty drive feel now instead of a floaty crown Victoria feel of the stock truck . The current F150 has morphed into a luxury truck. The stock F150 is wonderful and amazing, don't get me wrong, but its a bit boring in my opinion.
I wanted to add some personality to the driving experience and the XTF conversion absolutely does that. Now the truck has a sporty feel when it takes a spirited drive down a curvy road.
It was shocking really to have a 5000 lb truck that is willing and able to take the twisty roads. The drive experience was not what I expected from a lifted coil spring shock made for jumping and off road adventure like this.
Oh and if you turn the traction control off its possible to do an infinite burnout at 60mph. That's a new experience for me. The Ford performance (Whipple ) supercharger is amazing. It has plenty of power.
Last edited by kabacj; 10-07-2023 at 06:54 AM.
XTF #2
build start date June 19 2023
GTM # 344
Build Start December 2010
First track day April 2013
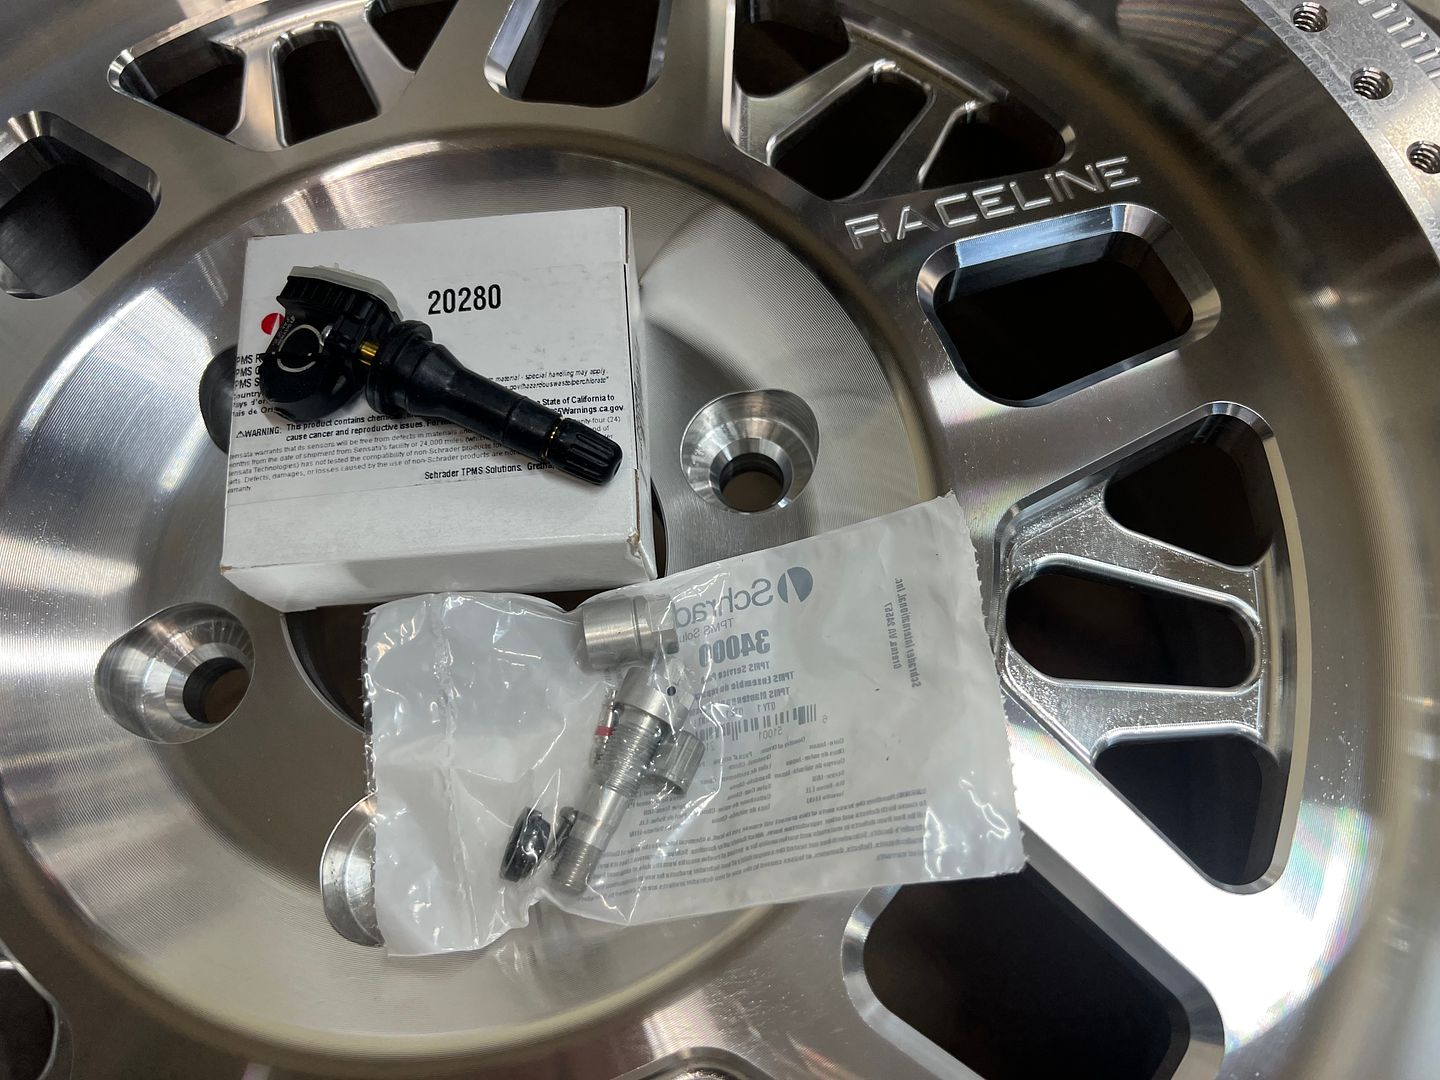
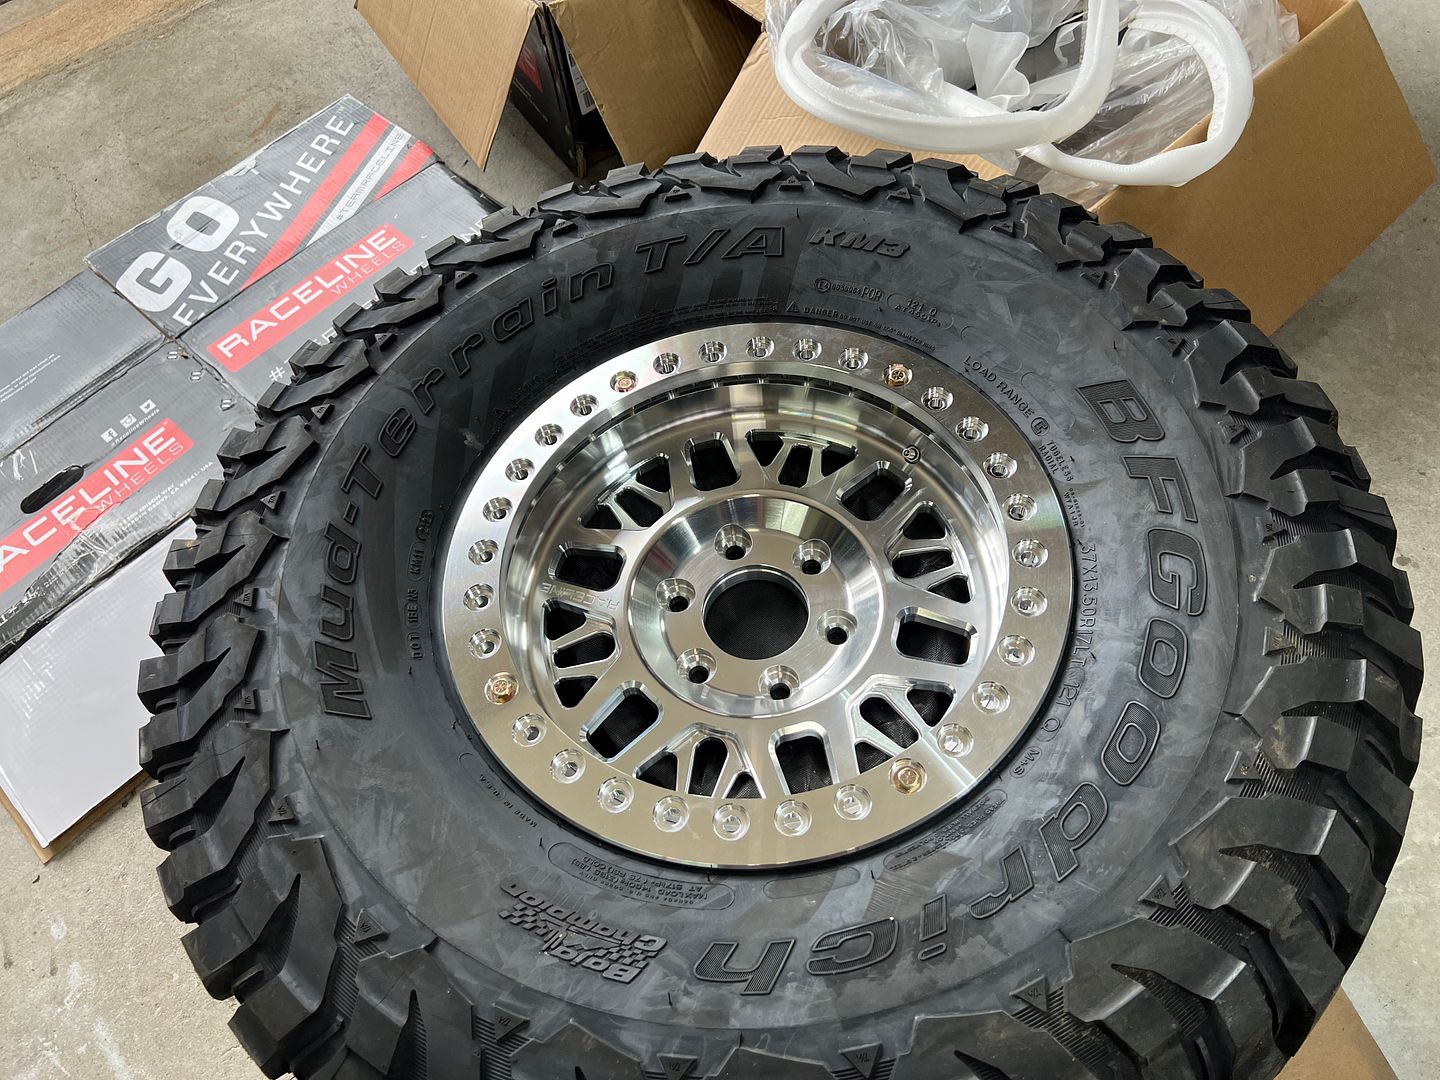
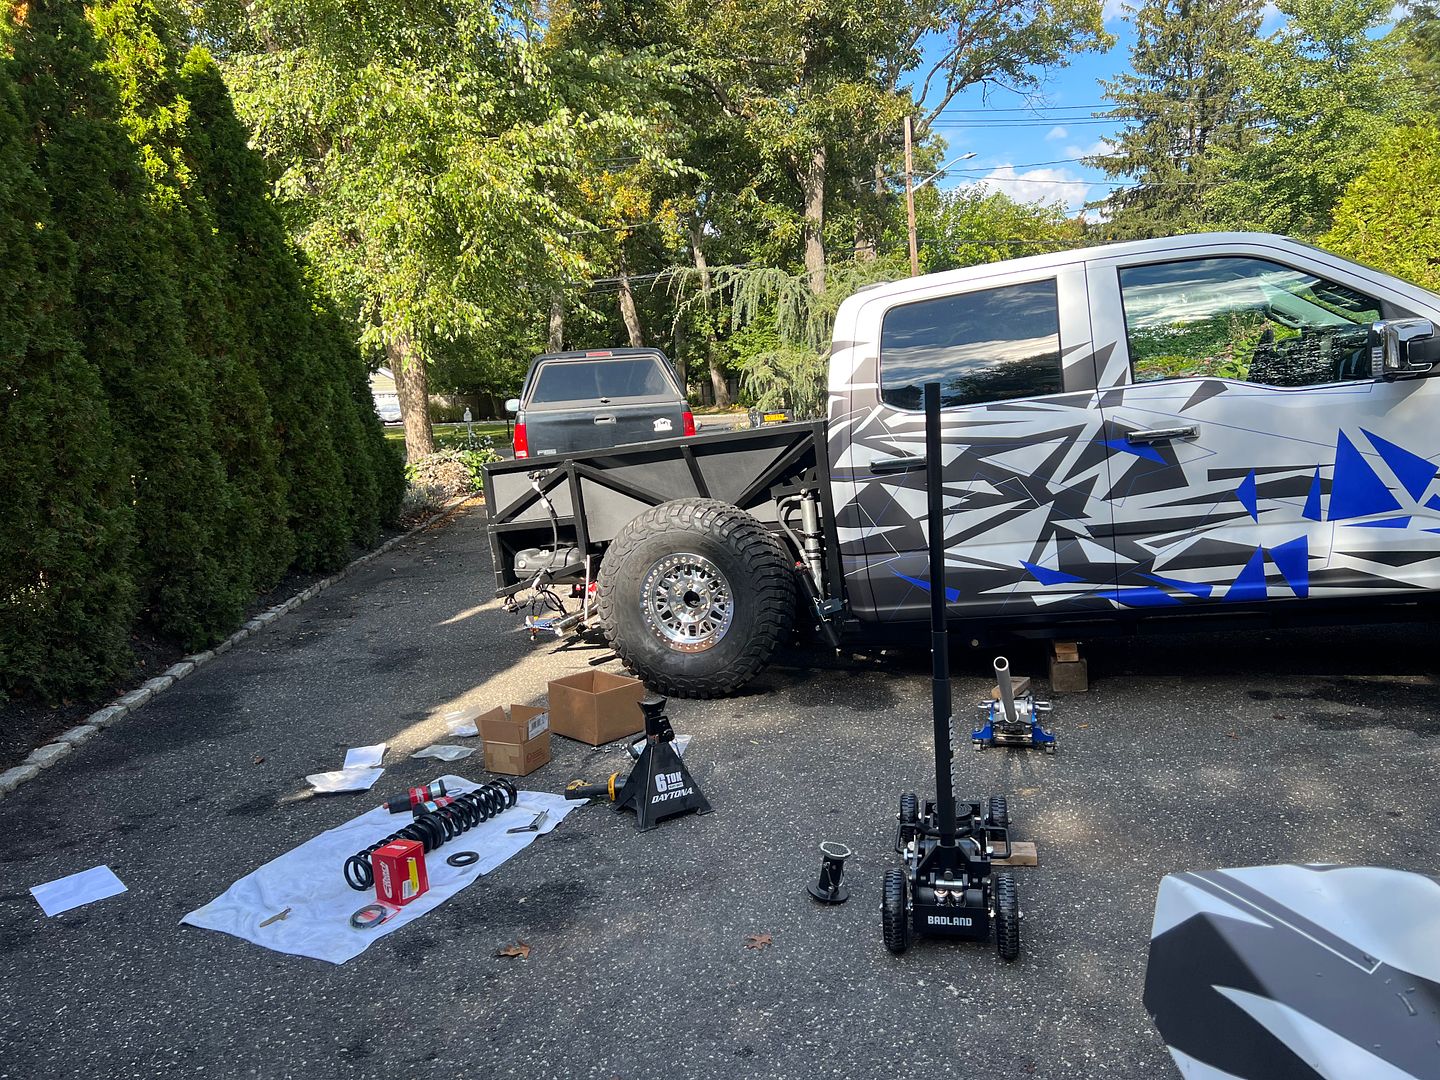
With the truck out getting wrapped I spent the weekend cleaning up the dust and pressure washing the driveway. Once things were back in order, I mounted the tires.
For some reason I thought mounting the tires on bead locks rims would be easy. Just pop the tire on and tighten lock the ring. This will be much more convenient than using a tire machine and worrying about damage to my new rims. Well that was not exactly how it went.
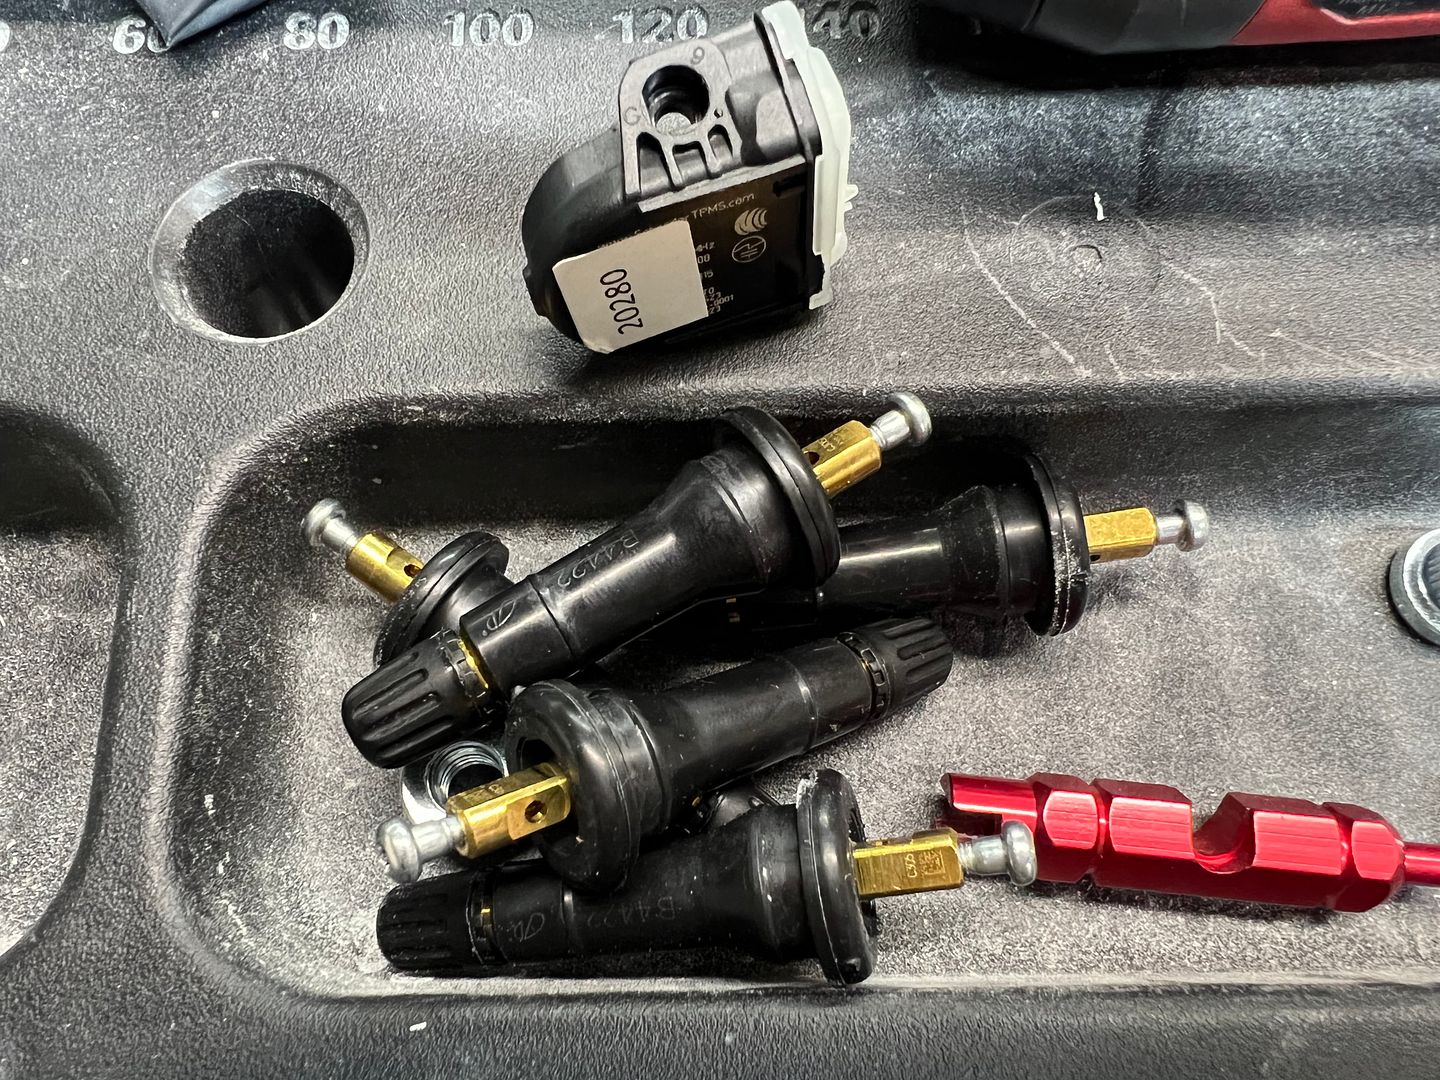
Step one. Install the TPMS
I used a standard schader valve and TPMS, but wanted to upgrade the rubber valve stem to an aluminum one that in theory would be more cut resistant and a bit shorter.
That was easy enough. Just remove the screw that attaches the TPMS to the valve stem.
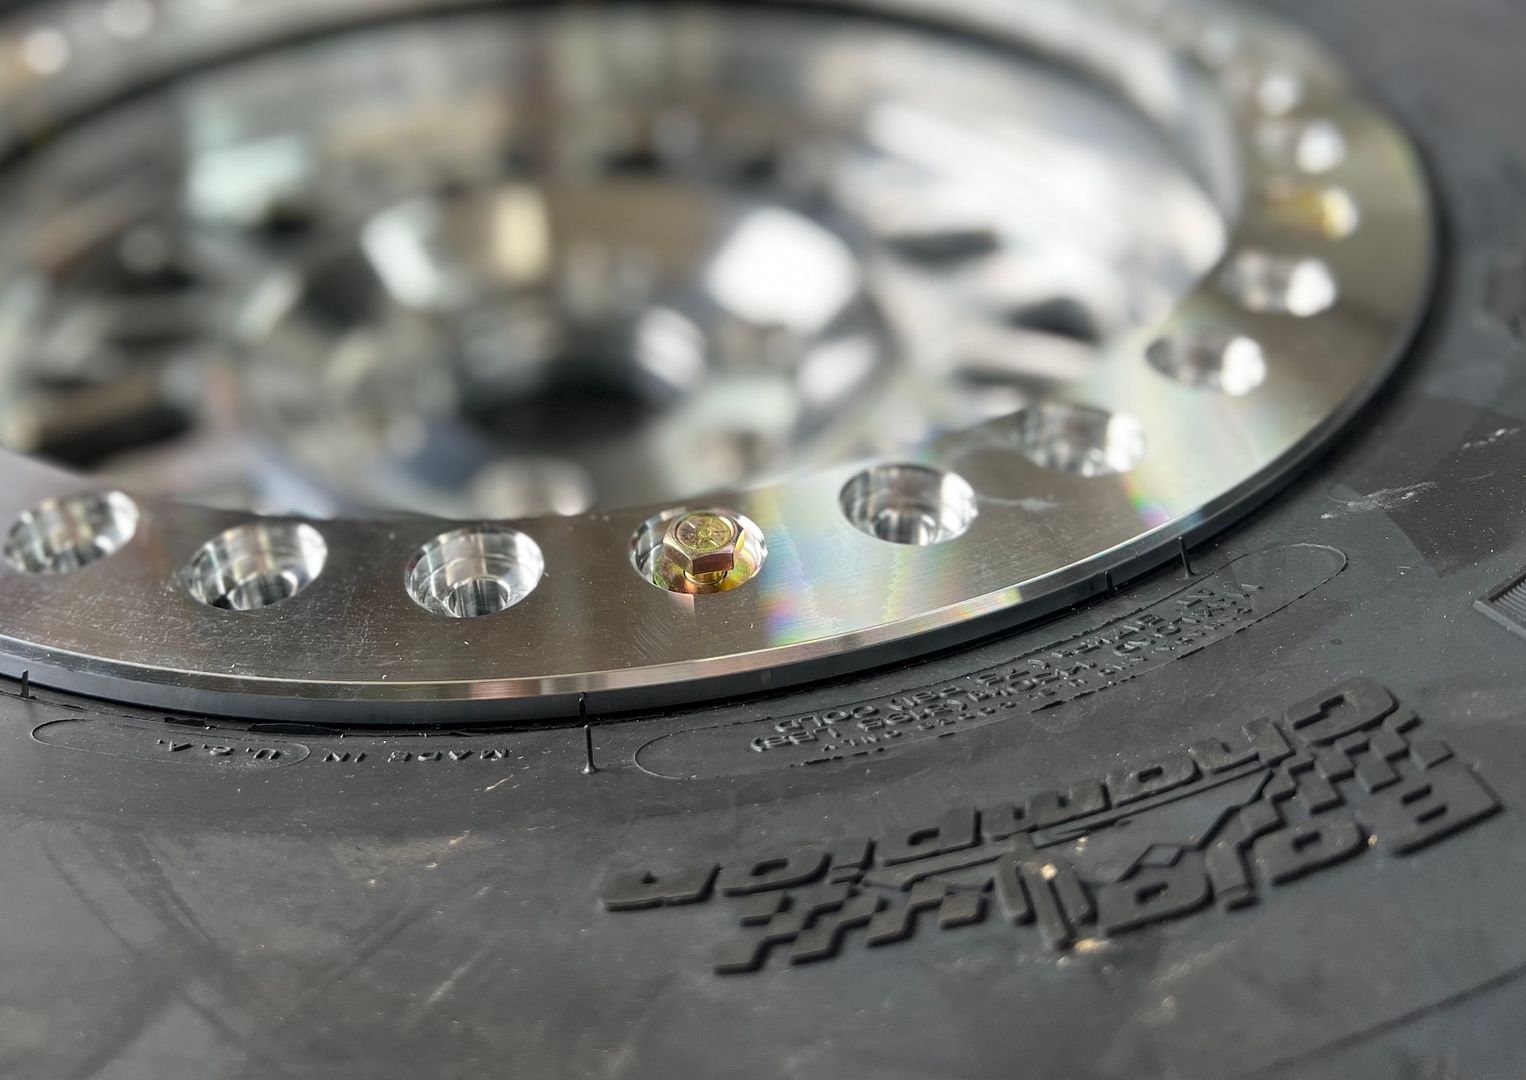
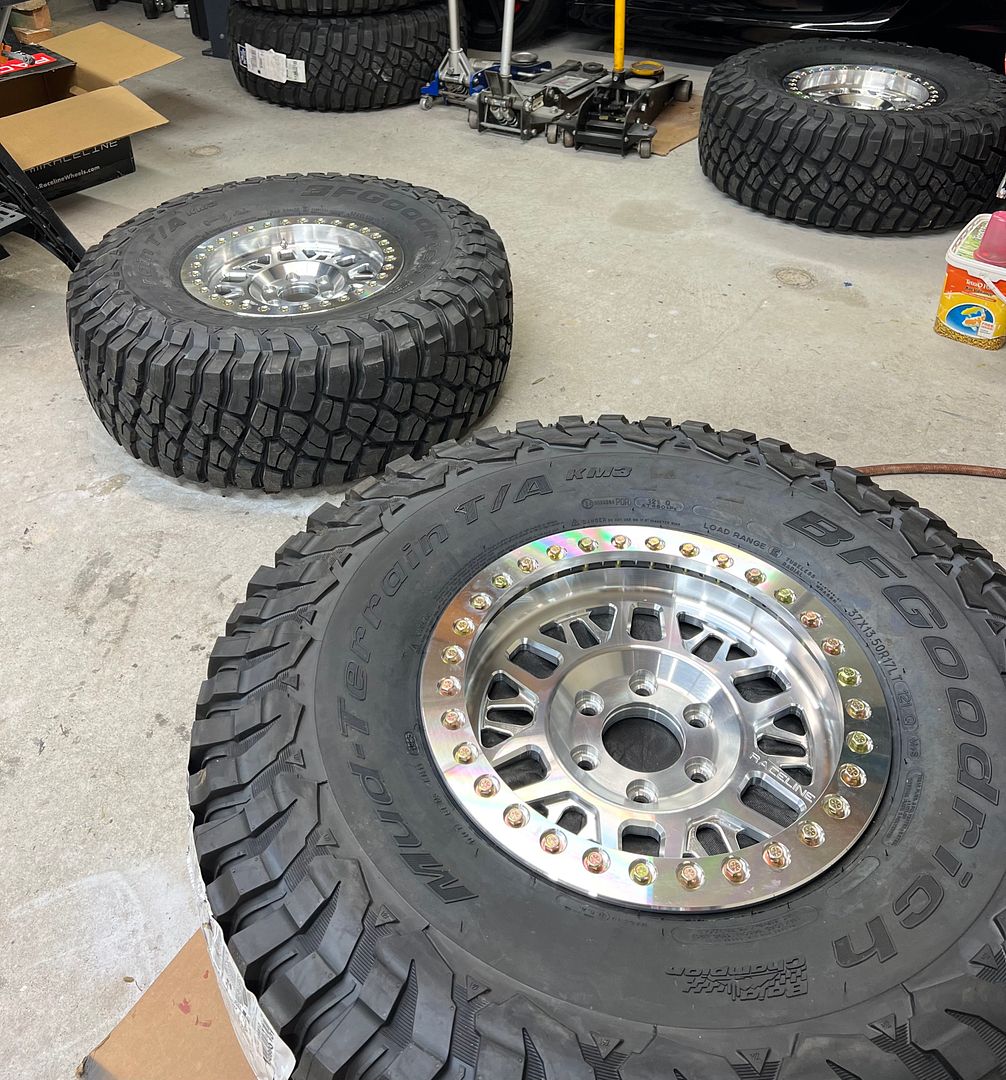
Next comes the fun part. Install 33 bolts, center the ring and the tire on the wheel and slowly walk down all the bolts tightening in a star pattern sorta like you torque down a head on an engine.
Even using a small nut driver this part of the job took a while. Threading each bolt by hand. Tightening down each bolt in steps and going around in a star pattern. Then finally when everything was as tight as my 1/4 in drive nut driver on low power could muster, then torque each bolt by hand to 20 ft lbs.
Surprisingly with barely any torque on the ring the tire would hold air. I set the back side bead and loosened and re tightened the front ring to try to ensure everything was concentric and aligned .
6 tires at roughly an hour per tire.
XTF #2
build start date June 19 2023
GTM # 344
Build Start December 2010
First track day April 2013
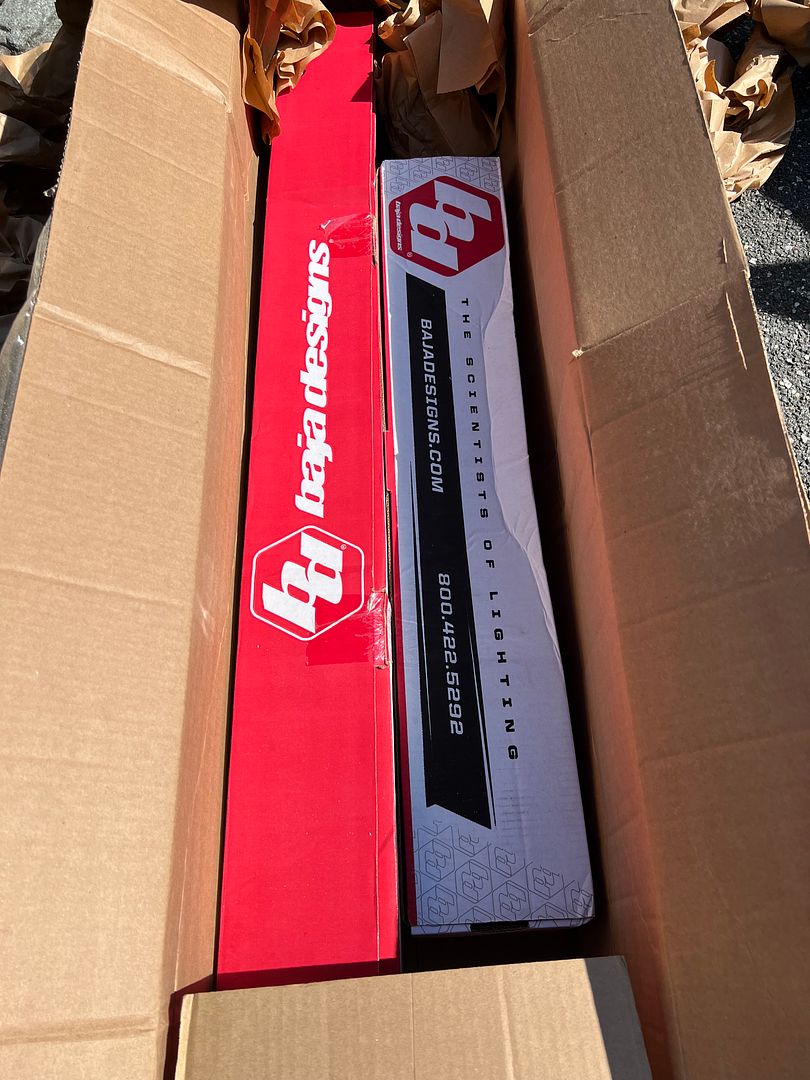
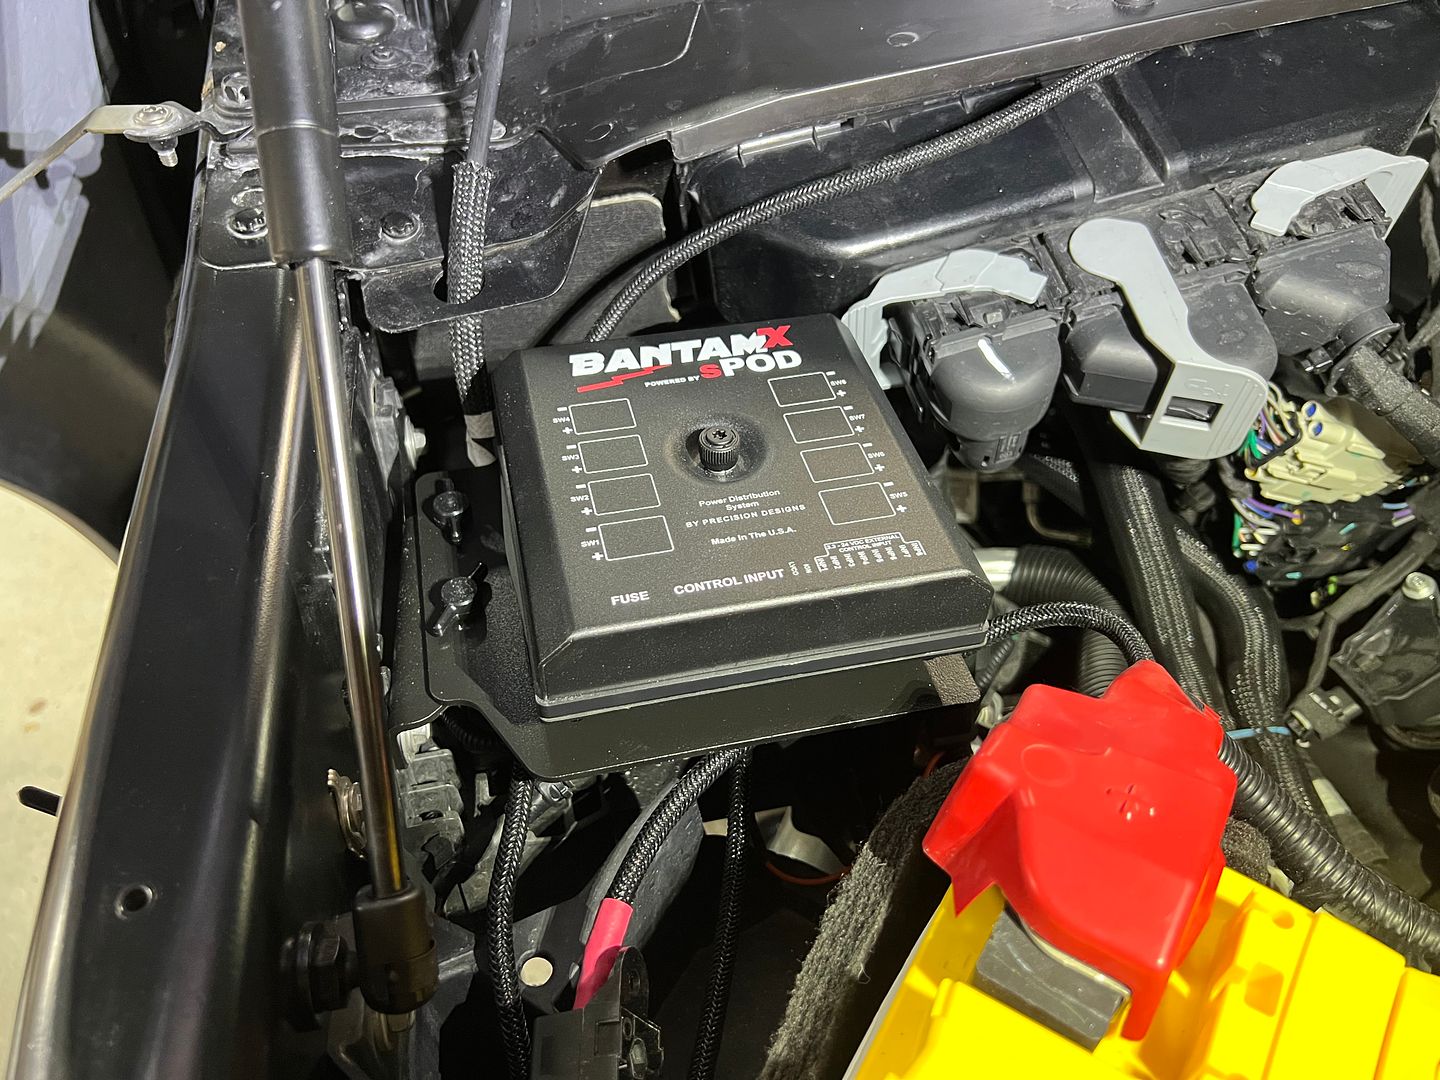
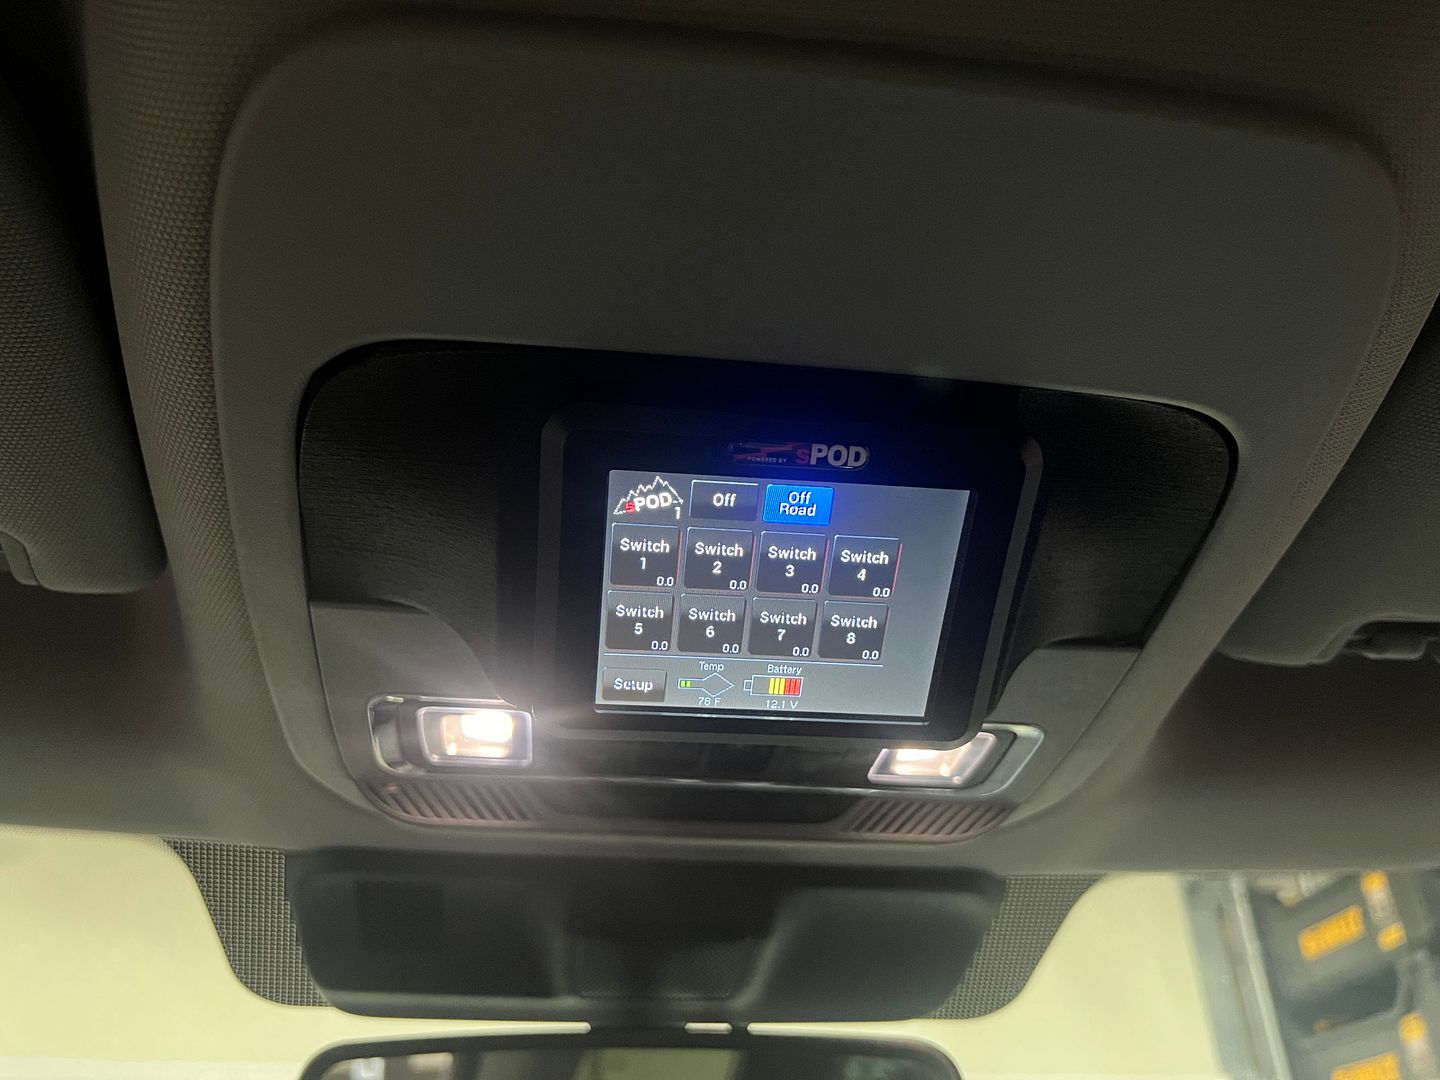
One of the things I need on an off road truck is lots of lights. One way to do this on an F150 lariat is to retrofit the up-fitter switches from the superduty, tremor and raptor OR you can go with this solution from Baja Design.
I like this solution because by default it comes with 8 circuits but it can expand to 32. Because its configurable I can make those 8 circuits do what I need.
Dimming
Strobe
Flash
Momentary
Switch Linking
On Road and Off Road mode of operation
The following features via their app.
Circuit timers
Switch lockout
Initial startup current for each circuit is raised to 65amps for 5 seconds
Program any circuit to be always on while still maintaining fault protection
Option to disable deep sleep mode
Selectable auto restart after circuit shuts down from over current/short
Programmable Current Limiting (in 2amp increments up to 30amps)
Selectable auto restart for current limiting shut down
Selectable Latch or Momentary actions for inputs
Programmable ignition control for all 8 circuits
Variable strobe function to create custom flash/strobe patterns
All better than the upfitter switches for my purposes. Most importantly the installation is very sanitary and simple.
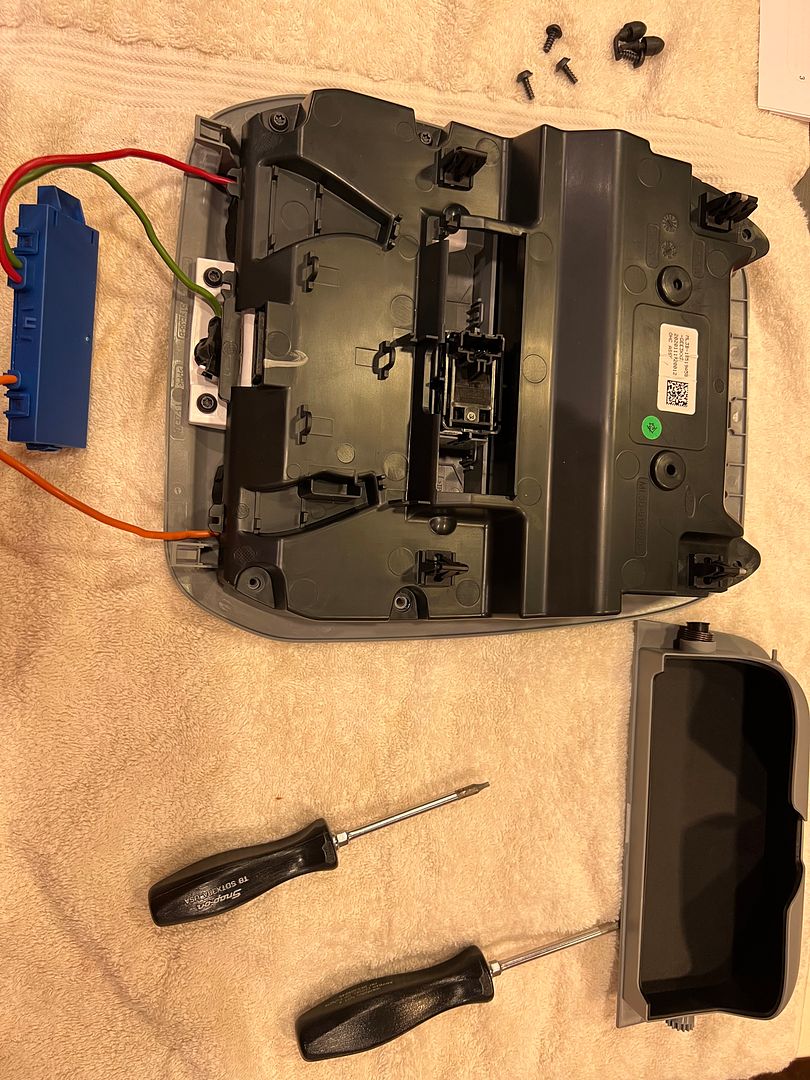
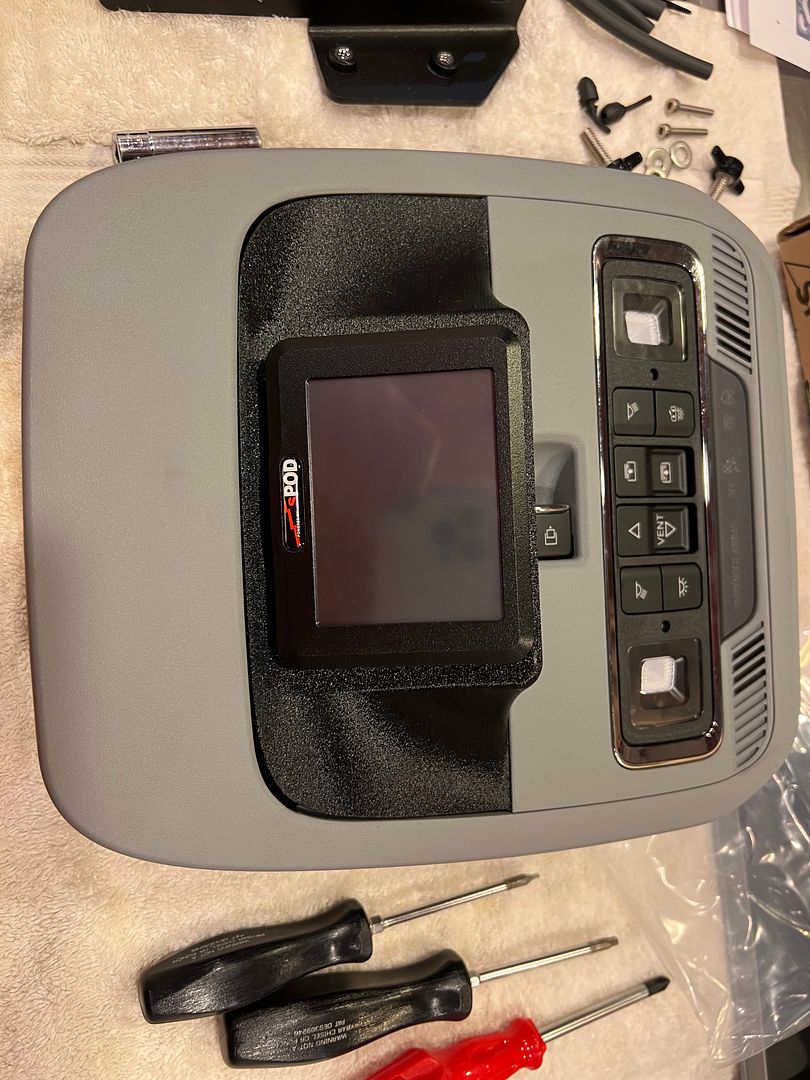
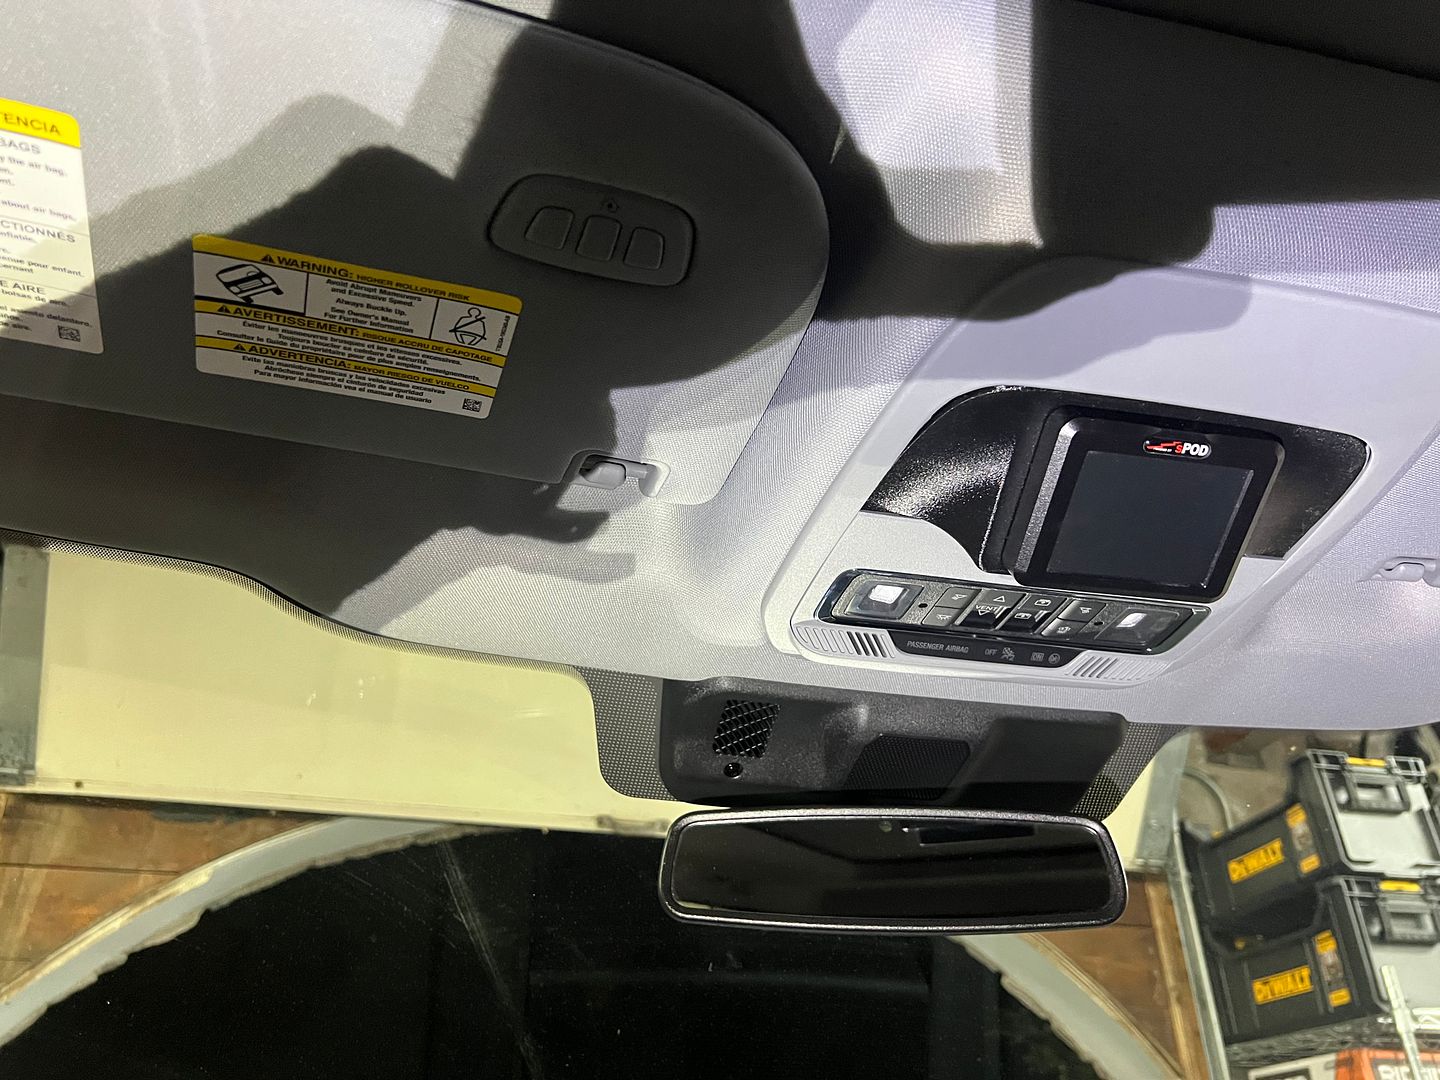
Just pull down on the overhead console.
Pull out the sun glasses holder. And install the touch screen
Quick easy and reversible.
The unit is controlled by one Rj45 cable that you snake down to the firewall via the drivers door A pillar . Thats the next task.
XTF #2
build start date June 19 2023
GTM # 344
Build Start December 2010
First track day April 2013
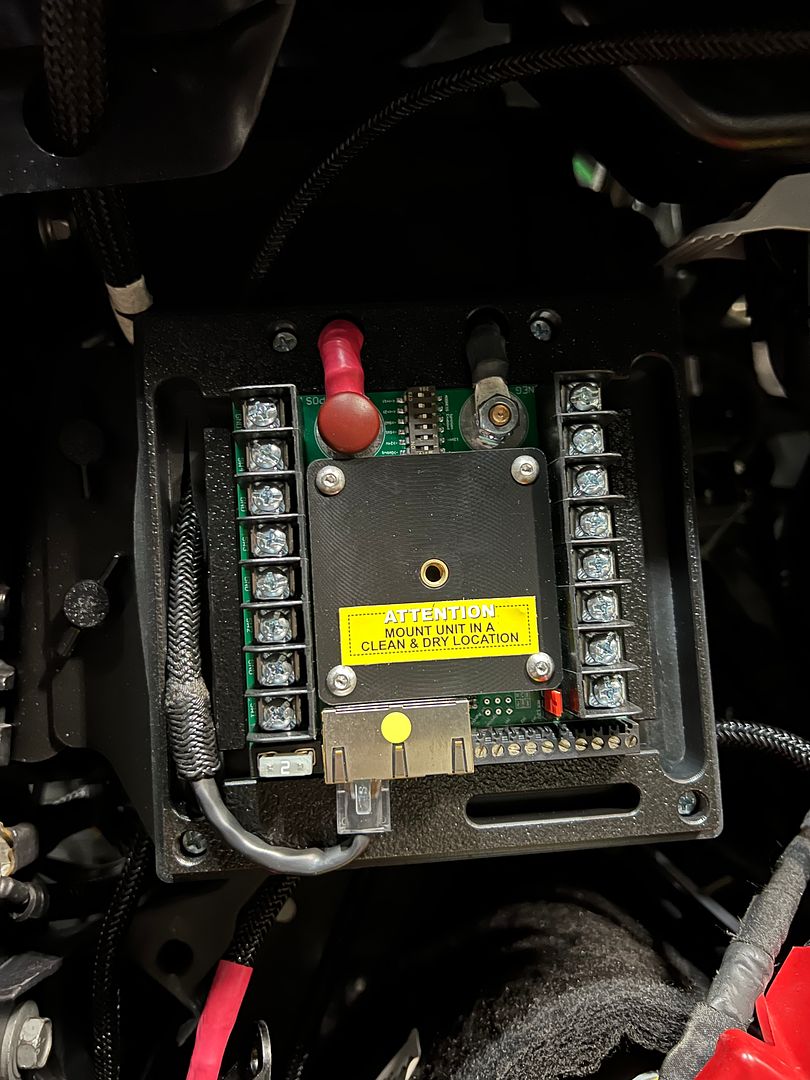
After mounting the touch screen its simply one cat 5 cable that is run from the cab to the power distribution box.
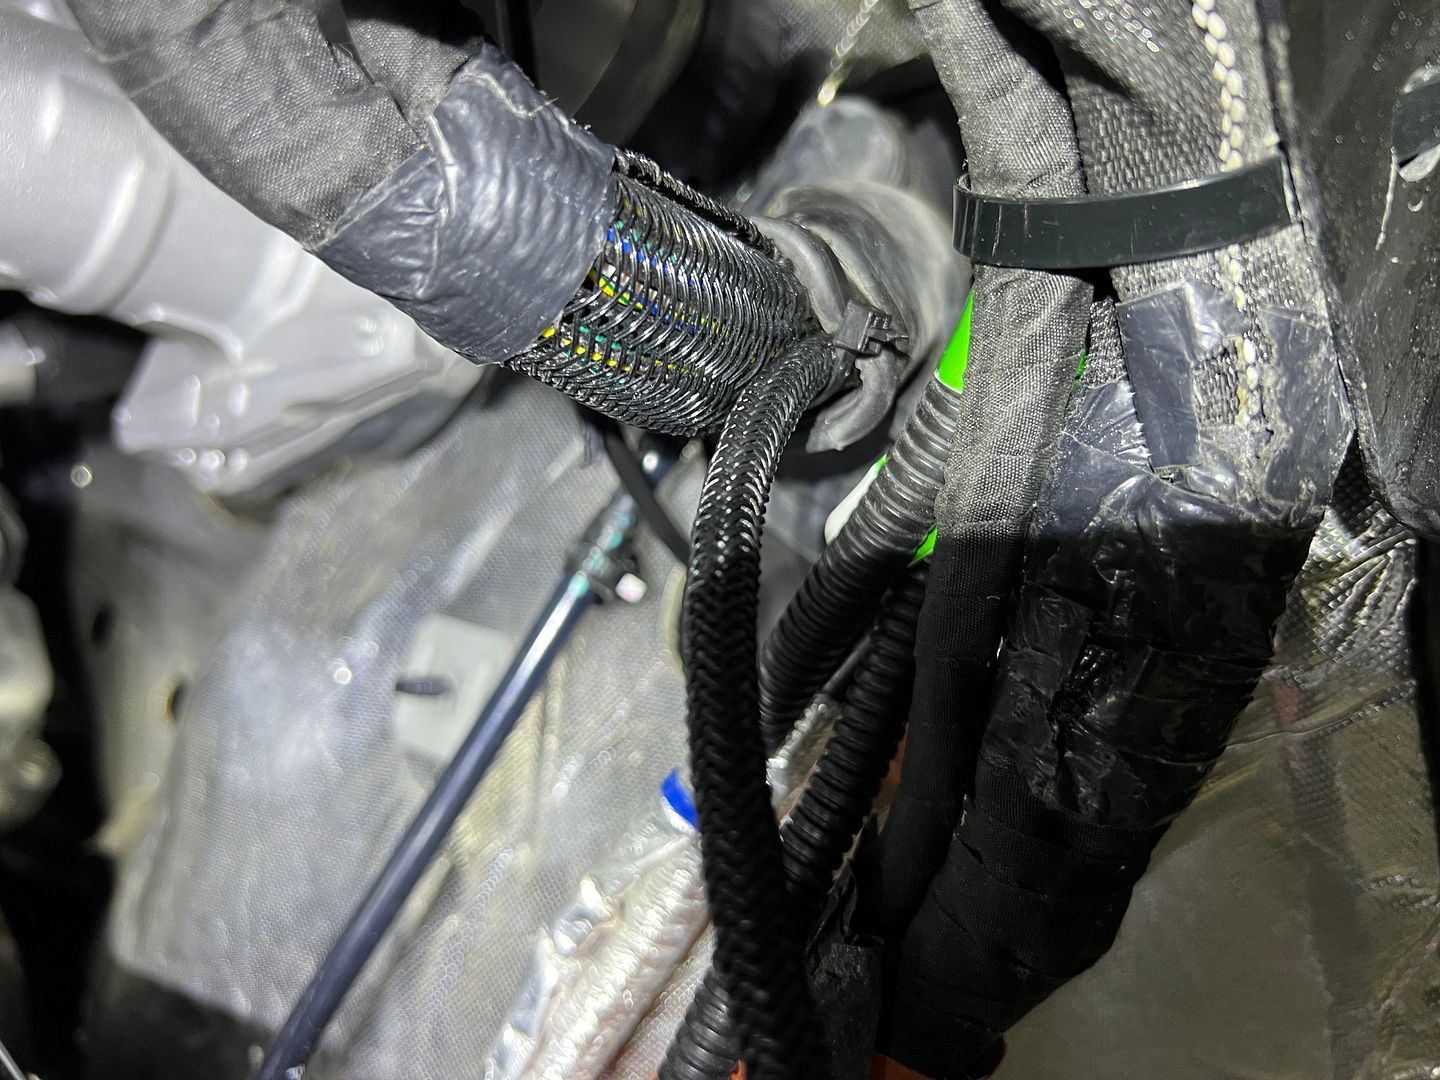
I used a piece of 12 gauge solid copper wire like you use in home wiring to get from the overhead console to the door frame. You simply pull off the rubber moulding around the frame and run the wire down the A pillar and under the dash.
There is an exit grommet in the driver foot well. I used the same solid copper wire as a fish tape here.
The smaller wire is the control wire for the Baja Designs sPod.
Its a tight fit to feed the wire, but thats why this truck is so quiet inside. Its air tight.
The cat 5 plugs into the Bantam X which has capacity for 8 circuits. You can expand to 32 with more bantam X boxes.
And close it up.
Ready to start adding lights.
Of course since this is all software you can name each switch and configure its behavior.
Very cool!
XTF #2
build start date June 19 2023
GTM # 344
Build Start December 2010
First track day April 2013
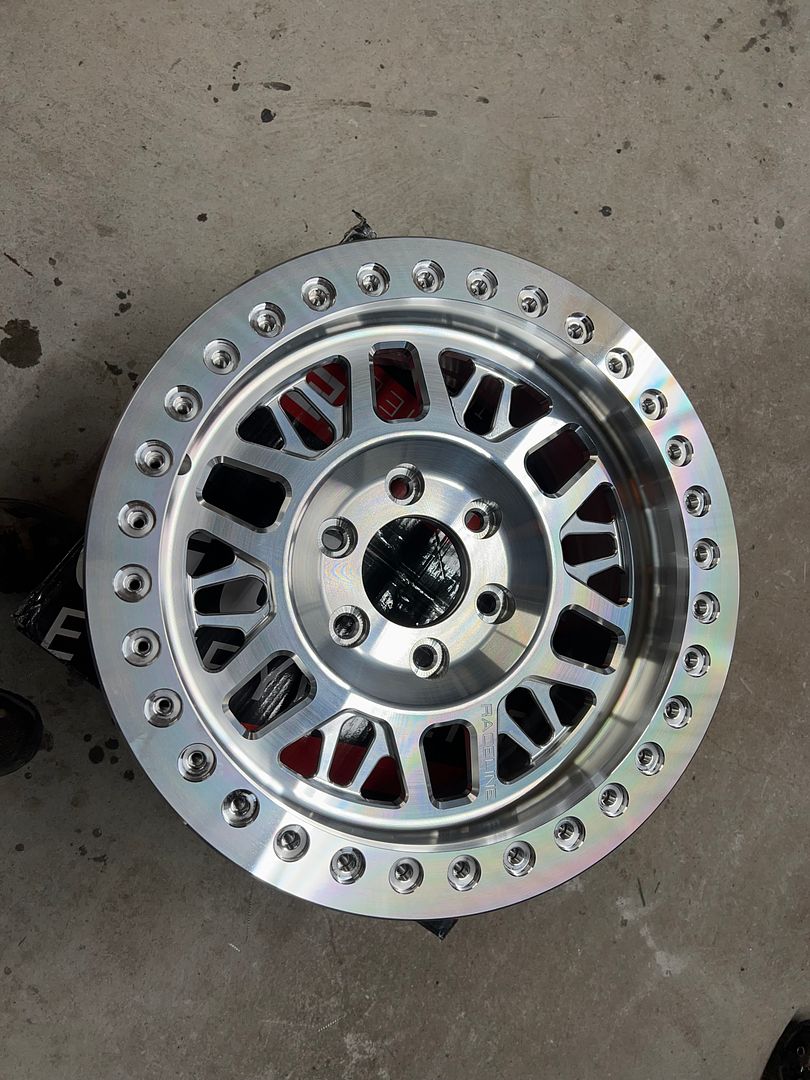
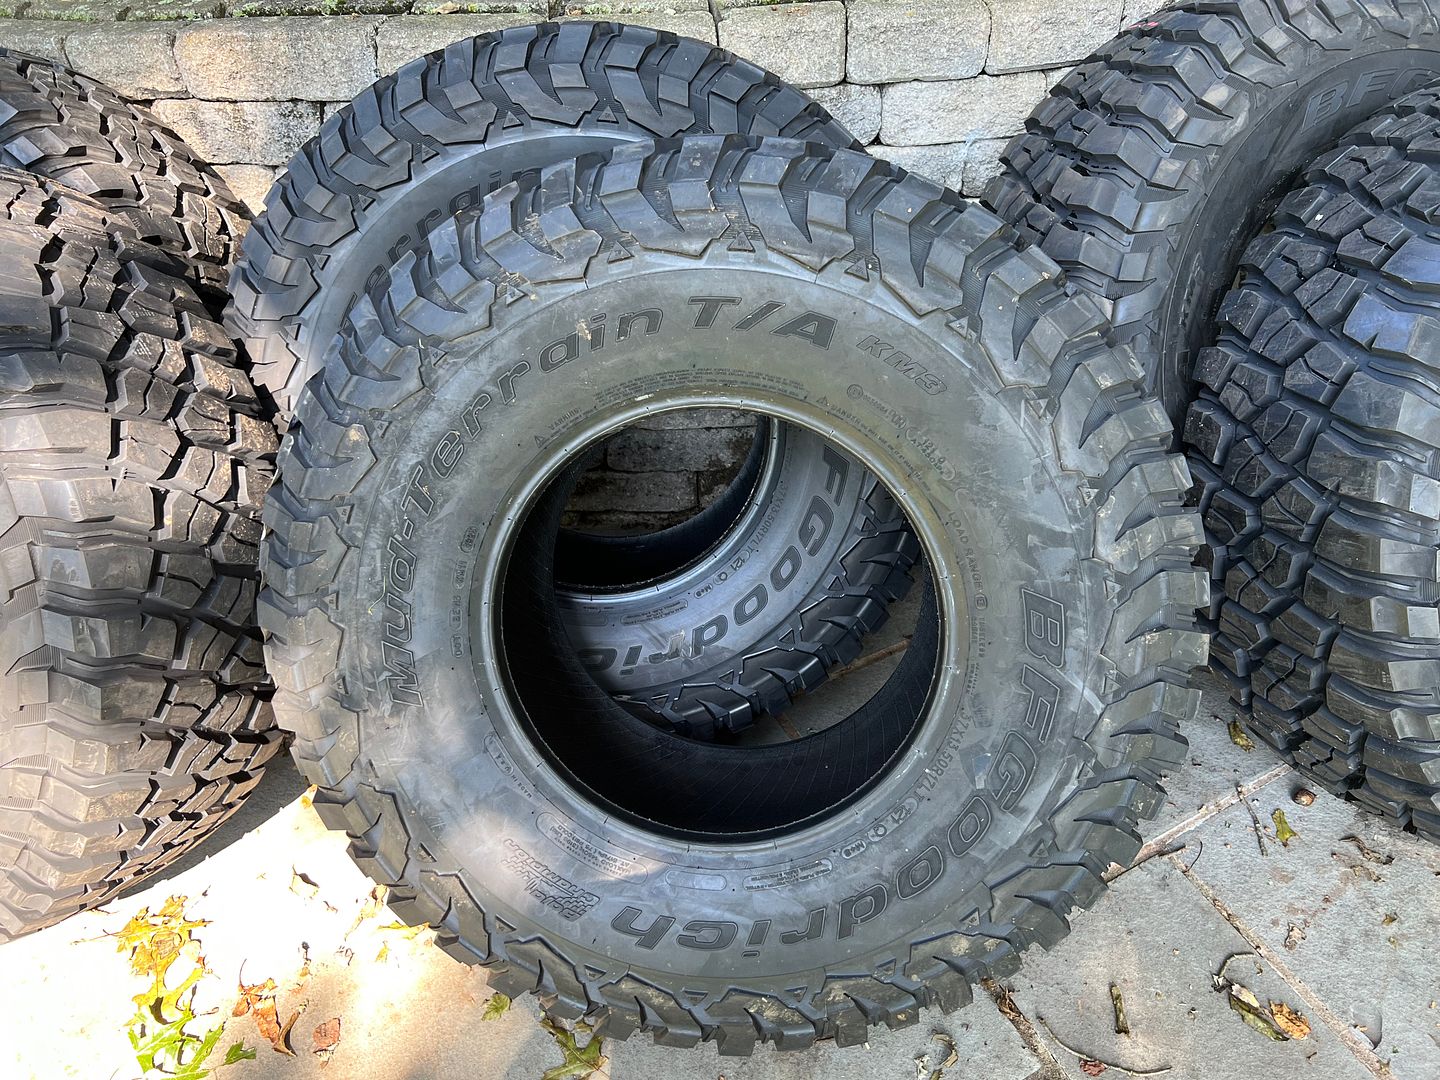
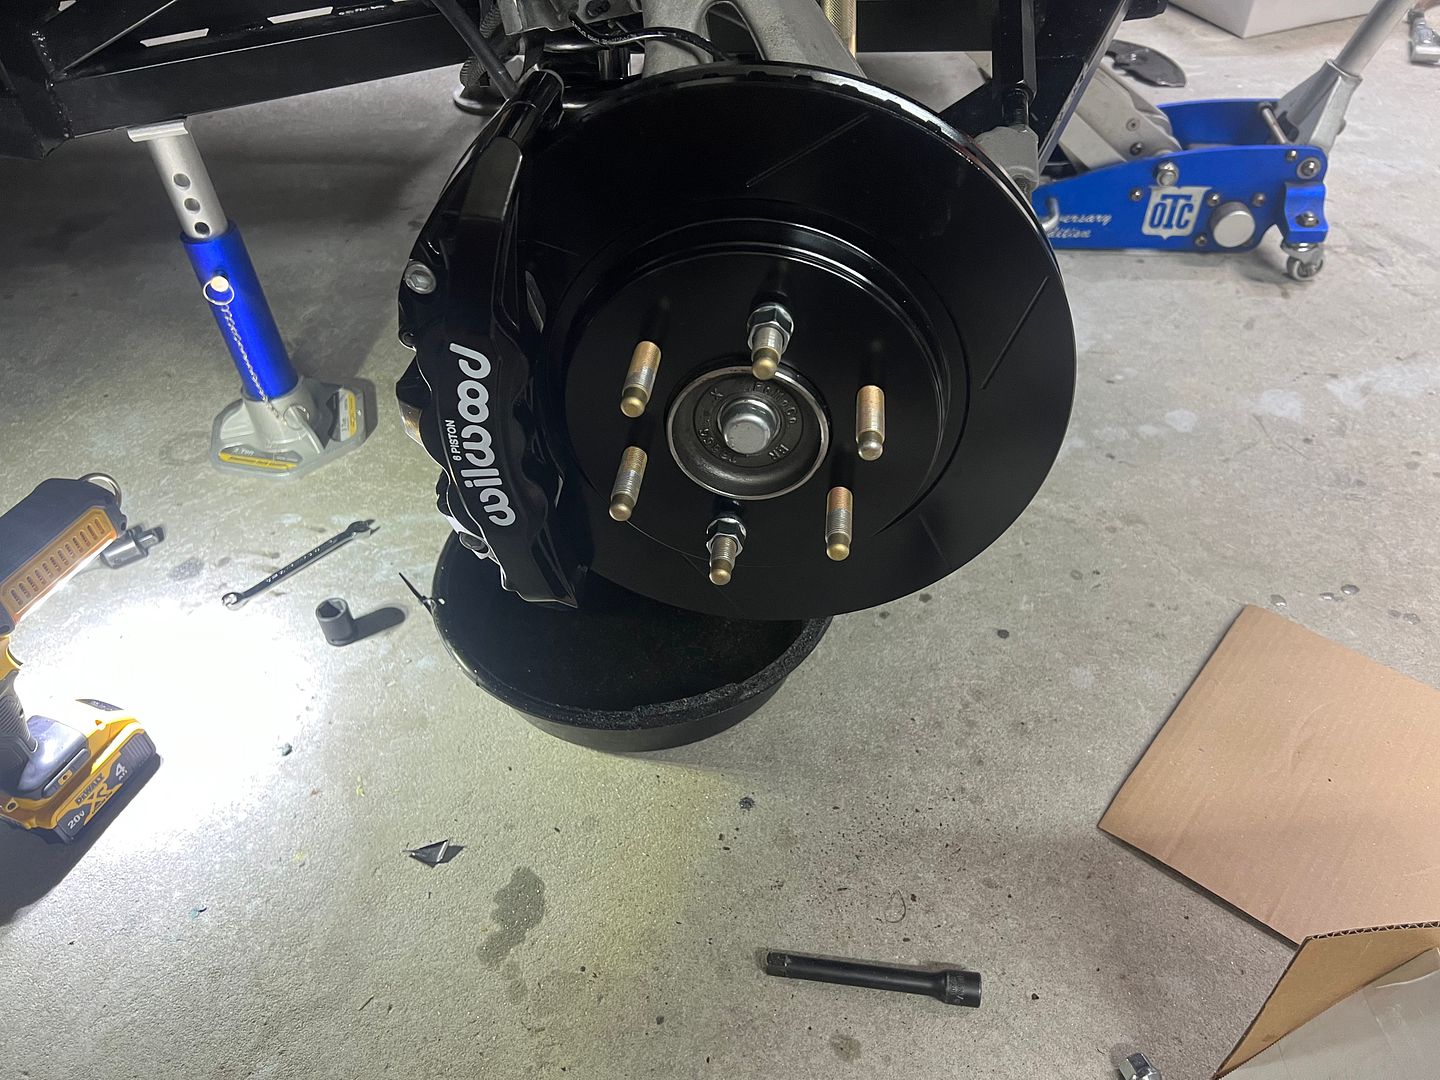
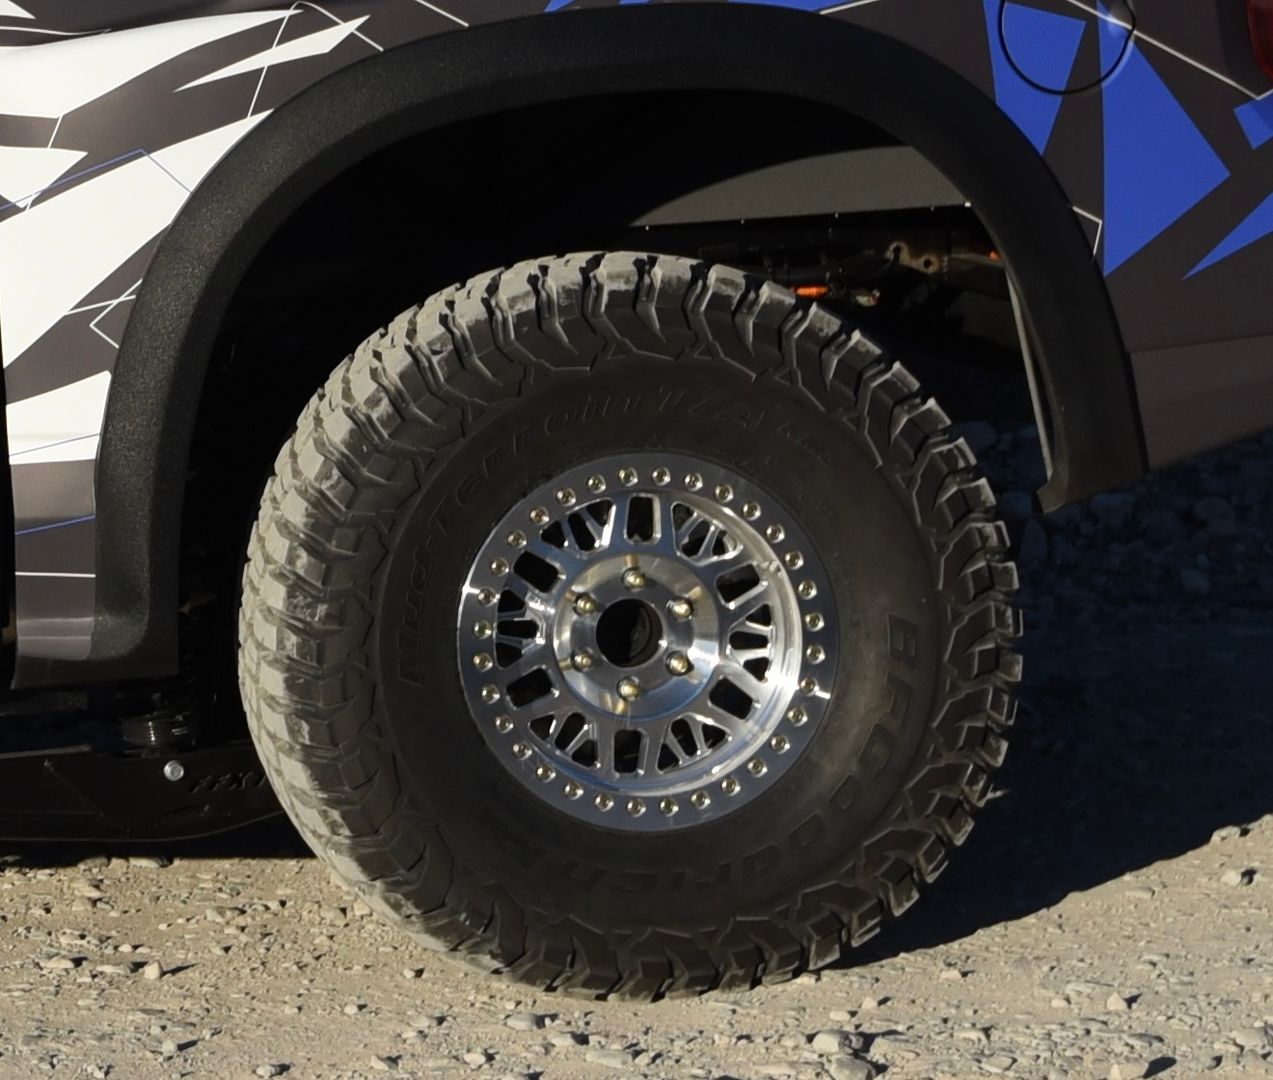
Since we have 37 inch tires and heavy duty rims the new tire setup is quite a bit heavier than stock. To get them slowed down in a hurry I upgraded to Willwood 6 piston front brakes.
Its the same Kit Willwood make for the raptor. The raptor kit works for our trucks with one modification. We need longer 23 inch stainless brake lines to account for the 16 inches of travel in the front.
The Willwood kit is made to fit inside 17 inch rims. Lucky for us the Raptor also runs 17 inch rims and we can use the aftermarket parts designed to fit the raptor.
Its a close fit, but plenty of room inside the Raceline rims.
XTF #2
build start date June 19 2023
GTM # 344
Build Start December 2010
First track day April 2013
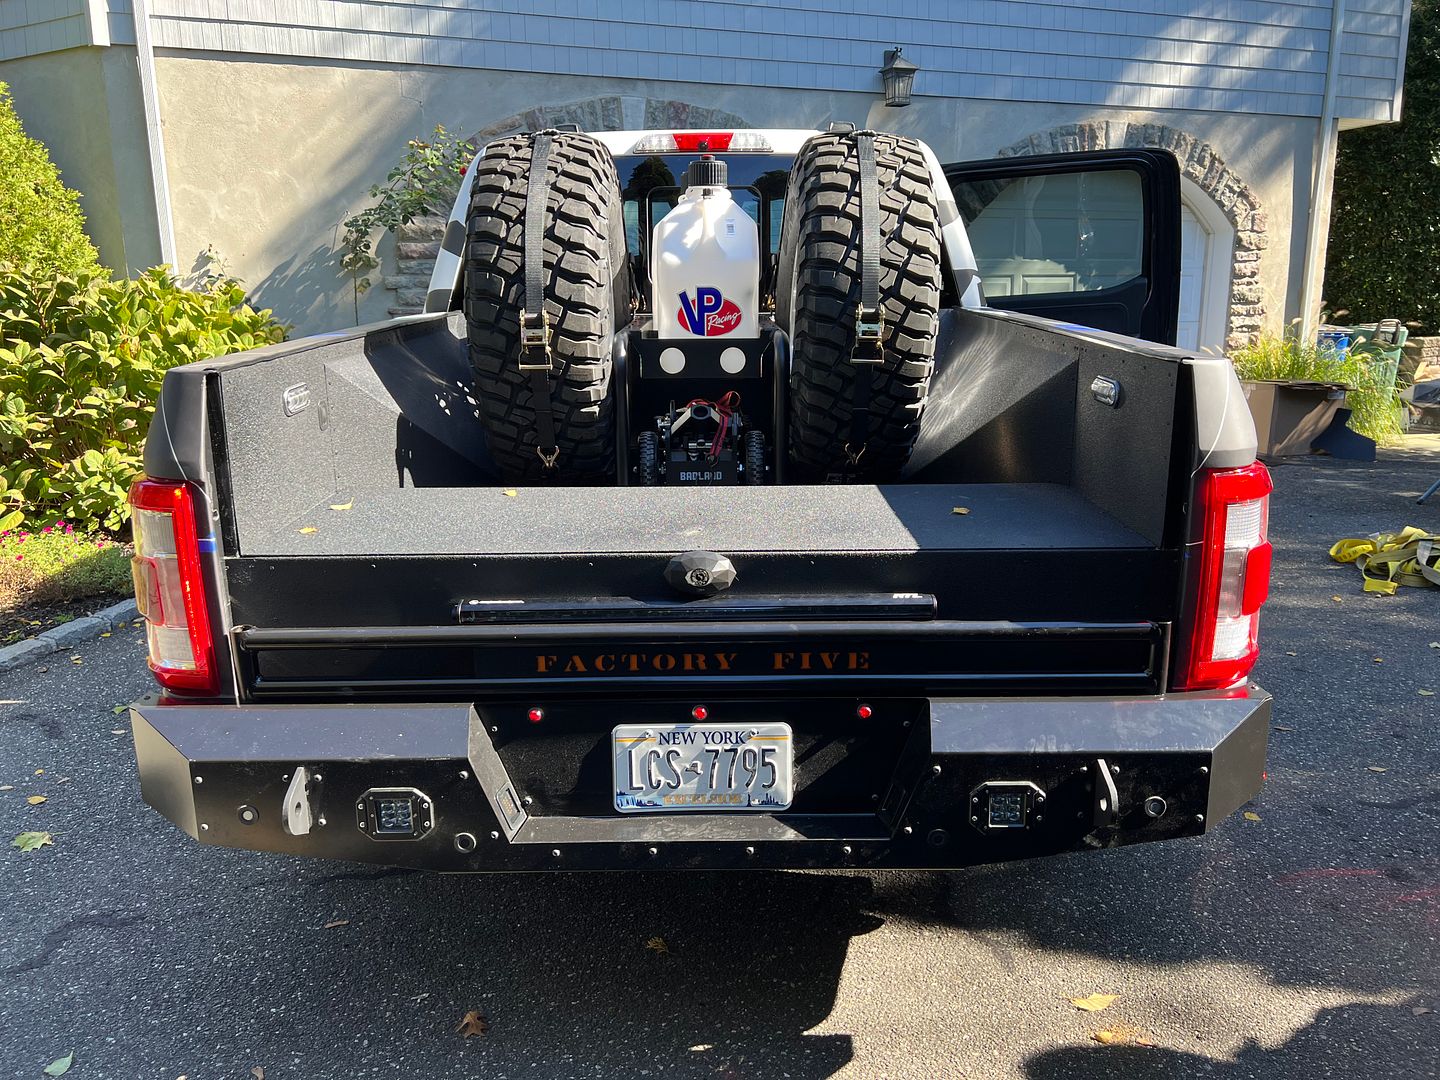
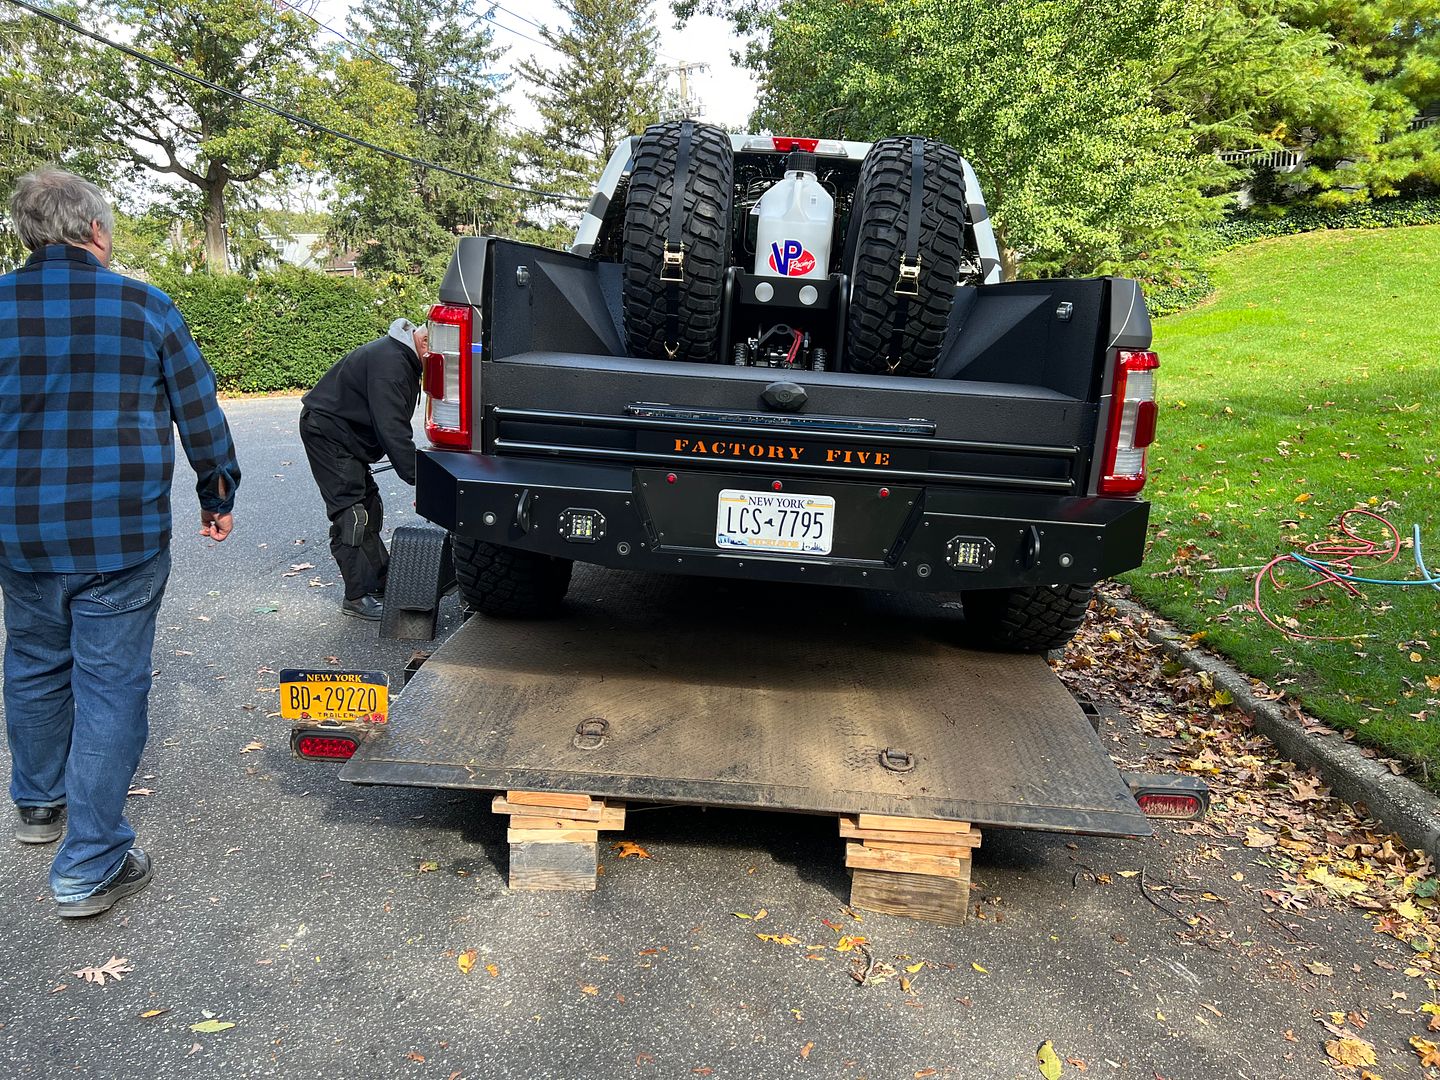
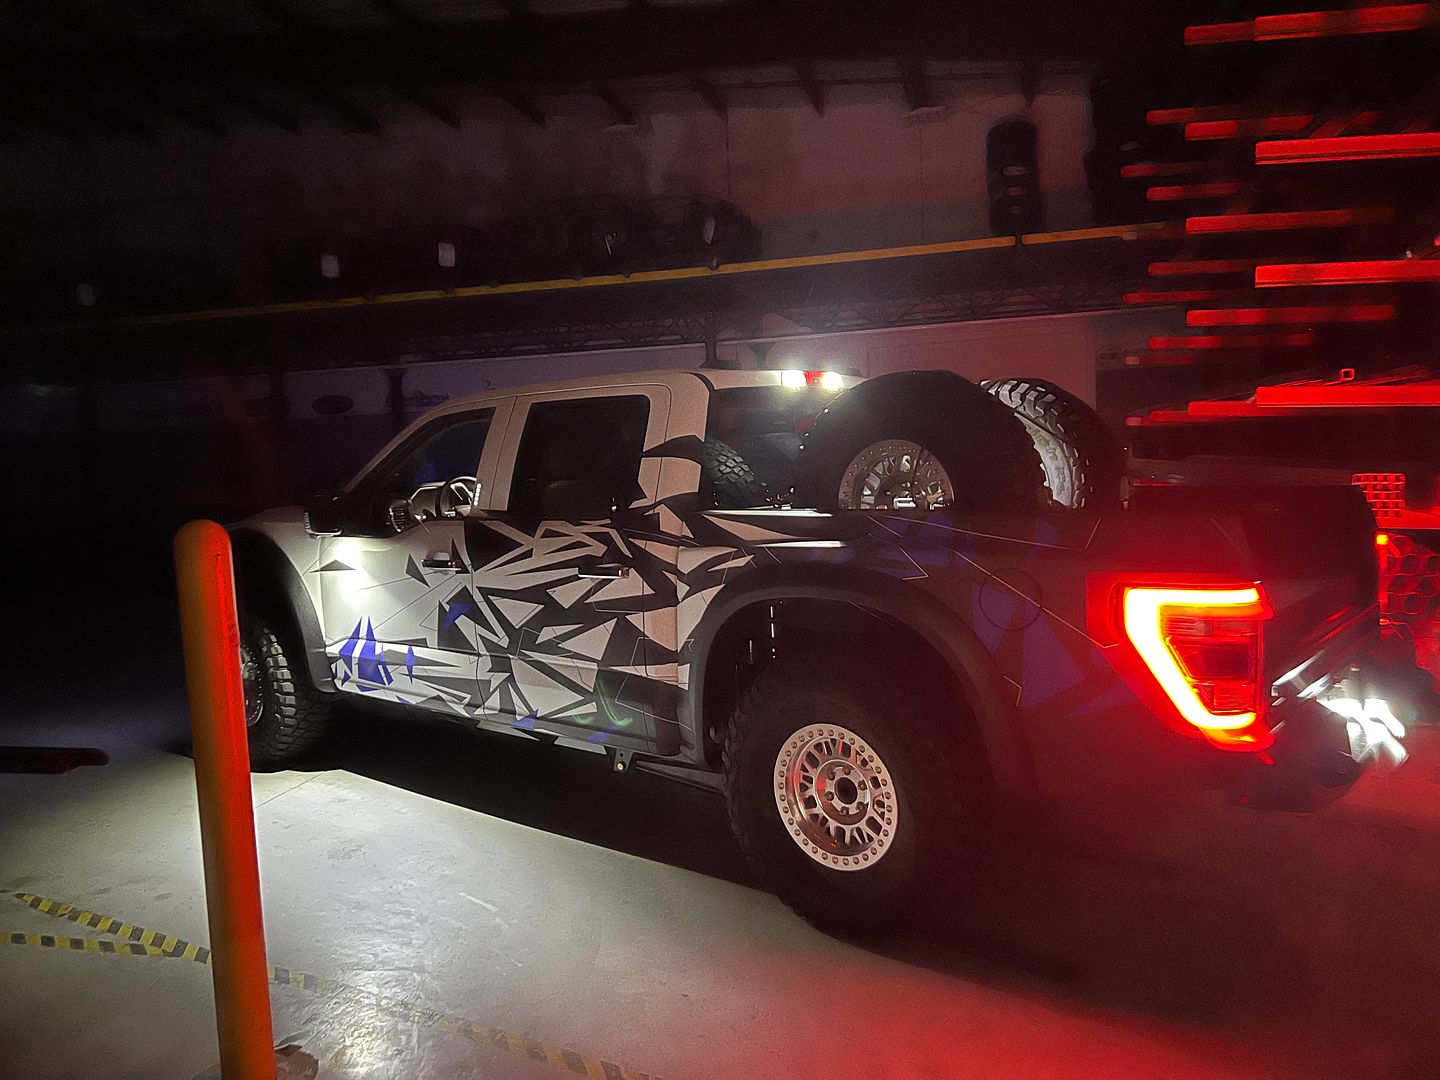
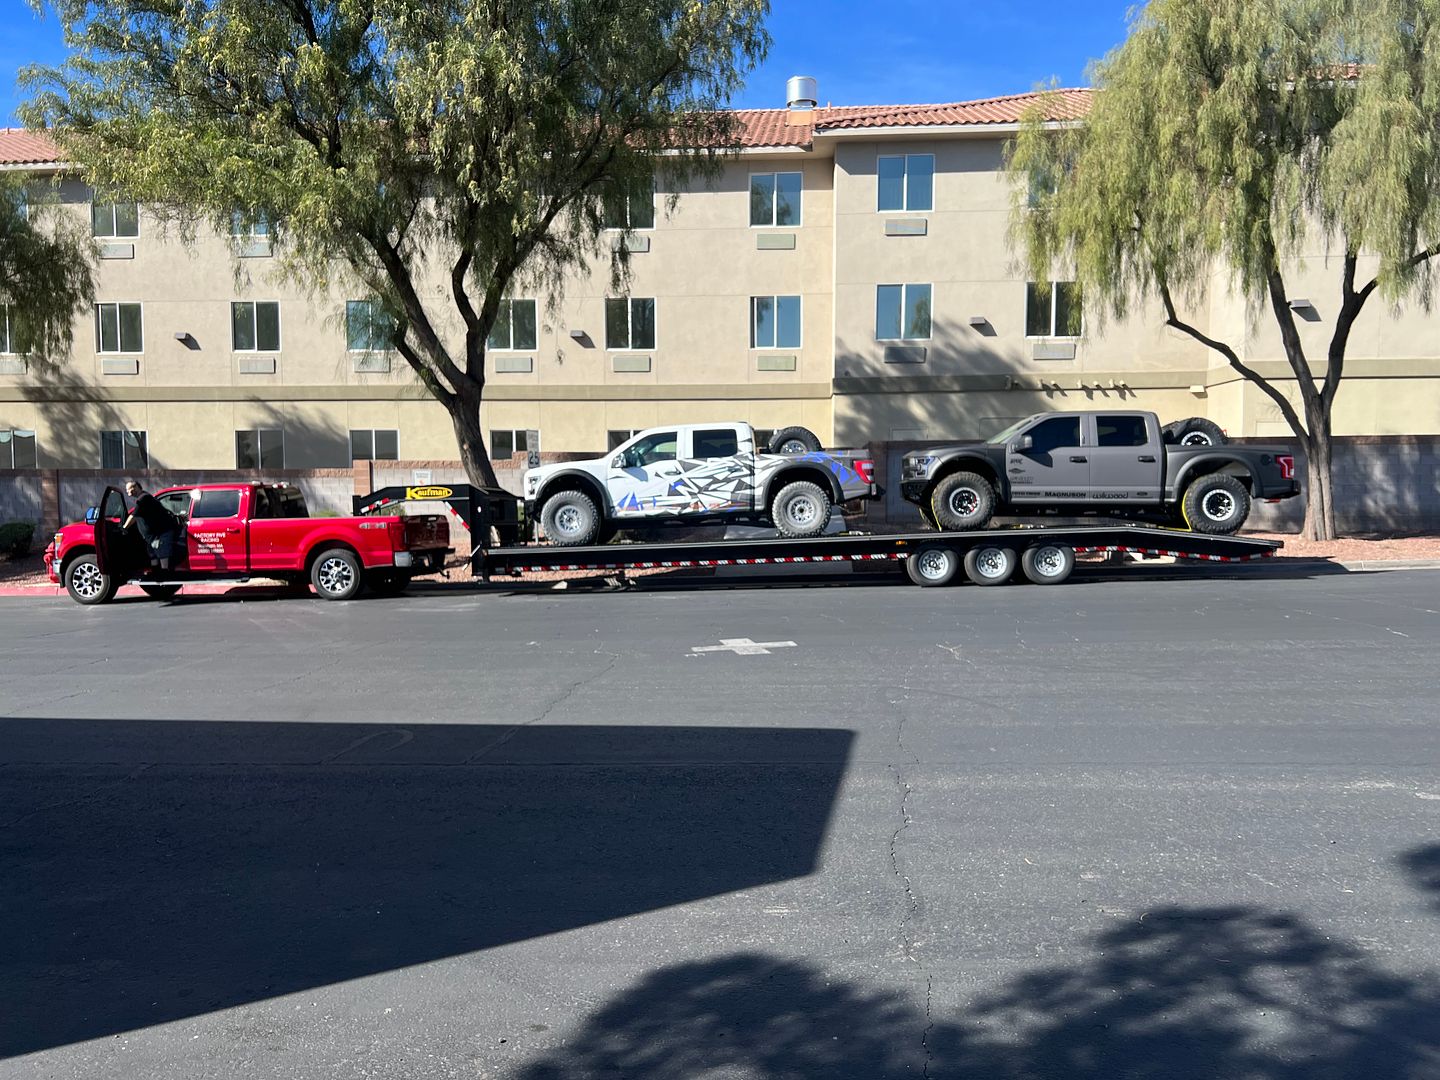
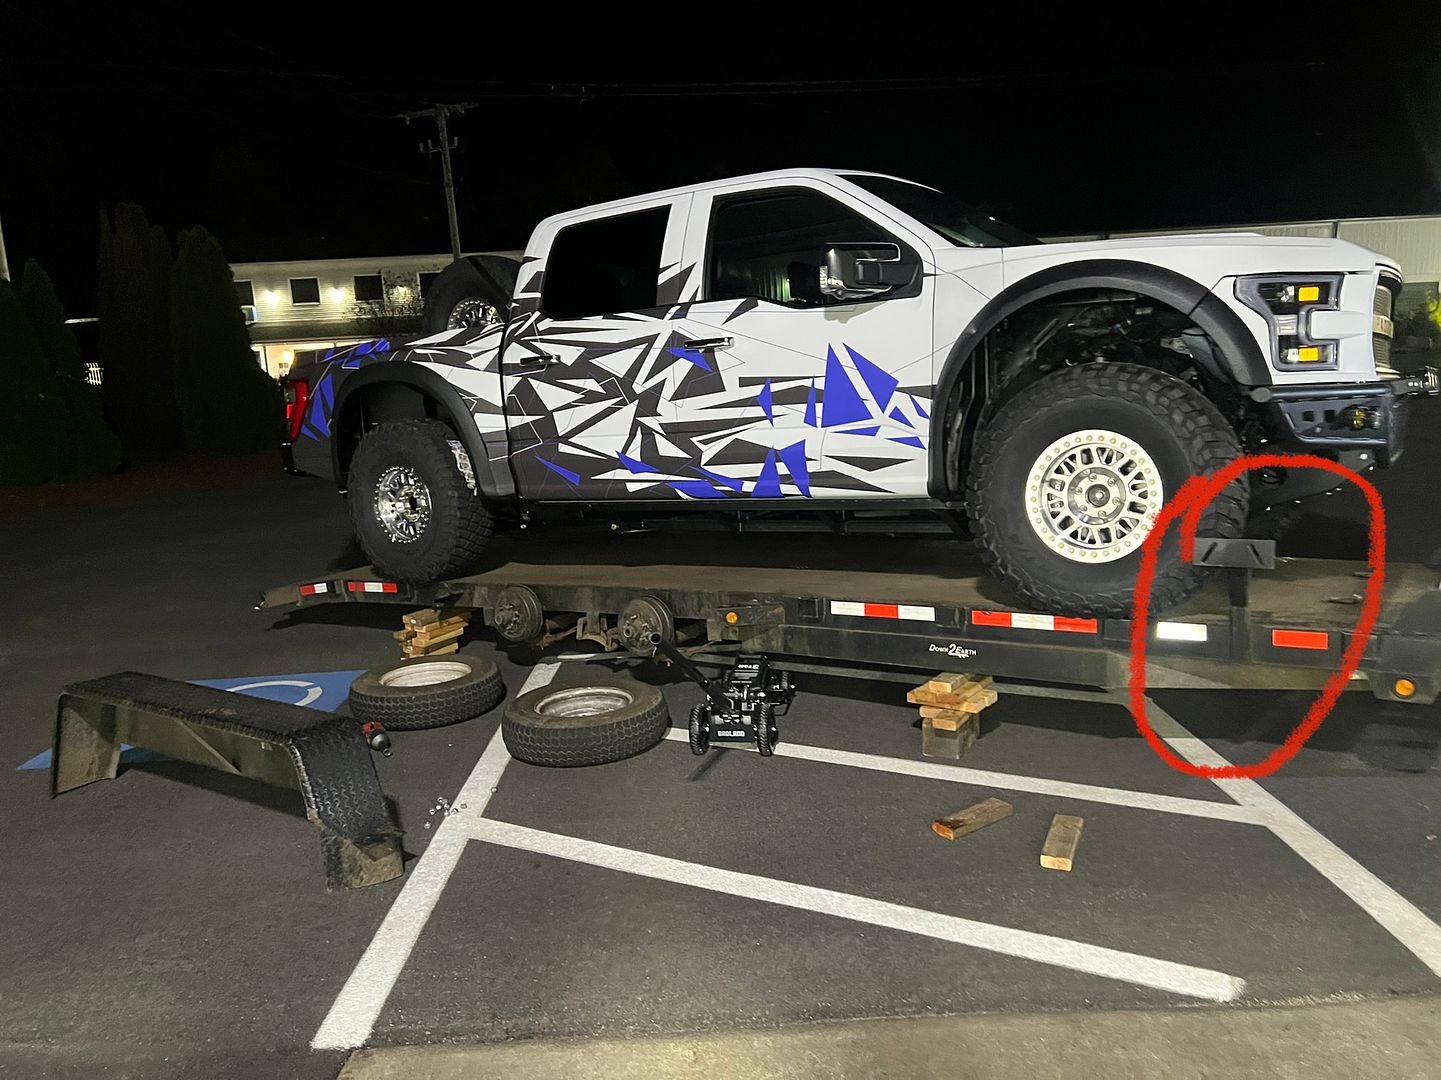
Well everything got done. Just in time as every SEMA build. A few stickers and trim bits will be installed when we roll it on the show floor but it’s good to go.
Here we have the chase rack with two spares two cans of fuel and an off road jack.
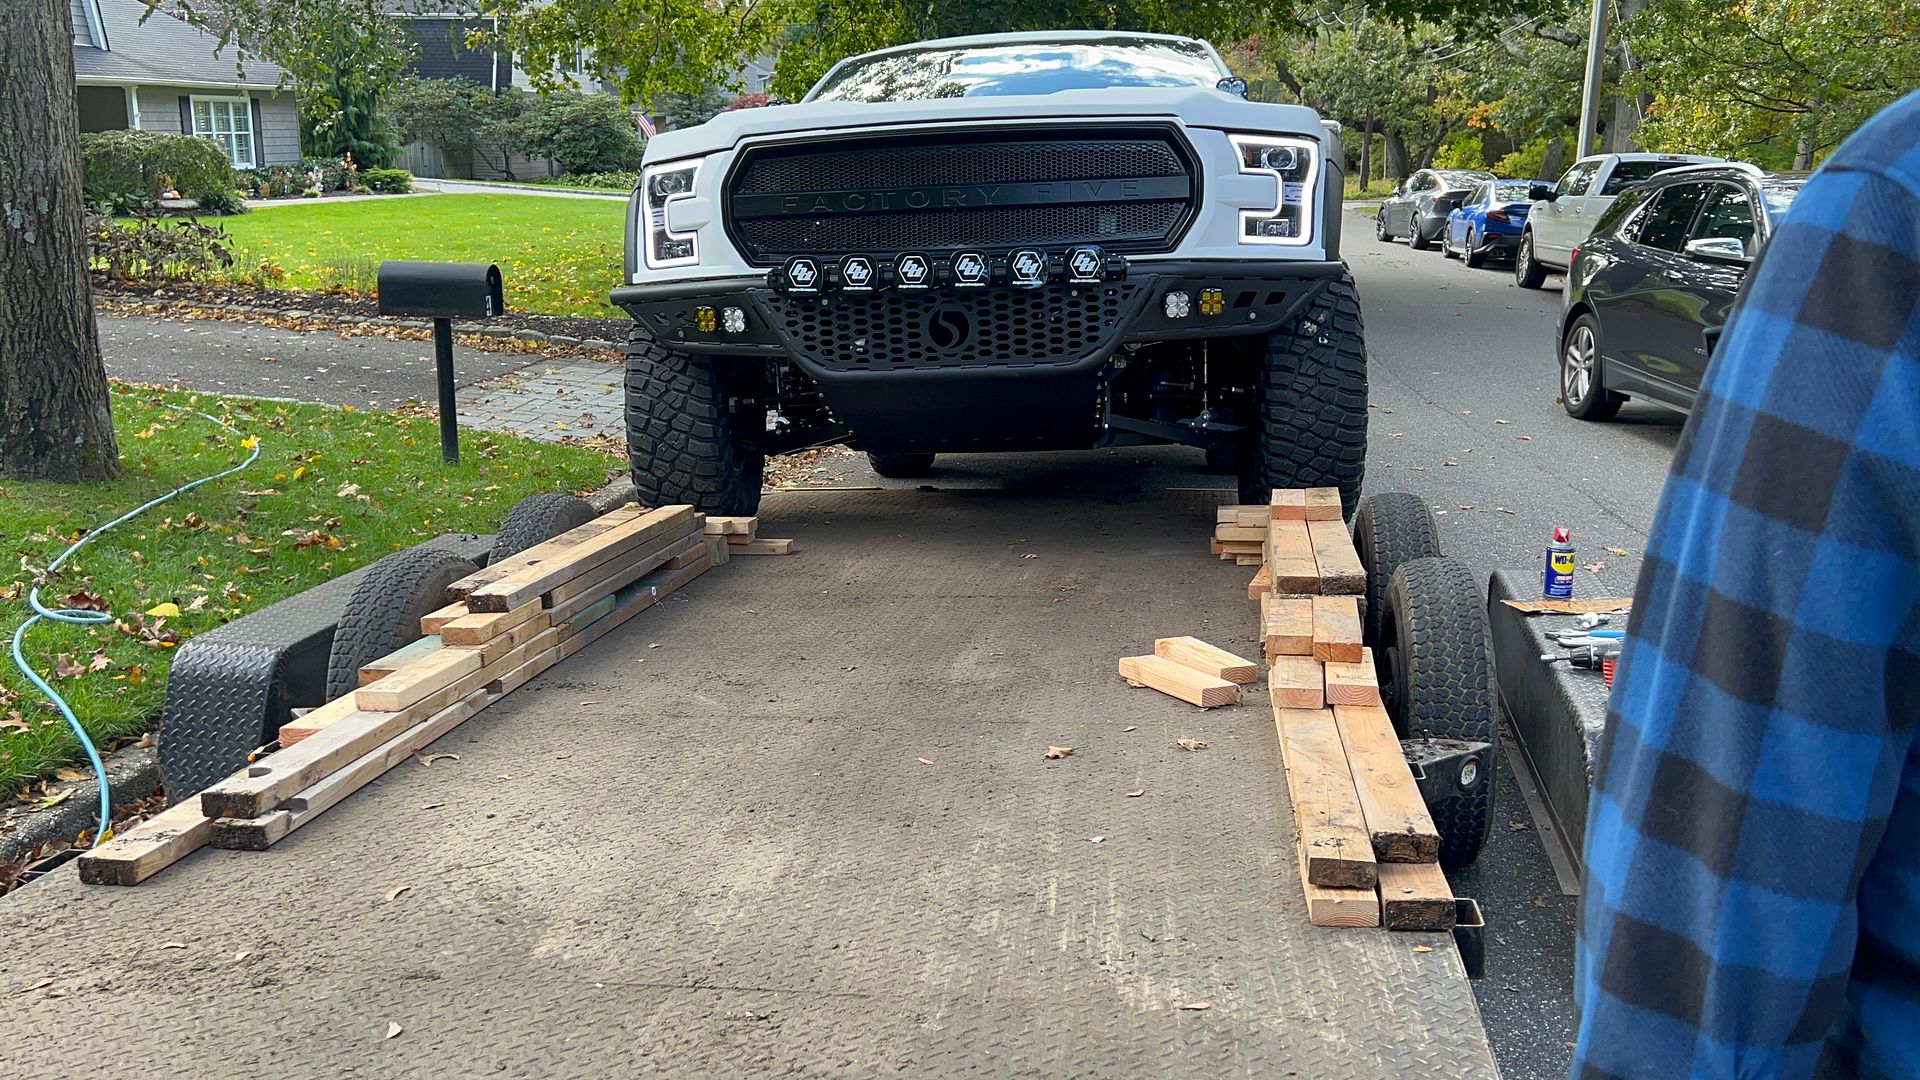
The next problem was getting the XTF on the trailer . It’s kinda wide. We were worried that the weight of the truck would blow the trailer tires right off their bead.
No worries i have a red neck solution!
Not the ideal way to load a trailer, but it works
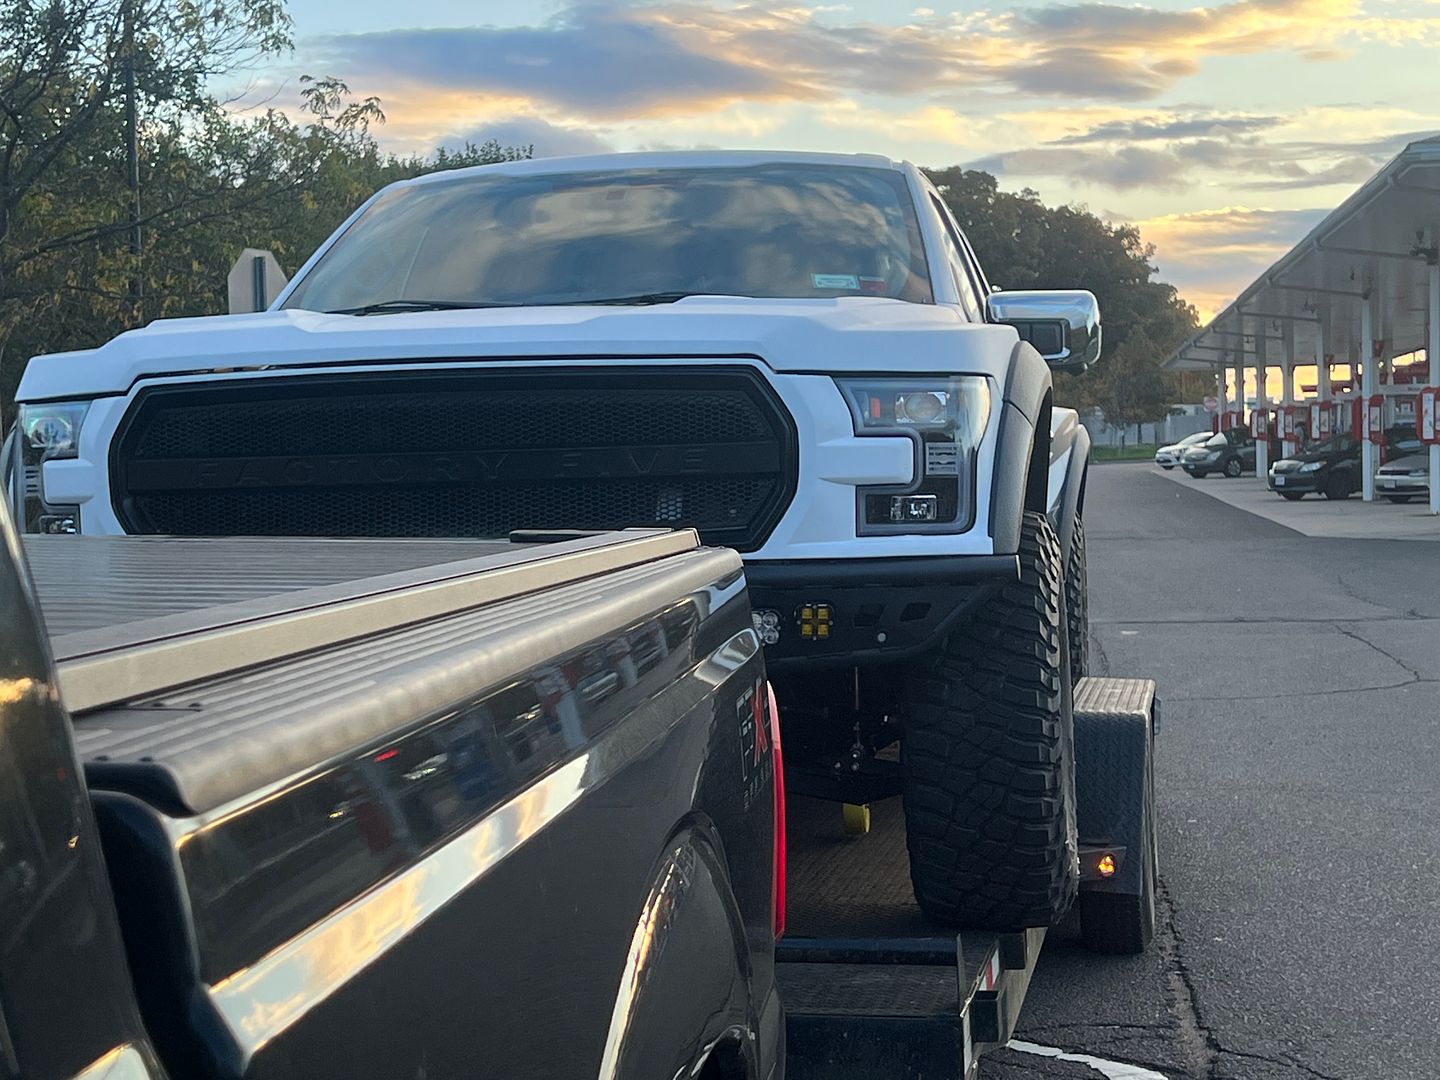
I have an enclosed trailer so I’m not used to seeing my baby in the rear view mirror. We got lots of thumbs up on the way to Factory Five.
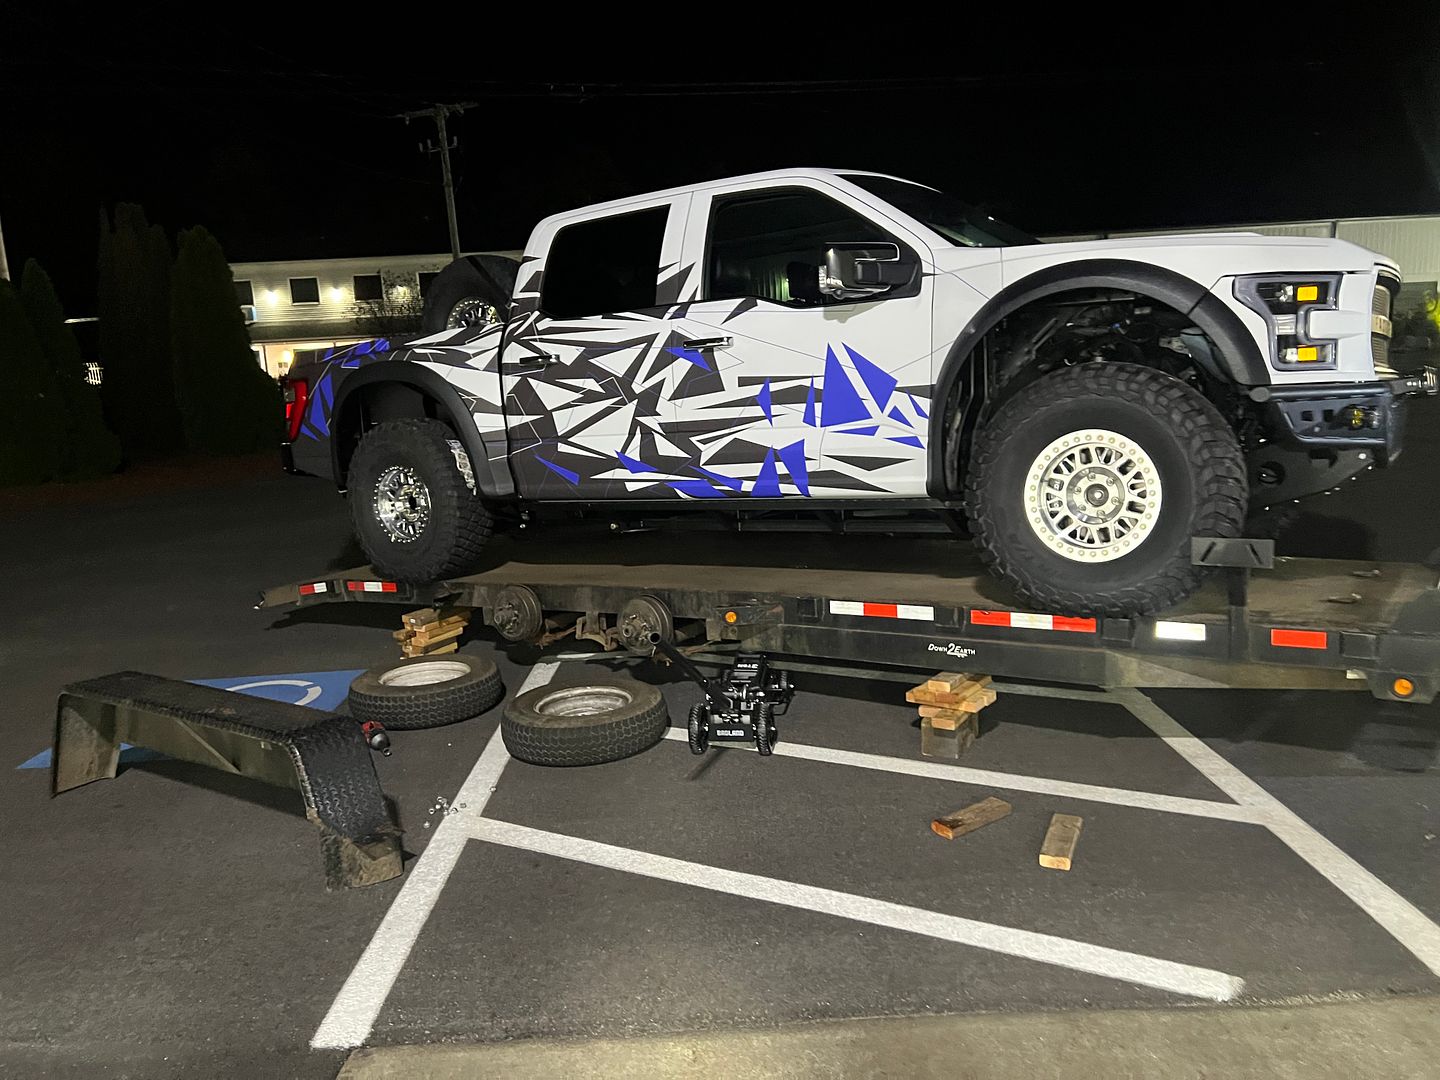
After sitting in the truck for 4 hours I thought of a Better way to load and unload the XTF. This is A MUCH easier way to get a wide truck on a trailer.
And there she sits on the Factory Five production floor among the steel stock from which she was born a few months ago.
Last edited by kabacj; 10-23-2023 at 08:53 AM.
XTF #2
build start date June 19 2023
GTM # 344
Build Start December 2010
First track day April 2013
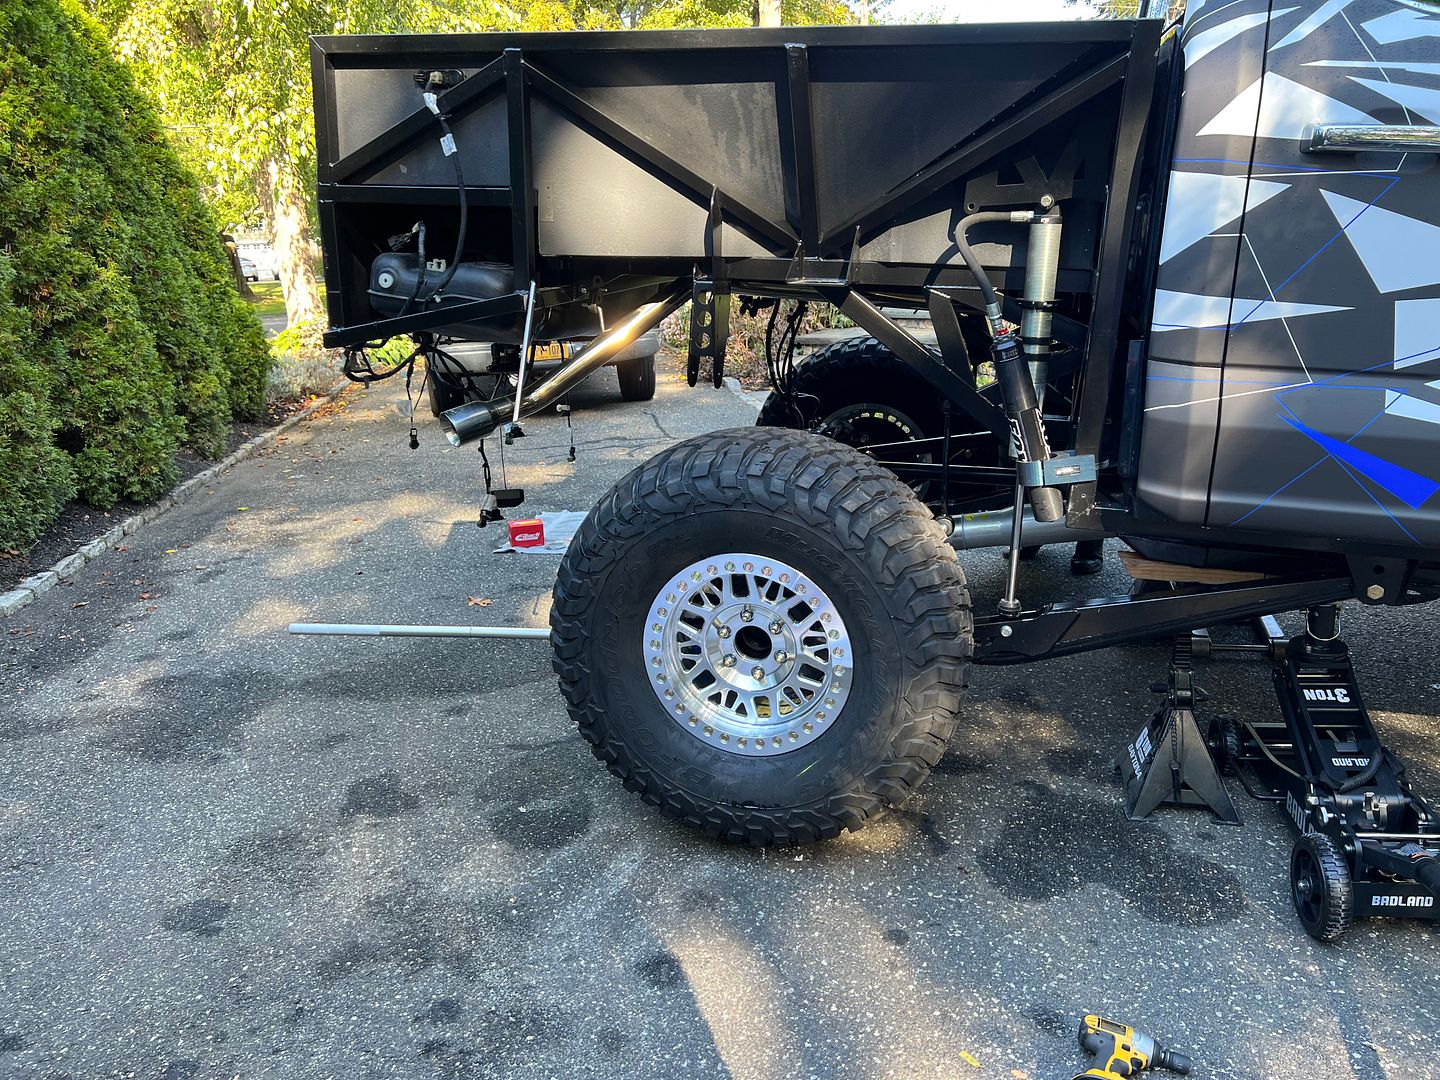
One of the last things I did before SEMA was set the bump stop height.
This operation requires you to cycle the shock through its full range and ensure the bump stop lands on the landing pad on the axle. After removing the spring I jacked up the frame until the wheel was just still touching the ground.
Then I lowered it down to the point where the bump stop would catch the full weight of the truck
Yes thats actually the full travel of the suspension.
We have some loose wiring in the picture, but when completely compressed the rear end squishes down quite a bit with the factory five provided exhaust only a few inches off the ground.
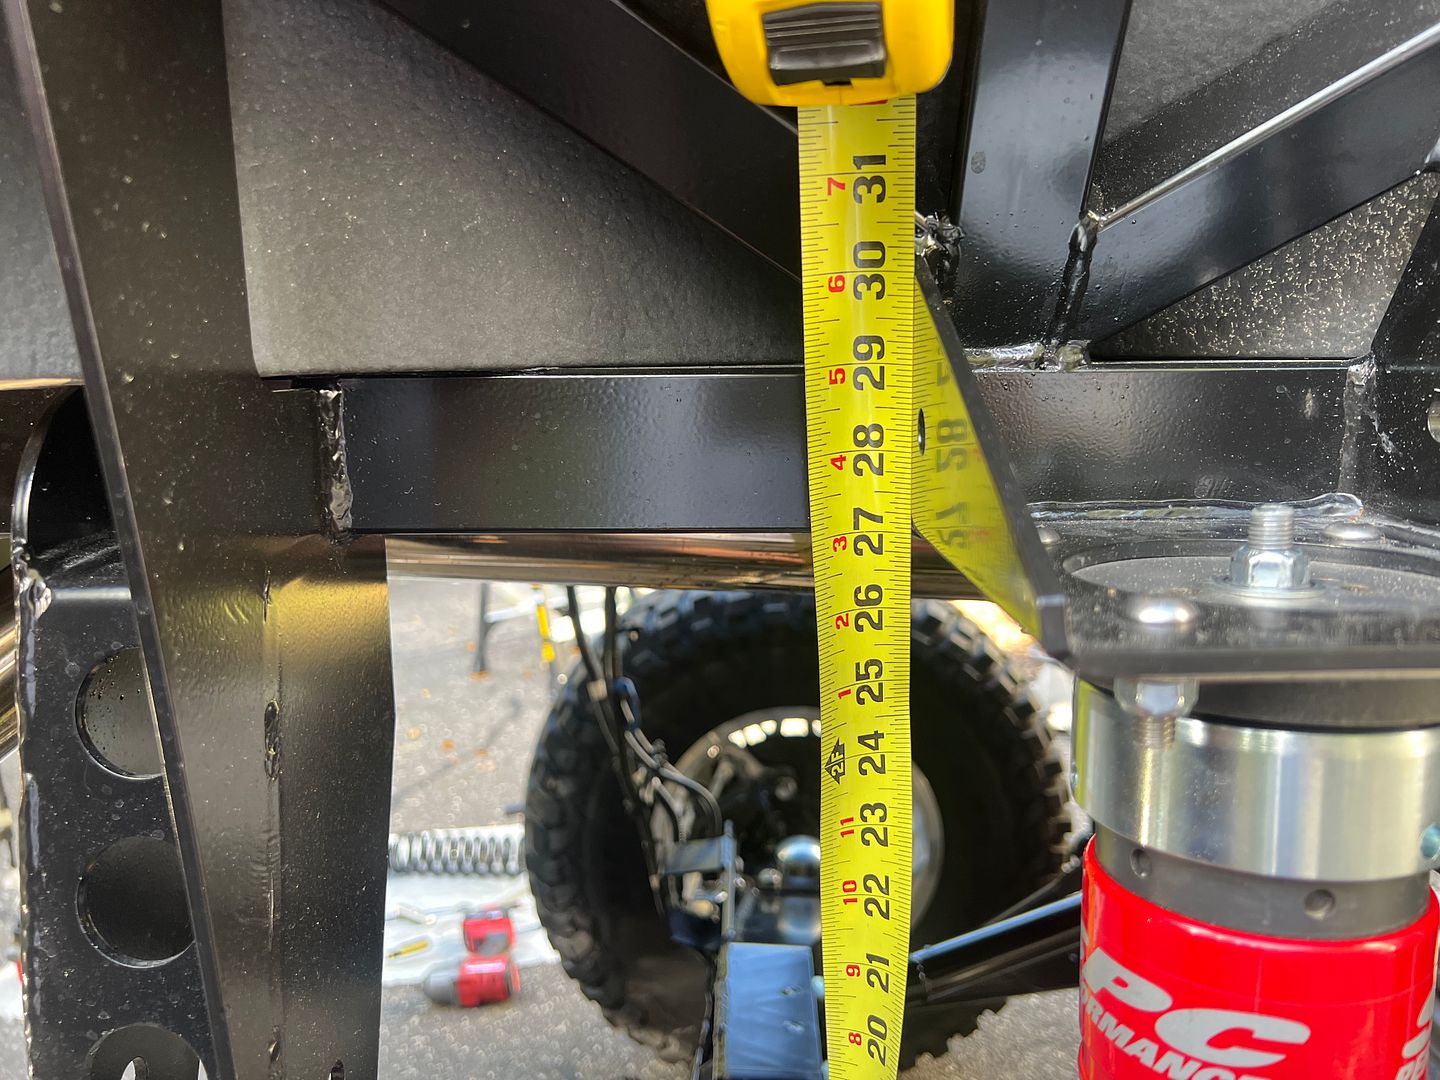
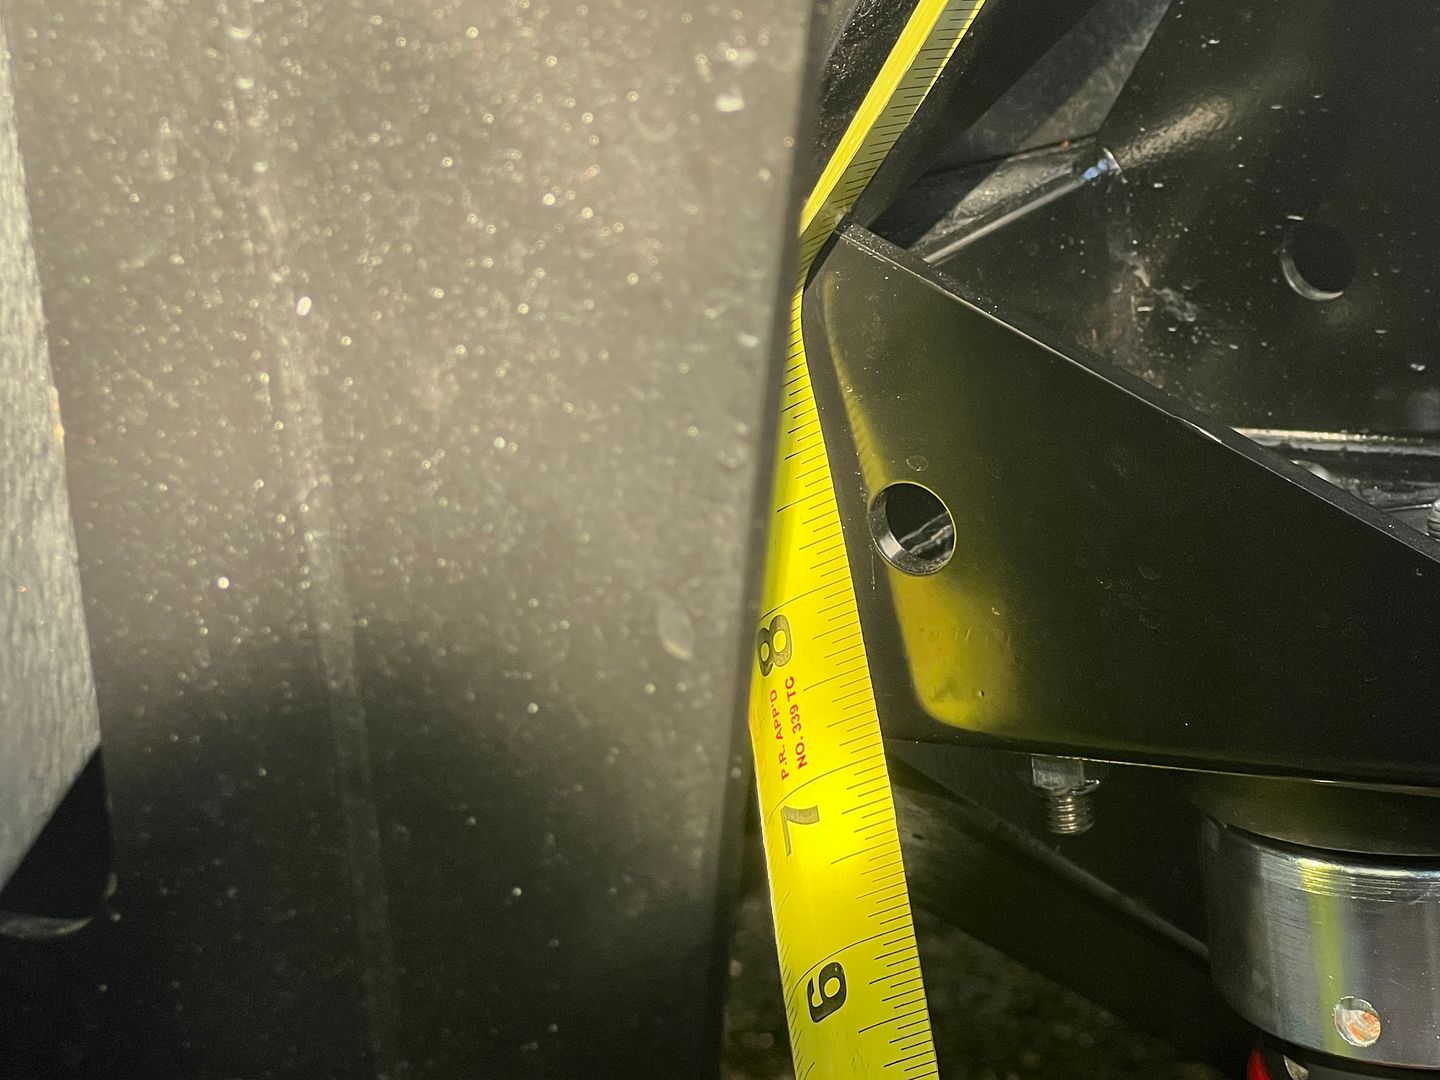
Because this looks insane I needed to measure the actual travel from axle to frame.
The top of travel measurement
Bottom of travel measurement. 20 inches of rear axle travel. Just like the marketing says. Actually I think I can get 24 inches by simply adjusting a few bits.
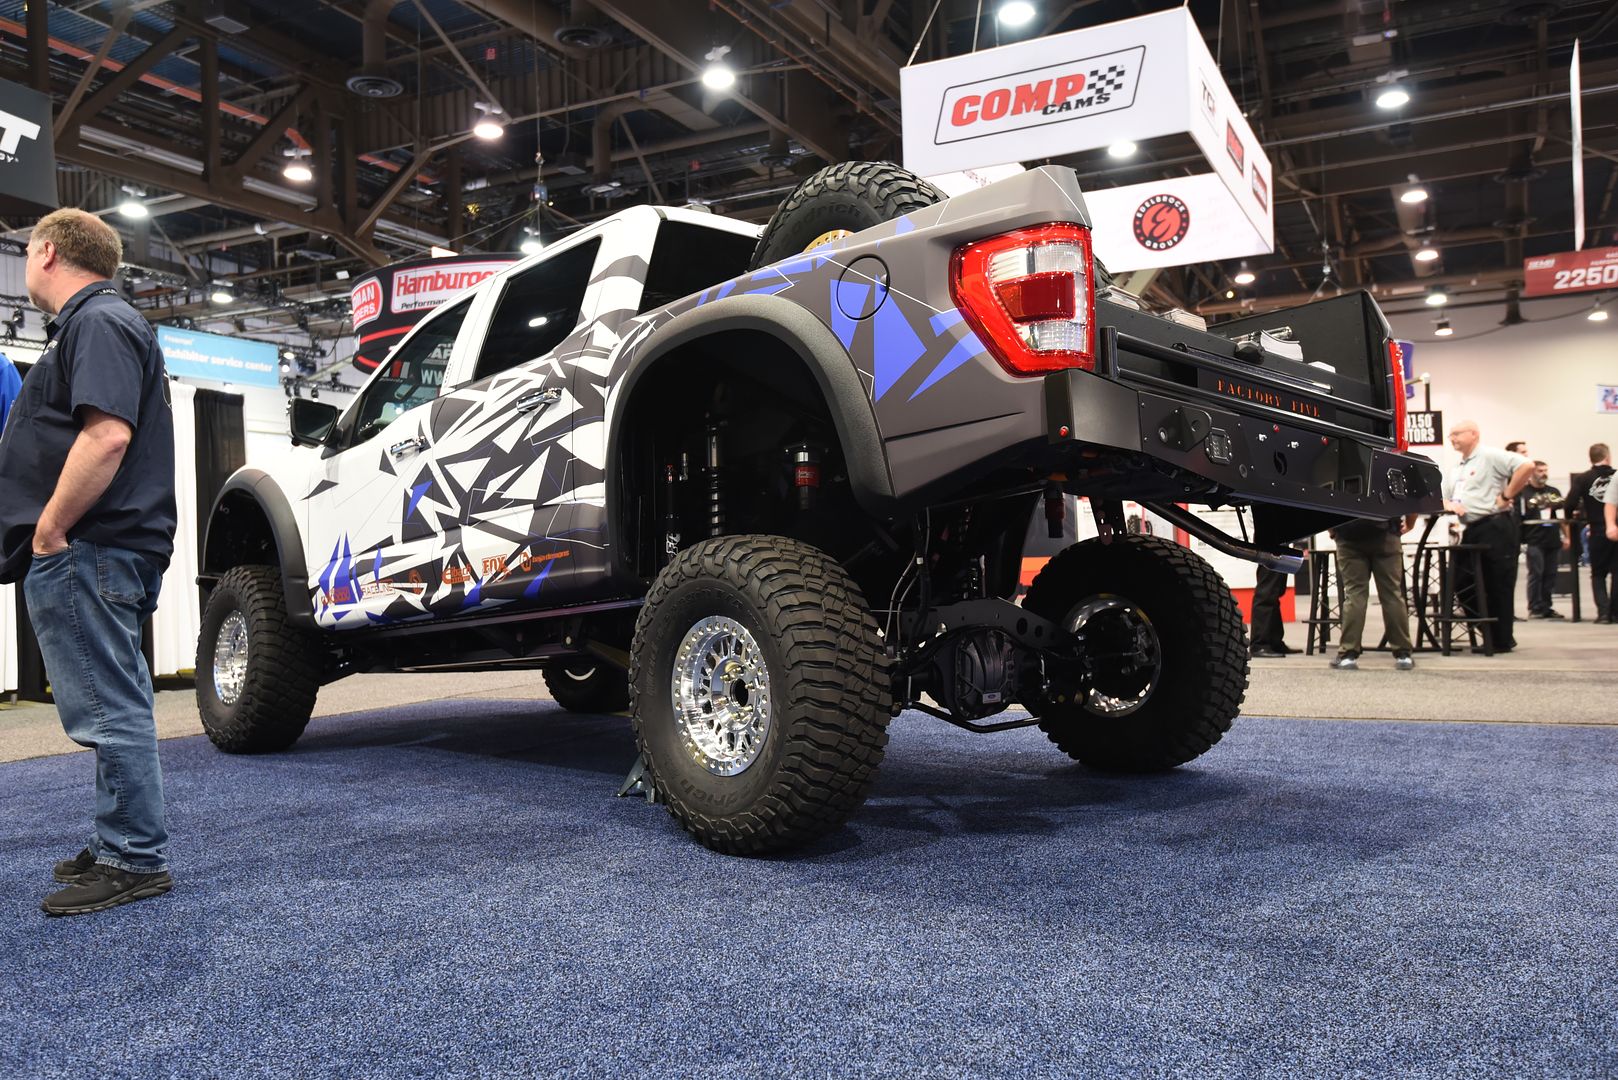
Because the fully drooped out pose where the axle is fully extended away from body is so dramatic. We decided to use it as the way we showed this XTF on the SEMA floor.
XTF #2
build start date June 19 2023
GTM # 344
Build Start December 2010
First track day April 2013
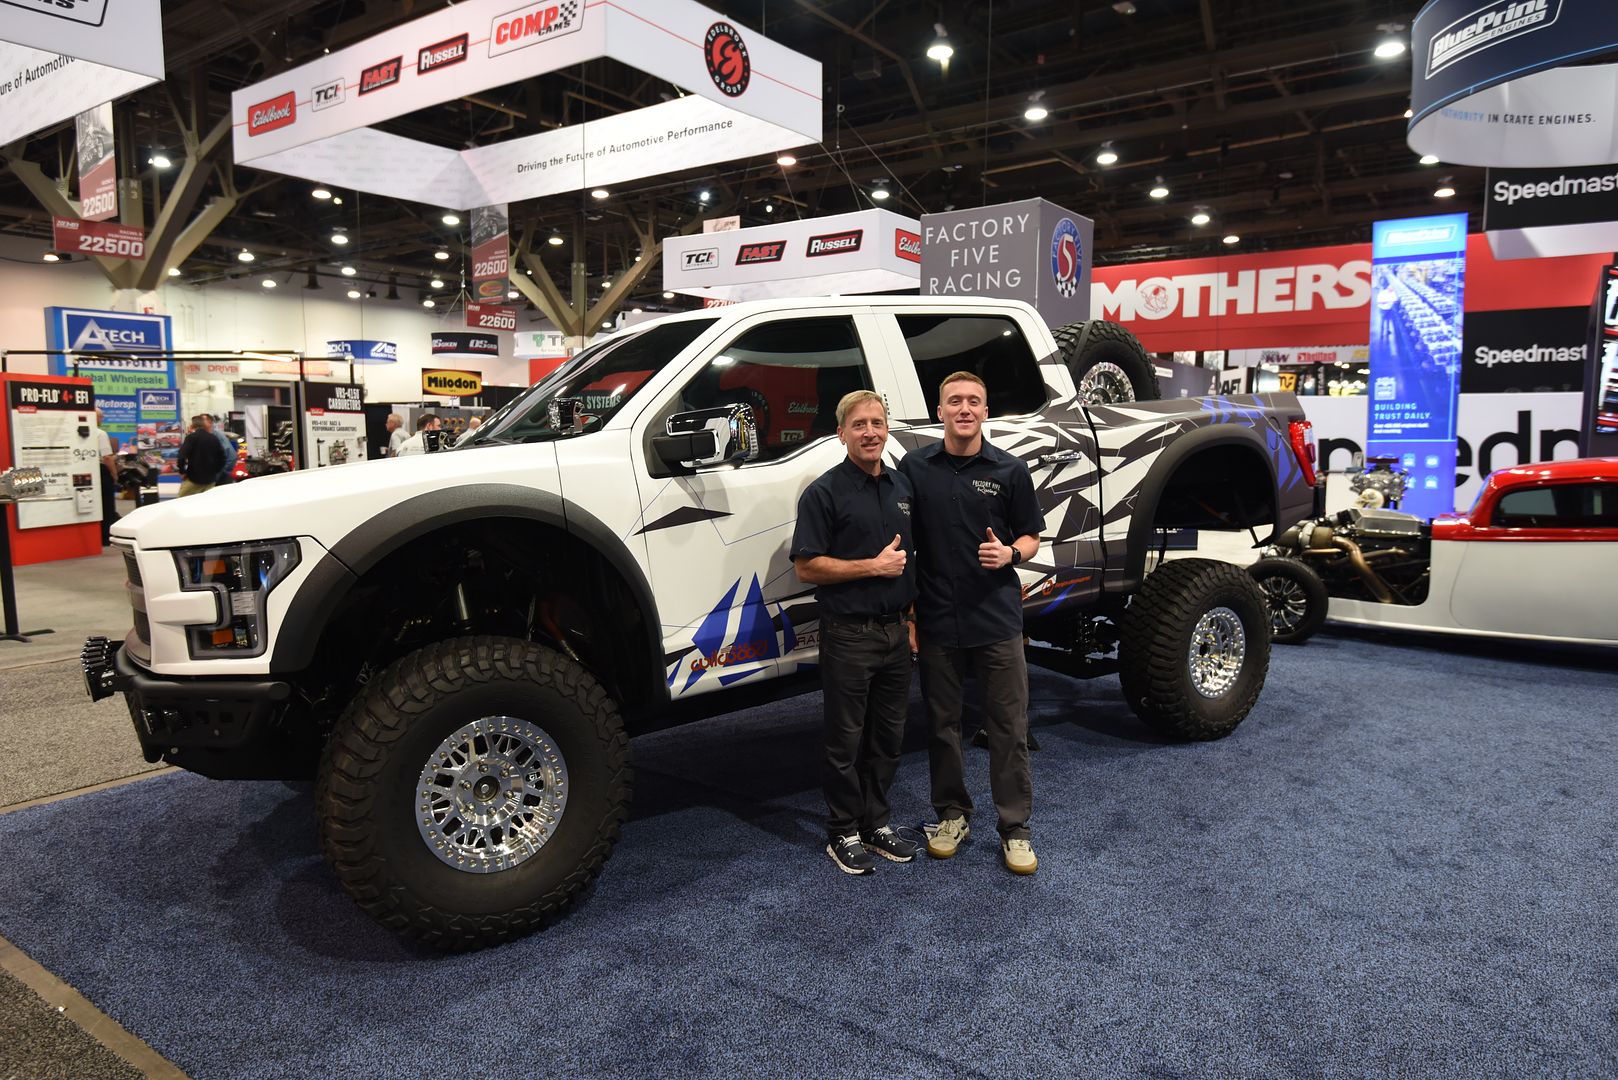
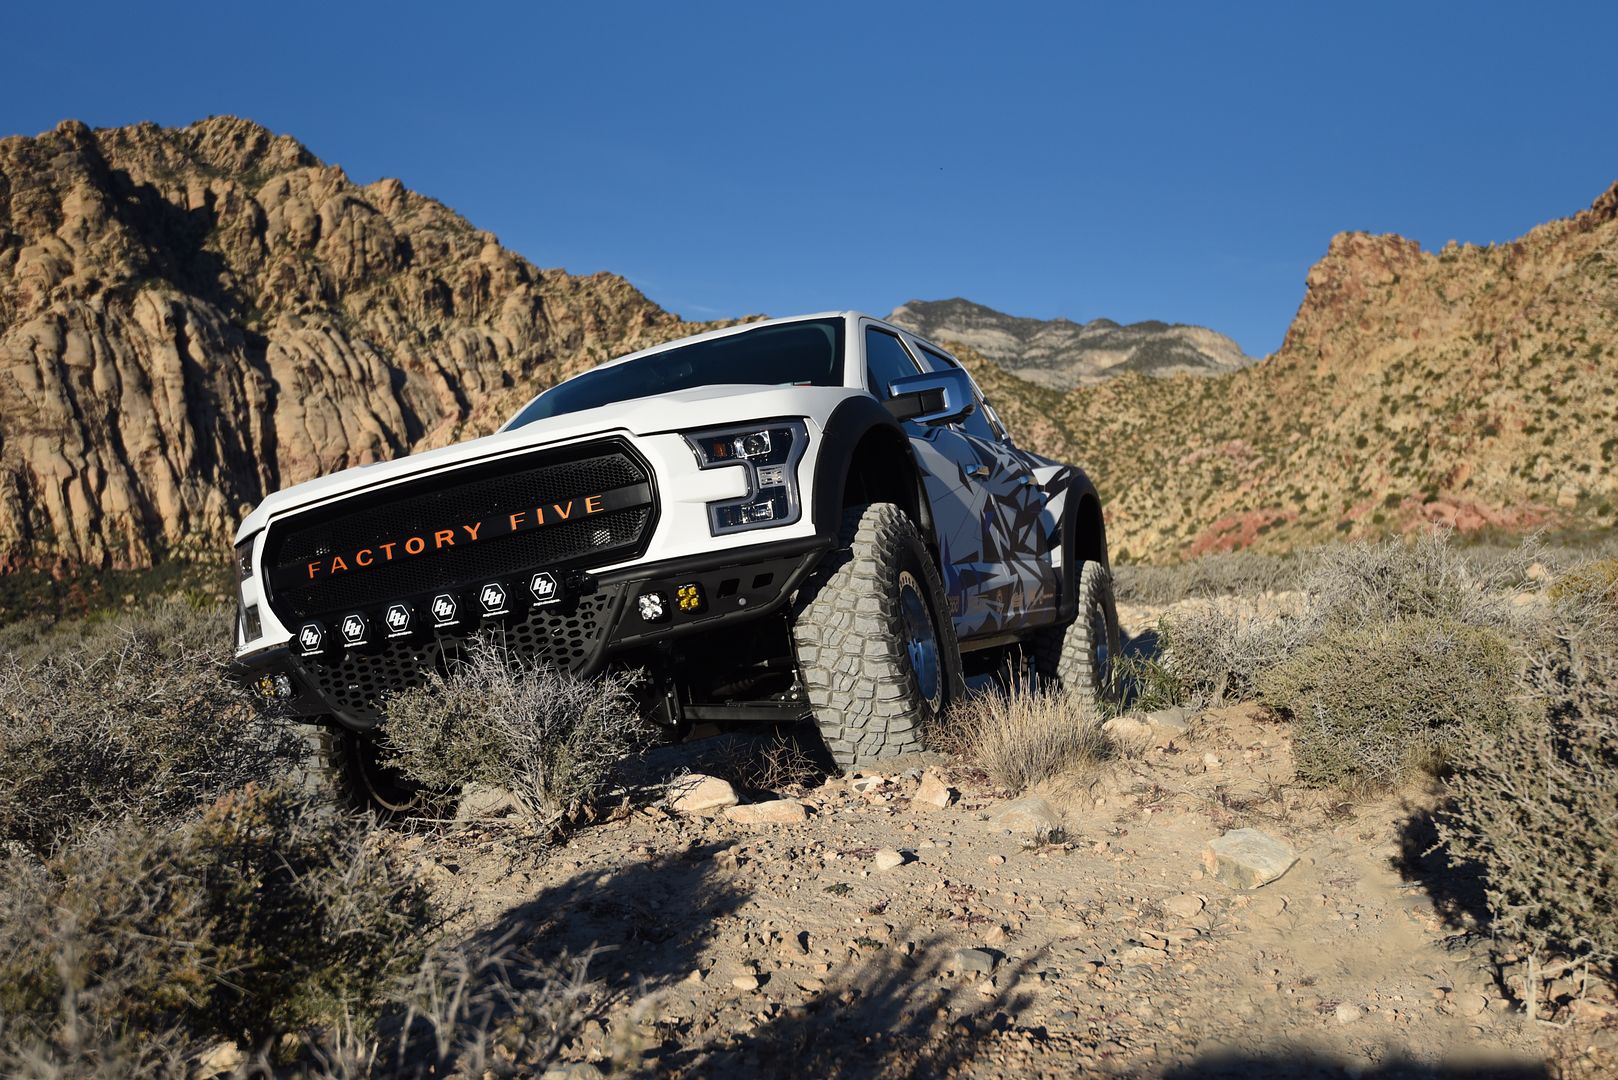
We were so excited to get the truck finished for SEMA. It was a great show with so much interest in the truck in all its versions. Folks could not believe the same kit could build Eriks, the Black Factory five truck, and my truck. This was such a fun father son project. After my son went back to school my dad pitched in to help me get the truck done in time. I could not be more thankful for that experience.
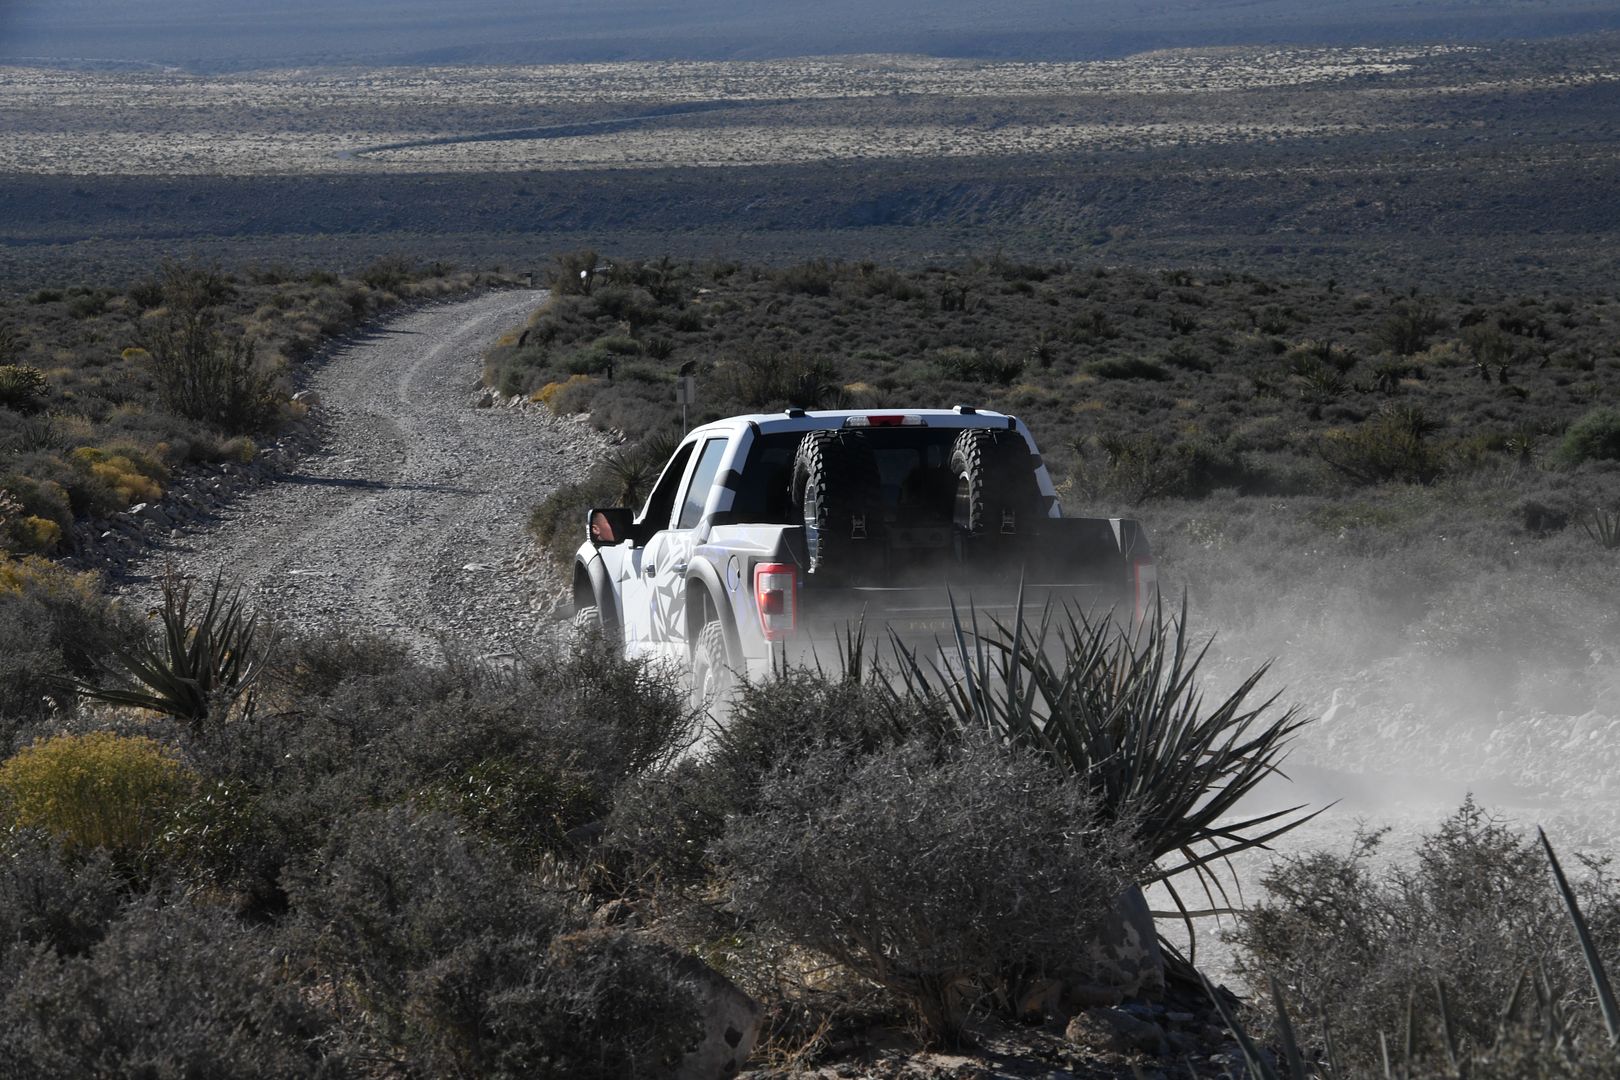
Now it was time for the payoff. Las Vegas is surrounded by the natural habitat for this truck . Of course I had actually only one trip around the block and a burnout before the XTF was loaded on the truck for Las Vegas. It was green and untested to say the least. But I go out and do 100+ mph with the GTM on the race track after doing work on it so this is similar.
We woke up early and drove out to the desert. 30 min drive. 65mph on the highway. Everything was smooth. The truck was working perfectly. WHEW!!
Lets see what this thing can do!
Now a high speed pass!
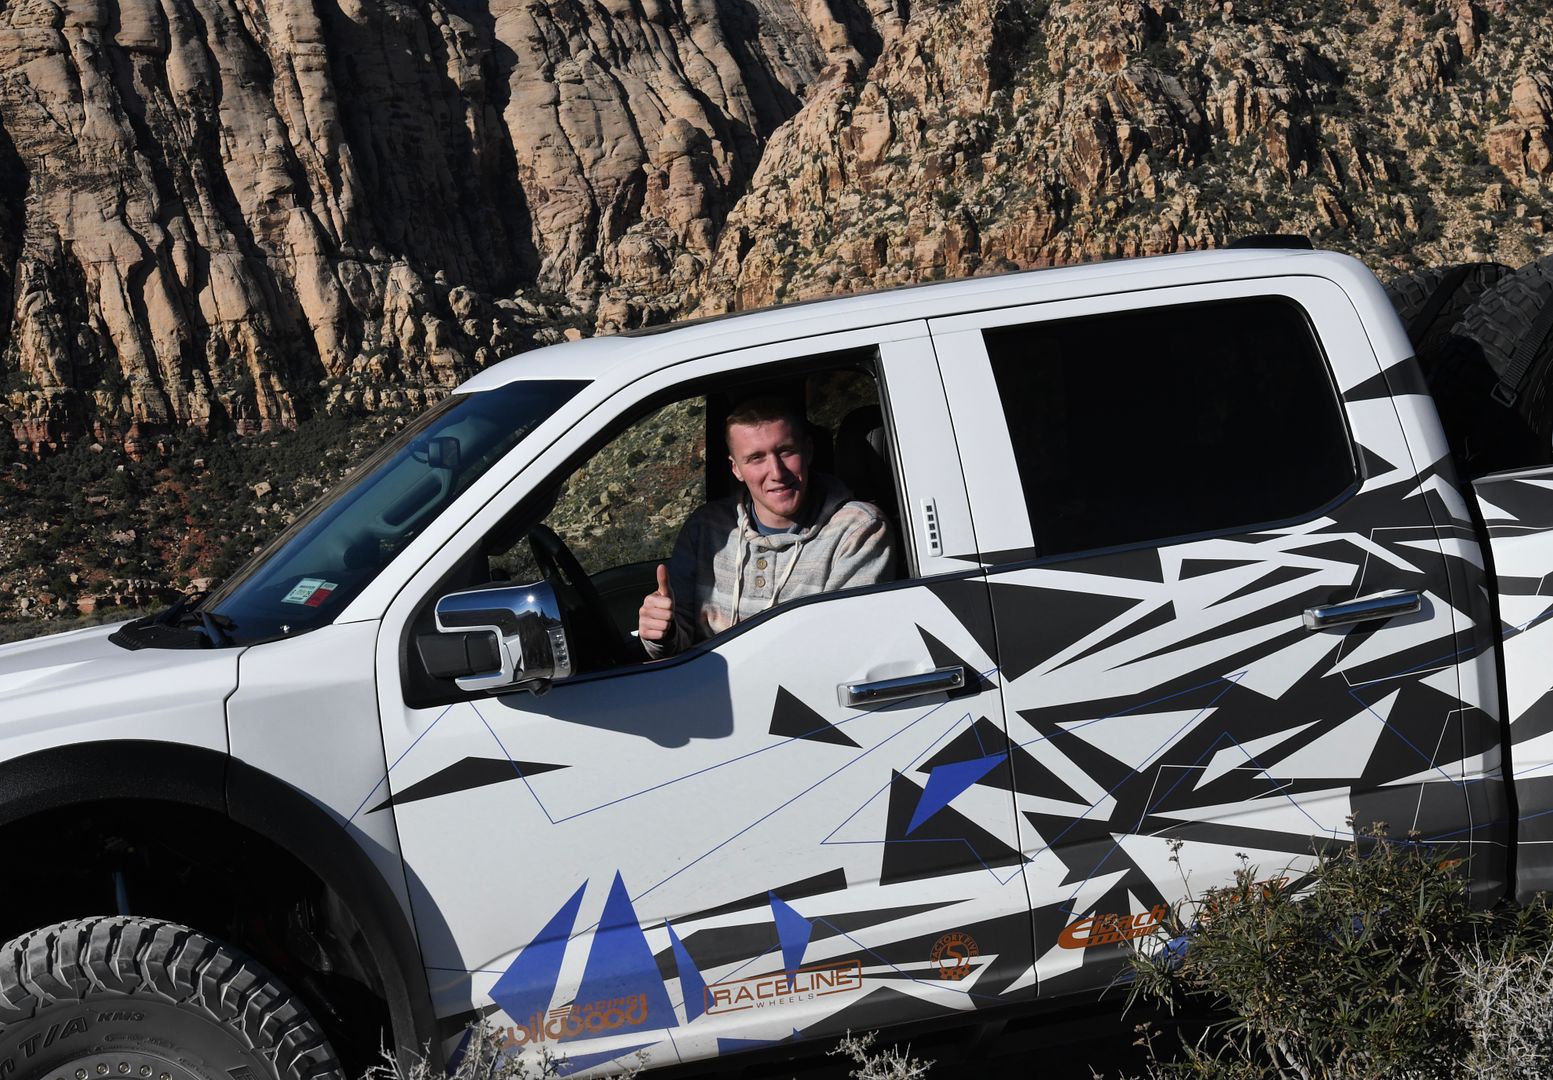
My son was so excited. He said that was like a video game and the most fun he had ever had driving.
Well we have hooked another young kid on the car hobby. Mission accomplished.
XTF #2
build start date June 19 2023
GTM # 344
Build Start December 2010
First track day April 2013
Thanks for all of the kind words on the XTF build. We really enjoyed the build so far.
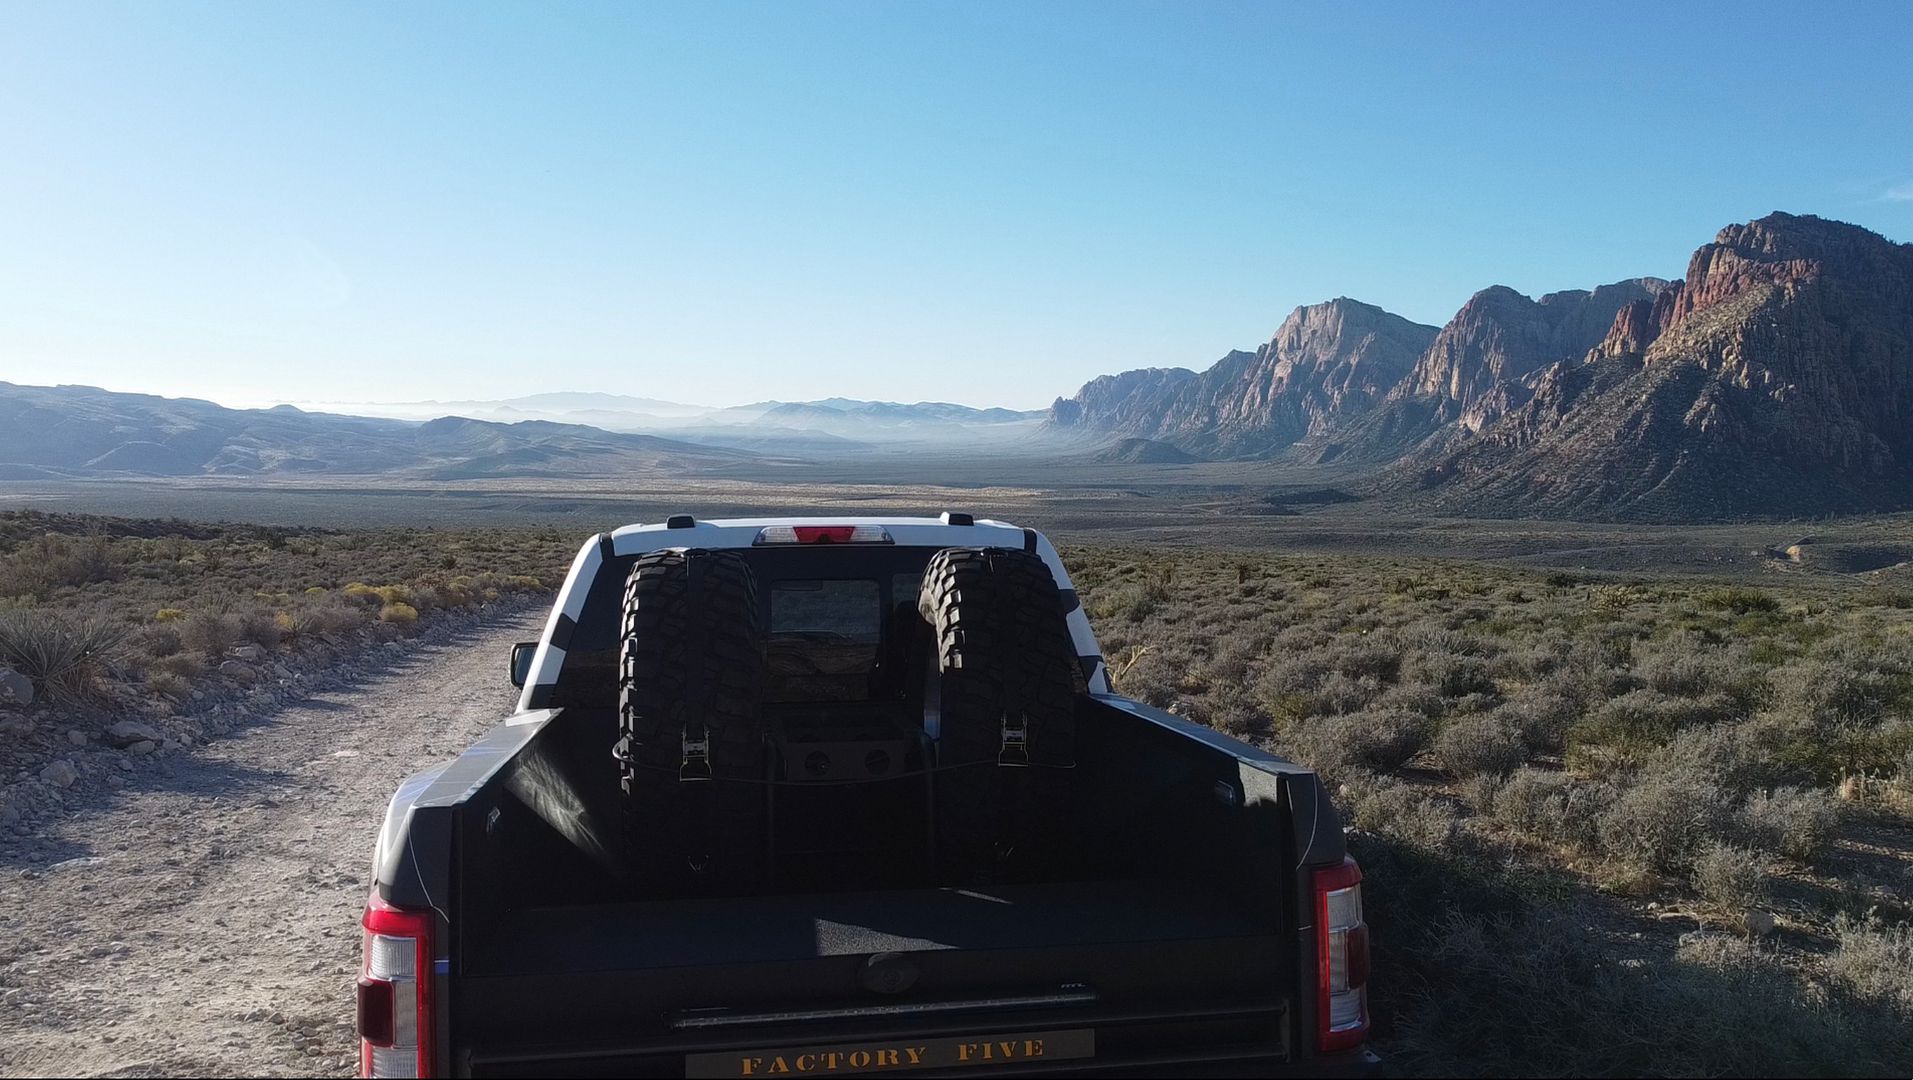
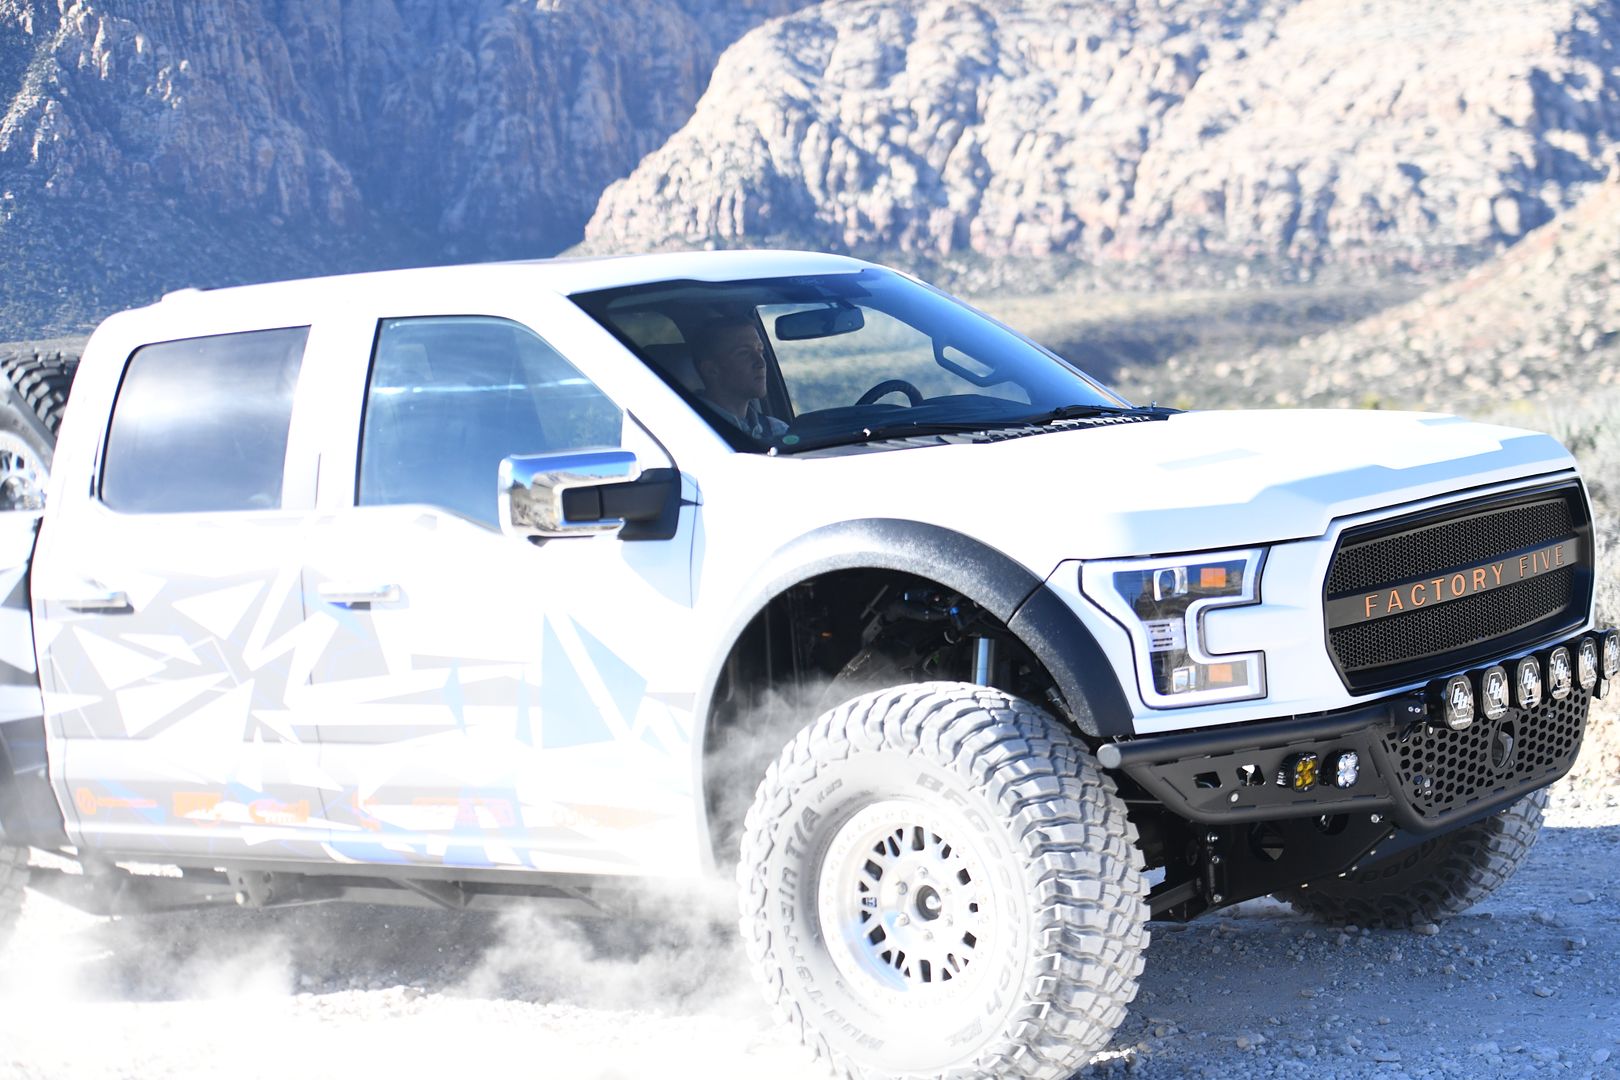
On Saturday after SEMA we had a few hours before the XTF needed to be on the transporter heading home. Priority one was to get some pictures in the desert
But the second most important thing was to get some setup information regarding the suspension tune.
Now keep in mind that I had not done a good alignment on the truck yet.
Our photo shoot area is north west of Las Vegas. Approximately 30 min from the Westgate hotel where we were staying. About 6.30 am we headed out to get most use of the good AM light for pictures as well as to have the most time to test.
Even without anything but an eyeball alignment the truck drove wonderfully on the highway. We were up to 70 mph and the truck was rock solid tracking very well. I was also concerned about the Raceline bead lock wheels.
When you mount the tires on these wheels you simply center the tires as best you can on the wheel then lock them in place. Its not like a normal setup where you set the bead on the rim with air pressure and it self centers. Even though I placed the tire in the center of the wheels by eye, they were centered. I did not have any vibration. Speaking of vibration beadlock tires are not typically balanced with weights. Again shockingly no vibration .
One thing we did notice was the speedometer was off by about 6mph. At first I thought it pretty weird that everyone was going so slow on the highway then I took out my phone and verified my speed with the GPS . Ill need to both update the wheel size in the engine and transmission tune using the Tamahawk tuner that comes with the Ford Performance (whipple) supercharger as well as update the tire size using Forscan.
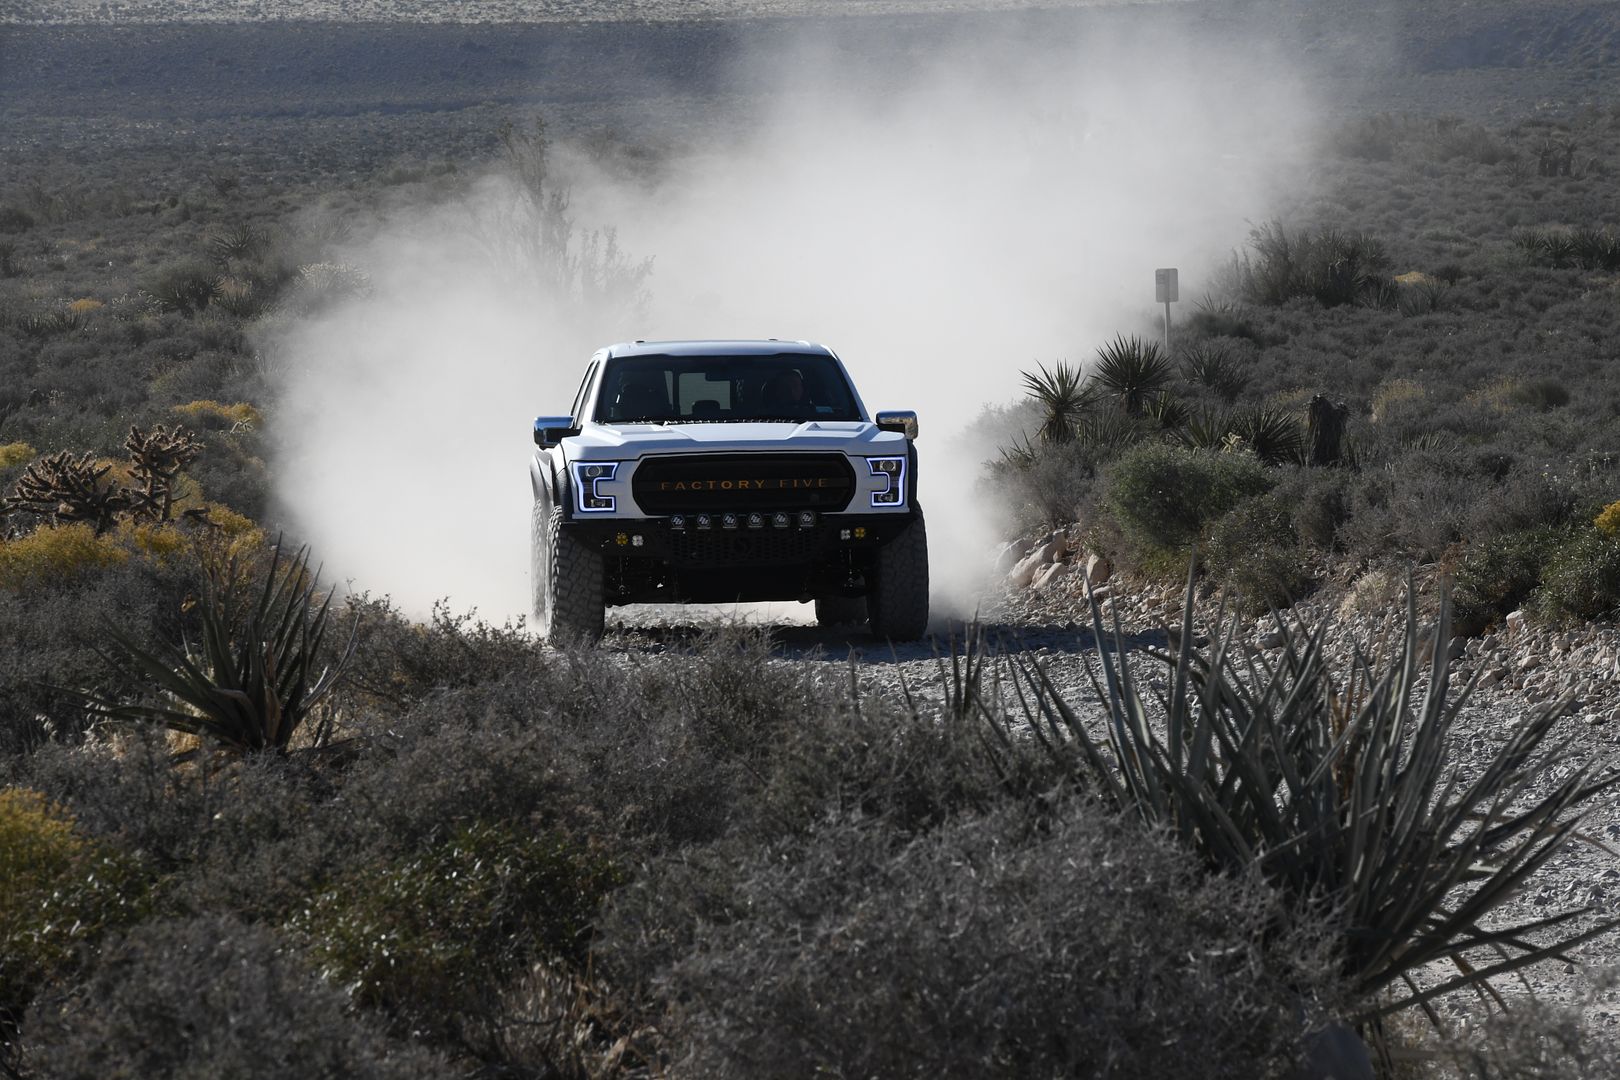
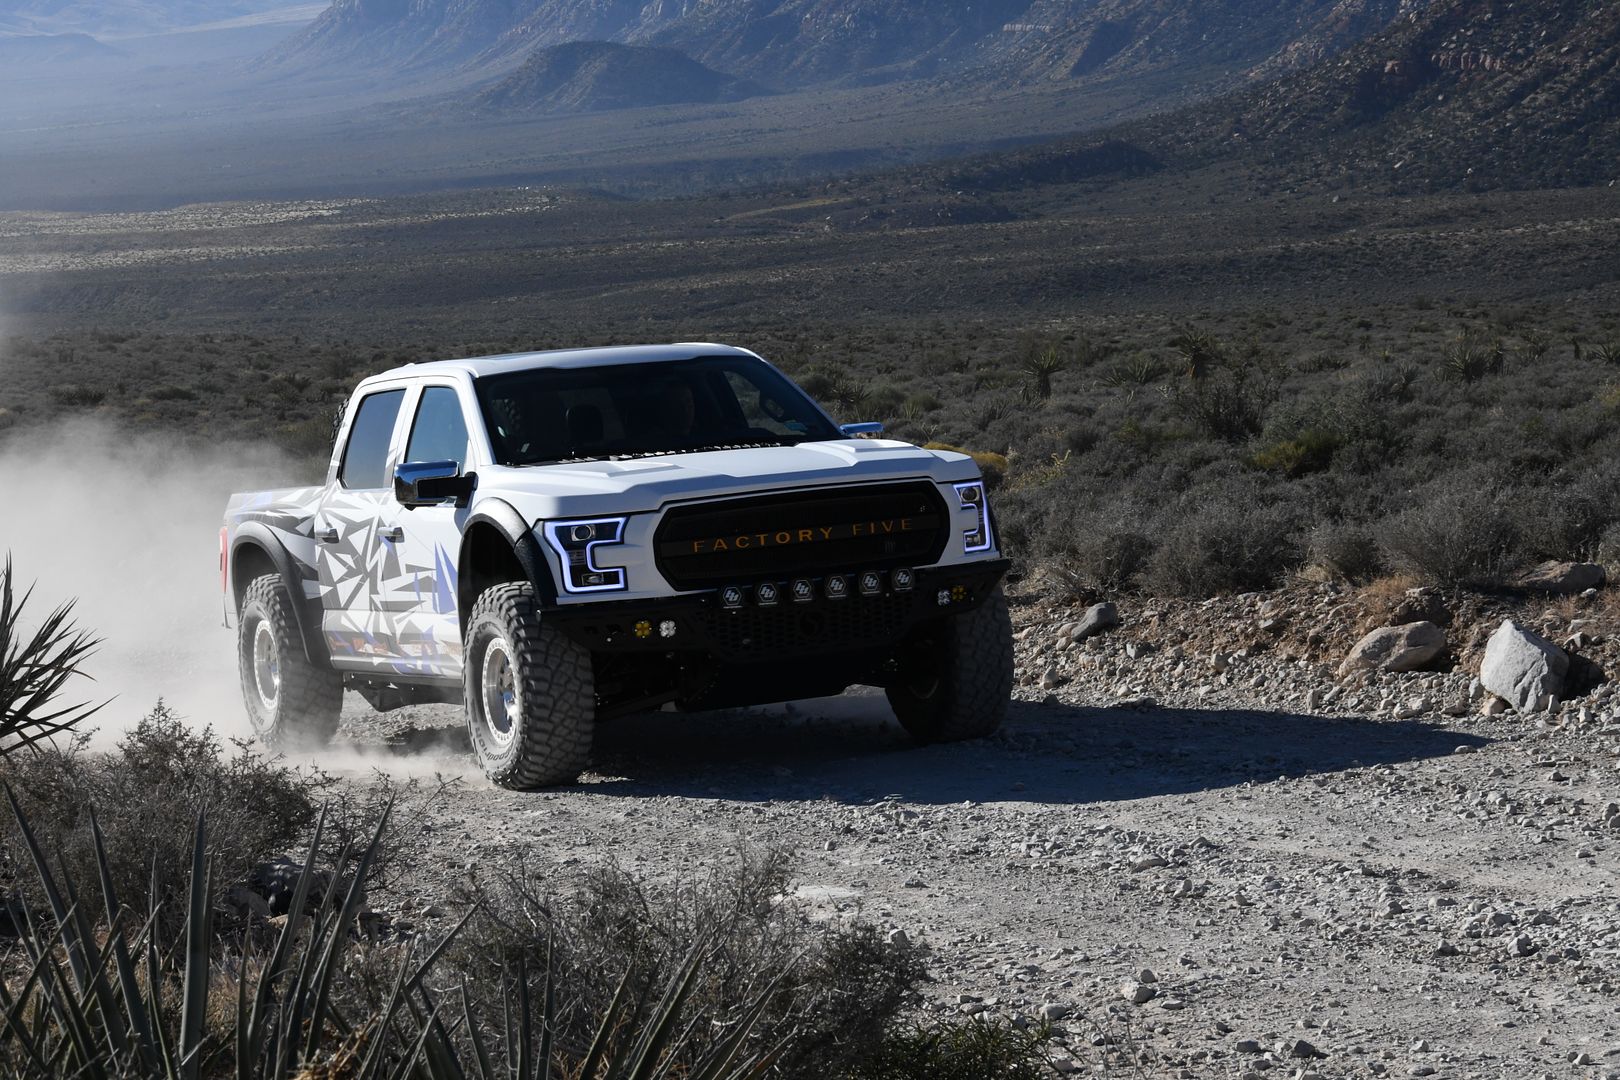
The other observation was off road.
The very rough road we chose to shoot photos had folks driving down to the park trailhead. Normal speed for those cars was walking pace. It was pretty amazing how well the XTF soaked up the bumps. As we made passes up and down the road we gradually increased our speed. 10 MPH .. 20 MPH 50 MPH soon we were going much faster than our drone could go.
We have the suspension set full soft on its adjustments and only at 60 mph did we start to need to adjust in more damping. Wow. Thats pretty insane. We just went highway speeds on a road that folks were going 5MPH because it was so rough.
Well now it was 10.00am and we were already late for our pickup heading back home. Satisfied that we had a good baseline. We put the truck on the transporter heading home.
Last edited by kabacj; 11-08-2023 at 06:26 AM.
XTF #2
build start date June 19 2023
GTM # 344
Build Start December 2010
First track day April 2013
Any of the BD guys show up in the booth? They are usually just a couple aisles over from the FFR booth.
Hey Crash,
Im sure they stopped by, but I did not get a chance to talk with BD. The SEMA layout was so disorganized this year. With Ford and GM pulling out as a result of their union contract talks, the organizers needed to re allocate space so there werent giant voids. So as a result vendors were randomly put everywhere.
Ohlins were stuck with the EV vendors ?! Wrap people mixed in with electronics and tires.
SEMA is vendor overload normally but at least it helps that you can see all the truck part vendors and all the paint and body people in one area. This year it was a random mix of folks all over the place.
Dogs and cats living together.. mass hysteria. You know that kind of thing haha .
XTF #2
build start date June 19 2023
GTM # 344
Build Start December 2010
First track day April 2013
I am considering purchase of a gooseneck trailer. Two reasons. First my 1979 CJ5 is not a highway cruiser. If I am going to drive 3-6 hours to go wheeling id rather tow it than drive it. Second, if I go out to test the XTF at its limits I should have a way to drag it home because you never know what could happen
when you push the envelope. Just like I don't drive my GTM to the track just in case something happens, I want an alternative to pull the XTF.
One choice is a bumper pull trailer. I have been borrowing my friends flatbed car trailer which is rated at 10,000 Ibs GVW. My friends trailer is fine.. not perfect as I would actually like to pull the XTF farther forward for more tongue weight, but the spare tire mount is in the way.
The XTF is wider than the trailer deck and driving over/ removing the tires to load and unload gets old quick. So that leaves a buggy hauler where I have drive over fenders made of rigid plate steel and 102 inch wide deck. Or a deck over trailer where I have a fully flat deck but also a higher carry for the load. Typically a deck over
trailer carries the load 30 inches in the air.
Finally I have gooseneck vs bumper pull. I want a 14,000lb GVW trailer as that's the max I can pull with out a Commercial Drivers License .
That size trailer gives me plenty of load capacity and I will not be pushing up against the trailer limits pulling an XTF loaded down with all sorts of other things that I want to take wheeling. When pulling the 2 xtfs out to Vegas the factory five trailer was 200 Ibs over weight. It was probably all the stuff I loaded into the truck just in case I had issues when testing out in the desert. Haha. But this was a lesson in having extra capacity. When you roll on to the scales at a weigh station you want some
buffer.
I could get a 14,000 lb bumper pull trailer, but that seems like a heavy trailer to tow on a bumper for long distances. It would be totally fine around town, but my goal is something I could drive for 12 hours in bad weather at 65 mph without white knuckles.
That leaves a gooseneck. 14,000 Ibs is the low end of typical gooseneck trailers capacity. I'll need to drive a decent distance to pick one up . A 24 foot trailer is long enough for any car/truck but not long enough for 2 cars. They are mostly used in rural areas where folks need to move farm equipment, hay bails,
and other cargo.
Anyone have suggestions on who makes a good 14,000 Ib gooseneck trailer? I never get rid of anything, so
consider the fact that I will keep it forever. I am looking for a trailer that will last and be trouble free for years.
XTF #2
build start date June 19 2023
GTM # 344
Build Start December 2010
First track day April 2013
Goose neck trailers ride better, for sure. The draw backs are that the bed of the truck is largely used up, and interference with the truck cab is sometimes an issue.
I personally have 9 trailers. 3 of them are goose neck.
My current race car trailer that I take to the track all the time is a tag. Sway can be an issue so I have two sway arrestors on the hitch. It is rated for 15,000 lbs. I need a class A after 10,000 lbs in CA and have one. If I was buying new I would have likely gone for a less than 30' goose neck, but I got a deal on this at $4500 and it has a $10,000 awning on it. I kid you not. I went to Larson Sails to get a quote on just replacing the canvas on this awning and it was $7,000. The trailer is a Carson and I have to tell you, it needed quite a bit of work. Seems to me like they took their standard 10,000 lbs trailer and just put another axle on it and called it a 15,000 lbs rated trailer. At least that is what the purchase receipt from the previous buyer states. I have reinforced the frame significantly as the beaver tail was sagging and there was no support under where the actual race car tires were sitting which had led to the plywood warping and drooping over time. Basement was a joke, and I welded in wall supports for full length E Track on the walls. Again, just the fact that it came with an 18' X 28' awning made the effort worth while.
The tag trailer works well enough, but I would recommend a goose neck if you are not worried about price. If you are worried about price, then a used tag might make a lot of sense if the right deal comes around like in my case.
I think you can go a max of 108" wide? That makes a difference and I would go the max trailer width with any full size desert vehicle being towed. Also nice to have the rails on the sides so you don't load off the side when it is near impossible to see where you are on the trailer when loading a high vehicle like a desert truck. Drive over fenders are pretty much standard when you are trying to tow a large truck, but the higher deck trailers can be cheaper to find since they are a more equipment type of a trailer. I have a 40' flat deck equipment trailer and it was a relatively cheap 26,500 lbs rated trailer. Goose neck. The problem with it is that when it comes time to replace the tires, which I just did, it is 8 tires which costs a couple thousand bucks. On the other hand, it allowed me to just buy a 20,000 lbs piece of equipment at auction and move it around. I wasn't planning on owning something this large but was glad I had the extra capacity when the need arose. I would definitely recommend going larger than you think you need.
A non commercial Class A was not that hard to get in CA and well worth not having to worry about being pulled over for weight/incorrect license issues. In CA that is a game stopper and the vehicle will not be allowed to move until a properly licensed person shows up to move it. If you cannot arrange this quickly, the rig will be towed and storage and towing WAY surpass the costs of a Class A.
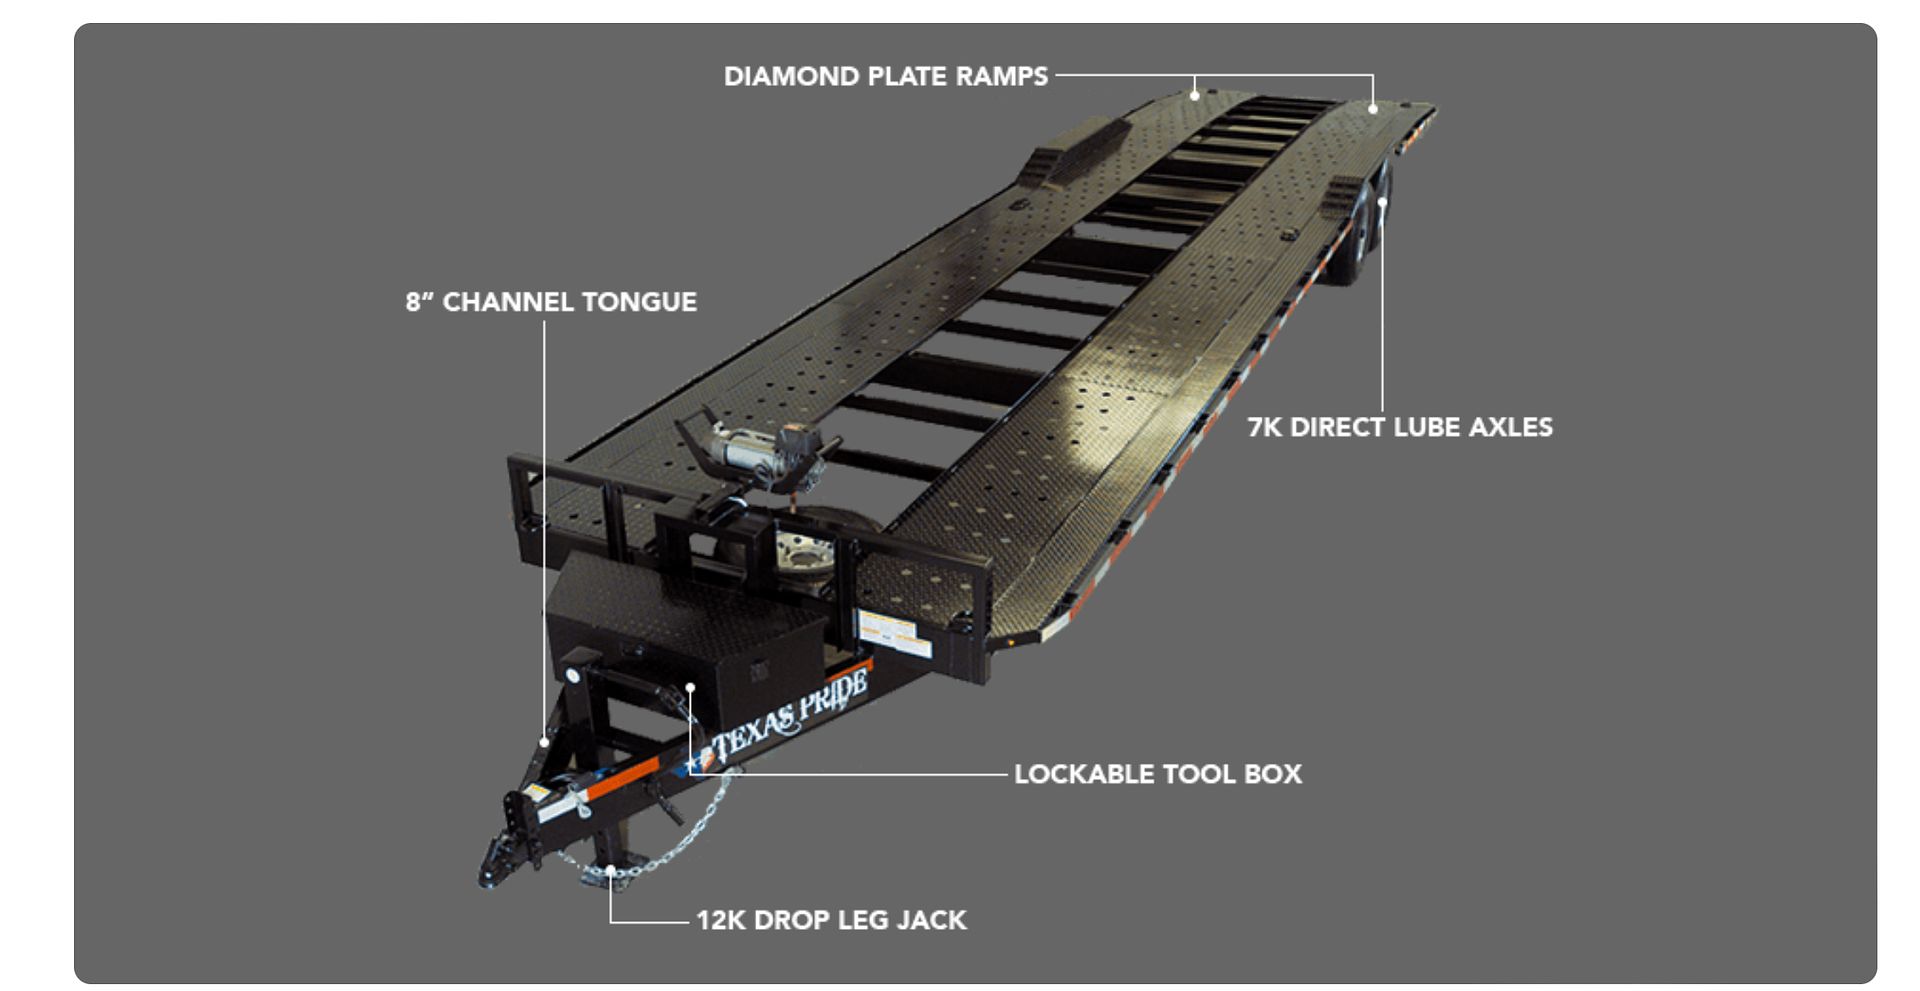
IIRC my big trailer is made by Brute, but I don't think you can go wrong with Texas Pride. You might want to look at some of the "Dirt Monkey" YouTube videos as he goes to the trailer shows every year and gets into them pretty deep. Crawling under, on top, visiting manufacturing facilities, etc.


 Thanks:
  Likes:


 Reply With Quote