-
Senior Member

Front Brakes
Front brakes came in - Powerstop Mustang Cobra calipers with 13" rotors

18" wheels clear calipers and rotors with plenty of room
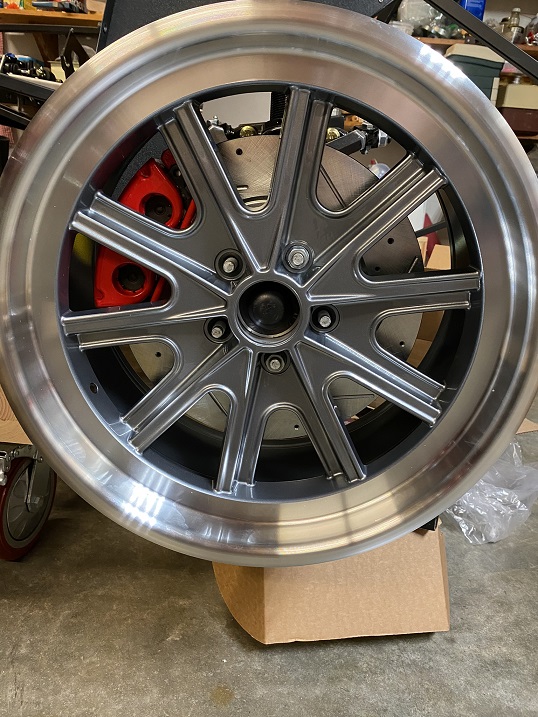
FYI, the Powerstop calipers have metal pistons.
Rears also arrived. I need to get bolts to secure the calipers.
I really wanted to run the Cadillac ATS Brembo front calipers, but they would not fit with the FFR wheels. Plenty of radial clearance, but hit the back of the wheel. Those things are fat.
Last edited by BRRT; 10-29-2023 at 08:35 PM.
----------------------------------------------
Jeff
Roadster delivered 8/27/23
Chevrolet Performance LS3
Build Thread
-
Senior Member
Headers
I pulled the headers out of the box to check their fit and any potential interference. All the holes line up, they clear the dipstick tube, and I can keep the supplied plug wires.
It does look like the flanges are not completely flat. We will see how they do.
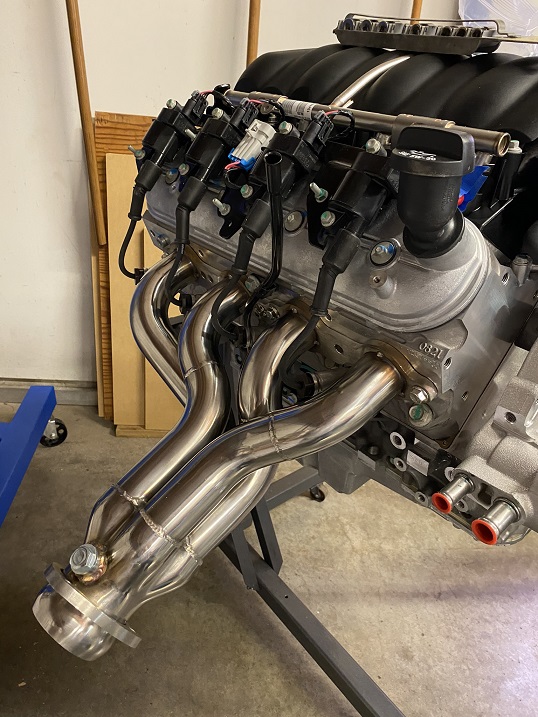

Those things are beautiful!
----------------------------------------------
Jeff
Roadster delivered 8/27/23
Chevrolet Performance LS3
Build Thread
-
Senior Member
Rear brakes. Standard late-model Mustang GT rears from PowerStop. 13" rotors, single piston calipers with parking brake.
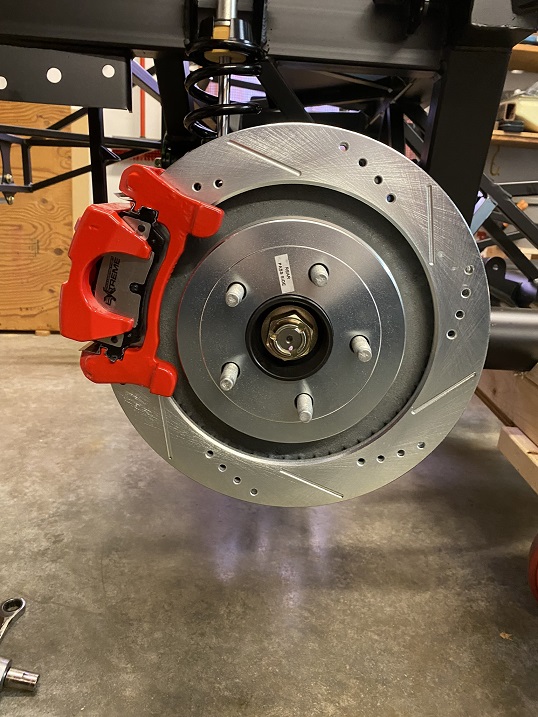
Like the fronts, the rears have plenty of clearance with the FFR 18" wheels

The rears go on quick. I did have to source the bolts from the local parts store, about $7 per pair.
The parts guy wanted to know the specifics on my Mustang. That started an interesting conversation....
----------------------------------------------
Jeff
Roadster delivered 8/27/23
Chevrolet Performance LS3
Build Thread
-
Jeff, I’ve got the same front and rear brakes waiting for my kit (Nov 18 ship). I’m hoping they fit with 17” wheels-will obviously be tighter than your 18s. Down the road we can compare notes on balancing front to rear, etc. my build is manual brakes. I’ll post a build thread this week after I make the final payment.
BUDFIVE
-
Post Thanks / Like - 0 Thanks, 1 Likes
 BRRT
BRRT liked this post
-
Senior Member
DBW Pedal
Well, its been too many weeks since the last update. I will attempt to catch up. Quite a bit of progress.
First up is the Drive-By-Wire throttle pedal. My LS3 came with a drive-by-wire throttle body. I had a choice of keeping it and using a drive-by-wire pedal or swapping out the TB.
After much internal debate, I elected to keep the TB and use a drive-by-wire pedal and a computer that would support them.
Once that decision was made then came "how do I mount this thing??". Luckily a couple other guys had been down this road. I pirated their ideas with some modifications.
The Holley Terminator X Max computer requires a GM pedal, part #10379038, originally intended for many Cadillac models.

I fab'ed the bracket from a piece of aluminum, cut some clearance for the connector latch, and made a couple of mounting details.

There is a lot going on in this very crowded area.
----------------------------------------------
Jeff
Roadster delivered 8/27/23
Chevrolet Performance LS3
Build Thread
-
Senior Member
Parking Brake - caliper end
Next I moved to the parking brake. I am using late-model S550 Mustang rear calipers and rotors source from PowerStop. I followed FixIt's (John) lead and used the factory Mustang parking brake cables. I sourced them from Rock Auto, MotorCraft #BRCA286 and #BRCA373. Less than $50 for the pair. Check out Fixit's post for a great writeup, starting with post 131:
https://thefactoryfiveforum.com/show...amp-9365/page4
I pried off all of the Mustang mounting brackets, except for the ones nearest the caliper. I trimmed off the tab that holds the ABS sensor cord.


The remaining hole in the rear knuckle, although metric, was very near the tap size of 5/16-18 (17/64"). I tapped the hole 5/16-18 and used a stainless 5/16 button head to secure the cable sheath.


----------------------------------------------
Jeff
Roadster delivered 8/27/23
Chevrolet Performance LS3
Build Thread
-
Senior Member
Parking Brake- Cockpit End
I trimmed the sheaths to length and put the ends back on. The plastic ends were a bit big for the holes in the bracket, so a step drill made quick work of that minor issue. Next up was the cables and the handle, and tying all of that together. This is where things went a wee bit sideways. I had a solid plan for the cables, cut them off, mounted the details, and had a functioning parking brake. Great. Until a placed the driveshaft safety loop into the tunnel. There was no way everything was going to go in there and still function. After much fitting, fussing, cussing, and redoing I followed the general plan of many others. I now have room for the driveshaft loop. I will finalize the mounting of it after I see exactly where the transmission tailshaft falls. Here is the PB handle and cables.

That was tough.
----------------------------------------------
Jeff
Roadster delivered 8/27/23
Chevrolet Performance LS3
Build Thread
-
Senior Member
Brake-Clutch Reservoir
I decided to use the Tilton triple chamber reservoir. I made the modification of the tops, adding the gaskets (per OB6), and fab'ed a bracket from a scrap of aluminum 3/8" thick. Could likely hang most of the car from it, but I like over-engineered and sturdy.
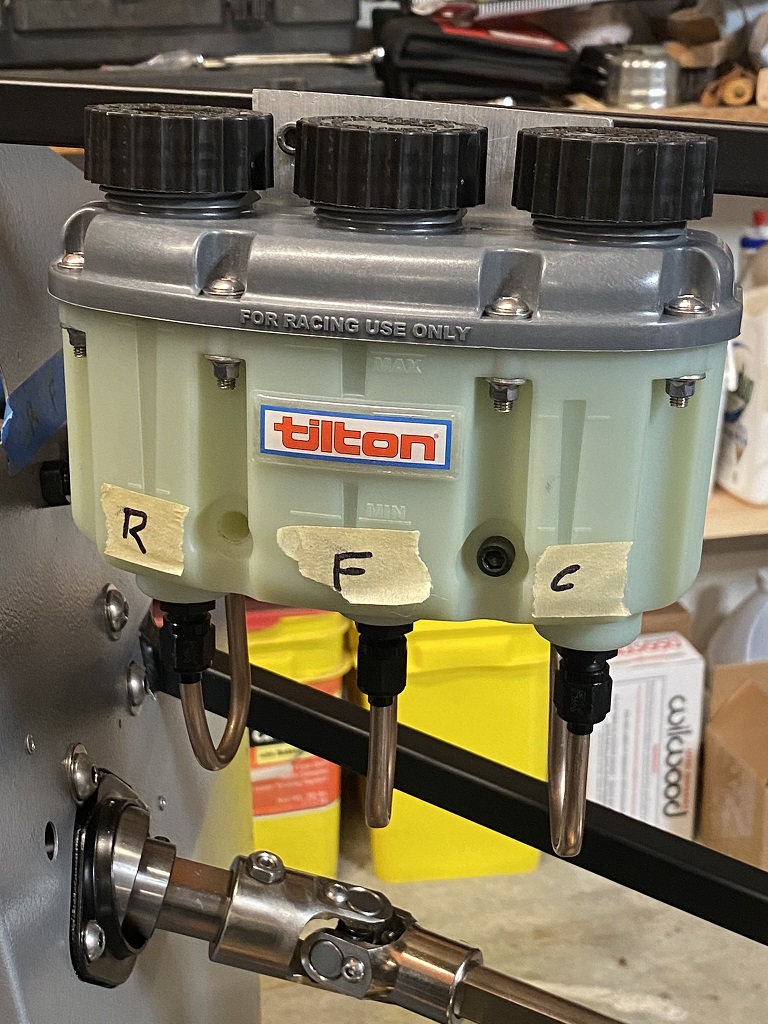
The reservoir came with -4AN fittings, so I used 1/4" Nicopp tube, -4AN bulkhead fittings, and -4 to 1/4" hose pushlock fittings sourced from Racetronix to create the fluid path to the master cylinders. A definite learning experience on tube flaring and bending. I trashed a boatload of tube before I got these made. Not exactly proud of them, but appear to be functional. We will see when I add fluid to the system.


----------------------------------------------
Jeff
Roadster delivered 8/27/23
Chevrolet Performance LS3
Build Thread
-
Senior Member
Front Brake Fittings and Hoses
Next came the brake hoses and lines. I made 5 of these brackets from 1 x 1 aluminum angle.
The large hole is 3/8" for the -3 AN fittings, the small holes are for the 1/8" rivets.
On 2 I cut the bottom leg down to 3/4" to fit the front tube without overhang.

The brackets were riveted to the frame in appropriate locations and the -3AN steel fittings installed.
The driver's side got a -3 steel Tee fitting.

The passengers side gets a -3 steel elbow.

On the hose side of the fitting I used a 90 degree steel coupler so the stress on the hose is reduced.
The FFR supplied front hose and banjo bolts and washers are used to connect to the Mustang Cobra calipers.

Here is the caliper with the hose connected and wheel hung on the hub.

Last edited by BRRT; 12-31-2023 at 10:24 AM.
----------------------------------------------
Jeff
Roadster delivered 8/27/23
Chevrolet Performance LS3
Build Thread
-
Post Thanks / Like - 0 Thanks, 1 Likes
-
Senior Member
Rear Brake Hoses
After the front hoses were connected I moved to the rear. I used a couple of the little angle brackets to mount -3AN steel straight bulkhead fittings onto the frame and connect 14" -3 flex hoses from Pegasus Racing. Straight fittings on both ends.


Since I did not source my brakes from FFR I did not have any fittings or hoses. At the caliper end of the hose I used -3 banjo fittings with a 30 degree offset, also from Pegasus. The banjo bolts were sourced from the local auto parts store, specified for a 2019 Mustang GT. They came with crush washers.

I used the last of the brackets I made to mount a -3 steel Tee onto the frame between the rear wheels, then bent and ran Nicopp 3/16 tube between the rears.


The long run was secured to the frame with some 3/16" aluminum clips from Racetronix.
While definitely not as nice as the tube bending some others have done, I'm learning. I hope it don't leak.
----------------------------------------------
Jeff
Roadster delivered 8/27/23
Chevrolet Performance LS3
Build Thread
-
Senior Member
On the advice of an excellent resource I moved the line for the rear brakes to inside the footbox. I ran the line forward, down the inside, and to a -3AN 90 degree bulkhead in the floor.

I ran the line along the 4" frame tube, up the rear fame tube, and to the bulkhead tee. I filled the master cylinders with fluid and bled them. A lot of air that took a loooong time to get burped out. Once the bubbles and foam stopped I reconnected the front and rear lines to the master cylinders and did a vacuum bleed at each of the calipers. Once there was clear flow into the bottle i applied foot pressure to the brake pedal - NO LEAKS! I did have a couple small weeps at 2 of the banjo fittings, only requiring slight tightening. The system will still require a final bleeding.
----------------------------------------------
Jeff
Roadster delivered 8/27/23
Chevrolet Performance LS3
Build Thread
-
Post Thanks / Like - 0 Thanks, 1 Likes
-
Senior Member
I had previously done some prep on my fuel tank, so I pulled it out and installed the Aeromotive 18638 "Stealth 340" fuel pump and hanger assembly. Went in without any issues except a little fiddling to get everything to fit in a little hole.

I sat the tank on a little shop stool, slid it under the frame (shock, perfect height), and secured it with the straps. The vent screwed in with no drama, tightened a little past hand tight to prevent cracking the plastic bushing.

Dropped in the gauge sending unit and secured it with its lock ring.

----------------------------------------------
Jeff
Roadster delivered 8/27/23
Chevrolet Performance LS3
Build Thread
-
Not a waxer

-
Post Thanks / Like - 0 Thanks, 1 Likes
BRRT liked this post
-
Senior Member

Nice job on your brake lines!
-
Post Thanks / Like - 0 Thanks, 1 Likes
BRRT liked this post
-
Senior Member
Thanks guys! They were a struggle at times, and I learned a lot along the way. I sure appreciate the advice and excellent examples.
Last edited by BRRT; 01-21-2024 at 07:48 PM.
----------------------------------------------
Jeff
Roadster delivered 8/27/23
Chevrolet Performance LS3
Build Thread
-
Senior Member
Drive By Wire Pedal
The guys at Holley are very specific about which drive by wire throttle pedal must be used with the Terminator X ECU. It was originally used on some Cadillac models, maybe a few more. It fit in the footbox, but is wide and gets very close to the brake and visually doesn't match. Just by chance I was on the Breeze website ordering my battery box and noticed Mark sold a nice stainless piece designed to fit the Russ Thomson pedal to make it look like the rest of the Wilwood pedals. I took a chance and ordered one, hoping it would I could make it work on the Caddy assembly.
Here is the pedal with the left side trimmed away:

Here it is from the side. It has a relatively narrow beam that is the structural part with the textured pad molded on top.

Here it is with the left and right side trimmed. The Dremel plastic cutoff wheel made quick work of the plastic.

I cut off about 1/2" from the bottom, reshaped the lower back side of the beam, cut away some of the pad at the top,and mounted the Breeze pad using the piece of stainless angle Mark includes in his kit.
The plastic works easily with the Dremel, a wood rasp and a file.
It is secured with a single #10-32 screw and lock nut that runs across the back side.

Here it is in the footbox. Looks a lot better and I have more pedal clearance.

----------------------------------------------
Jeff
Roadster delivered 8/27/23
Chevrolet Performance LS3
Build Thread
-
Good work with the pedal. The Willwood style pedals look nice, much better than the cheap-looking plastic DBW ones
-
Post Thanks / Like - 0 Thanks, 1 Likes
BRRT liked this post
-
Senior Member

Looks great. For reference, I ended up cutting off that spring housing part of the pedal because it was rubbing on my carpet with the paneling installed. I put a dab of epoxy on the little detent pin in place of the spring. I saw no reason or need to be able to fold the pedal up.
MK4, 427LS3, IRS, T56 Magnum, Wilwoods
-
Post Thanks / Like - 0 Thanks, 1 Likes
BRRT liked this post
-
I like what you did with the pedal. I've been looking at mine thinking I need to do something similar... the OEM pedal looks out of place. I also agree with Bruce that the folding mechanism can be deleted.
-
Post Thanks / Like - 0 Thanks, 1 Likes
BRRT liked this post
-
Senior Member

Ditto on both the pedal and the brakes. I think the modern pedal next to the two vintage-looking ones on the Wilwood pedal box is kinda jarring. I'll be interested to see what you think of the brakes - nice choice, I have some regrets about not including the Wilwoods in my kit order, but having said that, I can't say I have a single thing to complain about with the stock GT brakes. If AutoX or performance driving class exposes any weakness, I'm likely to upgrade with the choices you made.
MK4 #7838: IRS 3.55 TrueTrac T5z Dart 347
The drawing is from ~7th grade, mid-1970s
Meandering, leisurely build thread is
here
-
Post Thanks / Like - 0 Thanks, 1 Likes
BRRT liked this post


 Thanks:
  Likes:


 Reply With Quote