BluePrint Engines

Visit our community sponsor

Thanks Thanks:  0
Likes Likes:  5
Page 36 of 51 FirstFirst ... 26343536373846 ... LastLast
Results 1,401 to 1,440 of 2016

Thread: More progress made on the body : )

  1. #1401
    Senior Member The Stig's Avatar
    Join Date
    Feb 2011
    Location
    Charlotte, NC
    Posts
    2,004
    Post Thanks / Like
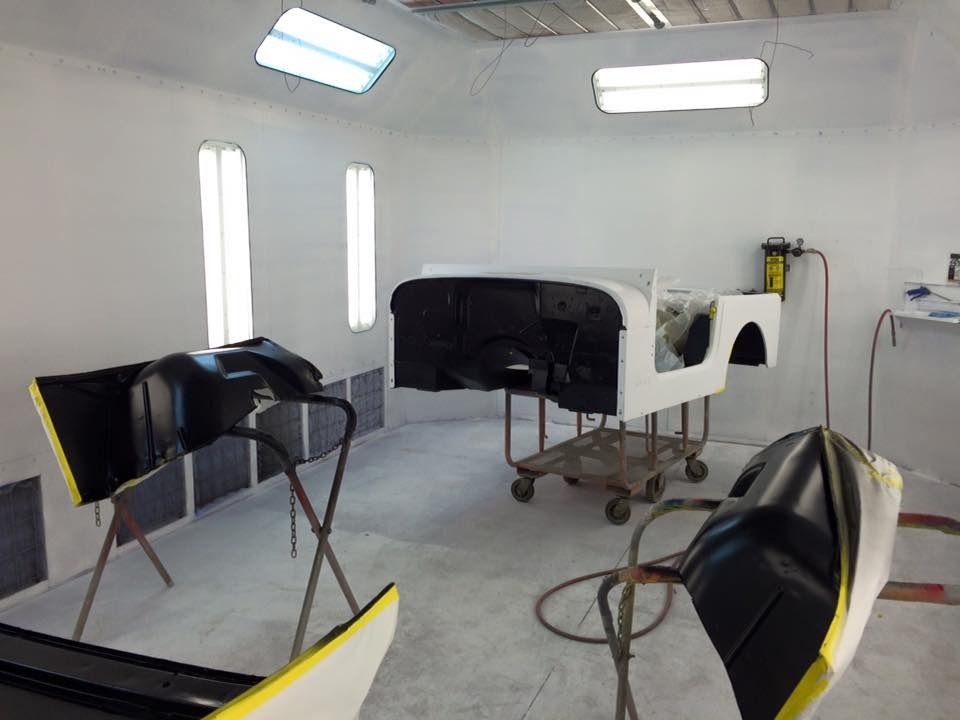
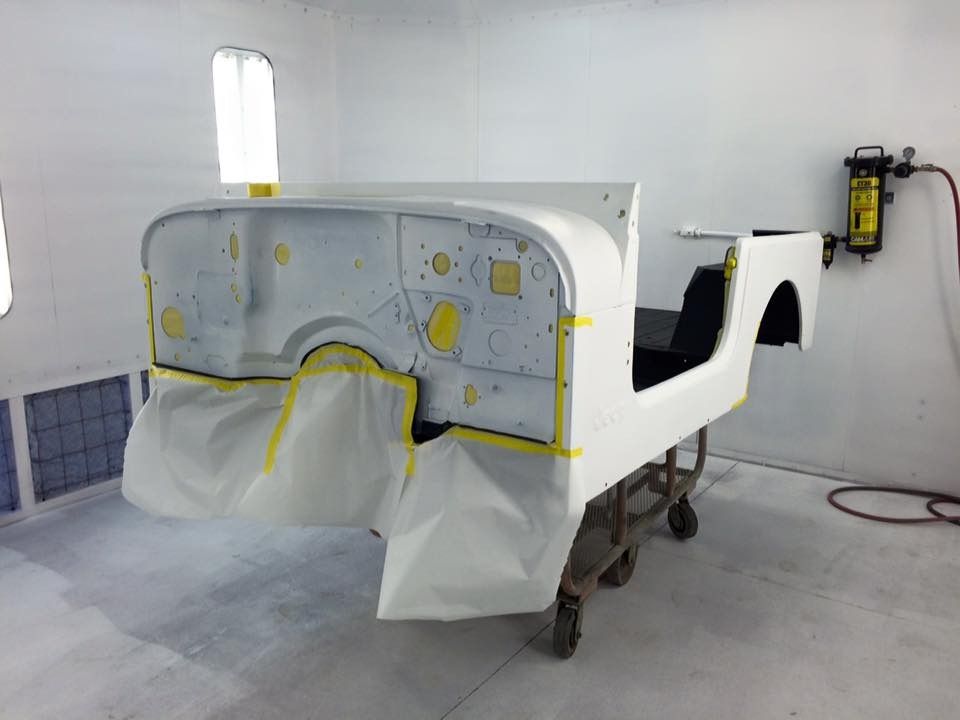
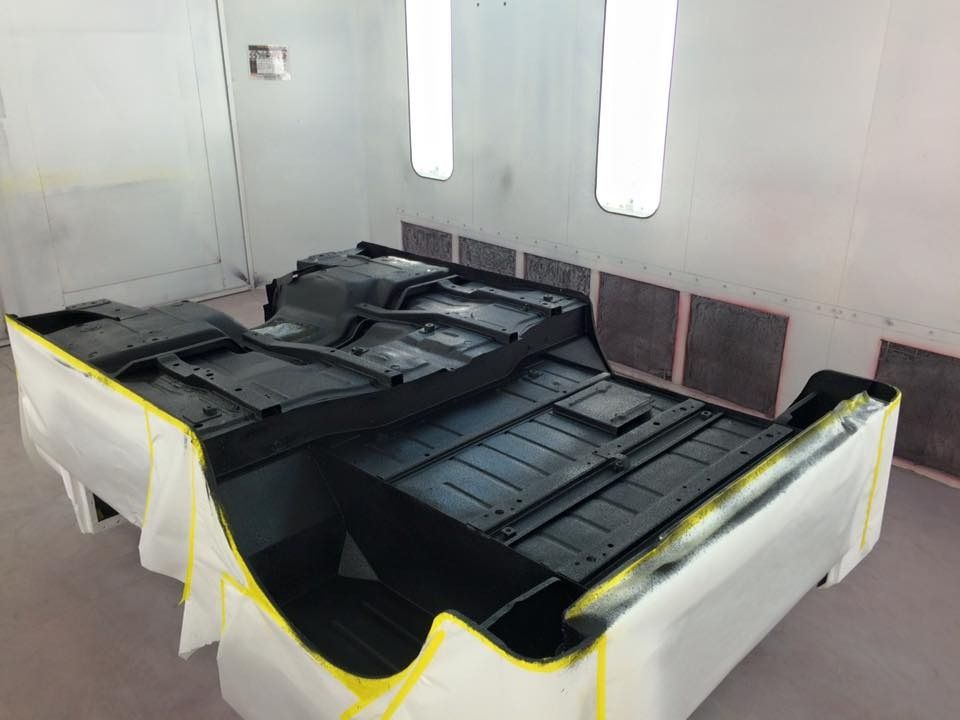
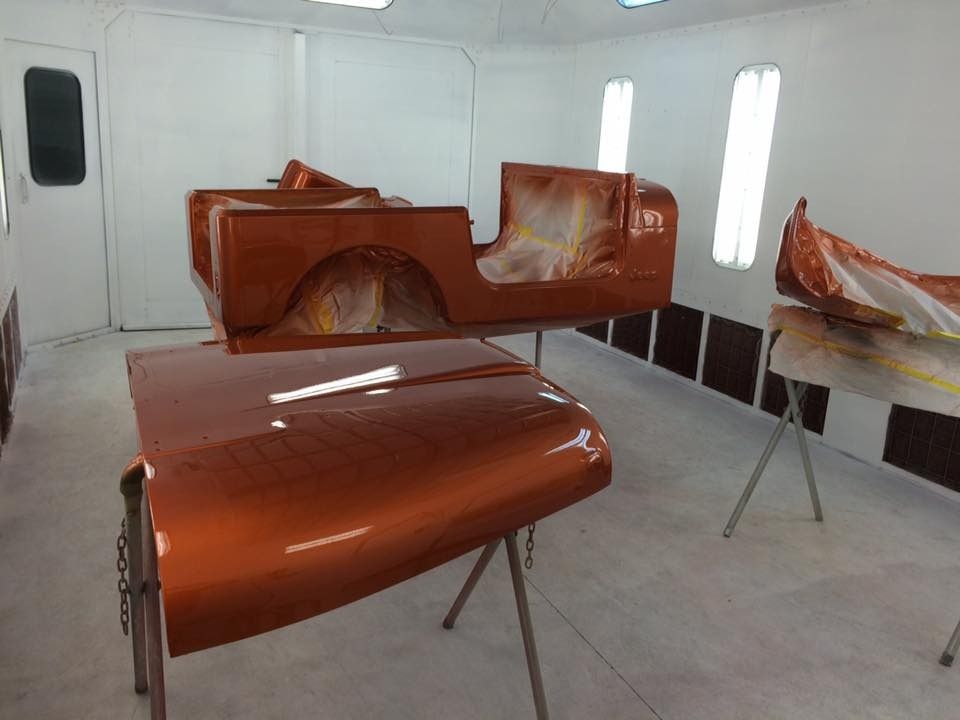
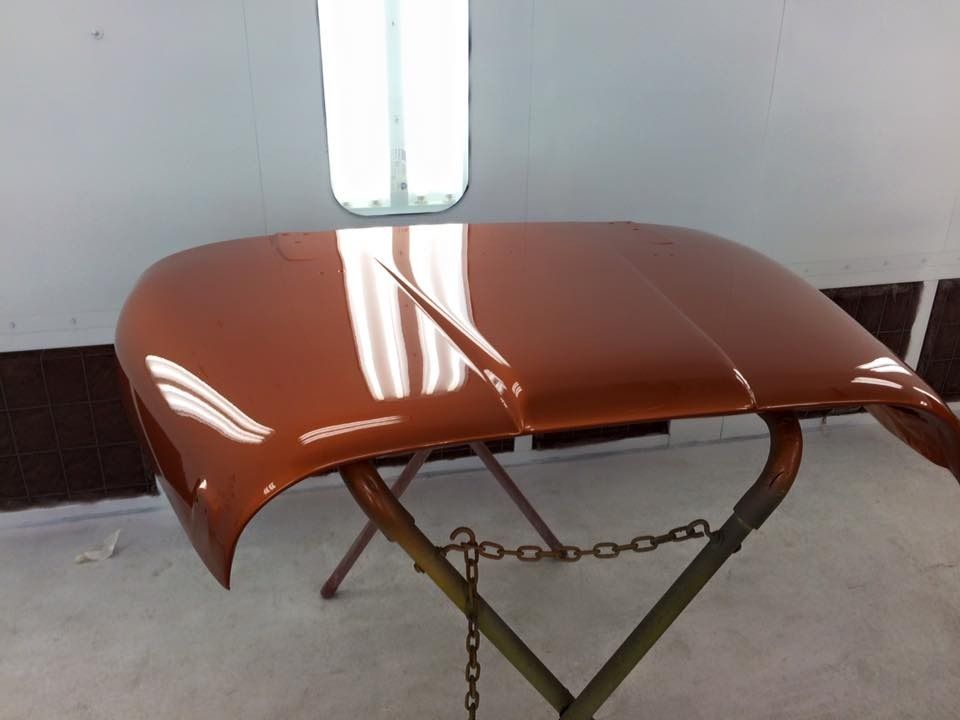
    Looks like Tony's Jeep is coming along nicely. Glad to see that he is making progress on his restoration, but it really wasn't the picture that I wanted to see when I logged into his company face book site. March 4, is getting here quick. I sure don't see the car (Pandora) being done by then. There is a LOT of work that still needs to be done before this car is done. The paint on his Jeep sure looks nice though...


    Mike
    The Stig

    Some say, that I only know two facts about ducks, (both being wrong); and that if I could be bothered, I could solve the "da Vinci Code" in 47 seconds...
    All I know is that I'm called "The Stig".
    GTM #0081

  2. #1402
    Senior Member The Stig's Avatar
    Join Date
    Feb 2011
    Location
    Charlotte, NC
    Posts
    2,004
    Post Thanks / Like
    I was corrected when I stopped by the shop today. Tony tells me that this is a project owned by another customer who is a member of the 1 year club.

    I did get to see an example of the brand of clear that will eventually be used on my car. I do have to say: he does some amazing paint work. The paint on the jeep was a standard type base coat. The clear was a very high-end clear. The reflection on the hood of the Jeep was as close to perfect as you can imagine. And it hadn't been cut/buffed. This clear just lays on like polished glass.

    Pandora's going to be well dressed when she finally steps out into the public eye.

    Mike
    Last edited by The Stig; 02-20-2016 at 09:57 AM.
    The Stig

    Some say, that I only know two facts about ducks, (both being wrong); and that if I could be bothered, I could solve the "da Vinci Code" in 47 seconds...
    All I know is that I'm called "The Stig".
    GTM #0081

  3. #1403
    Senior Member JL1958's Avatar
    Join Date
    Jul 2013
    Location
    Atlanta
    Posts
    159
    Post Thanks / Like
    I wish he would hurry up with your car. The suspense is killing me!

  4. #1404
    Senior Member The Stig's Avatar
    Join Date
    Feb 2011
    Location
    Charlotte, NC
    Posts
    2,004
    Post Thanks / Like
    Quote Originally Posted by JL1958 View Post
    I wish he would hurry up with your car. The suspense is killing me!
    You and me both...
    The Stig

    Some say, that I only know two facts about ducks, (both being wrong); and that if I could be bothered, I could solve the "da Vinci Code" in 47 seconds...
    All I know is that I'm called "The Stig".
    GTM #0081

  5. #1405
    Senior Member The Stig's Avatar
    Join Date
    Feb 2011
    Location
    Charlotte, NC
    Posts
    2,004
    Post Thanks / Like


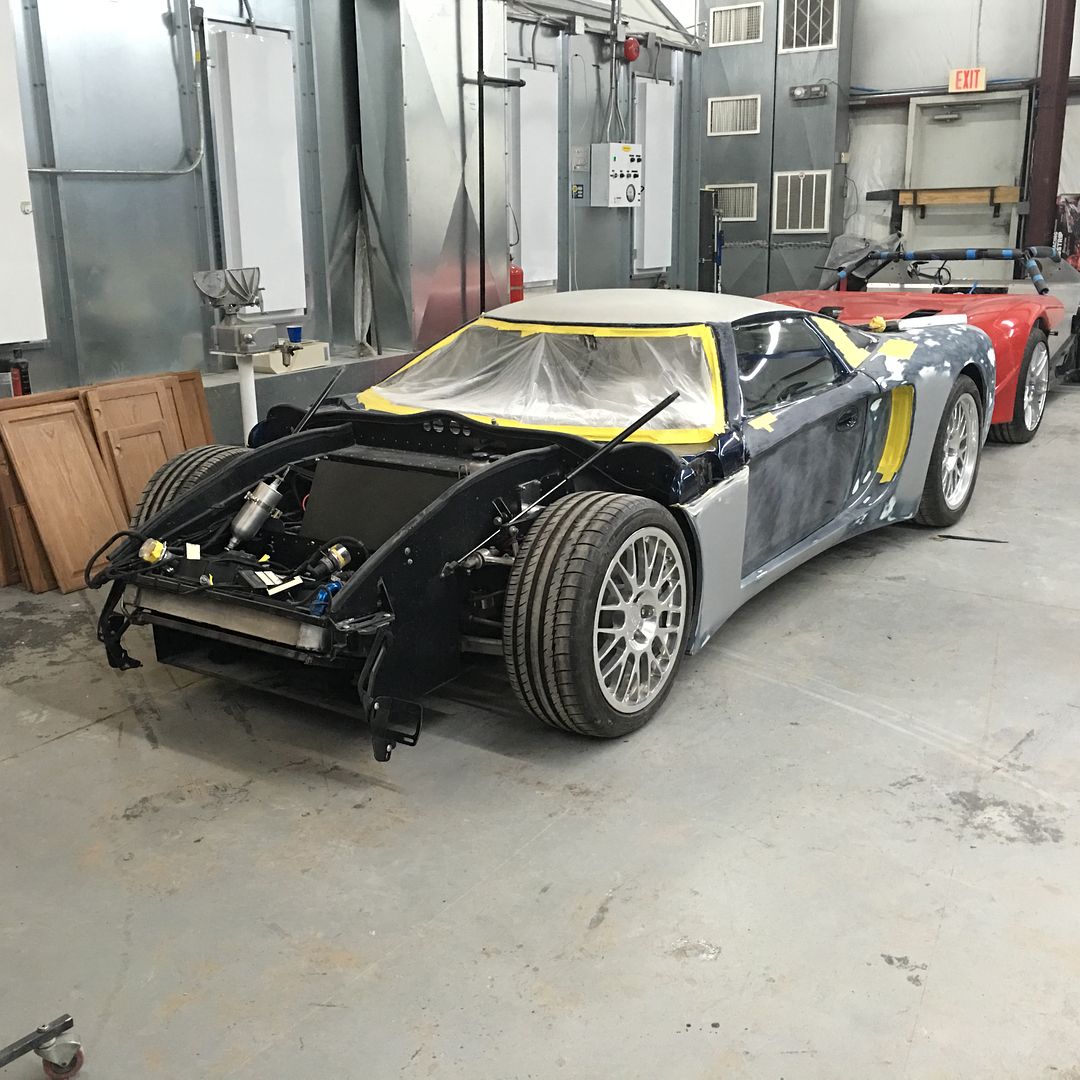
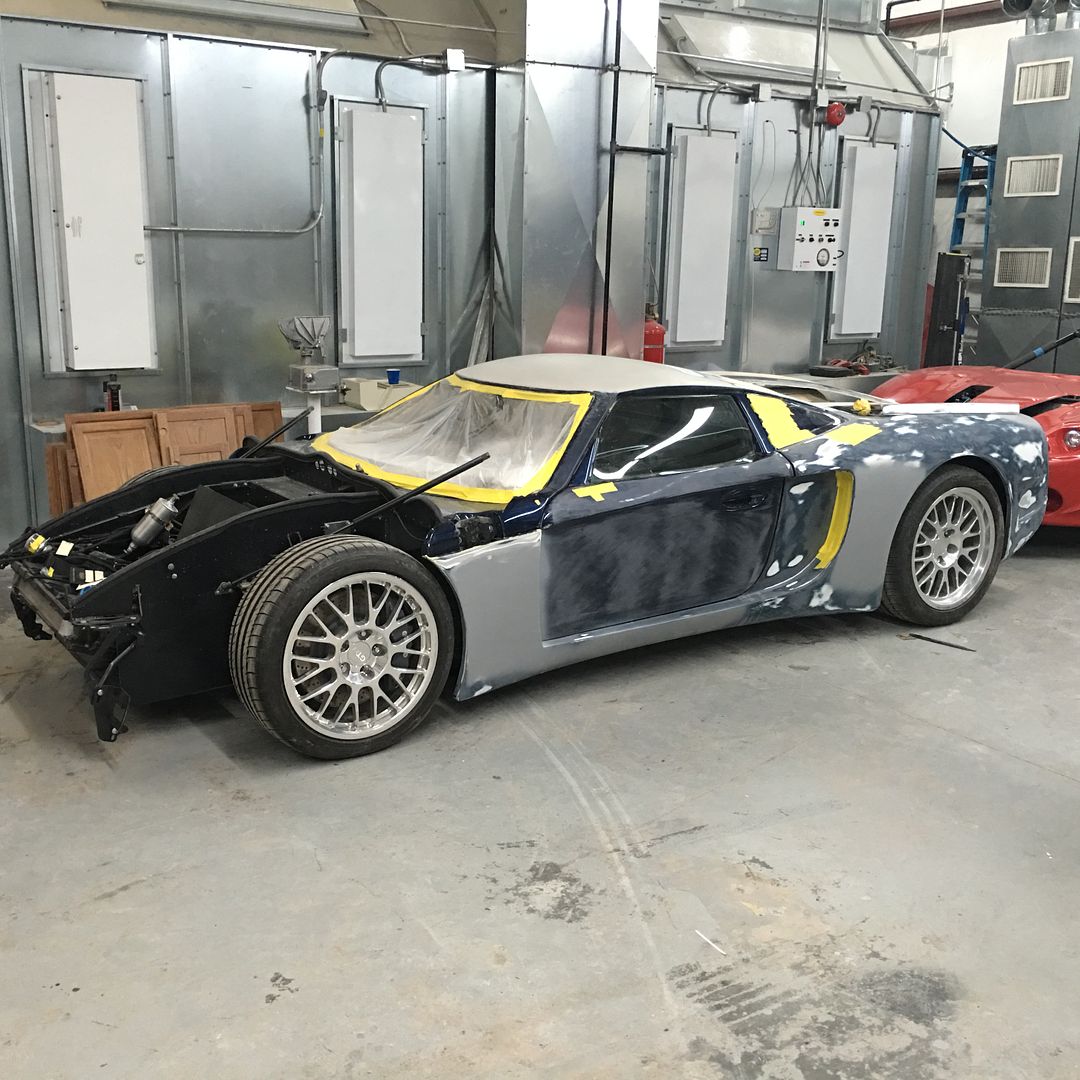
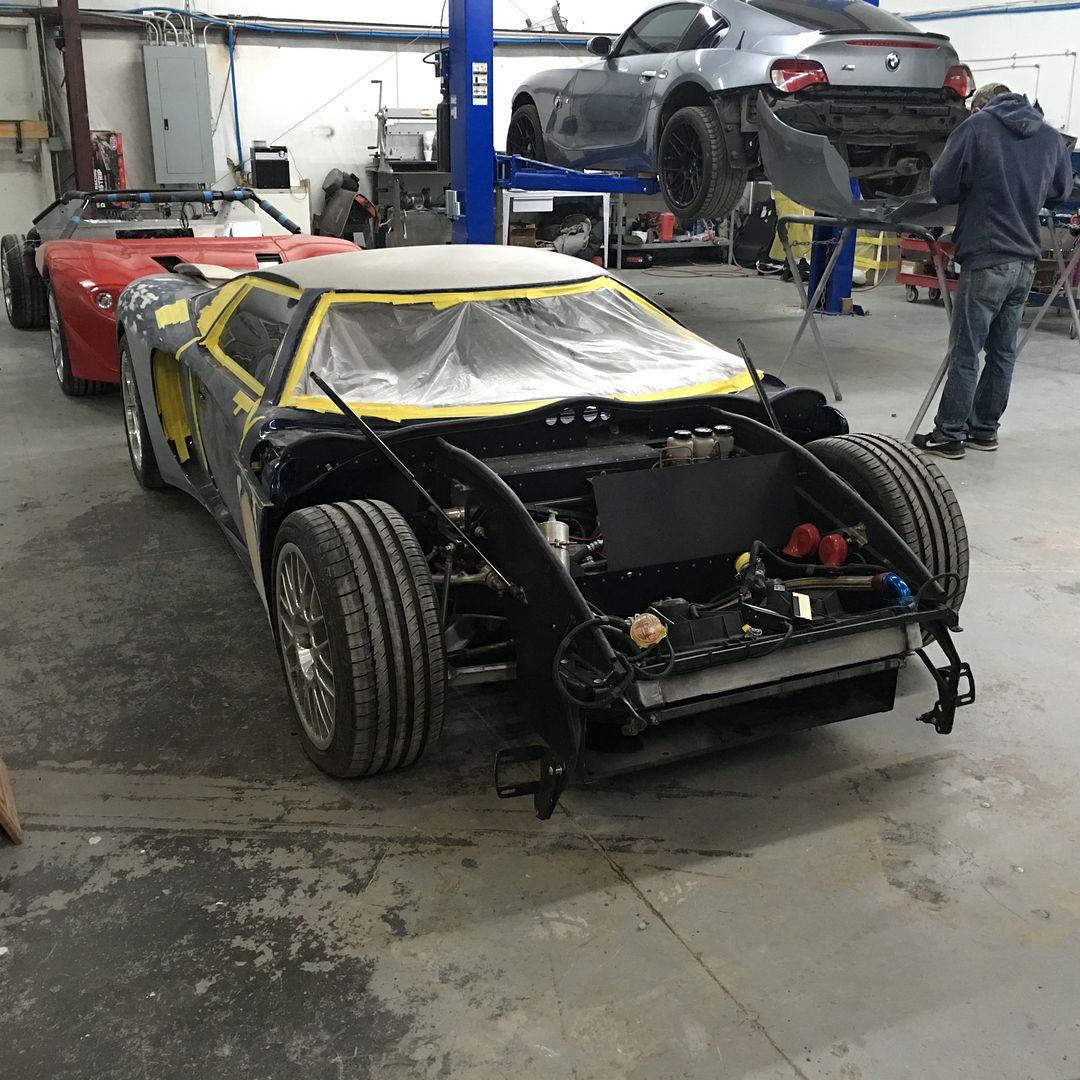
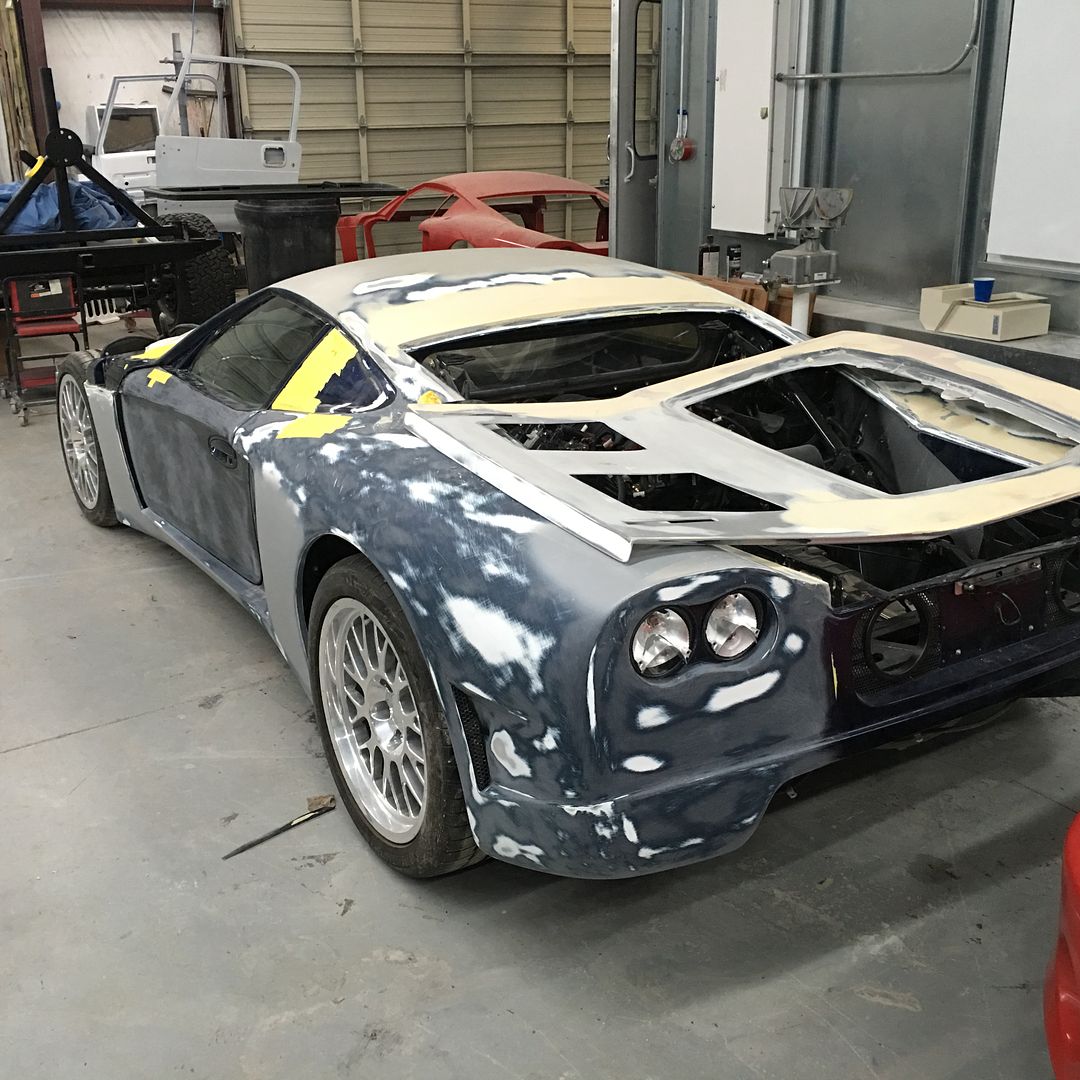
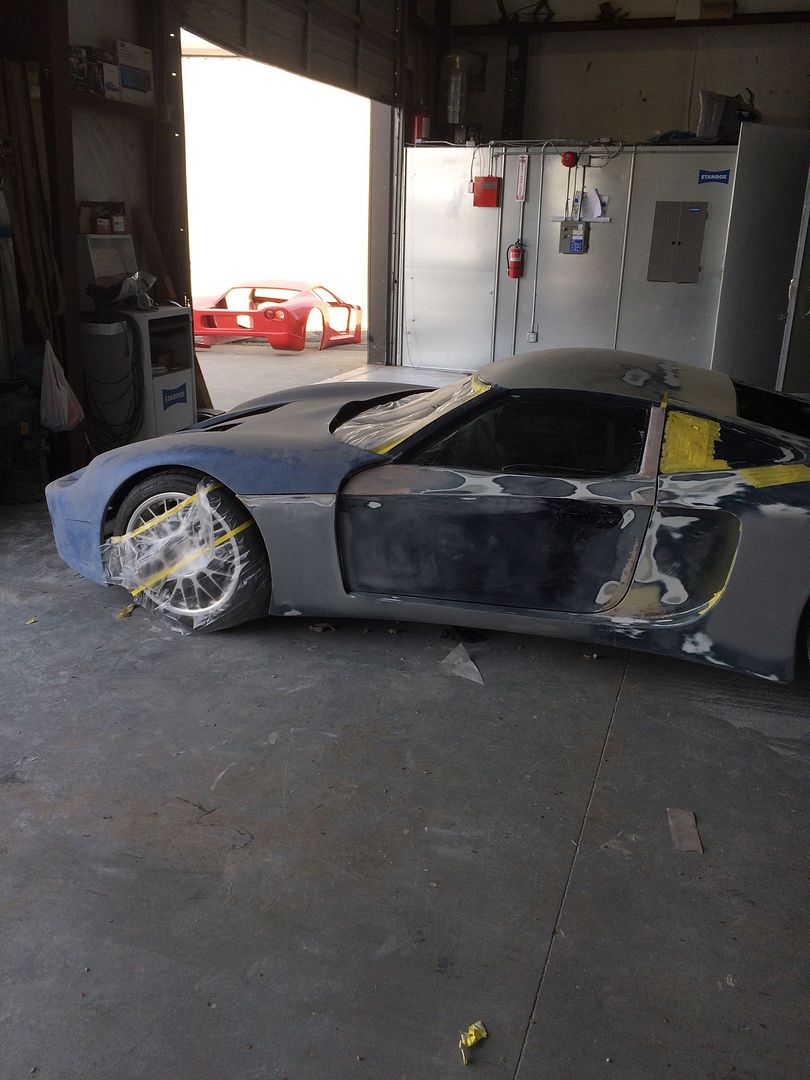
    Tony cleaned the car up a bit, moved it over to the paint side of the shop... We spent a bit of time going over his schedule and plan to get the doors going. They're not going to be easy, but we knew that they would be the hardest part of the project...


    The name Pandora is really about to get a work out. Changing one part or position of the door makes it mandatory to make another change, and then another change until you catch up with your tail. So here we go... The A-post triangle will be carefully cut out and moved. The window will be brought out a bit, in order to allow it to seal against the a-pillar. This means that the window tracks will need to be adjusted to allow the glass to close up and seal. When the front of the glass is sitting where we want it, the rear of the glass will be positioned to fit snug at the top rear, against the seal. The B-pillar will built up a little to get the rear seal at the correct distance from the glass. This step by step approach should get a perfect seal around the outer edge of the glass. The lower door/window opening will be worked a little, to provide a mounting ridge to install a seal at the lower window door edge. This should finish off the window seal.

    Then the seals for the doors themselves will be added. Tony is a BMW fan. And the door seals will be installed in pretty much the same fashion as the higher end BMW door seals. That will keep wind noise down as much as possible, This should give Pandora's windows a very OEM look & feel.


    The hood will be back on soon, and realigned to meet the doors. Once that is done, we'll correct the gap around the tires to get rid of the oval shape at the rear of the tire that can cause a pinch in the tire's clearance at times.


    And I don't know what it is, but no matter how hard we tried, we couldn't get the rear hatch to fit... Maybe after some sleep, we'll take another look at it.
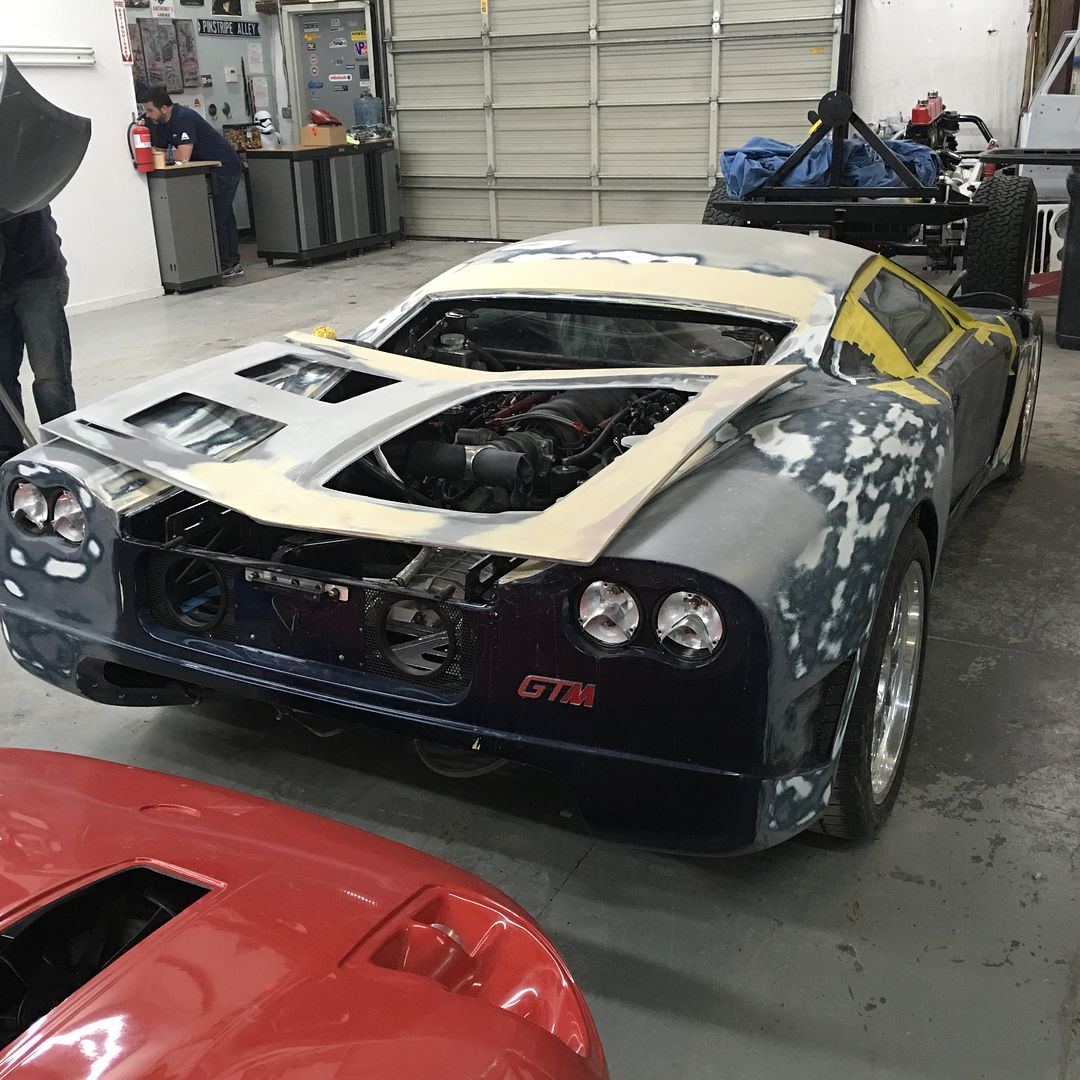
    More progress is right around the corner, so stay tuned.


    Mike
    Last edited by The Stig; 03-05-2016 at 09:05 AM.
    The Stig

    Some say, that I only know two facts about ducks, (both being wrong); and that if I could be bothered, I could solve the "da Vinci Code" in 47 seconds...
    All I know is that I'm called "The Stig".
    GTM #0081

  6. #1406
    Senior Member The Stig's Avatar
    Join Date
    Feb 2011
    Location
    Charlotte, NC
    Posts
    2,004
    Post Thanks / Like
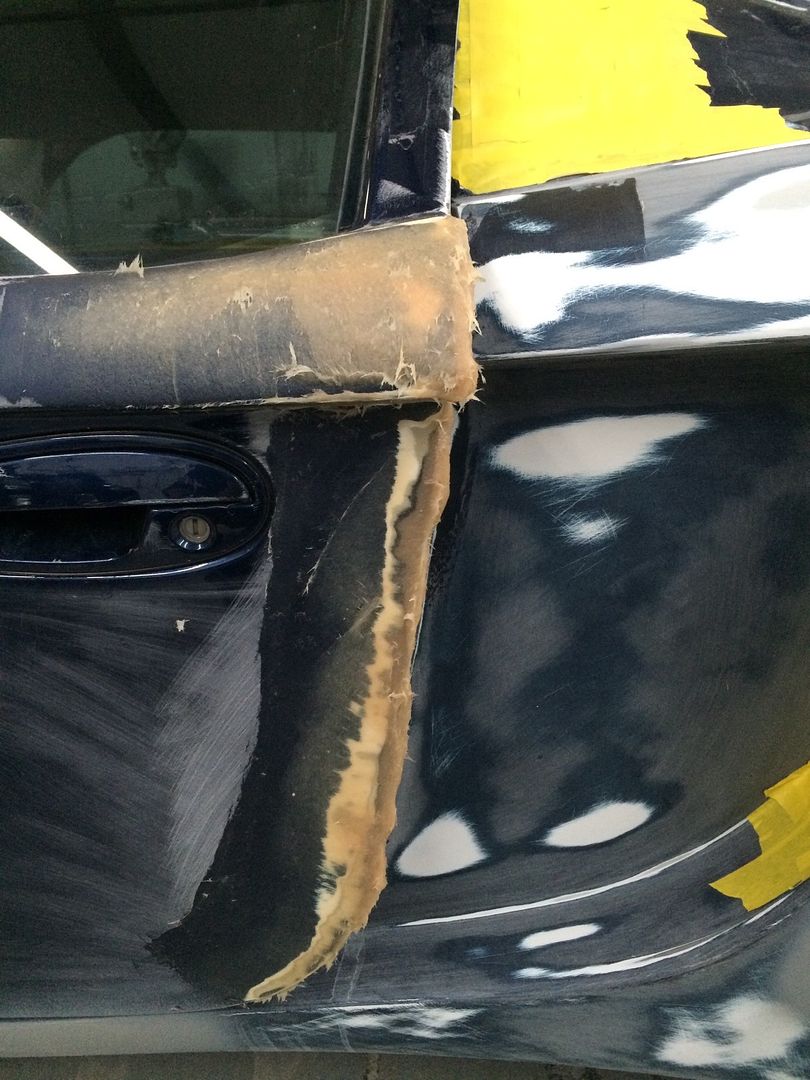
    See...? Progress!

    Feathered door ends to add fiberglass and build them up.


    Here we go...!


    I don't know about you, but this looks good to me!

    By the way, I'm sure that Tony probably had a secret bet with someone as to how long it would take me to post these two pictures that he sent to me this afternoon.

    Pandora needs see progress, so this is a step in the right direction.

    Mike
    Last edited by The Stig; 03-08-2016 at 07:27 AM.
    The Stig

    Some say, that I only know two facts about ducks, (both being wrong); and that if I could be bothered, I could solve the "da Vinci Code" in 47 seconds...
    All I know is that I'm called "The Stig".
    GTM #0081

  7. #1407
    Senior Member The Stig's Avatar
    Join Date
    Feb 2011
    Location
    Charlotte, NC
    Posts
    2,004
    Post Thanks / Like
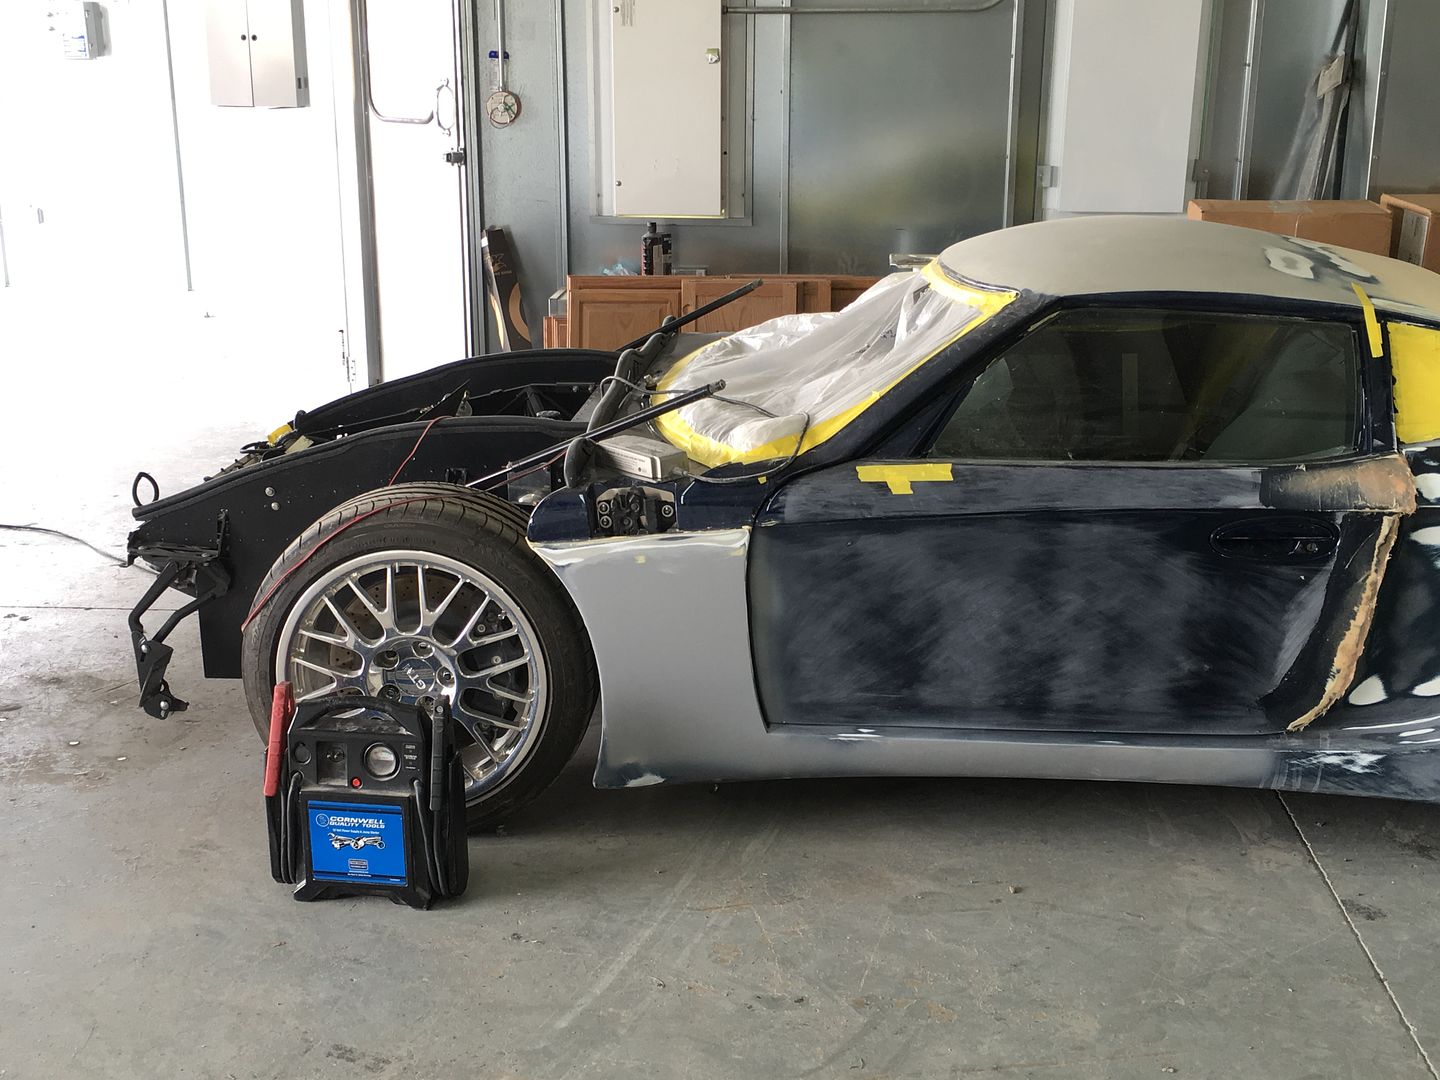
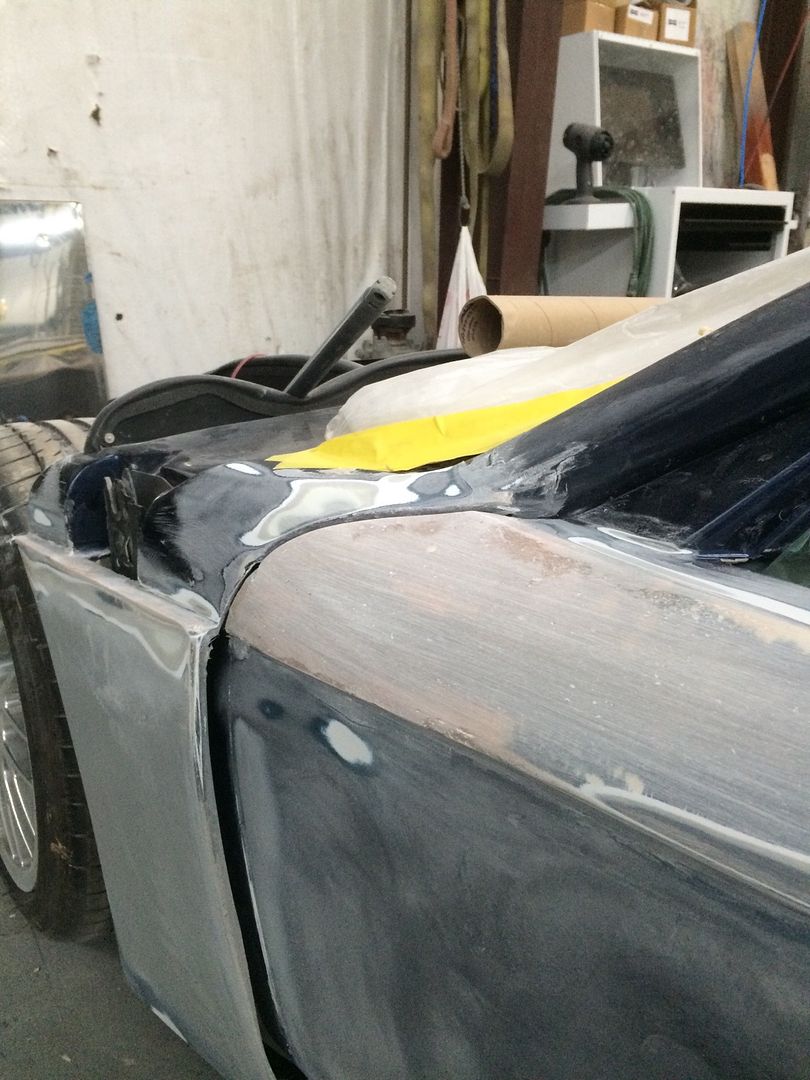
    I stopped by the shop and spoke to Tony about rounding out the front wheel openings to get rid of the "egg" shape behind each wheel. We also talked about a solution to resolve the issue of the door opening into the front fender at the lower 90 degree angle. I don't really want a chip in the paint or a crack in the fiberglass when someone opens the door and lets it swing too wide...

    So he told me what he was thinking and in the process made me nervous... but after thinking about it, and looking the car over from all angles, I realized that he was right. So I told him to go ahead with it. It's actually going to make the close out panel in the fender well make more sense.


    I ordered a couple of parts to try as far as window seals. I think the results will look very nice and give the car a more "OEM" look. When they are mocked up, and if I get the chance to take pictures, I'll share them and the part numbers. Of course they require more internal modifications to the doors. But I'll go into more detail about that when I actually have something to show.


    I took this picture as a visual reference for the body lines for the side intake "scoops". I really hadn't noticed until Tony mentioned it, but there are only a few right angles in the entire design of the car.

    Mike
    Last edited by The Stig; 03-13-2016 at 09:51 PM.
    The Stig

    Some say, that I only know two facts about ducks, (both being wrong); and that if I could be bothered, I could solve the "da Vinci Code" in 47 seconds...
    All I know is that I'm called "The Stig".
    GTM #0081

  8. #1408
    Senior Member
    Join Date
    Feb 2011
    Location
    Clarksville, MD
    Posts
    232
    Post Thanks / Like
    Quote Originally Posted by The Stig View Post
    I don't really want a chip in the paint or a crack in the fiberglass when someone opens the door and lets it swing too wide...
    Mike,

    I used door check rods off a 2004-2012 Mitsubishi Galant. They keep the doors from swinging too wide and holds them open as well. Just like an OEM car. I think I paid about $25 per side and they work beautifully. Simple solutions often work best .

    -Michael

  9. #1409
    Senior Member The Stig's Avatar
    Join Date
    Feb 2011
    Location
    Charlotte, NC
    Posts
    2,004
    Post Thanks / Like
    Hi Michael,

    Thank you. I have a set from a Porsche 944 that look like they'll work well. The issue that I have is that I need the door to open to a certain point in order to climb out of the car. With the door where it is, I am not able to open it to that point without it coming into contact with the lower point of the front fender. We're getting there with it.

    Mike
    The Stig

    Some say, that I only know two facts about ducks, (both being wrong); and that if I could be bothered, I could solve the "da Vinci Code" in 47 seconds...
    All I know is that I'm called "The Stig".
    GTM #0081

  10. #1410
    Senior Member The Stig's Avatar
    Join Date
    Feb 2011
    Location
    Charlotte, NC
    Posts
    2,004
    Post Thanks / Like


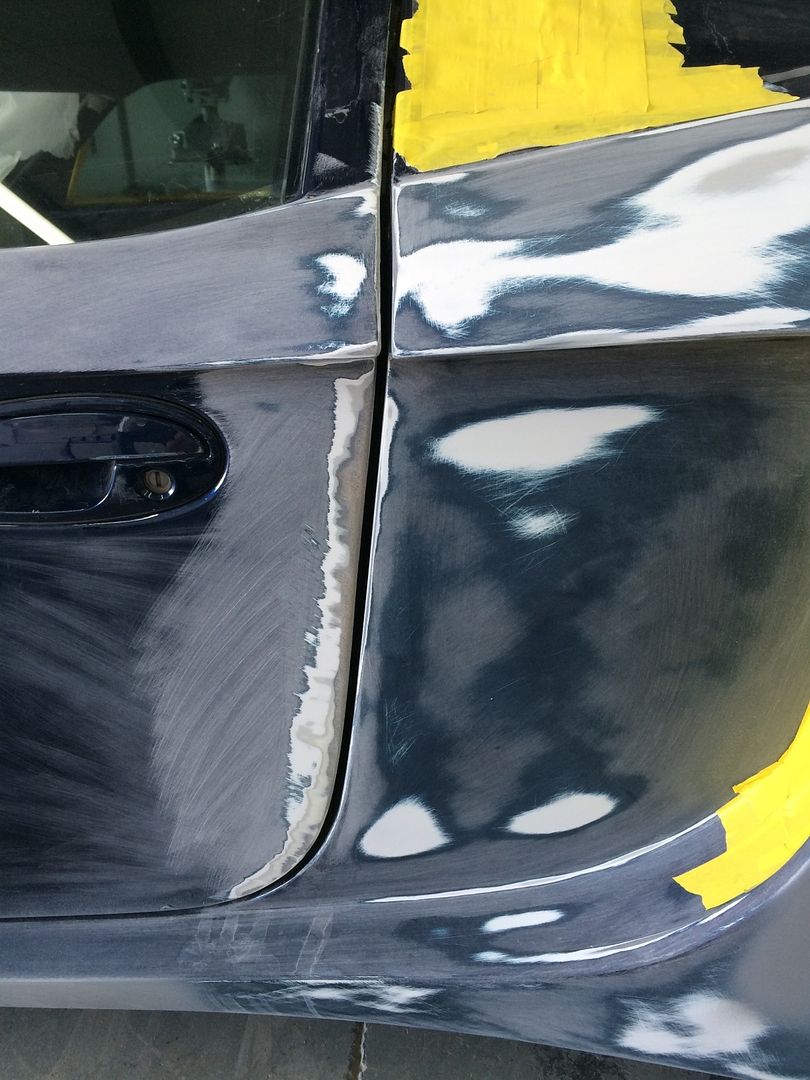
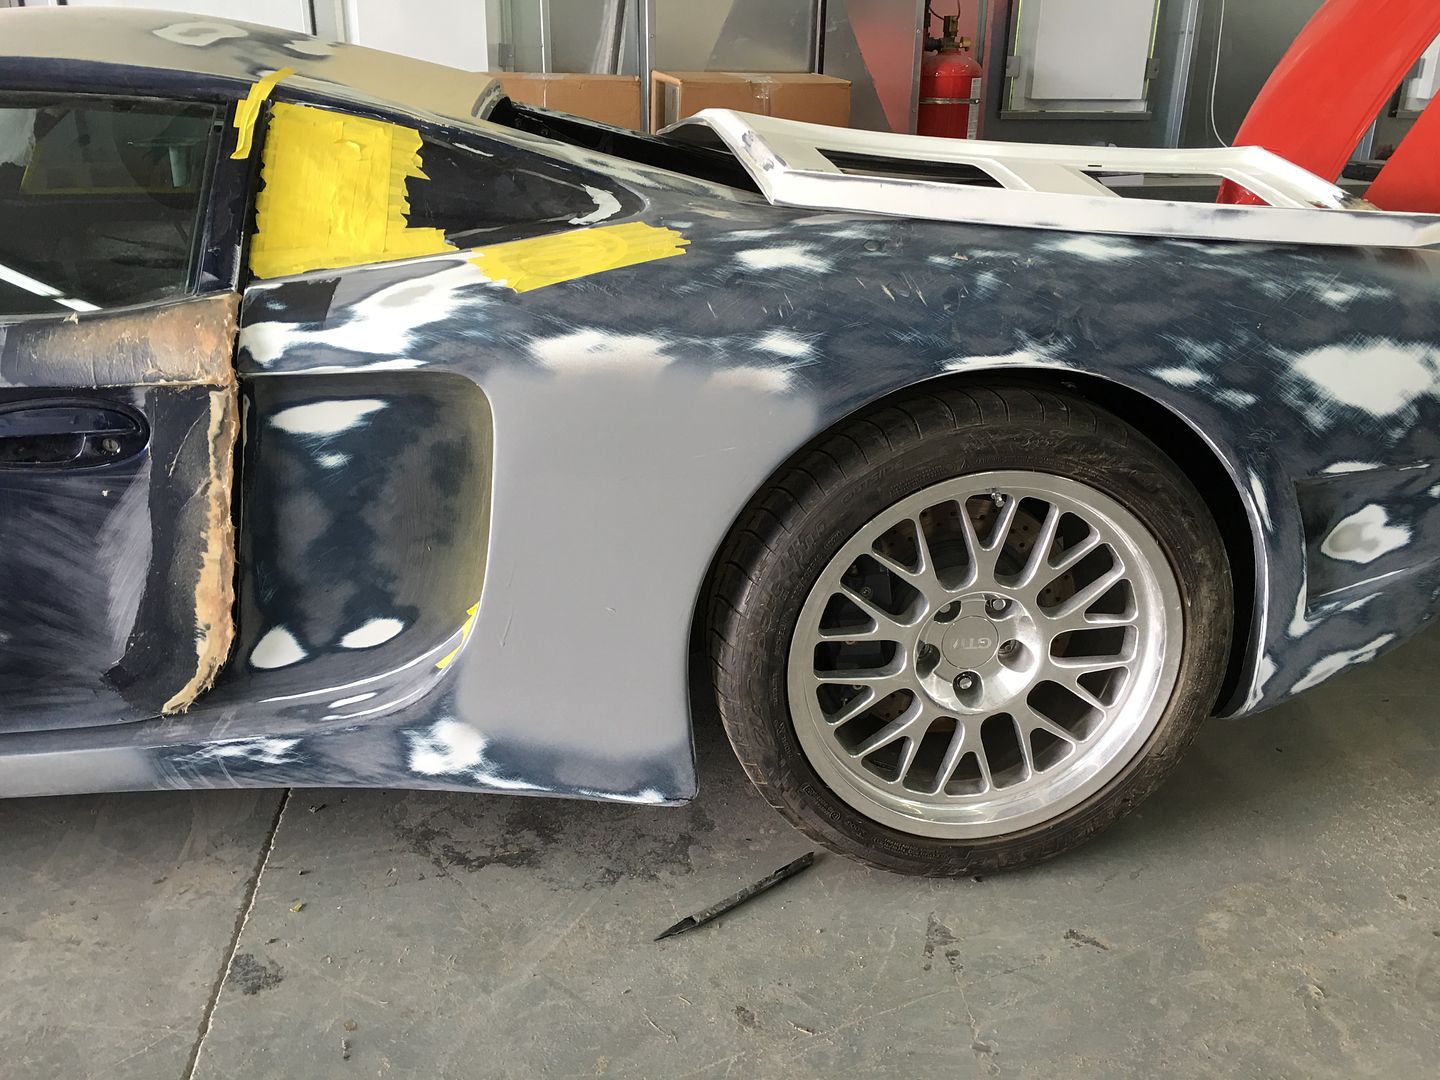
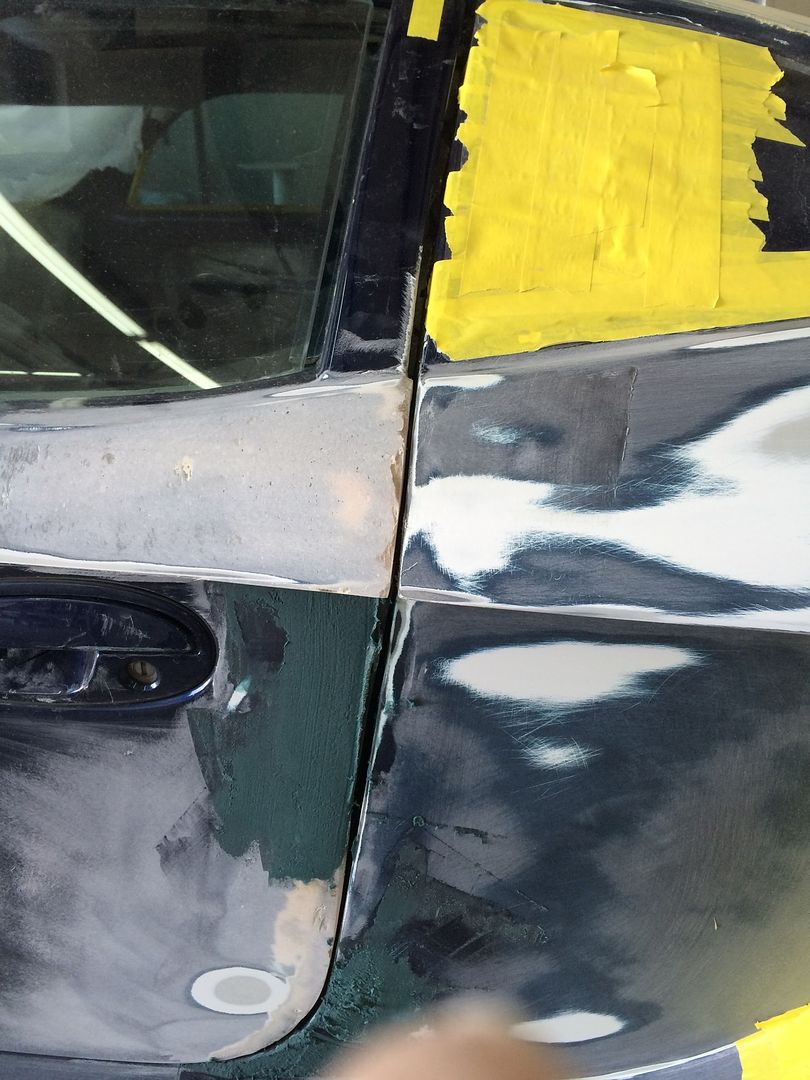
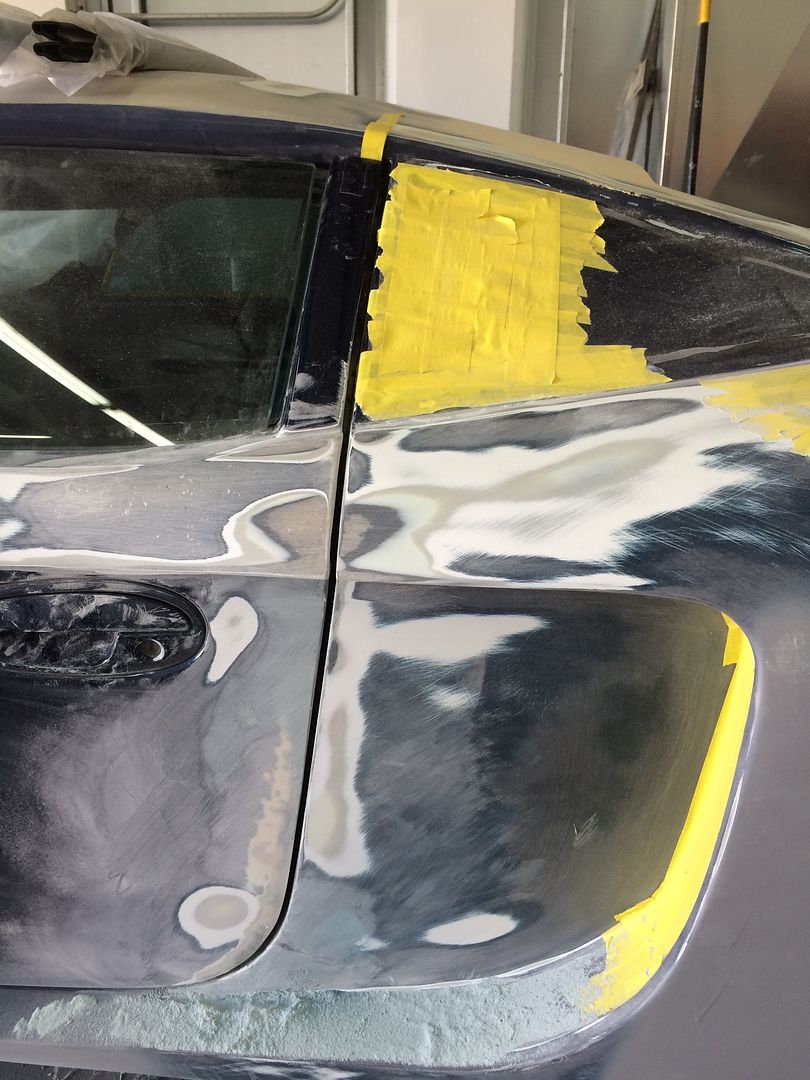
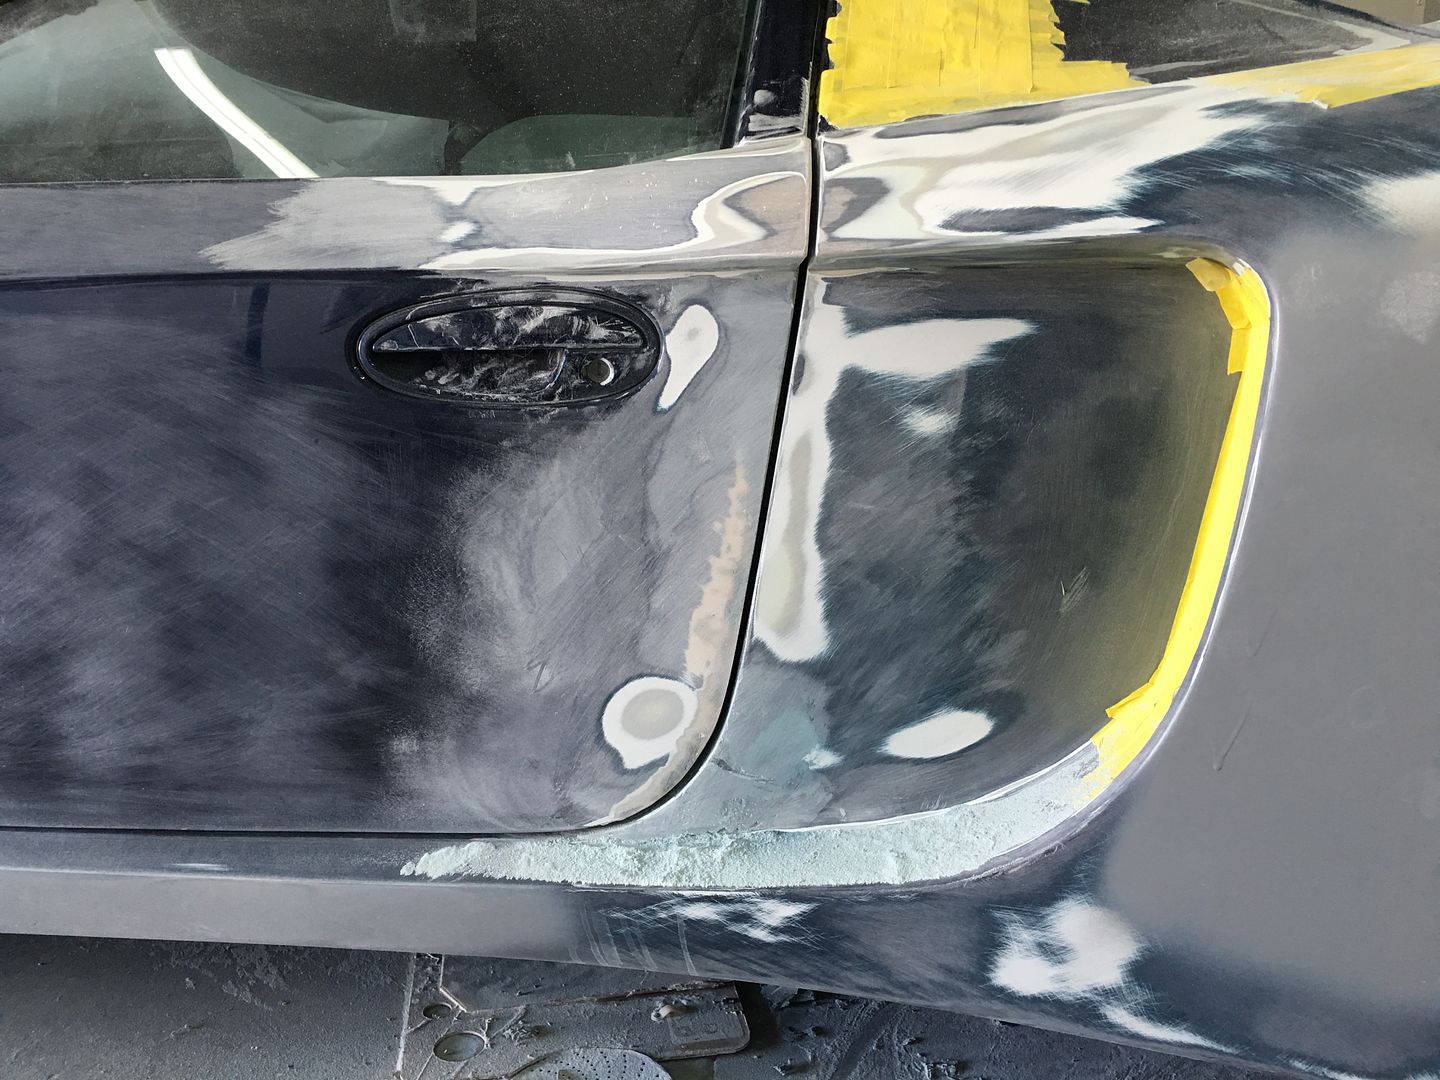
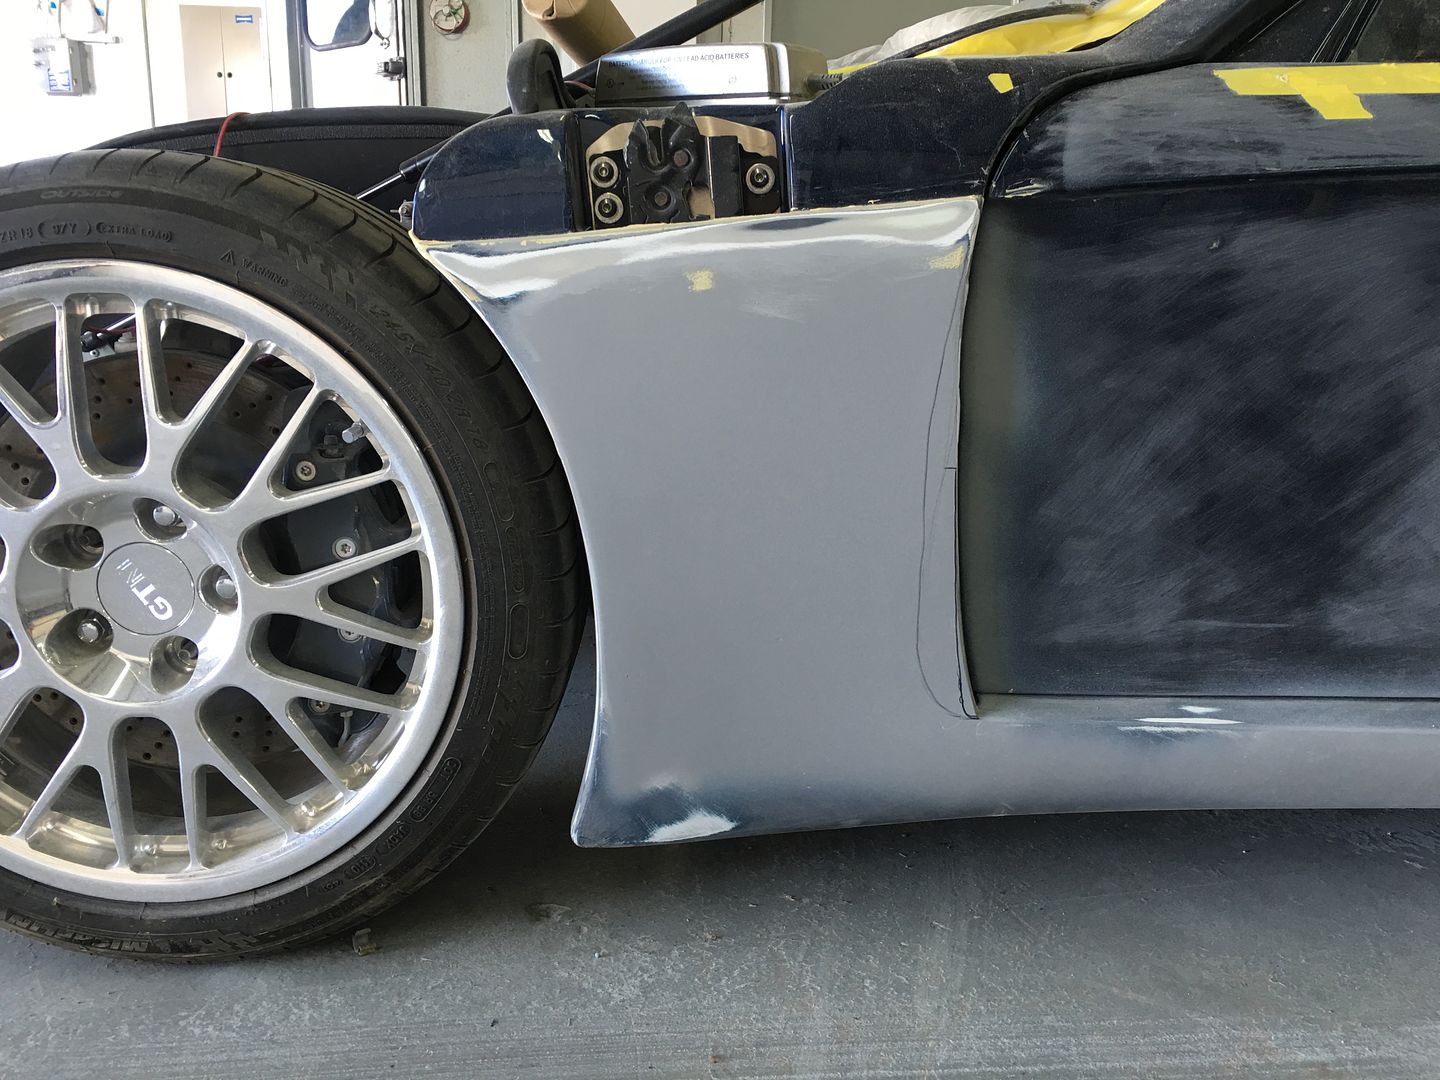
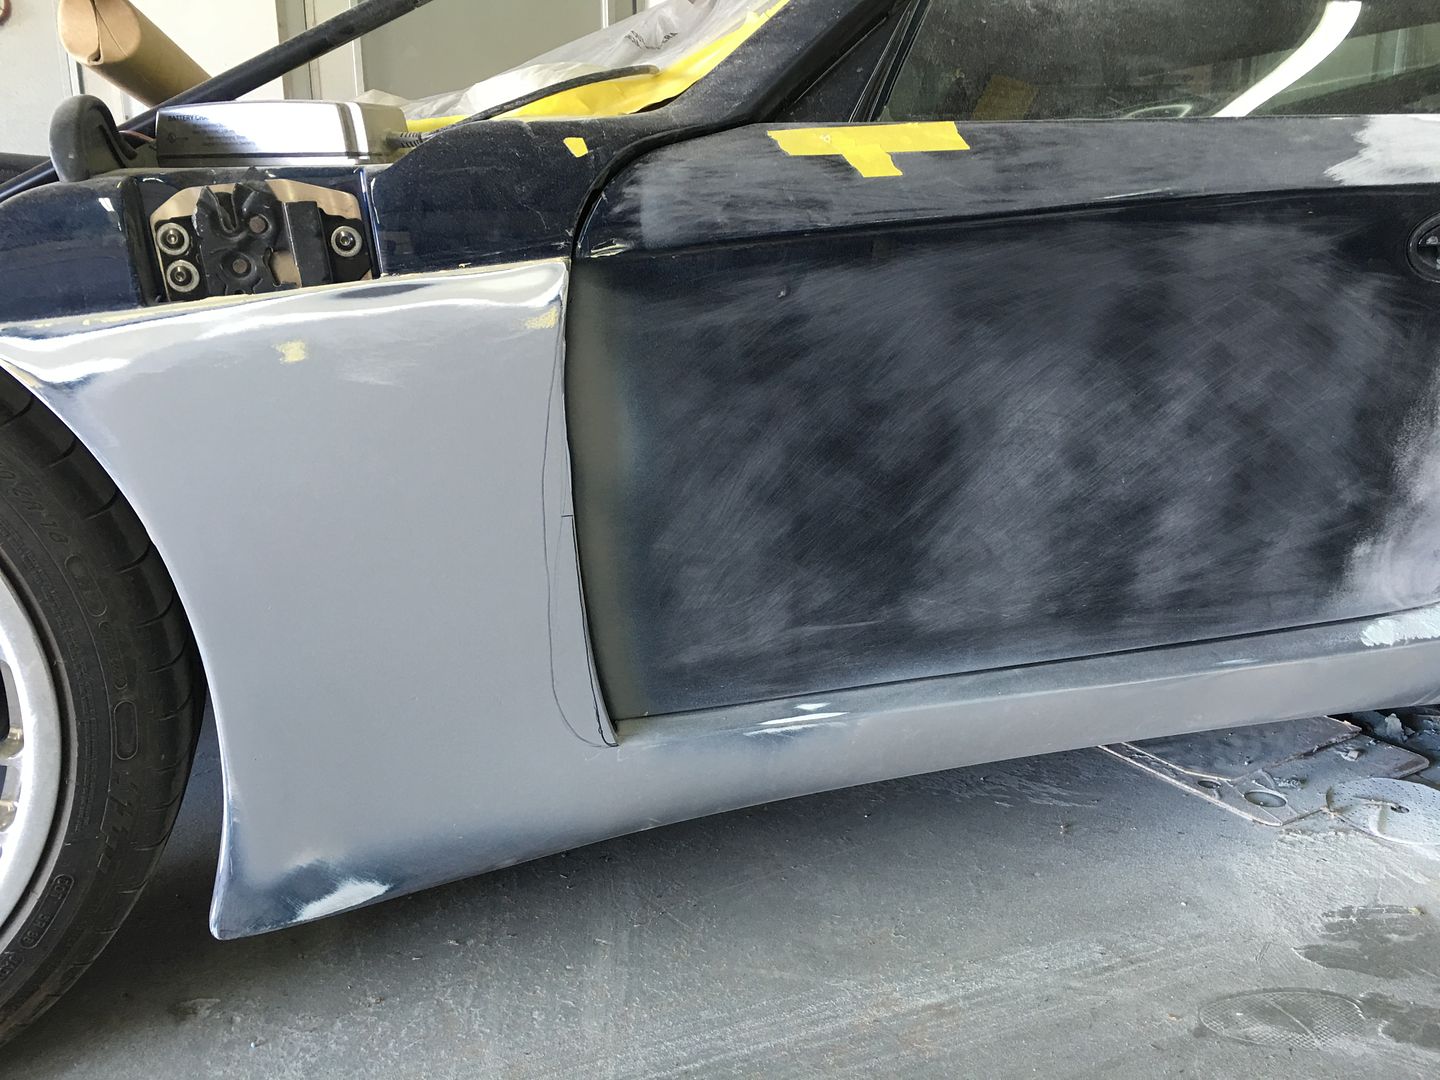
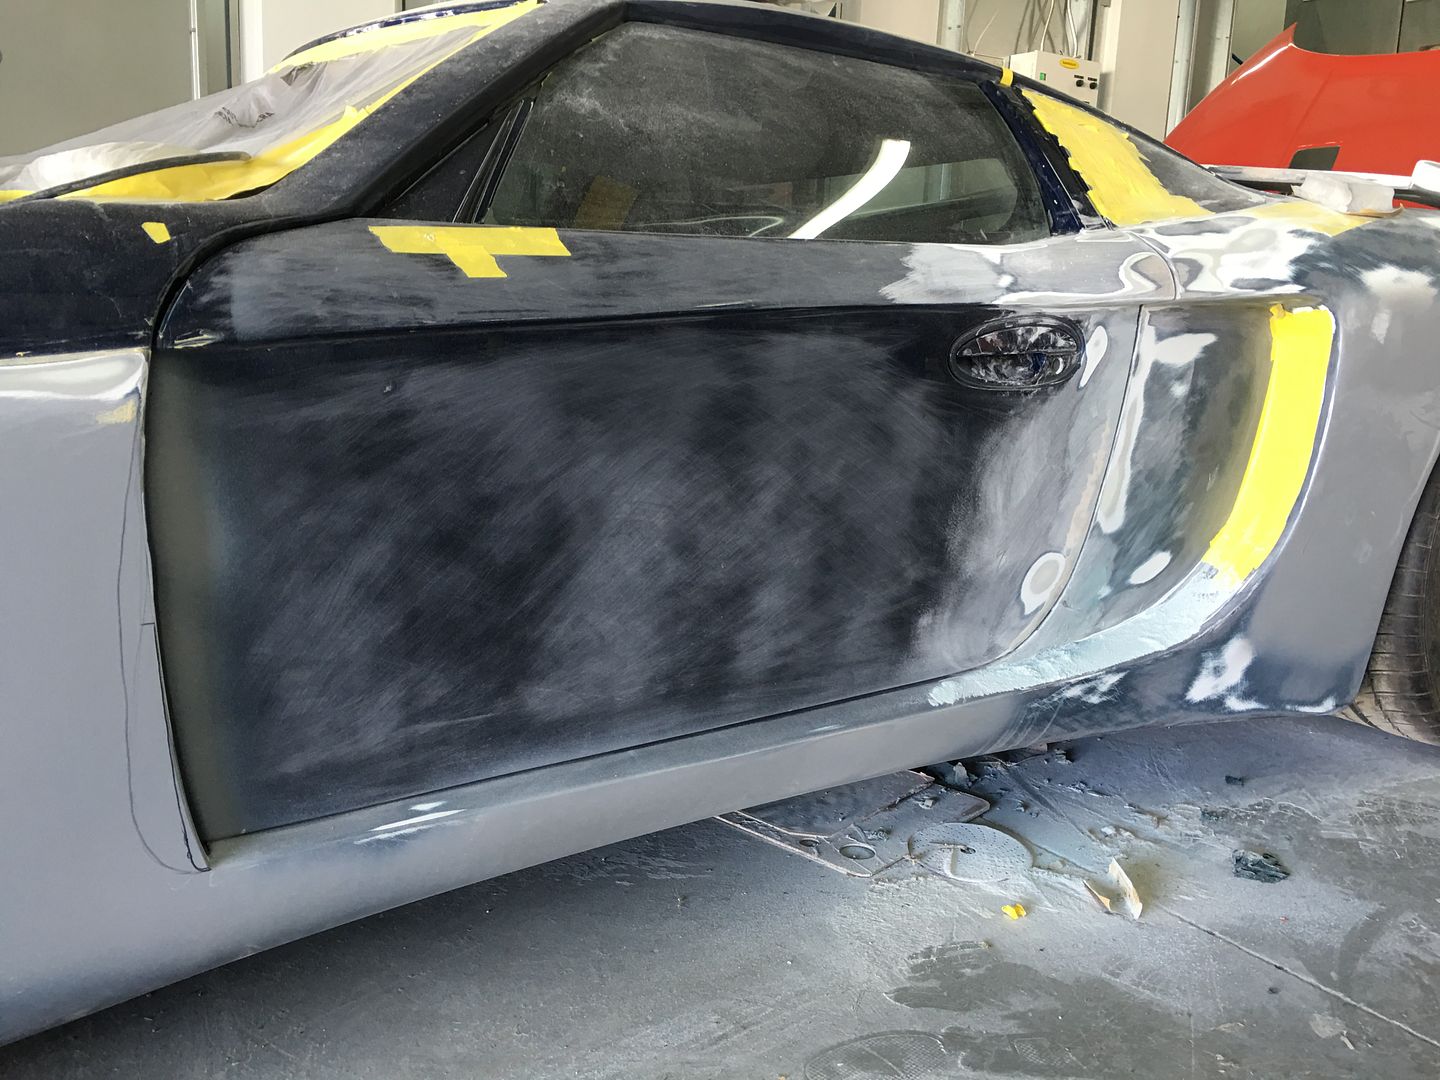
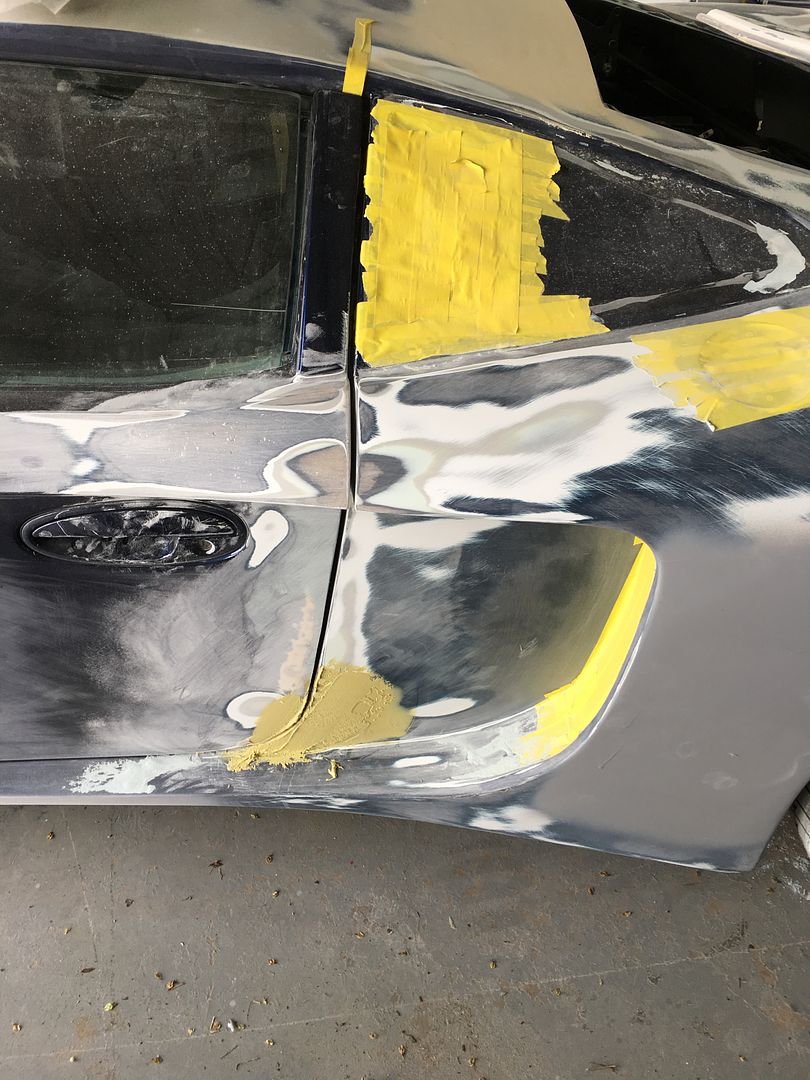
    Pandora's Getting her Gaps set to a much more consistent look and feel. Tony is working to tighten the gaps as much as possibly makes sense.
    At the same time, he's building up low spots to make surface to surface transitions absolutely as flat as possible.


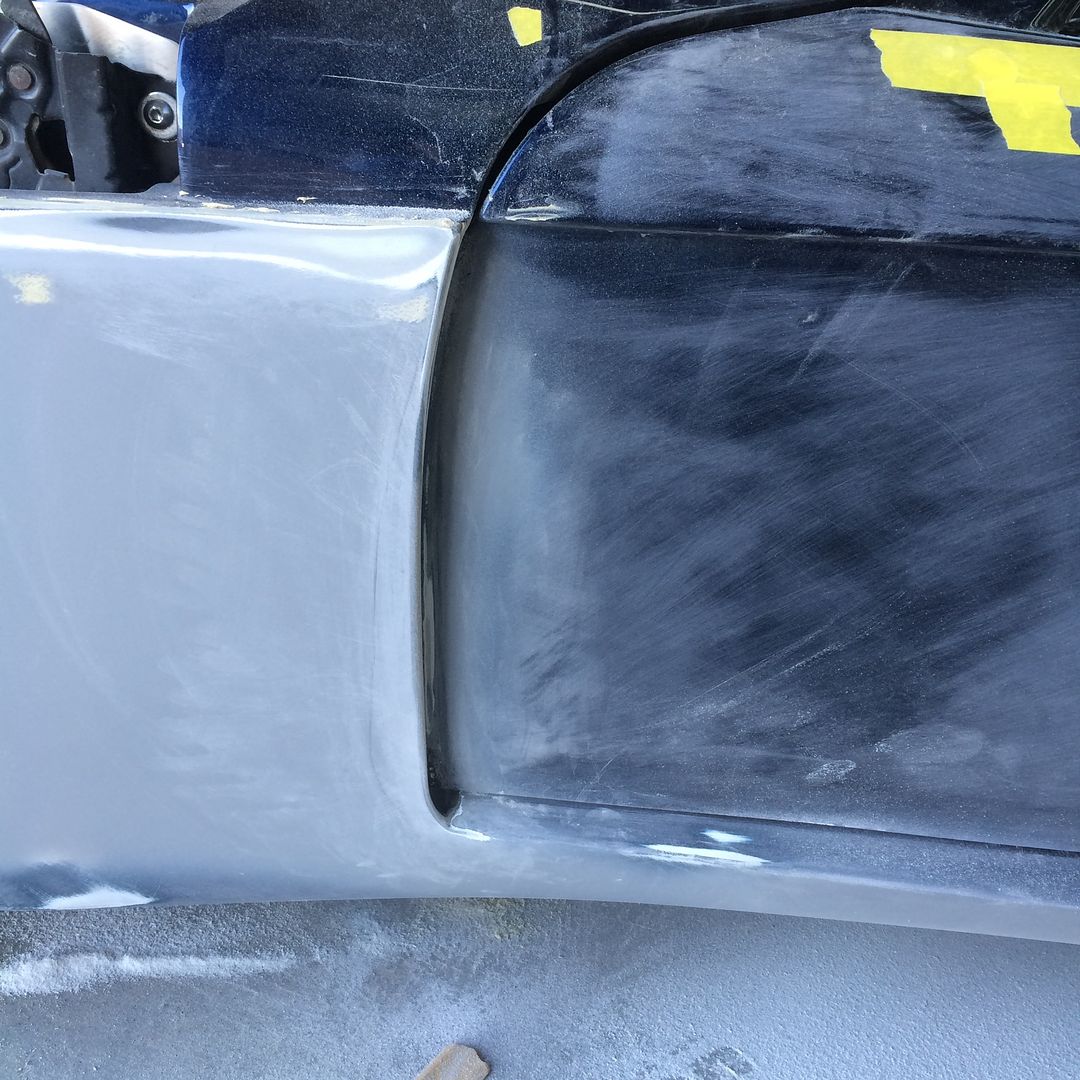
    The rear edge of the door is nice and straight. It'll get just a bit of fine tuning, but the lines are arrow straight. The picture is a little deceiving. There are a couple of spots that look wavy. But when I saw them in person, the were pretty much perfect.


    Crisp lines, near perfect gaps, black paint, and a reflection that looks back at you from 10 feet withing the panels... Pandora's going to break some hearts!


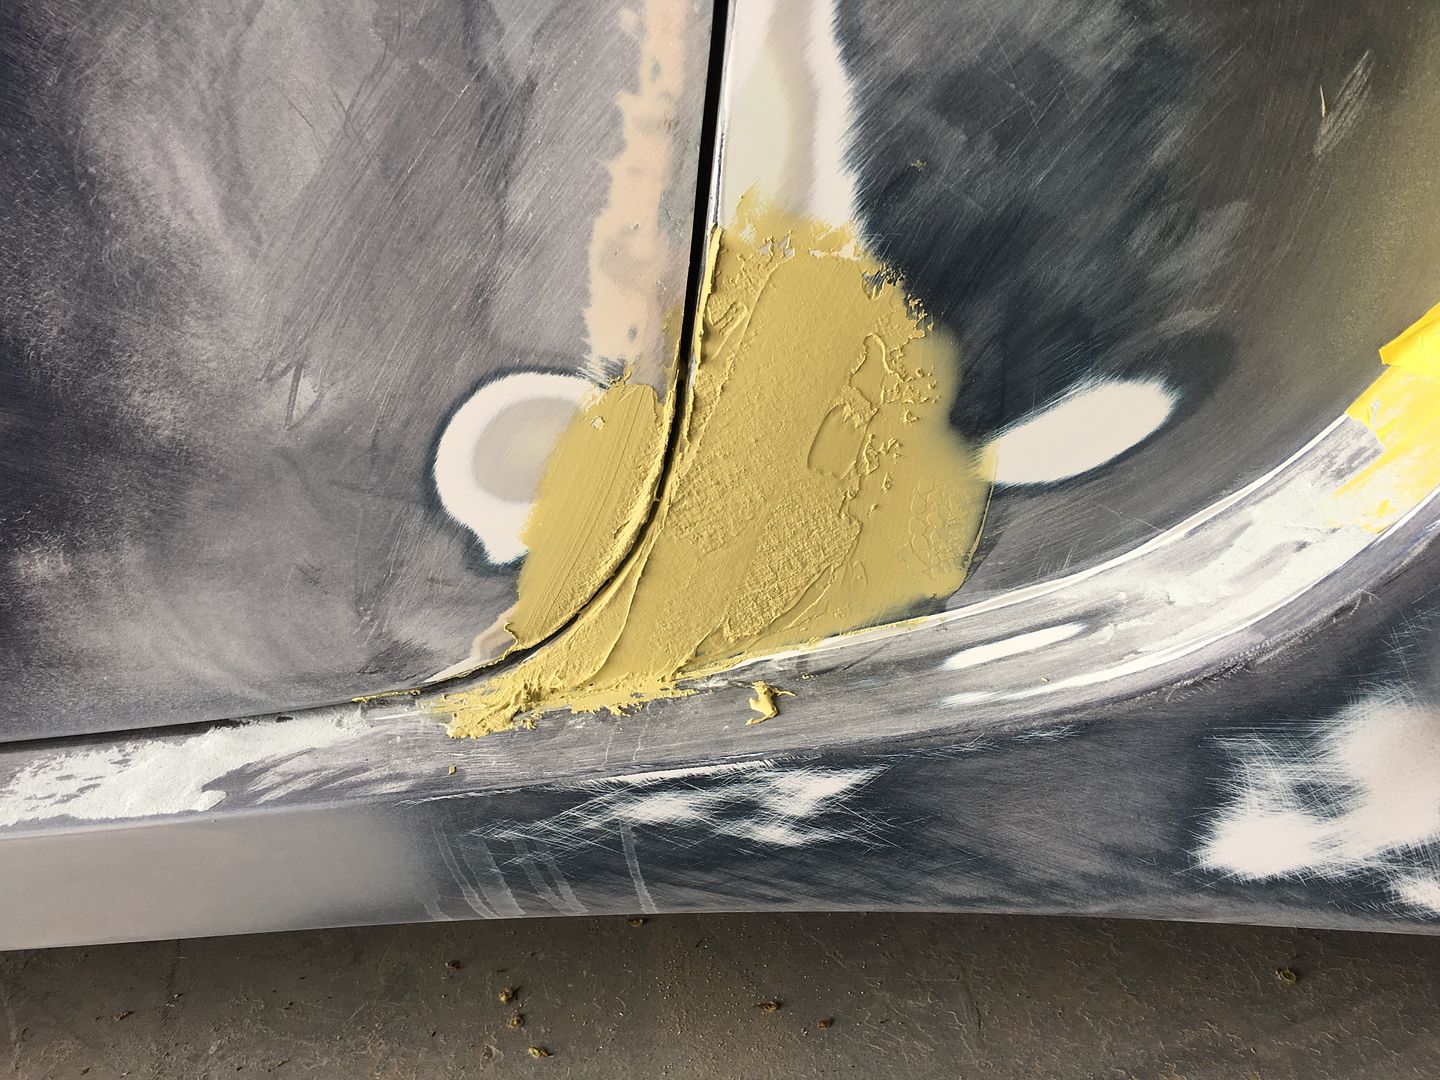
    I mentioned earlier that there is a bit of contact at the bottom of the door. The door can be clearanced by relieving the rear edge of the fender by maybe 1/4" to 3/8", and then blended back into the line of the rear edge of the fender. You will also see a wider line that shows more of a radius from the lower edge of the door, and swooping back up to the hood and upper door line.


    The idea is to mimic the radius at the upper rear of the door/ air scoop. For whatever reason, I can't seem to wrap my head around this one. In my mind's eye, it makes an hourglass of the section of the fender panel, which changes how m eye sees the whole door.

    From the beginning, my concept for this car has been to stick as close to the original Factory Five design as much as possible; because quite frankly, that's the design that I fell in love with, and I'm not sure that changes that I could make, would be an improvement.

    Tony and I talked about it again today, and he suggested that we relieve the fender edge just enough to clear the door, call it done, and then move on. That brought my comfort level back into normal opperating range.

    What are your thoughts?

    Thanks,

    Mike


    Last edited by The Stig; 03-18-2016 at 10:33 PM.
    The Stig

    Some say, that I only know two facts about ducks, (both being wrong); and that if I could be bothered, I could solve the "da Vinci Code" in 47 seconds...
    All I know is that I'm called "The Stig".
    GTM #0081

  11. #1411
    Senior Member The Stig's Avatar
    Join Date
    Feb 2011
    Location
    Charlotte, NC
    Posts
    2,004
    Post Thanks / Like


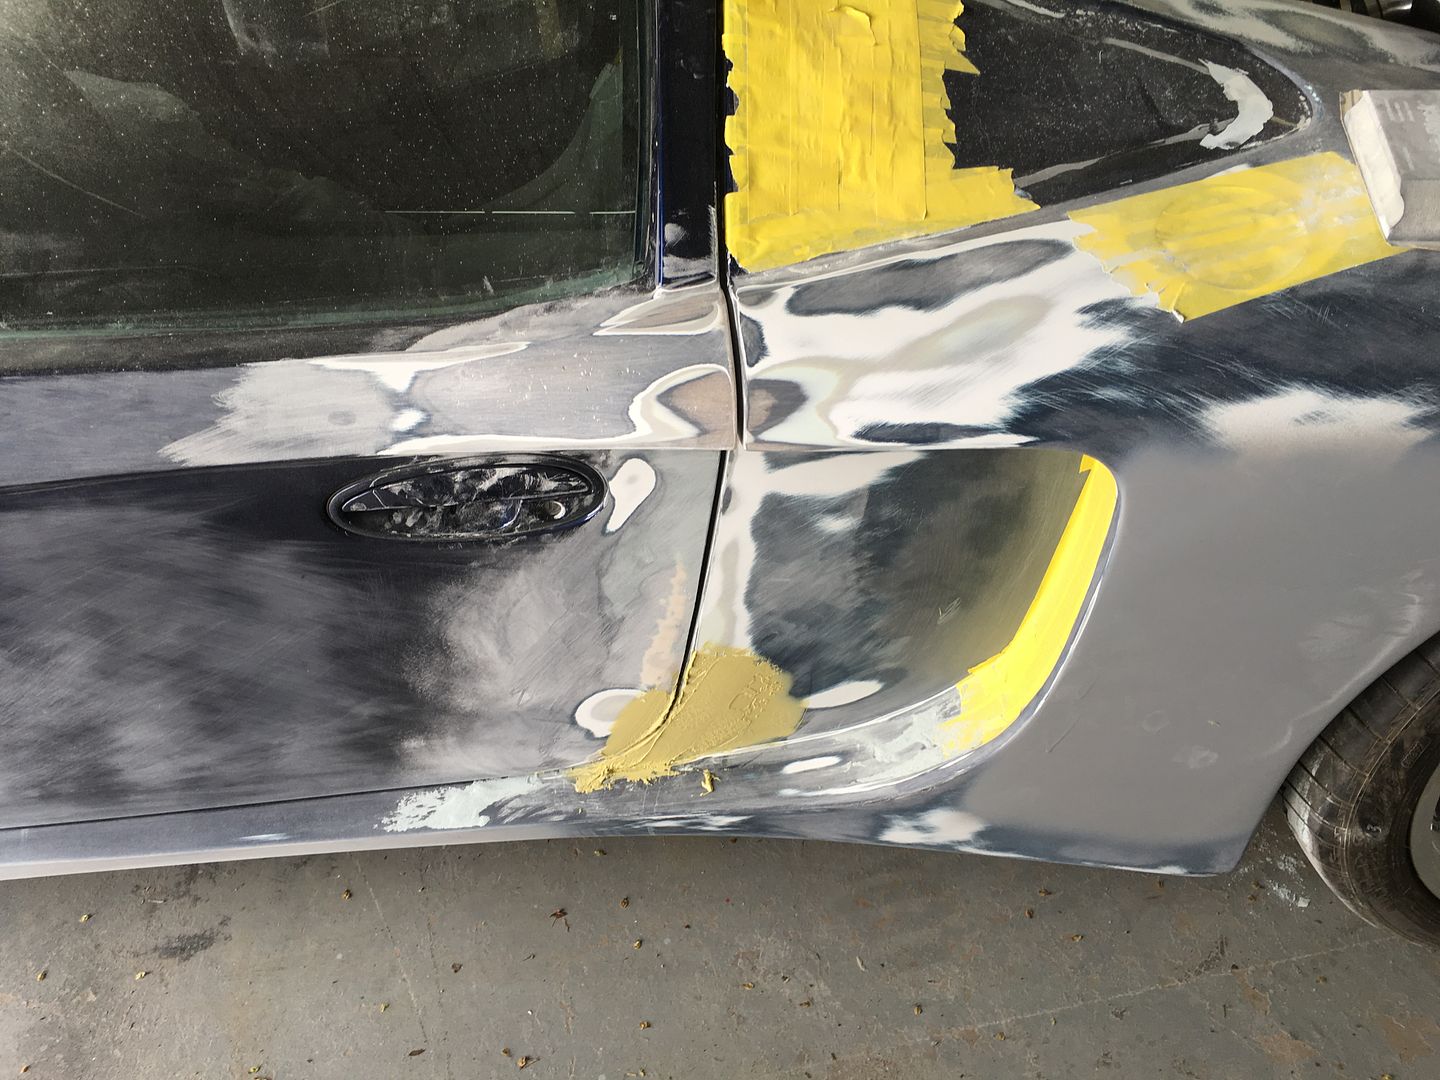
    From this angle, you get a better sense of how nice the gaps are. I really like the line running from the door into the side scoop. There is a very small section that will need to built up just a little, in order to make the flow from the door to the rear fender absolutely flat and seamless.


    I can not wait to see Pandora in her Carbon Black paint. The paint reflections will be as much as part of the look as the paint and the lines themselves. I'm getting pretty pumped up to see it all come together.

    I think she is turning out to be worth the wait...

    Mike
    The Stig

    Some say, that I only know two facts about ducks, (both being wrong); and that if I could be bothered, I could solve the "da Vinci Code" in 47 seconds...
    All I know is that I'm called "The Stig".
    GTM #0081

  12. #1412
    Senior Member
    Join Date
    Feb 2011
    Location
    San Diego
    Posts
    1,961
    Post Thanks / Like
    My thoughts are that I have never really liked the way the interface is there by the front of the door. Not only are there issues with door clearance, but the way the hood intersects with the door and fender lines makes it look like the hood was an after thought in the build process. There is no flow to the body lines there. That said, because of the way the hood sits on top of the body in that location, I think I would make sure that you look at the lines with the hood installed because otherwise you are likely to compound this issue by introducing more line angles by changing the front fender. In other words, in my opinion, you may need to continue the change in body lines that you have drawn there all the way up into where the hood interfaces that body panel in order for it to look right.

    All these details with the body are not individually extremely important, but, collectively, they make a huge first impression difference.

    Personally, I have changed the doors and fenders in that area so that the hood properly interfaces with the other body parts. But, of course, what is "proper" is simply what I care for, and may not work for you.

    BTW, the area of the door that you are working at the rear, where it interfaces with the rear scoop air inlet panel...well, I had made some significant changes to that area but never really liked the multiple angles that were again present there, so last night I got the sawz all out and completely removed that recessed door panel. From front fender to rear air inlet that panel is now being completely redone. I thought about this modification for probably 6 months to a year now, and finally yesterday got up the nerve to actually plug in the sawz all. Painful, but liberating all at once.
    Last edited by crash; 03-21-2016 at 09:09 AM.
    www.myraceshop.com

    GTM solution kits
    Corvette and Race parts

  13. #1413
    Senior Member
    Join Date
    Feb 2011
    Location
    San Diego
    Posts
    1,961
    Post Thanks / Like
    Here's a couple of pics from the last couple of days work...

    IMG00865-20160321-1642.jpgIMG00864-20160321-1642.jpg
    www.myraceshop.com

    GTM solution kits
    Corvette and Race parts

  14. #1414
    Member
    Join Date
    Feb 2011
    Location
    Sachse, TX
    Posts
    47
    Post Thanks / Like

    Cool

    I guess this is what the jeep will look like. Sorry to post but had too after I saw the jeep pics. This is the first car/thing I restored. Love Jeeps. But GTMs more!
    Attached Images Attached Images

  15. #1415
    Senior Member The Stig's Avatar
    Join Date
    Feb 2011
    Location
    Charlotte, NC
    Posts
    2,004
    Post Thanks / Like
    Wow... That looks just like the color that was on the jeep in the shop. So it was you that I've been waiting on !!!?!?!!!
    The Stig

    Some say, that I only know two facts about ducks, (both being wrong); and that if I could be bothered, I could solve the "da Vinci Code" in 47 seconds...
    All I know is that I'm called "The Stig".
    GTM #0081

  16. #1416
    Member
    Join Date
    Feb 2011
    Location
    Sachse, TX
    Posts
    47
    Post Thanks / Like
    LOL Please don't blame me! LOL That project was ten years ago. I love jeeps -I hate rust. But the color is spot on. Ill go back to lurking now.

  17. #1417
    Senior Member The Stig's Avatar
    Join Date
    Feb 2011
    Location
    Charlotte, NC
    Posts
    2,004
    Post Thanks / Like
    Quote Originally Posted by GTMsomeday View Post
    LOL Please don't blame me! LOL That project was ten years ago. I love jeeps -I hate rust. But the color is spot on. Ill go back to lurking now.
    Yeah, Yeah, Yeah...

    Nice Jeep!

    Mike
    The Stig

    Some say, that I only know two facts about ducks, (both being wrong); and that if I could be bothered, I could solve the "da Vinci Code" in 47 seconds...
    All I know is that I'm called "The Stig".
    GTM #0081

  18. #1418
    Senior Member The Stig's Avatar
    Join Date
    Feb 2011
    Location
    Charlotte, NC
    Posts
    2,004
    Post Thanks / Like
    I really like to post pictures of progress that has been made on Pandora. Tony has really made a lot of progress
    ... Block sanding the body to start getting it flat for primer;
    ... Fitting the rear hatch to the body,
    ... and then fitting the body to the hatch
    ... and then setting the tight gaps around it


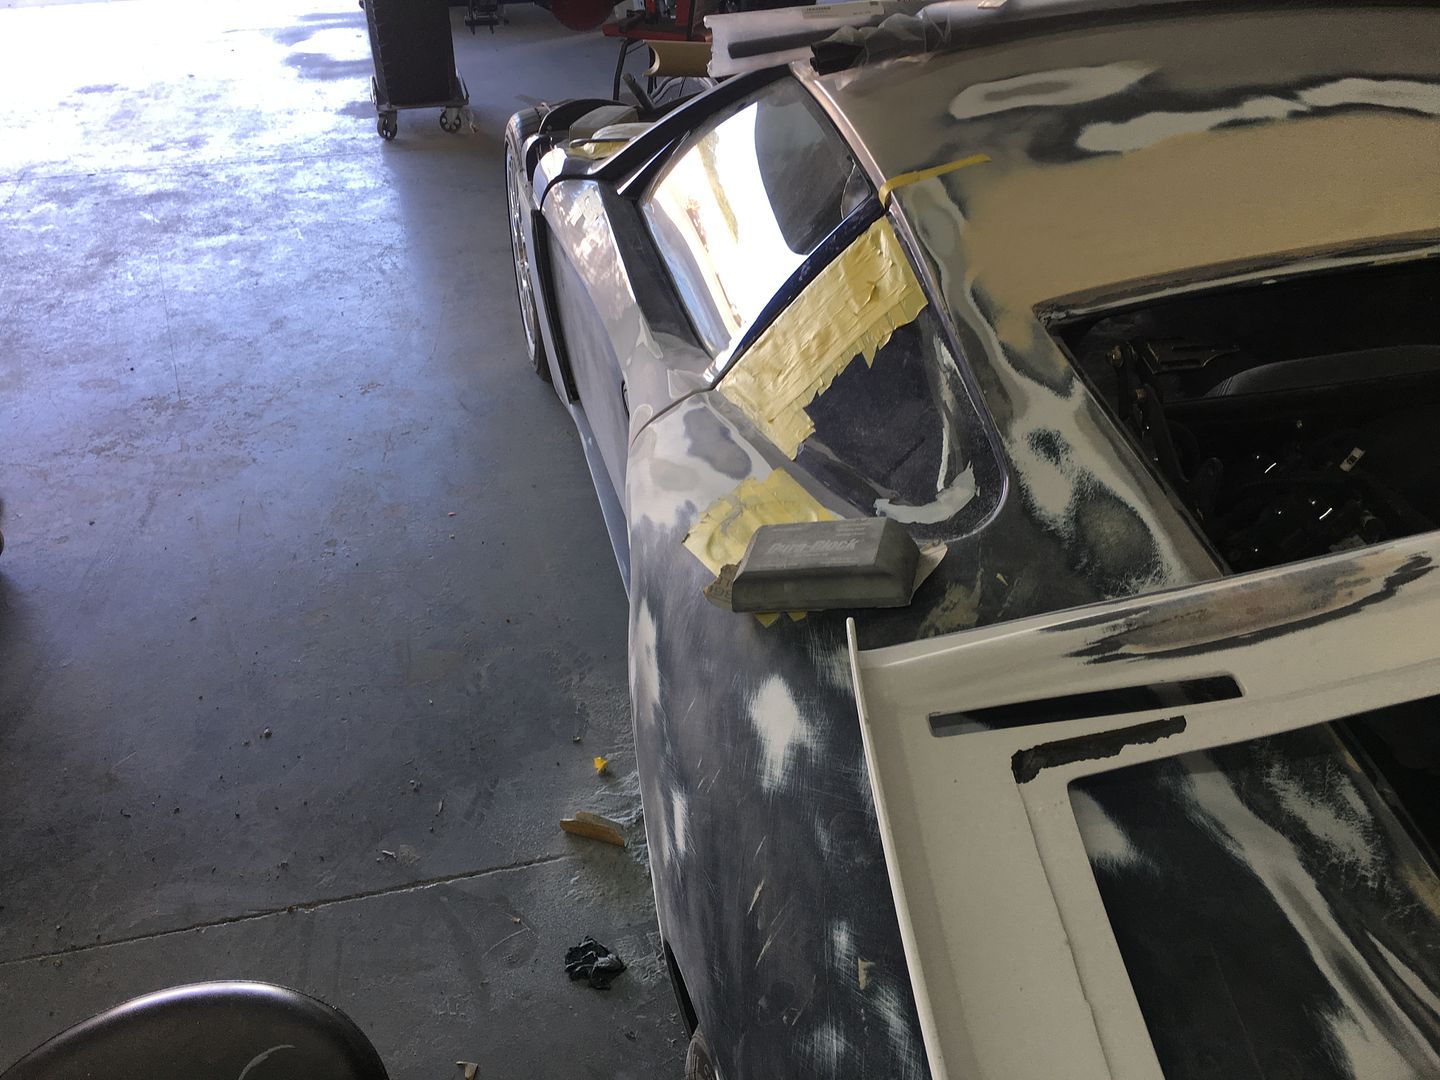
    ...Setting the gaps at the rear of the driver side door and rear fender/scoop.

    So with him being the perfectionist that he strives to be, he felt that a little tweaking of the lower curve at the bottom of the door was needed in order to get the gap just as it should be, as well as making sure that the panels are level with each other. So when it's done, even the curves will be straight.


    When she's done, she'll be ready for the bright lights at the hand full of car shows that I'd like to take her to.


    So at this pace, I should be ready to take the car to the Factory Five open house, in 2017, or 18, or 19... some time.

    It looks like I'm going to have plenty of time to do a couple of other mini projects on her while the body prep is being done. So I've decided to go ahead an rebuild the entire suspension with new parts. New adjustable upper arms in front (from Michael Jimenez). New knuckles at each corner. New upper and lower ball joints. New toe links and rod ends. New Tie Rods and bump-steer kits front and rear. New SKF Bearing/Hub assemblies from Pfadt Race Engineering at all four corners.

    And after reading through John's post about shock upgrade that he just made to his car, I thought about taking the plunge into a full set of Ohlins dual adjustable shocks. But I don't think they will fit with the Ram Lift Pro system. By the time I fit the hydraulic lift pucks into the coil-over space on the front shocks, there wouldn't be much room for a coil spring. So I'm taking another look at a set of Penske dual adjustable coil over shocks.

    The control arms, uprights, toe link bars and tie rods will all be powder coated Ferrari Silverstone Gray metallic. I would like to pull the axles and have them coated in the same color, but I don't really want to go through the trouble of disassembly. just to powder coat them. (But it would make them look much nicer).

    And I think that I would like to pull the brake calipers, and have them either painted or powder coated either Silverstone Gray or Black, with "FACTORY FIVE RACING" stenciled in either Silver or Black (depending on the color of the calipers), in a curve that follows the shape of the calipers. I think that would look a little better than the battleship gray powder coat that they were done in, after I had asked for medium charcoal metallic.

    If I do get the Penske shocks, I may have the shock bodies powder coated the same color as the calipers, and the springs done in the same color as the arms. (If I can do it without causing issues with the spring adjustment threads)... That may be a headache better left alone, now that I think though it.

    I figure that I can do the work and get everything complete, and then switch all the parts out either at Tony's shop one weekend, or in my garage when she is finished there. That way it becomes a weekend project once everything is ready.

    What's a few more days, or weeks, or months...?

    I bought Pandora from Reginald Herd on August 20, 2009. I had a pretty comprehensive plan that looked like I could build her the way I wanted to, in about 2 1/2 to 3 years. LOL...!$%$#%! I'm so funny sometimes...

    8/20/2009 - 3/28/2016: 6 years and 7 months, and counting.

    I spent about a year working on the chassis. Then I sent the car to Jeff Collins at Whitby Motorcars... He kept it for about a year.

    Then after I got her back home, she still need the wiring to be finished, so I sent her to Courty Stone in Charlotte. He kept her for 4 months, charged me $2500.00, and pretty much did NOTHING that I asked him to do.

    Then she went to The Custom Stitching Co, to have a full custom interior (and have the wiring finished). 3rd time's the charm? Steve had her for about another year.

    When she left Steve's she went straight to Exclusive Motorwerks to have the suspension dialed in as much as we could, knowing that she would be back when the new upper arms go on. Lou had her for about a month.

    From there she came home for a month until Tony had an open slot in his shop. She was going in to just have a few scratches fixed... We figured it would be easy enough. Lexus Indigo Ink Pearl is a fairly common paint code to mix, match, and blend in. And it probably would have been, if Jeff had painted my car Lexus Indigo Ink Pearl like I asked. I do remember thinking that the car was a little lighter shade than I was expecting. When I got the call from Tony that the color on the car wasn't what I had been told, that was the confirmation of what I thought may have been the case. And at that point I had pretty much had enough... I was sick of being forced to compromise, even when these people were being paid well to do what I had asked them to do on my car.

    One thing led to another, and I decided that she was going to be done they way she should have been in the first place. Of course that meant that I would have to pay to have the work done again, which made me mad again, but after I got past that, it was just another day... Tony came to my house to pick Pandora up and take her to his shop on March 4, 2015. So he's had her for a little more than a year so far.

    Whitby, 1 year
    Courty, 4 months
    Steve, 1 year
    Lou, 1 month
    Tony, 1 year

    So, out of 6 years and 7 months that I've owned my GTM, shes been in other peoples shops for 3 years and 5 months. Which means that she was actually in my garage for 3 years and 2 months.

    So the point of all of this, is that I'm tired of feeling cut off from my car and my build. So I'm taking steps to rectify the last compromise made with Pandora: the suspension. At least this will give me a change to get my hands back into the project, and I can see some progress that I will show later on the streets.

    This wasn't the update that I hoped to be writing, but it is what it is. With that said (repeated), the silver lining is that this car will absolutely correct and true to my vision of her when she is finally done. She'll look the way I saw her in my head on that first day, and she'll drive and handle the way I had hoped all through the 7 years of working and waiting to simply be able to drive her.

    Tune in next week and maybe we'll see a little mud on the front driver's side fender ahead of the door.

    Mike
    Last edited by The Stig; 03-28-2016 at 10:45 PM.
    The Stig

    Some say, that I only know two facts about ducks, (both being wrong); and that if I could be bothered, I could solve the "da Vinci Code" in 47 seconds...
    All I know is that I'm called "The Stig".
    GTM #0081

  19. #1419
    Senior Member
    Join Date
    Mar 2015
    Location
    Houston, Tx
    Posts
    134
    Post Thanks / Like
    Man, that is a hard read. Not what anybody signs up for when starting one of these projects. My heart goes out to you. (and your wallet.)

    Really respect you for staying the course and getting it right. I would have lost patients around year 3.6.

    Just a general question, why do these shops take cars when they do not have the resources to finish the project in a timely manner? Seems like a recipe for unhappy customers. Which nowadays with the internet it gives customers a reason to vent online. (See exhibit "A" ^^^^^) I notice Whitby was commenting at the top of the thread when things were good and has now gone radio silent.

    Good luck man. Can't wait until you can show us a finished car.

    -Another Mike

  20. #1420
    Senior Member The Stig's Avatar
    Join Date
    Feb 2011
    Location
    Charlotte, NC
    Posts
    2,004
    Post Thanks / Like
    Quote Originally Posted by wirenut View Post
    Man, that is a hard read. Not what anybody signs up for when starting one of these projects. My heart goes out to you. (and your wallet.)

    Really respect you for staying the course and getting it right. I would have lost patients around year 3.6.

    Just a general question, why do these shops take cars when they do not have the resources to finish the project in a timely manner? Seems like a recipe for unhappy customers. Which nowadays with the internet it gives customers a reason to vent online. (See exhibit "A" ^^^^^) I notice Whitby was commenting at the top of the thread when things were good and has now gone radio silent.

    Good luck man. Can't wait until you can show us a finished car.

    -Another Mike
    I think more often than not, people who are building the GTM have built other cars, whether they were Factory Five, or muscle cars that they restored in some way. Many of them work as mechanics and/or body repair. The short of it is that they have deeper skills than some of the others here. Those that don't tend to know what they can and can't do confidently, and they send their cars out to shops to help them get through the parts that they can't. Obviously for me that was wiring and body work/paint. I don't pretend to be in this boat alone. There are quite a few of us who get put on a shelf, and forced to wait on work that may or may not be to the level of quality that they paid for. It's a shame that shop owners go out of their way to do this to their customers.

    I would take cars back to Steve at The Custom Stitching Co., and to Tony at Charlotte Speed Shop, because they do very nice work, and although neither is inexpensive, I feel that I'm getting what I asked for and paid for.

    I guess the reason for this recent post is that I opened a thread about people who were planning to go to Huntington Beach Cruise-in, and it got me thinking again.

    The very unofficial PRE HB CRUISE AND BBQ!!!
    http://thefactoryfiveforum.com/showt...pril-29th-2016

    I wanted to go last year very badly. But couldn't because I decided to have the entire body reworked to get it done they way I thought it should have been. Then the FFR Open House came up, and I still wasn't ready. The Charlotte Auto Fair (Spring & Fall) passed. So I pretty much wrote off the rest of the year, thinking that it would be ready for 2016.

    So when I read David Hodgkin's thread about upcoming events for the HBCI, I figured this was another year that I would have to sit out. And it really bums me out. But it is what it is.

    As far as your question regarding why shop owners take in work that they can't cover in the period of time that they promised, who the heck knows? I think that they see these cars and think that it would be cool to work on them, not realizing what is really involved. The GTM body is not like working on Mustang or Camaro bodies... At all... So they have time in them that they don't want to bill you for, but they also need to keep the doors open, so they stop working on your car to go to a quick hit. And then another quick hit. And then another... Then when you show up to check on "progress", they get their reminder that you've paid quite a bit to not have your car further along, and they start working on it a little more until the next quick hit comes...

    Once they have your car, you're at their mercy in a sense, until you decide whether or not you want to pull the car or not. Tony does excellent work, so I'm not ready to pull the car. Am I frustrated? Yep. This has been quite the learning experience for the next build.

    Whitby had me for $40k. ($14.400 for paint & body, and an additional $25,500 for wiring and a hand full of chassis items). Courty Stone took me for $2500 more for wiring that was incredibly bad and had to be pulled out and reworked for yet a third time. My interior work came in at around $27.5 k, which I was happy to pay because I got exactly what I asked for. And Tony is reworking the body and paint, and is doing an excellent job with it. Slow, but very good. Dollar wise for the body, I'm pretty close to what Whitby charged me to do it the first time. (So between them and Tony I expect to have around 30k in paint and body work). But at least now it is being done right.

    I'll have paid almost as much in Body work, Interior, and Wiring as most people have in their entire build... And after almost 7 years, she still isn't finished.

    All I know is that if I tried to run my business they way others seem to be able to, I would have been out of business in 6 months or less.

    So the post wasn't meant to solicit sympathy.

    I'm just very disconnected from my build project and have been for years now, and the feeling is wearing quite thin.

    I just needed to vent a little. (again)

    Mike

    Oh... and as far as my patience to stick with it, my wife calls it pure stubbornness that increases as I get mad... I get to a point where I'm not going to let something or someone beat me. And they usually don't. And that's about the time that my wife reminds me how much it "cost me to not be beaten"...

    Oh well.
    Last edited by The Stig; 03-29-2016 at 03:02 PM.
    The Stig

    Some say, that I only know two facts about ducks, (both being wrong); and that if I could be bothered, I could solve the "da Vinci Code" in 47 seconds...
    All I know is that I'm called "The Stig".
    GTM #0081

  21. #1421
    Banned
    Join Date
    Aug 2011
    Posts
    669
    Post Thanks / Like
    I've been watching a long time, it's almost there. I know you're bummed about missing shows and events you've planned but I think there's going to be a point when you get the car back when that magic feeling will hit you. I don't think it will be at a show where people are drooling over it or being surrounded at the gas station. It'll be one sunny day and you take the car out by yourself (on a winding back road) when everything's finished/buffed/new suspension and the reason you did this car will hit you, hard in the back. Use all the things you've learned to better future projects.

  22. #1422
    Senior Member Roger Reid's Avatar
    Join Date
    Feb 2011
    Location
    Caldwell (near Boise) Idaho
    Posts
    237
    Post Thanks / Like
    Quote Originally Posted by The Stig View Post
    ...So I'm taking another look at a set of Penske dual adjustable coil over shocks...
    I can look up the info on my Penske's if you wish. http://www.ffcars.com/forums/2434395-post19.html
    Just an old man with a great hobby

  23. #1423
    Senior Member The Stig's Avatar
    Join Date
    Feb 2011
    Location
    Charlotte, NC
    Posts
    2,004
    Post Thanks / Like
    Hi Roger.

    I appreciate it. I am trying to make a decision between the 8300 dual adjustable, with remote reservoir, or the 7500 dual adjustable coil-overs. 8300's have more adjustability that I think would be useful to get each corner of the GTM truly dialed in. That's probably the direction that I'll end up going, but we'll see.

    Obviously Penske has a strong presence here in Charlotte, and has a couple of places that they work through here. RE-Suspension, being one. I've spoken with them in the past, so when the time is right, I'll go down and work with them to build a set of shocks that make sense for the car, and then get the suspension tuned and balanced.

    Please send what you have. I believe in having as much info as possible.

    Thank you Roger.

    Mike
    The Stig

    Some say, that I only know two facts about ducks, (both being wrong); and that if I could be bothered, I could solve the "da Vinci Code" in 47 seconds...
    All I know is that I'm called "The Stig".
    GTM #0081

  24. #1424

    Steve >> aka: GoDadGo
    GoDadGo's Avatar
    Join Date
    Feb 2015
    Location
    Slidell, Louisiana
    Posts
    6,572
    Post Thanks / Like
    Blog Entries
    1
    To The Stig:
    I want to let you know how much I appreciate the blood sweat & tears, plus a lot of money that has gone into this Quest for the ultimate GTM. While I'd never dream of tackling a build this big, I can truly appreciate the amazing effort and your ability to not give up.

    To The Rest Of The Forum:
    You need to start from the beginning and see this entire journey for it is impressive.

    Steve >>> aka: GoDadGo

  25. #1425
    Senior Member The Stig's Avatar
    Join Date
    Feb 2011
    Location
    Charlotte, NC
    Posts
    2,004
    Post Thanks / Like
    Quote Originally Posted by GoDadGo View Post
    To The Stig:
    I want to let you know how much I appreciate the blood sweat & tears, plus a lot of money that has gone into this Quest for the ultimate GTM. While I'd never dream of tackling a build this big, I can truly appreciate the amazing effort and your ability to not give up.

    To The Rest Of The Forum:
    You need to start from the beginning and see this entire journey for it is impressive.

    Steve >>> aka: GoDadGo
    Wow... Thank you Steve.

    But this really isn't so much about building the ultimate GTM as it is about building it to the level that I think the car deserves. From the beginning, I've been a tremendous fan of the design that Jim Schenk and the guys came up with for the GTM. That's exactly why you have only seen me change 1 thing that has to do with the body and that was the rear hatch, and how it will vent trapped hot air out of the upper engine bay. I decided from the start that I was going to build the car as Factory Five designed it, (except for the interior). Are there things that I wish were a little easier to resolve? Absolutely! But I still believe that Factory Five gave us all a great head-start on what for many will be the project of a lifetime.

    But having said that, I truly understand other peoples desire to make the car more their own in terms of look and feel. None of us are going to finish with exactly the same car, even if we tried. But hopefully each of us will be able to take the build to that point that we envisioned when we bought into moving forward with the project.

    I think I'm getting pretty close to achieving mine, and based on the builds that have been documented here, I'm sure that others here have achieved theirs as well.

    I have to keep reminding myself, that no one said that this would be easy and/or without frustration.

    Thank you again for the compliments of the efforts and results so far of my project build. We'll have a finished car before long, that I'll post some "graduation" photos of.

    And I also have 3 Go-Pro video cameras that I plan to put to good use when the time comes.

    Mike
    The Stig

    Some say, that I only know two facts about ducks, (both being wrong); and that if I could be bothered, I could solve the "da Vinci Code" in 47 seconds...
    All I know is that I'm called "The Stig".
    GTM #0081

  26. #1426

    Steve >> aka: GoDadGo
    GoDadGo's Avatar
    Join Date
    Feb 2015
    Location
    Slidell, Louisiana
    Posts
    6,572
    Post Thanks / Like
    Blog Entries
    1
    While I'd love to build a GTM, the skills and pocket book won't allow it, but I'm hoping to do a Type 65 Coupe if my MK-4 turns out well. At least the chassis and wiring are the same. I'll just have to look at the GTM's, but if we ever meet, I will definitely bug you for a ride. Can't wait to see the graduation pics. Good Luck & Stay Motivated!

  27. #1427
    Senior Member The Stig's Avatar
    Join Date
    Feb 2011
    Location
    Charlotte, NC
    Posts
    2,004
    Post Thanks / Like
    Quote Originally Posted by carbon fiber View Post
    I've been watching a long time, it's almost there. I know you're bummed about missing shows and events you've planned but I think there's going to be a point when you get the car back when that magic feeling will hit you. I don't think it will be at a show where people are drooling over it or being surrounded at the gas station. It'll be one sunny day and you take the car out by yourself (on a winding back road) when everything's finished/buffed/new suspension and the reason you did this car will hit you, hard in the back. Use all the things you've learned to better future projects.
    Hello Jason!

    There is one thing that I know for sure, I am going to love the way the new hatch will look when she's finished. Thank you for making that piece for me. The pictures that I've posted along the way don't really do it justice. Tony has it fitting perfectly, and the panels are glass smooth with some really sweet gaps. I think you're going to like it also.

    When Pandora is finished, I'll be taking drives around Charlotte with Pam, so I'll have contain myself a little. But when I have the chance to take off for a couple of hours, I have a couple of nice roads that I plan to introduce her to...

    I appreciate the positive point of view. It's a shame that I have to remind myself to think that way about the whole process.

    Take care Buddy.

    Mike
    The Stig

    Some say, that I only know two facts about ducks, (both being wrong); and that if I could be bothered, I could solve the "da Vinci Code" in 47 seconds...
    All I know is that I'm called "The Stig".
    GTM #0081

  28. #1428
    Senior Member The Stig's Avatar
    Join Date
    Feb 2011
    Location
    Charlotte, NC
    Posts
    2,004
    Post Thanks / Like
    Tony sent a couple of pictures of the driver's side door... It seems that he spent some time working on Pandora.


    The upper gap between the leading edge of the door, and the front fender is being tightened up quite a bit. Build it up, and gap it out.


    The trailing edge of the front fender has been relieved just enough to allow the door to open without contact with the fender.


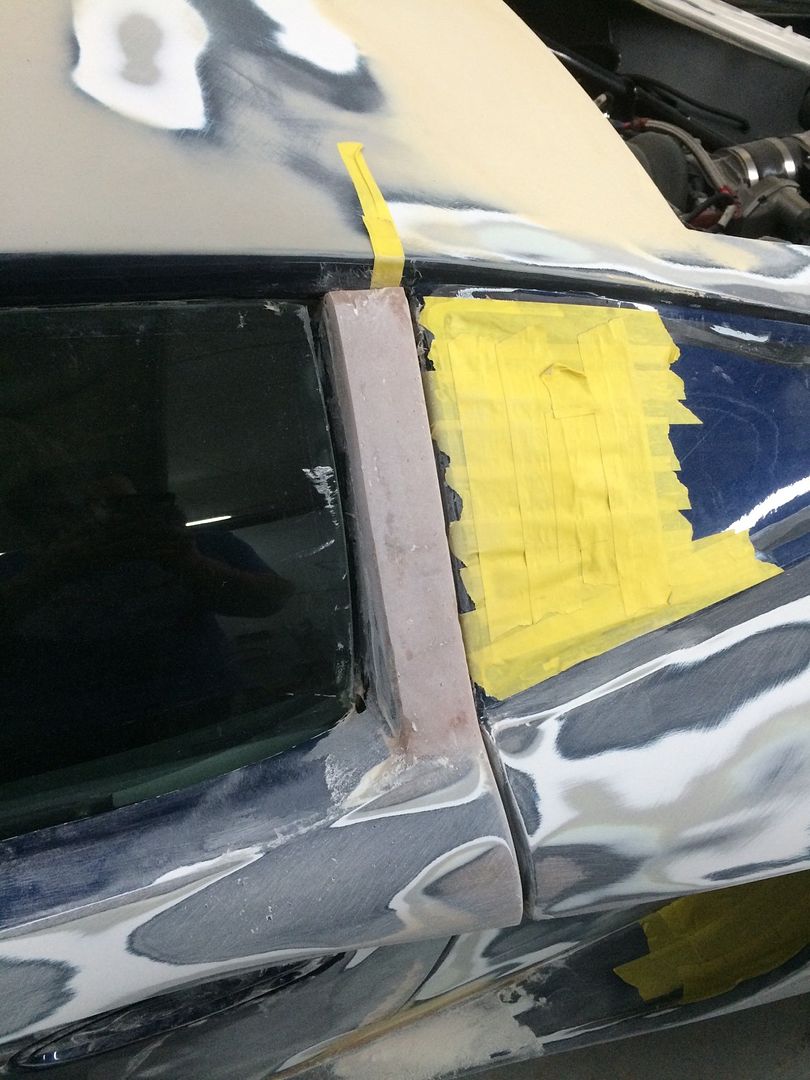
    The rear door post is being re-shaped a little in order to allow the upper and rear edge to fit flush with roof and the rear quarter glass for a nice smooth flow from door to window.


    There is another update, but I think I'll wait to show this one until I've actually seen it in person and spoke to Tony. I like the concept, but I think we may need to talk about it a little.

    Mike
    Last edited by The Stig; 03-30-2016 at 07:39 AM.
    The Stig

    Some say, that I only know two facts about ducks, (both being wrong); and that if I could be bothered, I could solve the "da Vinci Code" in 47 seconds...
    All I know is that I'm called "The Stig".
    GTM #0081

  29. #1429
    Senior Member The Stig's Avatar
    Join Date
    Feb 2011
    Location
    Charlotte, NC
    Posts
    2,004
    Post Thanks / Like
    It looks like Pandora's driver's side is coming along...

    The panel gaps are nice and tight with about 3/16" making them almost invisible. I can imagine that when the car is painted Carbon Black Metallic, they will pretty much disappear.

    You can follow the body line from the front fender along the door ridge and into the scoop. It looks like a nice crisp straight line!


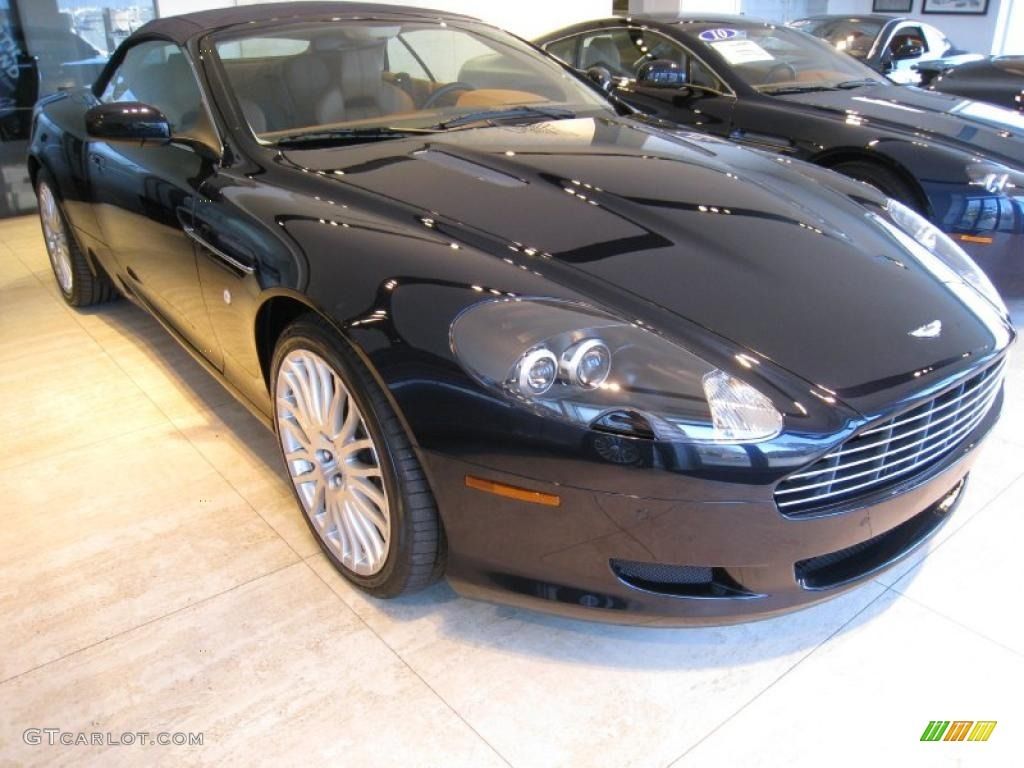
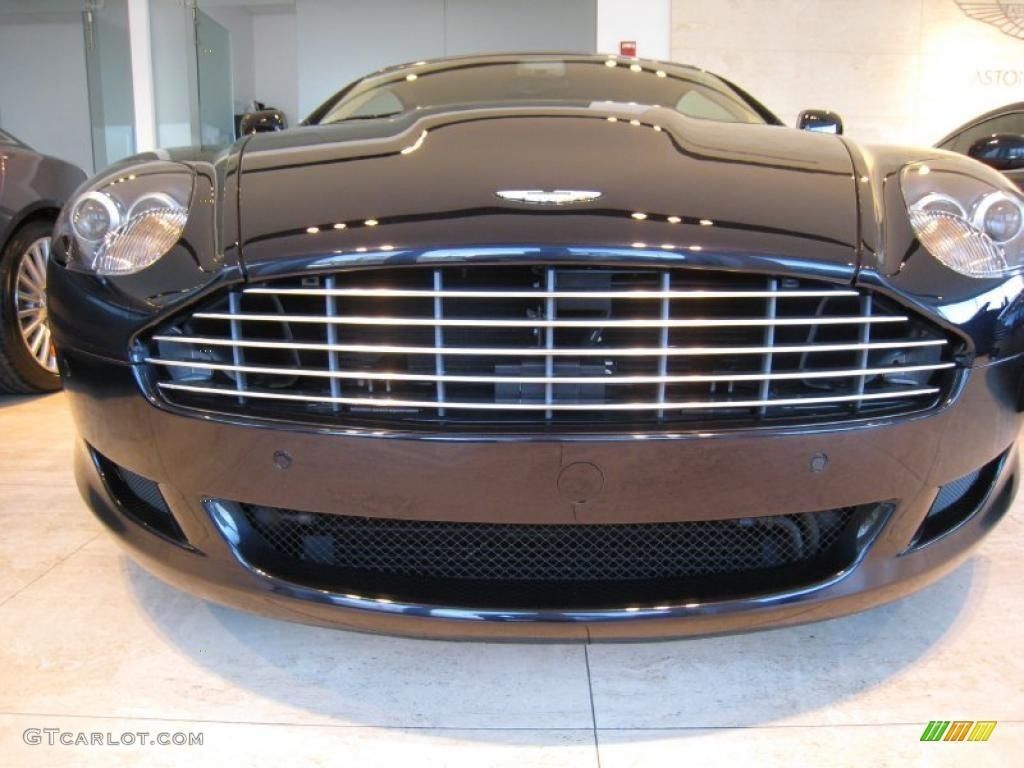
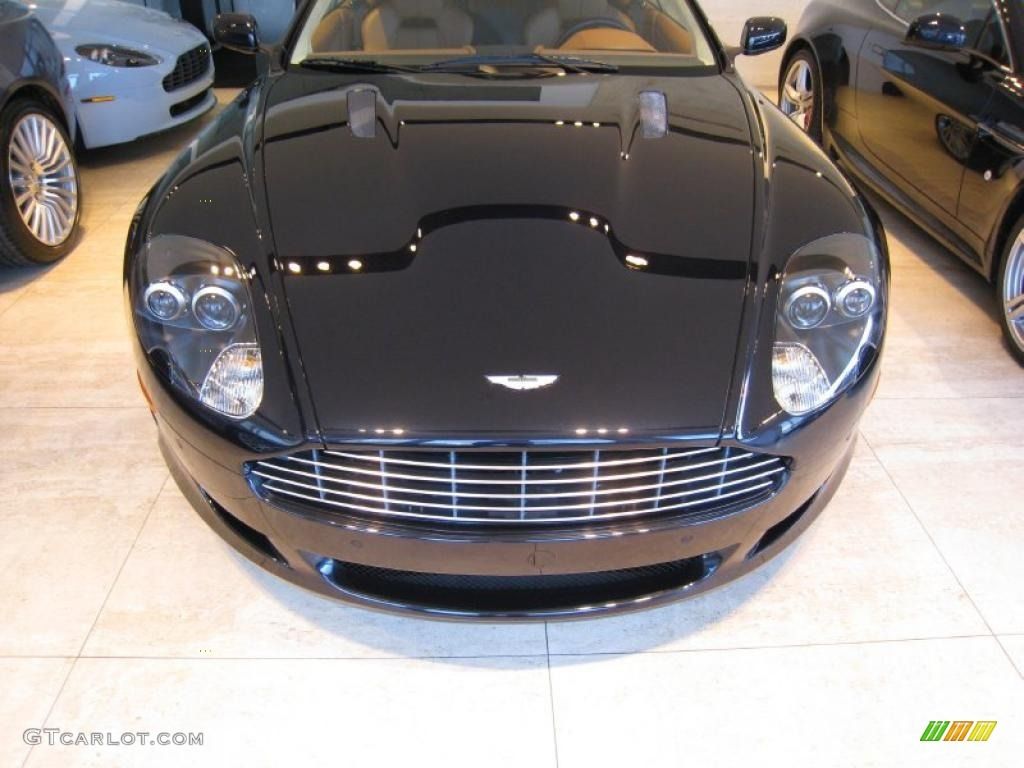
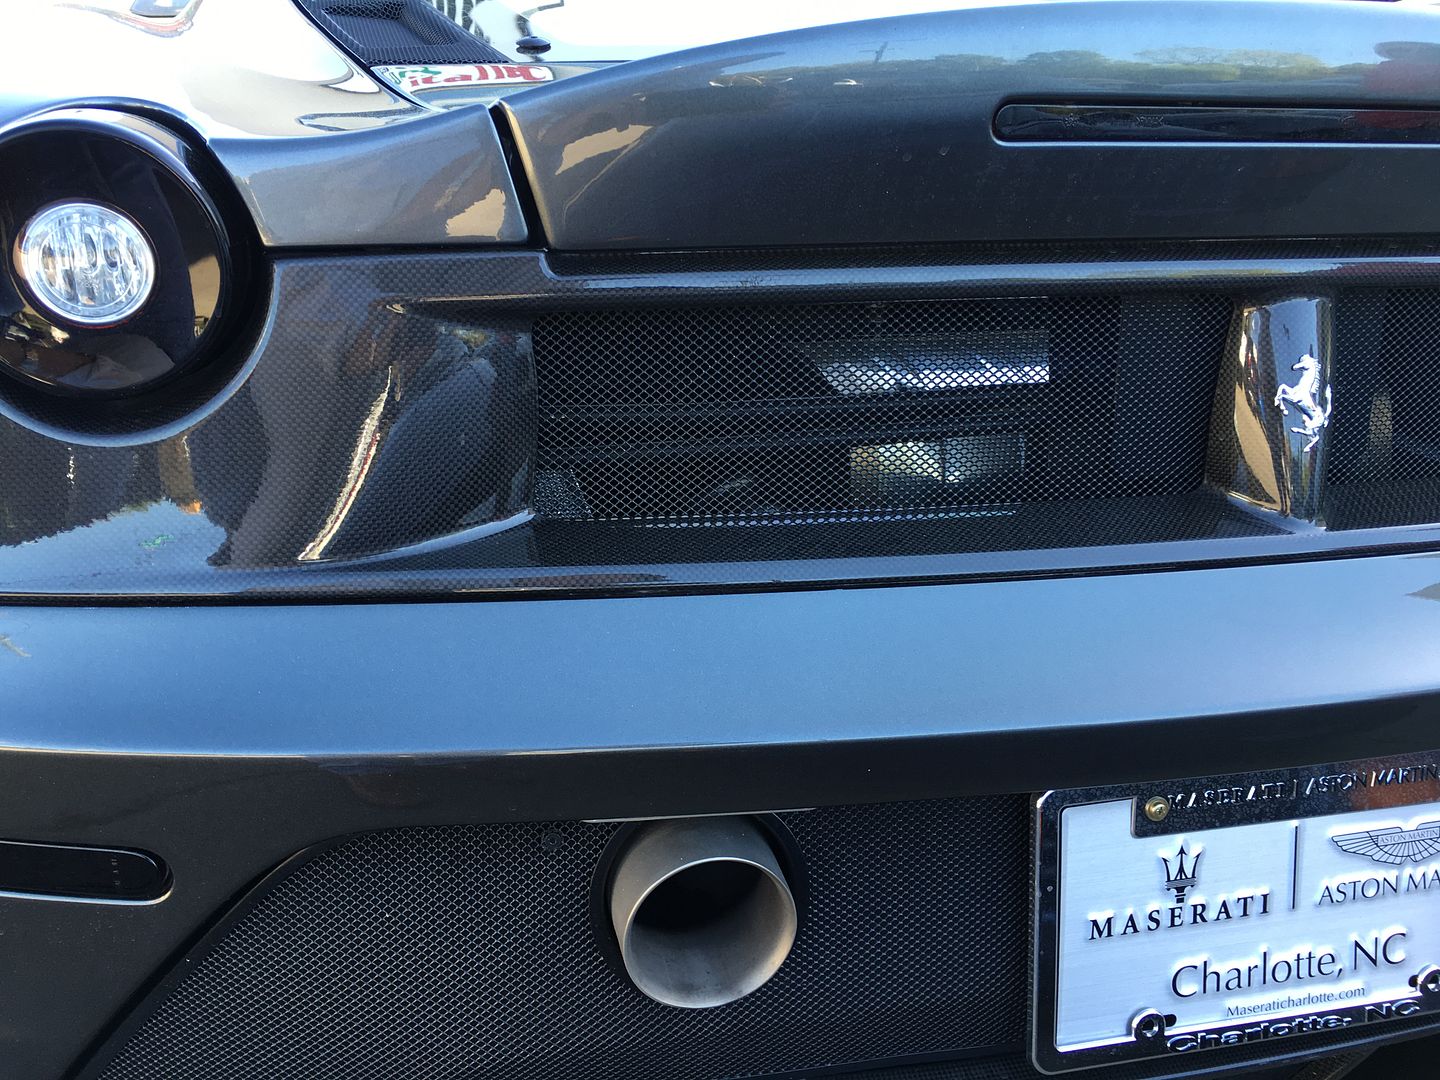
    Speaking of BMW Carbon Black Metallic paint... I ran across a nice Aston Martin that had actually been painted my new favorite color.


    I can just imagine this nice clear deep reflection filled color on Pandora.

    Mike
    Last edited by The Stig; 03-30-2016 at 08:36 PM.
    The Stig

    Some say, that I only know two facts about ducks, (both being wrong); and that if I could be bothered, I could solve the "da Vinci Code" in 47 seconds...
    All I know is that I'm called "The Stig".
    GTM #0081

  30. #1430
    Senior Member
    Join Date
    Mar 2015
    Location
    Houston, Tx
    Posts
    134
    Post Thanks / Like
    Oh man that is sweet! Progress is looking good!

  31. #1431
    Senior Member The Stig's Avatar
    Join Date
    Feb 2011
    Location
    Charlotte, NC
    Posts
    2,004
    Post Thanks / Like
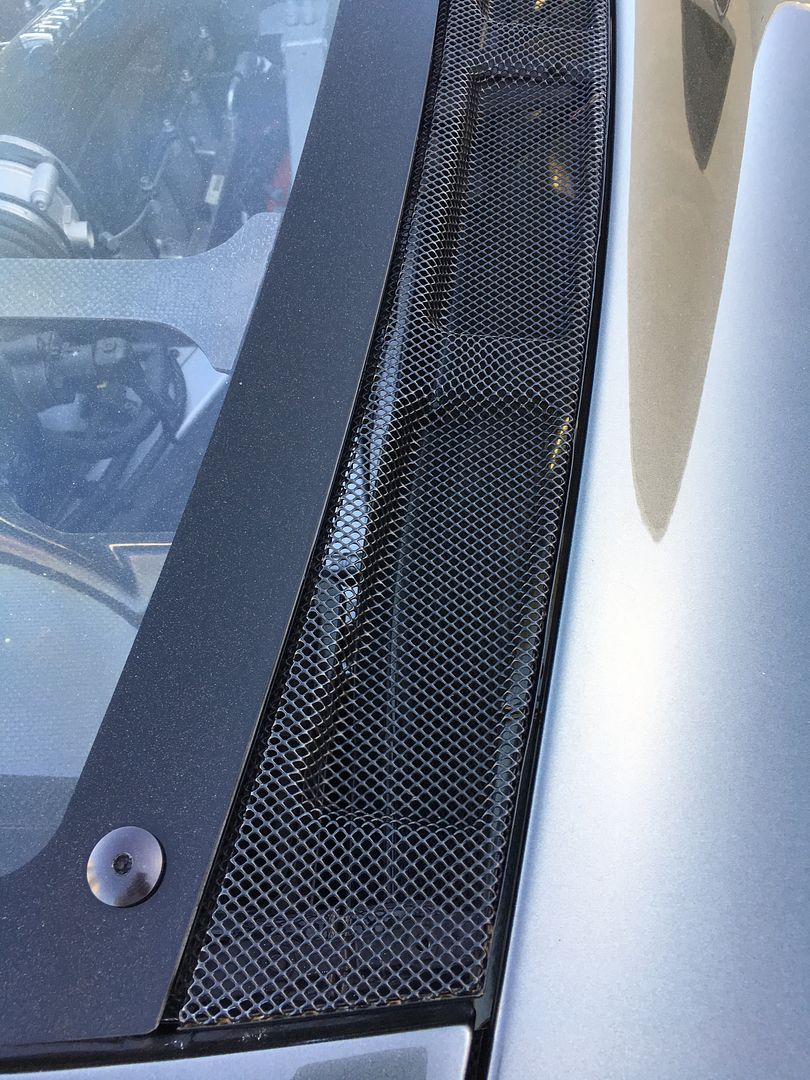
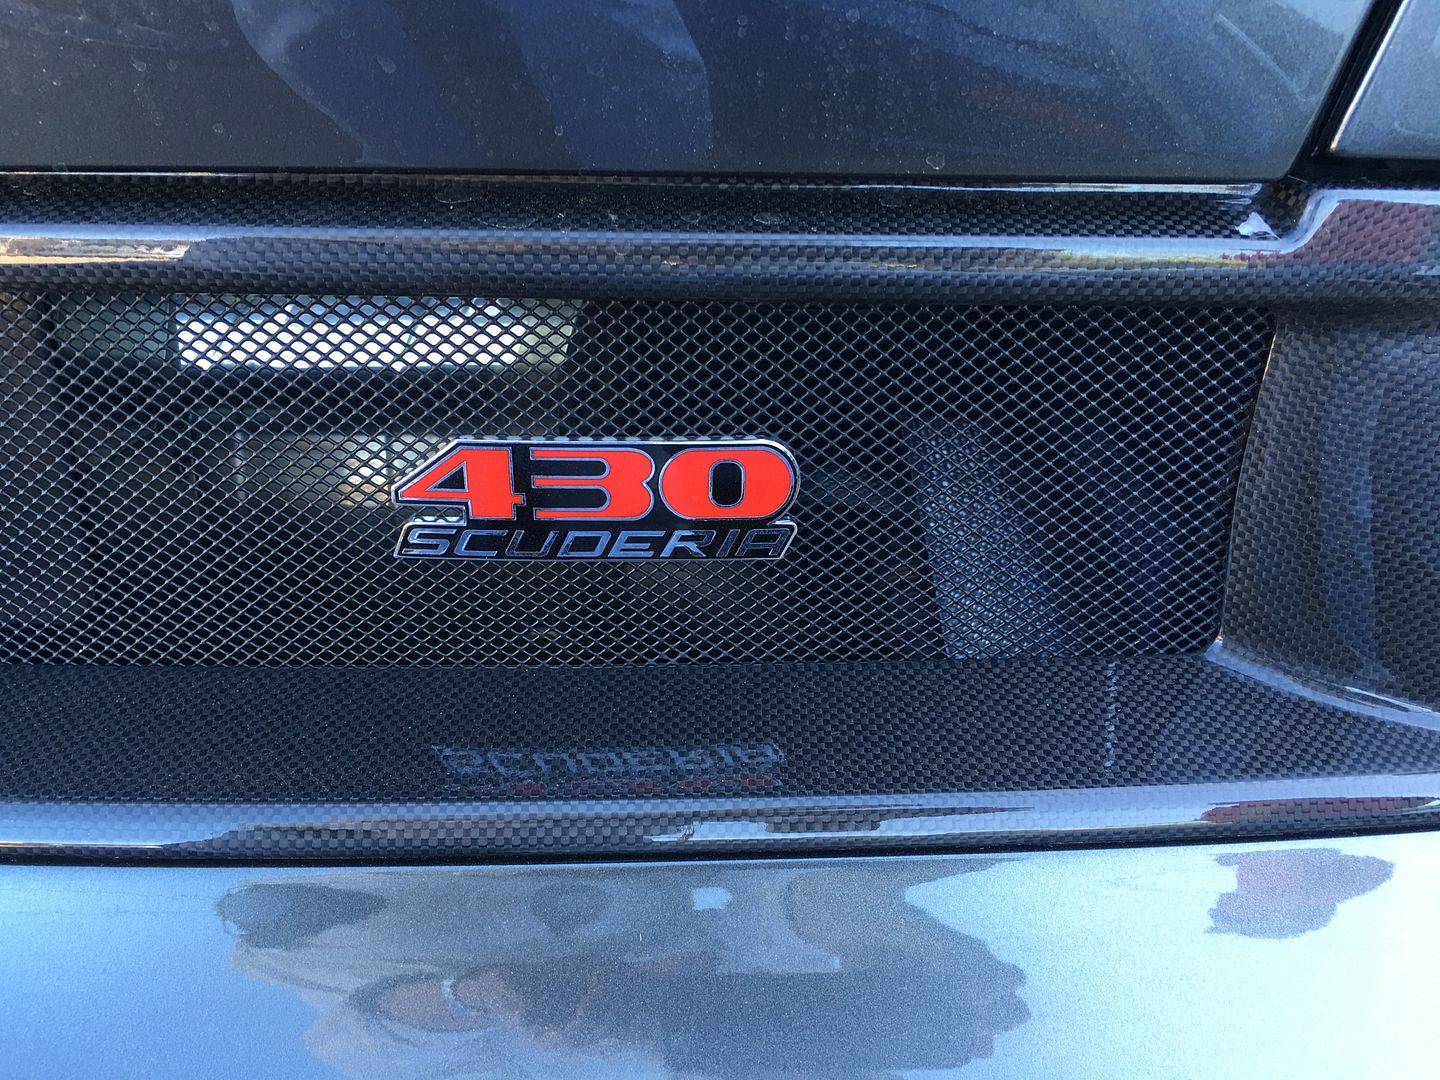
    I just remembered that I need to source some nice replacement panel mesh for the hood openings, radiator air intakes, rear scoops, rear hatch, exhaust openings, etc. I thought of keeping the Factory Five mesh, but I want a little more air-flow through the panels. Soooo... I could use some suggestions of where to go to get something that will work.

    I'm thinking that the mesh openings would be diamond shaped measuring 1/2" wide by 3/8" or so. I prefer Satin or Matte Black. It should be rigid, but also pliable enough that it can be shaped and fit into the openings. So welded heavy gauge wire my do the trick.

    The lower Grill on this Aston Martin looks very similar to what I'm thinking about.


    The search is on...

    Mike
    Last edited by The Stig; 03-30-2016 at 09:14 PM.
    The Stig

    Some say, that I only know two facts about ducks, (both being wrong); and that if I could be bothered, I could solve the "da Vinci Code" in 47 seconds...
    All I know is that I'm called "The Stig".
    GTM #0081

  32. #1432
    Senior Member
    Join Date
    Feb 2011
    Location
    Clarksville, MD
    Posts
    232
    Post Thanks / Like
    Mike,

    This is what I used from McMaster Carr:

    Easy-to-Form PVC-Coated Galvanized Steel Welded Wire Cloth

    It will still take a bit of navigating to find it once you're on the page. It has worked well for me.

    -Michael

  33. #1433
    Senior Member The Stig's Avatar
    Join Date
    Feb 2011
    Location
    Charlotte, NC
    Posts
    2,004
    Post Thanks / Like
    Thanks Michael,

    I was actually on their site last night. It's really tough to get a sense of hot this the mesh is in their pictures versus what you see on cars such as the Aston Martin in the pictures above.

    I'll probably give you a call later today. I think I have you number in my phone, (an probably in my PM list as well).

    Thanks,

    Mike
    The Stig

    Some say, that I only know two facts about ducks, (both being wrong); and that if I could be bothered, I could solve the "da Vinci Code" in 47 seconds...
    All I know is that I'm called "The Stig".
    GTM #0081

  34. #1434
    Senior Member
    Join Date
    Feb 2011
    Location
    Clarksville, MD
    Posts
    232
    Post Thanks / Like
    Mike,

    I'm away from home until tomorrow night. I'll take some up-close photos of the mesh installed on my car and email them to you tomorrow evening.

    -Michael

  35. #1435
    Senior Member The Stig's Avatar
    Join Date
    Feb 2011
    Location
    Charlotte, NC
    Posts
    2,004
    Post Thanks / Like
    Thanks Michael!
    The Stig

    Some say, that I only know two facts about ducks, (both being wrong); and that if I could be bothered, I could solve the "da Vinci Code" in 47 seconds...
    All I know is that I'm called "The Stig".
    GTM #0081

  36. #1436
    Senior Member
    Join Date
    Feb 2011
    Location
    Clarksville, MD
    Posts
    232
    Post Thanks / Like
    Mike,

    Here are some close-up pics. I used a black silicone to adhere the mesh to the underside of the openings.

    -Michael

    image4.JPG image3 (1).JPG image2 (2).JPG image1 (5).JPG

  37. #1437
    Senior Member The Stig's Avatar
    Join Date
    Feb 2011
    Location
    Charlotte, NC
    Posts
    2,004
    Post Thanks / Like
    Quote Originally Posted by RumRunner View Post
    Mike,

    Here are some close-up pics. I used a black silicone to adhere the mesh to the underside of the openings.

    -Michael

    image4.JPG image3 (1).JPG image2 (2).JPG image1 (5).JPG
    Thanks Michael.

    That looks pretty close to what I was thinking. Is that 3/4 width with about 14 gauge thickness?

    That would let plenty of air flow through but also block the sight into the area a pretty good bit. (That's a good thing).

    Mike
    The Stig

    Some say, that I only know two facts about ducks, (both being wrong); and that if I could be bothered, I could solve the "da Vinci Code" in 47 seconds...
    All I know is that I'm called "The Stig".
    GTM #0081

  38. #1438
    Senior Member The Stig's Avatar
    Join Date
    Feb 2011
    Location
    Charlotte, NC
    Posts
    2,004
    Post Thanks / Like
    I drove up to the shop this afternoon and spent some time talking with Tony about some ideas that he has for finishing out the doors.

    I'm not going to go into a lot of detail about what he suggested other than that I thought it was pretty cool, and was 100% all in.

    I'll post pictures when the time is right, but on this one, I don't want to give away his "thunder". He's been working through this issue with not only getting the doors of the GTM to fit correctly, but also getting the windows to seal, and having everything line up and look great doing so. I think he had his Einstein moment this week when everything sort of came together in his head.

    I saw a lot of real excitement in his face as we talked through the details of "the plan". I have to say, as we went through steps, and talked about how one thing is built on the last or is dependent something else, and how each individual thing would be an important part of the overall design, I started getting pretty excited about it also! I'm getting a sense that When it all comes together, it's going to be amazing: At least it will to me.

    More than that, I felt as if he's actually been listening to me, and he's sticking to my vision of Pandora almost exactly. Well, maybe 99.97%... And I'm good with that.

    There is cool stuff coming later.

    Mike
    The Stig

    Some say, that I only know two facts about ducks, (both being wrong); and that if I could be bothered, I could solve the "da Vinci Code" in 47 seconds...
    All I know is that I'm called "The Stig".
    GTM #0081

  39. #1439
    Senior Member
    Join Date
    Feb 2011
    Location
    Clarksville, MD
    Posts
    232
    Post Thanks / Like
    Mike,

    It's the 1/2" square. I personally wouldn't go any bigger. Not certain of the wire gauge, but it is whatever the PVC coated version is from McMaster. Plenty stiff.

    -Michael

  40. #1440
    Senior Member The Stig's Avatar
    Join Date
    Feb 2011
    Location
    Charlotte, NC
    Posts
    2,004
    Post Thanks / Like
    Quote Originally Posted by RumRunner View Post
    Mike,

    It's the 1/2" square. I personally wouldn't go any bigger. Not certain of the wire gauge, but it is whatever the PVC coated version is from McMaster. Plenty stiff.

    -Michael
    I was sort of thinking of something like this as well. But not sure if it would be strong enough to keep from collapsing in the hood openings.

    I would also like to make a "press" of some sort that would allow me to form the edges of the mesh so they fit into the openings and rise about 1/4" or so (just below the surface for the panels), instead of being mounted flat across the bottom of each panel opening. If I used something like the mesh in the pictures below, I think it would be easy enough to make. I'm thinking of doing something with a very dense wood, that could be used once and then tossed once the grills are made. I could use a router to make the edges and round-overs. Applying gradual pressure in timed increments. It could work... !?!


    Mike
    Last edited by The Stig; 04-05-2016 at 03:54 PM.
    The Stig

    Some say, that I only know two facts about ducks, (both being wrong); and that if I could be bothered, I could solve the "da Vinci Code" in 47 seconds...
    All I know is that I'm called "The Stig".
    GTM #0081

Page 36 of 51 FirstFirst ... 26343536373846 ... LastLast

Tags for this Thread

Posting Permissions

  • You may not post new threads
  • You may not post replies
  • You may not post attachments
  • You may not edit your posts
  •  

Brown County Customs

Visit our community sponsor