-
options

Originally Posted by
Tim Whittaker

Hi
Dale,
My battery surface mounts below the upper deck in the trunk. It's sized for an Optima battery.
Tim
My point was for buyers of your kit to have that option if it created enough extra room, not sure how much is gained with the fixed pinion height. I don't recall pictures of your battery box, did you post them here?
They might not want to move the battery into their trunk but a new lower tray option might be nice.
Dale
Last edited by myjones; 03-25-2014 at 09:00 PM.
-
Hi Dale,
It's probably on the other sites build page. Good point on the location for others.
Thanks,
Tim
-
Fabricated a panel to go behind the firewall. I will sandwich insulation between this and the firewall panel. Gave a nice solid place to mount the AC unit as well.
-
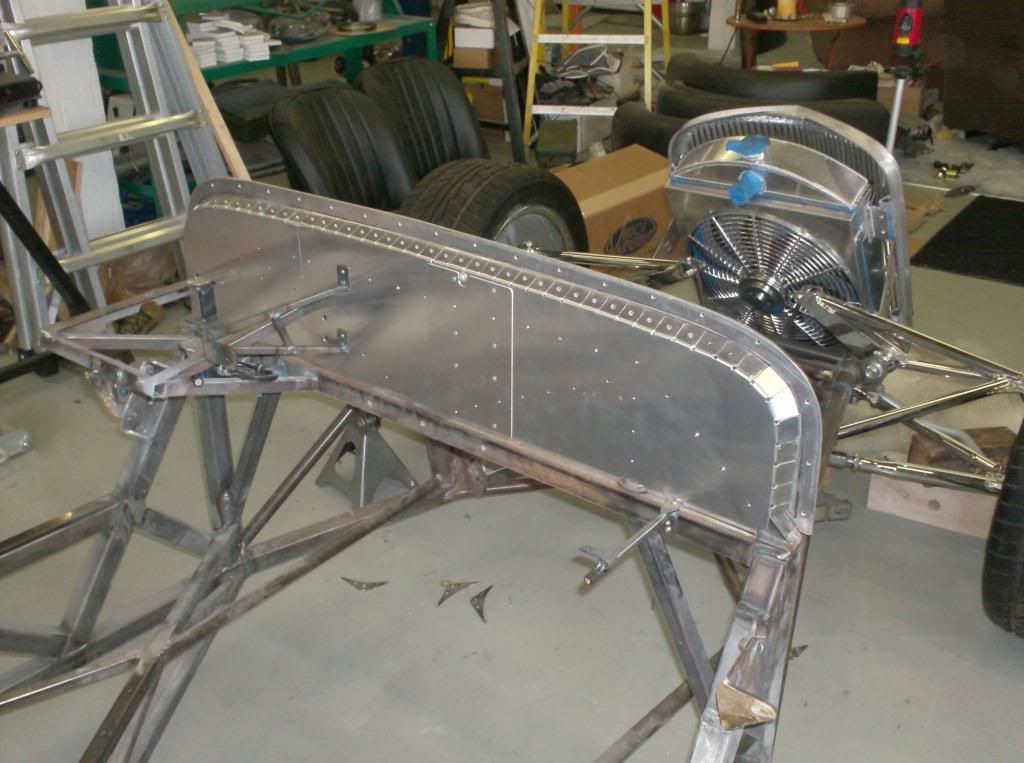
Front sway bar mock up.

-
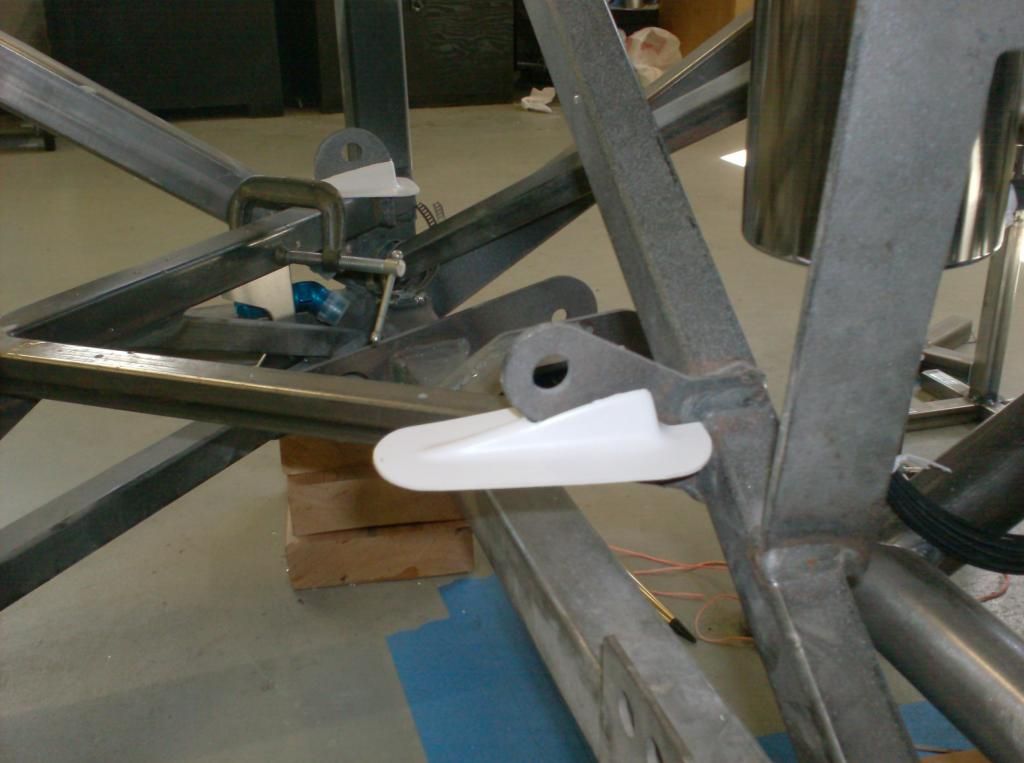
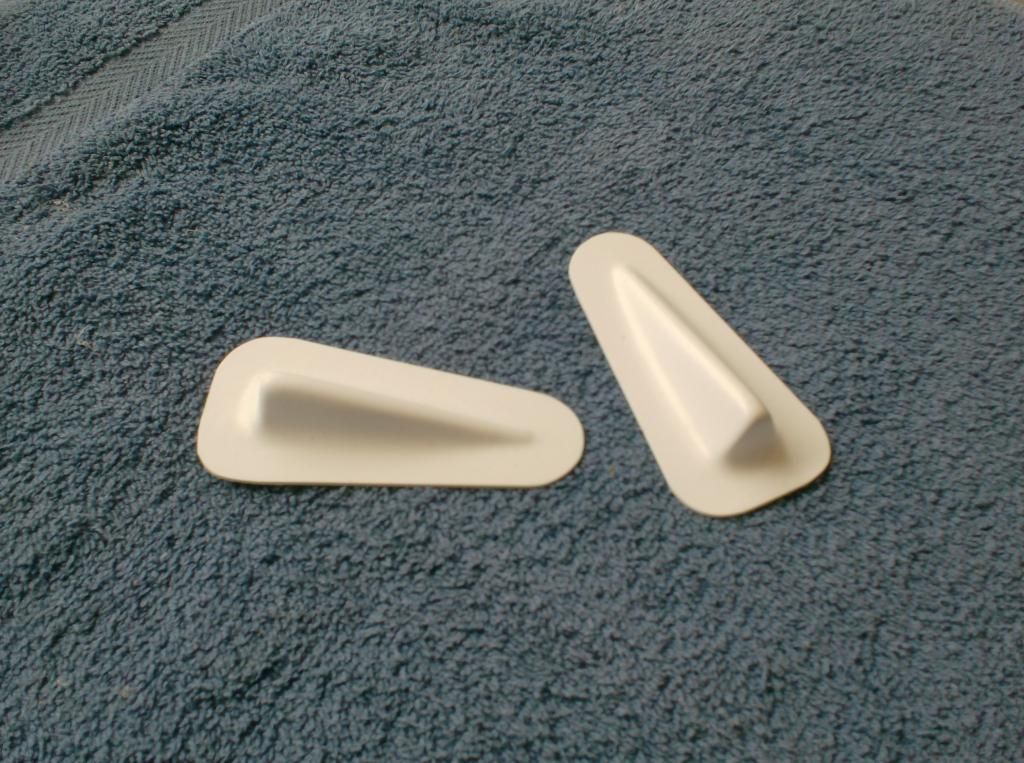
These little plastic fairings will cover the hole in the floor sheet metal where the seat belt tabs penetrate the floor.
-
-
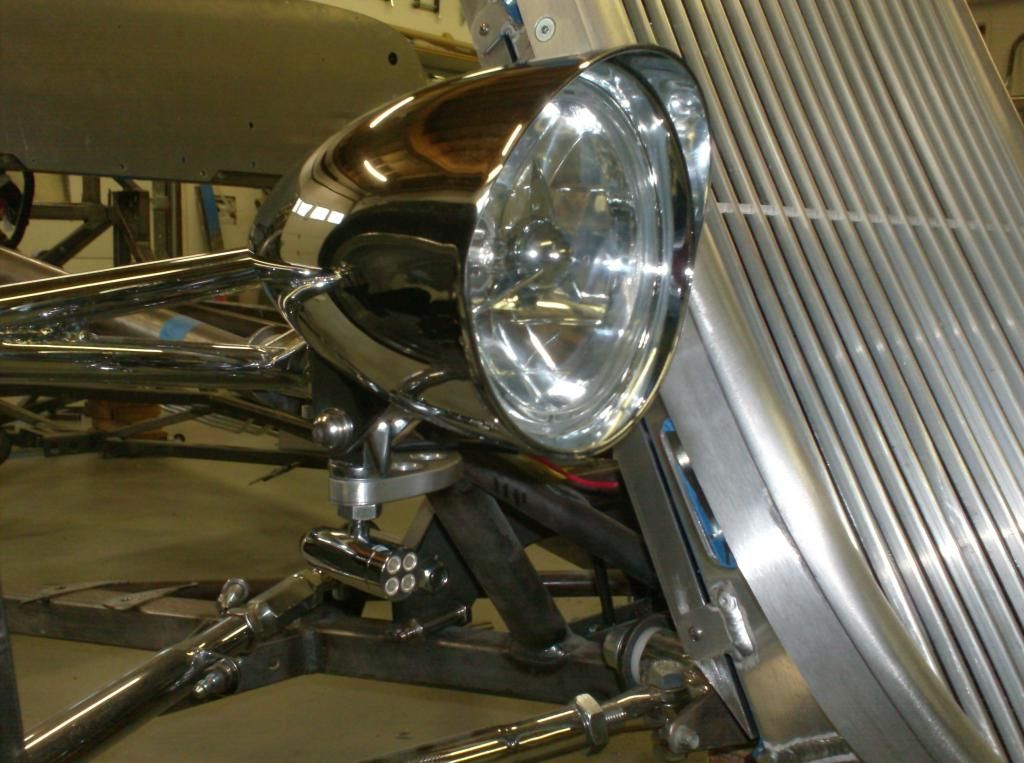
Finished the headlight mounts and turn signals. Found these LED signal lights that are simply the brightest I have seen for this service. I got a set of driving lights from them as well that are 3,000 lumen. These will melt deer along the highway at night.
-
-
Senior Member

Looks cool Tim, as always, nice craftsmanship.
Evan
-
-
w the full image.
Report this image
This image has been resized. Click this bar to view the full image.
Report this image
This image has been resized. Click this bar to view the full image.
Report this image
Well, they sent me the wrong MC. Everything else seems to be happy where I mounted it. Had to fabricate a few brackets, but it all fits nicely. Everything will mount to the pedal box chassis mount. I may have to bolt the pedal box in from the bottom side of the mount to lower the MC to a level below the brake reservoir outlet.
hard to tell from the one picture bet there's plenty of room behind the dash with the station wagon AC evaporator, manifold and wiper stuff.
Managed to get some plumbing stuff mocked up.
-
Report this image
This image has been resized. Click this bar to view the full image.
Report this image
This image has been resized. Click this bar to view the full image.
Report this image
Well, they sent me the wrong MC. Everything else seems to be happy where I mounted it. Had to fabricate a few brackets, but it all fits nicely. Everything will mount to the pedal box chassis mount. I may have to bolt the pedal box in from the bottom side of the mount to lower the MC to a level below the brake reservoir outlet.
hard to tell from the one picture bet there's plenty of room behind the dash with the station wagon AC evaporator, manifold and wiper stuff.
Managed to get some plumbing stuff mocked up.
-
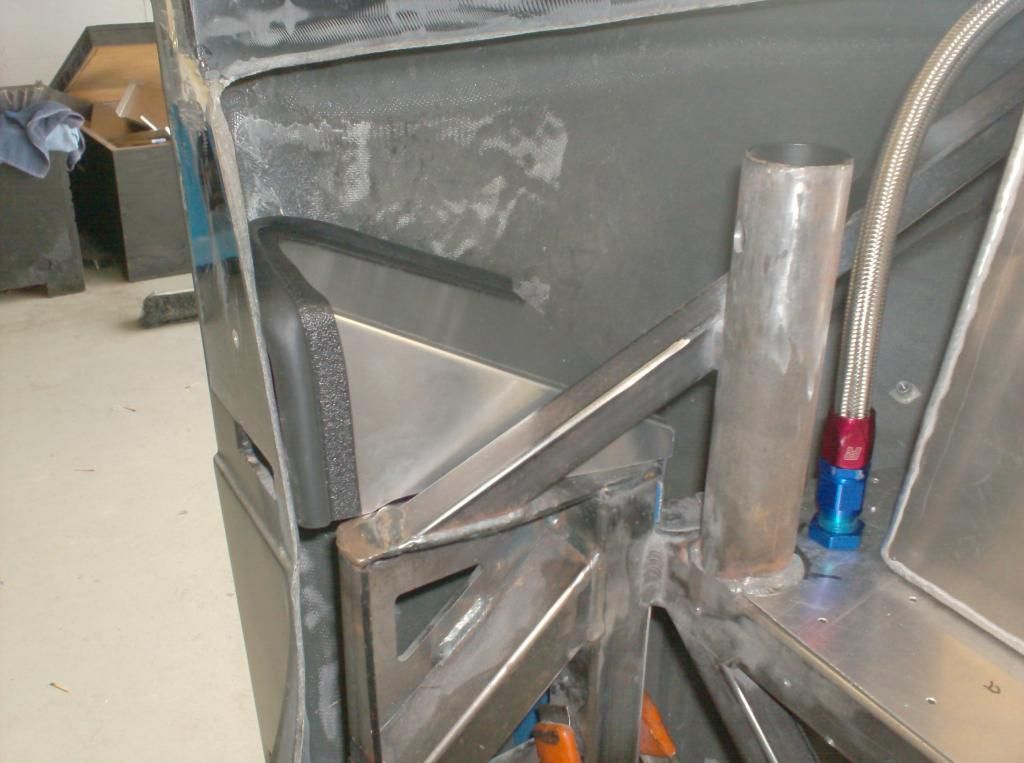
The sealing panel for the door hinge area compliments my wheel well sealing panel and effectively seals the hinge from the elements.
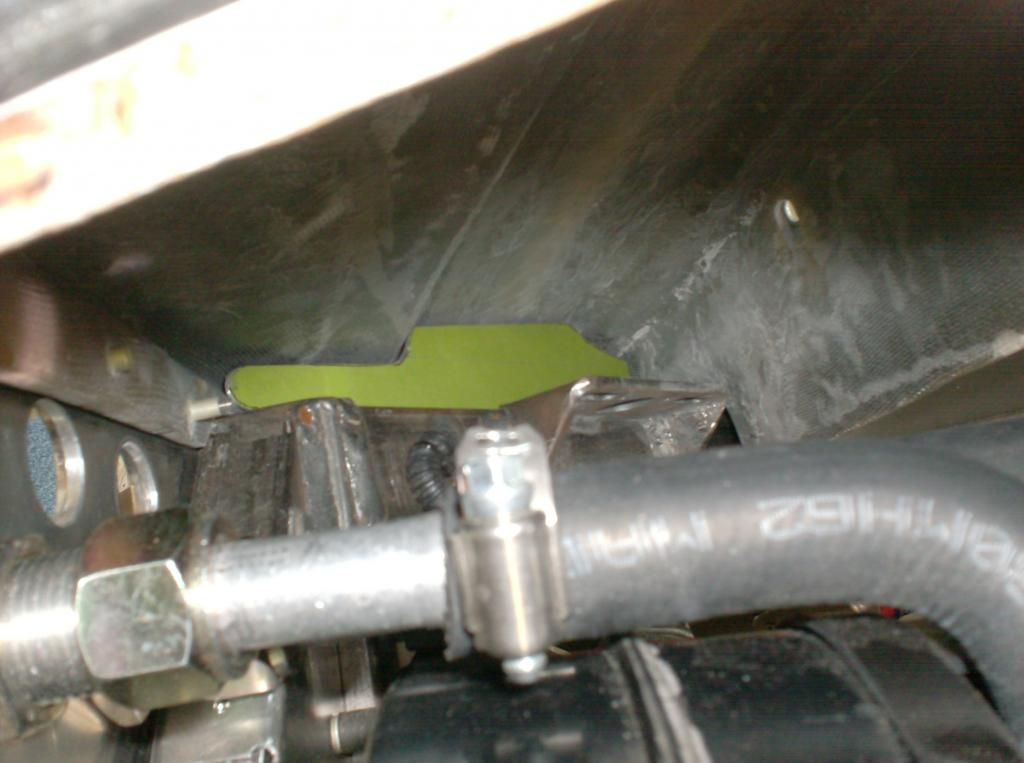
The piece covered in green masking tape now has a bulb seal on it as well and seals off the area that allows so much of the air to pass the firewall and into the interior of the car.
-
Just wanted to bring my build page to the top. They tend to get overlooked if they fall behind.
Recently started working on the 33 again and will be developing more parts soon. Starting with a new hood hinge design soon.
If anyone has build questions or looking for some parts, let me know.
Tim Whittaker
Kootenai Valley Customs
-
Post Thanks / Like - 0 Thanks, 1 Likes
 wrp
wrp liked this post
-
One of my favorite threads
-
Originally Posted by
Tim Whittaker
Just wanted to bring my build page to the top. They tend to get overlooked if they fall behind.
Recently started working on the 33 again and will be developing more parts soon. Starting with a new hood hinge design soon.
If anyone has build questions or looking for some parts, let me know.
Tim Whittaker
Kootenai Valley Customs
I cant wait to see your hood hinge design. I detest the FFR style.
Making a list to hopefully get everything i want from you at once.
'33 Hot Rod
Ordered: 3/25/17. Delivered: 5/6/17. 1st start: 8/24/18
MK4 Roadster
Ordered: 7/10/13. Delivered: 8/20/13. Completed: 10/26/15.
I did everything except spray it. She ain't perfect, but she's mine.
-
Tim, is that Hagan teardrop rear lights? Did you just not use the metal plate and shape the cutout yourself? Also, is that a hagan fuel door? What tube did you use to connect to the tank?
'33 Hot Rod
Ordered: 3/25/17. Delivered: 5/6/17. 1st start: 8/24/18
MK4 Roadster
Ordered: 7/10/13. Delivered: 8/20/13. Completed: 10/26/15.
I did everything except spray it. She ain't perfect, but she's mine.
-
What is everyone using for a photo host these days ? Photobucket seems to have frozen mine.
-
Tool Baron

Originally Posted by
Tim Whittaker
What is everyone using for a photo host these days ? Photobucket seems to have frozen mine.
Tim, just use the gallery built into the forum. It's a bit tricky until you get used to it but it works.
Frank
__________________________
Factory Five Racing MKIII Super Snake Replica. Cannonball Cobra Drop Trunk Box, Horn Button and other machined Do Dads.
i.e.427 Chromed Full Width Roll Bar with integrated LED Third Brake Light.
I will never forget My Buddy Paul.
-
02-26-2020, 12:42 PM
#100
Originally Posted by
Tim Whittaker
What is everyone using for a photo host these days ? Photobucket seems to have frozen mine.
I use imgur. Easy to upload from phone and copy the link for posting.
'33 Hot Rod
Ordered: 3/25/17. Delivered: 5/6/17. 1st start: 8/24/18
MK4 Roadster
Ordered: 7/10/13. Delivered: 8/20/13. Completed: 10/26/15.
I did everything except spray it. She ain't perfect, but she's mine.


 Thanks:
  Likes:


 Reply With Quote


