Visit our community sponsor

Thanks:
1

Likes:
4
-
Not trying to be a Richard, but if JG or you are anywhere near a REAL Trans Am series car then the people running them haven't a clue. Those should be 900 HP with huge tires and great suspensions. I was talking with a friend that used to run the Trans Am series and was saying how we were very happy to be running 148 down a particular straight. His reply was "Let me know when you reach 187". That's a HUGE difference, and challenge cars are no where near our times out here. Again, not trying to be a jerk, and comparing to TA cars is fun(obviously I am doing it also) but they should be 10 seconds faster than a challenge car, easy.
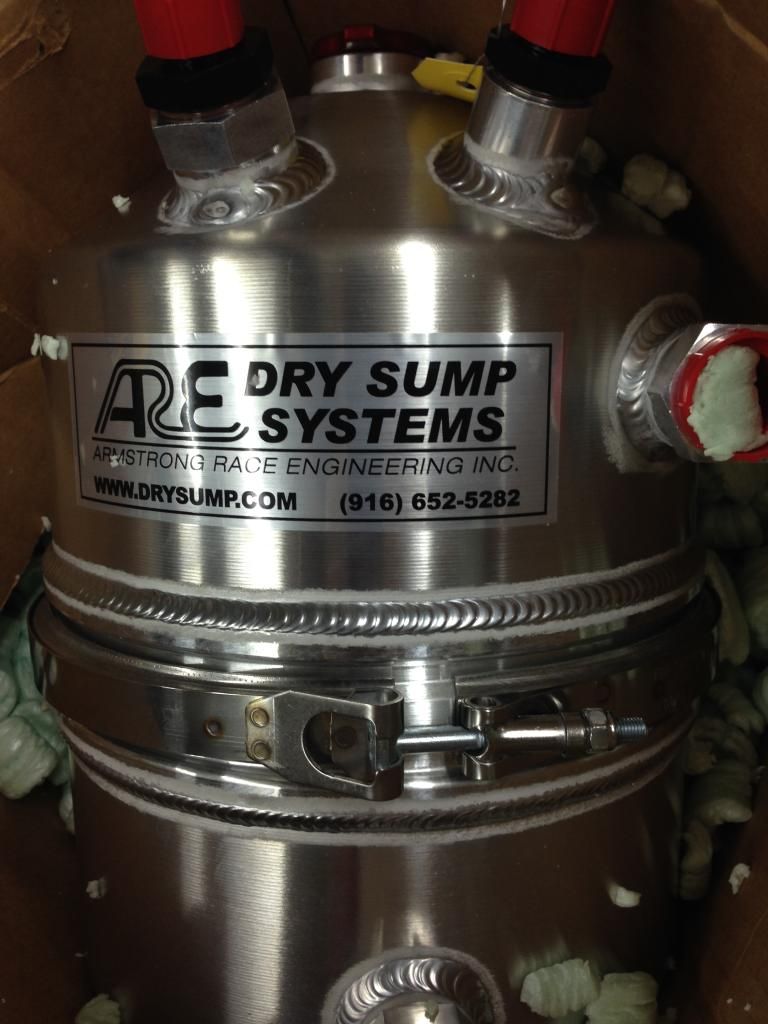
Now the ARE stuff. Really all I use of theirs is the pan. I run a 3 stage Auto Verde pump with a separator. The low profile pans from ARE require a bit of modification for a supply line attachment. I have suggested to Gary that he change/update his castings as it would be very nice to not have to weld on a brand new cast pan to make it work, but last time I checked, he had not done this. You can get one of those long block adapters, but the fitting ends up below the pan and the lowest thing on the engine/trans combo. Not a real good thing for the oil supply line to the engine. Be careful/aware of developing too much vacuum. It can starve a piston of oil. Also, the number of stages does more than create vacuum, it also gets the oil out of the engine better so it helps with crank windage. Segmented pans are another way to go if you want to go with a 4 stage scavange pump. This just makes the pan like four separate little pans and prevents sloshing.
The ASA stuff uses a single stage pump and vacuum is not created in any substantial amount.
I'll look for some pictures of my components.
IMG00060-20110411-1806.jpgAuto Verdi Pumps.jpg
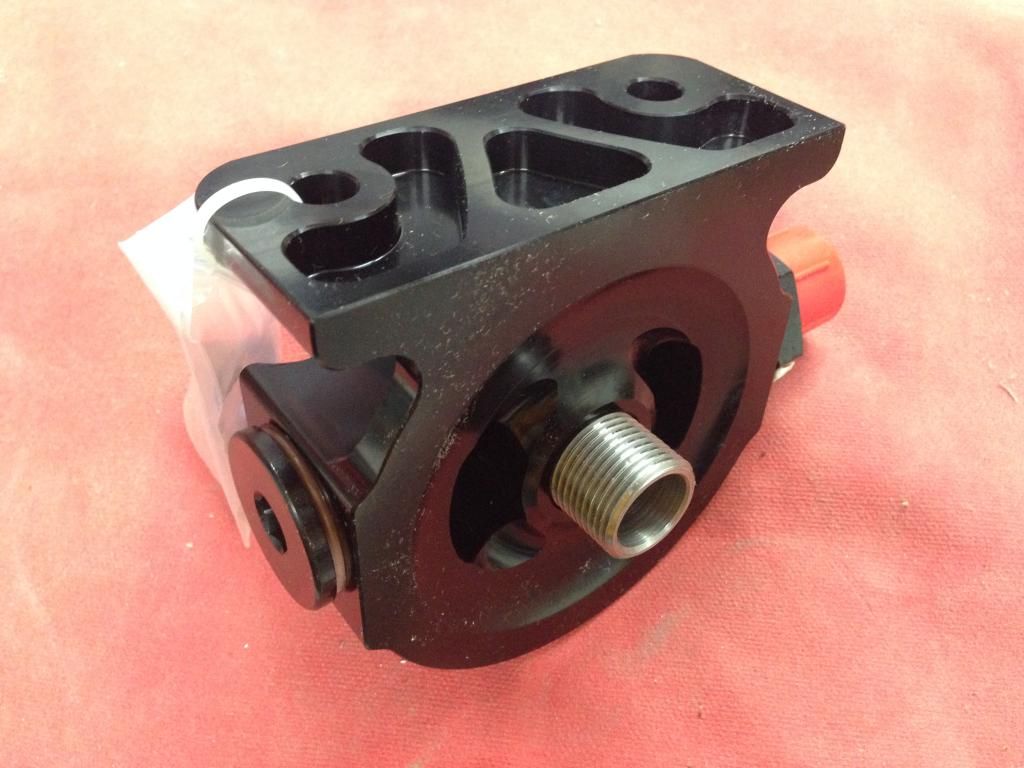
One of the things ARE has that is nice is a multi stage pump that bolts right to the A/C compressor block bosses. In my case I had to make a front engine plate to mount the pump, which was a hassle. ASA pump mounts this way also, and the Daley stuff doesn't need a mount as the pump is part of the pan.
Last edited by crash; 06-26-2014 at 12:05 PM.
-
Senior Member


Originally Posted by
crash

Not trying to be a Richard, but if JG or you are anywhere near a REAL Trans Am series car then the people running them haven't a clue. Those should be 900 HP with huge tires and great suspensions. I was talking with a friend that used to run the Trans Am series and was saying how we were very happy to be running 148 down a particular straight. His reply was "Let me know when you reach 187". That's a HUGE difference, and challenge cars are no where near our times out here. Again, not trying to be a jerk, and comparing to TA cars is fun(obviously I am doing it also) but they should be 10 seconds faster than a challenge car, easy.
Not trying to be a Richard either, but thanks for the props  Its 1.7mi with 10 turns and not a long straight thus suiting the Challenge Car on Hoosier A7 extremely well.. ohh and and here is the TransAm guy's incar: http://youtu.be/QC7d4ovEFgA
***SOLD!!! - NASA ST2 FFR#48 Gen3 Type65 Coupe R, Street legal.***
***SOLD!!! - NASA ST2 FFR#48 Challenge Car rolling chassis, Street legal.***
http://johngeorgeracing.com
-
Originally Posted by
johngeorge
Not trying to be a Richard either, but thanks for the props
Its 1.7mi with 10 turns and not a long straight thus suiting the Challenge Car on Hoosier A7 extremely well.. ohh and and here is the TransAm guy's incar:
http://youtu.be/QC7d4ovEFgA
Video is not loading. Other YT videos are fine. I'll try again later. Anyway, again really not anything against you in that I KNOW you are great at getting everything out of the challenge cars and have enjoyed running with you at the 25. Wish you would continue to make the trek out west but understand why you don't. 10 turns, 1.7 miles? Yeah that sounds pretty tight and with your abilities against a "normal" guy in a Trans Am car I can see how you all may be close. That said, under NORMAL racing conditions with the best TA cars/drivers and you or us, I would still favor the TA car heavily. They are intense...and fast. I was a crew chief for a TA team in the 90s and a fabricator for much longer. Best finish was a podium at Limerock. The TA guys(and gals) are a fast bunch.
-
I believe ARE makes a 2 stage setup that has 2 scavenge stages and uses the stock crank driven pressure pump. I think it can be driven by a serp belt with stock AC pulleys. It may even clear the motor mount but I don't know for sure. This is a major upgrade from the circle track pan ASA setup we're using.
One thing we found with our ASA single stage setup is that when the scavenge only pump failed the crank driven pressure pump continued until the tank was emptied. By this time the engine was so full of oil the performance and sound changed alerting the driver to look at the guage (we since have a warning light). Even with no oil pressure, splash lubrication with nearly 2 gallons of oil in the engine avoided major damage (we changed rod bearings but they weren't seriously damaged). This makes it nearly fail safe. A bit down the road from here Team QRP had an ARE 3 stage pulley failure (get the collet mounted one for 3 stage) and even with a bright dash warning by the time Chris shut it down it was seizing and caused major damage to the crank and rods.
If the 2 stage setup is scavenge only I would expect it could be a safer choice and may include an improved pressure pump.
Jim H, PDG
-
Member

Originally Posted by
tachman
I believe ARE makes a 2 stage setup that has 2 scavenge stages and uses the stock crank driven pressure pump. I think it can be driven by a serp belt with stock AC pulleys. It may even clear the motor mount but I don't know for sure. This is a major upgrade from the circle track pan ASA setup we're using.
One thing we found with our ASA single stage setup is that when the scavenge only pump failed the crank driven pressure pump continued until the tank was emptied. By this time the engine was so full of oil the performance and sound changed alerting the driver to look at the guage (we since have a warning light). Even with no oil pressure, splash lubrication with nearly 2 gallons of oil in the engine avoided major damage (we changed rod bearings but they weren't seriously damaged). This makes it nearly fail safe. A bit down the road from here Team QRP had an ARE 3 stage pulley failure (get the collet mounted one for 3 stage) and even with a bright dash warning by the time Chris shut it down it was seizing and caused major damage to the crank and rods.
If the 2 stage setup is scavenge only I would expect it could be a safer choice and may include an improved pressure pump.
Jim H, PDG
Thanks Jim. Your experience is one of my concerns. With a belt driven setup oil pressure and engine rpm are not directly related. If you throw a belt or the pump stops for any reason you have seconds to react before the motor starts to destroy itself.
I need to see if I can program my ECU to shut down throttle to idle if oil pressure drops below a determined value.
I can't believe I need to pull the motor and transaxle again!
Thanks for sharing your experience.
John
XTF #2
build start date June 19 2023
GTM # 344
Build Start December 2010
First track day April 2013
-
Member
Dry sump install
The first step to install the dry sump is to remove the A/C compressor. I was really dreading the dry sump install because I figured it was going to require pulling the motor to get everything apart. I was pleasantly surprised. It's actually not that bad to pull the compressor.
First remove the aluminum sheet that covers the tunnel and accessories under the motor. It's was good to use silicone (instead of something more adhesive) as a vibration damper between the panel and frame because the panel comes right off. Of course there are 50 rivets to drill.
Next remove the header. In order to remove the bolt the attaches the A/C lines to the compressor the headers need to be moved.
Next it's just a matter of unbolting the A/c bracket from the block. The two bottom bracket bolts take a while unless you have a high quality 15mm ratcheting box end wrench. I don't. With a normal open end wrench you need to turn bolt flip the wrench turn the bolt a few hundred times backing out the bolt a degree at a time.
There is not a lot of room in this area, but it was reasonably easy to drop the compressor and bracket out from under the car.
Next was the harmonic balancer. I did not want to remove all of the plumbing in front of the motor. Mostly to save time and avoid the cooling system refilling procedure. I just moved the cooling tubes out of the way and installed the puller. A few min later the balancer was out. Again the balancer drops out from under the car without issue.
The dry sump arrives this week. I went with the 4 stage ARE. Lots of plumbing ahead of me.
John
XTF #2
build start date June 19 2023
GTM # 344
Build Start December 2010
First track day April 2013
-
Member
-
Member
Originally Posted by
crash
I have suggested to Gary that he change/update his castings as it would be very nice to not have to weld on a brand new cast pan to make it work, but last time I checked, he had not done this. You can get one of those long block adapters, but the fitting ends up below the pan and the lowest thing on the engine/trans combo.
One of the things ARE has that is nice is a multi stage pump that bolts right to the A/C compressor block bosses. In my case I had to make a front engine plate to mount the pump, which was a hassle. ASA pump mounts this way also, and the Daley stuff doesn't need a mount as the pump is part of the pan.
Thanks for that. For once I just want to bolt something on without fab / design work. I don't mind welding, but I would think that it would be possible to warp the pan.
In your setup do you eliminate the stock oil pump?
XTF #2
build start date June 19 2023
GTM # 344
Build Start December 2010
First track day April 2013
-
Originally Posted by
kabacj
Thanks for that. For once I just want to bolt something on without fab / design work. I don't mind welding, but I would think that it would be possible to warp the pan.
In your setup do you eliminate the stock oil pump?
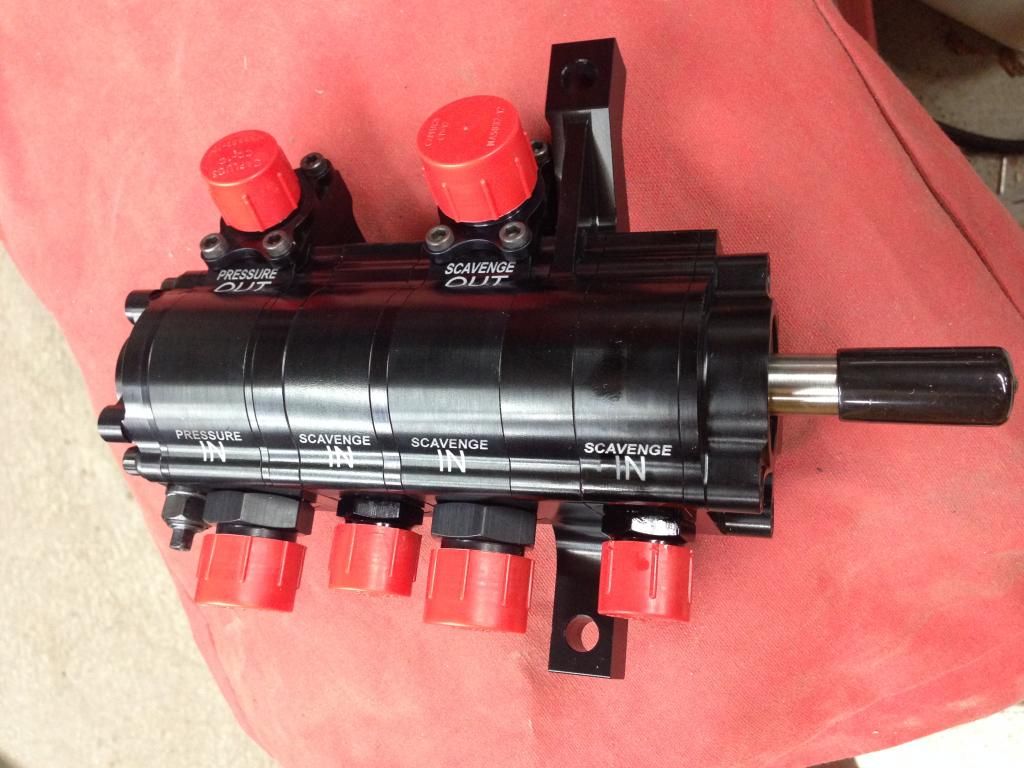
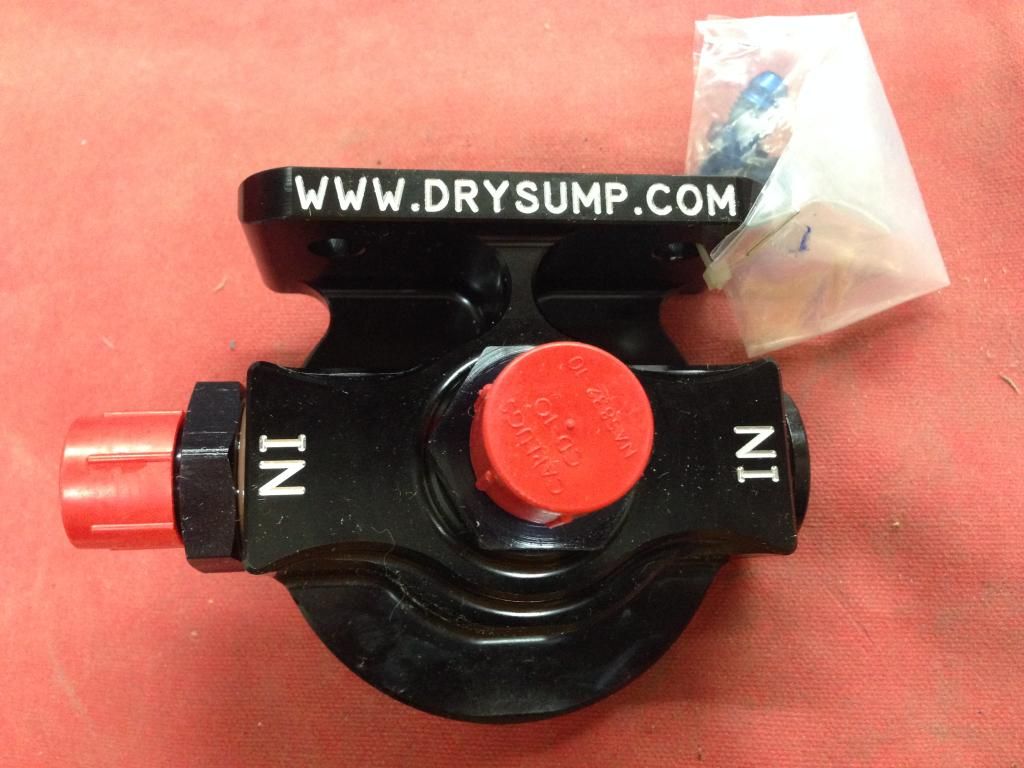
You can see in the picture...the red caps are scavenge and the yellow cap is the pressure stage. Yes I eliminate the crank driven internal pressure pump. One of the problems with cog belts is tearing the teeth off when decelerating. ATI has a new one way clutched hub assembly for just this issue on super charged engines. I may try retrofitting that into my setup. Definitely the internal pump is a very good and easier solution.
Tags for this Thread
 Posting Permissions
- You may not post new threads
- You may not post replies
- You may not post attachments
- You may not edit your posts
-
Forum Rules

Visit our community sponsor


 Reply With Quote