BluePrint Engines

Visit our community sponsor

Thanks Thanks:  3
Likes Likes:  3
Page 3 of 4 FirstFirst 1234 LastLast
Results 81 to 120 of 141

Thread: Simplifying the EJ

  1. #81
    Senior Member
    Join Date
    Feb 2013
    Location
    Bowling Green OHIO
    Posts
    178
    Post Thanks / Like
    Blog Entries
    2
    TGVs! the tumbler valves on the car are bulky restrictive and heavy. People argue that they help with cold starts but really their main purpose is cold start emissions. Removing them saves a ton of weight, and the accompanying motors/wiring/vent tube really cleans up the top of the motor. Its also good for about 8-15hp depending on who you talk to. This is an easy and pretty much free mod anyone can do at home with a drill and a tap, a few bolts and some grinding equipment. It is well documented.
    initially i wasnt going to do this till later but my 06 wrx has the air pump and what a monster it is, not even sure where i would put it, so while engine is out and everything is easy to get to i mis well reomove it and purchase the delete plates. the only issue is my donar is strickly stock and i want to be able to turn the key and have it start when i get there someday. does anyone know if there would be an issue with this. i dont have an ability to tune out any codes (at least not yet) i am only going to run this car in warm weather so i dont car about cold starts. i guess i can always tune that out later but for know i want to just remove and still be able to start it when that day comes. has anyone done this?

    also, if anyone knows a good website for the blockoff plates please post.

    also, i read about grinding off bollts in order to remove, i dont quite understand which ones they are talking about.
    any help is appreciated.
    thanks,
    doug

  2. #82
    Tazio Nuvolari wannabe Scargo's Avatar
    Join Date
    Nov 2013
    Location
    south-central CT
    Posts
    1,611
    Post Thanks / Like
    This is a pretty good guide to modifying TGVs, though there may be ten more... If you don't grind off the back of the screws they will likely break off when you attempt to unscrew them, or you can just start by drilling out the screw.
    I used a hacksaw to rough cut the partition out of the throat. In addition, I used JB Weld to fill the holes after I cleaned the parts and roughed up the holes with a Dremel burr. I also took my TGVs to the bandsaw and cleaned up the sides.

    You do not need block-off plates if you are comfortable tapping a hole or can get someone to do it for you. A slightly larger drill than the current hole size is all that is needed to prep those holes in the heads for a 1/4" pipe tap.
    If you have concerns about drilling and tapping an assembled engine, or that resultant chips might hurt the turbine, let me explain my method. You will need tweezers, hemostats or the like. Now stuff a bit of rag down the hole deep enough that the drill bit will not catch it (about an inch). Now open up the hole with a 7/16" drill bit. Tap deep enough that the plug will be flush. I use female, hex drive plugs. I suggest a good quality tap. So many from chain hardware stores are crap. If you do not have a tap wrench you can usually make do with a socket. I like to use a drill so there is less wobble involved in the tapping process. Since this is a tapered tapped hole this is not a huge concern. Use a light grease and you will remove most of the chips when you back out the tap.
    Now, clean out the hole with Q-tips, brush or low pressure air and pull out the rag.
    Viola! No need for a plate, gasket and bolts.

  3. #83
    Senior Member
    Join Date
    Feb 2013
    Location
    Bowling Green OHIO
    Posts
    178
    Post Thanks / Like
    Blog Entries
    2
    thanks for the info and link scargo.

    some things look different in this one, maybe its another year model or some other thing or who knows what i think are tgv's might be something else..
    i am trying to get rid of this air pump:

    image.jpg

    i figured these are the tgv's the other is right behind this one and neither one is bolted directly to the motor:
    image.jpg


    the block-off plates i figured would cover the holes where this pipe would be removed:
    image.jpg

    it appears that everything could be removed easily then i would just need to cap the holes, is this the tgv system?

  4. #84
    Senior Member waruaki's Avatar
    Join Date
    Aug 2013
    Location
    Salem, Oregon
    Posts
    168
    Post Thanks / Like
    Nope. Read the link below and look at the picture provided. Its a TGV assembly from a 2004-06. You can look at my build for more pictures.

    If you decide to do a delete on your TGV assembly the link to the guide that Scargo provided is a good one.

    http://forums.nasioc.com/forums/show....php?t=1663677

    2004-06 TGV.jpg
    Last edited by waruaki; 06-08-2014 at 10:58 AM.

  5. #85
    Tazio Nuvolari wannabe Scargo's Avatar
    Join Date
    Nov 2013
    Location
    south-central CT
    Posts
    1,611
    Post Thanks / Like
    Quote Originally Posted by dougkirkbride View Post
    thanks for the info and link scargo.

    some things look different in this one, maybe its another year model or some other thing or who knows what i think are tgv's might be something else..
    i am trying to get rid of this air pump:...
    it appears that everything could be removed easily then i would just need to cap the holes, is this the tgv system?
    That is the air pump system. It is independent of the TGVs. TGV is as Waruaki has showed you. Note that if you are retaining the stock ECU, and not doing any retuning, that you need to retain the air pump sensor on the driver's side connection. You can pare it down and lose some of the bulk, but you need that sensor in the loop to not cause a fault/code.

  6. #86
    Senior Member
    Join Date
    Feb 2013
    Location
    Bowling Green OHIO
    Posts
    178
    Post Thanks / Like
    Blog Entries
    2
    ok wow..... i am out in left field. thanks for shedding some light.
    i guess i should have started with air pump delete. any issues with removing the pump and 2 valves and installing the air pump delete block off valves such as these:

    http://www.ebay.com/itm/like/171342911257?lpid=82

    scargo-- any way you can provide a little more definition on the drivers side sensor?

    thanks.

  7. #87
    Tazio Nuvolari wannabe Scargo's Avatar
    Join Date
    Nov 2013
    Location
    south-central CT
    Posts
    1,611
    Post Thanks / Like
    I know I'm pushy, but those plates are really too pretty for something that is virtually never seen. $55 for them VS $7 for SS plugs?
    As to the sensor it is a barometric pressure sensor. It is covered in-depth if you Google it.
    You can lose the sensor if you put about a 194K resistor in it's place, between red with yellow stripe wire and the ground wire (black with blue stripe or white). I did this and pared it down and taped it off on the harness.

  8. #88
    Harley818's Avatar
    Join Date
    Jan 2014
    Location
    Vancouver BC
    Posts
    788
    Post Thanks / Like
    just re-read this thread again to make sure i got all the mods sorted out.
    Its a great thread for us non-subie guys.
    Looks like I'm good to go but this was wayyyy down in the threads. Thought I would bump it up a bit.
    This one should be a sticky.

  9. #89
    Moonlight Performance
    Hindsight's Avatar
    Join Date
    May 2014
    Location
    Atlanta
    Posts
    3,402
    Post Thanks / Like
    Regarding air pump delete, and any other items that may throw a code: My understanding from someone very reputable is that any fault code can be tuned out of the ECU via Access Port or the open-source equivalent. This will prevent a CEL.

  10. #90
    Member CanadianYank's Avatar
    Join Date
    Sep 2014
    Location
    Carstairs AB
    Posts
    61
    Post Thanks / Like
    Blog Entries
    2
    I booked marked this thread thanks for the information. I see the thread is over a year old I'm glad it made its way back up to the top...

    Frank

  11. #91
    nkw8181's Avatar
    Join Date
    Sep 2013
    Location
    Dallas, TX
    Posts
    762
    Post Thanks / Like
    Quote Originally Posted by CanadianYank View Post
    I booked marked this thread thanks for the information. I see the thread is over a year old I'm glad it made its way back up to the top...

    Frank
    Me Too Me too!

    Just got the air pump stuff off. Not fun since I didn't take much of anything else off but got it!!
    Nolan
    65 coupe Gen 3 "Phoenix" build
    http://thefactoryfiveforum.com/showt...032#post297032

    818 s (with r windscreen ) 350 rwhp. Registered and street legal (SOLD)

  12. #92
    fasterer and furiouser longislandwrx's Avatar
    Join Date
    Aug 2012
    Location
    Long Island
    Posts
    2,540
    Post Thanks / Like
    Blog Entries
    6
    This was posted elsewhere iirc, If you don't need the bling and don't want to spent $70

    Factory Tribeca block off plates will work, you'll need two and will need to enlarge one of the holes.

    Part# 14754AA050

    Retail $3.70


    see thread:
    http://forums.nasioc.com/forums/show....php?t=2371781

    or something in the middle:

    http://www.kstech.biz/servlet/the-21...e-block/Detail
    A well stocked beverage fridge is the key to any successful project.

  13. #93
    Senior Member Rasmus's Avatar
    Join Date
    Mar 2012
    Location
    Las Vegas, USA
    Posts
    983
    Post Thanks / Like
    Quote Originally Posted by longislandwrx View Post
    This was posted elsewhere iirc, If you don't need the bling and don't want to spent $70

    Factory Tribeca block off plates will work, you'll need two and will need to enlarge one of the holes.

    Part# 14754AA050

    Retail $3.70
    Brilliant! Need me two. Thanks LongIsland.
    Fast Cars, Fast Women, Fast Haircuts!

  14. #94
    FlatironsTuning's Avatar
    Join Date
    Mar 2014
    Location
    Boulder Colorado
    Posts
    39
    Post Thanks / Like
    We usually keep one or two of those plates on hand if anyone needs them. Here they are on our site:

    http://www.flatironstuning.com/p-245...lve-plate.aspx
    www.flatironstuning.com

    303.402.5142

    Your source for any Subaru parts that you may need to build your 818 from engine parts to gear sets, etc. We have what you need.

  15. #95
    Moonlight Performance
    Hindsight's Avatar
    Join Date
    May 2014
    Location
    Atlanta
    Posts
    3,402
    Post Thanks / Like
    I lucked out and my donor came with the Cosworth blockoff plates. I hear that they are good for an extra 25WHP

  16. #96
    Senior Member Rasmus's Avatar
    Join Date
    Mar 2012
    Location
    Las Vegas, USA
    Posts
    983
    Post Thanks / Like
    Only if you apply the sticker on your doors.
    Fast Cars, Fast Women, Fast Haircuts!

  17. #97
    Senior Member Goldwing's Avatar
    Join Date
    Nov 2012
    Location
    Medina, OH
    Posts
    744
    Post Thanks / Like
    Nice find! I'll add that to my winter work shopping list!
    Rich

    818S in progress. 2007 WRX sedan donor.
    Powered up: 7-8-14, First Start: 7-20-14, Go kart: 8-19-14

  18. #98
    Member
    Join Date
    Jul 2011
    Posts
    66
    Post Thanks / Like
    Quote Originally Posted by Hindsight View Post
    Regarding air pump delete, and any other items that may throw a code: My understanding from someone very reputable is that any fault code can be tuned out of the ECU via Access Port or the open-source equivalent. This will prevent a CEL.

    IMPORTANT NOTE!!!!!!!!!!!!!!!!!!!!!!

    If you do an air pump delete you MUST retain the sensor with the larger connector. It is not enough to just turn off codes. It contains a barometric pressure sensor that must be used for the ECU to properly adjust boost. Leaving it off is a common mistake with amateur shops (we have done 4 tunes in the last two weeks where other shops did not reuse this part and the part costs ~$250). You can cut the black sensor off the top of the metal cylinder and hide it out of the way though.

    Tony

  19. #99
    Mechie3's Avatar
    Join Date
    May 2012
    Location
    Indianapolis
    Posts
    5,174
    Post Thanks / Like
    ^^ That's only for 07, correct, not 06?
    Zero Decibel Motorsports
    Check out my new website!
    www.zerodecibelmotorsports.com
    www.facebook.com/zero.decibel.motorsports

  20. #100
    Member
    Join Date
    Jul 2011
    Posts
    66
    Post Thanks / Like
    07+ engines.

  21. #101
    Tazio Nuvolari wannabe Scargo's Avatar
    Join Date
    Nov 2013
    Location
    south-central CT
    Posts
    1,611
    Post Thanks / Like
    This is it, stripped down. Heavy little sucker!
    barometer sensor.jpg
    Can I remove the heavy metal portion, too? I saw where one was bandsawed through the metal just in front of the plastic.
    Another person dismembering one. The post after suggests that you can just cut the plastic where it joins the metal.
    Last edited by Scargo; 10-14-2014 at 11:02 AM.

  22. #102
    Member
    Join Date
    Jul 2011
    Posts
    66
    Post Thanks / Like
    Yep. , All you need is the plastic bit at the top.

    Tony

  23. #103
    Senior Member Hobby Racer's Avatar
    Join Date
    Feb 2011
    Location
    Syracuse, NY
    Posts
    1,291
    Post Thanks / Like
    Quote Originally Posted by Mechie3 View Post
    ^^ That's only for 07, correct, not 06?
    This appears to be on 06 models as well. My 06 WRX donor has the sensor in the LH (driver side) valve solenoid. The give away is the larger 6 pin connector on the solenoid valve. The RH side has only two pins.

  24. #104
    Senior Member C.Plavan's Avatar
    Join Date
    Mar 2011
    Location
    Clovis, Ca
    Posts
    2,225
    Post Thanks / Like
    I don't remember seeing it on my 06 WRX
    http://i.imgur.com/pZQD5Et.jpg
    Thanks- Chad
    818R-SOLD!!!- Go Karted 7/20/14/ Officially raced NASA ST2- 2/28/15
    2016 Elan NP01 Prototype Racecar Chassis #20
    1969 Porsche 911ST Vintage Race Car
    1972 Porsche 911T (#'s matching undergoing nut & bolt resto in my garage)

  25. #105
    Senior Member matteo92065's Avatar
    Join Date
    Feb 2014
    Location
    Ramona, CA
    Posts
    417
    Post Thanks / Like
    My 06 WRX motor has the sensor.

  26. #106
    Mechie3's Avatar
    Join Date
    May 2012
    Location
    Indianapolis
    Posts
    5,174
    Post Thanks / Like
    It has it, I don't believe that it uses it. I deleted the entire thing on my 06 in 2007 and never had issues.
    Zero Decibel Motorsports
    Check out my new website!
    www.zerodecibelmotorsports.com
    www.facebook.com/zero.decibel.motorsports

  27. #107
    Senior Member Rasmus's Avatar
    Join Date
    Mar 2012
    Location
    Las Vegas, USA
    Posts
    983
    Post Thanks / Like
    Quote Originally Posted by Turn In Concepts View Post
    Yep. , All you need is the plastic bit at the top.

    Looks like this once you cut it off.
    Fast Cars, Fast Women, Fast Haircuts!

  28. #108
    Tazio Nuvolari wannabe Scargo's Avatar
    Join Date
    Nov 2013
    Location
    south-central CT
    Posts
    1,611
    Post Thanks / Like
    I'm still nervous about this surgery. Once you cut the wanger off it can't be put back on...
    Looks like you cut to within a quarter inch of the plastic and then slit the metal. I am reluctant to cut into the plastic because I thought I saw a diaphragm in one picture. It looked very close to the edge of the plastic.
    Does the ECU need to read atmospheric pressure? Does it help if it still functions? And what are all the GD wires for in the metal chunk?

    Follow up note: I pared mine down to just plastic as others have done. I discussed this with my tuner regarding my STi and it is needed for a reference for the ECU as to what the barometric pressure is. Perhaps for older ECU's this is not the case, but for '07+ STi's, it is needed. I think that it might refine idle or low-speed tuning adjustments, but my tuner wanted it on the car even though I was tuned with Speed Density and to 381 WHP.
    Last edited by Scargo; 12-04-2018 at 09:15 AM. Reason: Added a follow-up note.

  29. #109
    Senior Member Rasmus's Avatar
    Join Date
    Mar 2012
    Location
    Las Vegas, USA
    Posts
    983
    Post Thanks / Like

    Here's what it looked like before.


    Closer


    After I cut it off.


    Different Angle. I just kept my coping saw as close to the aluminum lip as possible and it came off clean. Sanded the rough plastic off and it looks fine. Not sure if it works though 
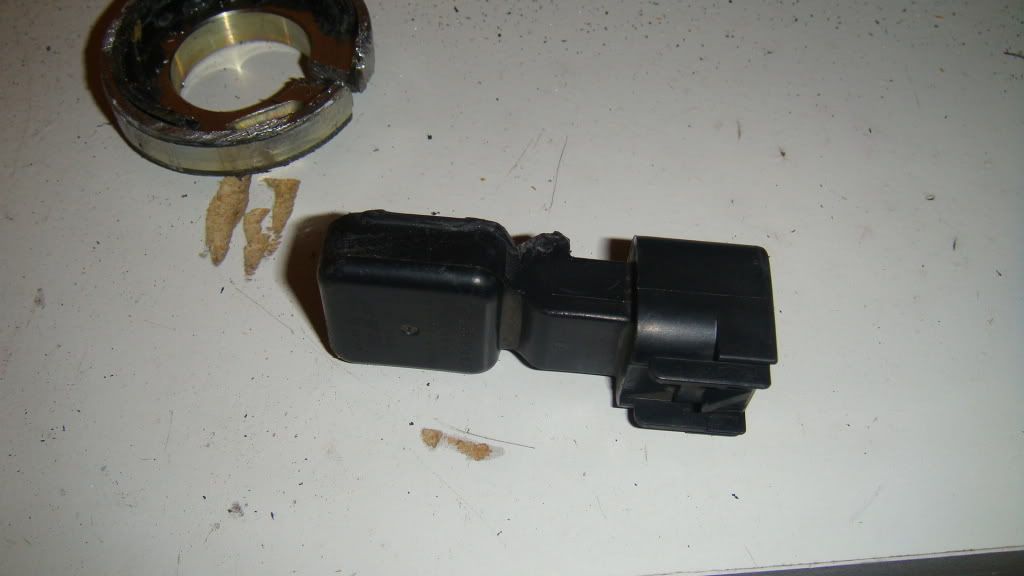
. Weighs 22 grams, btw.

    Apparently, because I'm running a 2006 WRX ECU, I don't need this atmospheric pressure sensor. The 2006 ECU gets the data from something else. I don't know what that is. To be sure, I'm keeping all the parts and will be sure to log atmospheric pressure data when tuning driving up 1000 ft.
    Last edited by Rasmus; 10-15-2014 at 07:09 PM.
    Fast Cars, Fast Women, Fast Haircuts!

  30. #110
    nkw8181's Avatar
    Join Date
    Sep 2013
    Location
    Dallas, TX
    Posts
    762
    Post Thanks / Like
    Someone correct me if I'm wrong but I believe this is the "purge control solenoid" and can be deleted along with purge valve??
    Attached Images Attached Images
    Nolan
    65 coupe Gen 3 "Phoenix" build
    http://thefactoryfiveforum.com/showt...032#post297032

    818 s (with r windscreen ) 350 rwhp. Registered and street legal (SOLD)

  31. #111
    Tazio Nuvolari wannabe Scargo's Avatar
    Join Date
    Nov 2013
    Location
    south-central CT
    Posts
    1,611
    Post Thanks / Like
    Correct, unless there might be an emissions standard you must meet for how fuel tank vapors are vented. If you will not be running a vapor canister then you can ditch it and all the related vacuum hoses and plug the tap in the manifold or use it for a vacuum gauge.

  32. #112
    nkw8181's Avatar
    Join Date
    Sep 2013
    Location
    Dallas, TX
    Posts
    762
    Post Thanks / Like
    Ok that sounds good. Anyone have some good docs on what all nipples can be plugged? The manual can be convoluted to figure out.
    Nolan
    65 coupe Gen 3 "Phoenix" build
    http://thefactoryfiveforum.com/showt...032#post297032

    818 s (with r windscreen ) 350 rwhp. Registered and street legal (SOLD)

  33. #113
    Harley818's Avatar
    Join Date
    Jan 2014
    Location
    Vancouver BC
    Posts
    788
    Post Thanks / Like
    bumping for the new guys who are new to subaru.
    This was extremely helpful for me.
    Harley
    Bought 2002 Donor Jan 2014
    First Start Jan 18, 2015
    First Drive Feb 14, 2015

  34. #114
    Senior Member
    Join Date
    Jul 2015
    Posts
    112
    Post Thanks / Like
    Can someone who has simplified their EJ207 VER 7, chime in in what they did?

  35. #115
    Senior Member Bob_n_Cincy's Avatar
    Join Date
    Sep 2012
    Location
    Cincinnati OH
    Posts
    3,903
    Post Thanks / Like
    Quote Originally Posted by Chef818 View Post
    Can someone who has simplified their EJ207 VER 7, chime in in what they did?
    I don't know if the engine matters what you delete.
    On my 04 Ej255 out of forester XT.
    Delete power steering
    Delete air conditioning
    Delete belt tensioner
    Delete evap system
    Delete TGV butterflies
    When I added the dry sump system, I deleted the PVC system and the breather pipes.
    brake booster vacuum port plugged.

    Some delete the water heating to the throttle body. I did not.

    Bob
    Last edited by Bob_n_Cincy; 12-11-2016 at 10:58 PM.
    818S #22 Candy Blue Frame, Front Gas Tank, 2.5L Turbo, Rear radiator, Shortened Transmission, Wookiee Compatible, Console mounted MR2 Shifter, Custom ECU panel, AWIC soon
    My Son Michael's Turbo ICE Build X22 http://thefactoryfiveforum.com/showt...rts-818S-Build
    My Electric Supercar Build X21 (on hold until winter) http://thefactoryfiveforum.com/showt...e-Build-Thread

  36. #116
    Senior Member
    Join Date
    Jul 2015
    Posts
    615
    Post Thanks / Like
    Quote Originally Posted by Chef818 View Post
    Can someone who has simplified their EJ207 VER 7, chime in in what they did?
    Ej207 v7 owner here you can see everything I deleted in my wiring thread. Hope that helps. All evap,emissions, and a/c deleted. Not much else left to delete on the ej207.

    http://thefactoryfiveforum.com/showt...wiring-harness

  37. #117
    Senior Member TouchStone's Avatar
    Join Date
    Sep 2014
    Location
    Dallas, TX
    Posts
    512
    Post Thanks / Like
    Blog Entries
    1
    My engine shop deleted the OEM oil heater/cooler.
    818S Chassis #288 2.5L 323hp
    Ordered: 9/19/14 Received Kit: 11/2/14 First Start: 5/31/15 First Drive: 6/7/15 Registered: 3/10/2016 Completed: 2/10/2017
    Status: Complete Build Thread Sold 9/22/2017
    joshuajach.com

  38. #118
    Harley818's Avatar
    Join Date
    Jan 2014
    Location
    Vancouver BC
    Posts
    788
    Post Thanks / Like
    I deleted most of the items listed in this thread...
    zerodeletes - TGV deletes
    water heat to the throttle body
    eliminated emission control stuff (no airpump on my 02)
    little green tubes of death...
    PS
    AC
    added two catch cans - one for each circuit
    kept the stock fuel distribution, but probably will change in the future to equal length distribution lines.
    Harley
    Bought 2002 Donor Jan 2014
    First Start Jan 18, 2015
    First Drive Feb 14, 2015

  39. #119
    Member
    Join Date
    Sep 2011
    Posts
    62
    Post Thanks / Like
    This thread needs to be a sticky? It would be great if it didn't get lost in the shuffle.

  40. #120
    Senior Member AZPete's Avatar
    Join Date
    Feb 2011
    Location
    Scottsdale, AZ
    Posts
    2,374
    Post Thanks / Like
    I'm bringing this valuable thread back up to the top. It should be a sticky for new 818 builders who don't eat & breath Subaru engines.
    818S/C : Chassis #25 with 06 WRX 2.5 turbo, ABS, cruise, PS, A/C, Apple CarPlay, rear camera, power windows & locks, leather & other complexities. Sold 10/19 with 5,800 miles.
    Mk3 Roadster #6228 4.6L, T45, IRS, PS, PB, ABS, Cruise, Koni's, 17" Halibrands, red w/ silver - 9K miles then sold @ Barrett-Jackson Jan 2011 (got back cash spent).

Page 3 of 4 FirstFirst 1234 LastLast

Posting Permissions

  • You may not post new threads
  • You may not post replies
  • You may not post attachments
  • You may not edit your posts
  •  

Stewart Transport

Visit our community sponsor