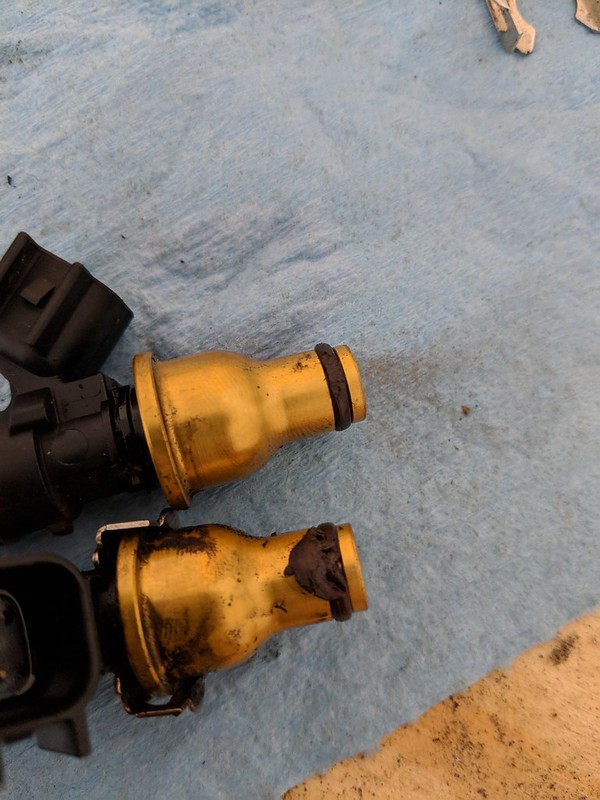
Do you have heads with two vent nipples or just one? If two, you might consider a crossover tubelike I made and ditching some unnecessary water lines. Made from 5/8" thin-walled soft aluminum tubing.
Note how clean my water crossover manifold is. I actually went to thin-walled Neoprene tubing for the vent T hoses. You don't need a throttle body heat system.
Turbo water fittings could come straight out of housing?
Glad to see you back on it.
Frank
818 chassis #181 powered by a '93 VW VR6 Turbo GT3582R Go-karted Aug 5, 2016 - Then May 19+21, 2017
Tracked May 27/July 26, 2017 Build time before being driveable on Sep 27, 2019: over 6000h Build Completed Winter 2021
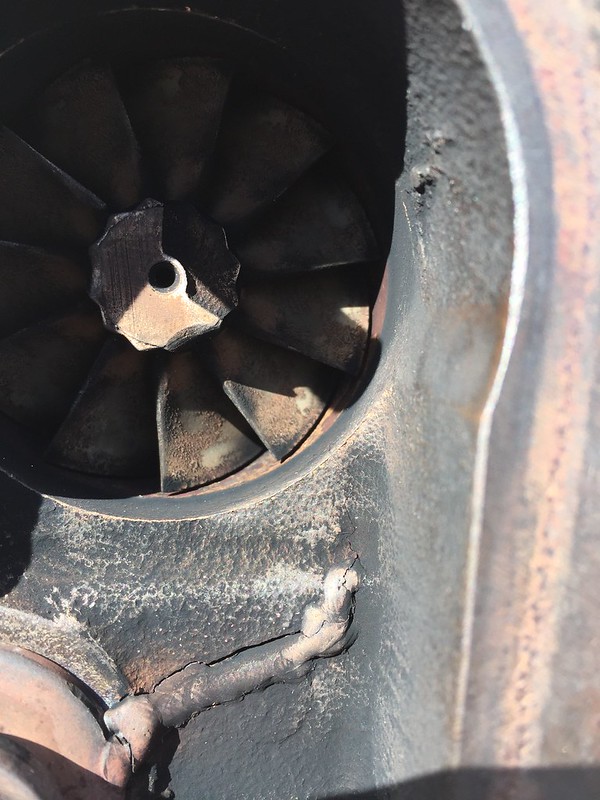
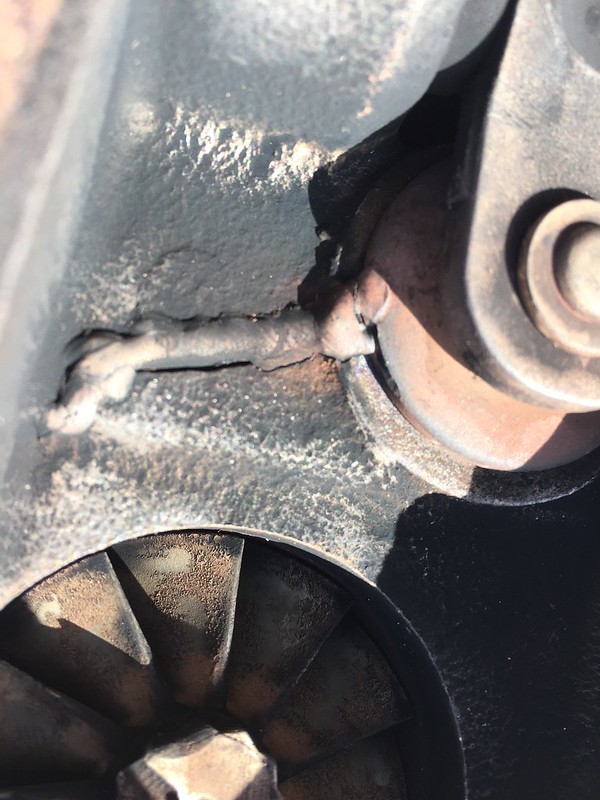
So, a bit more stuff! Turbo wastegate was flapping about. Crap in the turbo worsened. Welded that up at work(thanks to a friend)
Also, spent so long delaying because of $ and how much I had planned (shift linkage/MR2 shifter swap, the new trans, the AWIC and side vents) that I decided to dial it back. Gonna do 1 at a time. So I unclocked the turbo:
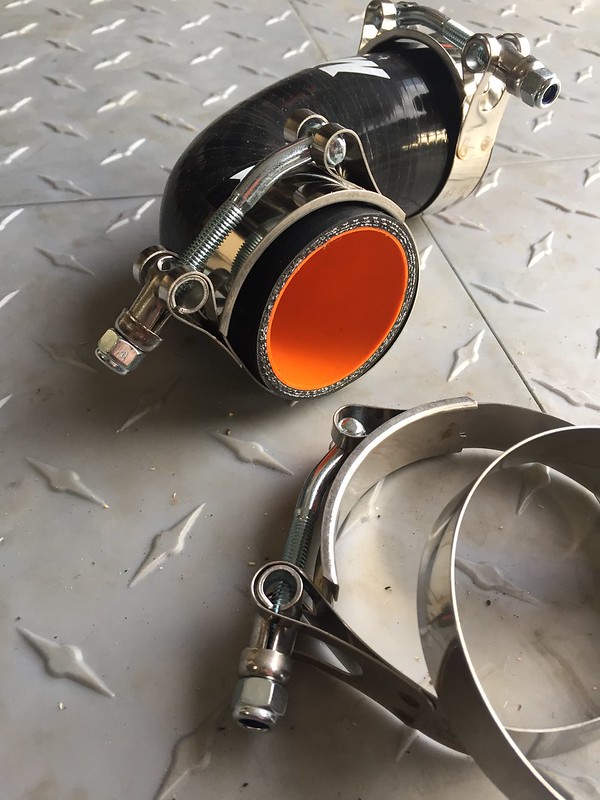
Also got some new clamps..... one at a time! But man they are nice.
Last edited by Pearldrummer7; 12-24-2017 at 10:46 AM.
Also, off topic: I rode at Barber over thanksgiving. WOW that is a crazy track. Mostly on the ninja(600), partly on a borrowed R3
One more "aside"– I have hella long 2 piece race ramps (131" I think?) that I no longer need now that I have a hella low trailer. In case anyone wants them; they helped me load the 818 on a really tall trailer in years past
Last edited by Pearldrummer7; 12-24-2017 at 10:48 AM.
Too bad. I built some 3 piece plywood ramps to solve the same problem two years ago. How high are they at the end where the trailer ramps went? How much do you want for them?
Too bad. I built some 3 piece plywood ramps to solve the same problem two years ago. How high are they at the end where the trailer ramps went? How much do you want for them?
How hella low is your new trailer? Low in terms of height or in terms of angle?
Happy Holidays and don't forget to buy your Trumpy Bear! lolll
Frank
818 chassis #181 powered by a '93 VW VR6 Turbo GT3582R Go-karted Aug 5, 2016 - Then May 19+21, 2017
Tracked May 27/July 26, 2017 Build time before being driveable on Sep 27, 2019: over 6000h Build Completed Winter 2021
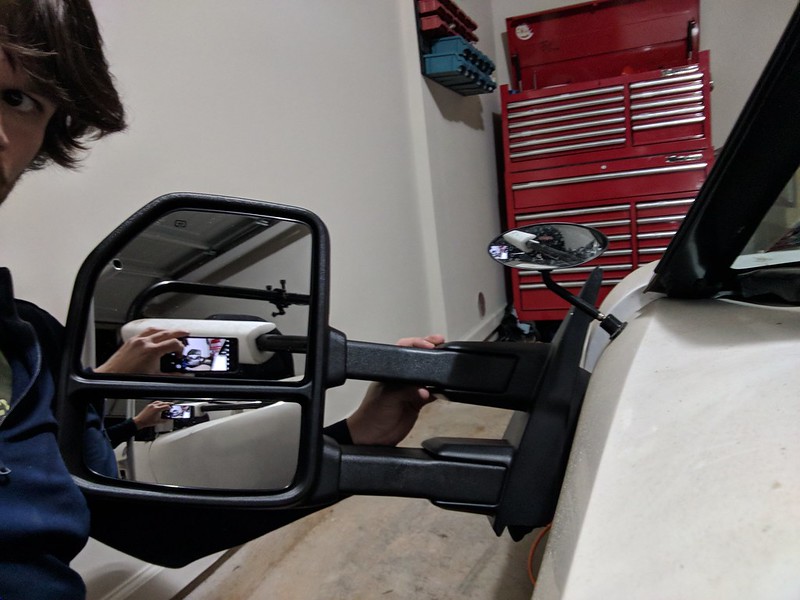
Thems be bad! I mean the mirrors. A little drag but hey, you will see everyone behind you.
Nice to see you thinking out of the box! They will be really intimidating...
Trigger warning: janky stuff below. Not for the faint of heart.
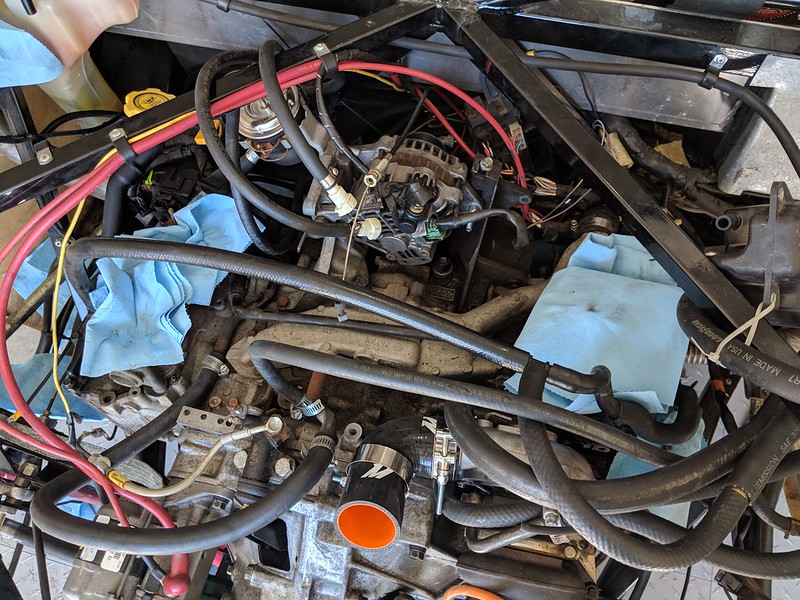
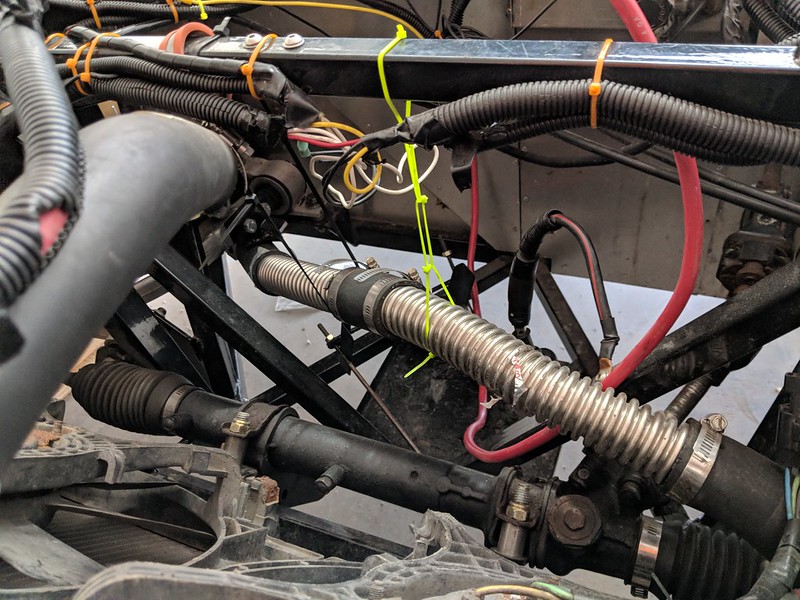
I had some JANK around the engine, and my second fuel leak (an old hose that was sweating) was my breaking point to do a little overhaul on it. I replaced all the fuel hoses, hitting coolant hoses with some cleanup, removing unused wiring (PS pressure sensor, TGV stuff), and got rid of some monstrosities down there. My welded shut PCV valve was missing on my first track day (fell out), so I got out my JB welder on my spare valve. That has since been holding pressure in my manifold. Yikes.
Cleaning up some wiring.....bachelor style. Some Subaru bros do TGV deletes.... I did that and TGV wiring deletes. Mostly for cleanliness in the engine bay, but every ounce counts!
Think this held pressure?
Said fuel leak. I knew I was on borrowed time here.
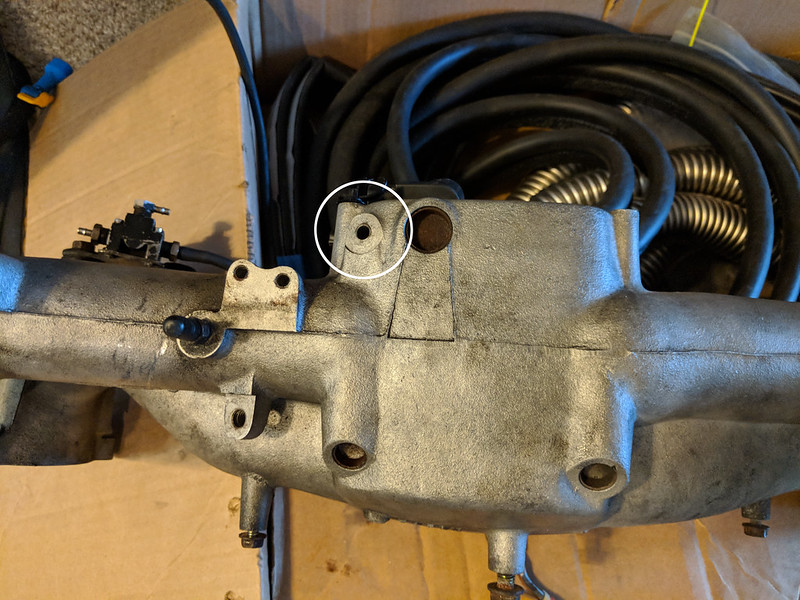
I was going to replace all the unused hose connectors with just bolts, but dudes, wtf thread is it?? M10x.9? 3/8 - 27? It's a strange size according to my measurements(calipers + thread finder). Might just weld them shut. Also, anyone know what this hose was for? I am going to plug it, but didn't know what its deal was.
It's likely the metric equivalent of 1/8" NPT. I suggest just tapping it to that. It is a tapered thread. It is very close to the NPT size. At least when I plug unused holes for fittings I re-tap them and I have mostly NPT sensor ends so I re-tap those too.
Subaru uses a Japanese "npt" known as JIS; equivalent to BSPT not NPT for pipe threads. There is a slight difference from BSPT in the seats. Strangely, it is not metric, it's Imperial. See: https://www.adaptall.com/info-tutori...sh-threads.php
There are charts and conversion calculators on the internet. There are also threads about it on NASIOC. This usually comes up when trying to put an AEM 1/8" NPT sensor directly in the block, you can screw it and get it to seal with thread sealant, but only once. When you pull it out the block threads will be hosed. There are BSPT to NPT adapators available at many dealers.
Last edited by Sgt.Gator; 03-11-2018 at 01:29 PM.
"Good Judgement comes from Experience. Experience comes from Bad Judgement"
Owner: Colonel Red Racing
eBAy Store: http://stores.ebay.com/colonelredracing
818R ICSCC SPM
Palatov DP4 - ICSCC Sports Racer
You guys are awesome. Thanks for the heads up on the BSPT. Got a tap and will be giving it some freedom, NPT style!
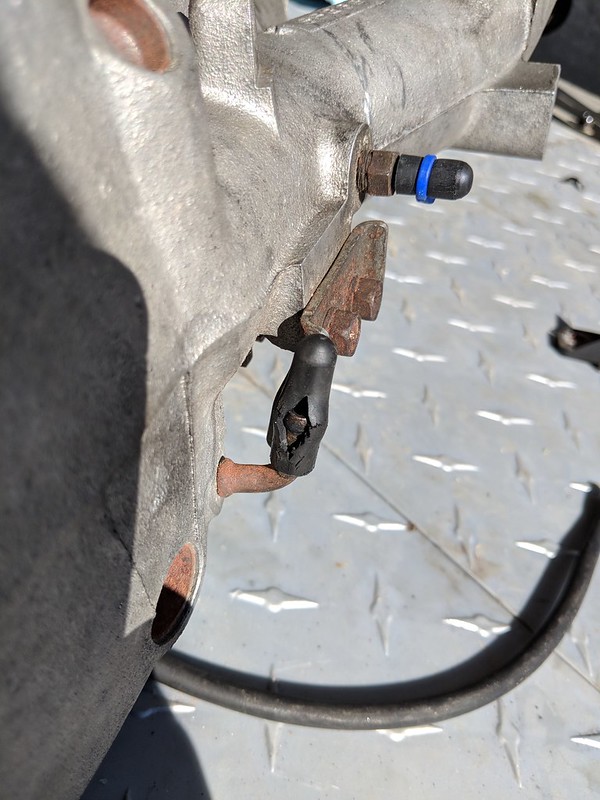
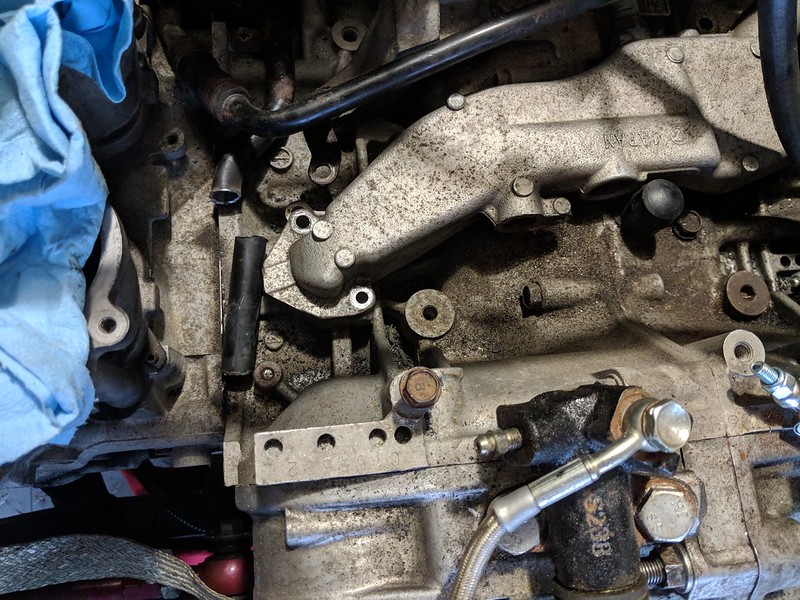
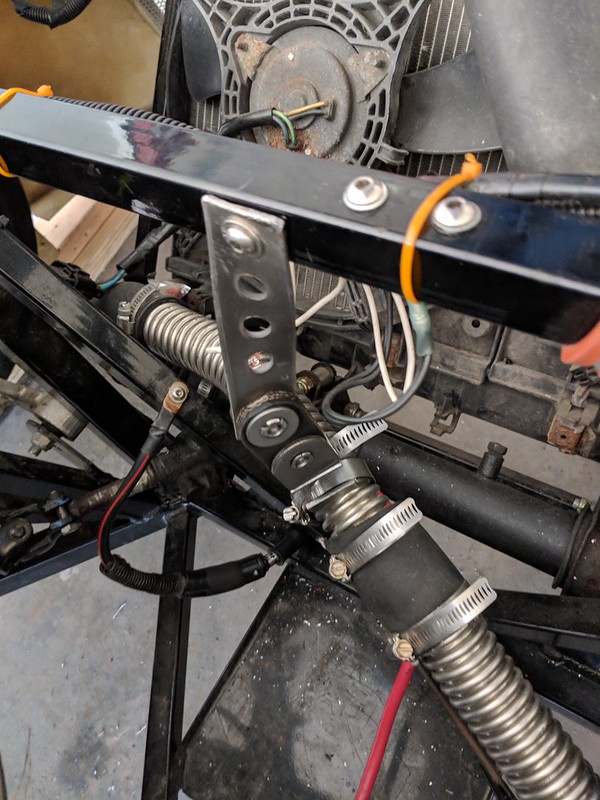
Took off the coolant crossover pipe and did a little cleanup down there (and replaced the really old and cracked O rings). Just kinda going through and making things a little more robust as they're accessible. Had a broken bolt on the crossover pipe and had to drill/tap it.
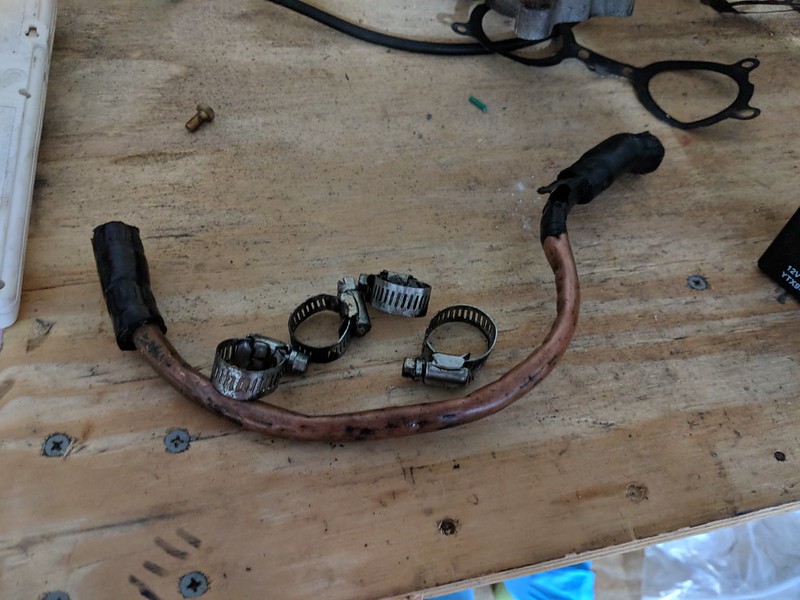
Another fix at the track. Bypassed my oil heater using whatever I had lying around, which included some 1/2" copper tubing that I hand bent. That has been there for WAY too long. Gone and replaced with some more robust coolant hose that's routed a bit cleaner.
Here is the before picture of coolant and PCV stuff. Basically was a rats nest of hoses.
Shortened this guy up (using an angle grinder....no mistakes made, not even a little scratch!)
And instead of the old way of right-exiting hose goes left and left-exiting hose goes right, it's a little more direct now. This was the old path to the throttle body warmer, which is long gone. I am actually hoping I can figure out a way to entirely delete this path from both the crossover pipe and the path coming up from the engine on the left. Thoughts? Path in red is the current set up.
Did some more cleanup of things I'm not super proud of to less ghetto things:
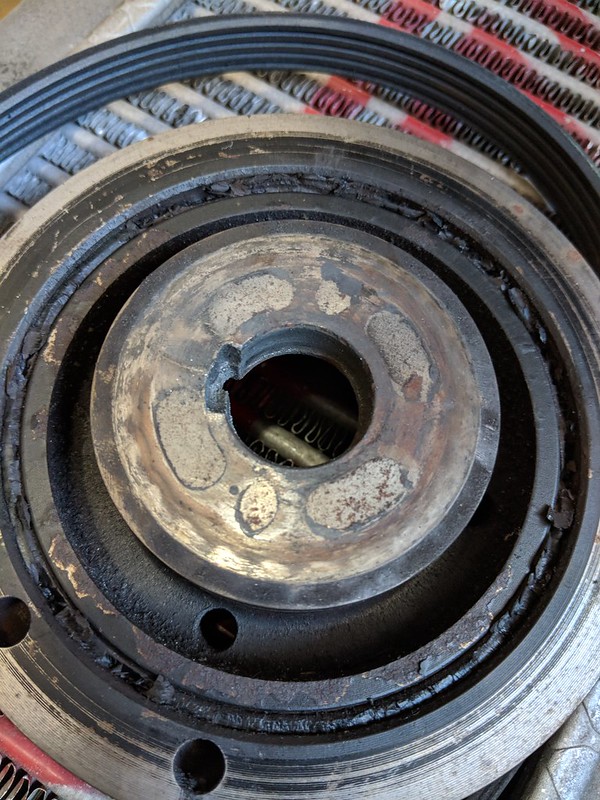
Found THIS. Keyway itself is fine, but damn is that not going back on t
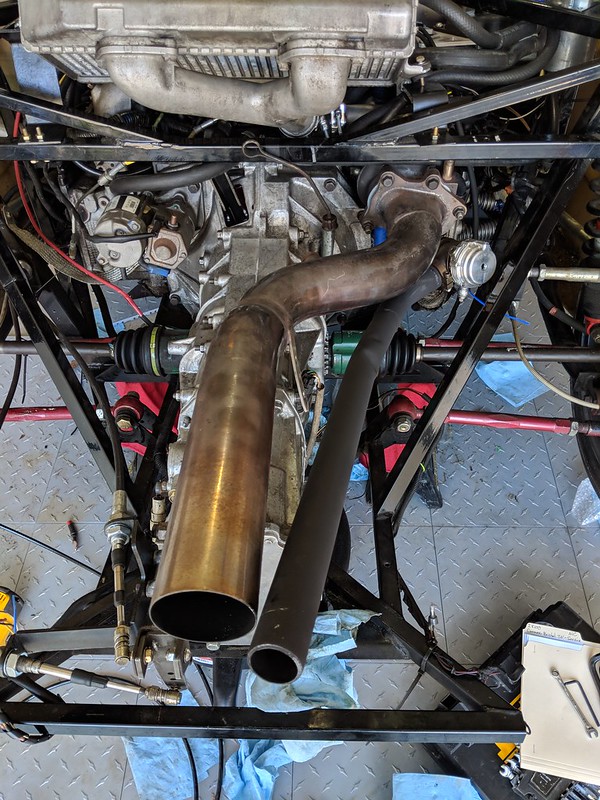
Made this with my amateur welding skills so the wastegate heat can be sent out a little better than before. I also have since cut it flush with the exhaust pipe
Biggest problem: I have a single speed bump separating me (and a mile of road) from the Blue Ridge Parkway that my car will not make it over. I have to figure out a way to make a quick and dirty ghetto ramp that's easily deployable.
My question to y'all:
It's too loud for around town or Blue Ridge driving. What's the best way to quiet the exhaust down and is easily-ish removable/fixable for track events? anyone have a nice high flow muffler for my 3" pipe?
We sell baffles that slide into the end of the tailpipe, we stock 2" - 4" Baffle 2.JPG
just drill a couple of holes in the pipe/baffle and 2 #8 bolts and lock nuts and you are set. We see a reduction of 4-6DB on average.
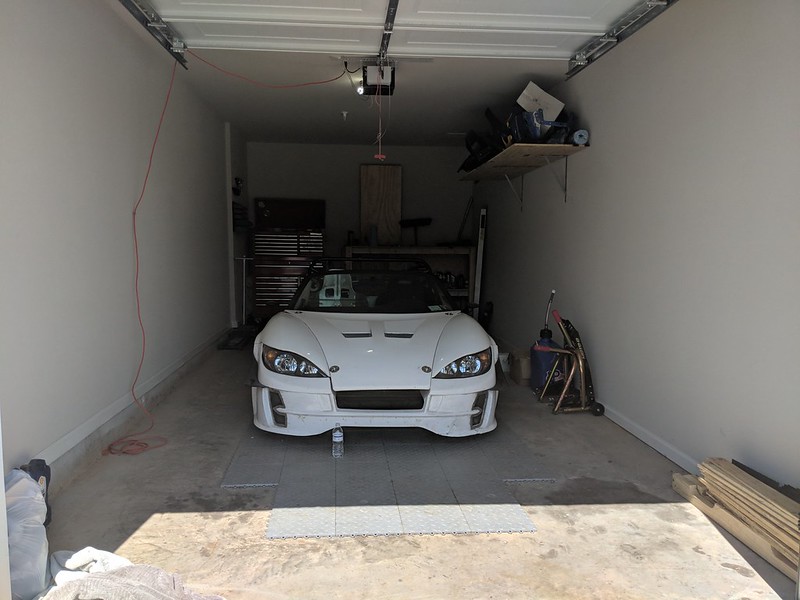
It seems after seeing my garage floor tiles you decided to buy the same in grey? loll But you're missing a lot to complete the entire floor, I guess that money went on the car!
Frank
818 chassis #181 powered by a '93 VW VR6 Turbo GT3582R Go-karted Aug 5, 2016 - Then May 19+21, 2017
Tracked May 27/July 26, 2017 Build time before being driveable on Sep 27, 2019: over 6000h Build Completed Winter 2021
We sell baffles that slide into the end of the tailpipe, we stock 2" - 4" Baffle 2.JPG
just drill a couple of holes in the pipe/baffle and 2 #8 bolts and lock nuts and you are set. We see a reduction of 4-6DB on average.
Gave Justin a call; thanks for the heads up! Looking for the bigger baffle set and he said you only carried the 2 baffle (not 3)
Originally Posted by Frank818
Nice dump pipe!
It seems after seeing my garage floor tiles you decided to buy the same in grey? loll But you're missing a lot to complete the entire floor, I guess that money went on the car!
More like giving them a test run, but yes entirely inspired by your garage, actually! I really like them and will be filling it out more. So comfy to lay on!
Well below our 103db limit, Bob if I remember correctly your cars was 94-95db. The cast iron OEM exhaust manifold mellows exhaust note some over a tube header as well.
Last edited by Mitch Wright; 04-24-2018 at 08:59 AM.
Been a whole year. Damn. I am not falling back off the wagon this time!
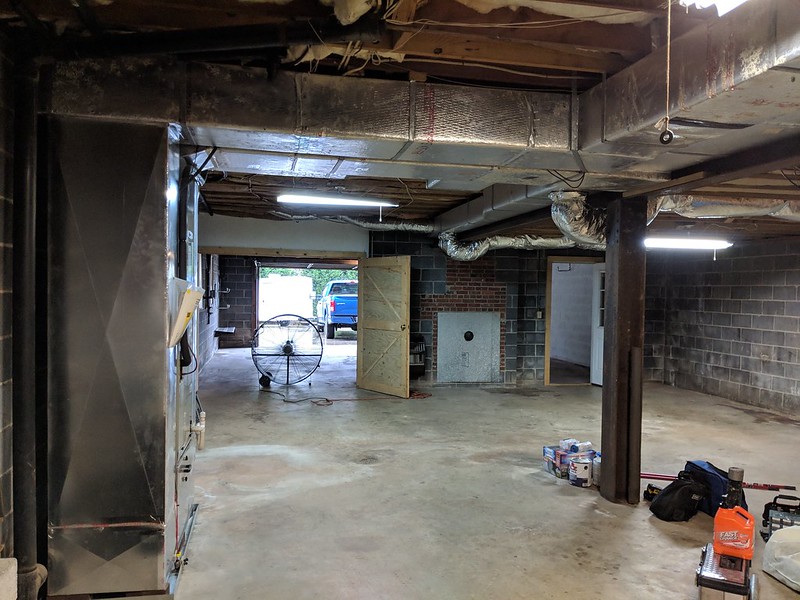
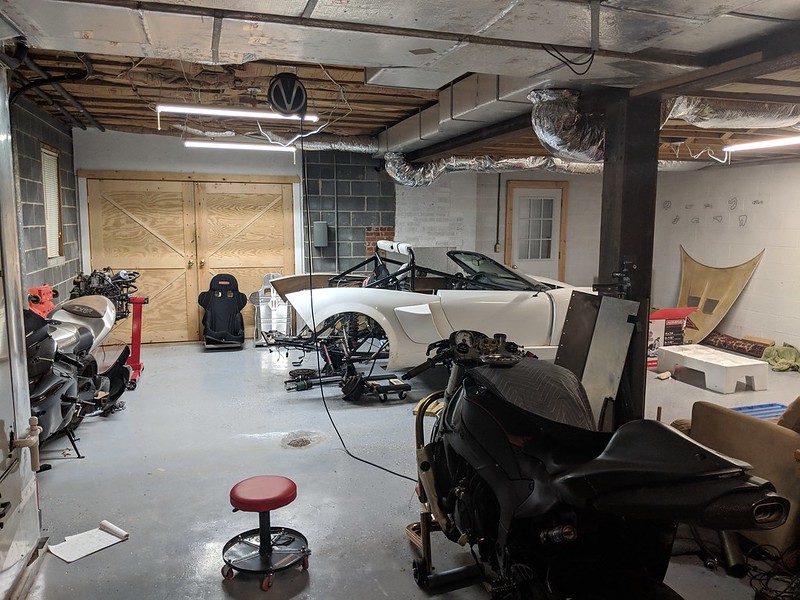
Bought a house, did a lot to the most important space in it (the garage). It's a beautiful house with a killer view, but the garage really sold it to me. ~2,200 sq ft of basement/garage, almost all of which is 9' ceilings. Super well built house (poured concrete on steel I-beams). Here's some before/after epoxy/paint in the shop portion. Other side of that wall is a garage big enough to fit my truck, a car, a few bikes, and all the yard equipment. The inside "shop" is big enough for the 818, a few bikes, and plenty of room to move around still.
with some toys in it
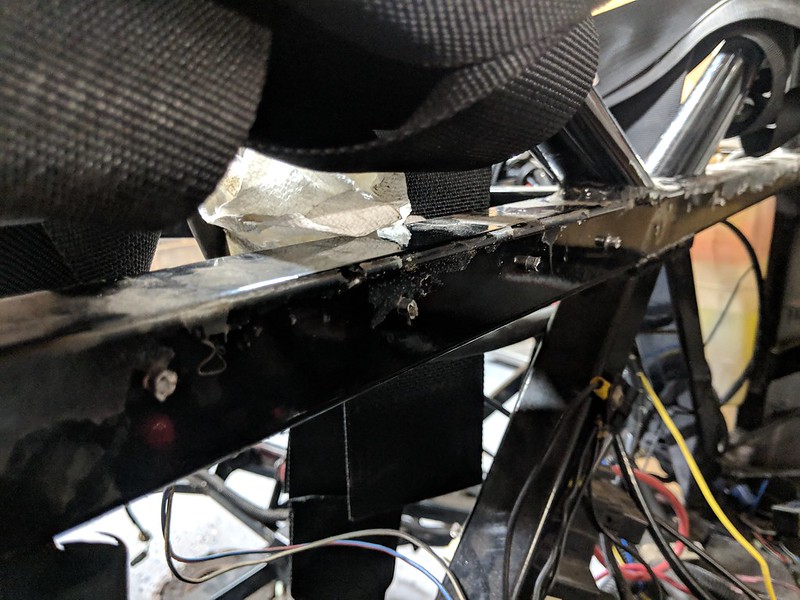
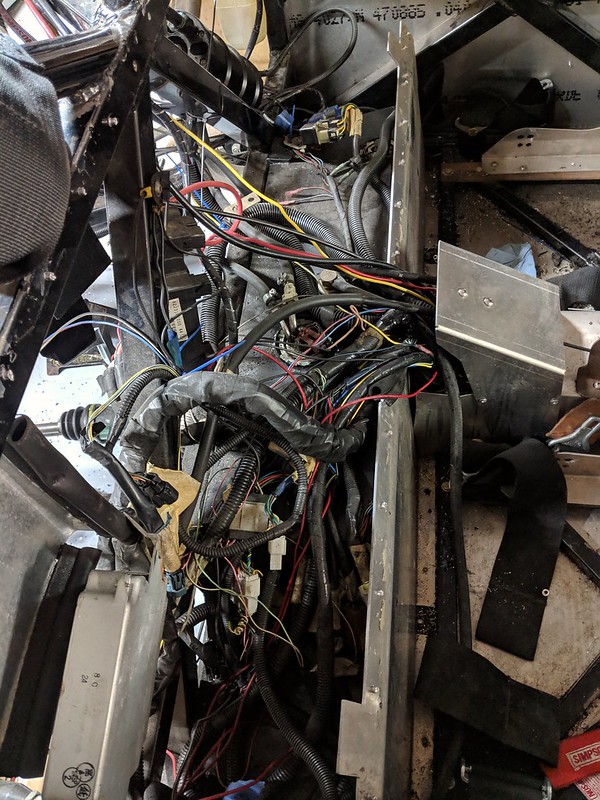
Then, I started diving back in where I left off. Transmission STILL leaks, so that's at a local transmission shop for evaluation. There is a LOT of jank in this race car right now. Spending as long as it takes to clean it up something proper. First thing's first....I hate that the firewall was attached via rivets. It's such a pain to remove! Since I was gonna pull it for the horrible wiring gore that accumulated under it, might as well take care of that too. Embarassing, but embracing how bad it is is the best way to start fixing it, I think. Wiring gore photo below (warning: it's bad).
what happens all-too-often to removed rivets....such a pain
Garage is warm in the winter, and (more importantly, in NC) cool in the summer. Pretty excited about how comfy it is so far.
Transmission guy said he found the problem. Doing o ring (not the axle seal) that I'm unaware of (and that's probably why it hasn't been replaced before). Hoping to pick that up tomorrow.
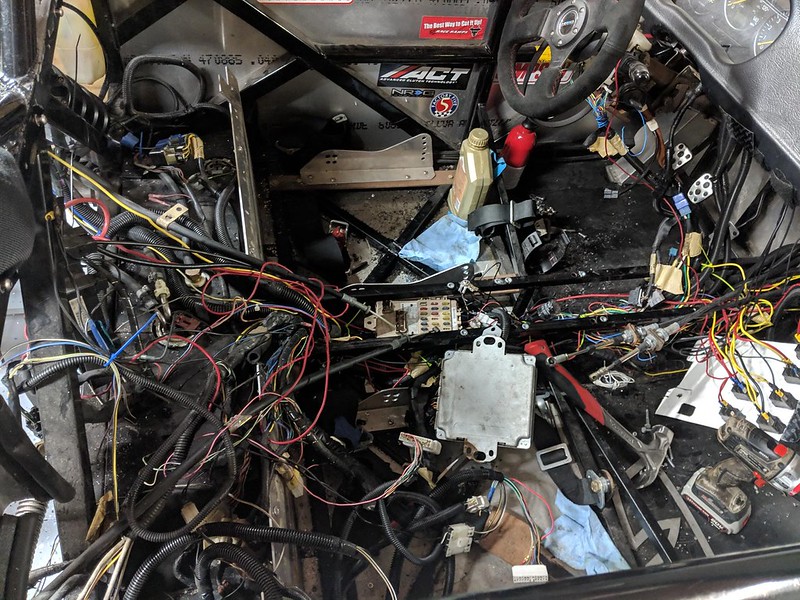
Here's the freaking mess I've made pulling things out. I'm gonna further diet the harness, rearrange things to be easier to service while the car is in-use, and make it way prettier.
Got plenty of cut but not de-pinned wires. Looking for suggestions when this happens while trying to de-pin the wires. Anyone got a nice tool recomendation for me or something?
And of course, I'll weigh the box's contents when I'm done
I would consider hiding that hammer, you don't need it for wiring work. I keep such tools put away most of the time, temptation would be to correct a problem part by rendering it inert...
Oh, and when you get the connector de-pin down, go back and catch those ones you cut with a hemostat and pull them out too
WOAH. This is some AWESOME information. I somehow missed the 2016 post on this despite all my electrical searching. Art-- thanks so much for this! Guess I've got a few tools to buy.
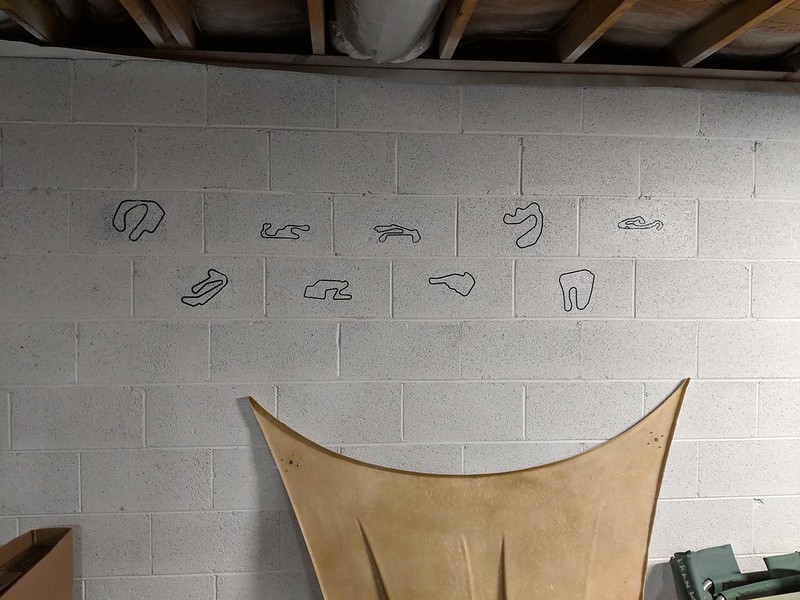
Also, forgot about these and figured people might get a kick out of the "artwork" in the shop. All places I've ridden/driven:
Top row, then bottom row, L->R: CVMP in upstate NY (kart track), NYST, Barber Motorsports Park, Jennings GP, National Corvette Museum, SLMP (upstate NY), Waktins Glen, Road Atlanta, Talledega GP.
Those layouts are fun. You'all know about the sinkhole at the NCM not so many years ago that swallowed several cars. I was there about a year before that happened. What a bummer.
NCM is a great track, and a killer venue for a track day. Those garages had me drooling (mostly for shade; I went in July I think).
I was working on it downstairs and my girlfriend said "why don't you bring the wiring upstairs? You could do it in the dining room", followed by "...That's a lot of wires. How long is this going to take?"
The cat, however, is a fan of a giant mess of toy in the dining room. He's been helping me stay distracted. I think I can remove a good bit of this, now that I know more (still had things like fuel drain solenoid, fuel temp sensors, windshield washer)


 Thanks:
  Likes:


Do you have heads with two vent nipples or just one? If two, you might consider


 Reply With Quote


 ...
...